
Three cheap and easy DIY reflectors you can use to take your portraits to the next level
#diy #diyreflectors #jaypmorgan #portraitphotography #theslantedlens
Simple Corporate Portraits: How to Light and What to Charge
Hi, this is photographer Jay P. Morgan from The Slanted Lens. In this article and video, we’re going to take a look at how to set up a simple corporate portrait in a tight space.
It’s about working professionals like dentists, doctors, lawyers, etc. This is a great way to make money, for a bread and butter income for a lot of people. Let’s take a look at how we set it up, the equipment we need, some tips, and what we charge.
Setting it Up
My example shoot was done in a dentist's office in a very tight space. I went in thinking that we would do an environmental-type portrait, but they said they just wanted a neutral portrait. We could do white, that would be fine, but I looked at the wall and thought, “This is not a bad color.”
I said, “Let’s see what it looks like to just shoot against that wall, I can always put my white up if I need to.”
The only place I could get enough space to be able to shoot was from across the desk with the subject standing up against the desk. I’m going to shoot against the wall behind them. And I’m going to light in that little space right there.
I use a 90mm lens because I just like that look on people’s faces with an 85mm or 90mm. I have both of those, but I use the 90mm very often. I’m going to go to like f/6.3 with my aperture at 160th of a second. It kind of kills all the ambient in the room, but it gives me a little bit of depth of field.
I don’t like shooting a portrait of someone’s face on a 90mm at f/2.8 because there’s just not enough focus. Their eye will be in focus but their ear will not be in focus, especially on a full-frame sensor. I want a little deeper depth of field, so I’m going to go to f/6.3.
Lighting
Let’s talk about how we lit this. I rarely ever use more than two heads. I’m going to set one up with a large source, then I’m going to put a head in the background and use that just to give me a little bit of rim light in their hair. Then last of all, I’ll put in a reflector.
I use that Sunbounce for my reflector -- you can use anything, of course, but the Sunbounce is nice because I will sometimes put it horizontally, which allows me to bring it forward and bounce the light back into their face from the key, but also wrap it around a little bit to the side of their head as well.
Because this is a corporate portrait, I don’t want it to be too dark or moody. I want the shadows to be pretty open. I’m going to push that card in very close and it’s going to open up the shadows on the side of their faces.
It’s a very simple two-light setup. I have a key light, a rim light, and a reflector to fill in the shadows. And we’re really ready to shoot at this point.
One thing I like to bring with me in this kind of situation is a small white/black card -- you have a white side and a black side. I’ll use that to reflect a little bit of light under the chin. If someone’s a little older, perhaps I’ll put that in just to open up the light under their chin.
In the case of our dentist, I wanted to kill the light on his white shirt, so I’ll toss that card in and use the black side towards my subject. And I’ll use it as a flag to cut the light off from his shirt.
So there’s a look at how we lit this up. A simple two-light setup using the wall as our background.
Sample Portraits
Here are some of the images.
Equipment Tips
Here are a few tips and tricks that I’ve learned in doing this thing over the years.
1. Wagon Bring a wagon. Have an equipment list, put everything in your wagon, and tow everything up. It makes it really easy because I can roll everything in one trip. Then shoot and put it all back in the wagon and head right out. That’s the idea, get in, shoot quick and go.
2. Bring a small step stool, a collapsing step stool. Those things are just so nice to have with you. Because you’re going to be in a situation where you want to get up higher sometimes. Or maybe your talent needs to be up higher. But just a collapsible folding step stool.
3. Now working with your people, there are a couple of things you should know. First off, look and make sure your talent’s hair is in place. Don’t be afraid if they just have some hair that is way out of control. You want to tame those down a little bit. It kind of helps you with the retouching later.
4. Also, for the men, look at their ties. If their tie is too loose, tighten it up. If their tie is tied in a single Windsor, it’s not going to fill the shirt like it should. Have them tie it into a double Windsor. That will fill the tie and fill up the collar of the shirt and look a lot nicer. It makes it easier when you’re retouching.
5. You also want to make sure that your person’s accessories are ok. Look at the things that they’re wearing like the jewelry and the earrings and just make sure that they’re comfortable with those things. Do they want to show them in the image? If they do, that’s fine, but just make sure. They may say, “Oh no, I wouldn’t want that on.”
6. I think it’s super important that you dress nicely when you do something like this. You should look professional. You should look like this means something to you and it just gives a much better impression to the clients you’re working for, so don’t show up in a T-shirt and a pair of jeans.
Put on a pair of pants, a nice collared shirt, a sweater, or something so that you look good and it makes them feel like you’re a professional. That’s really important to do.
7. And the last tip, bring that pop-up reflector, that black/white reflector, because you can throw that up and get a shot on a black background or a white background. That will help you have some background choices.
I try to do environmental portraits as much as I can. I just let the background fall way out of focus. But a lot of times people just want something simple. And they want them all to be the same so everyone in the office has the same shot that you put up on their website. They can use it in mailers they send out.
So that’s a little easier: just put your subject against a white or a dark background. I prefer white. as dark is a little heavy for this kind of portraiture. I think it’s better with a lighter background like this kind of tan color that we used from the office wall.
You just have to be resourceful. We’re looking around going, “Yeah, that wall, I’m thinking that is going to be great. I’ll just shoot against that wall.” I got a spot where the receptionist was working the entire time we were shooting. She was there answering the phone, but that was just the space we had. It was a very tight office.
What to Charge
Now let’s talk about what to charge. You know, if I’m doing headshots for a company, and I do these periodically, I’m going to charge somewhere in the $2,000 range for my time. And then, $2,000 to $3,500 depending on the company. I’m going to charge somewhere between $300 and $500 for my assistant.
I’m then going to charge for a makeup person in that same category of $300 to $500. And then we’re going to charge for each retouched image somewhere around $75 an image. That’s just kind of a general rule on what we charge.
Headshots : $2,000-$3,500
Assistant : $300-$500
Makeup Artist : $300-$500
Retouched Photo : $75 per image
In this case, however, I wasn’t there all day. It was just a short shoot where I’m going to come in and shoot and leave. I would not generally use an assistant -- I would try to shoot this on my own, which means I’m going to try to get this in the $300 to $500 range.
Probably the most I’m going to be able to charge if I’m going to shoot a single person is $300. That’s not a bad deal. But if I’m going to shoot a group of people like three or four people, and I’m going to be there for a couple of hours, then $500 at the least.
Quick Shoot : $300-$500
Single Person Shoot : $300-$500
Quick Group Shot : $300-$500
If I’m going over two and a half hours then I’m going to charge significantly more like $1,200 for half a day and $2,000 to $2,500 for that full day.
Half-Day Shoot : $1,200
Full-Day Shoot : $2,000-$2,500
So there’s a quick look at what to charge when you’re doing these kinds of commercial portraits. I think it’s a great market to look at, these kinds of working professionals. They all need pictures for advertising and for their website. There are so many things they need these for. It’s a great place to go out and to look and to market to. Because they do need photography on a very regular basis.
I hope you learned something from this and got some great tips and tricks. Now go out and light your own portraits and make some money in that commercial photography world in the corporate or professional portraits. Keep those cameras rollin’ and keep on clickin’.
About the author : Jay P. Morgan is a commercial photographer with over two decades of experience in the industry. He teaches photography through his company, The Slanted Lens, which runs a popular YouTube channel. This article was also published here.
#tips #tutorials #walkthroughs #advice #business #commercial #corporate #headshots #jaypmorgan #lighting #portraits #portraiture #pricing #walkthrough
Will Photo and Video Conventions Survive?
I'm photographer Jay P. Morgan of The Slanted Lens, and in this video and article, I'm going to look at photo conferences, photo/video conferences. Are they dead? Are they going to happen this year? Is it kind of the nail in the coffin for conferences? Because they were sliding before. Where exactly are they at? What’s going to happen and what can you expect coming in 2021 and 2022?
I just went to WPPI, and it was a lot of fun to be there. It was great to be with other photographers again, to be able to sit in the classes to hear people talk about their businesses, show their work, and really teach photography principles. But it was so small. They had only about under 4,000 people that registered and about 3,000 people actually picked up their badges (at least, that's what I heard). So it was a very small show.
The conference was lacking so many players. Sony wasn’t there. Nikon wasn’t there. Just a whole group of people that didn’t come.
So you might think, “Well, conferences are dead. There’s no place for them any longer.” I don’t believe that’s the case. I think we’re in a building process here. They had taken a year and a half off because of COVID, so this conference came at a time when most people aren’t used to having WPPI -- it became a reset conference. And I think if you look at it in that way, I think it’s going to grow and be back on track in the future.
Why should you go to a conference? I think there’s a lot of great reasons.
1. You get information at conferences that is very difficult to get anywhere else.
How often do photographers open their doors and allow you to look at their business practices and understand exactly their process? Show their process, teach, and mentor. You don’t really get that in any other place except for clubs and conferences, the kinds of places that bring photographers together and allow you to be able to work together and learn together. And I think because of that it’s a really valuable experience to have.
**2. There’s nothing like a hands-on to grab something and to be able to hold it.
To use the camera, to understand it, and to be able to get a sense of whether it’s going to work for you or not. And I think all this kind of equipment is really about that. What innovation is out there? What are the cameras that are coming out? What do you want to test and hold and see and figure out? And I think that’s one of the reasons conferences are so important.
But really the main one for me is #1, a kind of mentoring at a distance. People are teaching their process and talking about what they do. And I think that is really the foundation for helping you to grow in your business and be able to get new ideas to get excited again. We all become a little stale sometimes and it’s hard for us to keep going. But conferences give us a little jolt, a little heart pump to keep you going.
So here are some of the big conferences:
Shutterfest
We just had Shutterfest on September 8th-10th. Shutterfest is a great conference. It’s a small intimate conference in a great location in St. Louis -- the building is just so fun to shoot in. And people go there to shoot. They have models. You can go down and check out a model and go shoot.
And people bring their gear. They bring their strobes and they come to shoot, and that’s what made that conference so really enjoyable. You have great speakers, you have a great location, and you get to shoot.
Cine Gear Expo
Next, we have Cine Gear Expo in Los Angeles, which has been a favorite show of mine for years. It has always been at the Paramount backlot, but this year it’s going to be at the LA convention center, which is unfortunate because the whole vibe of that show was outside at the lot, the place where so many famous incredible movies were made.
So many actors walked that lot and those buildings. But the expo will still have vendors and speakers and people coming together to talk about the industry and to be able to share their thoughts and views on what’s happening in the market. I think that’s really important.
PHOTOPLUS (Cancelled)
Going on from there, we have PHOTOPLUS, which had been scheduled for September 30th–October 2nd in New York City in the Javits Center. They have gotten rid of all their education, which is a little unfortunate -- I feel like that really was the backbone of PHOTOPLUS. The strength of that show was you got to hear speakers in a lot of commercial applications, and it’s really a trade show.
It’s a three-day trade show that brings in a lot of great vendors. What has happened is, because that education is not out in the different lecture halls, all the vendors brought that education onto the trade show floor and you’ve got great speakers in all the different booths. They and the vendors create a great vibe.
NAB (Cancelled)
Moving on from that, we have NAB October 9th – 13th. I predict that NAB will bounce back to being a very strong show. We know NAB has been great in the past. We want it to be great in the future, and I think vendors are going to show up and they’re going to make it happen. And I think if we will come and support it, it’ll be a great show again one day.
WPPI
Going into the new year, another is WPPI in February.
ImagingUSA
We also have ImagingUSA, which going to be in Washington DC from January 16 to 18. I have not been to ImagingUSA, but it's something I’d like to do next year just to be able to see exactly how that shows going and what’s going to happen there. If you’re on the East Coast, that’s a great show to take in near Washington DC.
There are my thoughts on photo conferences. Are they dead? I don’t think so. I think they’re going to continue.
I think they may pare down, and I think a lot of them may go to a hybrid where you are in person but they also have a lot of online Zoom classes that are shared afterward. They’ve been trying this for a long time, trying to get you to buy the classes afterward or to buy a package.
I wish they would do that, offer a package where you spend X number of dollars. For an extra 100 bucks, you get all the classes as Zoom classes or all of them as recorded video classes you can go back and look at because there’s always great information there.
Grab your face mask and go to a conference. You’ll have a great time.
About the author : Jay P. Morgan is a commercial photographer with over two decades of experience in the industry. He teaches photography through his company, The Slanted Lens, which runs a popular YouTube channel. This article was also published here.
#educational #cinegear #imagingusa #jaypmorgan #nab #photoconferences #photographyshows #photoplus #photoshows #shutterfest #wppi
How to Do Top Back Lighting in Product Photography
I'm photographer Jay P. Morgan from The Slanted Lens, and in this article and 10-minute video, we’re going to talk about my favorite lighting when it comes to lighting any kind of product: top back light.
Our camera is generally in front of the food, and what do we do with our lights? We usually put our lights right next to the camera. It’s the place that makes the image, the product, the things on our set look the most flat and the most uninteresting.
I'll share what each of the lights in my top back lighting setup does so you can set it up yourself.
First off, we’ve got our Westcott large softbox that’s the 3’x4’ in the back. It’s just behind the background so that at that angle it’s not going to light the background.
The softbox is throwing some pretty significant shadows forward. You see it underneath the little bowls. You see it on the limes. They have very strong shadows coming forward. You see it under the bowl in the back. You get strong shadows because the light is fairly low.
So for my background, I literally took the table that usually sits in our corner and set it on a couple of chairs in the foreground and apple boxes and stools in the background, and that became our background.
You could say, “okay I’m done, let’s shoot,” and that would be great, but is it done? No, it’s not done.
There are several things we can do to it, but the first thing is, I love mixing the quality of light. The next light I have is an Intellytech Light Cannon. It’s got a Fresnel lens on it. This is a directional and harder light and you’ll see it in our main image. The minute it came on, we see highlights in the salsa. We see highlights on the tomatoes. We see highlights in an area. I don’t have it covered in the entire scene.
I have it just raking across the salsa in the back because in the little video move we did, our goal was to end up on top of the salsa. That was our hero and so that’s where I put the raking hard directional light. That gave us just a really beautiful light on the salsa and the objects in the back.
I didn’t want to just put it everywhere because pretty soon now it just becomes uninteresting. But if you just create a little shaft in an area it makes that area more interesting. You could now go in there and put a mirror and bounce a little light in on the side of the bowl. You could come in and just with mirrors, and people put them on things.
So soft light first, then hard light to create some areas of emphasis. And now we want to see some depth in the background.
Another light I use is the Litra Studio Pro light. With this light, I have a piece of diffusion back there so that it would diffuse the light.
My backdrop is a very reflective surface, so I just want a little bit of light back there to give me some horizon. We see just a little bit. It’s almost too much.
In fact, it was too much in the middle, so I brought it over a little more behind the onion.
Now as I look at this scene, that onion in the back is very, very pronounced. It’s light-colored. I’m getting a really hard kick on it from that Fresnel directional hard light. That Fresnel light in the back is really hitting that onion pretty hard from the camera right side, so I’m going to flag that Fresnel light off and I’m going to cut it off from the onion.
Even though I have set a hard light, and my hard Fresnel light is really giving me pools of light, don’t be afraid to cut it off from different areas that may become too pronounced. Too prominent and you want them to recede a little more. So you start getting cards or maybe a piece of netting so that it can just take it down a little bit and not just knock it off completely.
So now I’m looking at this now thinking you know what, this is looking pretty good. But the last thing to do with this is to just simply bring up the shadows or the floor. You use those terms, I use those terms interchangeably.
The floor is just the amount of light that opens up the shadows but does not create its own shadow. If I put a light right in there to open up the shadows, that light will create its own shadow, and then I’ve got a whole new problem -- it looks like there are two light sources. So instead, I’m going to just bounce our large soft light back into the shadows. And I do this with two different V-flats.
I used little inexpensive foam board V-flats that I bought from a dollar store for like $1.30. I tape two of them together. They’re black on one side and white on the other. I can use it to reflect or just subtract light, and they're very easy to work with. These are the last two cards I set just about every time.
If I don’t want the floor or the shadows to be too bright, I may only set one. If I want the shadows to be fairly open I’ll set two.
I put my V-flats to the sides where the angle of view is always on a triangle off from the camera. It gets narrow on the front and deeper at the back, obviously, so I’m going to put the V-flat on that angle of view. I’m going to slide it in as close as I can get it to my lens. And the large white vertical card now is going to start to bounce light into all of the shadows from its side.
Will it open up the shadows on that side? Nope, not going to do that. That’s why I’m going to add a second card on that other angle of view.
Adding my second fill card to the other side and sliding it right on that angle of view up to the lens opens up all the shadows.
It becomes now a matter of really creative choice. How open do you want the shadows to be? You make that decision depending on how you bring these cards in or how you move them out.
I feel at this point like this is ready to shoot.
I feel like I’ve got nice raking hard light from that Fresnel lens on the right. I’ve got a great top back soft light that opens up and just draws and gives me dimension to all the subject matter. I’ve got great fill cards that open up the shadows.
And I’ve got that one card taking off light on the onion. If I was really working a scene like this and doing this for a major client, I would probably set up three or four mirrors and two or three cards cutting light off from different areas and really finesse this. Take a picture. Look at it in Capture One. Decide exactly what you want to change, what you want to work on. So this really becomes a starting point.
This is the point at which I would show this scene to my client and my client now would say, “Well I like this or I don’t like that.” And we would start working on the things that we do and don’t like. The hardest thing about this kind of setup right is controlling this many items in a scene.
It’s controlled chaos, getting things in in a way that gives them groupings and small simple areas design-wise. But the whole starts to work together.
Here are some photos captured with this lighting setup:
So there you have it: a look at top back lighting. I love this look.
About the author : Jay P. Morgan is a commercial photographer with over two decades of experience in the industry. He teaches photography through his company, The Slanted Lens, which runs a popular YouTube channel. This article was also published here.
#tutorials #walkthroughs #jaypmorgan #lighting #productphotography #products #studio #topbacklighting #tutorial
10 Ways To Gain Confidence To Make Money In Photography
You know we’ve all got a confident side and a not-so-confident side of our personalities. Let’s develop and strengthen the confident side. Here are 10 points on how you can gain confidence to know you’re ready to make money in photography. Follow these 10 points. You’ll gain a lot of confidence. Don’t listen to that other side of your personality.
#1. Streamline Your Equipment
The lie : You can’t shoot without all the latest equipment. You need all the good stuff. I mean, how are clients going to trust you if you don’t have a lot of equipment. You need equipment. If you don’t have the equipment you can’t shoot.
You only need a certain amount of equipment to be able to make money in photography. You don’t need a huge amount of equipment, just a few simple things. A camera and a lens to start with and a few other basics. You only need 6 things to be able to make money in photography video. That's it.
#2. Photograph Friends and Family
The lie : That’s going to make me too uncomfortable to try to ask the people I know to take pictures. What if they don’t like my pictures. I don’t have to see them all the time. I don’t know, maybe I want to do products. I don’t want to shoot people. It’s just too uncomfortable.
To gain confidence and start to make money in photography, start by photographing all of your friends, your children, your friends, anyone that you know. As you take pictures of the people around you and you do it just for fun you’re going to start to create portfolio pieces. You’re going to start to create images you can use to show the type of work that you want to do and it’s going to give you confidence.
The more times you photograph, the more confidence you’re going to gain, and if it’s in a no-loss situation where you’re not really getting paid, it’s going to give you confidence to know you can do it when it’s time to get paid.
#3. Show Off Your Images
The lie : I don’t want to show my pictures to anybody. I just want to be able to look at my pictures myself. What if they don’t like them? What if they say things about them I don’t like, you know? I don’t want to show my pictures to anybody.
Show your images to other people either in a photo class or a photo club or some kind of a Facebook group. Show your images and get feedback. As you get the feedback you’re going to get confidence. You’re going to say, “Oh, I understand what I can do better. I understand what I did. It was really good.” And that gives you confidence to move forward. Show your images.
#4. Create a Portfolio
The lie : It’s too much work to be able to put things up on the website. I don’t even know how to do that anyway and it’s going to cost me money. And I’m not ready. My images aren’t ready. I don’t have enough good images. It’s just, I don’t want to put together a portfolio on a website. It’s just too soon.
Create a portfolio with your images. What’s a portfolio? It’s a website where all of your images are together. Put your very best images up there and then get rid of the ones that aren’t as good as you get better images. But seeing a body of work is going to give you confidence to start to charge money.
You can let people look at that when you think the time is right. But you have to get a body of work together. It gives you direction. It gives you vision. It helps you start to feel like, “I can, I know I can do this. I can do portraits, I can do product work.” You start to see it develop and it gives you confidence to keep shooting more, so create a website.
#5. Accept as Many Shoots as You Can
The lie : I’m not going to shoot anything that comes along. I want to shoot for people who really understand my style and they want to do what I like to do. Those are the people I want to work with. I don’t want to waste my time on dumb things. I want to shoot the cool stuff.
Shoot anything you’re offered. Don’t turn anything down. Now if morally you just don’t think it’s right for you then don’t do it. But don’t do it because well, “I don’t want to shoot mufflers”. I shot mufflers for a long time before I started doing my large-set production work. But it gave me confidence.
I started to shoot and get paid. I was shooting images and getting better. My skills were getting better. My confidence was growing. Be prepared for that time when they’re going to ask you to shoot something you've never shot before. Be confident you can do it. Do the research. Find out what you need to do and then go and do the job.
I know a comedian who said she was offered many roles in sitcoms but said no to every single one of them because she didn’t think they were good enough or right for her. In the end, she never did a sitcom. She missed out completely.
Don’t turn things down. Do everything you’re offered and that’ll help you move forward and gain confidence.
#6. Keep Moving Up
The lie : But I’ve got great images like travel images I shot when I was in Tibet. I have to have those in my portfolio because they’re just cool. They just show my personality. It doesn’t matter if they match my portfolio because I want to do fashion. It’s just, it’s cool stuff, you know. So I’m going to put up whatever I want. Let me just show anything that I have.
Your goal is to move up every time you do a job. You want to find better jobs. But keep doing those jobs. Don’t turn things down but look to move up and do better work. If you don’t want to do mufflers, which I didn’t, you could do two websites, one for weddings and one for mufflers. You can have different places that show your work. Just attach your name to the one that you want inevitably to be your look and your work and the type of work you really want to do. But your goal is to try to look to move up.
Try to move your clients up. Try to find better clients. Your goal is to find a better job. Every time you move up to a little better job your confidence goes up. You’ll be going, “Wow, I’m able to do better jobs. People are looking to me for work that is better. That is a confidence builder.
Look to move up and give yourself a pat on the back every time you do move up. Take a moment and glory in that. Know that you’re moving up and getting better. That’s going to help you gain confidence.
#7. Spend 50% of Your Time Looking for Work
The lie : My work comes to me by word of mouth. People tell other people. That’s how I get my jobs. I’m not going to call people. I’m not going to spend time looking for jobs. I’m a creative person. I need to be shooting. I need to be doing the cool things that keep me creative and not have to look for work.
Spend 50 percent of your time looking for work. How does that give you confidence? Because you know that work is going to come. There’s a possibility for work to come. If you aren’t looking for work then you sit there going, “How will I ever get a job?” and you start to collapse in on yourself. But when you’re looking, then you feel hope like there’s going to be jobs that are going to come. You feel like things are going to happen.
Photography is a lot about looking for work and running a business and not just taking pictures. You’ve got to concentrate that 50 percent of your time on looking for jobs. And your confidence goes up every time you spend two or three hours in the morning looking for jobs. You sit down and feel confident that things are going to come. Confidence comes from looking for work.
#8. Find a Mentor
The lie : I got this. I know what I’m doing. I don’t need other people to tell me what to do. That just doesn’t make any sense. I know what I need to do. I don’t need mentors. You know they don’t understand me. They don’t understand what I need to do. It’s just, it’s not for me.
One of the greatest ways to gain confidence when you’re in a creative process is to find a mentor, someone who’s going to help you to move forward. It makes you feel confident that you can face the challenges that you’re going to encounter because you have a person to go to who’s going to help you overcome those challenges. You can create a mentoring group. A lot of people are at the same place in this process.
I was learning how to do bees and I connected with another person who was at the same level as I was, but at least I had someone to talk to. He would say, “Well I read this and I read that.” We were able to talk with each other.
I know really high-end business people who have million-dollar businesses and who are making millions of dollars a year and they still mentor together with a group of other business owners so they can trade ideas and get confidence in that experience, so find a mentor. Create a mentoring group that’s going to give you confidence and help you to move forward knowing that you can overcome the challenges that you’re going to face.
#9. Show Yourself You Can Do This
The lie : It’s just too hard and it’s just too hard sometimes. I just don’t want to. I don’t want to do it. It’s just too hard.
Know you can do this and then prove it to yourself. You’re going to need to change in this process. As you go through the years there are going to be times you’re going to need to change your portfolio and your point of view. Maybe even what you do. I changed from doing stills to a lot of video. But just have the confidence that as you keep moving forward that things will come. Things will happen.
You just have to keep moving forward and prove to yourself every day you can keep doing this. Don’t give up, keep shooting. As you move forward you’re going to gain confidence that you can change, adapt and move forward with the industry. And that’s going to help you stay on top of it, make money in this industry and have a lot of confidence.
#10. When Discouraged, Go Back to #2 and #7
When you get discouraged refer back to number two. Start photographing. Maybe you’ve progressed enough in your career that you can photograph the models and the locations and make better work, different work, something interesting. As you photograph, as you shoot the doors will open for you and work will come.
I always refer back to #2, which is to continue to photograph, and #7, which is to start looking for clients. If you do those two things you’re going to have confidence. You’re going to move forward even when things get tough. Stop listening to that negative side of your personality. Let confidence take over. Do these ten things. Refer to them often. It’ll help you to grow and feel more confident and you’ll be successful in this experience.
I want you to be successful. I want you to feel confident. It is one of the hardest things for creative people, to continue to feel confident. Do these ten things every single day. It’ll help you have confidence to know you’re ready to make money in photography, and you can continue to make money in photography.
About the author : Jay P. Morgan is a commercial photographer with over two decades of experience in the industry. The opinions in this article are solely those of the author. He teaches photography through his company, The Slanted Lens, which runs a popular YouTube channel. This article was also published here.
#inspiration #tips #advice #business #confidence #encouragement #jaypmorgan #peptalk #success
You Only Need These 6 Pieces of Gear to Make Money in Photography
I'm photographer Jay P. Morgan from The Slanted Lens. In this 6.5-minute video and article, we’re going to look at the six pieces of equipment that you need to make money in photography. That’s all you need, six pieces of equipment.
You should allow yourself with a minimal amount of equipment to start a really healthy side hustle or a great way to make a living. You don’t need a ton of gear. I have mentored hundreds of people, and they have all started out with simple equipment packages, but you do need these six things.
#1. Camera
You’ve got to have a camera, obviously. It doesn’t have to be the best camera in the world. I know a lot of people who have made money and are making good money shooting with an entry-level Canon Rebel DSLR. You just need a decent camera that is going to get a decent image, and the Canon Rebel is exactly that.
The camera does not have to be a full-frame and does not have to be a $6,000 camera. You can spend $1,000 on a camera and get a camera that is going to be very, very usable and get you great images and help you start to make a living.
#2. Lens
So once you have a camera, what’s the next thing you need? Well, you have to have a lens on your camera. Now this varies for every photographer. You are going to want to choose the lens that is best for you and what you’re going to be photographing. That 16-35mm is a great place for someone to start who’s going to do architectural kinds of work. But if you’re going to do portraiture, I think a good fast 50mm like an f/1.2 is a great place to do portraits and some kinds of family settings. You can even do a lot of wedding stuff with that 50mm lens.
Generally speaking, I tell people to get a zoom just because it gives you more options. If you’re doing portraits, a 24-70mm is a great lens because it gives you a little wider for context, then a little more closer to an 85mm gives you a little more of a portrait-type lens.
Thus, I think a zoom lens is a great second piece of equipment to add to your equipment package because it does give you some options.
#3. Memory Card
Once you've picked a camera and lens, you have to have an SD card to go in your camera. Get two of them. Don’t buy a small SD card like 16GB. Get at least 64GB or 128GB.
At this point, 256GB is almost starting to become mandatory on a lot of cameras. It depends on what camera you’re shooting on. But get decent SD cards that are going to last you for a long time and give you the space to be able to shoot a lot of images.
#4. Tripod
Next, a tripod, you’re going to need a tripod. There will always be situations where you’re shooting where you’re going to need a tripod. If you’re doing event photography at night, you may want to get some long drag shutter images. So a tripod becomes very important. Or if you want to set up your camera and then go work with your talent. So having a tripod is just a must in photography. You may not use it all of the time, but you should always have one.
#5. Computer
You also have to have a computer or access to a computer with the ability to sort images and send images to people. You can try to do it all on your phone but that just becomes extremely cumbersome. You don’t even need to have Adobe Photoshop -- there are other programs out there that will give you a great way to sort and send images and they are much less expensive and don’t have a monthly fee.
You may not need Photoshop, but you do need a computer or a way to be able to sort your images and send images out because everything becomes about editing and fulfilling orders and getting things out to your clients.
#6. Reflector
Finally, you should get your first piece of lighting equipment: a 4-in-1 or a 7-in-1 reflector. You want to get a reflector with multiple covers because you can use a translucent to allow light to pass through it to just give a nice soft light on someone’s face. Put it up in front of the Sun and it makes it like a softbox. You can put on a hard bounce so you can bounce light back into someone’s face to open up the shadows.
You don’t even need to stand for this. There’s always a boyfriend, girlfriend, brother-in-law, somebody standing around, or a good friend of yours who will go and hold a reflector for you. But that’s going to give you a piece of lighting equipment that’s going to make your images look a lot better. They’re going to up your images significantly one level because you’re going to have much nicer lit images. And they’re going to look so much better than taking just exactly whatever nature gives you.
Bonus. Flash
I'm going to mention a bonus piece of equipment. The first thing most people are going to step up to after this set of equipment is some kind of on-camera flash. The reason that we go here is that we want something that we can do event photography with or wedding photography with. Something to provide a fill light to be able to bounce off the ceiling to give us a nice light when we’re doing events or weddings. And this becomes a very easy way to accomplish that. It’s compact. It moves around with us very easily. It’s just a really simple way to work.
I’m not an advocate of buying the stuff that's name brand because generally speaking, you can find really great aftermarket strobes or on-camera flashes that are half the price at least.
That's It!
So there you have it. Secure these six items and you now are ready to make money in photography. You are ready. Get these six pieces of equipment and start learning and shooting now. But more than likely you already have all six pieces of this equipment, so why aren’t you shooting? Why aren’t you getting jobs?
Carry your camera with you everywhere you go so that people will ask, “Hey, are you a photographer?”
“Yes, I am," you'll reply. "Here’s my card.”
Get out there and start hustling. Network with everybody you know. Start to take pictures and put them up on Instagram of your nieces, your nephews, your family, of buildings, or of whatever is going to be key to the type of work you want to do. Just start shooting and putting things up. As you start shooting and putting things up, things will start to happen.
But if you wait (and are always buying new equipment), these six pieces of equipment are just going to sit around and not do anything while you could have a great side hustle going or a great way to make a living.
About the author : Jay P. Morgan is a commercial photographer with over two decades of experience in the industry. The opinions in this article are solely those of the author. He teaches photography through his company, The Slanted Lens, which runs a popular YouTube channel. This article was also published here.
#equipment #tips #tutorials #advice #beginner #cameragear #gear #jaypmorgan #primer #recommendation
To Shoot Great Portraits, Learn To Control The Background
If you don’t control the background, you’re not controlling your image. In this video and article, I'll share 7 different ways to control your background and give you better images. These are simple techniques to master to improve your photography.
We’re down here in Los Angeles and I have model Jenny Crespo with me, and we’re going to take a look at backgrounds. I’ve wanted to do this lesson for a long time. Because, when I look at student work and when I look at my own images, nine times out of 10, the thing that kills it is the background.
I’m going to use a 70-180 millimeter lens. I have so much more control of my background when I’m using that 70-180mm because it allows things to fall out of focus. It makes me have to isolate things. But there are techniques that are going to really simplify that background and make your images so much better.
What do we mean by "simplify the background"? Very clearly, I want the background to be simple. It should not compete with my subject matter. It’s going to give me a beautiful canvas that makes my subject matter the focal point of my image. Great composition means simplicity. My background should be the foundation for simplicity in my image. It can’t be busy and garish and loud and hard. It needs to be soft and needs to disappear -- it just needs to be a soft, simple element in your composition.
1. Use a Shallow Depth Of Field
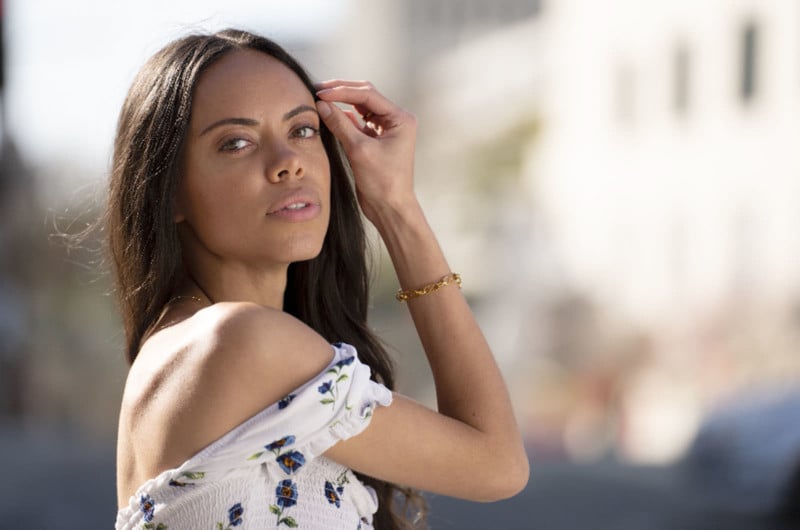
One of my go-to ways to get a simple background is just simply by focus. A long lens with a shallow depth of field gives you a beautiful bokeh out-of-focus canvas behind your subject matter and it just looks really wonderful. A lot of people shoot at f/16 and the situation in the background is busy.
It’s just too lit. It just looks terrible. Even if you’ve got a lot of sunlight back there, that shallow depth of field is going to make that all melt together, and it’s going to look wonderful. That’s one of the reasons I choose the 70-180 millimeter lens -- it's so I can let the entire background fall out of focus so easily. It’s almost hard for it not to be and that’s what I love about this lens.
2. Shoot Into The Shadows
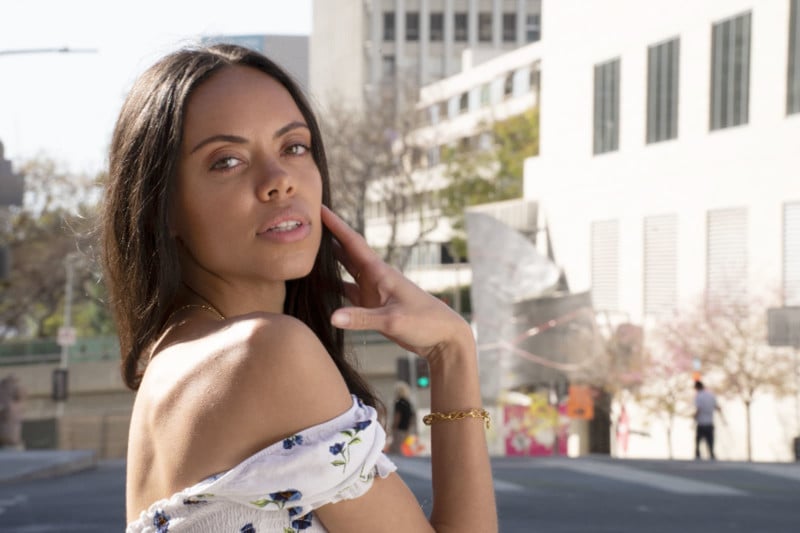
If I’m outside shooting in the sun, I do not want to look into the sunlit side of the buildings and the trees. Right now I’m looking back at the sunlit side. Even though I put a translucent on her face, if I take a couple of shots here, the background is so busy. All I have to do is swing around her 180 degrees, all the way around.
When I swing around to this side, I’m now looking into the shadows of the scene. The shadow of the buildings, of the trees, everything, even the cars in the front of me here are all in shadow. Now that makes my background darker. I’ve got a nice rim light on her hair, which separates her from that background. And it just gives me a much more simple background and a beautiful image.
I’m not in a beautiful place, but I’m getting a beautiful image because I’m letting the background fall out of focus and shooting into the dark shadows back there. And it just makes it so much more successful. It’s really about how you set yourself up in relationship to the light and shoot into those shadows that makes a really nice image. It gives that background a really deep look. It falls out of focus and looks wonderful.
3. Use Solid Color Backgrounds
A lot of times it’s just a matter of being aware of your surroundings. I can photograph her against this tree, which is just so busy. But look for simple, solid-colored backgrounds.
That gives you a nice wash of color in the background that is all the same, and shoot away. And especially if you can just drop to a really shallow depth of field, which I’m going to do, it just looks excellent.
4. Use The Sky
If you want to simplify your background are you shooting at eye level? I’m looking at her and I’m seeing the street and the trees and everything is just so busy back there. But there’s tons of blue sky above her.
If I come down, I’ve now pushed her figure up into that blue sky. I’ve got a beautiful blue canvas behind her and it simplifies and isolates her wonderfully. It’s a great way to get a simple background, just take a knee.
5. Use Zoom Lens For Flexibility
The Tamron 70-180mm is light enough that I can handhold this thing and shoot on that longer lens without any problem, especially with the stabilization in the Sony A1. It’s just an easy platform to work with. It’s lightweight, and I can handhold it.
6. Use Leading Lines
In this situation, the background is very busy. Rather than trying to get rid of my background, I’m going to use that background as a leading line. Right now I’m looking into just that wall.
If I just swing myself around slightly and I bring her out to the middle, I can see all of this. Now the scene has vanishing lines behind her. They become leading lines right into my subject matter. It strengthens the composition and just looks fabulous.
7. Use Smoke
I often use smoke to simplify the background. If I’m shooting a fantasy portrait or something, I have complete control of my setup. I’ll put a wall of smoke back there when I’m shooting outside because it just simplifies that background.
It looks like a mottled backdrop. Recently, I shot a commercial where they had a World War II scene in it. We set up in our backyard and I didn’t want to see the pool in the background, so we put smoke back there.
I got all the things in the foreground and then the smoke just covered up the pool and the trees and everything in the background.
And it isolated our subject matter and the stuff in the foreground and it looked fabulous. Smoke just isolates and gets rid of things you don’t want to see, like a pool in the middle of a World War II scene.
If you pay attention to your background, try to simplify that background using one of the ways we talked about here today your images are going to become much stronger.
Your composition will become stronger. Your image is going to be much more powerful. So try these out, practice them, see if you can apply them to your own work.
Keep those cameras rollin’ and keep on clickin’.
P.S. If you enjoyed this article, subscribe to our YouTube channel for more content like it.
About the author : Jay P. Morgan is a commercial photographer with over two decades of experience in the industry. He teaches photography through his company, The Slanted Lens, which runs a popular YouTube channel. This review was also published here.
#tips #tutorials #background #jaypmorgan #lesson #portraits #portraiture #tutorial


To Shoot Great Portraits, Learn To Control The Background
If you don’t control the background, you’re not controlling your image. In this video and article, I'll share 7 different ways to control your background and give you better images. These are simple techniques to master to improve your photography.
We’re down here in Los Angeles and I have model Jenny Crespo with me, and we’re going to take a look at backgrounds. I’ve wanted to do this lesson for a long time. Because, when I look at student work and when I look at my own images, nine times out of 10, the thing that kills it is the background.
I’m going to use a 70-180 millimeter lens. I have so much more control of my background when I’m using that 70-180mm because it allows things to fall out of focus. It makes me have to isolate things. But there are techniques that are going to really simplify that background and make your images so much better.
What do we mean by "simplify the background"? Very clearly, I want the background to be simple. It should not compete with my subject matter. It’s going to give me a beautiful canvas that makes my subject matter the focal point of my image. Great composition means simplicity. My background should be the foundation for simplicity in my image. It can’t be busy and garish and loud and hard. It needs to be soft and needs to disappear -- it just needs to be a soft, simple element in your composition.
1. Use a Shallow Depth Of Field
One of my go-to ways to get a simple background is just simply by focus. A long lens with a shallow depth of field gives you a beautiful bokeh out-of-focus canvas behind your subject matter and it just looks really wonderful. A lot of people shoot at f/16 and the situation in the background is busy.
It’s just too lit. It just looks terrible. Even if you’ve got a lot of sunlight back there, that shallow depth of field is going to make that all melt together, and it’s going to look wonderful. That’s one of the reasons I choose the 70-180 millimeter lens -- it's so I can let the entire background fall out of focus so easily. It’s almost hard for it not to be and that’s what I love about this lens.
2. Shoot Into The Shadows
If I’m outside shooting in the sun, I do not want to look into the sunlit side of the buildings and the trees. Right now I’m looking back at the sunlit side. Even though I put a translucent on her face, if I take a couple of shots here, the background is so busy. All I have to do is swing around her 180 degrees, all the way around.
When I swing around to this side, I’m now looking into the shadows of the scene. The shadow of the buildings, of the trees, everything, even the cars in the front of me here are all in shadow. Now that makes my background darker. I’ve got a nice rim light on her hair, which separates her from that background. And it just gives me a much more simple background and a beautiful image.
I’m not in a beautiful place, but I’m getting a beautiful image because I’m letting the background fall out of focus and shooting into the dark shadows back there. And it just makes it so much more successful. It’s really about how you set yourself up in relationship to the light and shoot into those shadows that makes a really nice image. It gives that background a really deep look. It falls out of focus and looks wonderful.
3. Use Solid Color Backgrounds
A lot of times it’s just a matter of being aware of your surroundings. I can photograph her against this tree, which is just so busy. But look for simple, solid-colored backgrounds.
That gives you a nice wash of color in the background that is all the same, and shoot away. And especially if you can just drop to a really shallow depth of field, which I’m going to do, it just looks excellent.
4. Use The Sky
If you want to simplify your background are you shooting at eye level? I’m looking at her and I’m seeing the street and the trees and everything is just so busy back there. But there’s tons of blue sky above her.
If I come down, I’ve now pushed her figure up into that blue sky. I’ve got a beautiful blue canvas behind her and it simplifies and isolates her wonderfully. It’s a great way to get a simple background, just take a knee.
5. Use Zoom Lens For Flexibility
The Tamron 70-180mm is light enough that I can handhold this thing and shoot on that longer lens without any problem, especially with the stabilization in the Sony A1. It’s just an easy platform to work with. It’s lightweight, and I can handhold it.
6. Use Leading Lines
In this situation, the background is very busy. Rather than trying to get rid of my background, I’m going to use that background as a leading line. Right now I’m looking into just that wall.
If I just swing myself around slightly and I bring her out to the middle, I can see all of this. Now the scene has vanishing lines behind her. They become leading lines right into my subject matter. It strengthens the composition and just looks fabulous.
7. Use Smoke
I often use smoke to simplify the background. If I’m shooting a fantasy portrait or something, I have complete control of my setup. I’ll put a wall of smoke back there when I’m shooting outside because it just simplifies that background.
It looks like a mottled backdrop. Recently, I shot a commercial where they had a World War II scene in it. We set up in our backyard and I didn’t want to see the pool in the background, so we put smoke back there.
I got all the things in the foreground and then the smoke just covered up the pool and the trees and everything in the background.
And it isolated our subject matter and the stuff in the foreground and it looked fabulous. Smoke just isolates and gets rid of things you don’t want to see, like a pool in the middle of a World War II scene.
If you pay attention to your background, try to simplify that background using one of the ways we talked about here today your images are going to become much stronger.
Your composition will become stronger. Your image is going to be much more powerful. So try these out, practice them, see if you can apply them to your own work.
Keep those cameras rollin’ and keep on clickin’.
P.S. If you enjoyed this article, subscribe to our YouTube channel for more content like it.
About the author : Jay P. Morgan is a commercial photographer with over two decades of experience in the industry. He teaches photography through his company, The Slanted Lens, which runs a popular YouTube channel. This review was also published here.
#tips #tutorials #background #jaypmorgan #lesson #portraits #portraiture #tutorial


A Guide to Traveling with Lithium-ion Batteries as a Photographer
I'm photographer Jay P. Morgan from The Slanted Lens. In this video and article, we’re going to take a look at batteries. What you can fly with, what you feel comfortable checking in your check bags, what you should carry on with you, and what you shouldn’t take with you.
Because we have all these batteries, and they’re in all of our equipment and we’re going to fly somewhere, what are the restrictions when it comes to flying with batteries?
Alkaline Batteries
First off, let’s go right to the really basic batteries. If you’ve got the old standard run-of-the-mill batteries like AA, AAA, C, and D – all these batteries. Can you fly with these? Can you check them? Can you carry them on? What can you do? How many can you take with you?
You can take as many of these as you want. You can check them, you can put them in your carry-on, and you can put them in devices. There is no restriction on how many of these batteries you can take with you on an airplane.
Lithium-ion Camera Batteries
Let’s move to lithium-ion. Lithium-ion batteries are in just about everything that we use and this is where the restrictions start to be a little strange. First off, any batteries that go in cameras and are in cameras can be left in the cameras and they are considered no problem whatsoever. So Canon batteries, Sony batteries, even the large one for my C200 is still under 98 watts. They can go in the camera and be left in the camera, and they can be carried on inside the camera or it can be put into the luggage.
If you want to check it you can check it as long as it’s in the camera. Those do not count as batteries that are loose. So you can set those in the camera. Definitely put those in the camera.
These are batteries I use a lot. These are Sony L batteries or NPF batteries. These batteries are seldom installed in anything. As wonderful as these L series batteries are, the problem with them is that they have contacts and they’re rarely ever in anything. Are they a 100-watt battery? No, they’re not. Generally speaking, these larger ones are going to be about a 48-watt battery and the smaller ones maybe like 25 to 30 watt. But they are part of that four battery contingency you can carry on the airplane.
You can carry eight of these and that equals 100 watts for every 2. Because they’re just under 48 watts or just around 48 watts each. So two of 48 watt equals one of the 99 watt. You know four of these equals two of these. I will often carry at least two or three of the 99-watt batteries and about four of the 48 watt. That way I have enough batteries at that point.
Technically speaking, you can’t have a whole bunch of these loose batteries without that becoming part of your lithium-ion battery restriction to carry on to the airplane.
I put all of my batteries in a small zipper case. In the zipper case I will have my Sony or Canon batteries all lined up and all zipped together. I put a label on it that says, “Sony batteries”. I’m not making any secret about what it is. I’ve never been stopped or asked about this at all because it is an enclosed container. It’s zipped. I’ve never had an issue with it.
Lithium-ion Batteries
I get asked this question all the time. I’ve got my Westcott FJ200 and I’ve got my Westcott FJ400 Can I fly with these? And the answer to this question is you can check these without any problem. I check my strobe heads, I checked them all the time.
You can check any battery for a piece of equipment into your checked-in baggage as long as the battery is installed in the device that it runs. So as long as my battery is on my Westcott FJ400 then I can check it. A lot of times I have a case that has 4 FJ400s in it and I check that bag and put it on the airplane in my SKB case. I do that all the time.
Westcott FJ200 and FJ400 strobes.
The minute I separate this, and I now have a battery in my hand, I can’t put it loose in my checked-in baggage. I now have to carry it on. So the best way to carry the batteries for your strobes is to keep them installed on the device. The reason for this is that most batteries that are installed in equipment are 99 or fewer watts. So like the FJ400 battery is about a 65 watt. And the FJ200 battery is about a 45-watt battery.
Those are under the battery restriction level and they are in the device. So there’s no possibility that this is going to accidentally fall against a piece of metal and create some kind of a short and cause a fire. As long as it’s installed in the device, you don’t have to worry about it being an issue on the airplane.
Large Lithium-ion Batteries
For production, we carry larger 99-watt batteries. They are super small V-mount batteries and super lightweight. They are an excellent battery because of their size. These are pretty revolutionary because they’re so small. How many of these can I carry on the airplane? TSA says four, and some airlines say, four to six or eight. So that is a little unclear.
I did some checking with some companies. They say that four to six of the 99 watt batteries are never going to cause a problem for you. If you have eight or ten of them, it’s probably going to start to cause a problem for you. So you definitely can carry four of these without any concern whatsoever.
For batteries that are 99 watt or under 100 watts each you can carry four. You can carry up to 160-watt batteries. And you are allowed up to two 160 watt batteries, not more than two. And you may only carry them on, you may not check them. If you have two 160 watt batteries, and then you start stacking on 99-watt batteries, you’re going to start to have a problem. They’re going to start saying you’re carrying way too much.
Some airlines will give you special permission to carry up to one 300 watt battery, not more than one, over 160 watt and up to 300 watt. But you have to check with the airline, and you have to get written permission from them. Don’t risk it unless you have that, it’ll never work.
Packing Your Batteries
How should you package your batteries when you’re going to travel? You might be wondering to yourself, “Well, why should I package my batteries when I travel?” It just avoids any questions going through TSA and avoids any questions that may come up with the airlines. If they are packaged correctly, most of the time, people are not even going to notice or care. So if you package them like one of these three ways, you’ll just make sure your batteries are going to fly right through and on the airplane with you without any problem.
1. So the number one way is to just simply put them in their original box. If you bring batteries in their original packages, AA, AAA, Cs, etc. in their original packages, you’re never going to have a problem. If you put these 99-watt batteries in the original box and close that box up. It says right on it what it is. When they open it, it is what it says it is. And there’s not going to be any question about that. And it doesn’t look as scary as a big row of batteries in your carry-on case.
2. If you can’t put them in their original packaging, then what I do is I just do something to secure them. Put them in a Ziploc bag. That means that they’re all together and they’re less likely to touch a piece of metal or something and create a short. I do this for my batteries.
3. If you’re going to travel with the battery, you just simply take your battery, take a little piece of electrical tape and tape over the contacts. I use yellow electrical tape because I want them to see it and know that I have taken the time to make sure that battery is not going to have any kind of electrical short.
The mounting bracket is not your contacts on a gold mount battery, these are not electrical contacts. So on a gold mount battery, where would I put that tape, I’d put it right there across that little section there. Now when they open up and look at your bags, your batteries all have tape on them. They’re secured and there’s not a problem.
Travel Smarter and Easier
Here are three great tips helping you travel just a little easier.
1. Number one is get a media badge. This is a great indicator of the fact that you are a professional photographer or videographer, and they’re not going to harass you about your equipment. With a media badge, you can call ahead of time and tell them that you are flying with the media rate. And what that means is that they don’t give you free bags, but they’ll allow your bag, rather than being 50 pounds, to go as high as 90 pounds.
So when you have a bag that you’re checking on the airplane with a ton of equipment in it, that media rate allows you to have that extra weight without having to pay a premium for it and that makes it much easier to fly with your equipment. You are legitimately a business just because you are a business. You don’t have to work for a large corporation. You can work for your own company.
I’ve flown with my media badge many, many times. I have a business card that matches it. So those two together become proof that you are media and if you have your stuff in something like an SKB case or some case that looks like media, it’s not going to be a problem.
2. Number two is get TSA precheck. It’s just an easy thing to do. It lasts for about five years. They are not near as uptight in that precheck line as they are on the other side. So I just think precheck is an absolutely fabulous way to fly. I’ve done that now since it came out. It’s been perfect.
3. And last of all, don’t forget there is the REAL ID and this is something that just makes it even quicker to get through the airports. It means that you’re pre-screened, that they know you’re less of a risk and so carrying the batteries and things are going to be less of an issue for them because they know that you are an individual that they have all your information.
So I think the Real ID is a great thing to have as well.
Conclusion
Just remember that with lithium-ion, you can carry four batteries under 100 watts on the airplane with you. You can’t check them if they’re loose. You can check them if they’re in other devices. You can also take two up to 160 watt or sometimes one 300 watt battery with special permission.
That's the basics for all battery travel, make sure you tape them up and secure them so they’re not going to be loose. You can get everything on that airplane and go where you need to go.
P.S. If you enjoyed this article, subscribe to our YouTube channel for more content like it.
About the author : Jay P. Morgan is a commercial photographer with over two decades of experience in the industry. He teaches photography through his company, The Slanted Lens, which runs a popular YouTube channel. This review was also published here.
Image credits: Airplane stock photo in featured image licensed from Depositphotos
#educational #tutorials #advice #batteries #flying #guide #jaypmorgan #learn #lithiumion #tips #traveling