Turn Your 3D Printer Into a Smart Machine: How OctoPrint Changes the Game
1,347 words, 7 minutes read time.
If you’ve ever found yourself baby-sitting a 3D printer for hours, wondering whether your print is still going smoothly or if it’s failed somewhere mid-layer, you’re not alone. Most 3D printing enthusiasts—especially guys who love tinkering, hacking, and squeezing every bit of performance from their machines—have hit this roadblock. But there’s one tool that’s quietly become the secret weapon of serious makers: OctoPrint. This open-source powerhouse transforms a standard 3D printer into a remotely managed, visually monitored, and fully customized smart machine. In this deep-dive, we’ll explore how OctoPrint works, how to set it up, and why it might be the most important upgrade you can make to your 3D printing setup.
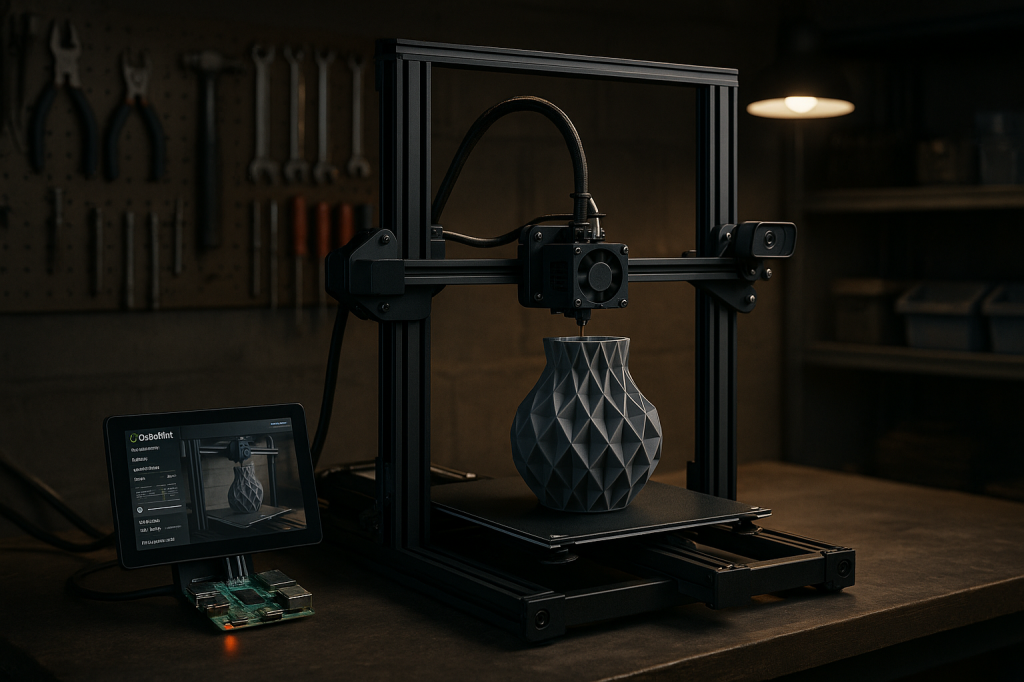
OctoPrint was developed by German software engineer Gina Häußge, and it’s been steadily growing in popularity since its launch. What started as a personal project has become one of the most essential tools in the 3D printing world. According to the official site, it’s now used by thousands of makers worldwide to manage and monitor their prints from any browser. OctoPrint runs on a small single-board computer—most commonly a Raspberry Pi—and connects to your 3D printer via USB. Once set up, you can access it through a web interface, giving you control of everything from temperature settings and file management to live webcam streams of your ongoing prints.
Setting up OctoPrint isn’t rocket science, but it does take a bit of prep work. First, you’ll need a Raspberry Pi (the Pi 4 is recommended), a microSD card, a decent-quality power supply, and a USB cable to connect to your printer. Many users also add a webcam to monitor prints visually or create slick time-lapse videos. The installation process typically involves downloading the OctoPi image—a Raspberry Pi-compatible version of OctoPrint—from the official OctoPrint site, flashing it onto the SD card using software like BalenaEtcher, and then configuring your Wi-Fi and printer settings through a simple text file before booting the Pi.
Once everything is plugged in and powered up, you can open your browser and head to “http://octopi.local” to start setting up. The first-time setup wizard will walk you through steps like creating a user account, configuring basic printer settings, and enabling access control. It’s fairly intuitive, and if you run into any snags, there are dozens of excellent community resources, including guides from All3DP and Raspberry Pi Foundation.
What truly makes OctoPrint shine is its feature set. Once installed, it acts as your 3D printing command center. You can upload G-code files directly from your computer, start and stop prints remotely, adjust temperatures in real time, and even pause or cancel prints if something goes wrong. Add in a webcam, and you get a live video feed of your printer that you can access from your phone or computer anywhere with internet access. For makers who want control and oversight, this is a game-changer.
Another standout feature of OctoPrint is its plugin ecosystem. There are hundreds of plugins that allow you to tailor your OctoPrint experience. The OctoPrint Plugin Repository hosts an array of extensions, from visual enhancements to performance tools. For example, Bed Level Visualizer gives you a detailed view of your print bed’s flatness, helping with better adhesion and fewer print failures. PrintTimeGenius improves estimated print durations with startling accuracy, a small upgrade that goes a long way in planning your printing sessions. Want cinematic timelapses? Octolapse creates buttery-smooth videos that are social media gold. If you’re concerned about security and cloud access, plugins like Obico (formerly The Spaghetti Detective) even let you monitor and control prints from anywhere while detecting print failures using AI.
The beauty of this plugin system is that it scales with your needs. Whether you’re just starting out or you’re managing multiple printers in a print farm setup, OctoPrint has you covered. Resources like Obico’s blog and 3D Print Beginner provide great lists of must-have plugins, many of which are completely free and updated regularly.
Beyond technical capability, OctoPrint also excels at usability. The web interface is clean and responsive, designed for efficiency. You can upload, organize, and manage print jobs right from the browser. For guys who are used to digging into firmware settings and SD card juggling, this is a breath of fresh air. The interface is also themeable thanks to plugins like Themeify and UI Customizer, allowing you to tailor it visually to your taste. Whether you want a dark mode, a sleeker dashboard, or just larger icons, there’s a plugin to do it.
Now let’s talk performance. OctoPrint won’t magically speed up your printer, but it dramatically speeds up your workflow. Uploading files wirelessly, adjusting settings mid-print, monitoring progress from your phone—these are quality-of-life upgrades that save hours over time. In setups where printers are running constantly, like in Etsy shops or small-scale production businesses, OctoPrint’s automation features and ability to manage queues become invaluable.
Security is another topic worth discussing. Since OctoPrint runs on your network and can be accessed remotely, it’s important to set it up correctly. Always enable user authentication, and consider installing a firewall plugin or VPN for extra protection. Resources like OctoEverywhere provide smart advice on keeping your setup safe while enjoying remote access.
The community around OctoPrint is one of its strongest features. Whether you’re troubleshooting an issue, trying to write your own plugin, or just want to show off your latest timelapse, you’ll find support on the OctoPrint Community Forums, GitHub discussions, and Reddit’s 3D printing threads. The community is active, helpful, and filled with makers who’ve encountered every problem under the sun.
Troubleshooting and advanced customization are also major parts of the OctoPrint experience. For example, you might run into issues with camera lag, plugin conflicts, or Wi-Fi stability. Forums and tutorials from Instructables and Prusa are great places to start. Common advanced tweaks include adding custom LCDs, scripting automated bed probing, or integrating OctoPrint with home automation platforms like Home Assistant.
Let’s not overlook aesthetics and user experience. With plugins like OctoDash or TouchUI, you can even turn a touch screen connected to your Pi into a standalone printer control panel. This is a favorite feature among guys who love building custom enclosures or want their printer setups to look as good as they perform.
Looking at the bigger picture, OctoPrint isn’t just a tool—it’s a philosophy. It embodies the DIY spirit of 3D printing. It’s open-source, customizable, and endlessly extensible. It’s built for people who love to tinker, improve, and share what they learn with others. And when it comes to getting the most from your 3D printer, especially in terms of convenience and control, there’s really no competition.
If you’re serious about 3D printing—or if you just want to stop hovering over your printer every time you hit print—it’s time to give OctoPrint a serious look. Visit the OctoPrint download page, gather your components, and dive in. You’ll quickly realize why so many people consider this the most powerful upgrade you can make to a 3D printer that doesn’t involve changing a single piece of hardware.
We want to hear from you—are you already using OctoPrint, or thinking about diving in? Share your setup, tips, or questions in the comments below. And don’t forget to subscribe to our newsletter for more in-depth guides, reviews, and updates straight to your inbox.
D. Bryan King
Sources
- OctoPrint Official Download & Setup Guide
- All3DP: How to Install OctoPi on Raspberry Pi
- Raspberry Pi Foundation: Set Up OctoPrint
- OctoPrint Plugin Repository
- All3DP: Best OctoPrint Plugins (2024)
- Obico: Beginner’s OctoPrint Plugin Pack
- 3D Print Beginner: My Top OctoPrint Plugins
- OctoPrint Community: Must-Have Plugins Discussion
- Prusa Knowledge Base: OctoPrint Configuration & Install
- OctoEverywhere: Must‑Have Plugins Updated 2024
- The Next Layer: 12 Best OctoPrint Plugins
- Instructables: Newbies’ Guide to Installing OctoPrint
Disclaimer:
The views and opinions expressed in this post are solely those of the author. The information provided is based on personal research, experience, and understanding of the subject matter at the time of writing. Readers should consult relevant experts or authorities for specific guidance related to their unique situations.
Related Posts
#3DPrinterEnhancement #3DPrinterRemoteControl #3DPrinterSmartTools #3DPrinting #bestOctoPrintPlugins #bestRaspberryPiForOctoPrint #howToUseOctoPrint #OctoPi #OctoPrint #OctoPrintAdvancedFeatures #OctoPrintAutomation #OctoPrintBedLeveling #OctoPrintBenefits #OctoPrintCamera #OctoPrintConfiguration #OctoPrintControlPanel #OctoPrintCustomization #OctoPrintDashboard #OctoPrintFeatures #OctoPrintForBeginners #OctoPrintForMakers #OctoPrintGCode #OctoPrintGuide #OctoPrintImage #OctoPrintInstallGuide #OctoPrintInstallation #OctoPrintInterface #OctoPrintMobile #OctoPrintMonitoring #OctoPrintPerformance #OctoPrintPluginList #OctoPrintPlugins #OctoPrintPlugins2025 #OctoPrintPrintMonitoring #OctoPrintPrintQueue #OctoPrintPrintTimeEstimate #OctoPrintPrinterControl #OctoPrintRaspberryPi #OctoPrintRemoteAccess #OctoPrintRemoteMonitoring #OctoPrintRemotePrint #OctoPrintReview #OctoPrintSecurity #OctoPrintSetup #OctoPrintSetupHelp #OctoPrintSupport #OctoPrintThemes #OctoPrintTimelapse #OctoPrintTips #OctoPrintTutorial #OctoPrintUI #OctoPrintUpgrade #OctoPrintWebInterface #OctoPrintWorkflow #RaspberryPiOctoPrint #remote3DPrinting #smart3DPrinter