#Corvair #AutoRestoration progress.
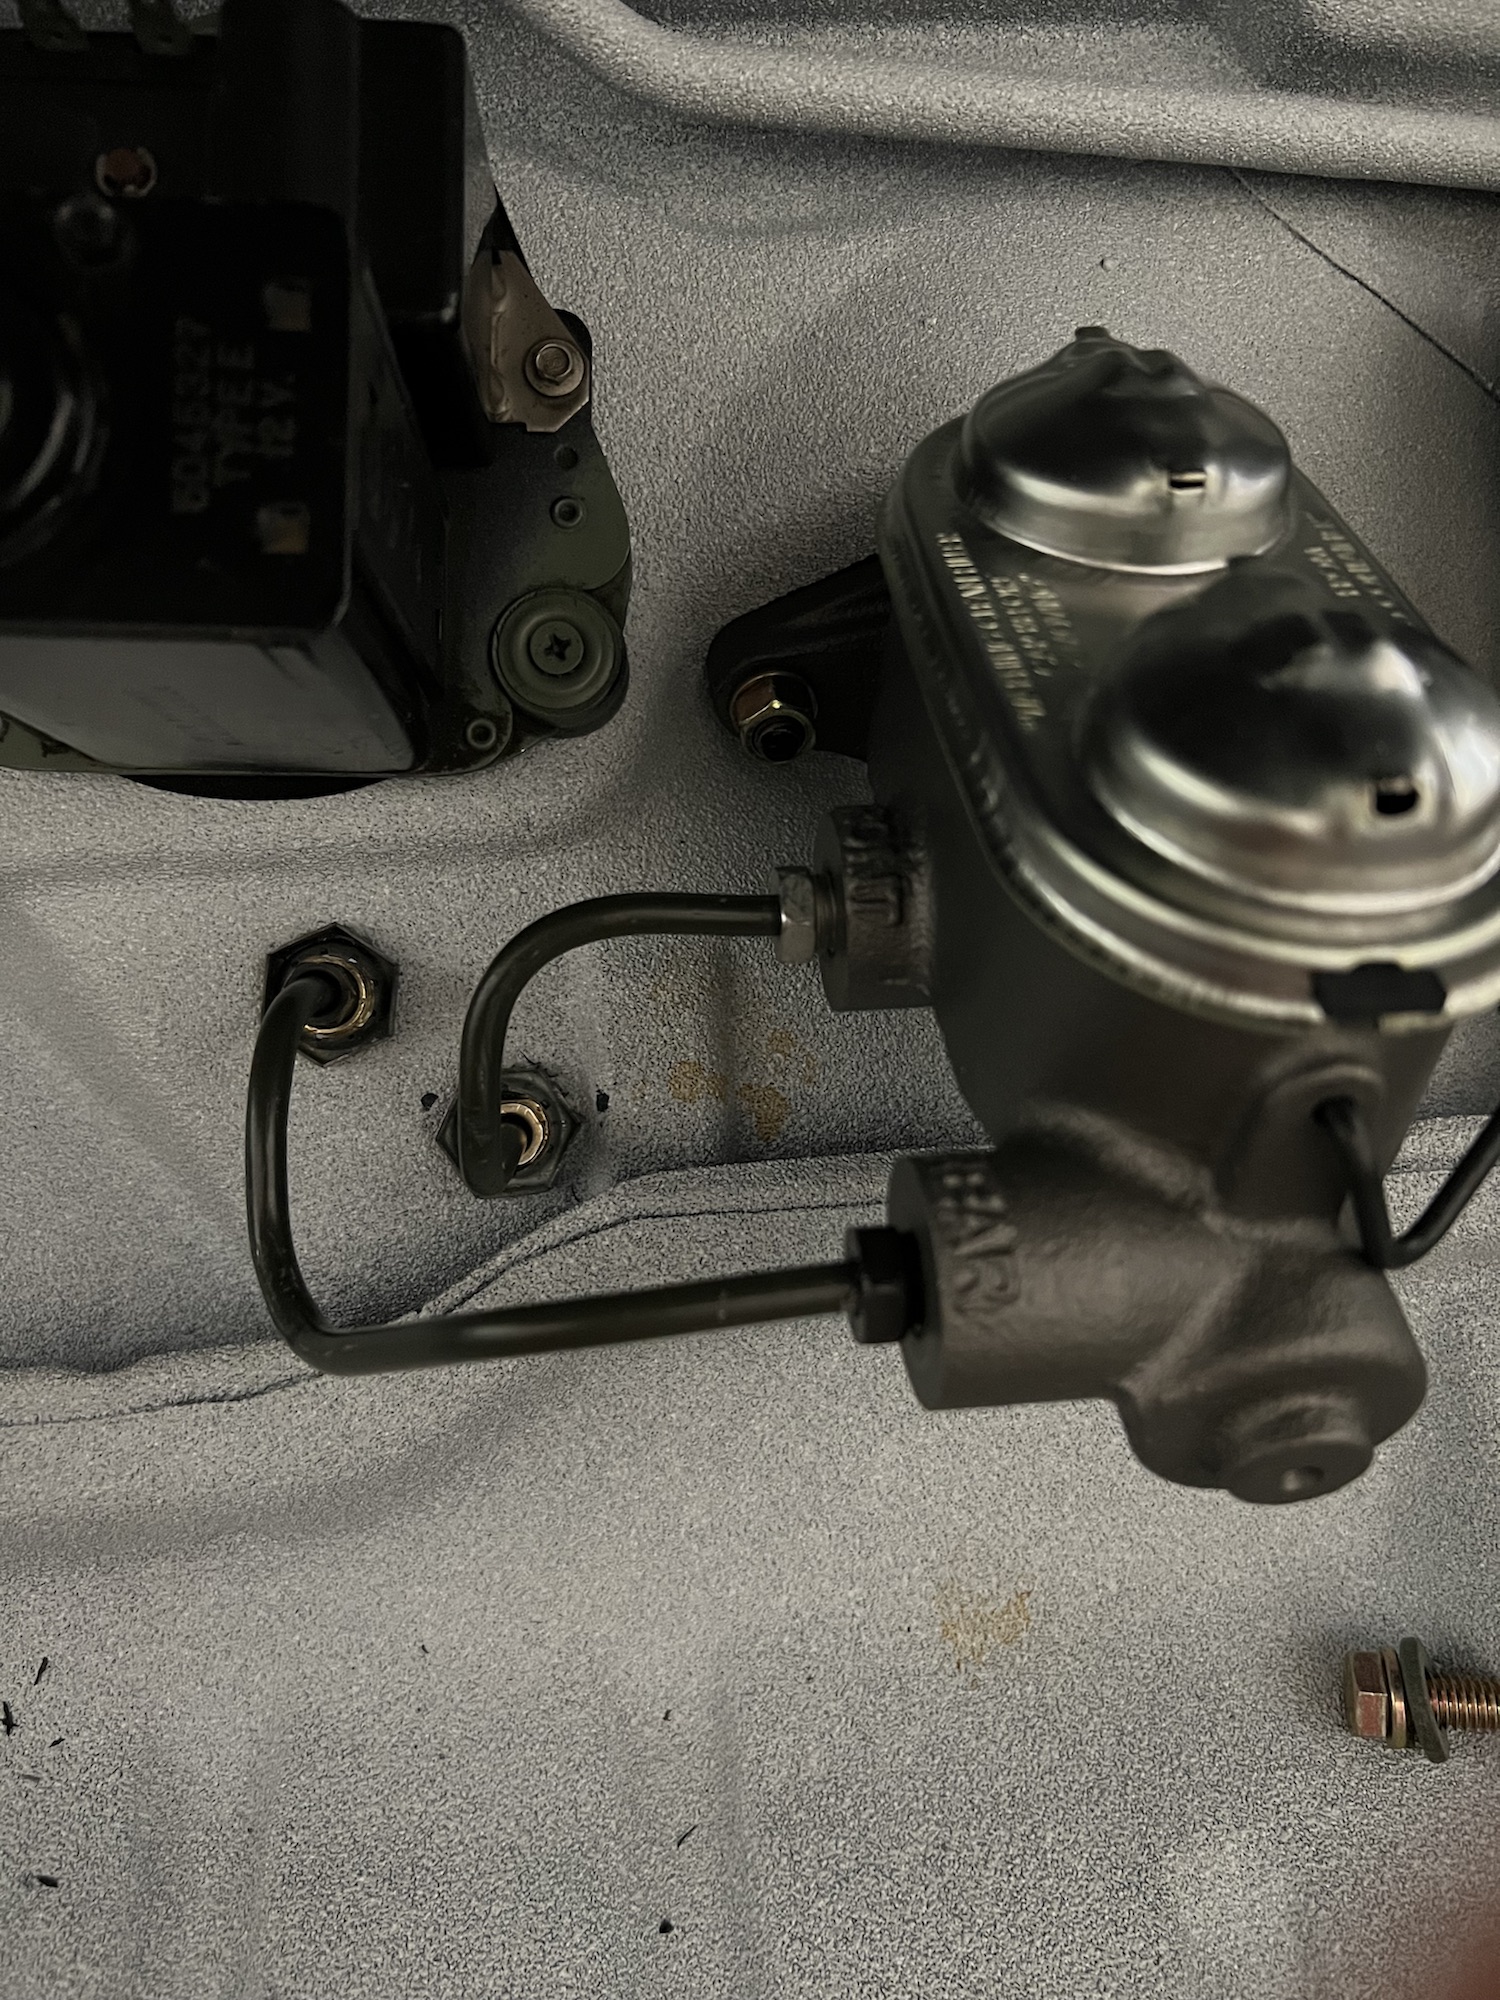
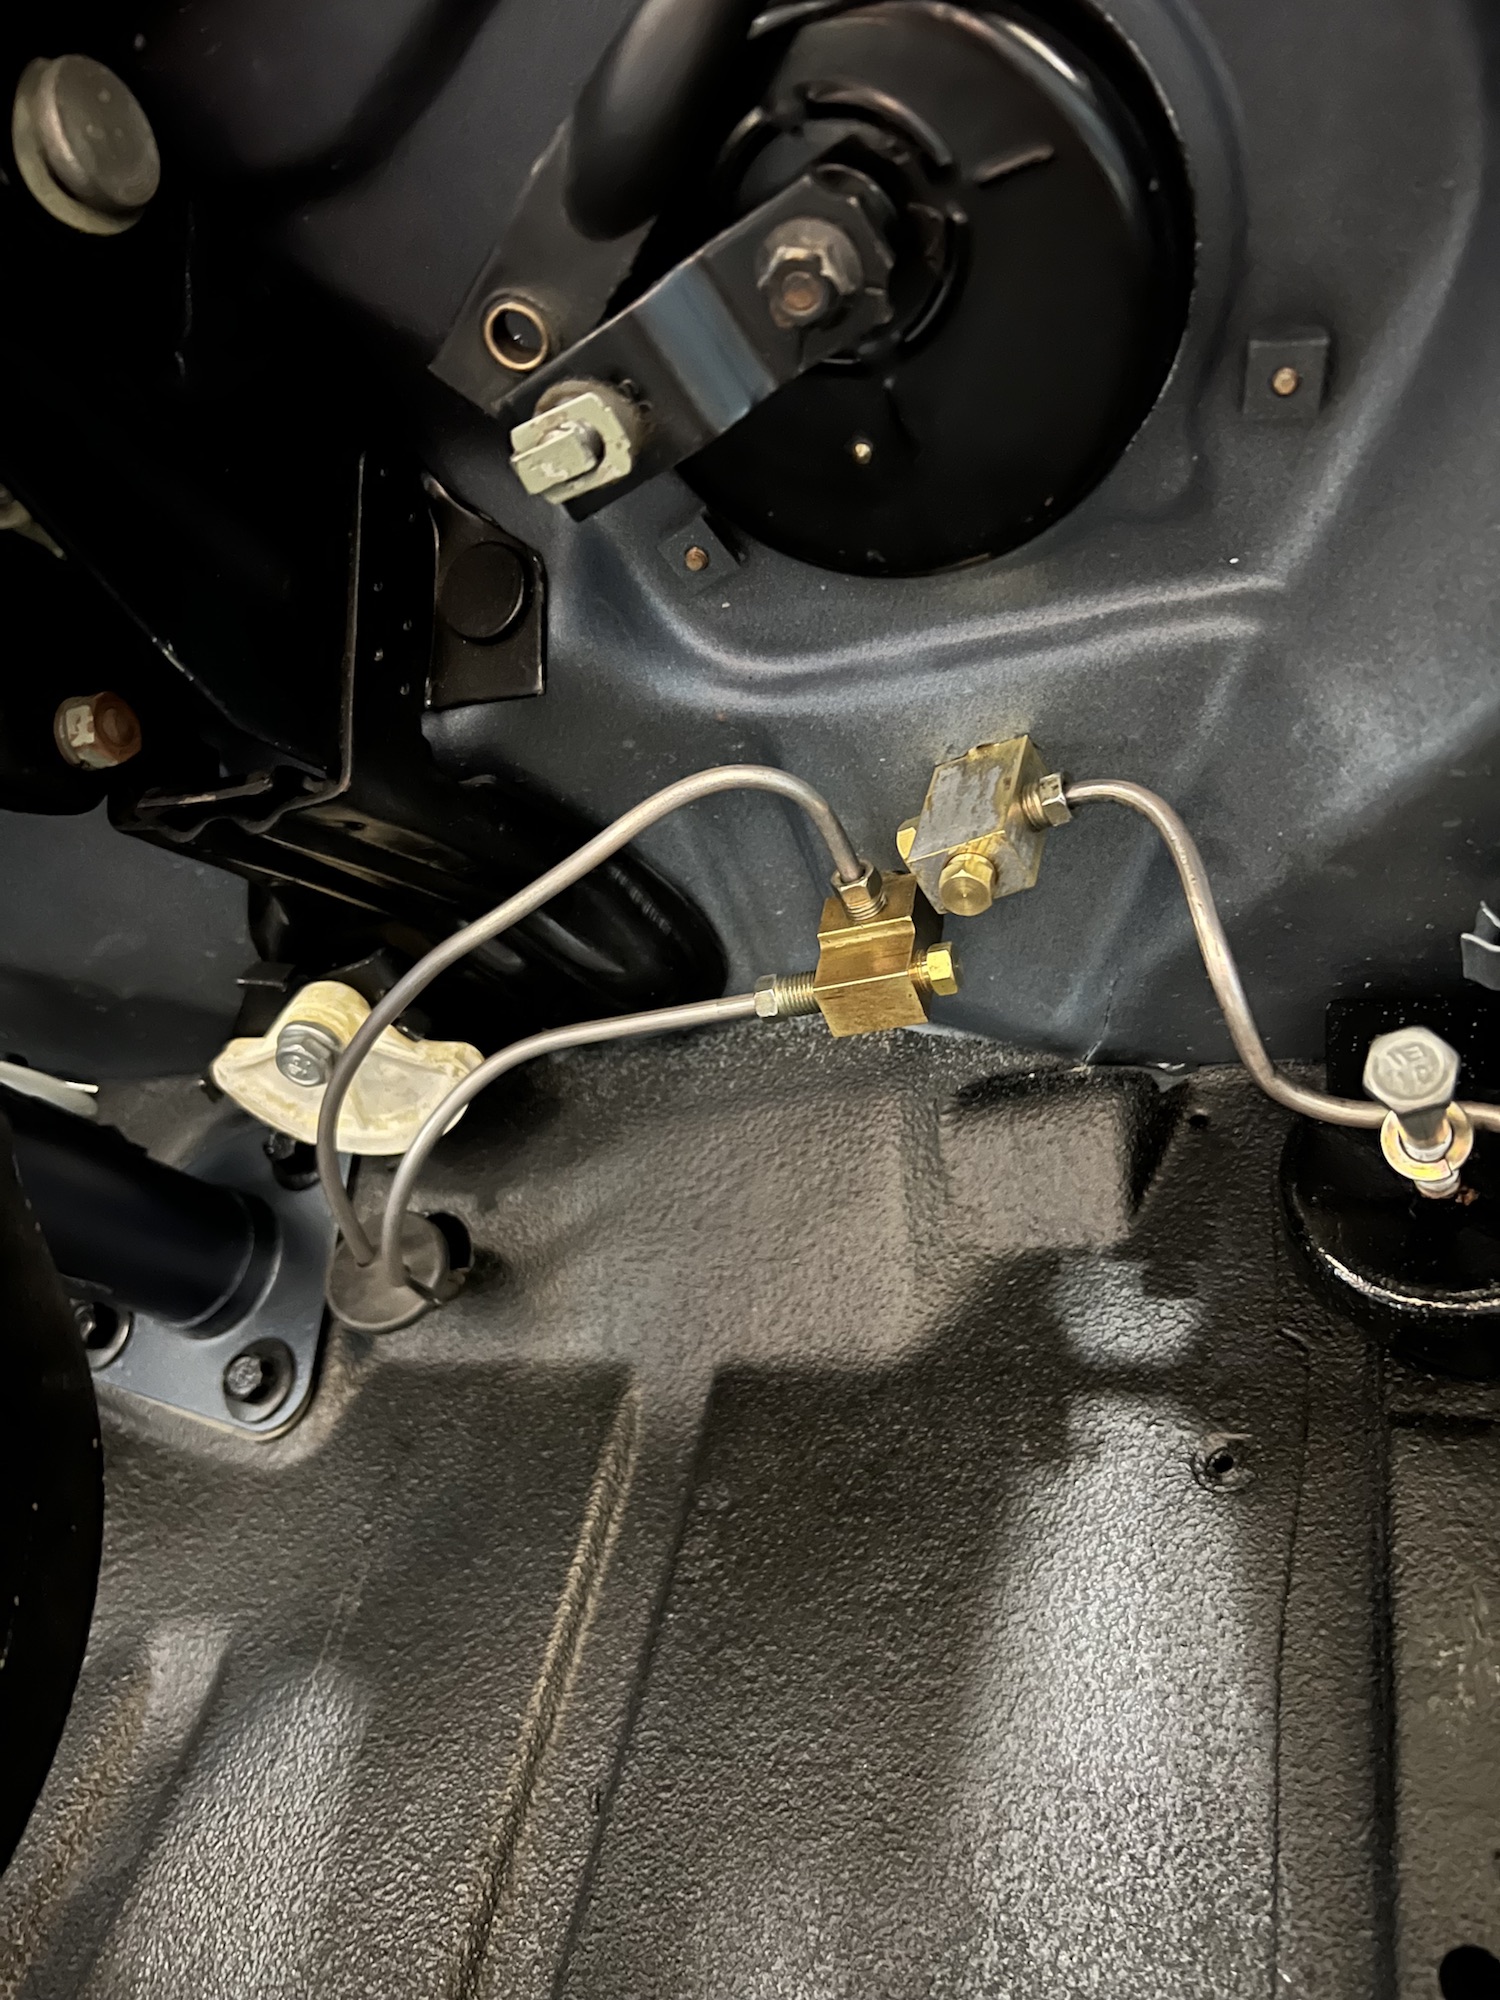
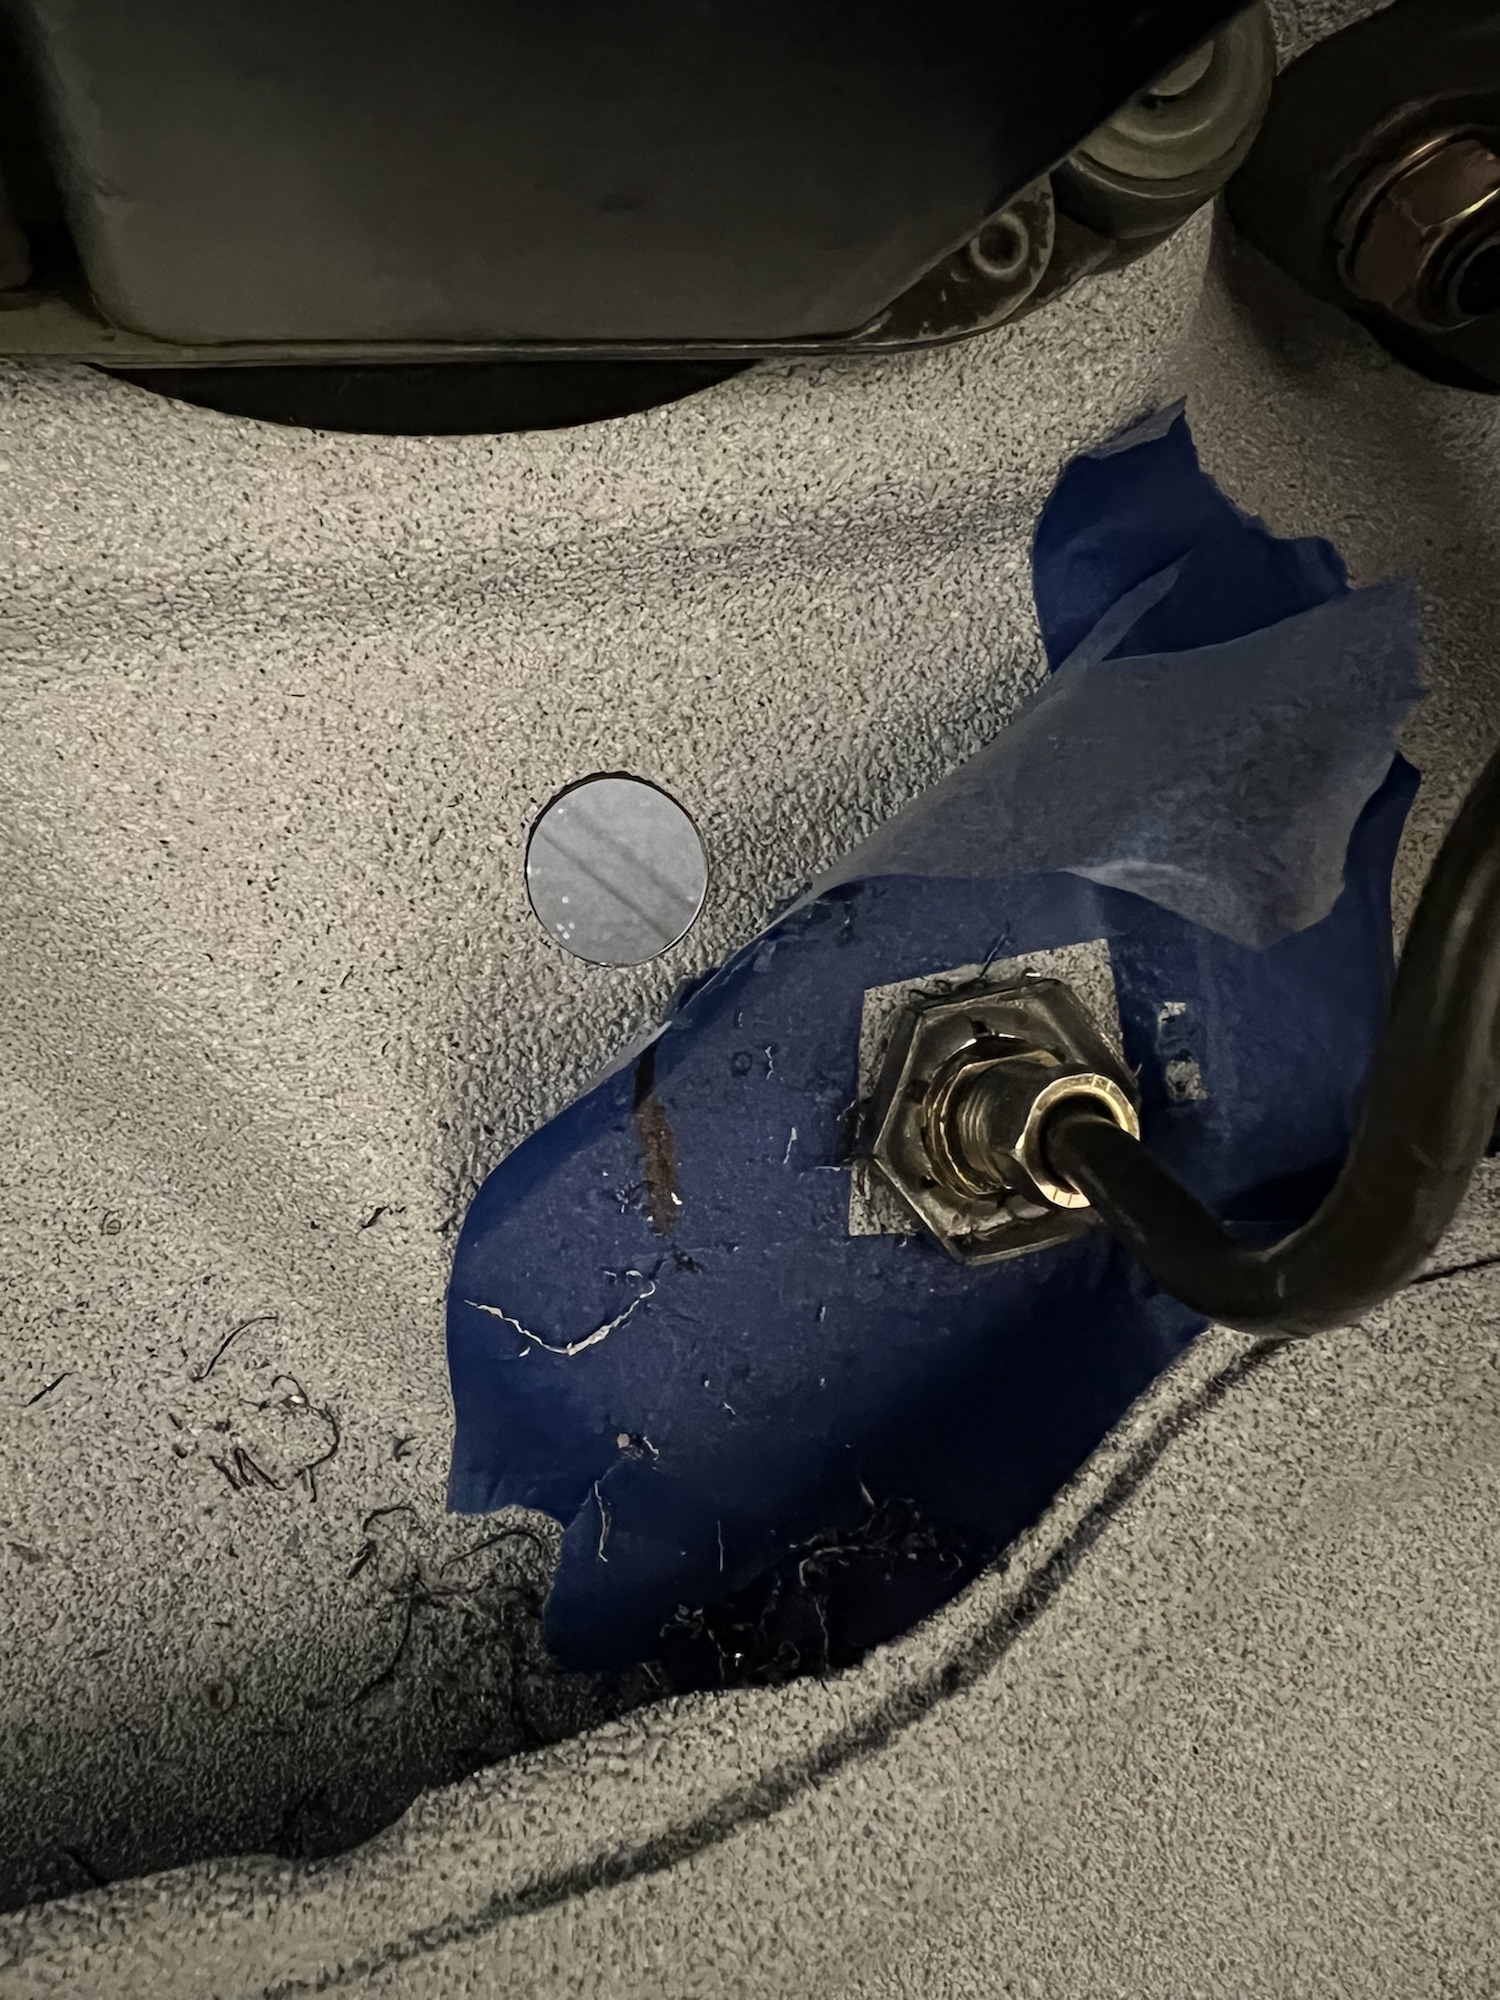
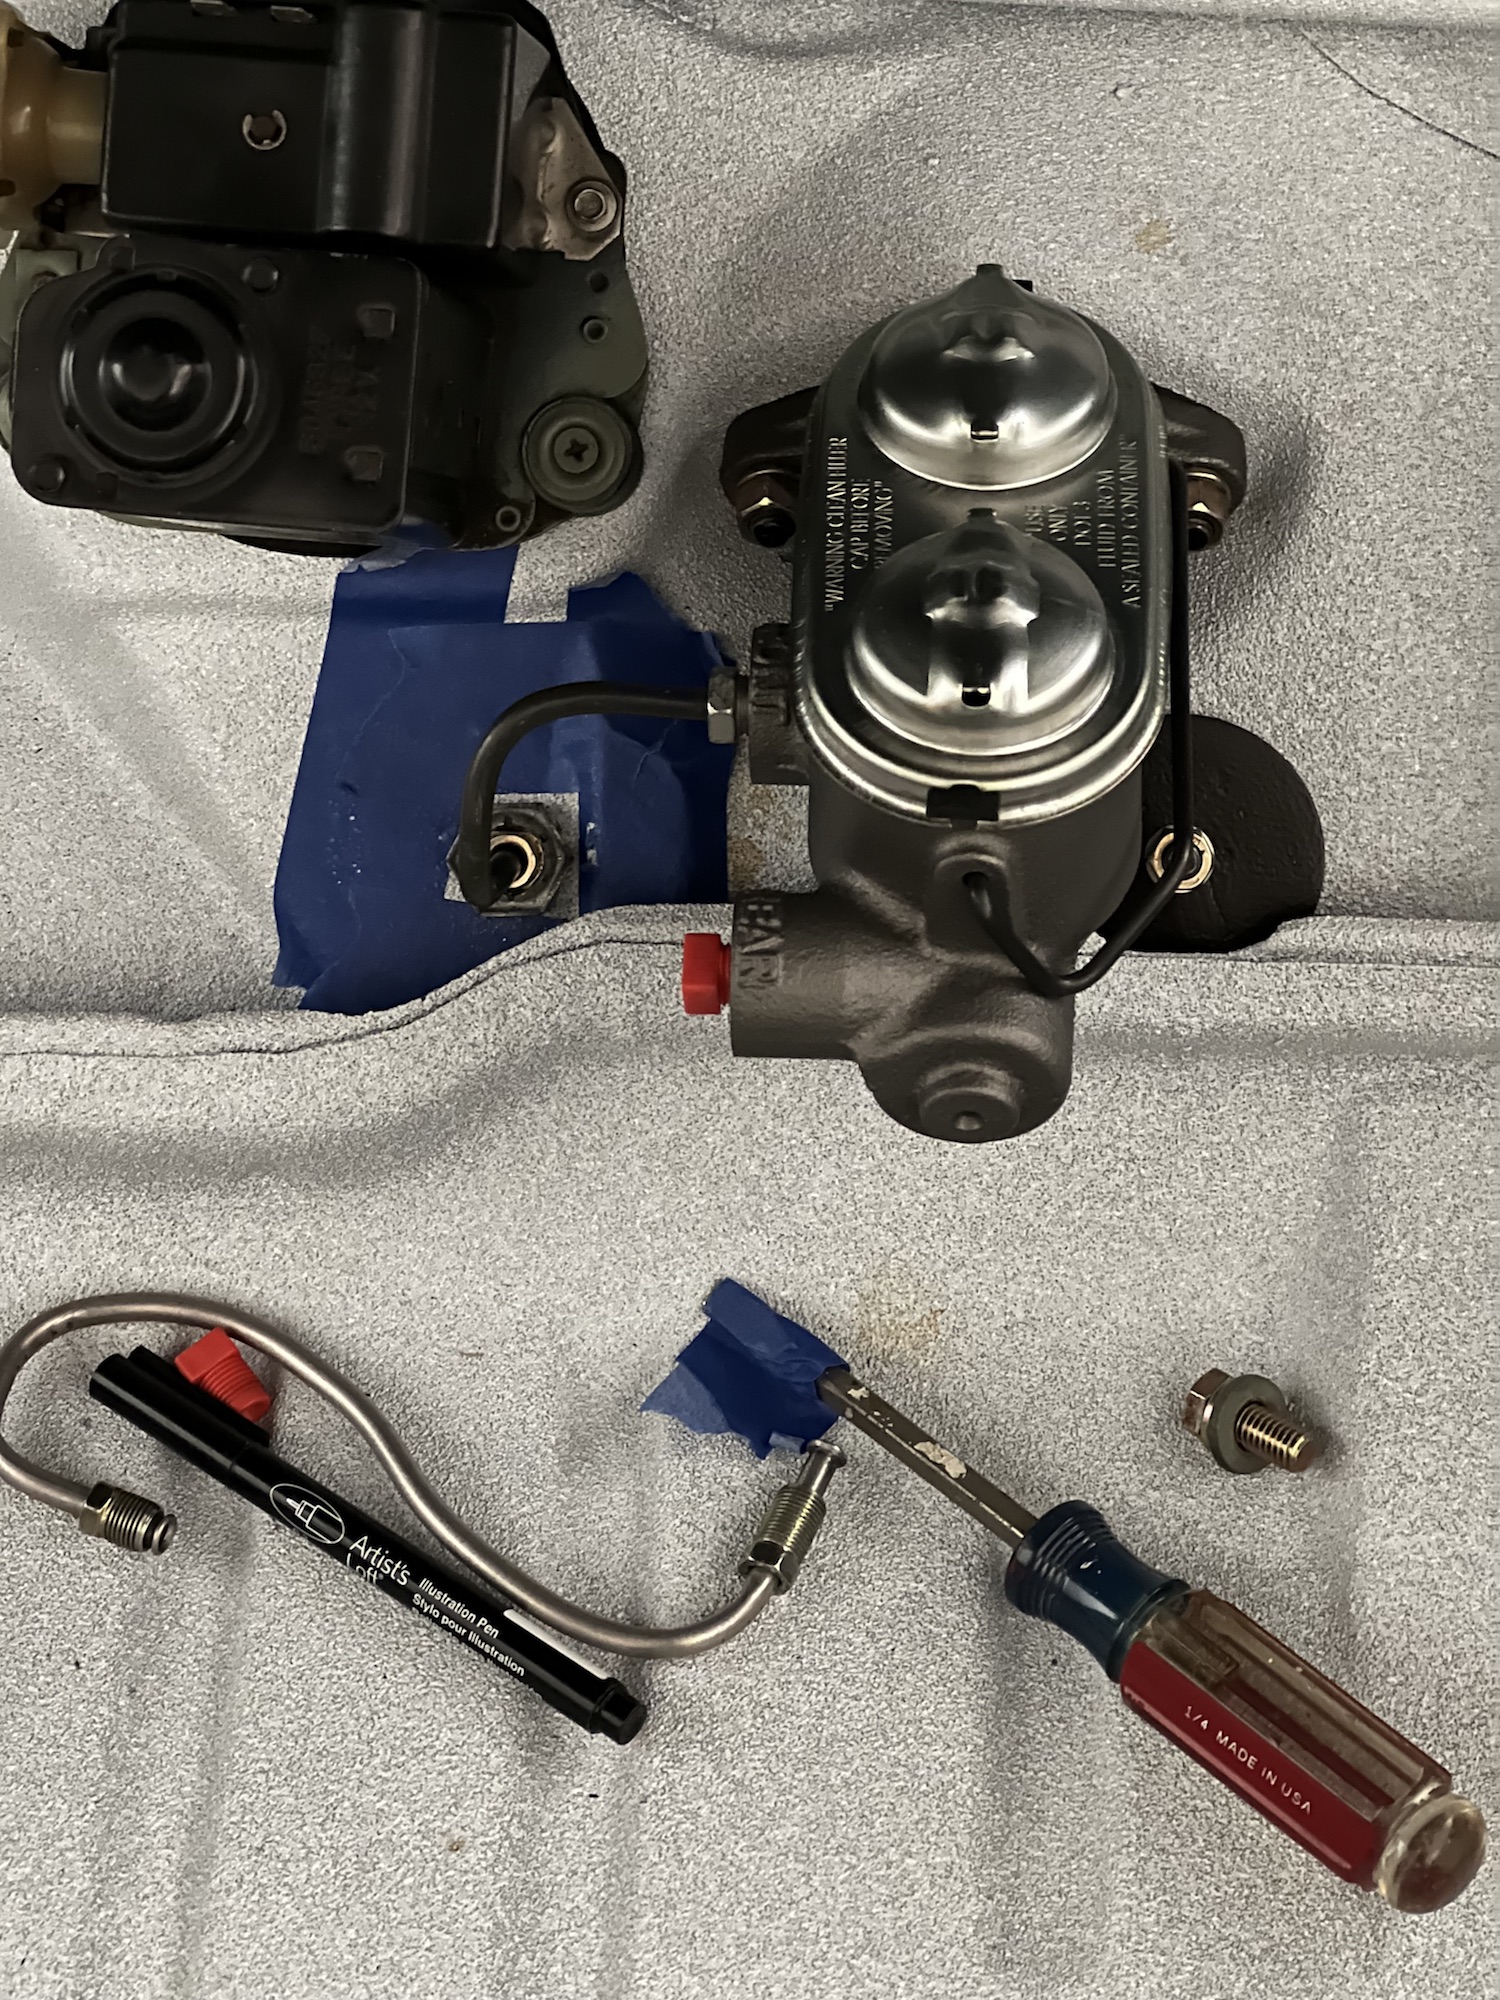
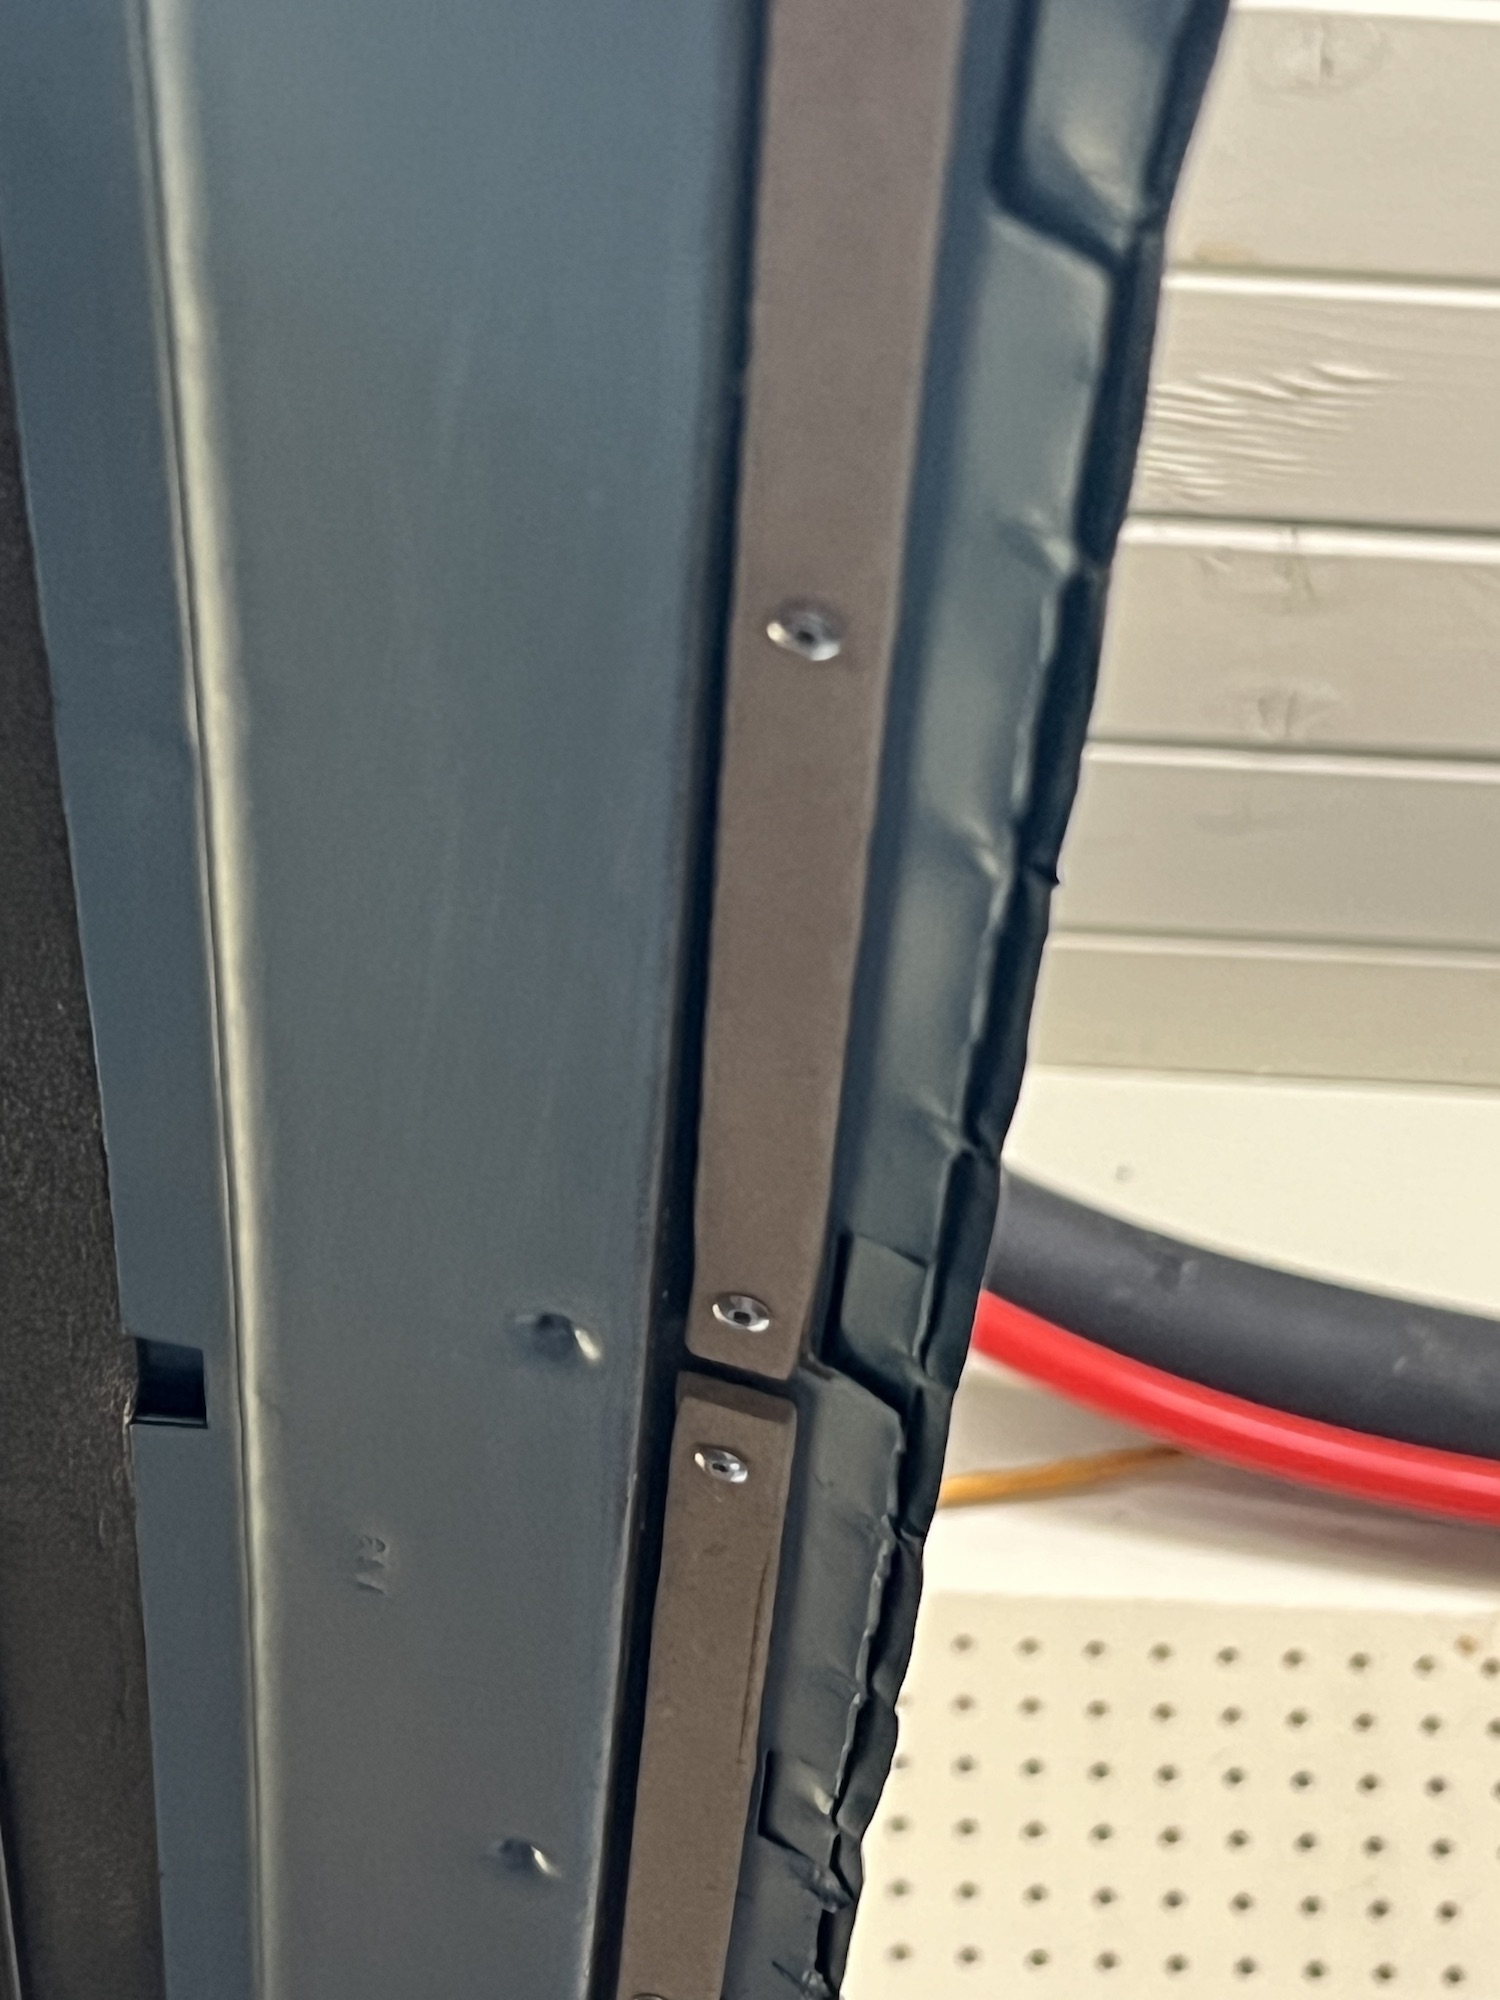
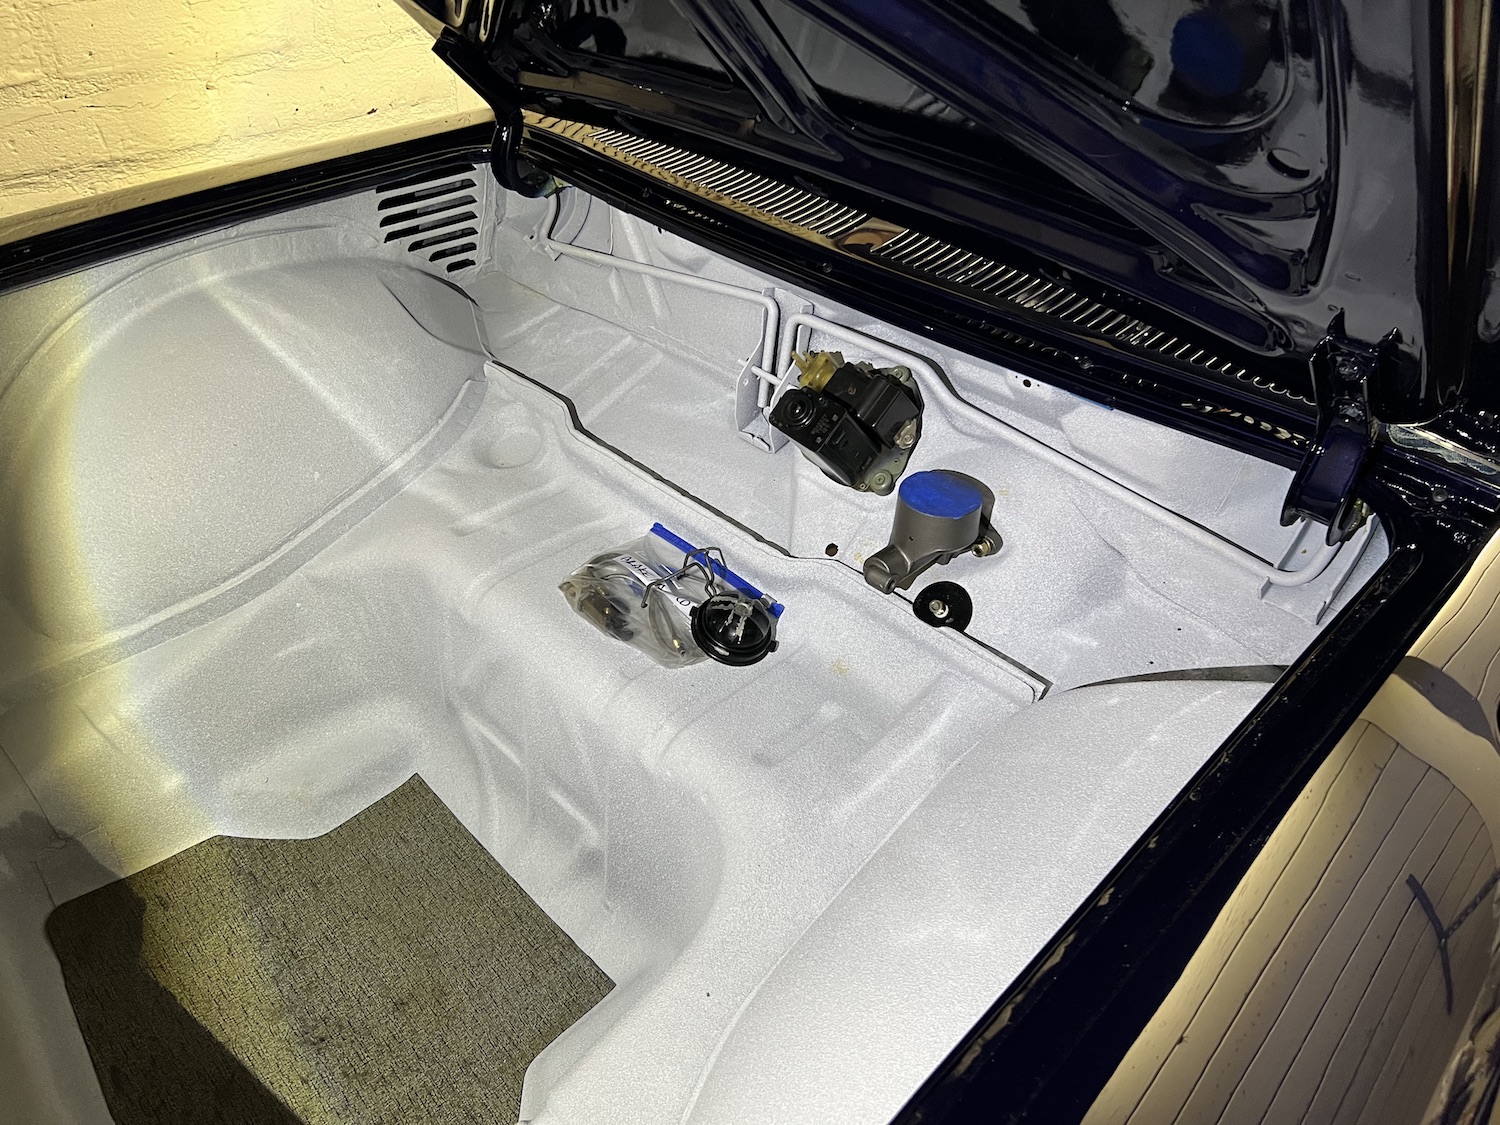
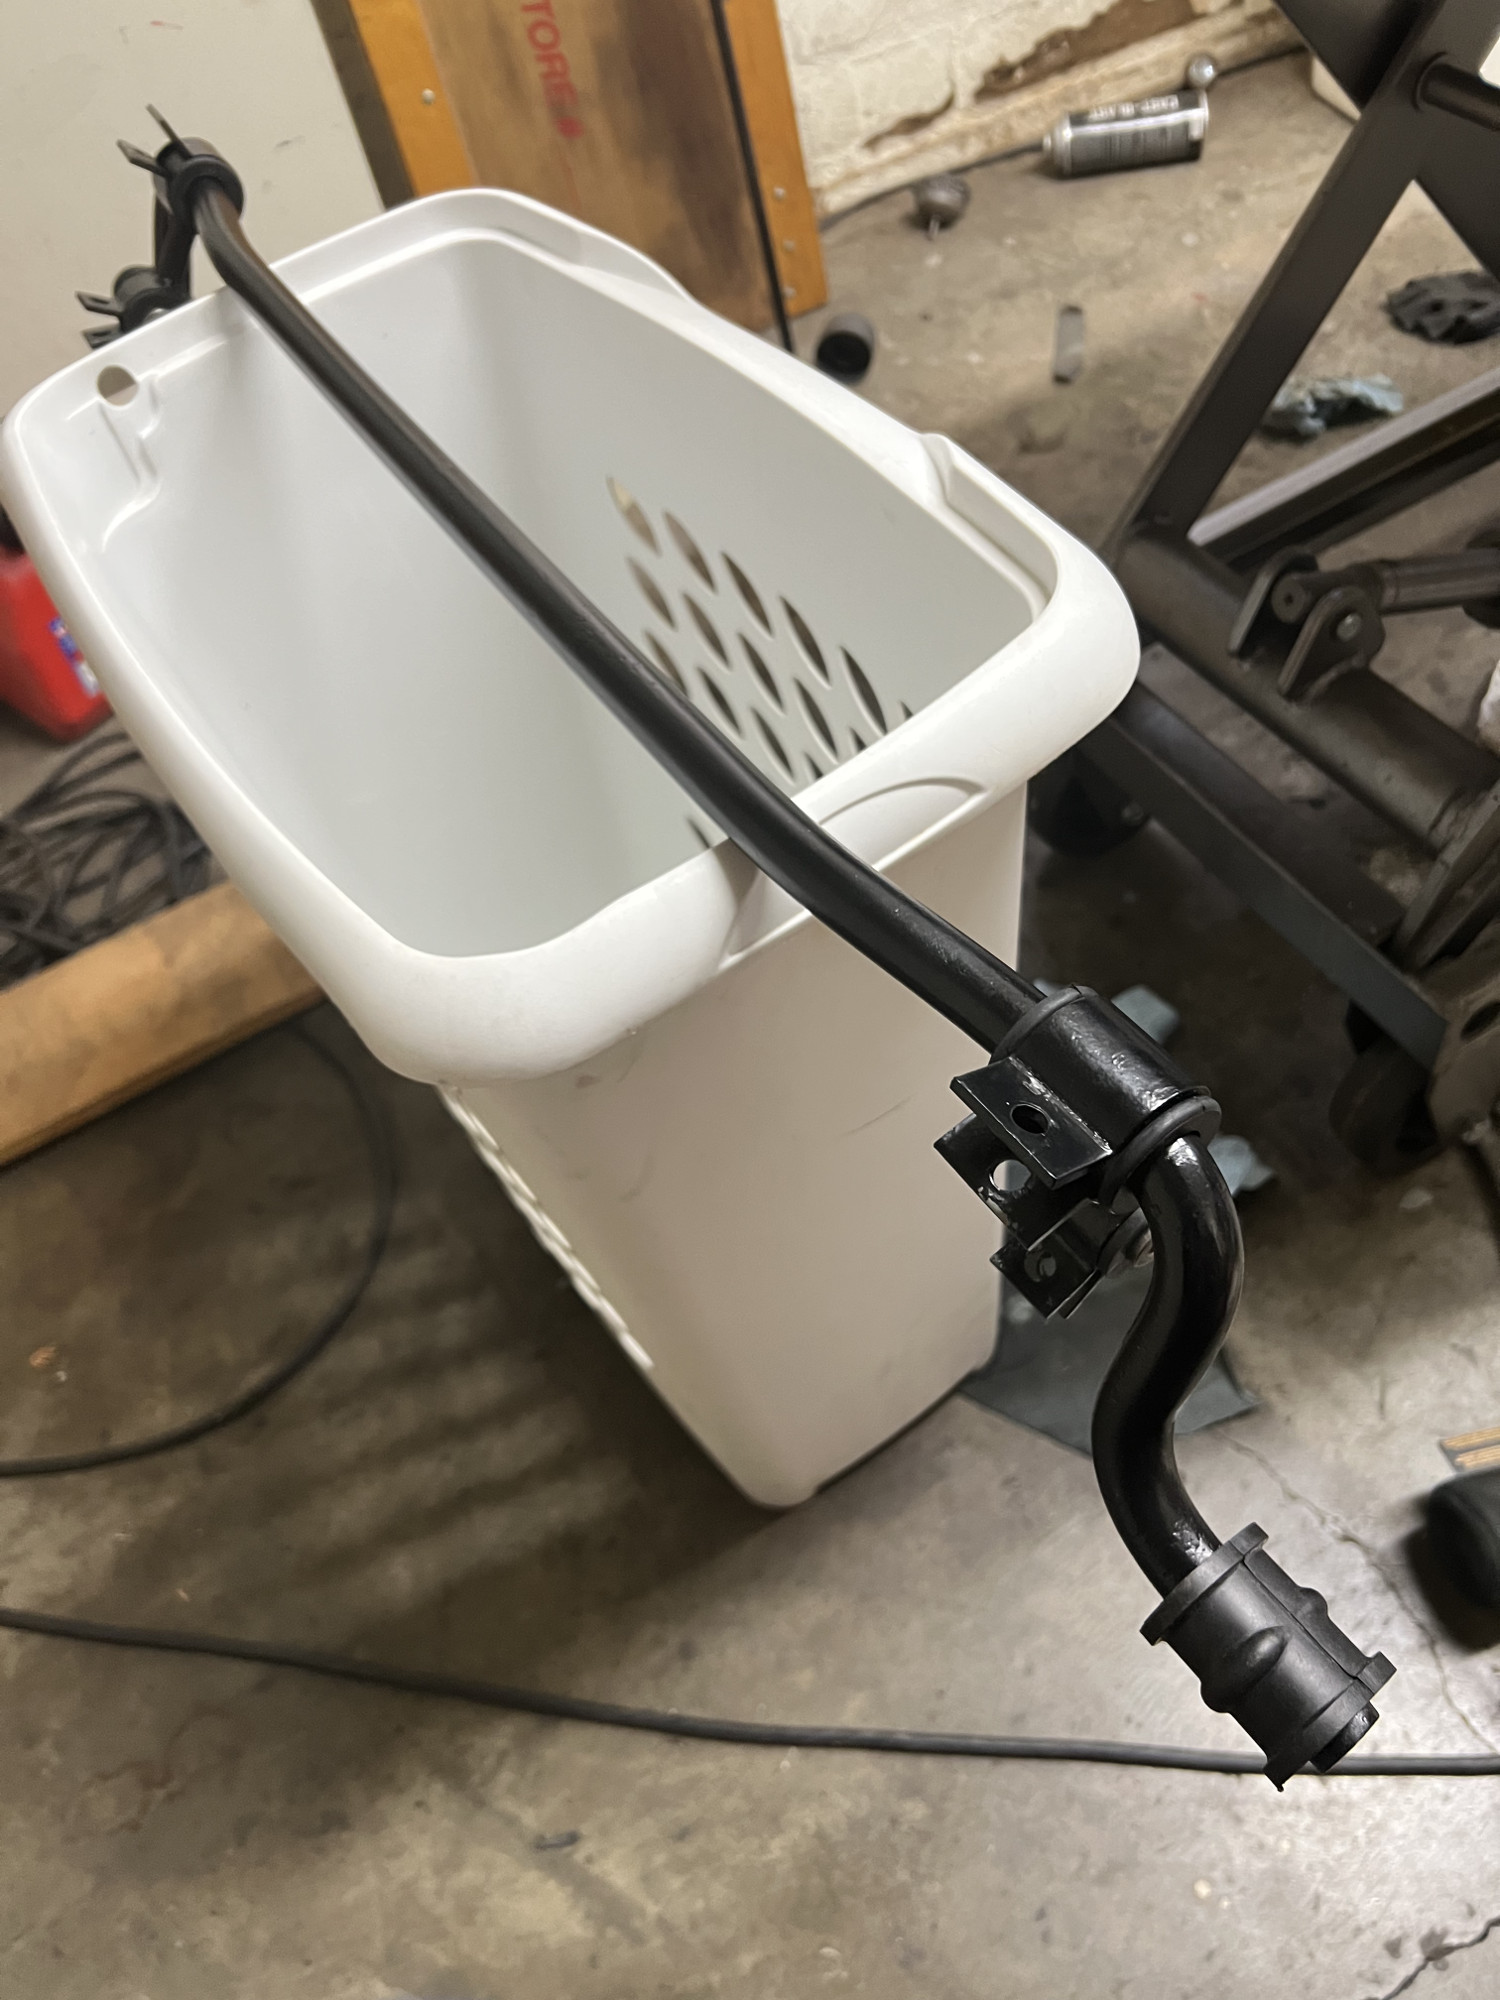
FINALLY finished the dual master cylinder brake conversion.
It took forever to get the correct trunkside lines with 1/2" on one end and 7/16" on the other, while keeping the original 1/4" line size. Had to pick up pipe bender and double flare the shorter line after cutting to length.
I chose to use the original GM brass T and special nut, which required sourcing from 2 different Corvair supply houses.
In the end, I think it looks pretty clean. I took the opportunity to paint the new unit with "Cast Blast" paint.
#AutoRestoration
#Corvair #AutoRestoration progress.
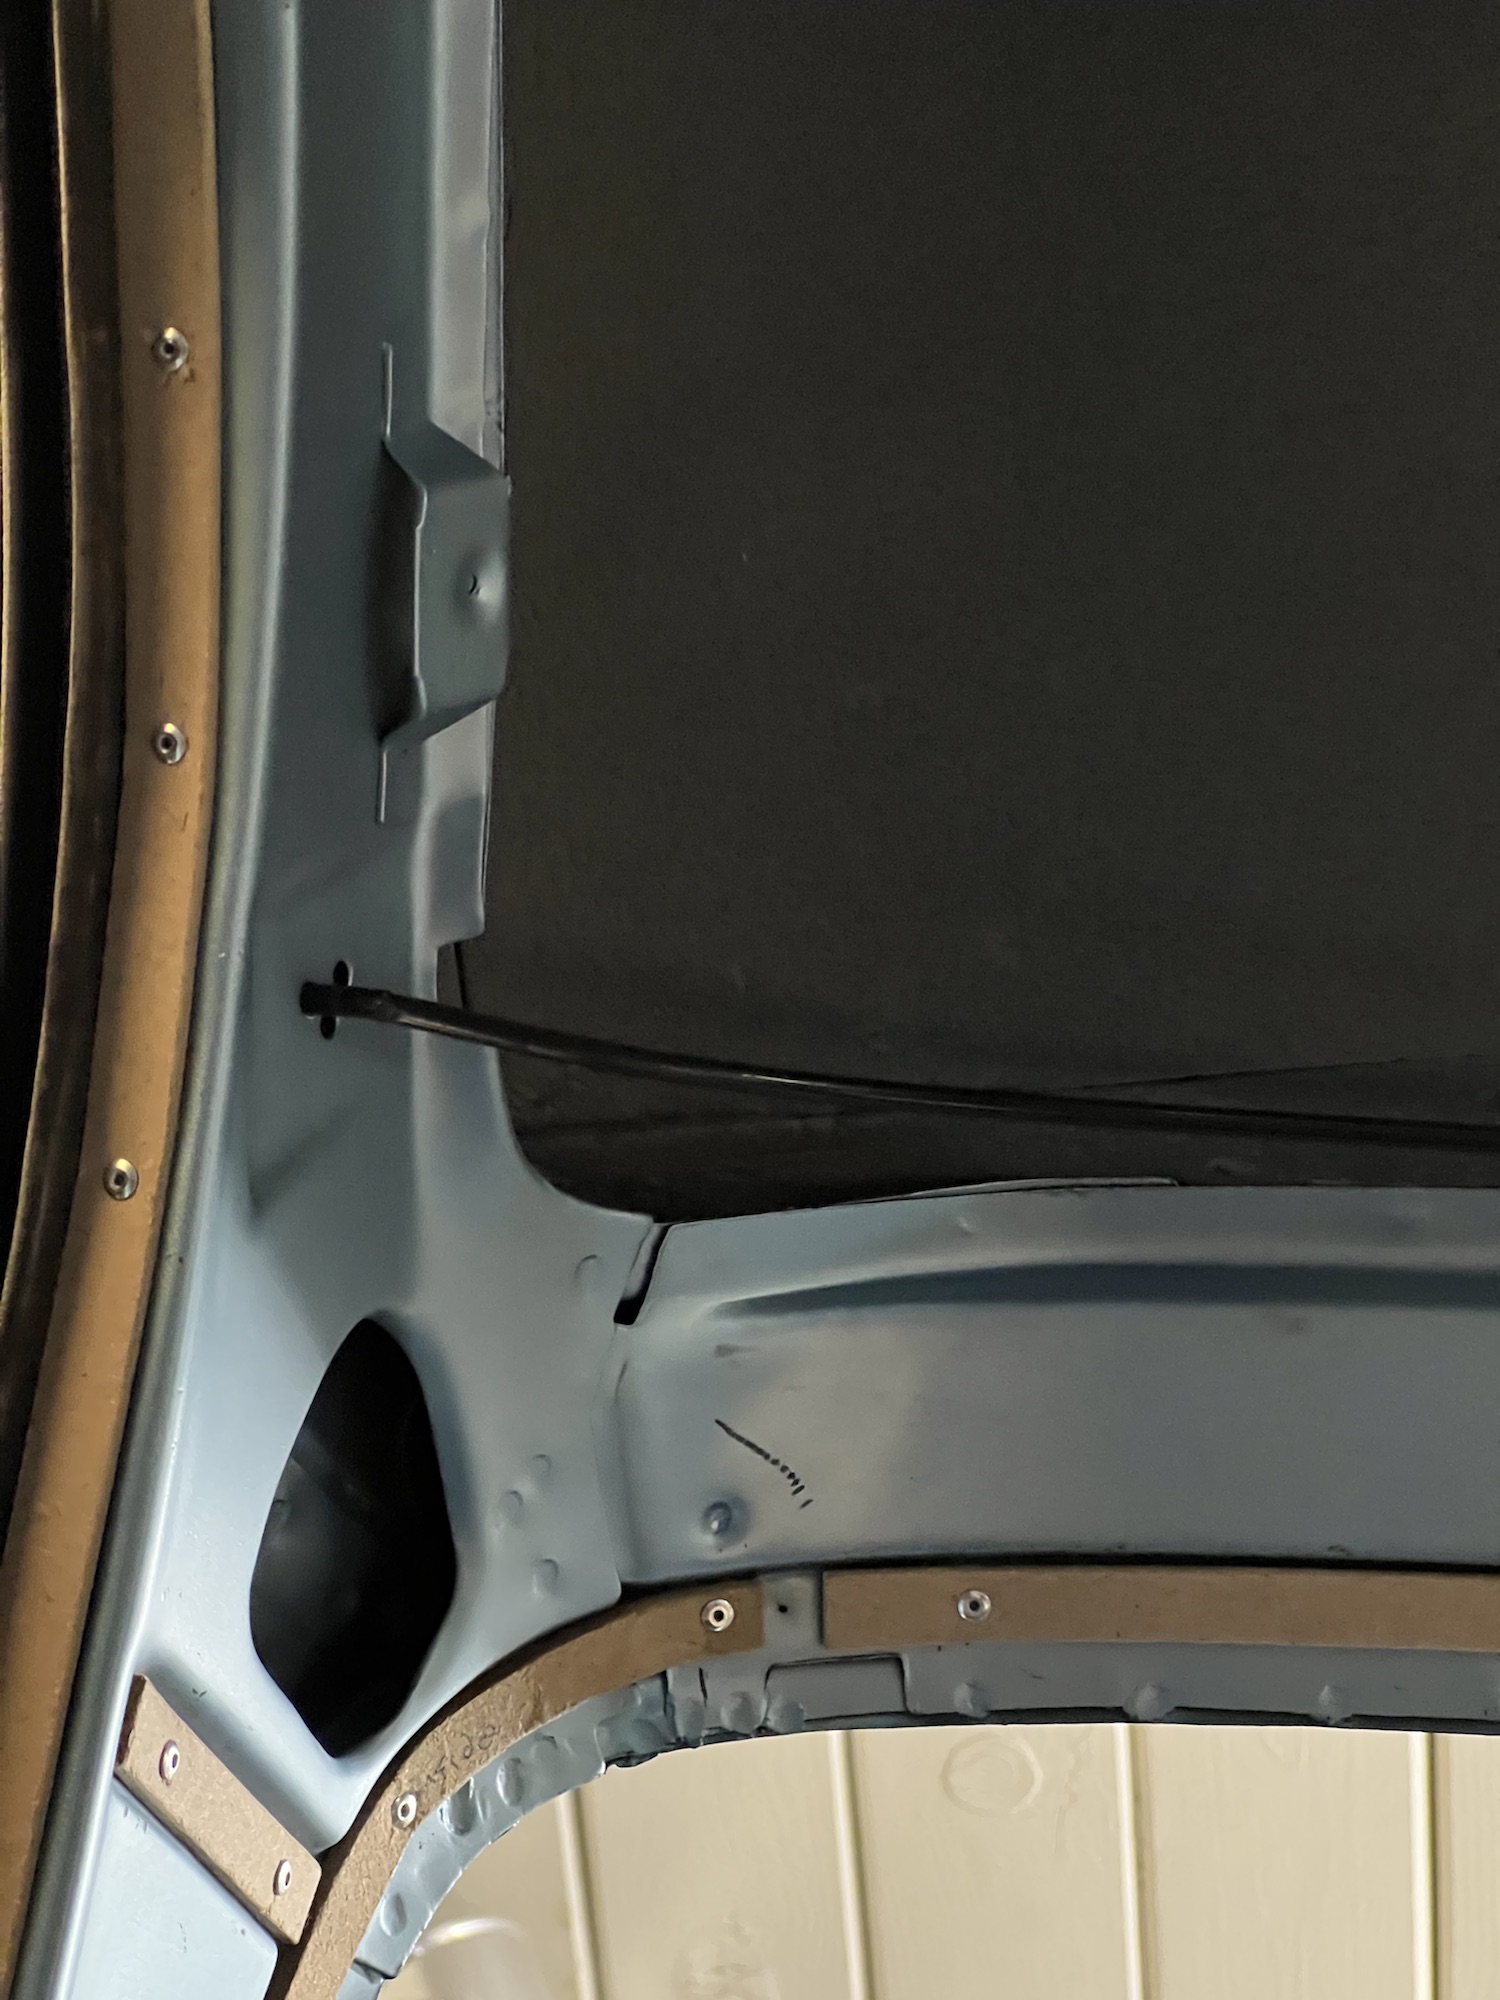
The original headliner was stapled onto the car via a hard cardboard strip that was itself stapled into the metal of the roof's edge.
When the car was stripped, the old hardboard was blasted away, but the staples remained.
I ripped the old staples out, drilled out every other existing staple hole and riveted in new strips of 1/8" hardboard which had been cut to size. For tight curves, I had to wet, bend and then dry the hardboard to shape.
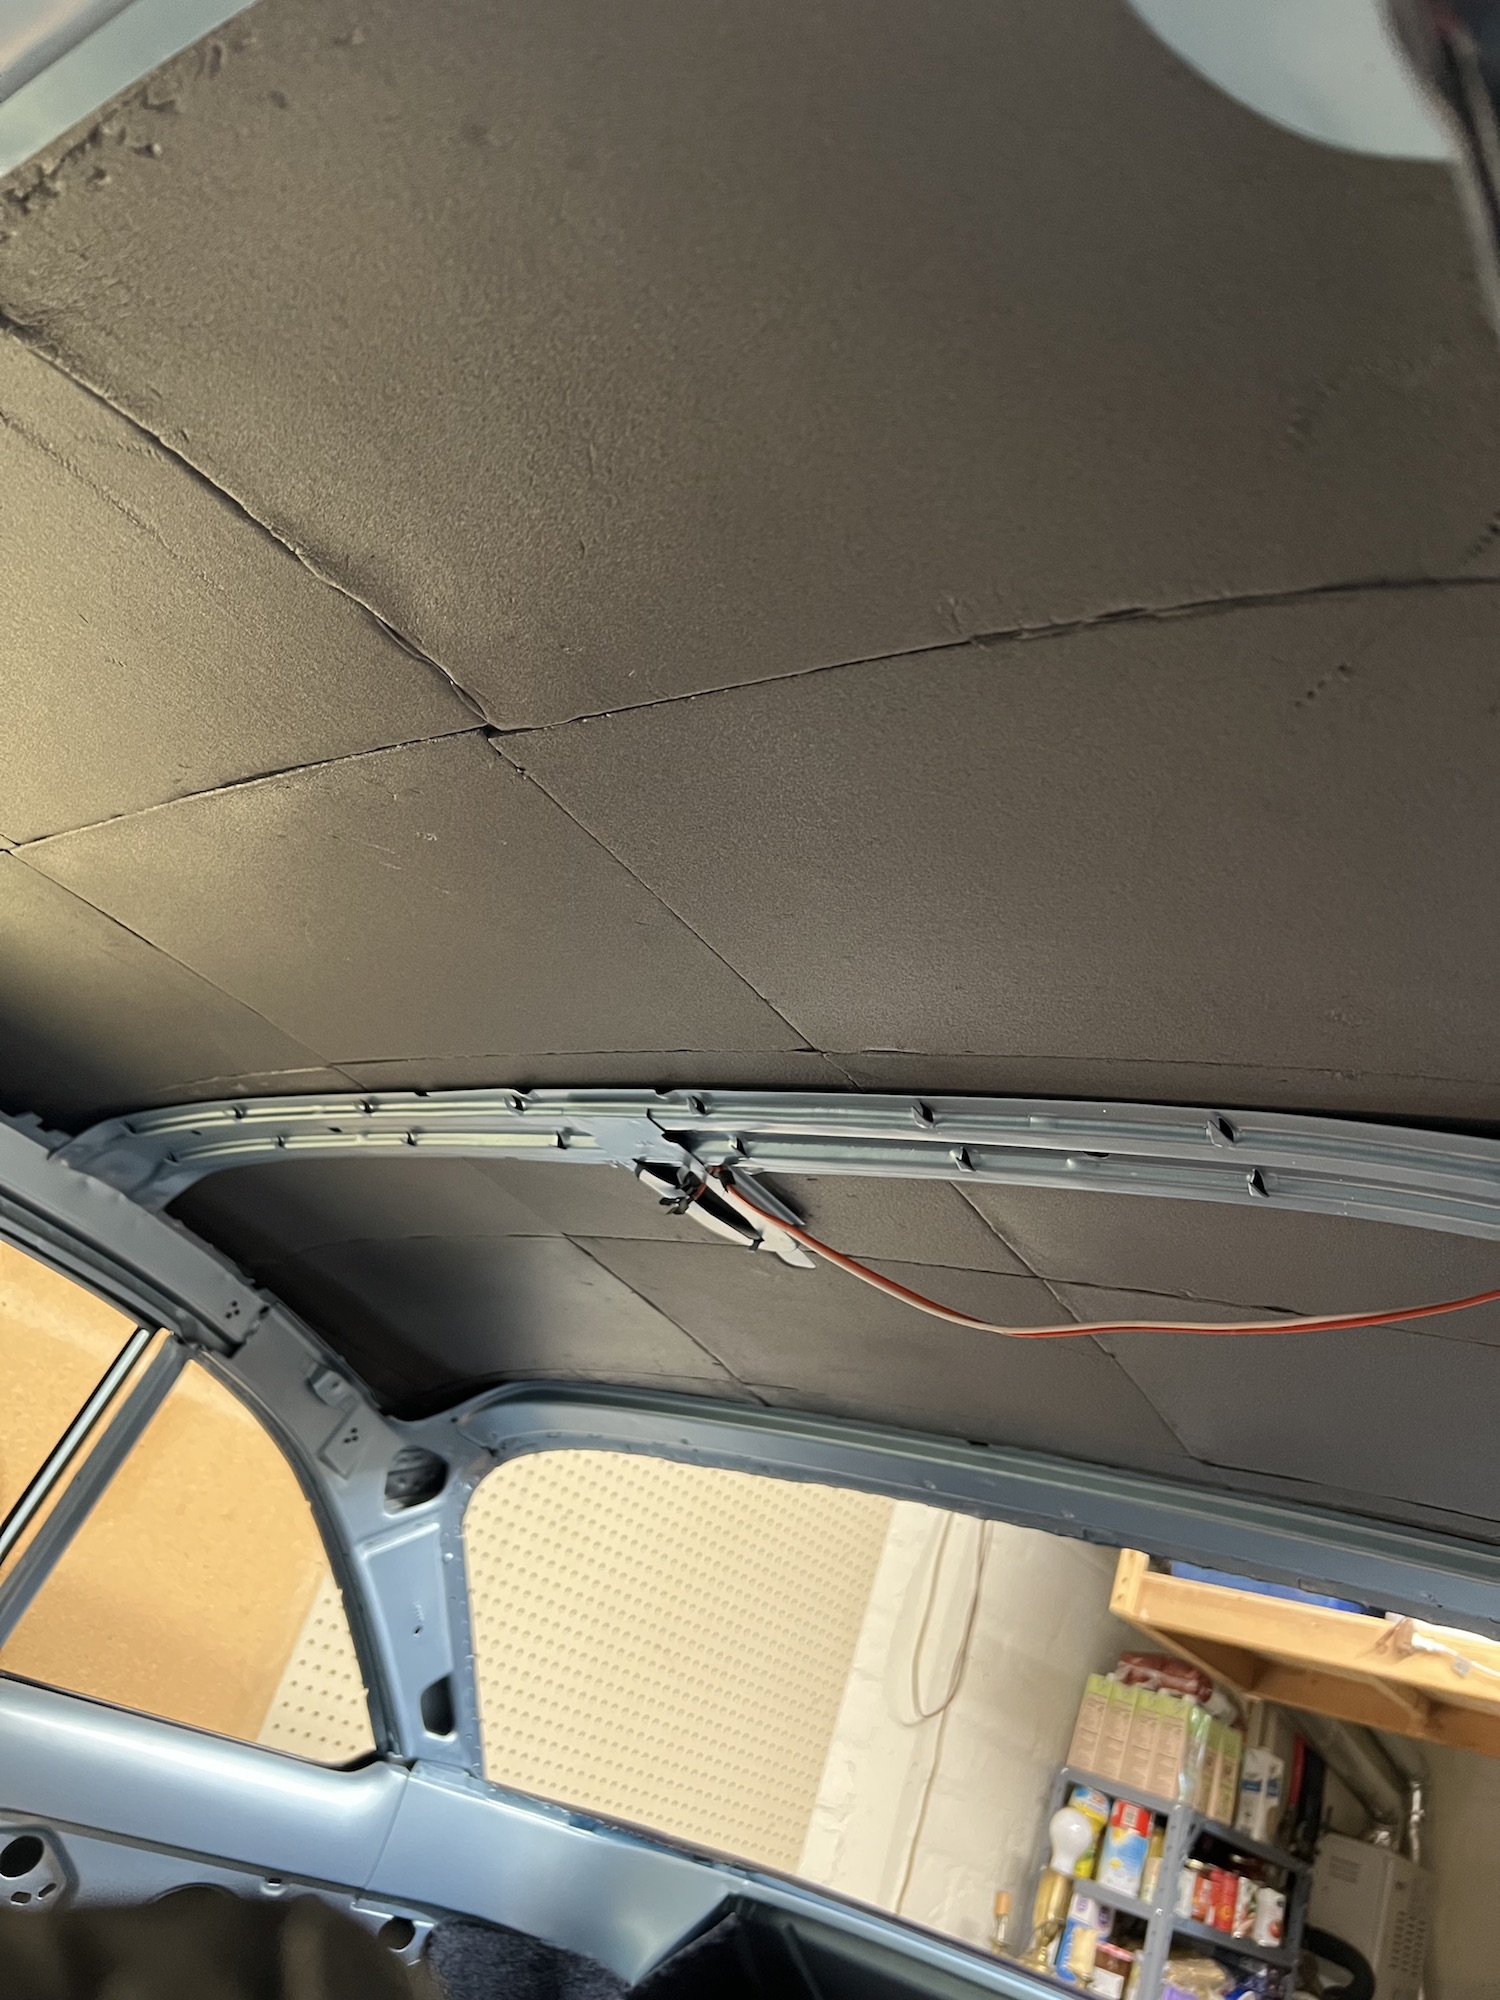
Now that the roof has been soundproofed, There should be nothing - but fear of doing a bad job - to prevent me putting the new headliner material in.
If I mess up headliner installation, that'll be $140 down the drain. Or do I pay someone $500 to "do it right"?
The original headliner was stapled onto the car via a hard cardboard strip that was itself stapled into the metal of the roof's edge.
When the car was stripped, the old hardboard was blasted away, but the staples remained.
I ripped the old staples out, drilled out every other existing staple hole and riveted in new strips of 1/8" hardboard which had been cut to size. For tight curves, I had to wet, bend and then dry the hardboard to shape.
Now that the roof has been soundproofed, There should be nothing - but fear of doing a bad job - to prevent me putting the new headliner material in.
If I mess up headliner installation, that'll be $140 down the drain. Or do I pay someone $500 to "do it right"?

#Corvair #AutoRestoration progress.
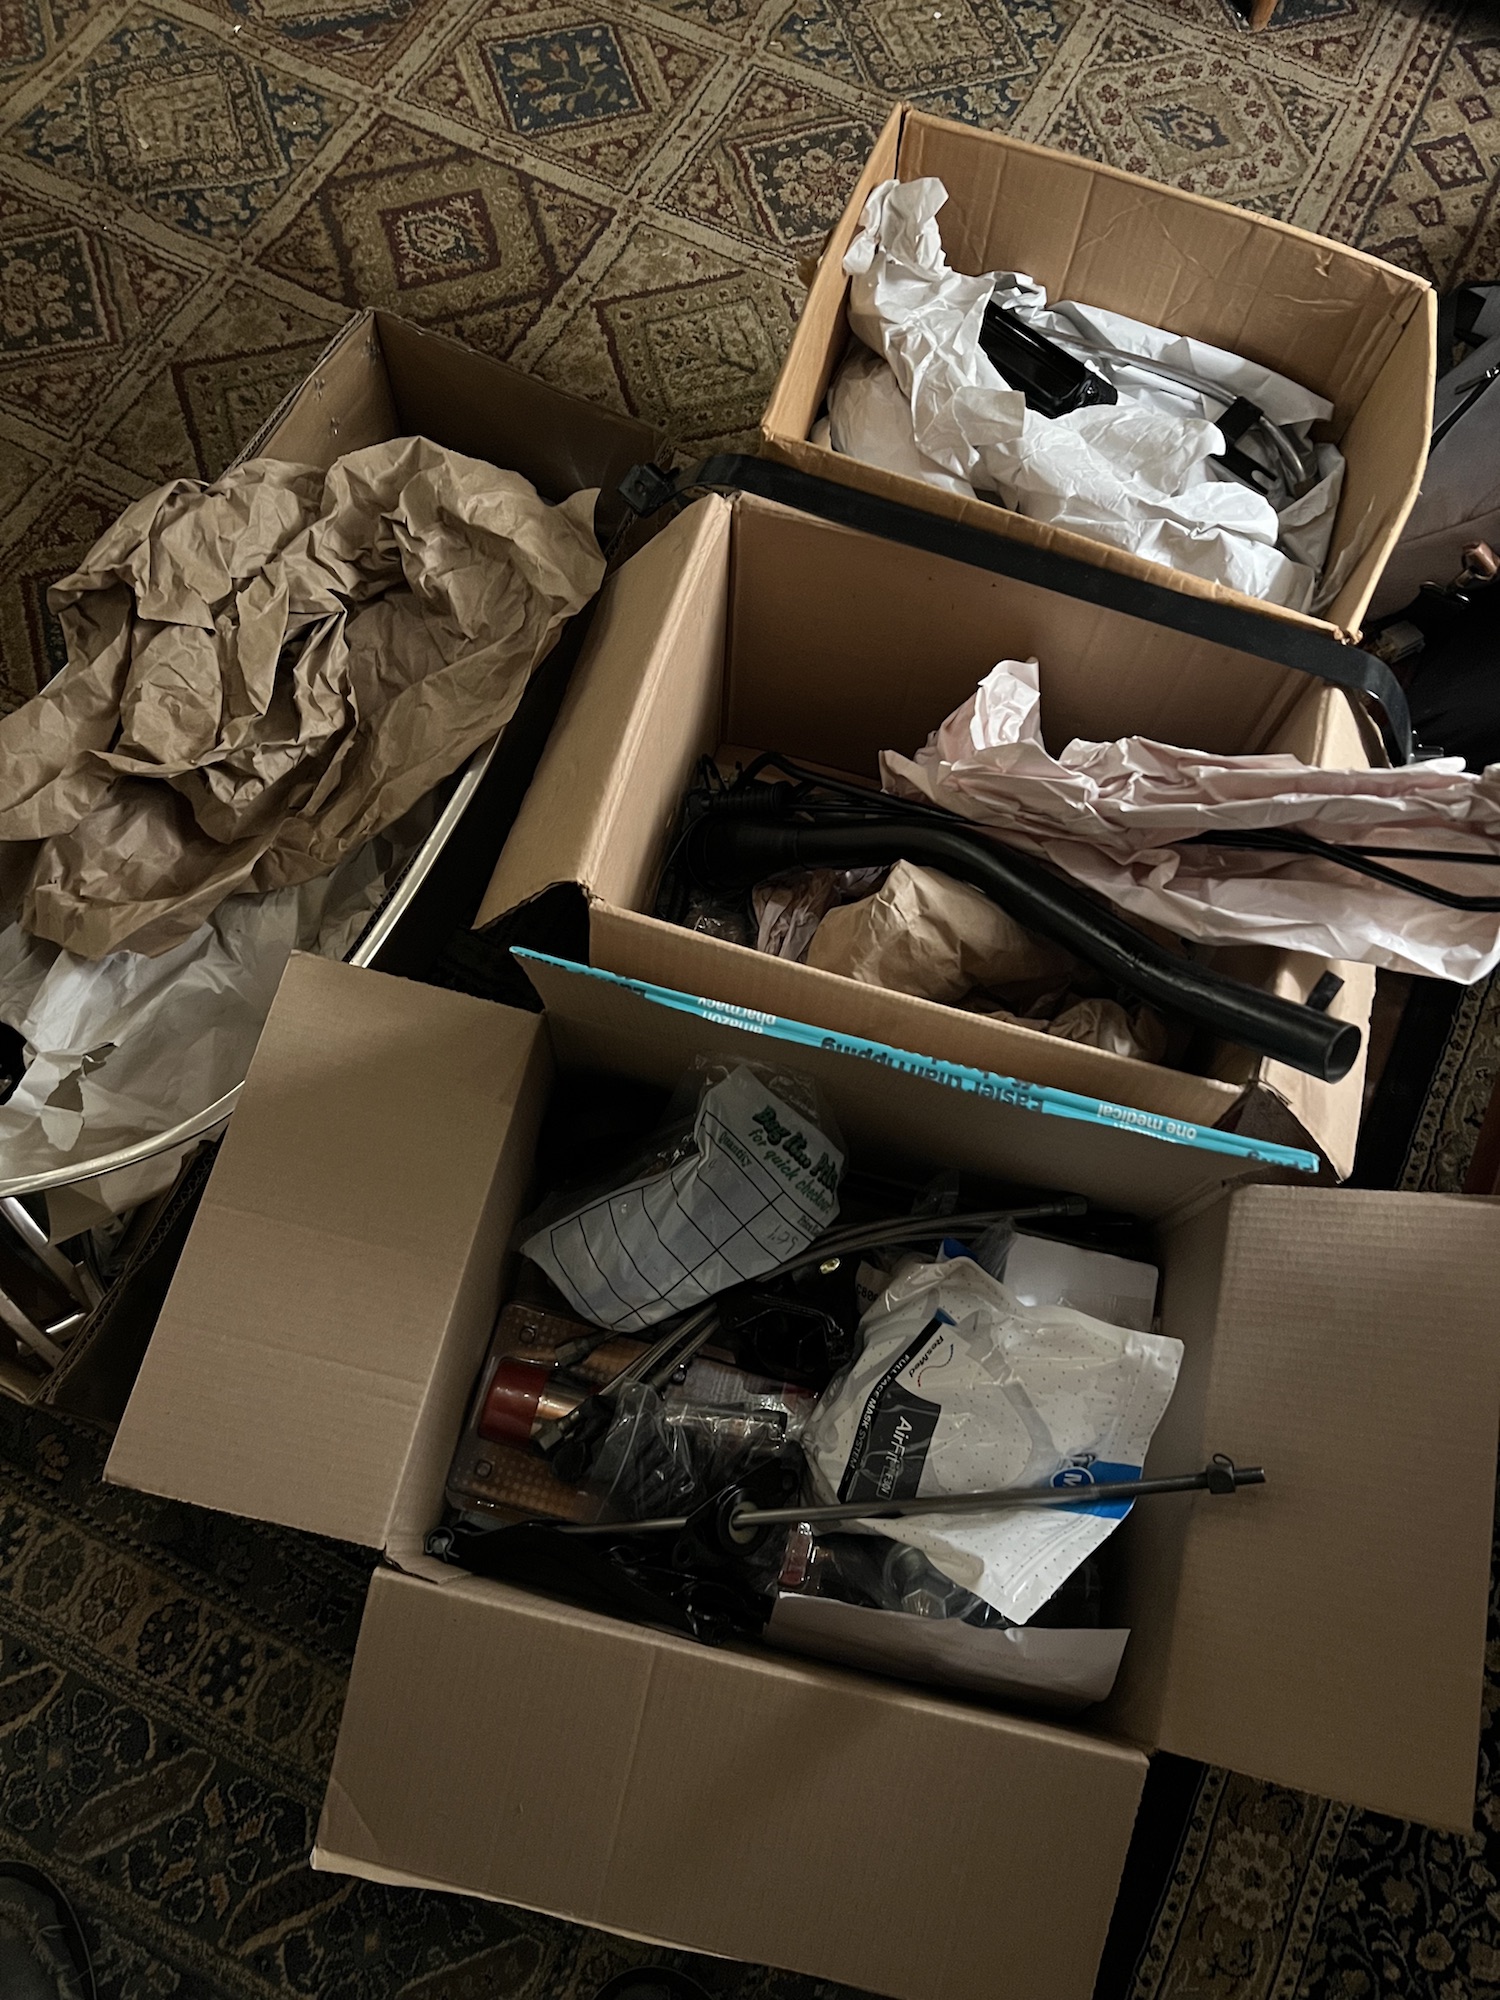
Now that the un-assembled puzzle is all here, I have to admit to being overwhelmed to the point that some days it goes untouched.
Some of the order-of-operations are daunting. Example: headliner - need to pull all the staples that held down the glue strip and replace with screwed-in new glue strip. The staples are SOLIDLY in metal that is easily scratched.
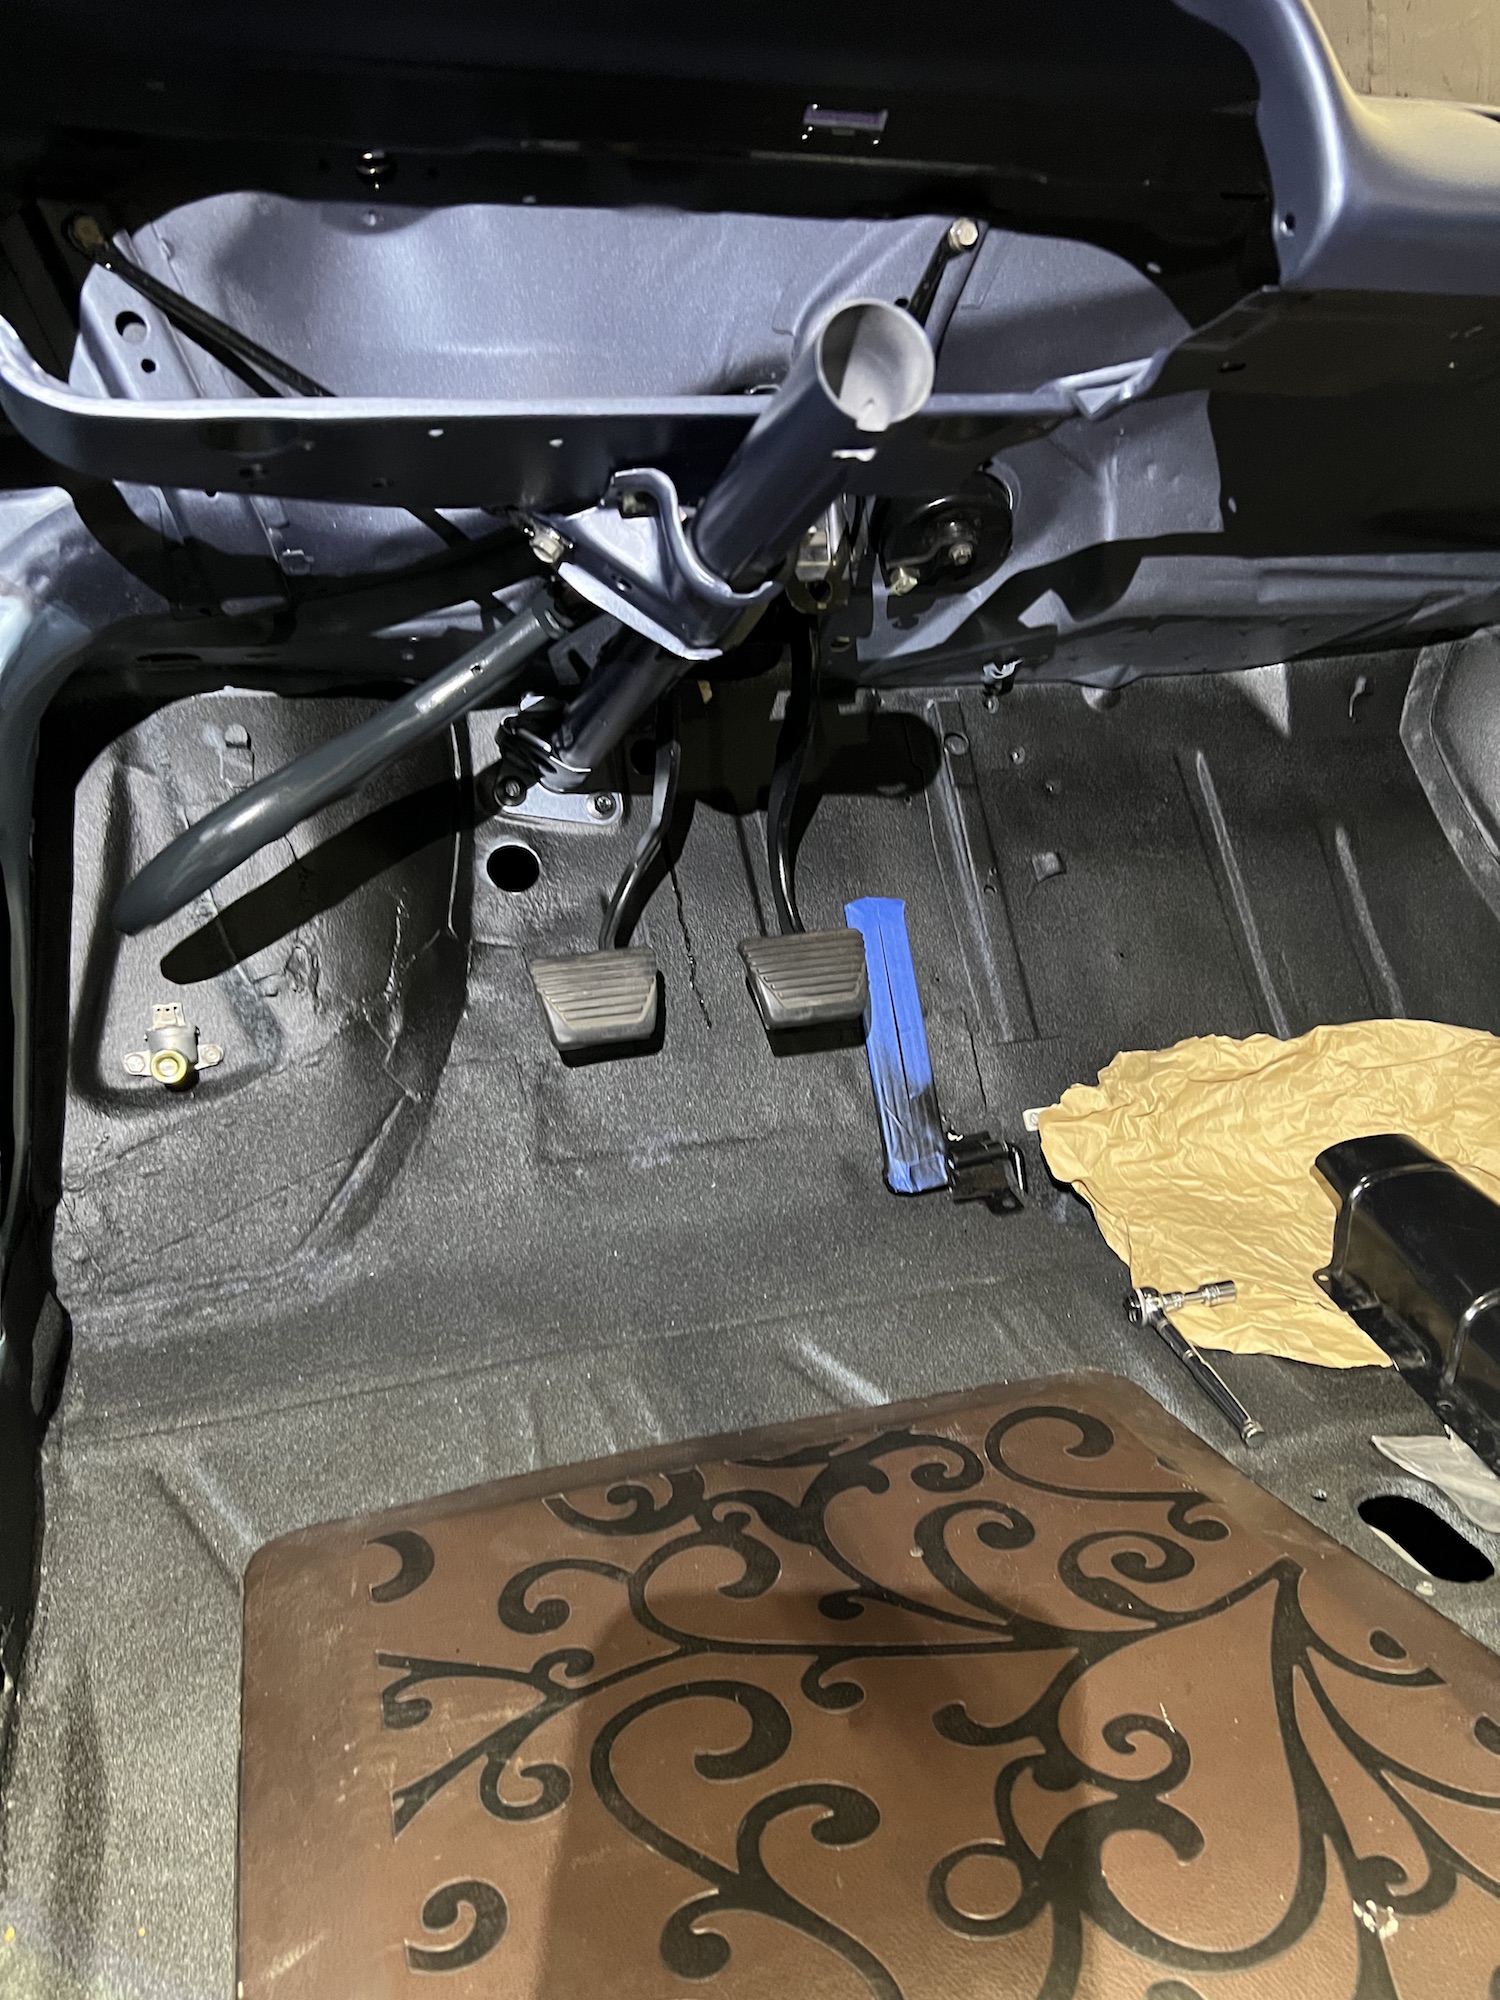
Carpet - first need to seam-seal spots missed by the shop, then need to drill holes for gas pedal bolts in the replaced floor pan, but need to install brakelines to determine positioning.
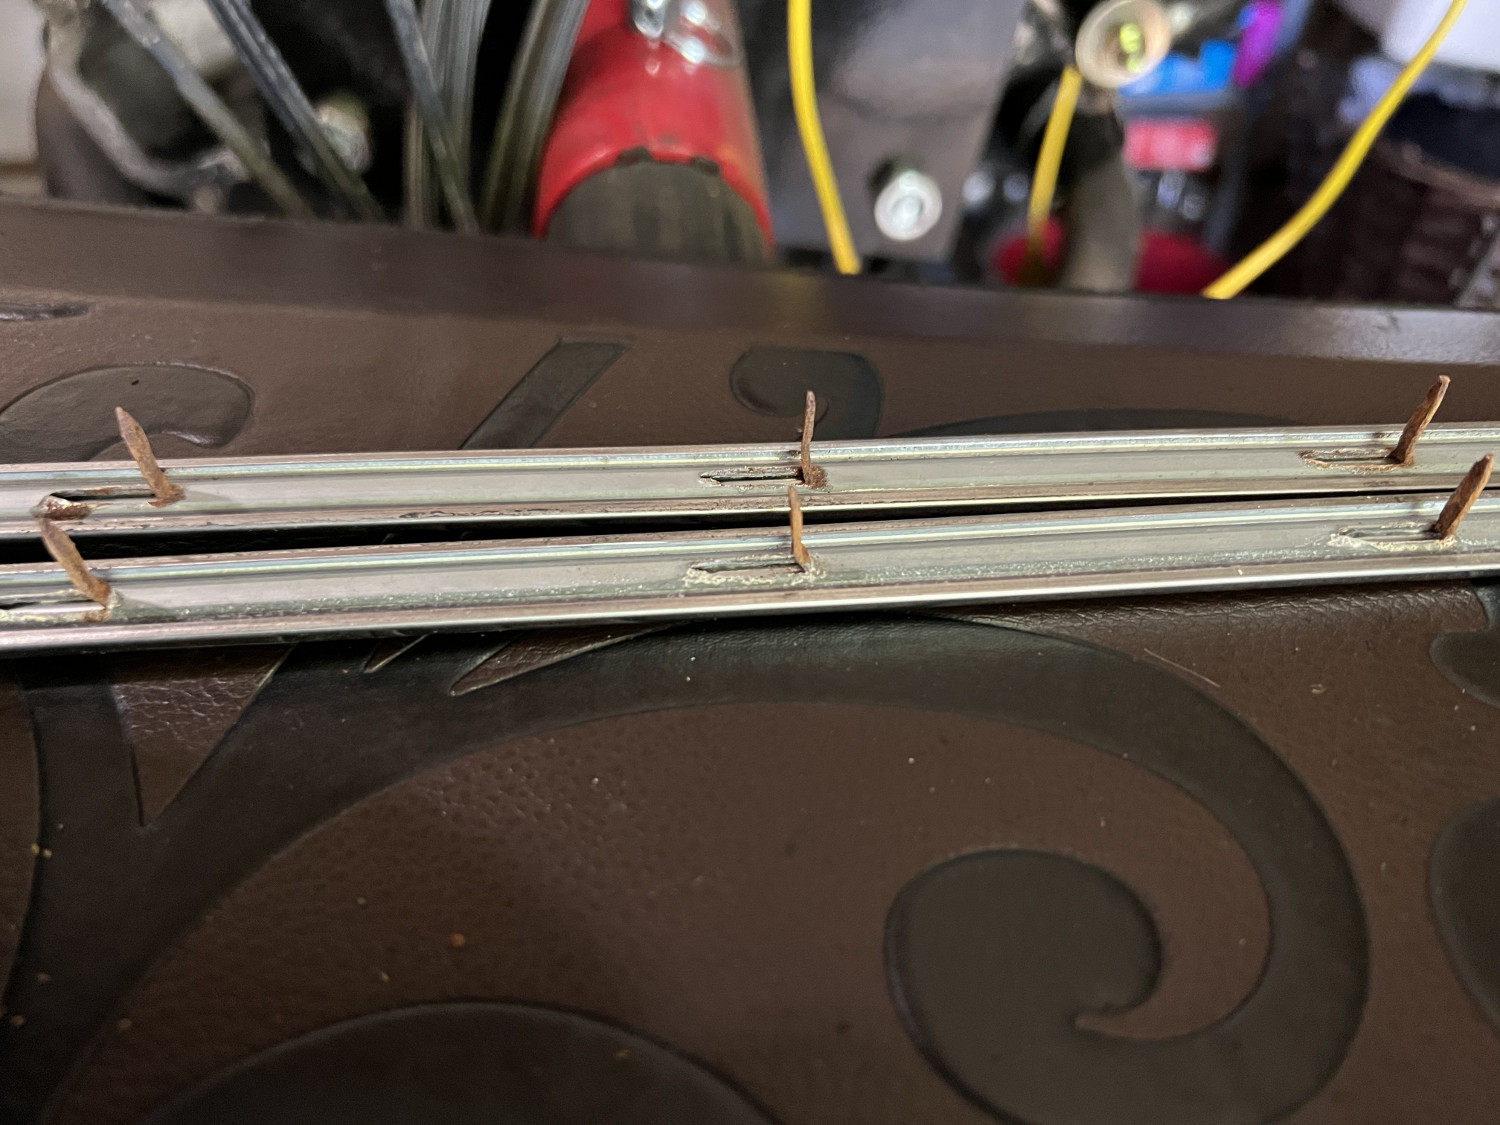
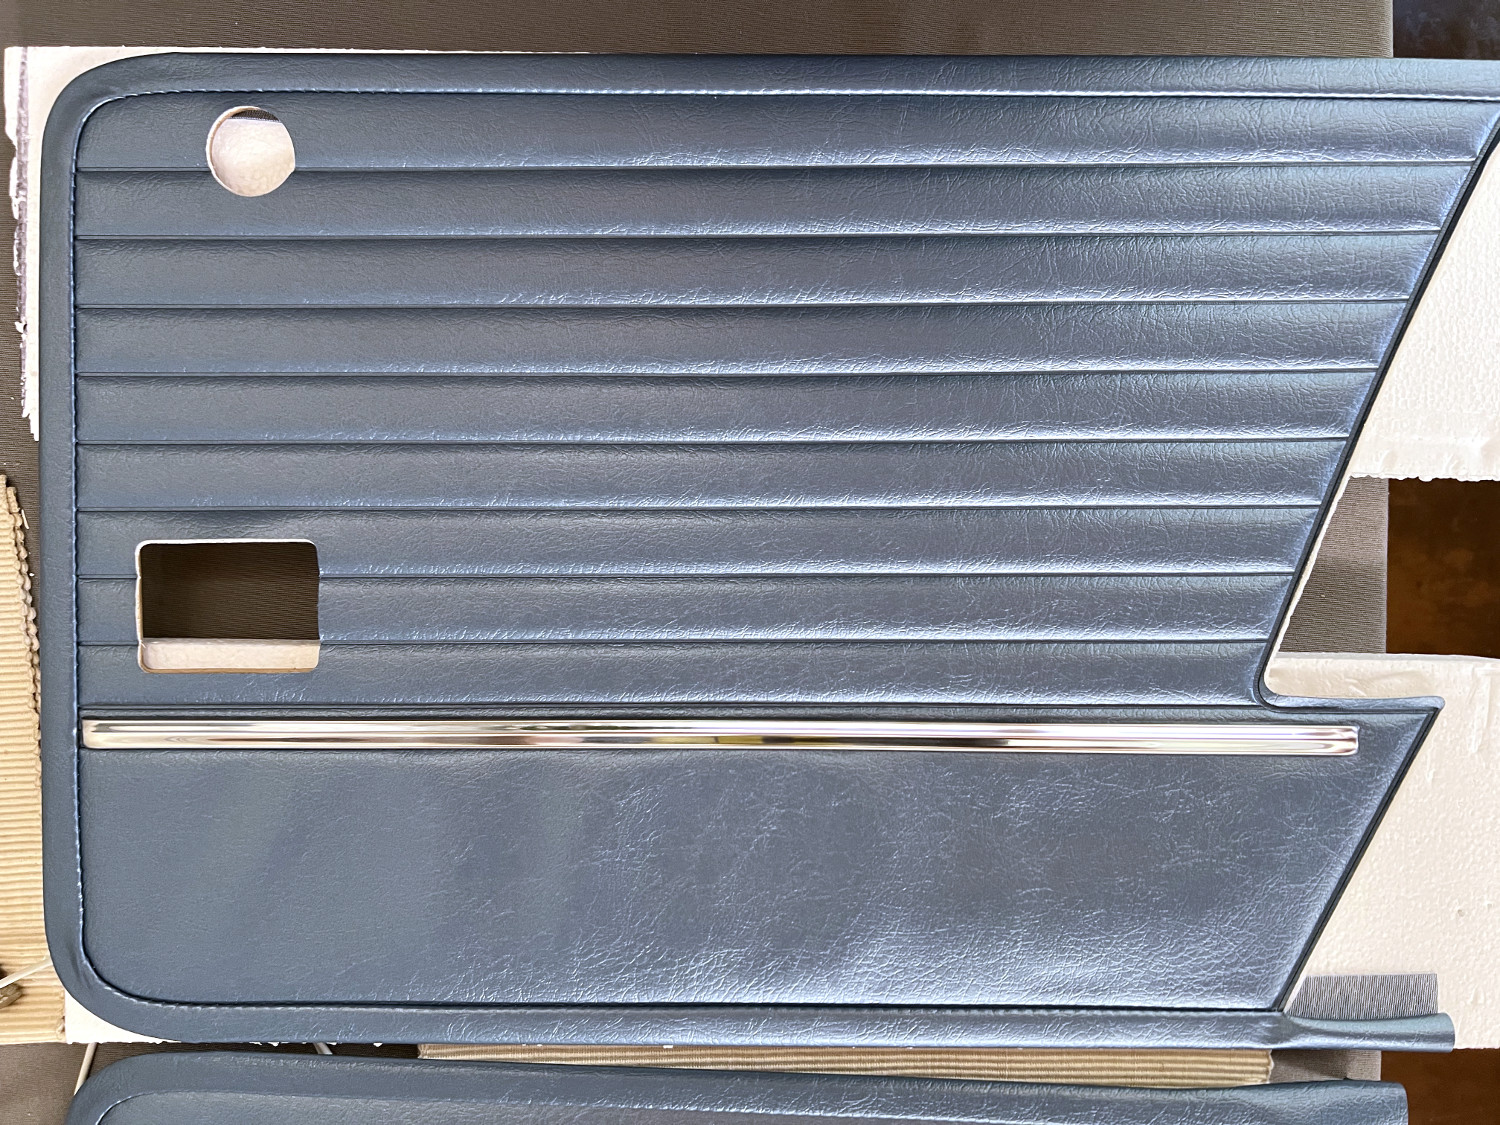
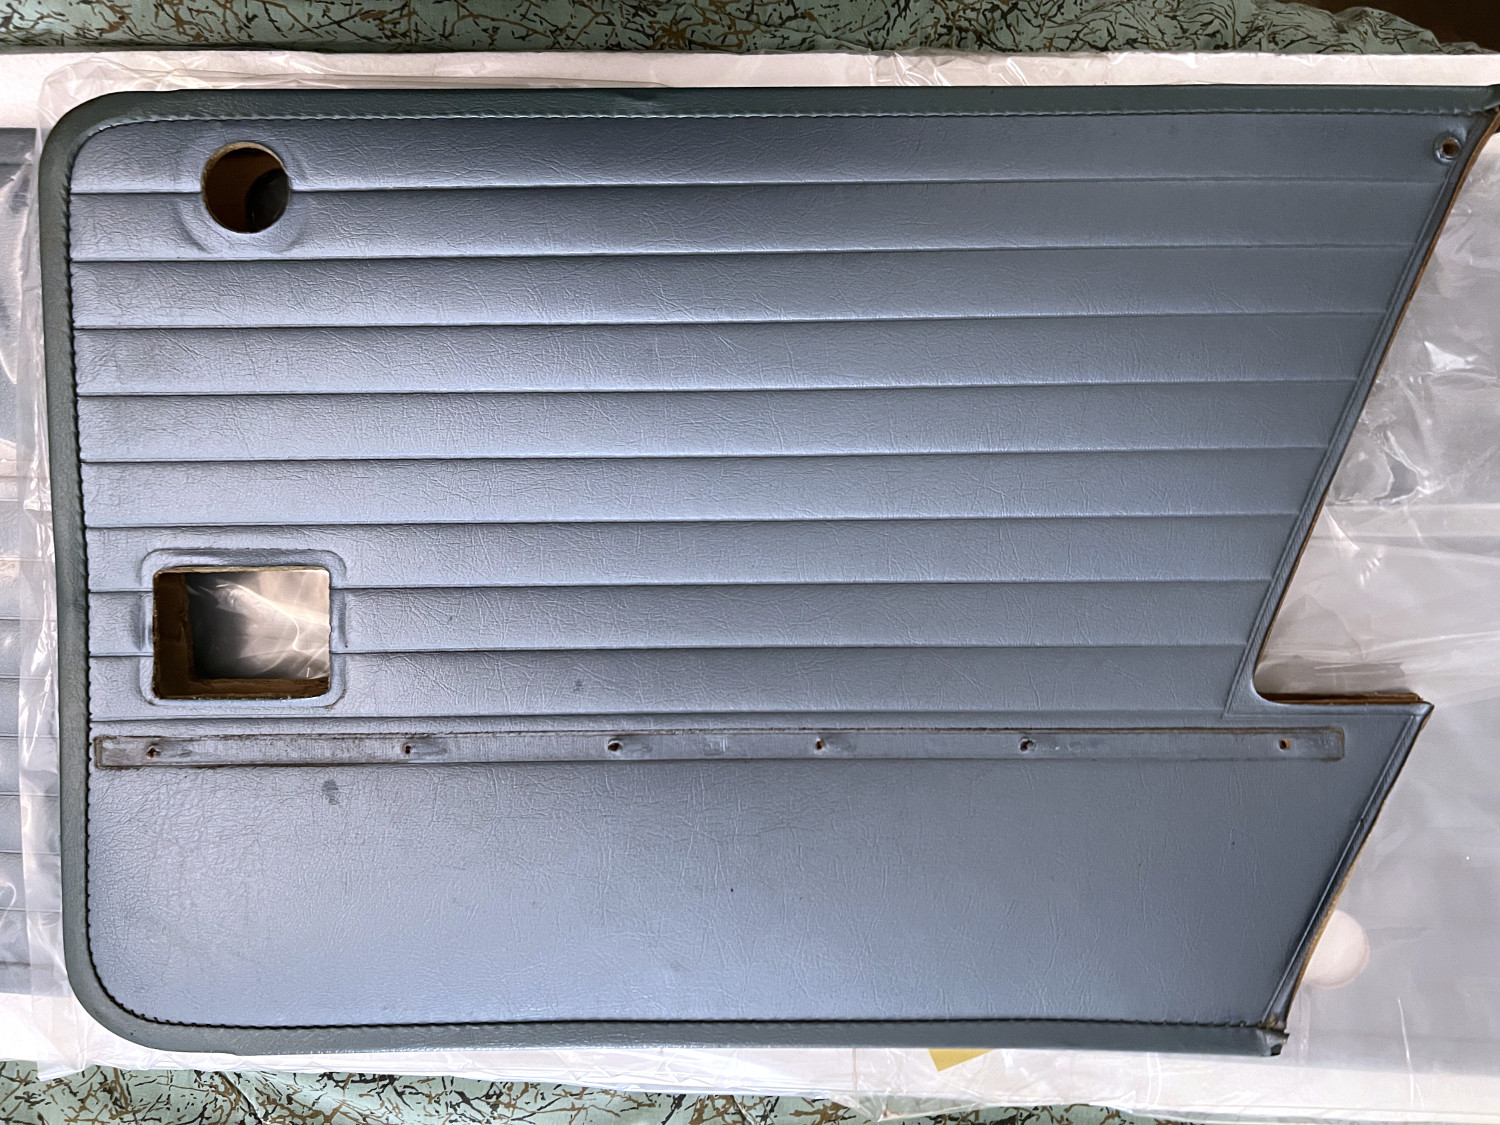
Anyway, today I tackled and easier task: taking the old stainless trim from the worn out door cards, polished 'em and installed then in the new door cards.
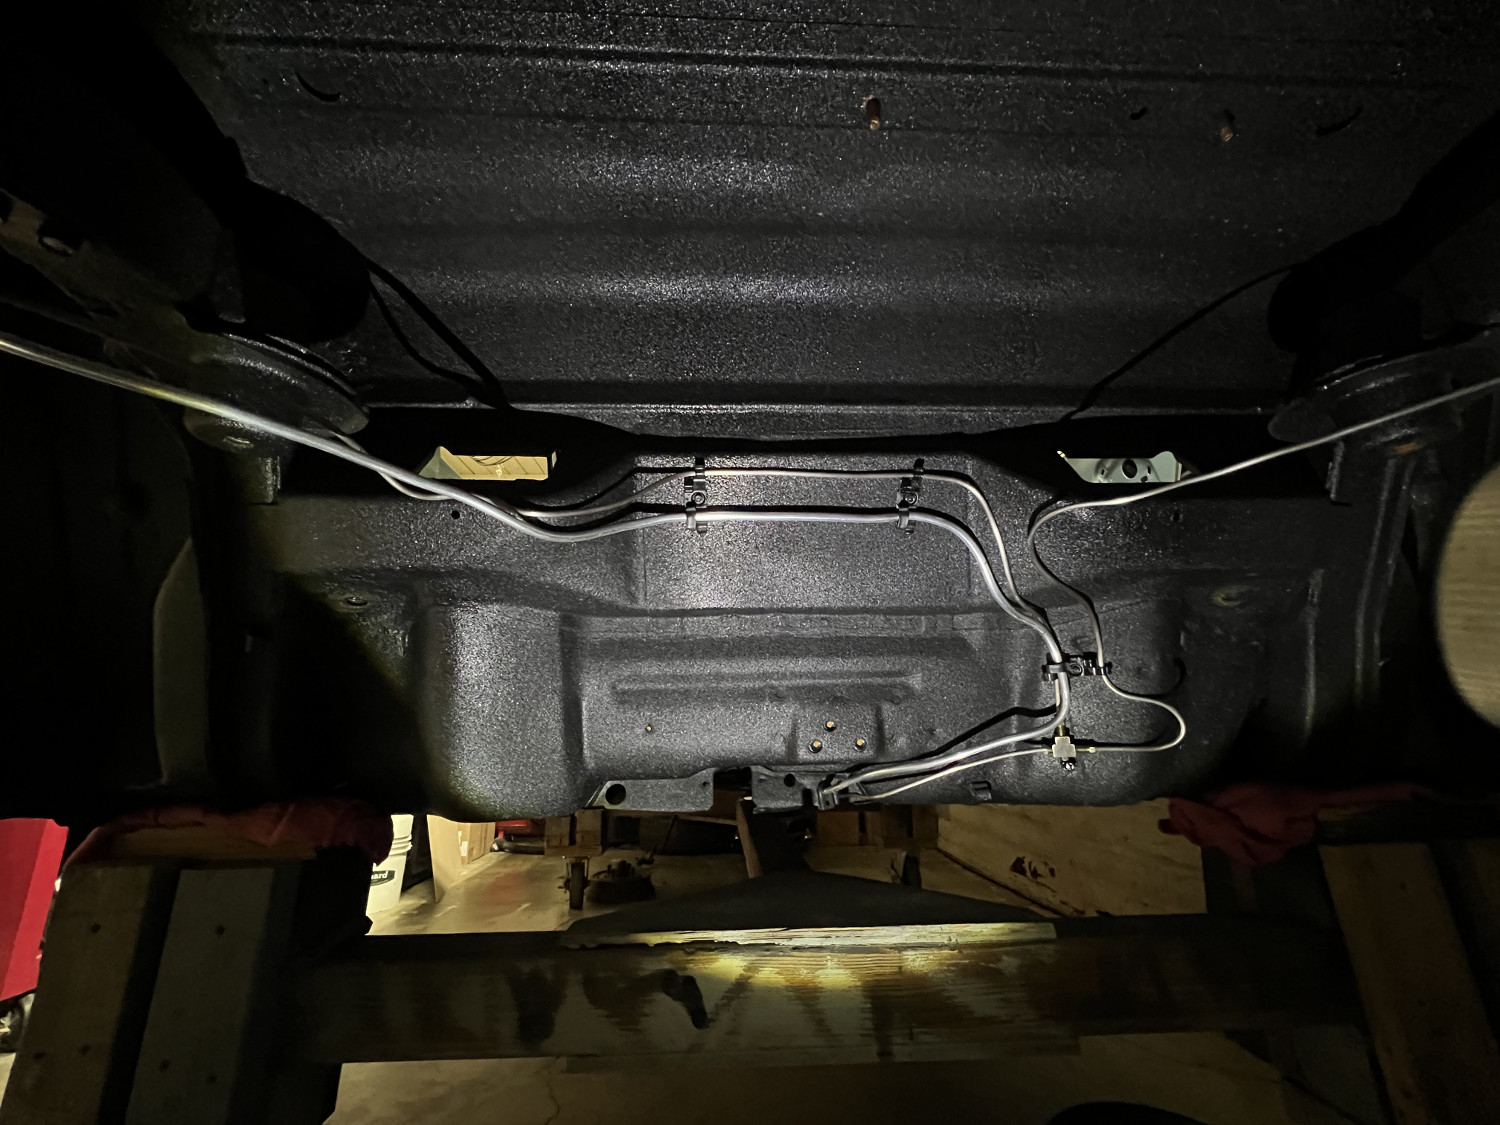
I also chose to replace the gasline with aluminum after reading that aluminum is kosher for it. SOOOOoo much easier to work around bends while under the car than that bastard stainless line that had a hole.
Now that the un-assembled puzzle is all here, I have to admit to being overwhelmed to the point that some days it goes untouched.
Some of the order-of-operations are daunting. Example: headliner - need to pull all the staples that held down the glue strip and replace with screwed-in new glue strip. The staples are SOLIDLY in metal that is easily scratched.
Carpet - first need to seam-seal spots missed by the shop, then need to drill holes for gas pedal bolts in the replaced floor pan, but need to install brakelines to determine positioning.
Anyway, today I tackled and easier task: taking the old stainless trim from the worn out door cards, polished 'em and installed then in the new door cards.
I also chose to replace the gasline with aluminum after reading that aluminum is kosher for it. SOOOOoo much easier to work around bends while under the car than that bastard stainless line that had a hole.
#Corvair #AutoRestoration progress.
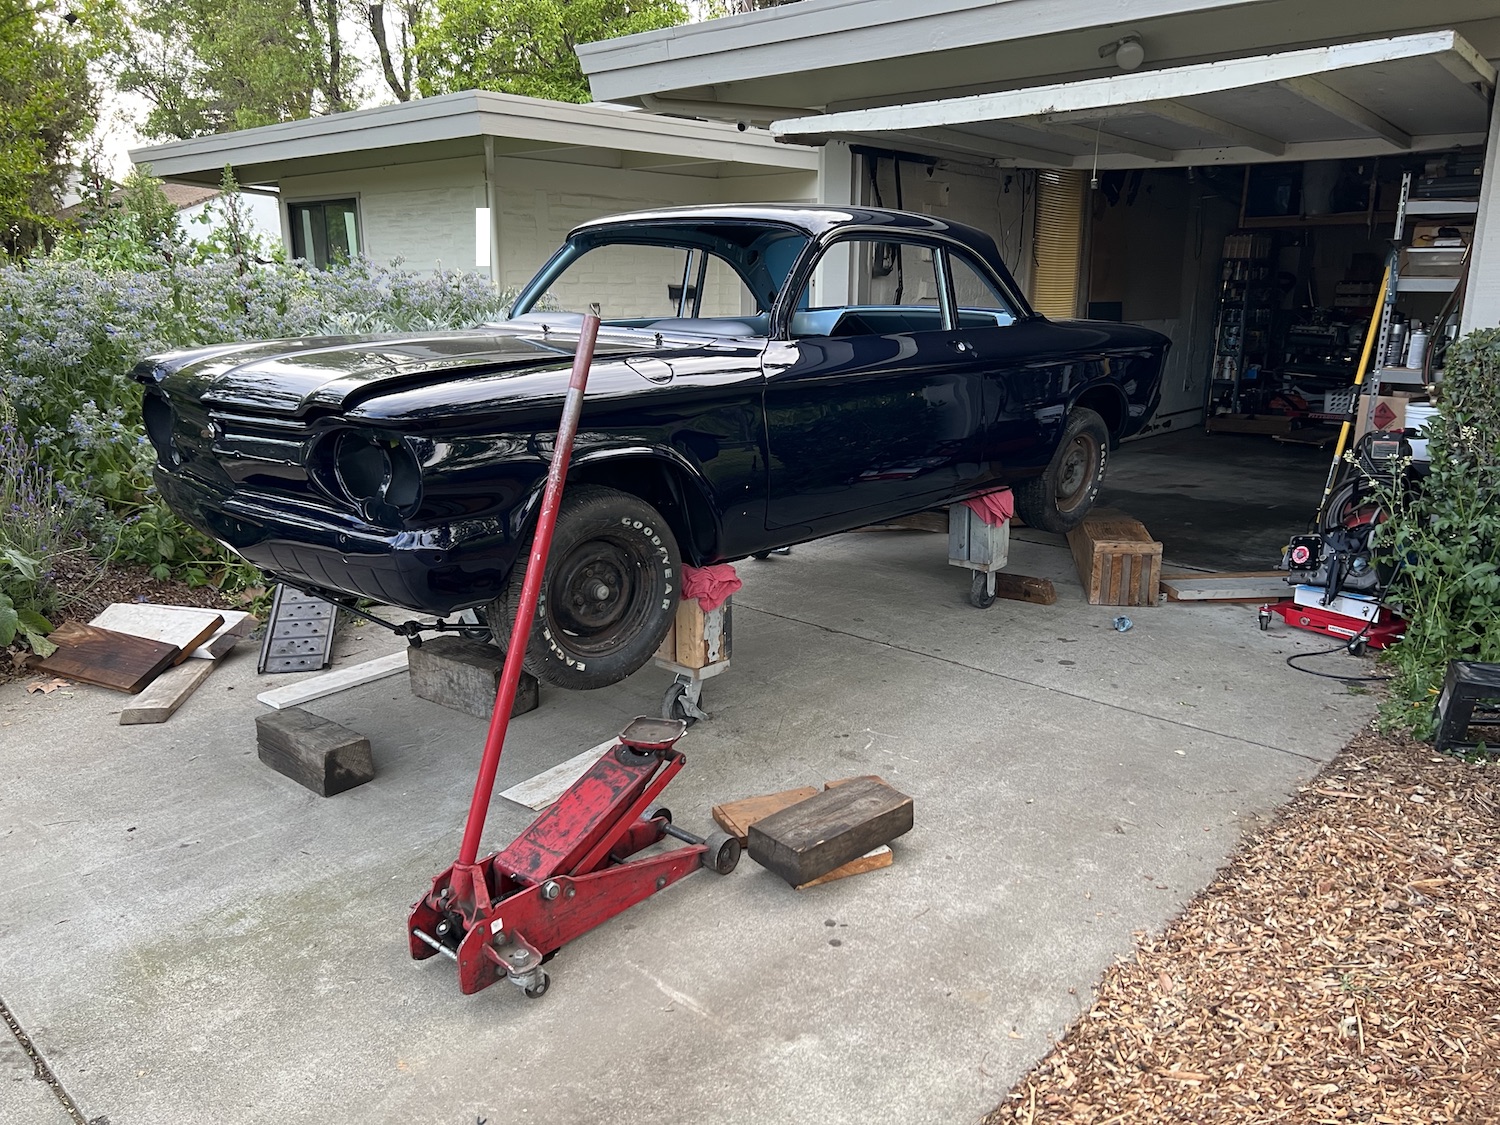
After considering my (expensive) options, I realized that the cheapest way to get the Corvair back high in the air so that I could easily work under it... was to simply borrow a massive 100lb floor jack from a local auto machine shop.
The last time I did this, it took 6 hours and many dangerous small jack stands.
This time it only took 2 hours. My hydraulic lift table was heavy-duty enough to hold the car aloft while I removed all the wheel ramps and wooden block to let the car finally rest back down on my 20" tall wooden dolly.
Next up: remove the suspension so that brake lines and such can go back in
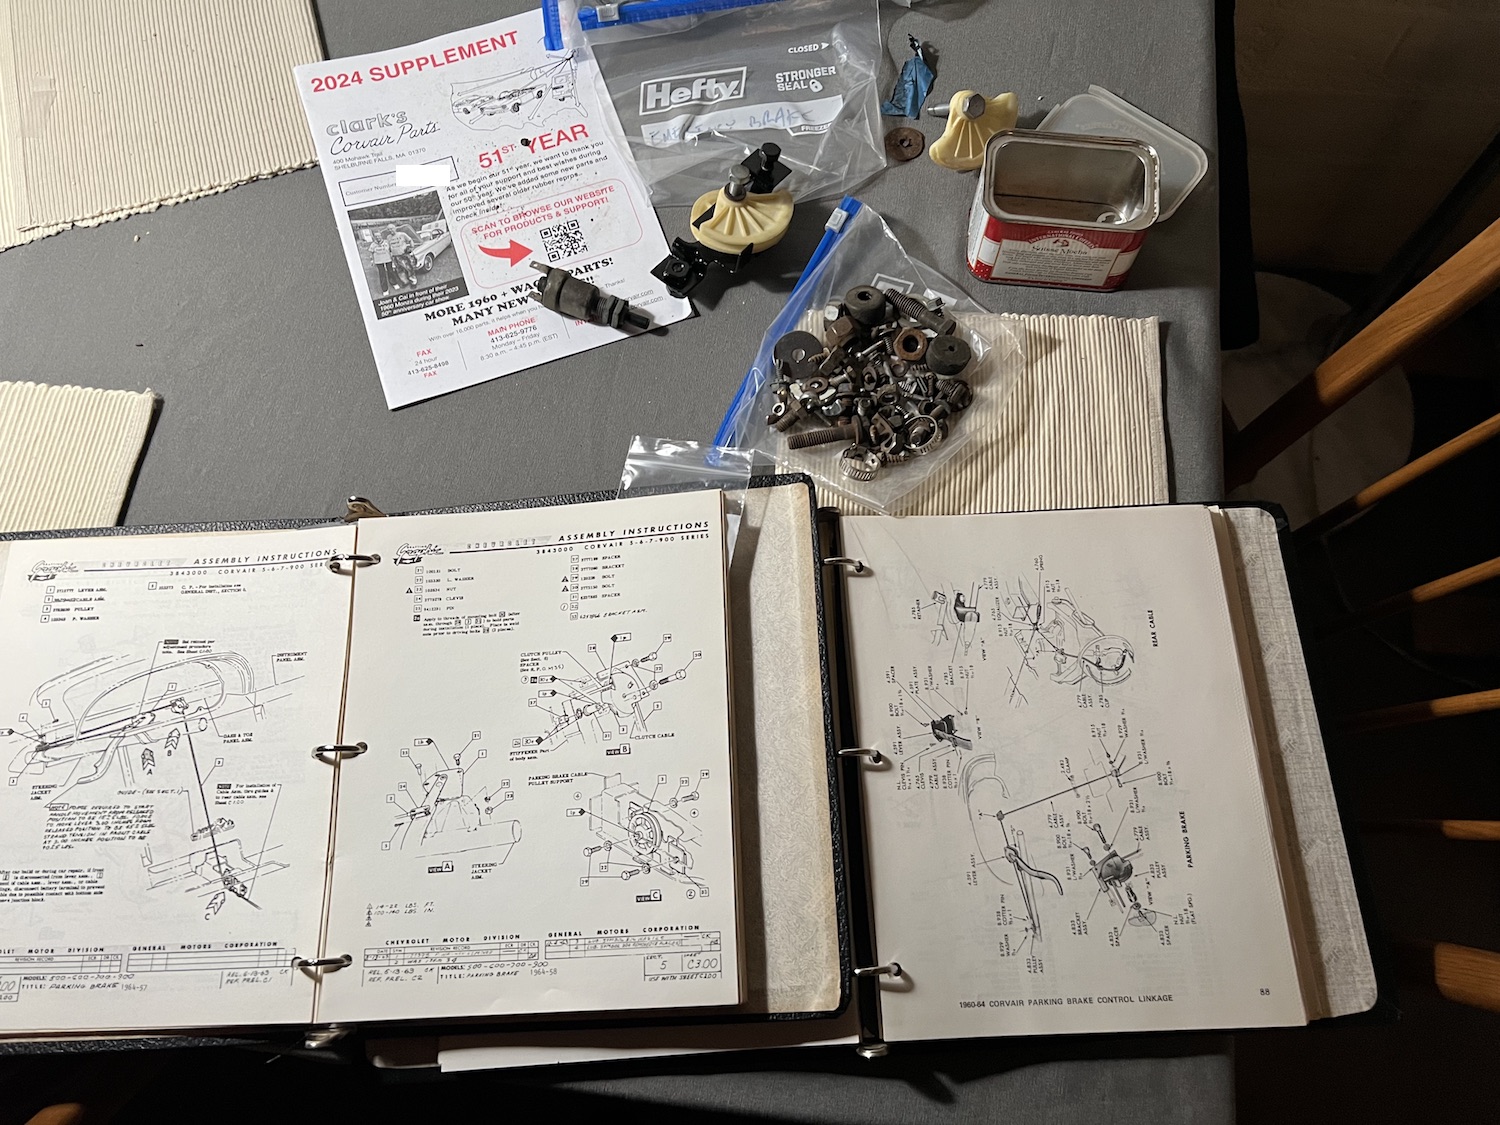
#Corvair #AutoRestoration progress.
Putting the puzzle back together. Shop and assembly manuals are essential. The clutch and e-brake pulley details are especially non-intuitive.
The rubber floor mat in the trunk will be one of the few original pieces not replaced. I mean, why?
Putting the puzzle back together. Shop and assembly manuals are essential. The clutch and e-brake pulley details are especially non-intuitive.
The rubber floor mat in the trunk will be one of the few original pieces not replaced. I mean, why?
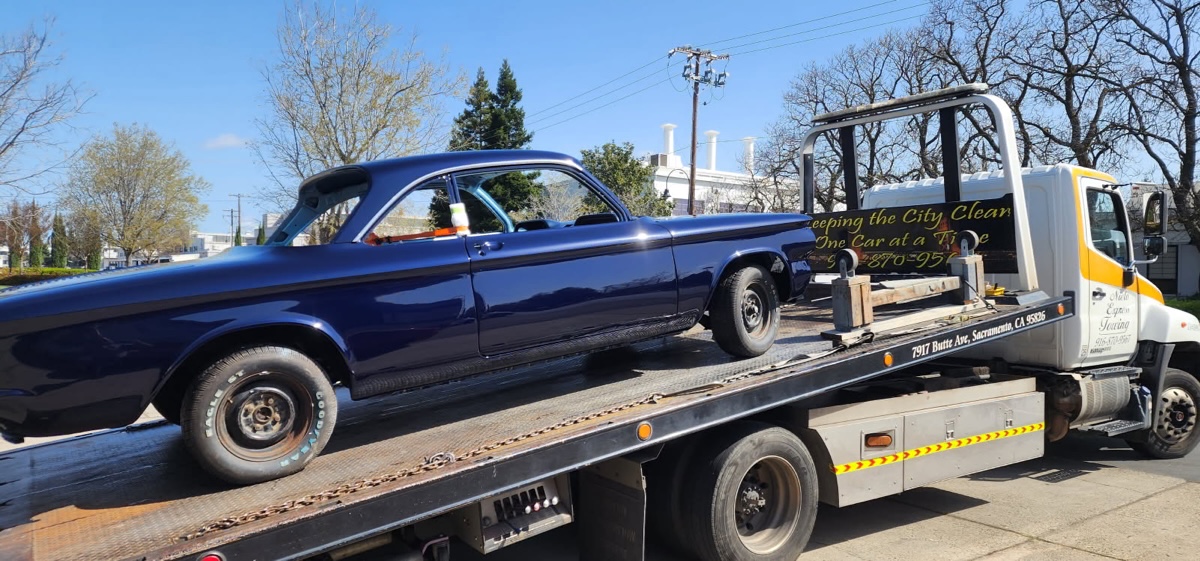
#Corvair #AutoRestoration progress.
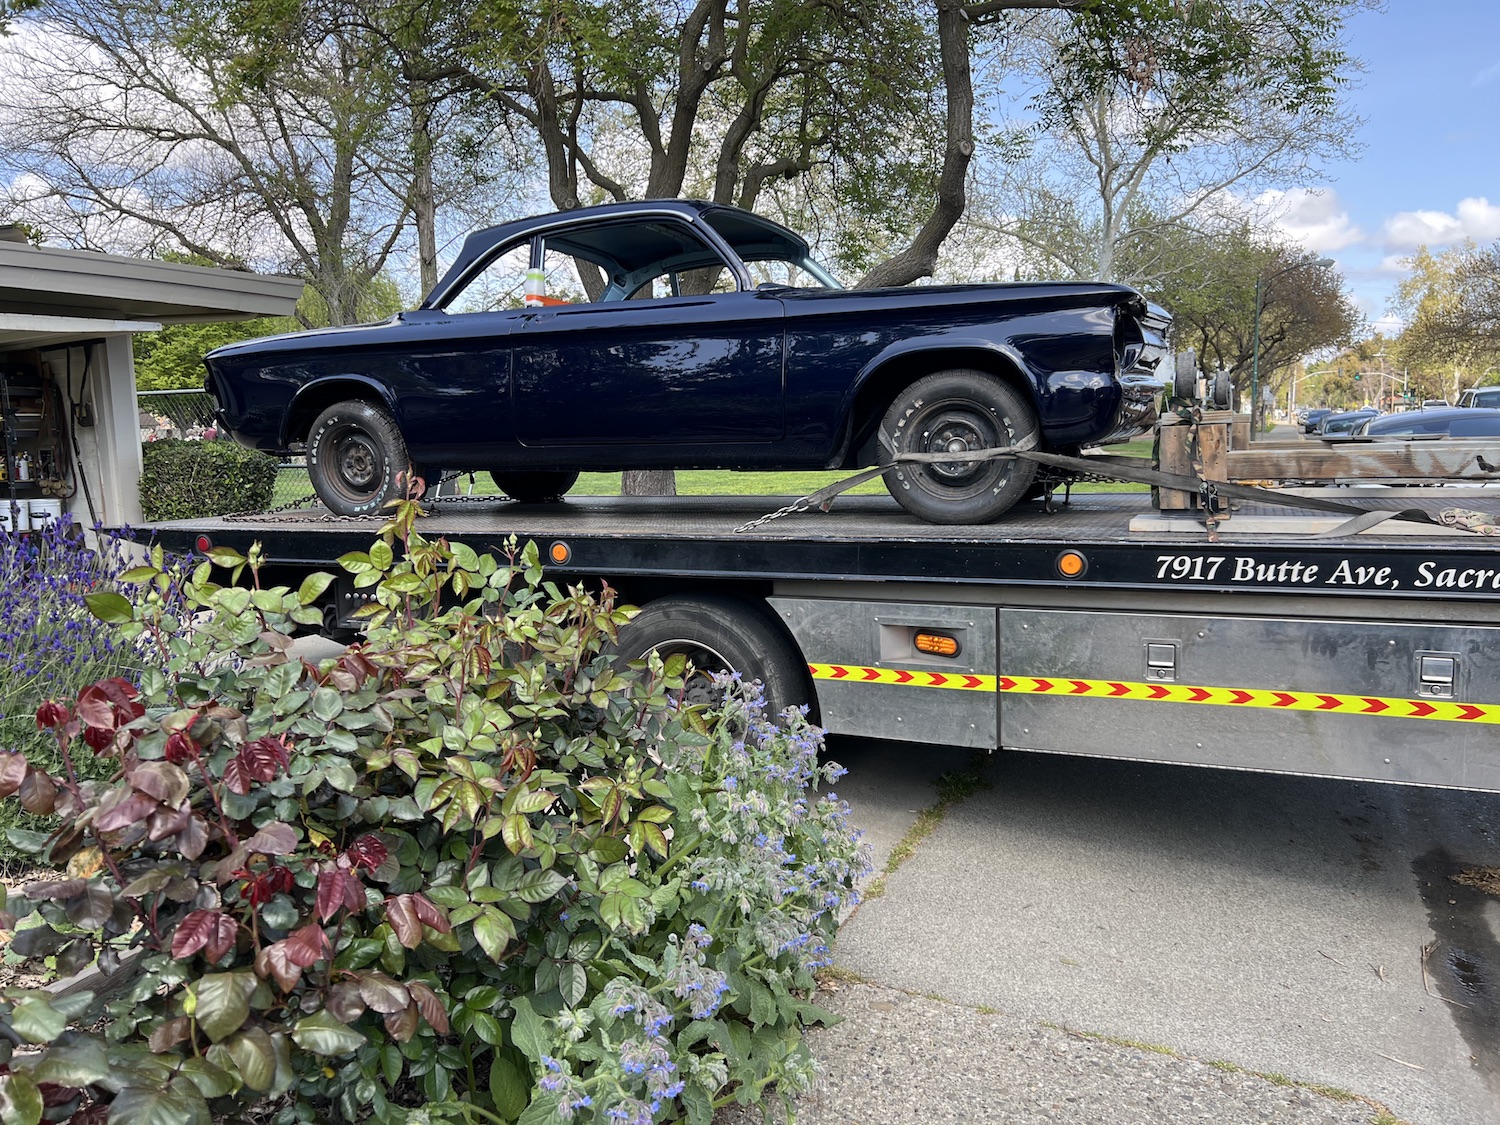
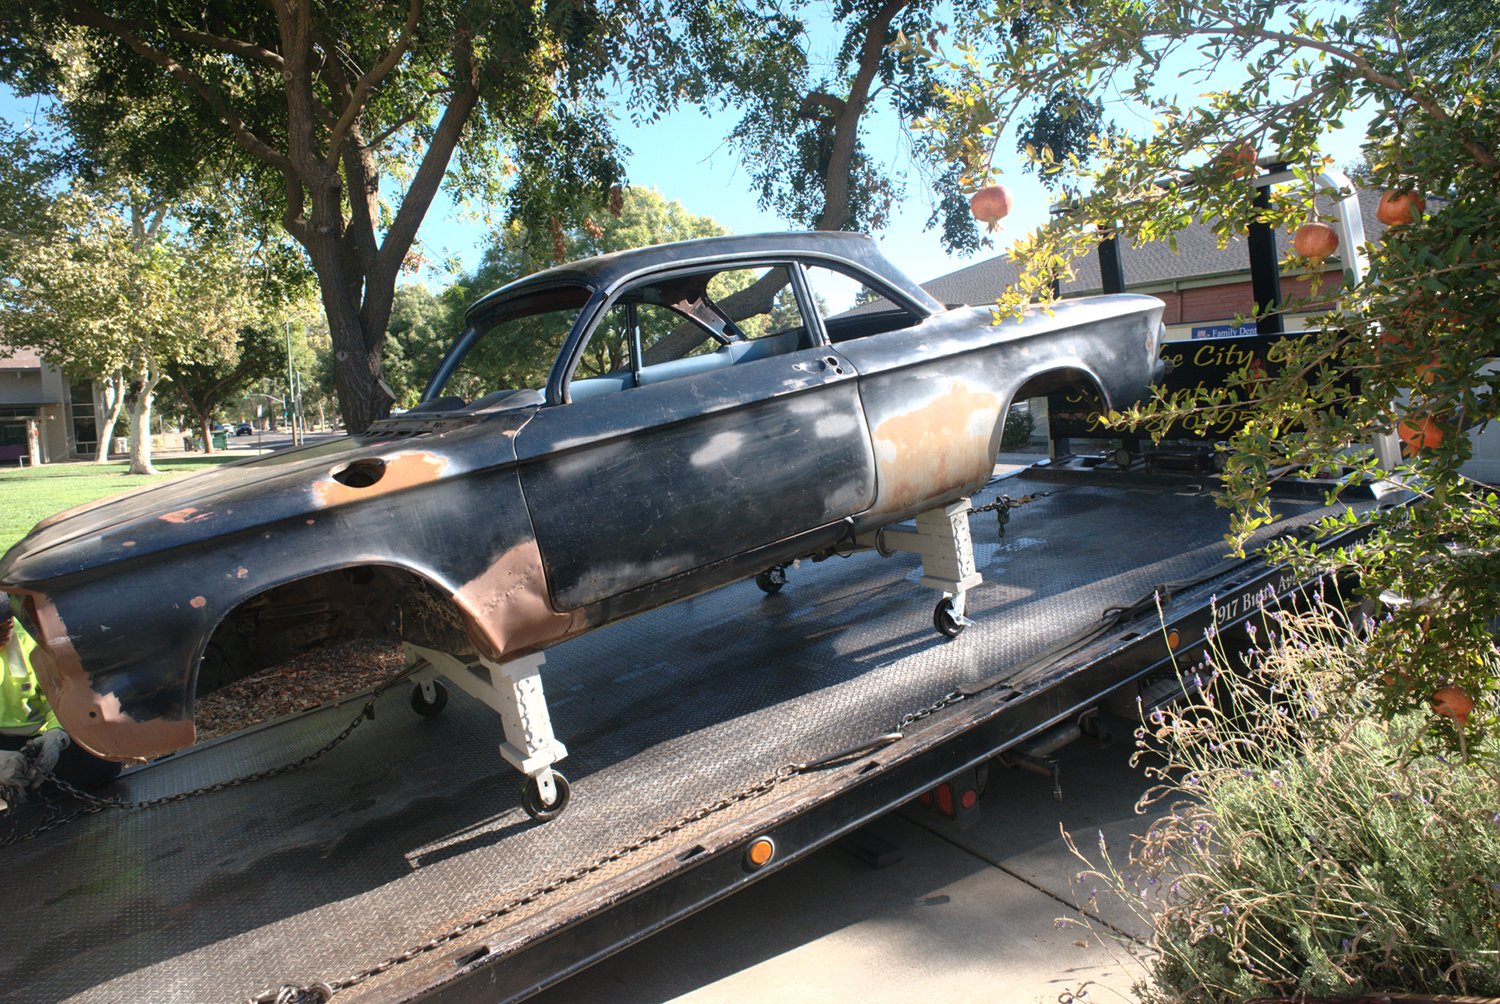
7 months between the before and after tow truck pictures.
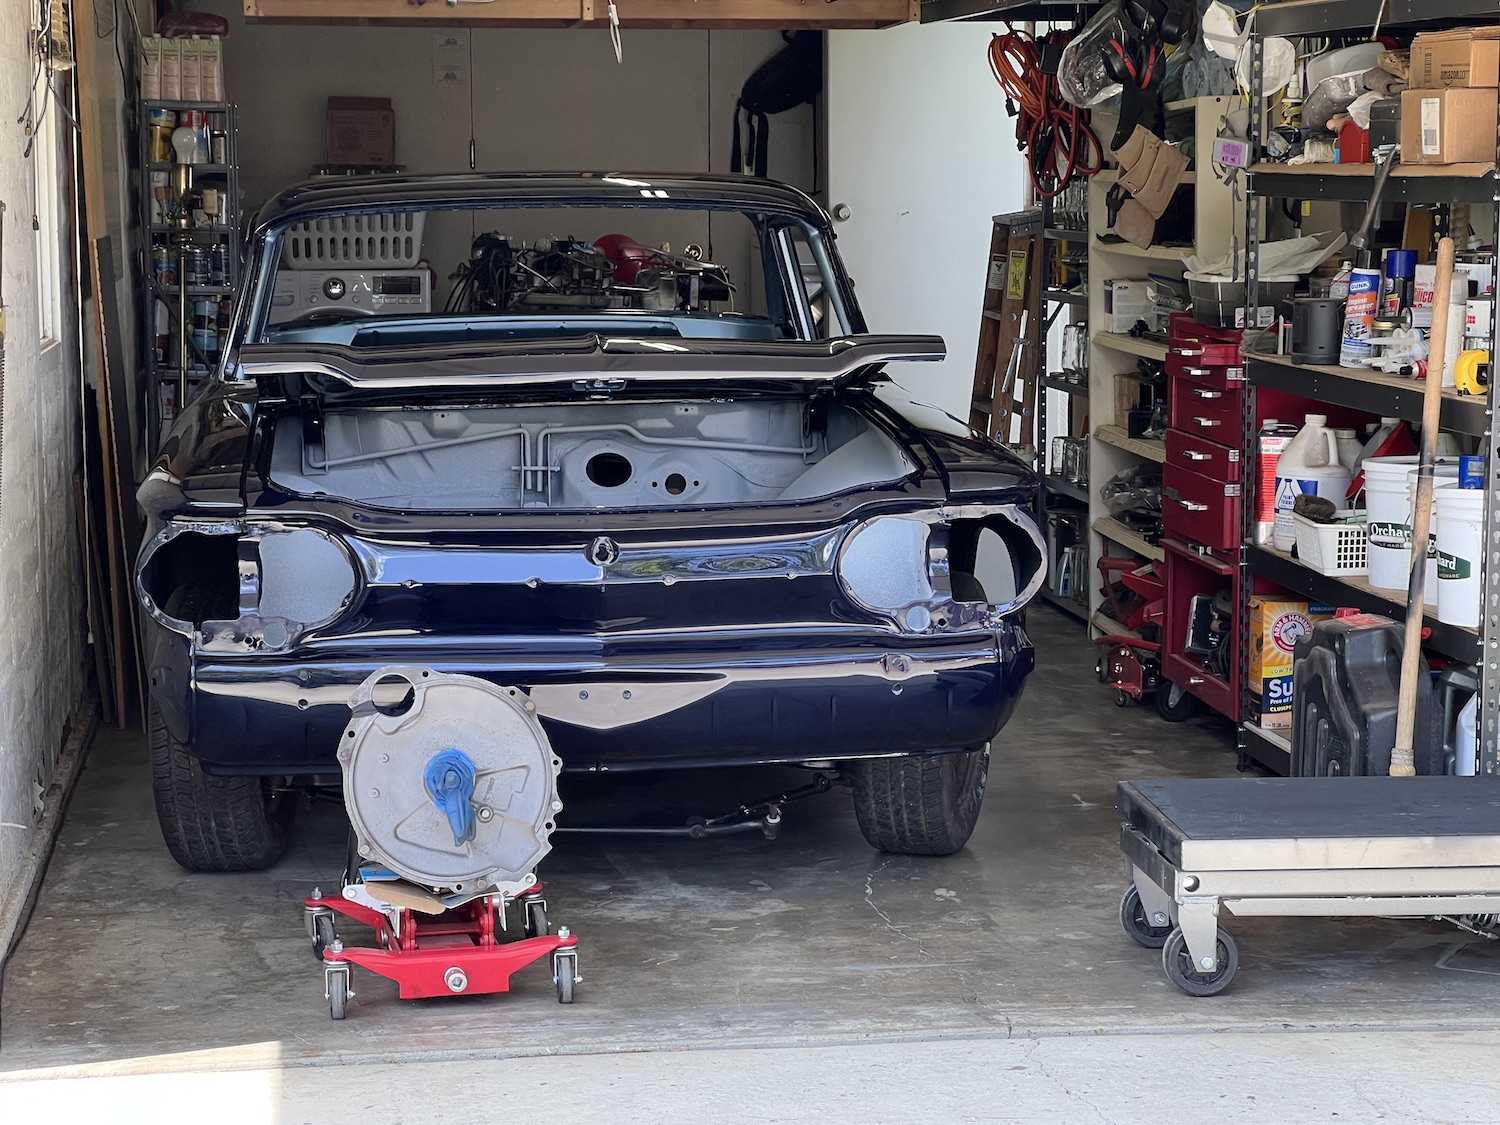
Now I have some other things to attend to while my mind works over how to get this thing back in the air since the bodyshop declined to return the car on the tall wooden dolly I had made.
Space to work in is tiiiight.
7 months between the before and after tow truck pictures.
Now I have some other things to attend to while my mind works over how to get this thing back in the air since the bodyshop declined to return the car on the tall wooden dolly I had made.
Space to work in is tiiiight.
#Corvair #AutoRestoration progress.
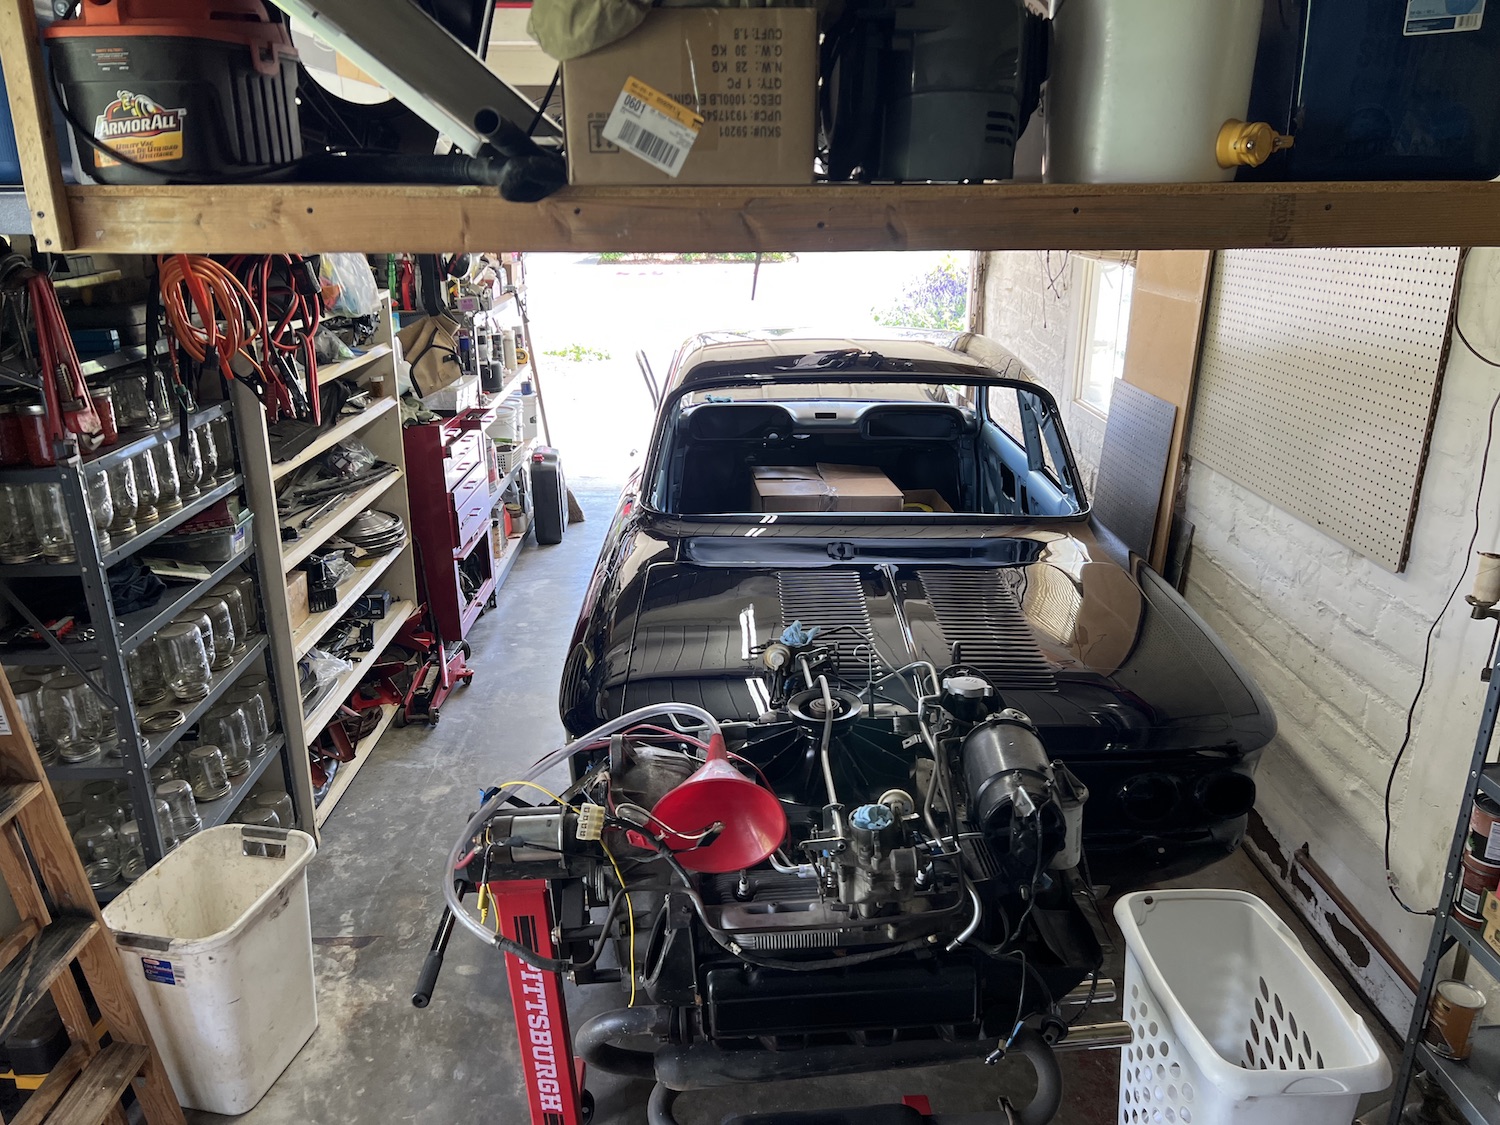
The car will be coming home tomorrow, which means final tiding of the Very Small Garage. I built more hanging storage in a 5 hour burst of inspiration, but will still only be able to exit passenger side, due to narrowness.
Pro-tip: buy an already-restored car. Doing it yourself will cost at least 2x. Nostalgia is still an expensive drug.
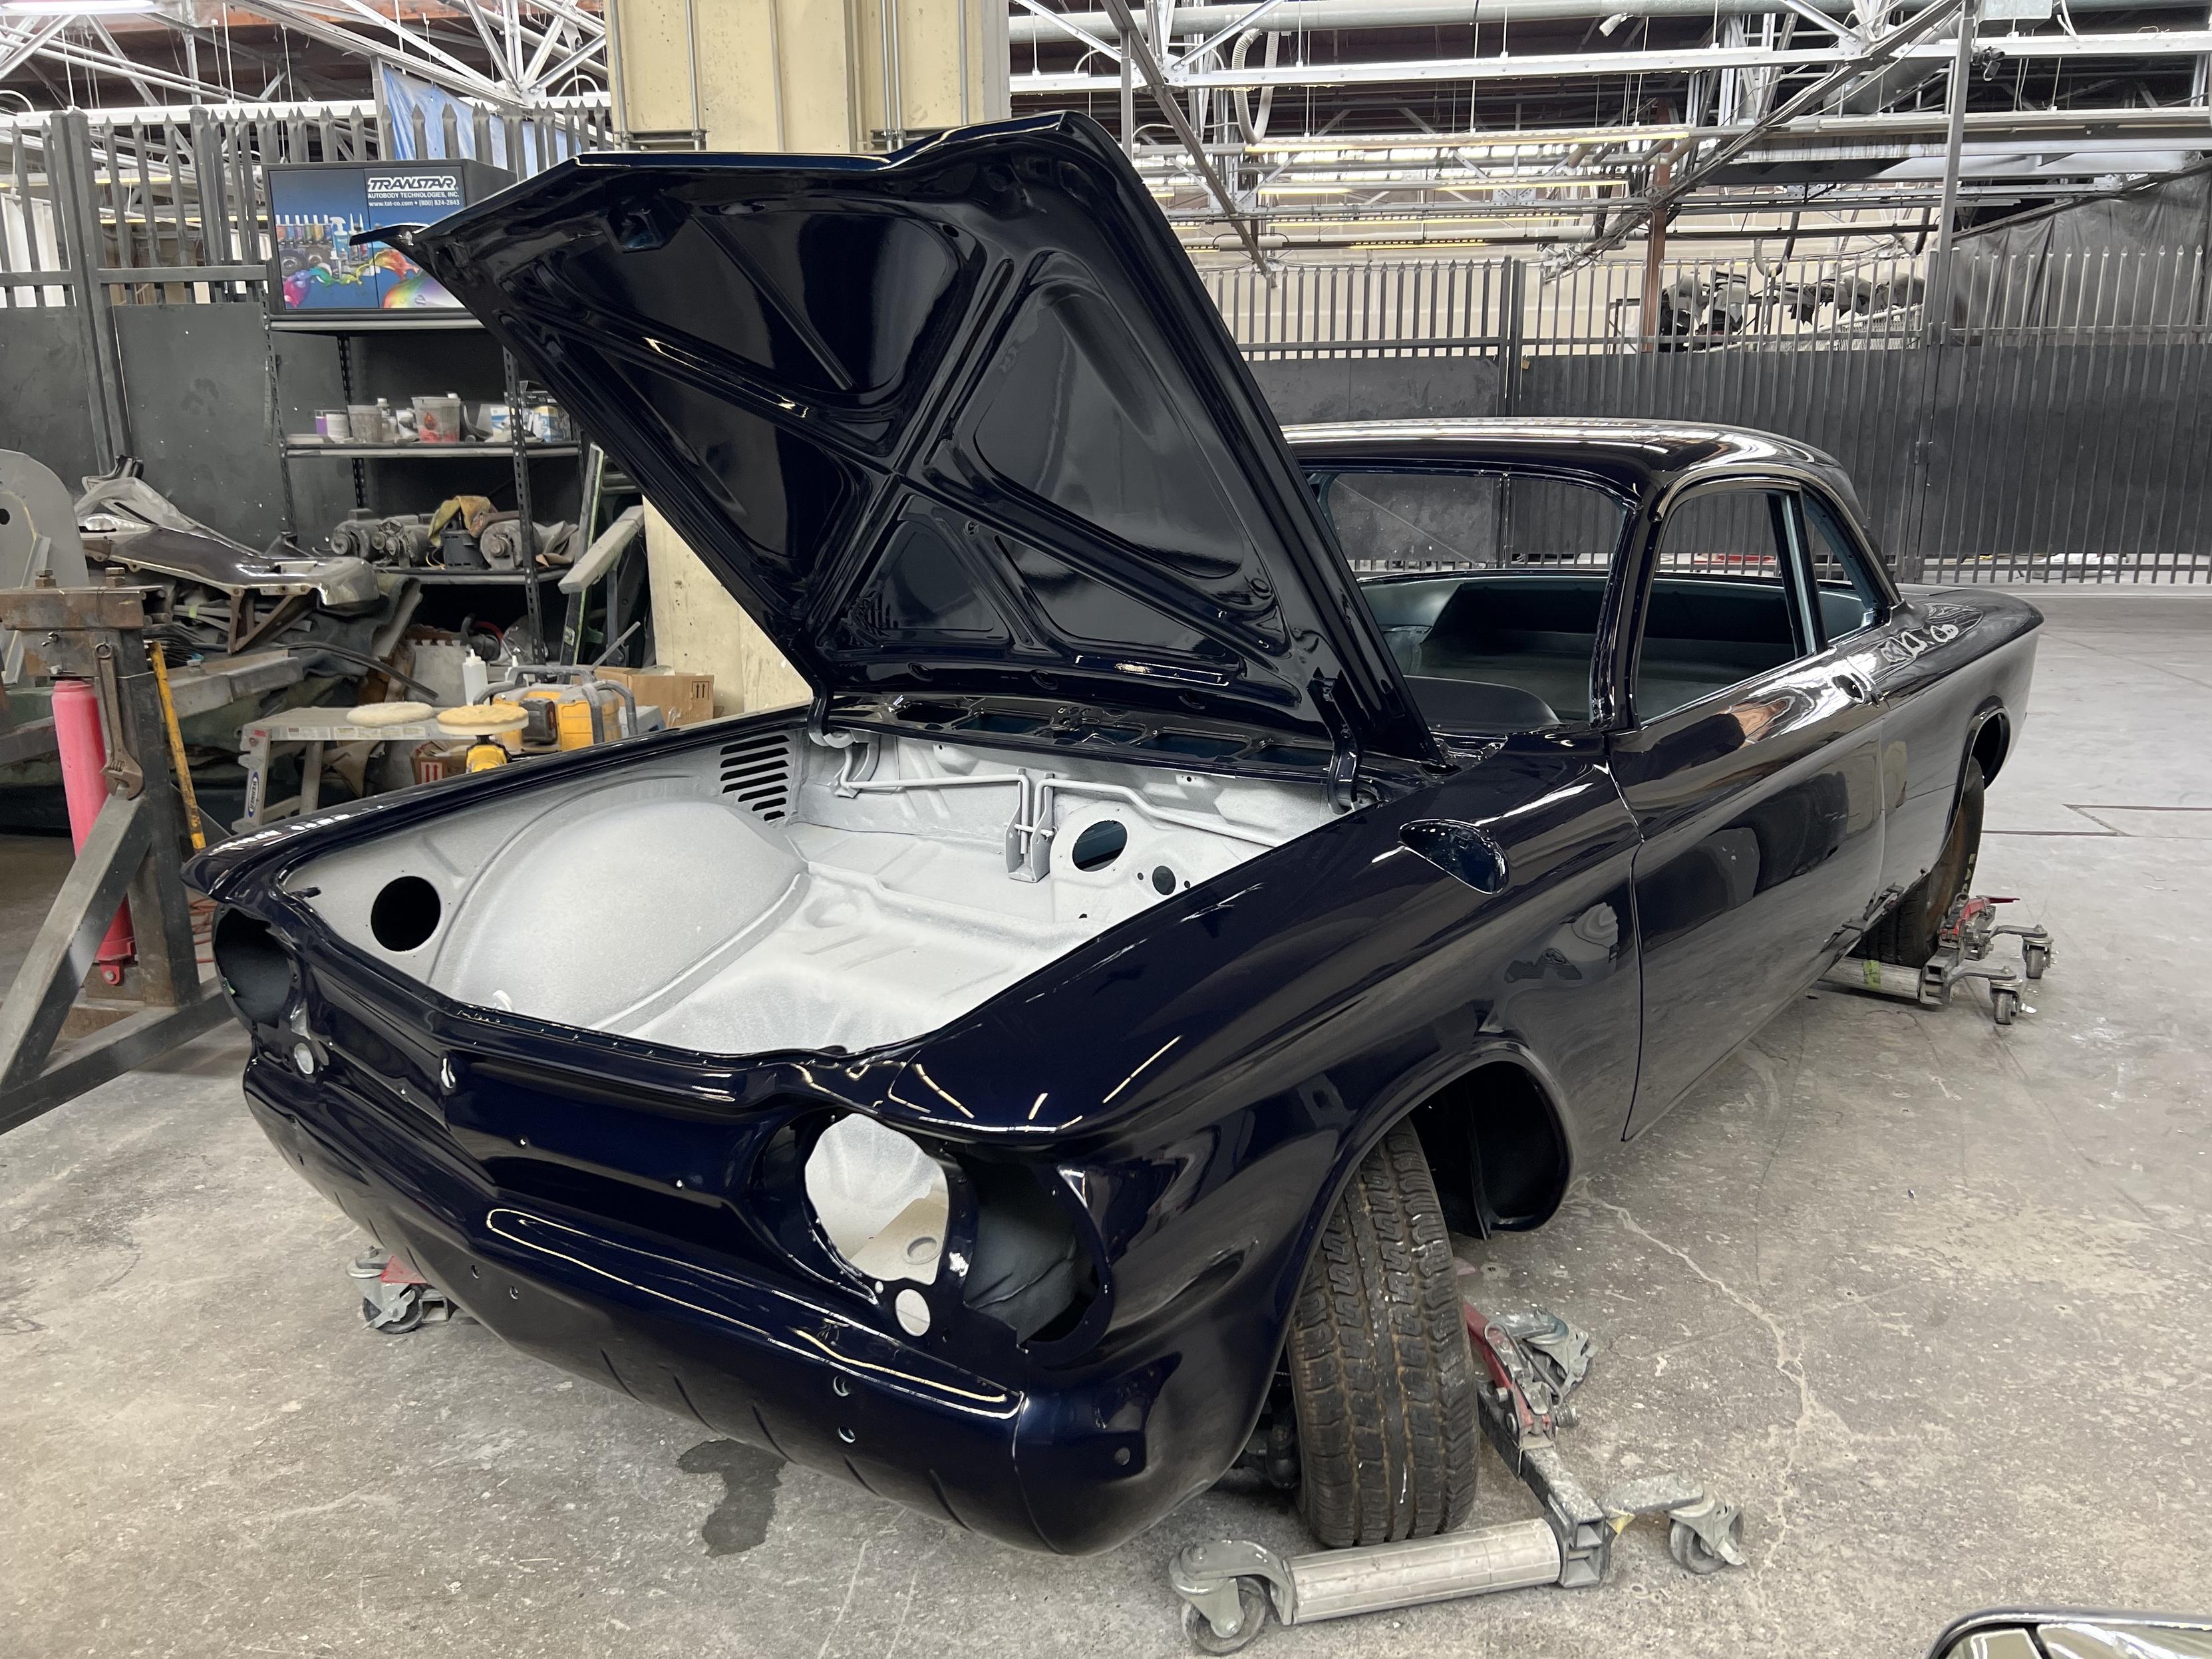
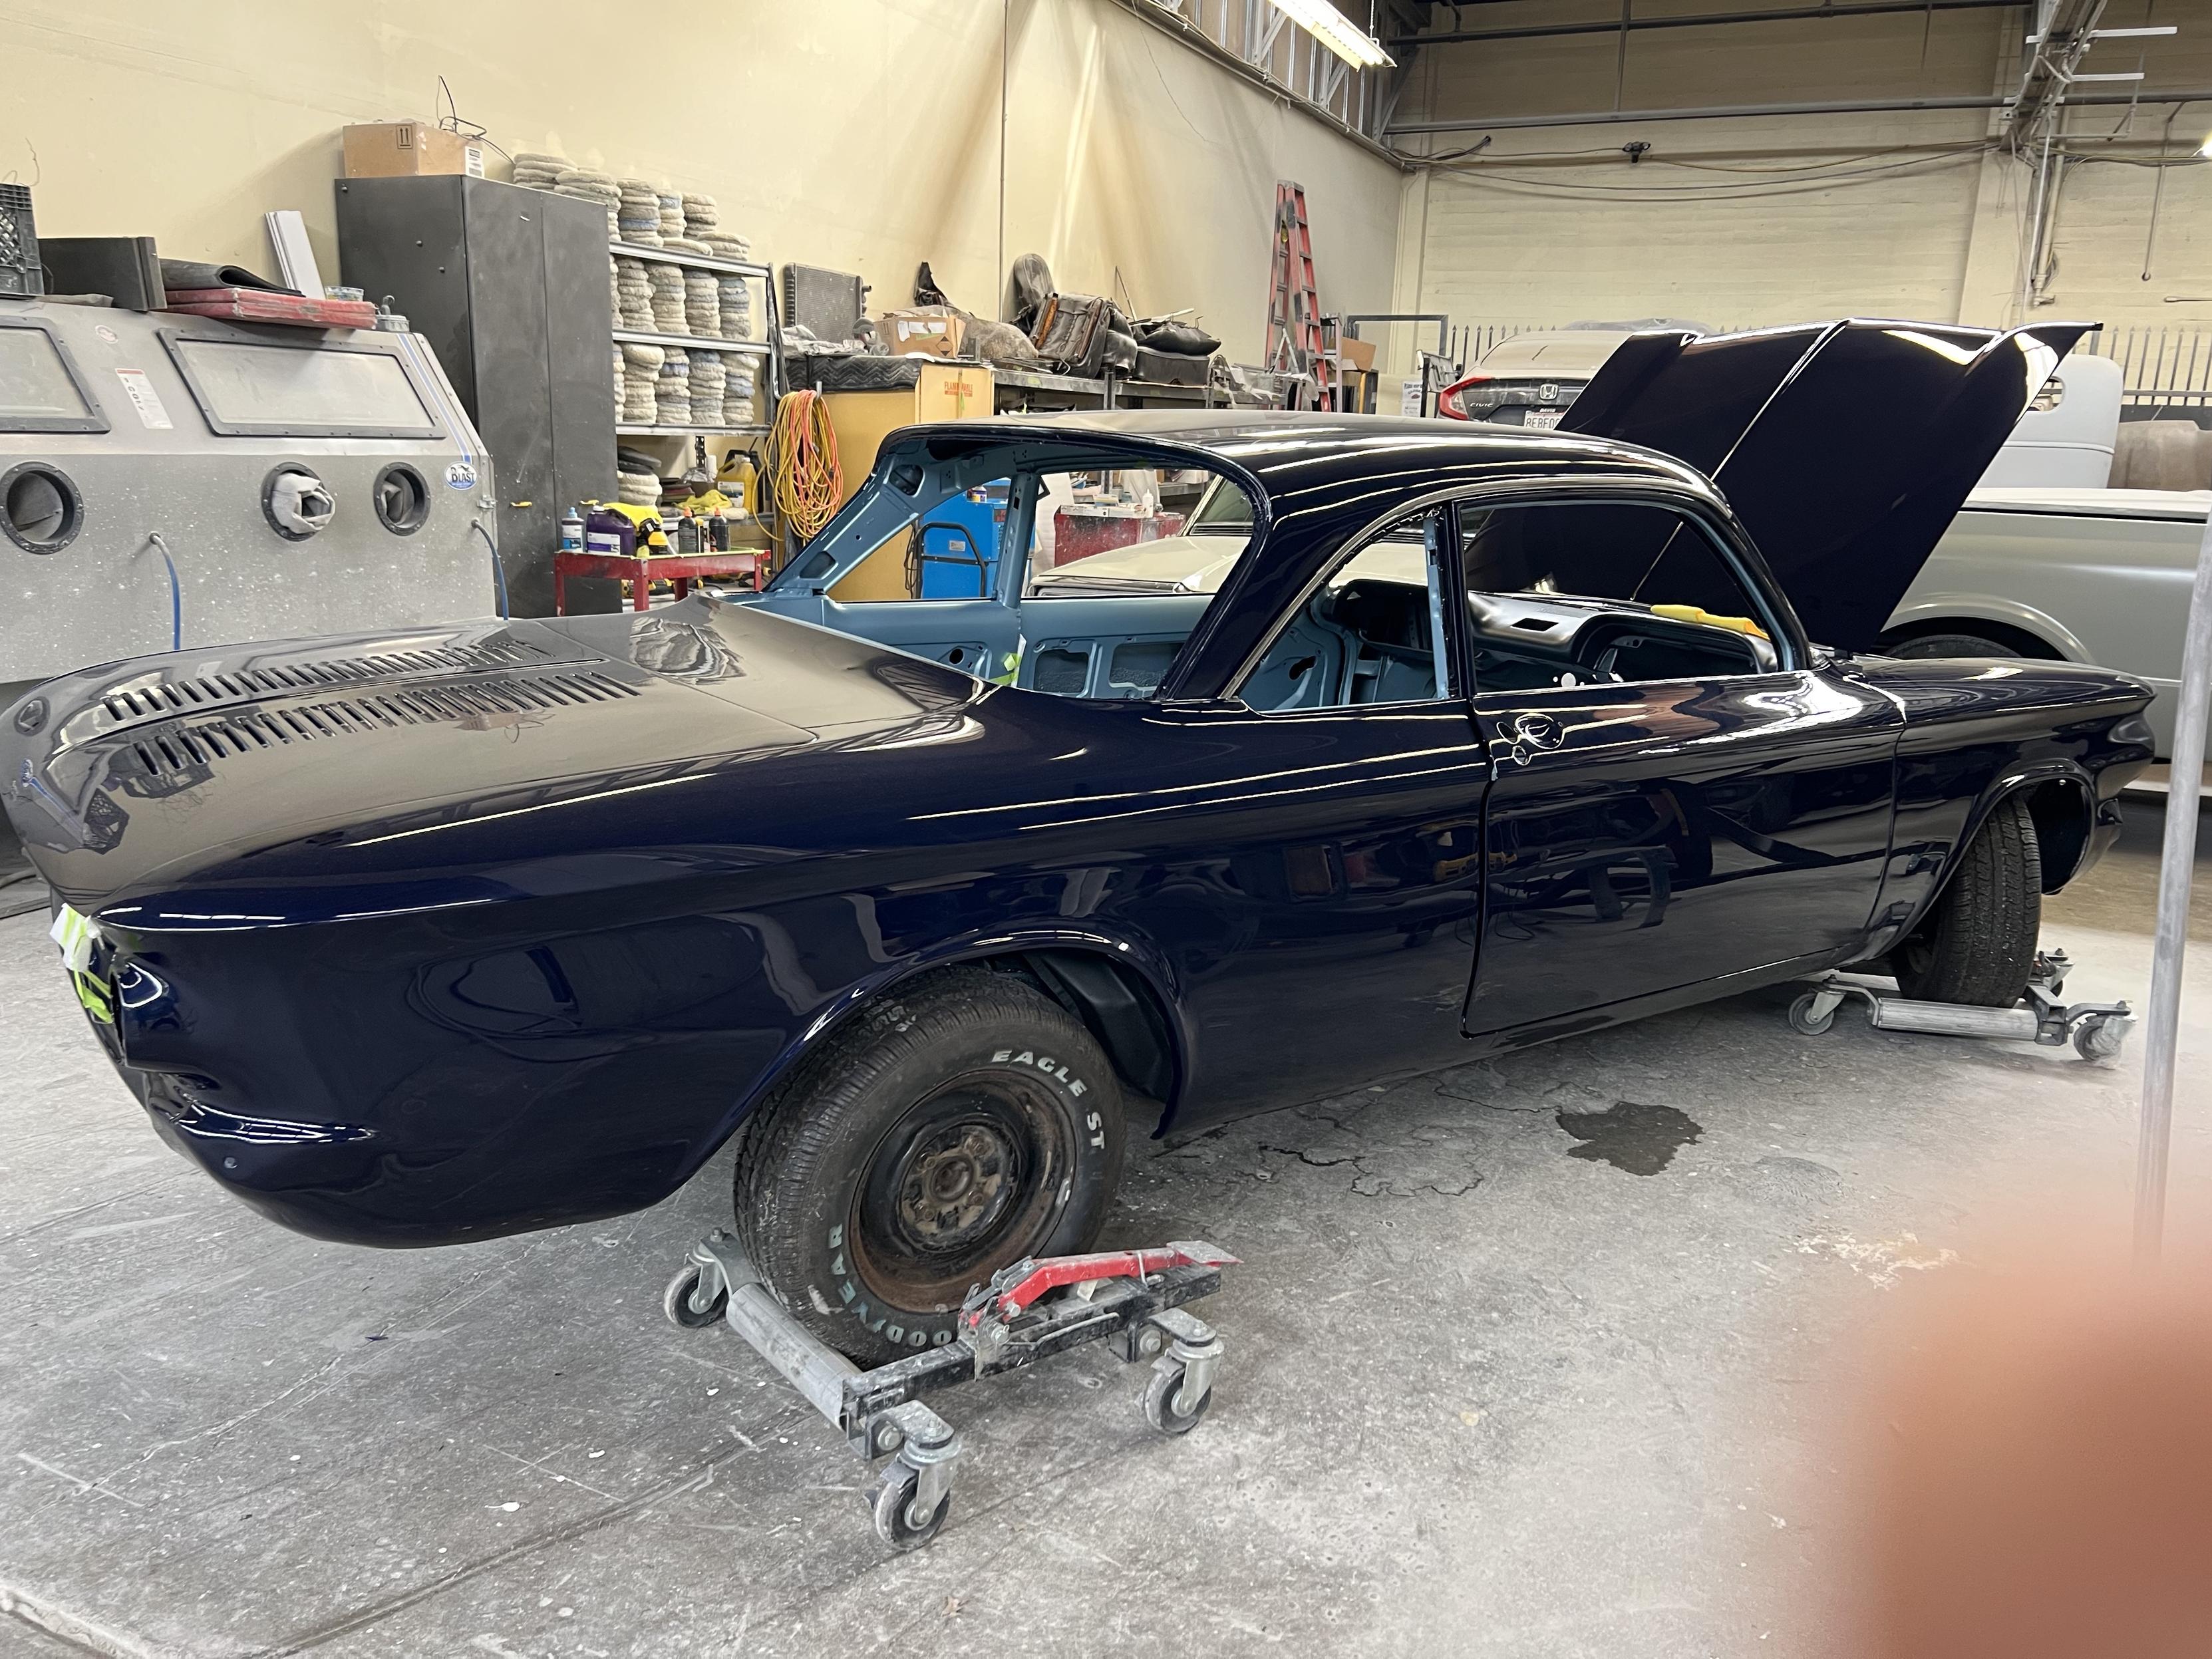
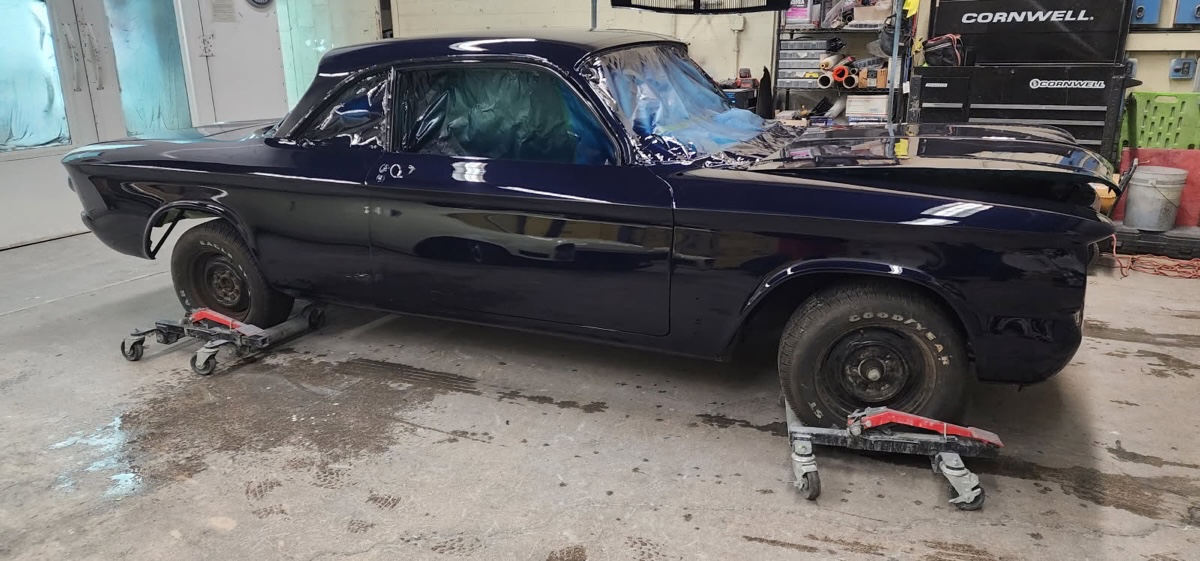
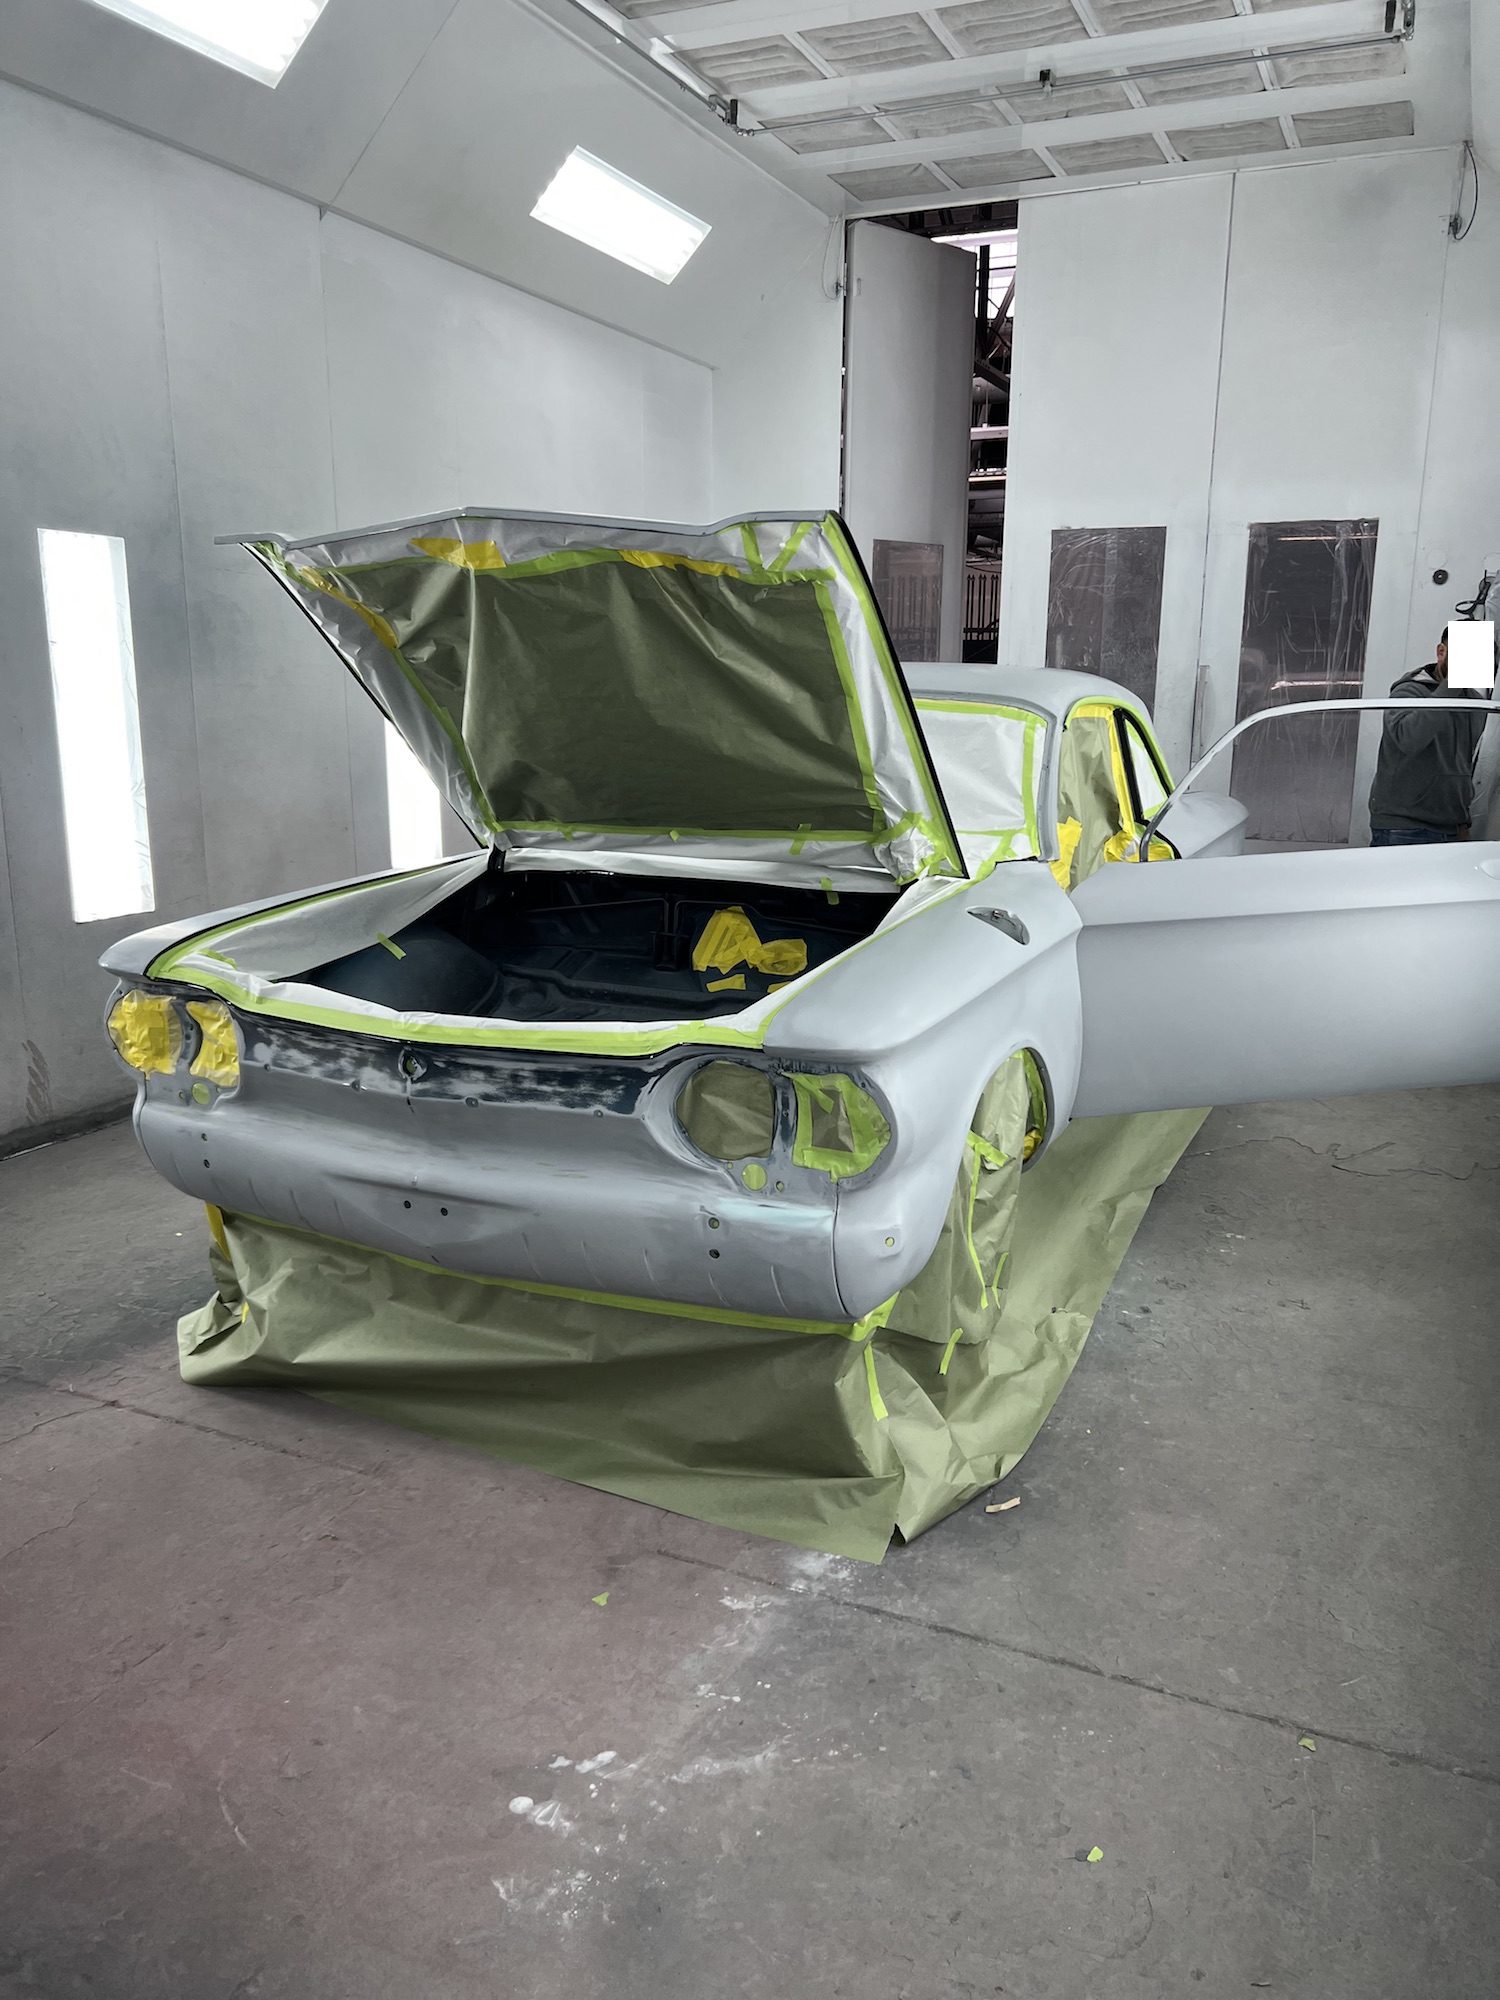
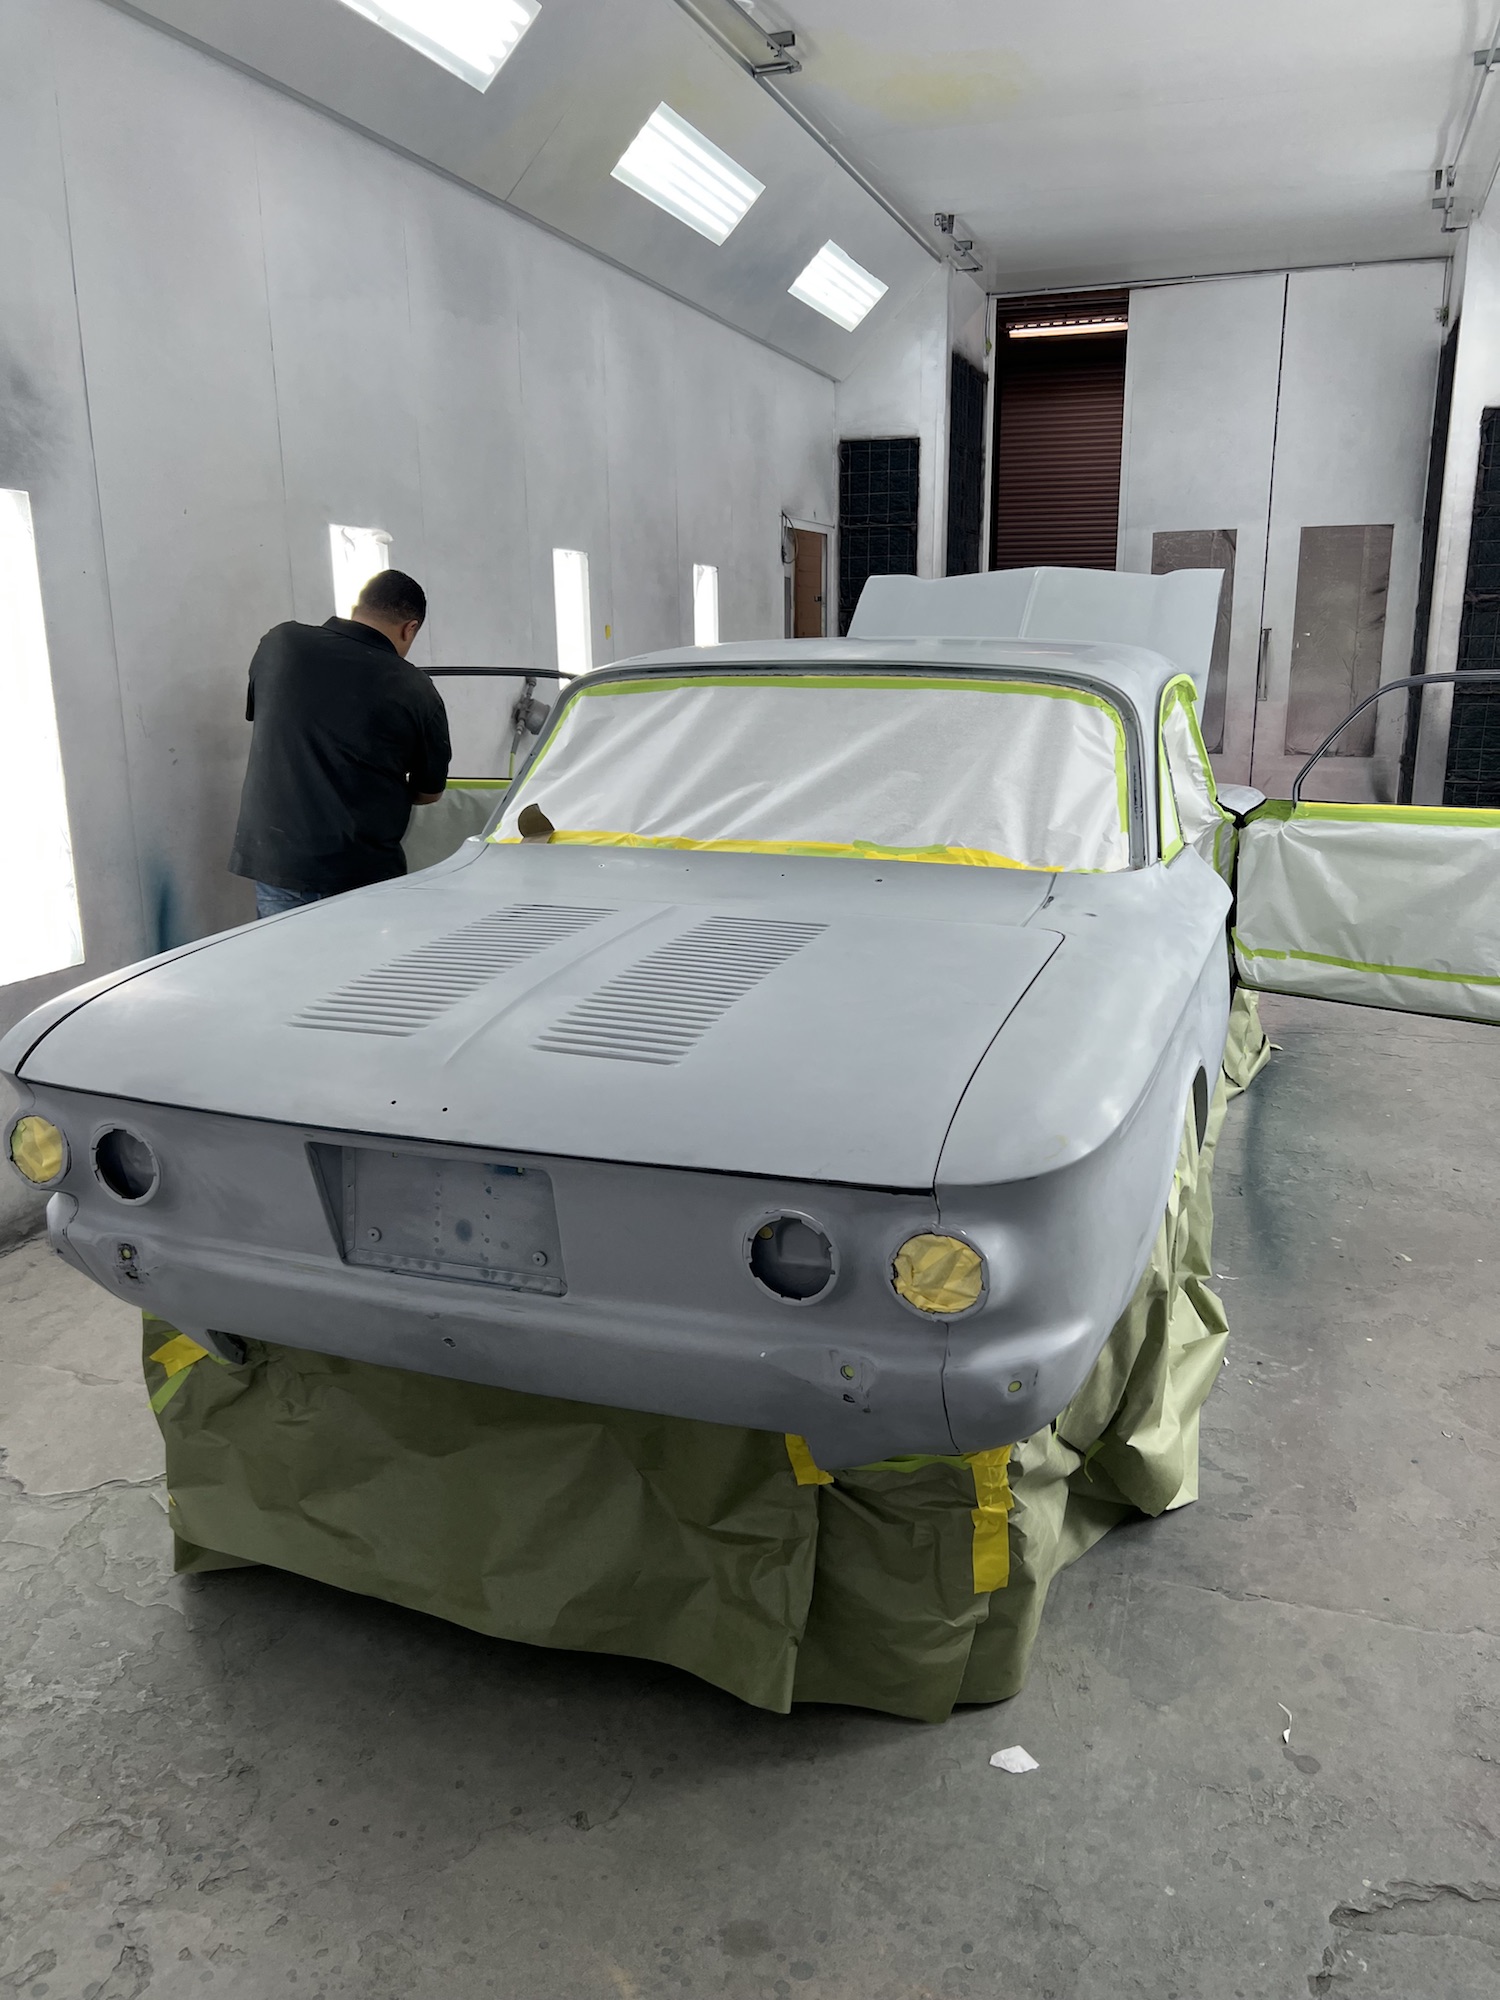
#Corvair #AutoRestoration progress.
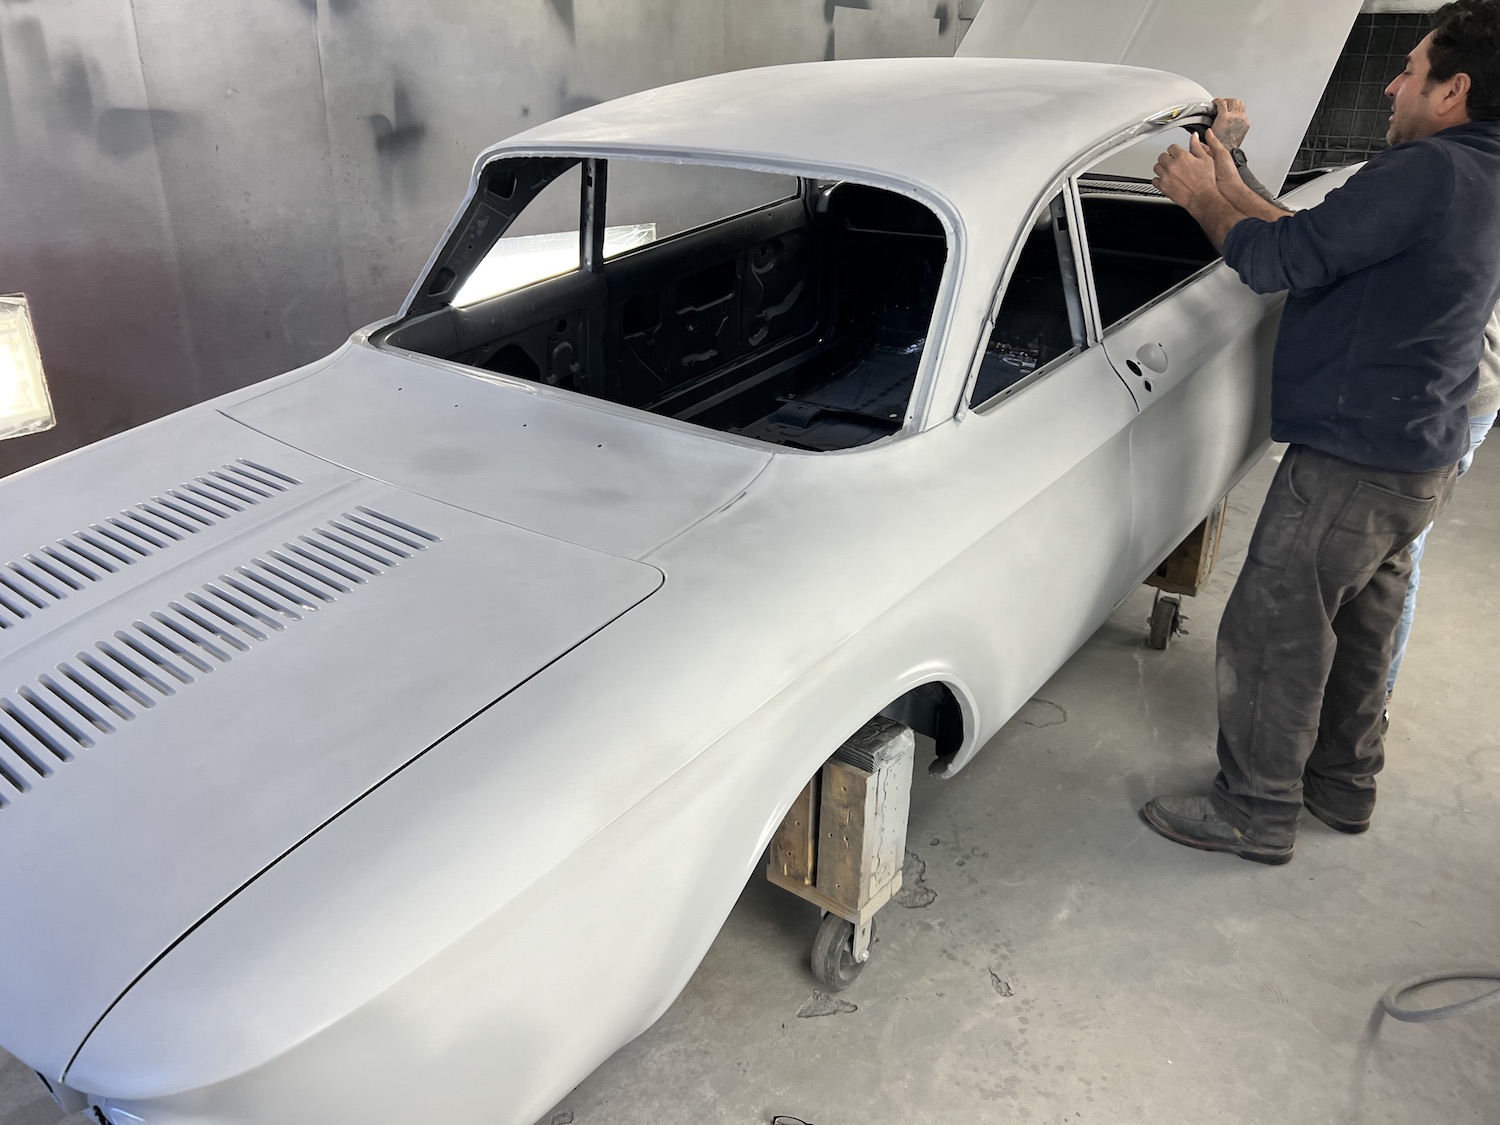
Visited the 1964 Corvair during its final week of cutting, buffing, and touchup. It is just a touch darker than I'd like, but close enough not to make a fuss about. I'm sure it'll look dynamite in the sun.
Visited the 1964 Corvair during its final week of cutting, buffing, and touchup. It is just a touch darker than I'd like, but close enough not to make a fuss about. I'm sure it'll look dynamite in the sun.

#Corvair #AutoRestoration progress.
Ug.
Just place The Order from Clarks - the one that includes all new interior panels, carpet, repro trim.
There remains The Final Order from Clarks, which will be the expensive exterior trim repro sets.
I'm going to see how the car looks naked before that final order is made.
Hopefully the interior order will arrive the same week as the fresh body.
No new pix, but lots of futzing with window mechanisms and cleaning/painting the last of what's sitting around.
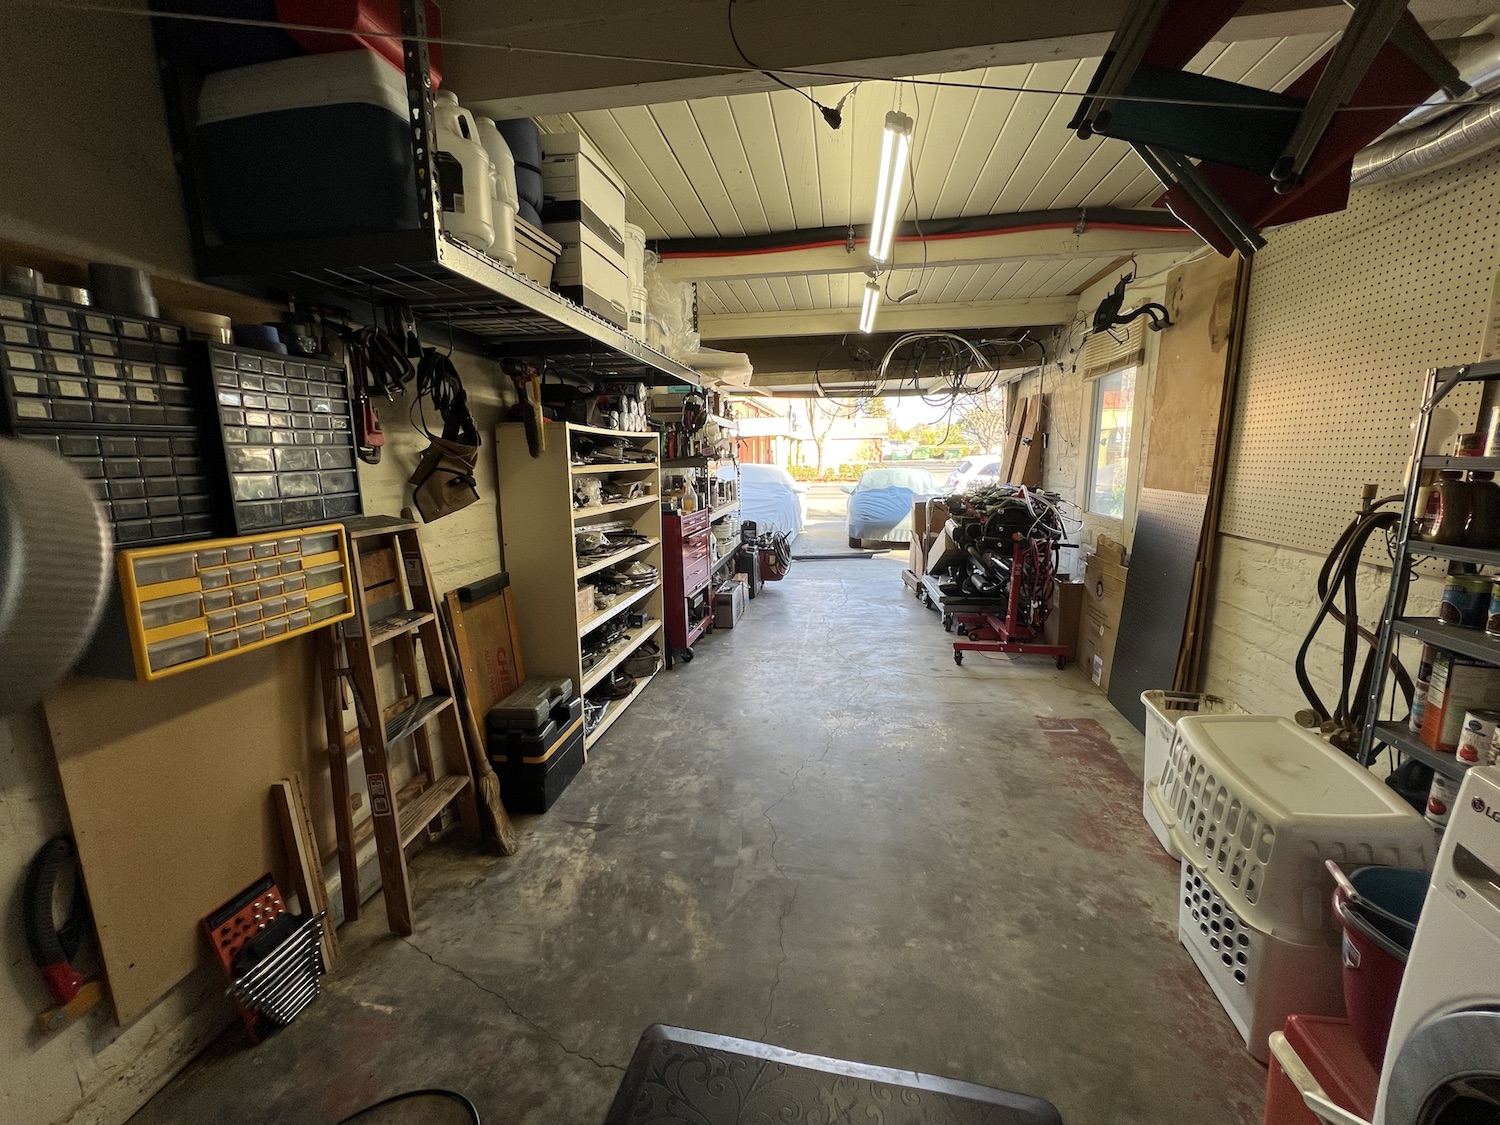
#Corvair #AutoRestoration progress.
The garage is as "wide" as I can get it for the eventual (2? 3? weeks) return of the painted body.
The interior trim bits have been painted, and final prep is occurring for body color paint - tomorrow!
Then clear coat, then cure a week, then cutting and polishing.
Weeee!
The garage is as "wide" as I can get it for the eventual (2? 3? weeks) return of the painted body.
The interior trim bits have been painted, and final prep is occurring for body color paint - tomorrow!
Then clear coat, then cure a week, then cutting and polishing.
Weeee!
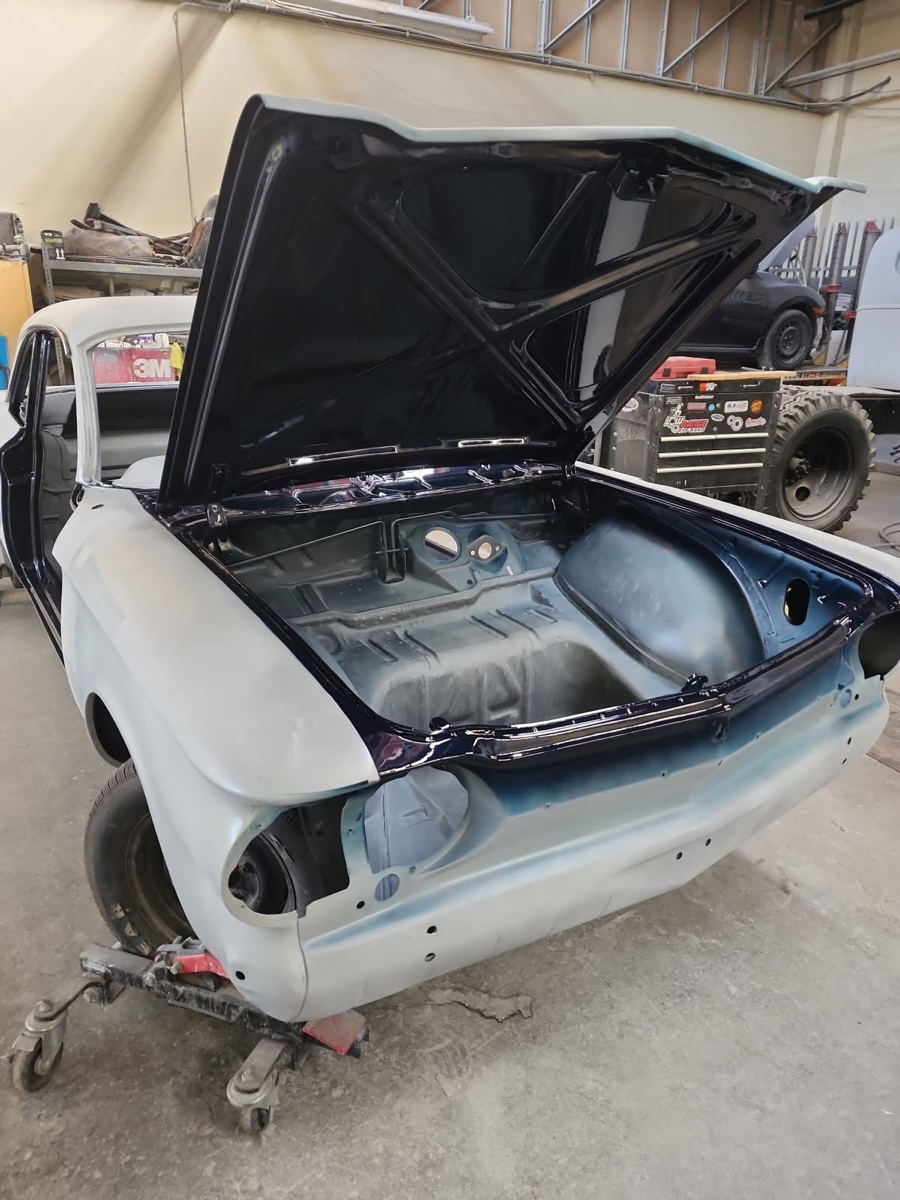
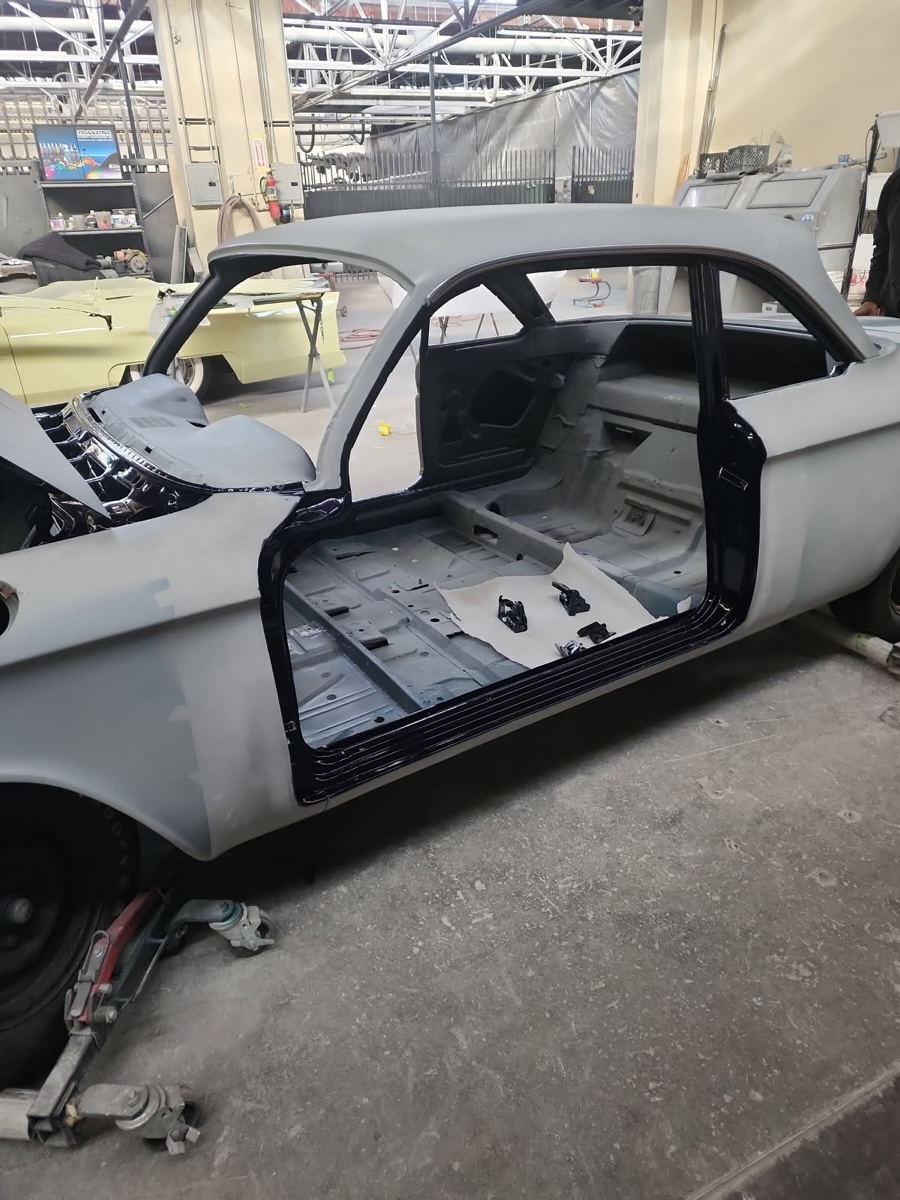
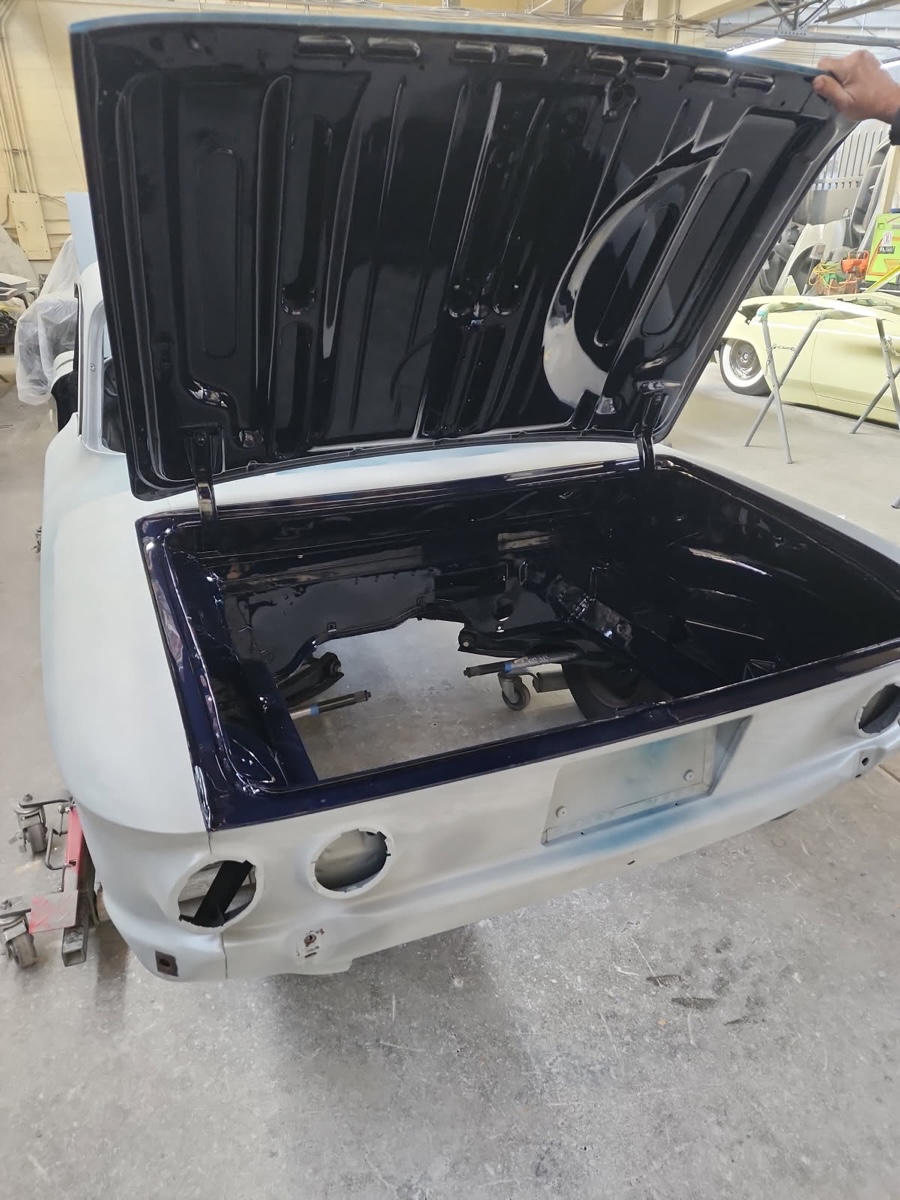
@david #Corvair #AutoRestoration progress.
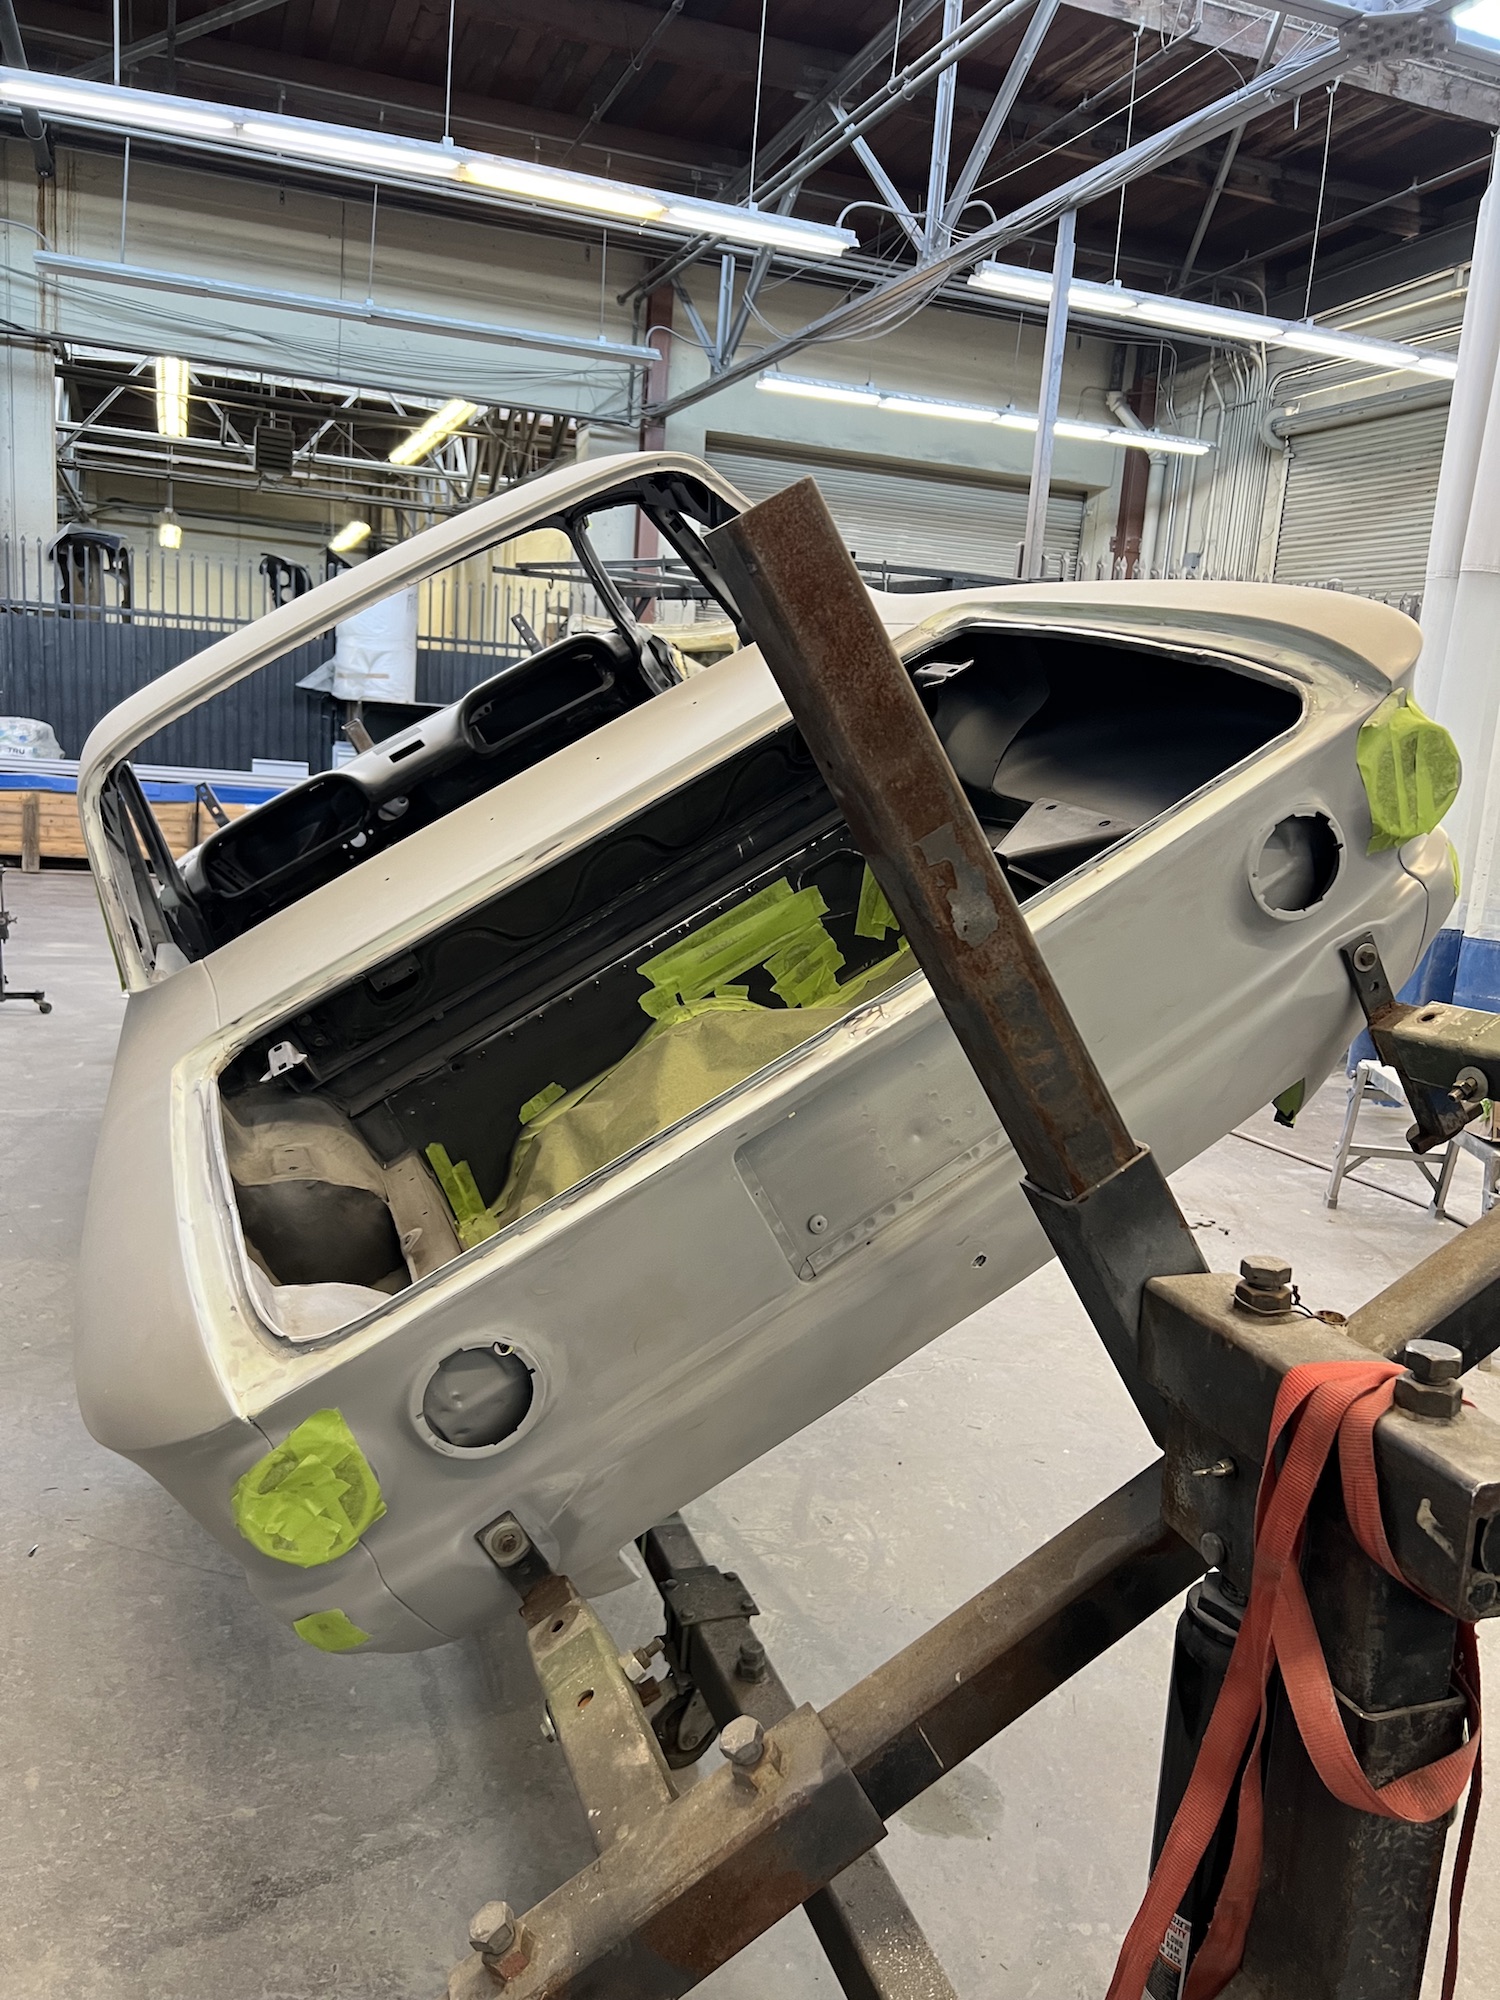
Body shop shared some pix of the first real paint - for door jambs, and front and rear of the beast.
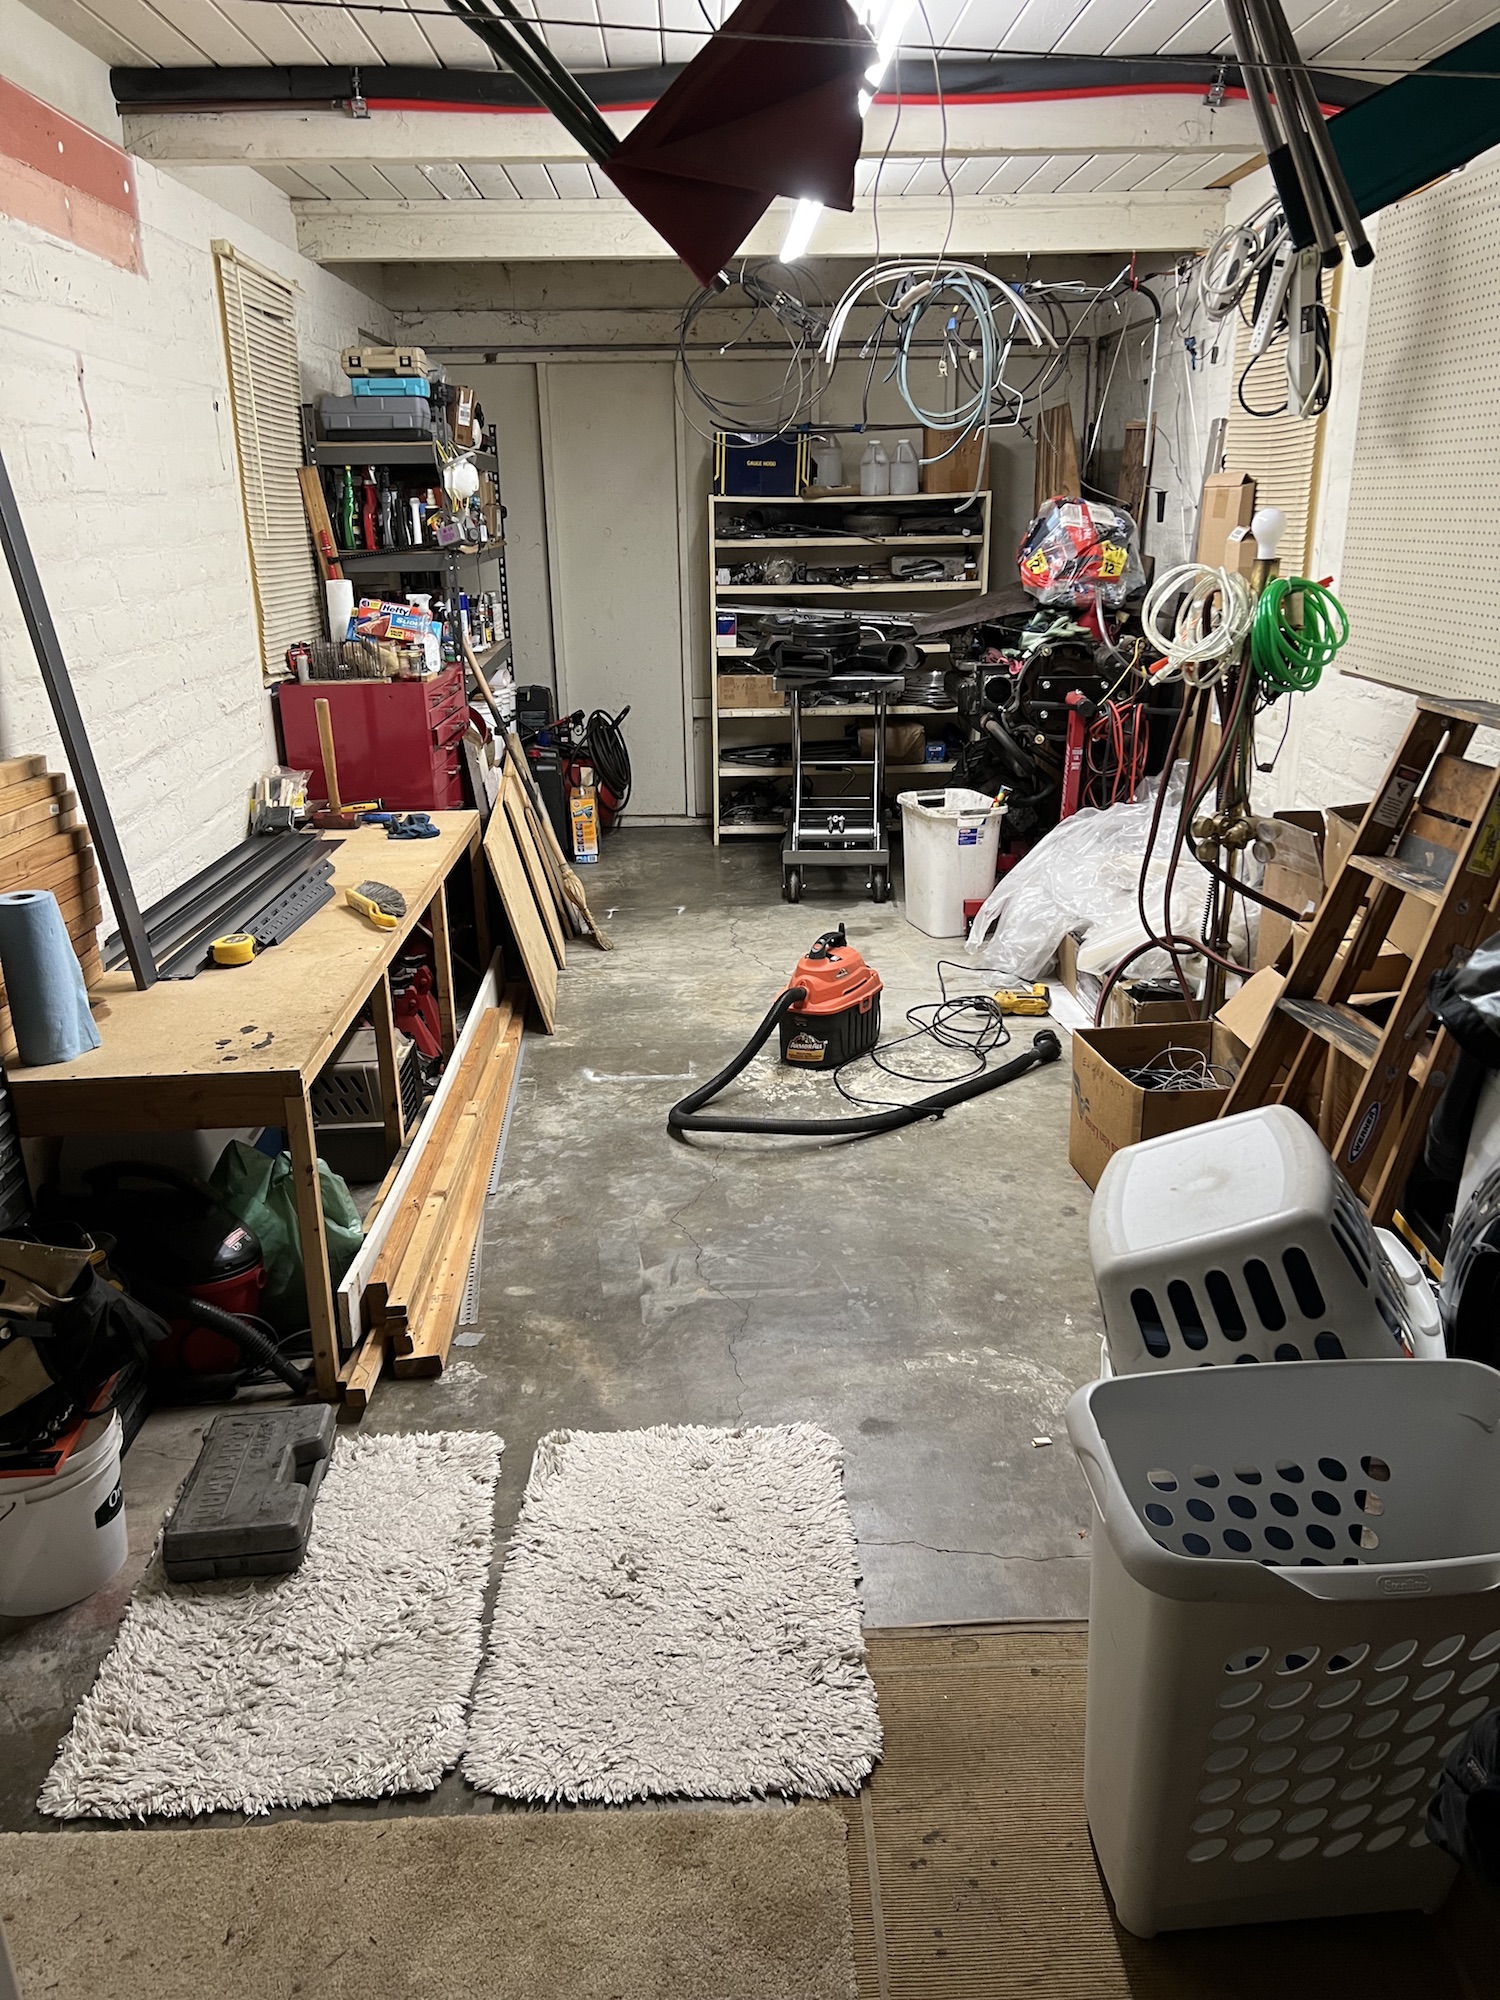
Meanwhile, I'm frantically re-organizing my tiny garage so that (hopefully) both doors will be able to be opened once inside. I reckon I have until the end of the month.
In the back left of the garage shot, you can see my new steel storage shelves which holds all the paints and solvents and such that used to live in the partially disassembled wooden shelves I built long ago. They are just TOO wide to remain.
Tomorrow will see the installation of 8' of hanging racks, which will be home to the rest of the rubble seen in this picture.
Sad to say, my garage no longer smells like a garage, with all the cleaning I've been doing.
(In the top left of the garage pic, you can see the last spots of original colors of this house, which was built in 1954. Pink and Salmon. Bold! The original owner ended up in jail for embezzling from the city. Bold!)
Body shop shared some pix of the first real paint - for door jambs, and front and rear of the beast.
Meanwhile, I'm frantically re-organizing my tiny garage so that (hopefully) both doors will be able to be opened once inside. I reckon I have until the end of the month.
In the back left of the garage shot, you can see my new steel storage shelves which holds all the paints and solvents and such that used to live in the partially disassembled wooden shelves I built long ago. They are just TOO wide to remain.
Tomorrow will see the installation of 8' of hanging racks, which will be home to the rest of the rubble seen in this picture.
Sad to say, my garage no longer smells like a garage, with all the cleaning I've been doing.
(In the top left of the garage pic, you can see the last spots of original colors of this house, which was built in 1954. Pink and Salmon. Bold! The original owner ended up in jail for embezzling from the city. Bold!)
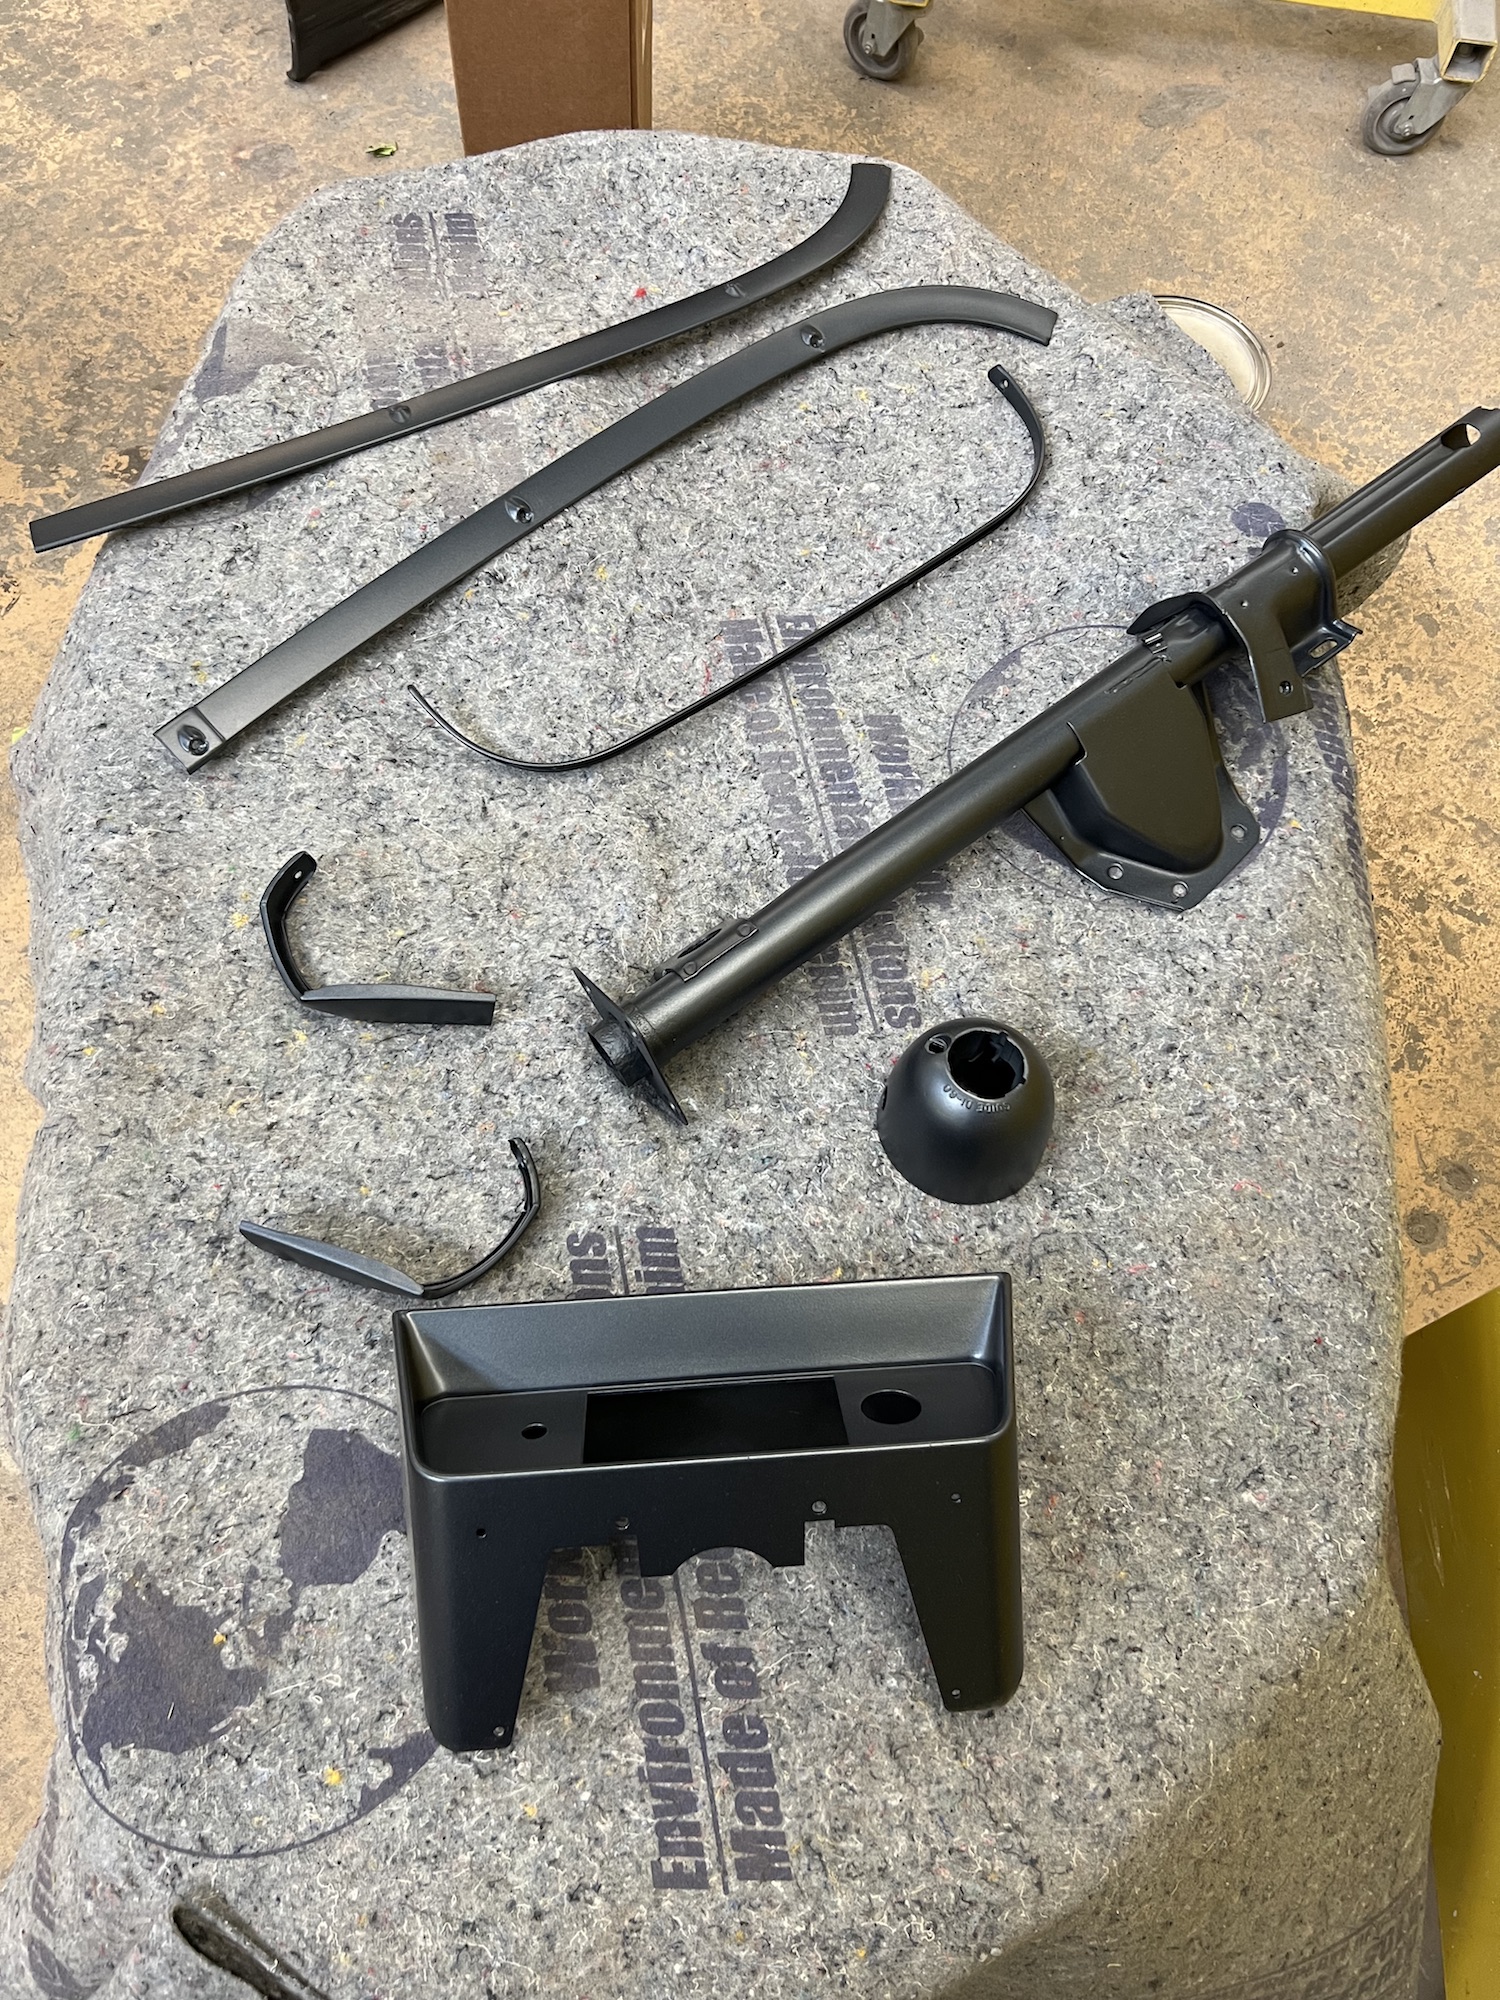
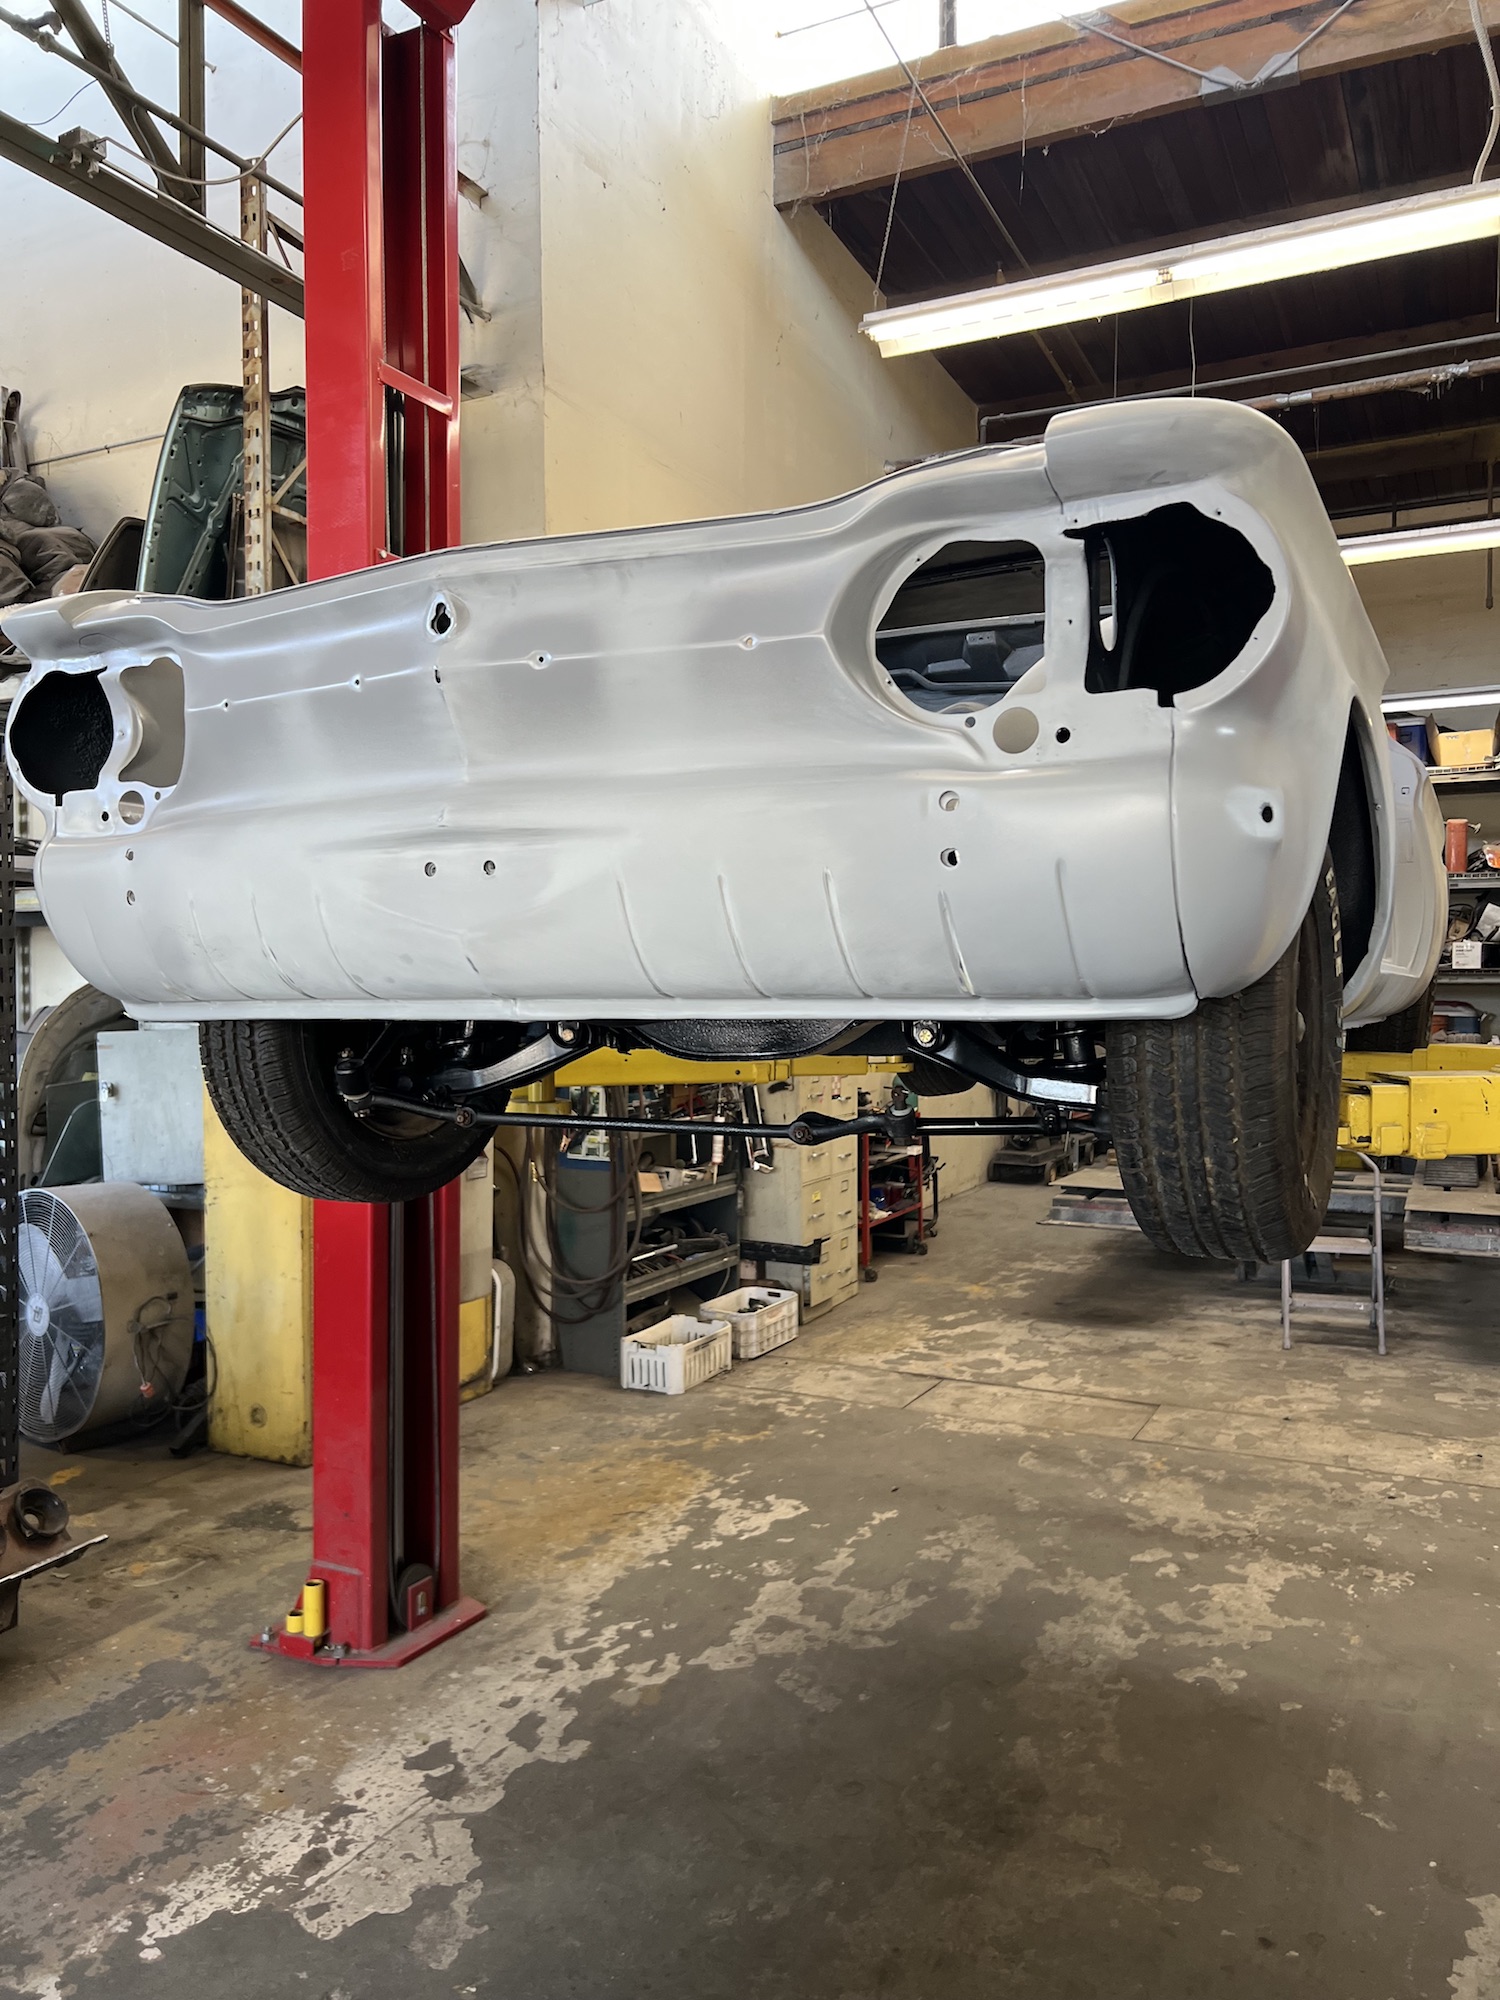
#Corvair #AutoRestoration progress.
I returned to the body ship to install the steering linkage and wheels so that they can move the beast around.
Next week begins some real paint work.
I returned to the body ship to install the steering linkage and wheels so that they can move the beast around.
Next week begins some real paint work.

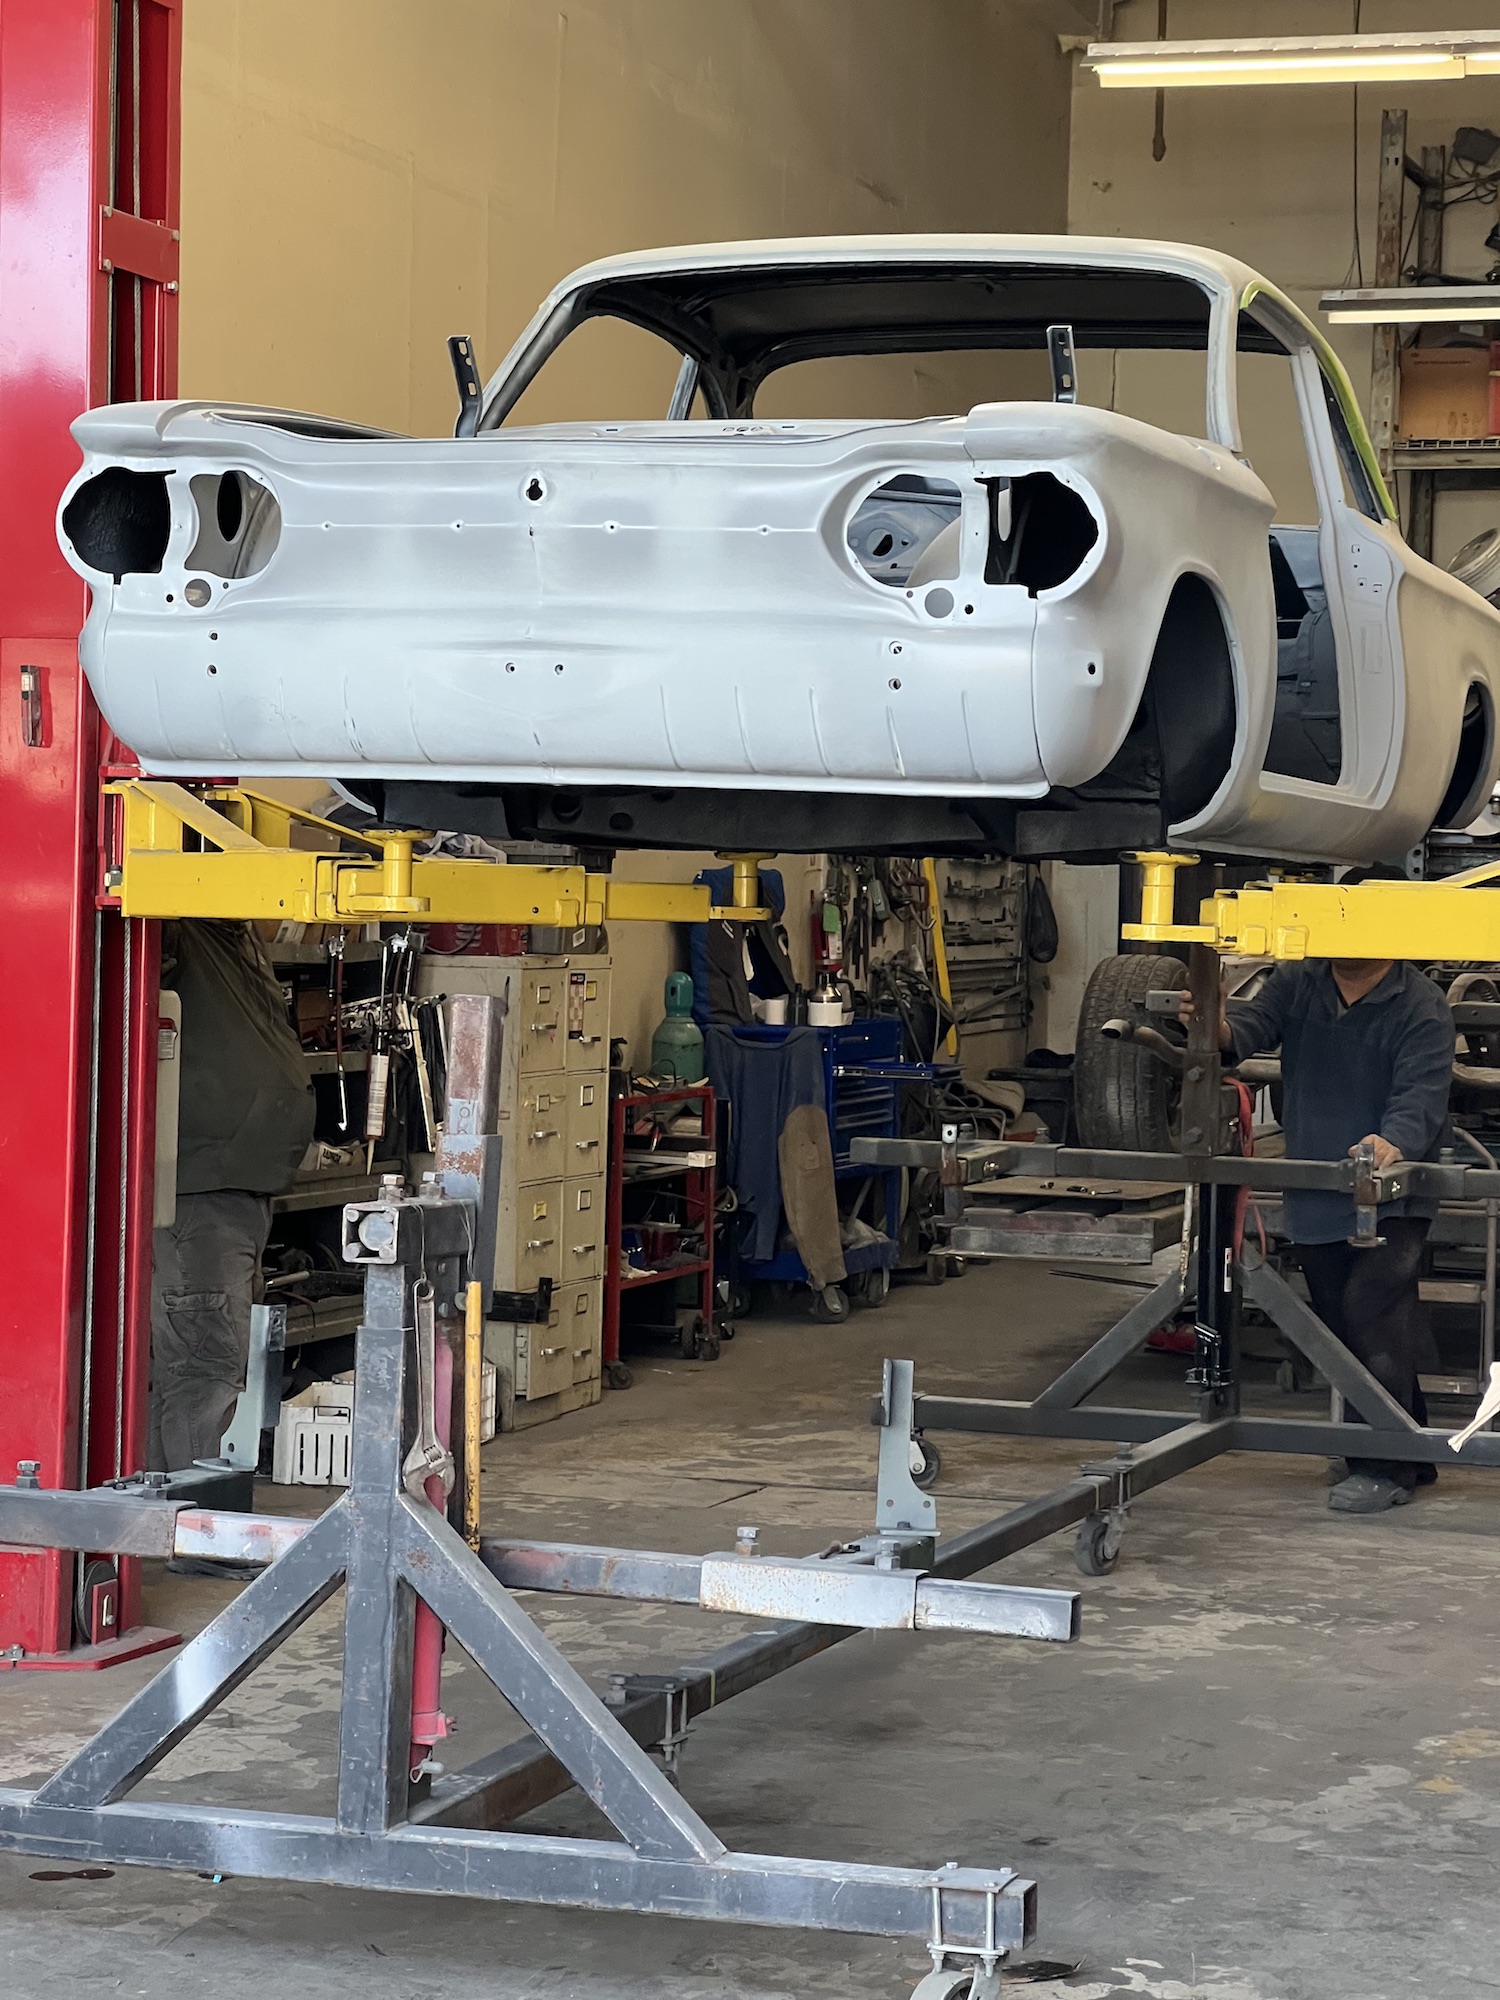
#Corvair #AutoRestoration progress.
Another trip to the body shop, this time to temporarily install the suspension, so that they can work on it at normal levels.
I only sliced one finger using a wrench, and the two shop workers only narrowly missed losing an eye, and being killed by a flying pipe during the compression of the rear springs (yikes).
I will return tomorrow with the steering linkage and wheels so the thing can get back on the ground and be aim-able during final bodywork operations.

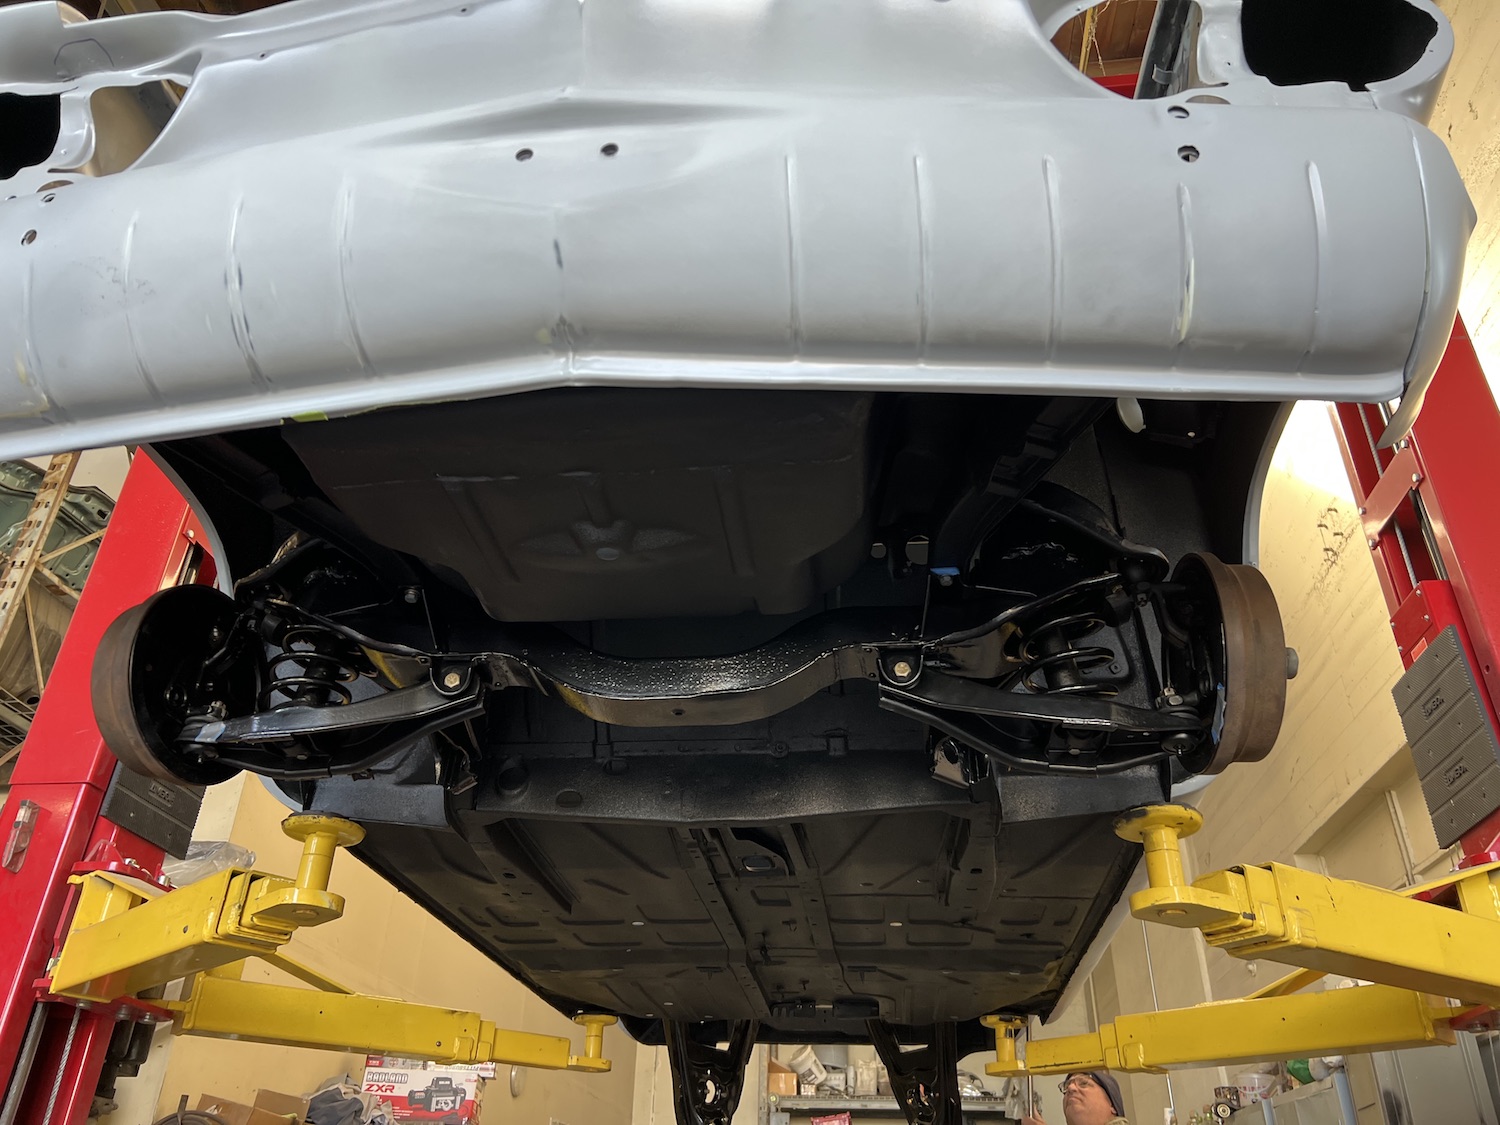
#Corvair #AutoRestoration progress.
Getting close now.
The bodyshop wants to do final panel fit and block sanding with the body on the suspension, so it is time for me to get this puzzle back together.
Getting close now.
The bodyshop wants to do final panel fit and block sanding with the body on the suspension, so it is time for me to get this puzzle back together.

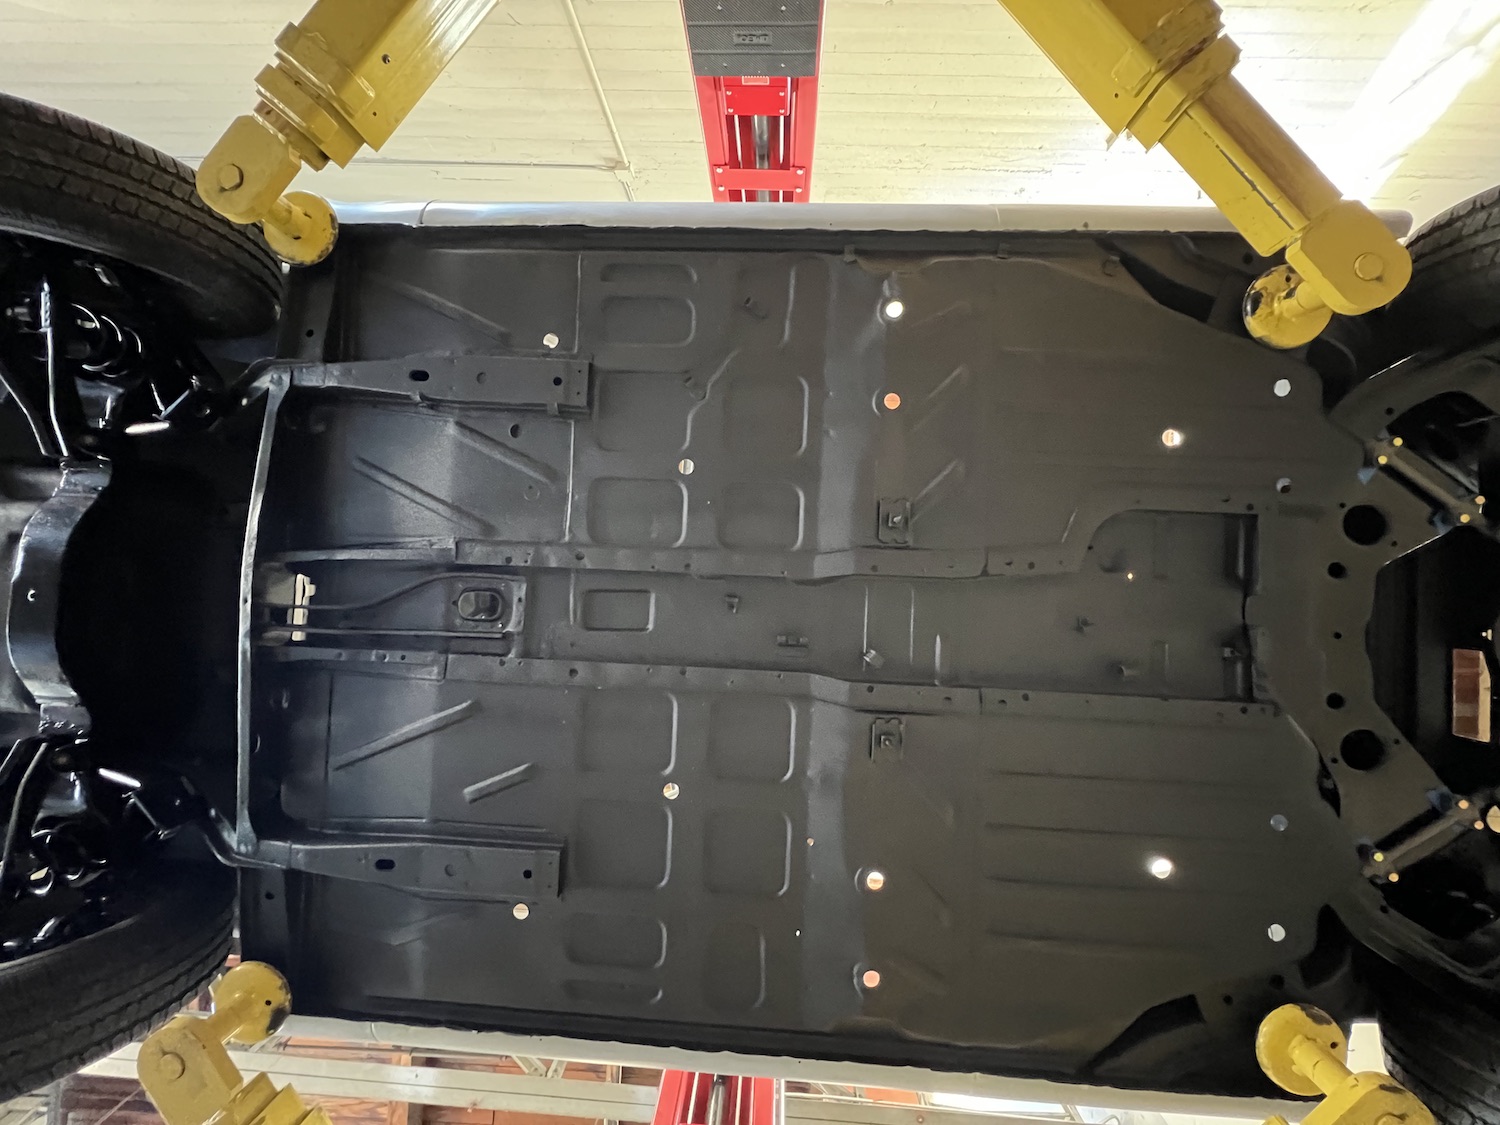
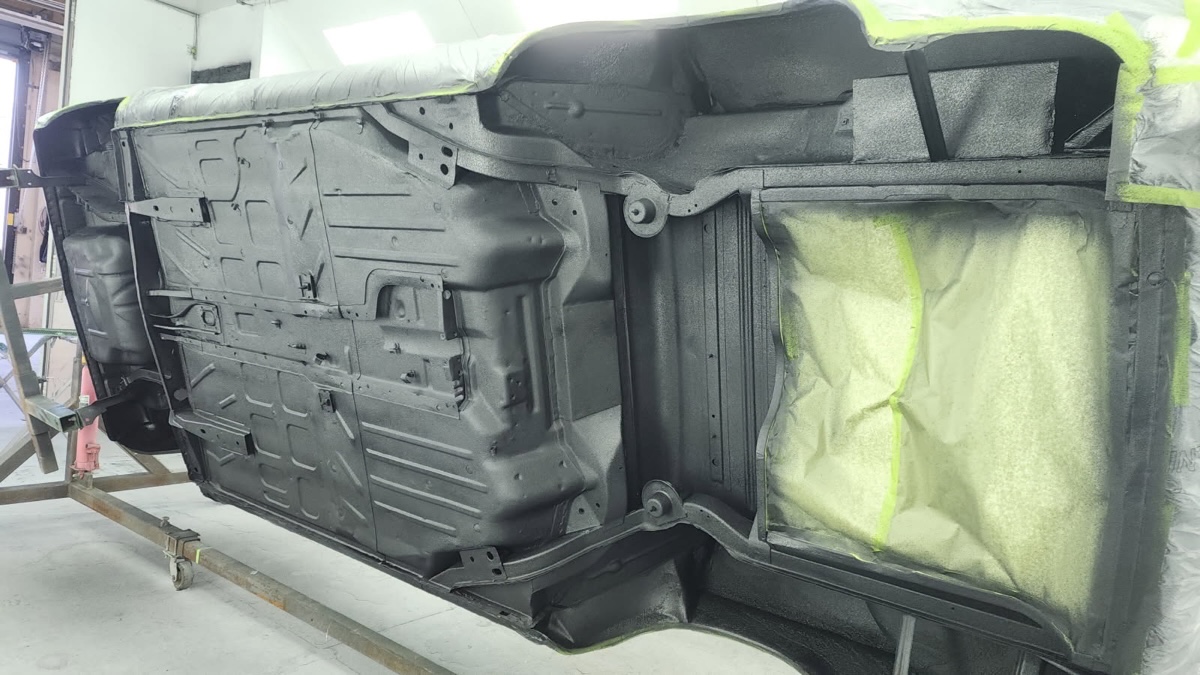
#Corvair #AutoRestoration progress.
Last few weeks off, feeling like dogshit.
I have, however: completed upholstery, cleaned all suspension components. Lots of little stuff.
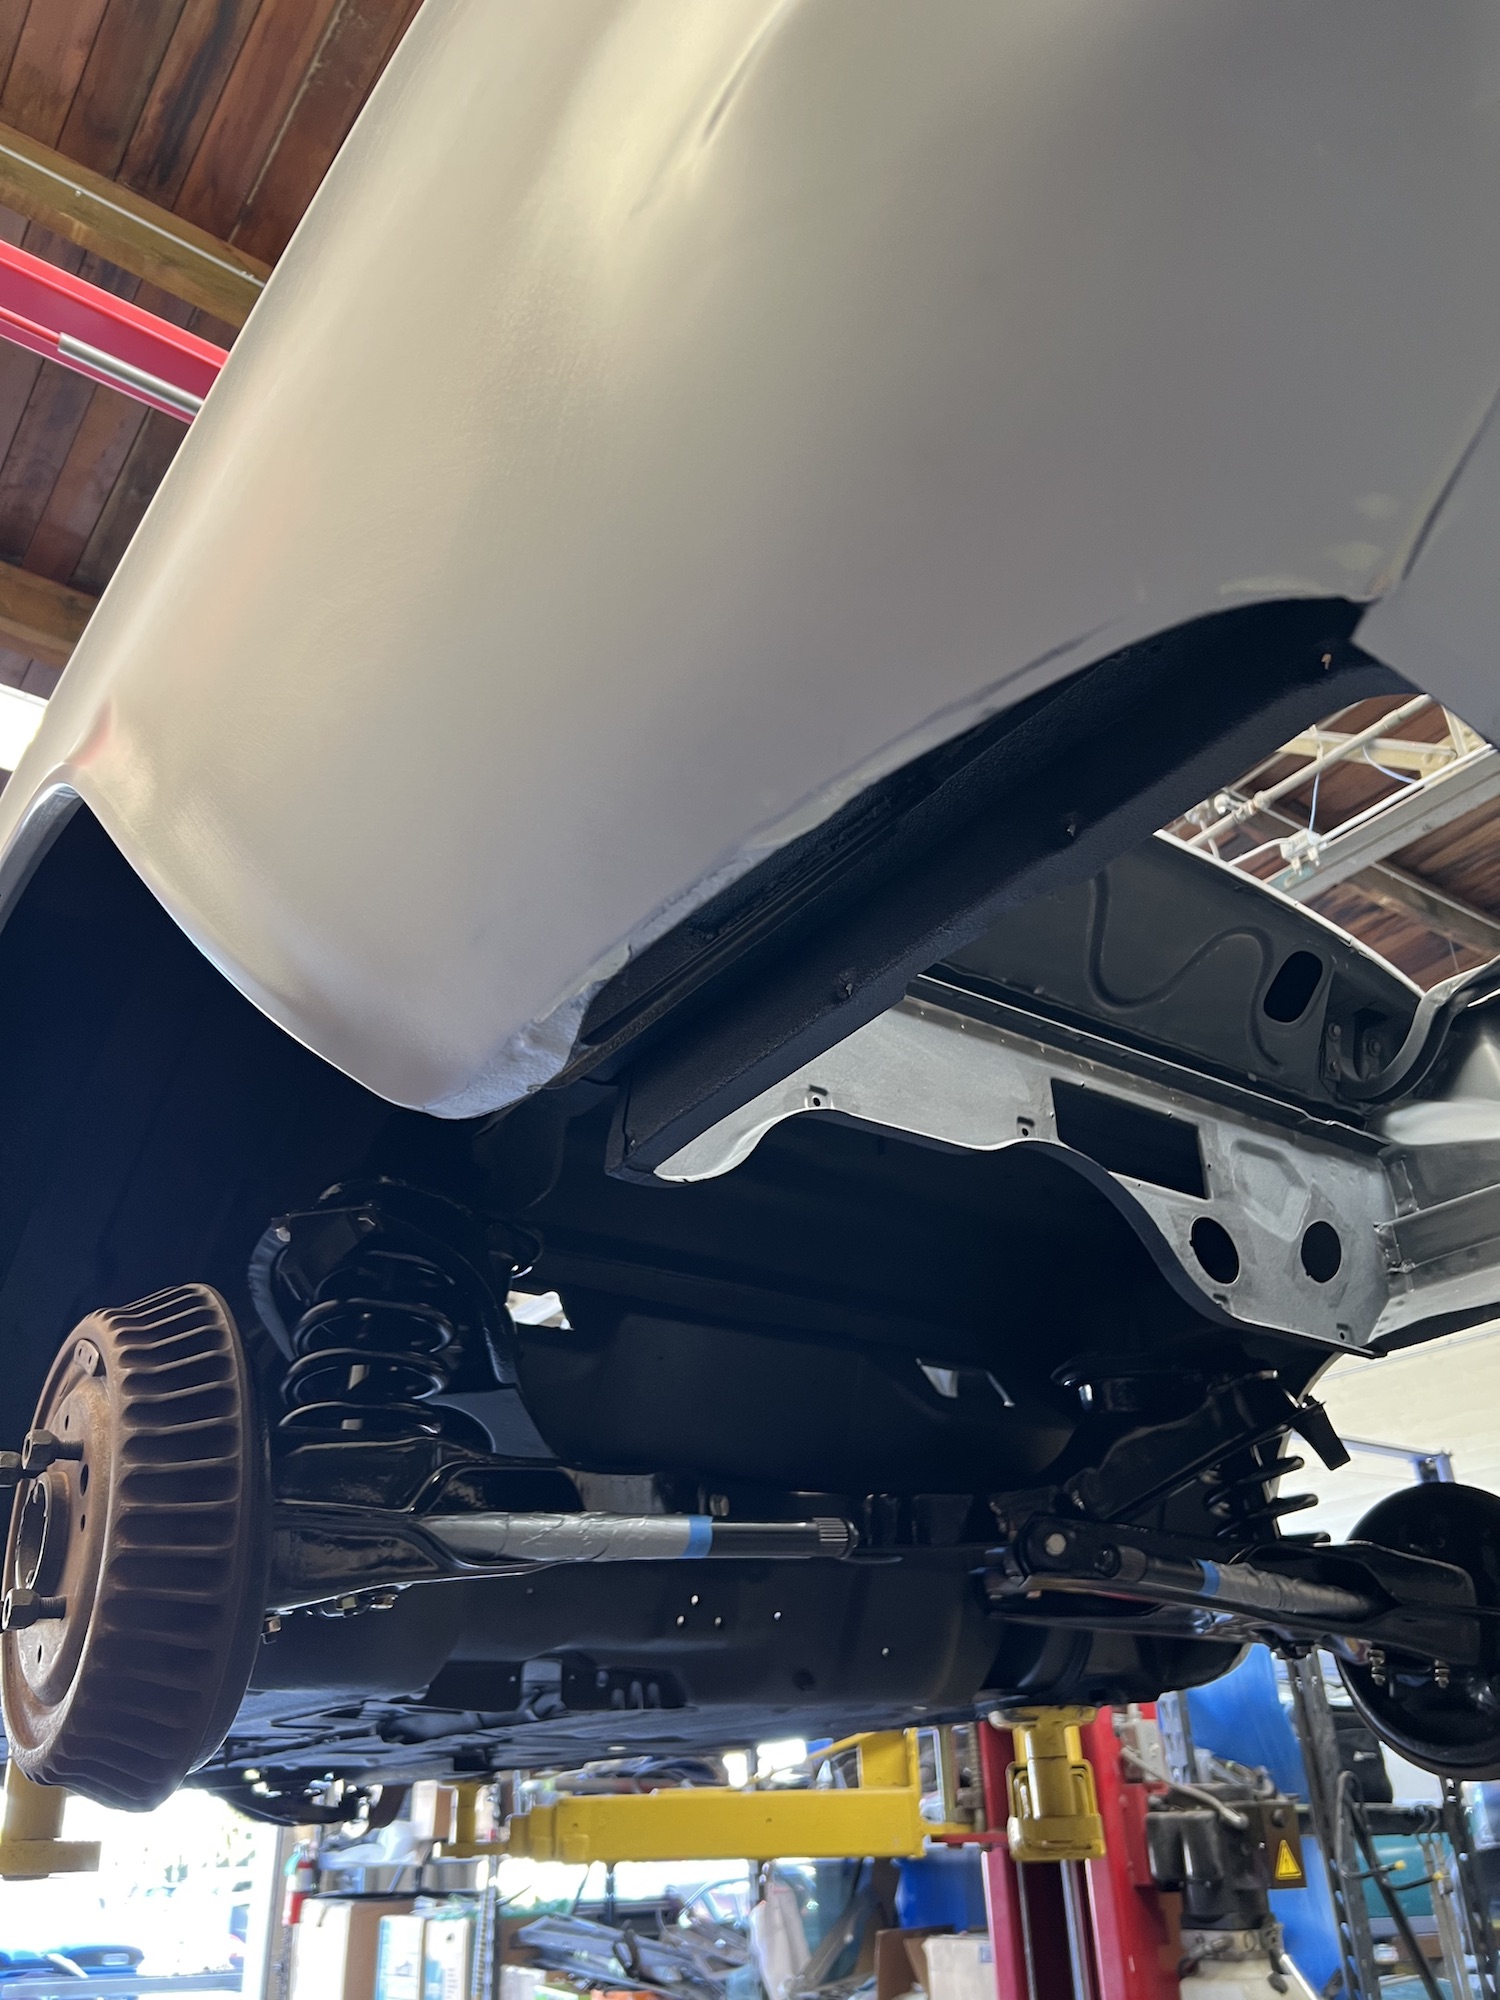
The bodyshop sent a pic of the state of the underside. Soon!
Last few weeks off, feeling like dogshit.
I have, however: completed upholstery, cleaned all suspension components. Lots of little stuff.
The bodyshop sent a pic of the state of the underside. Soon!

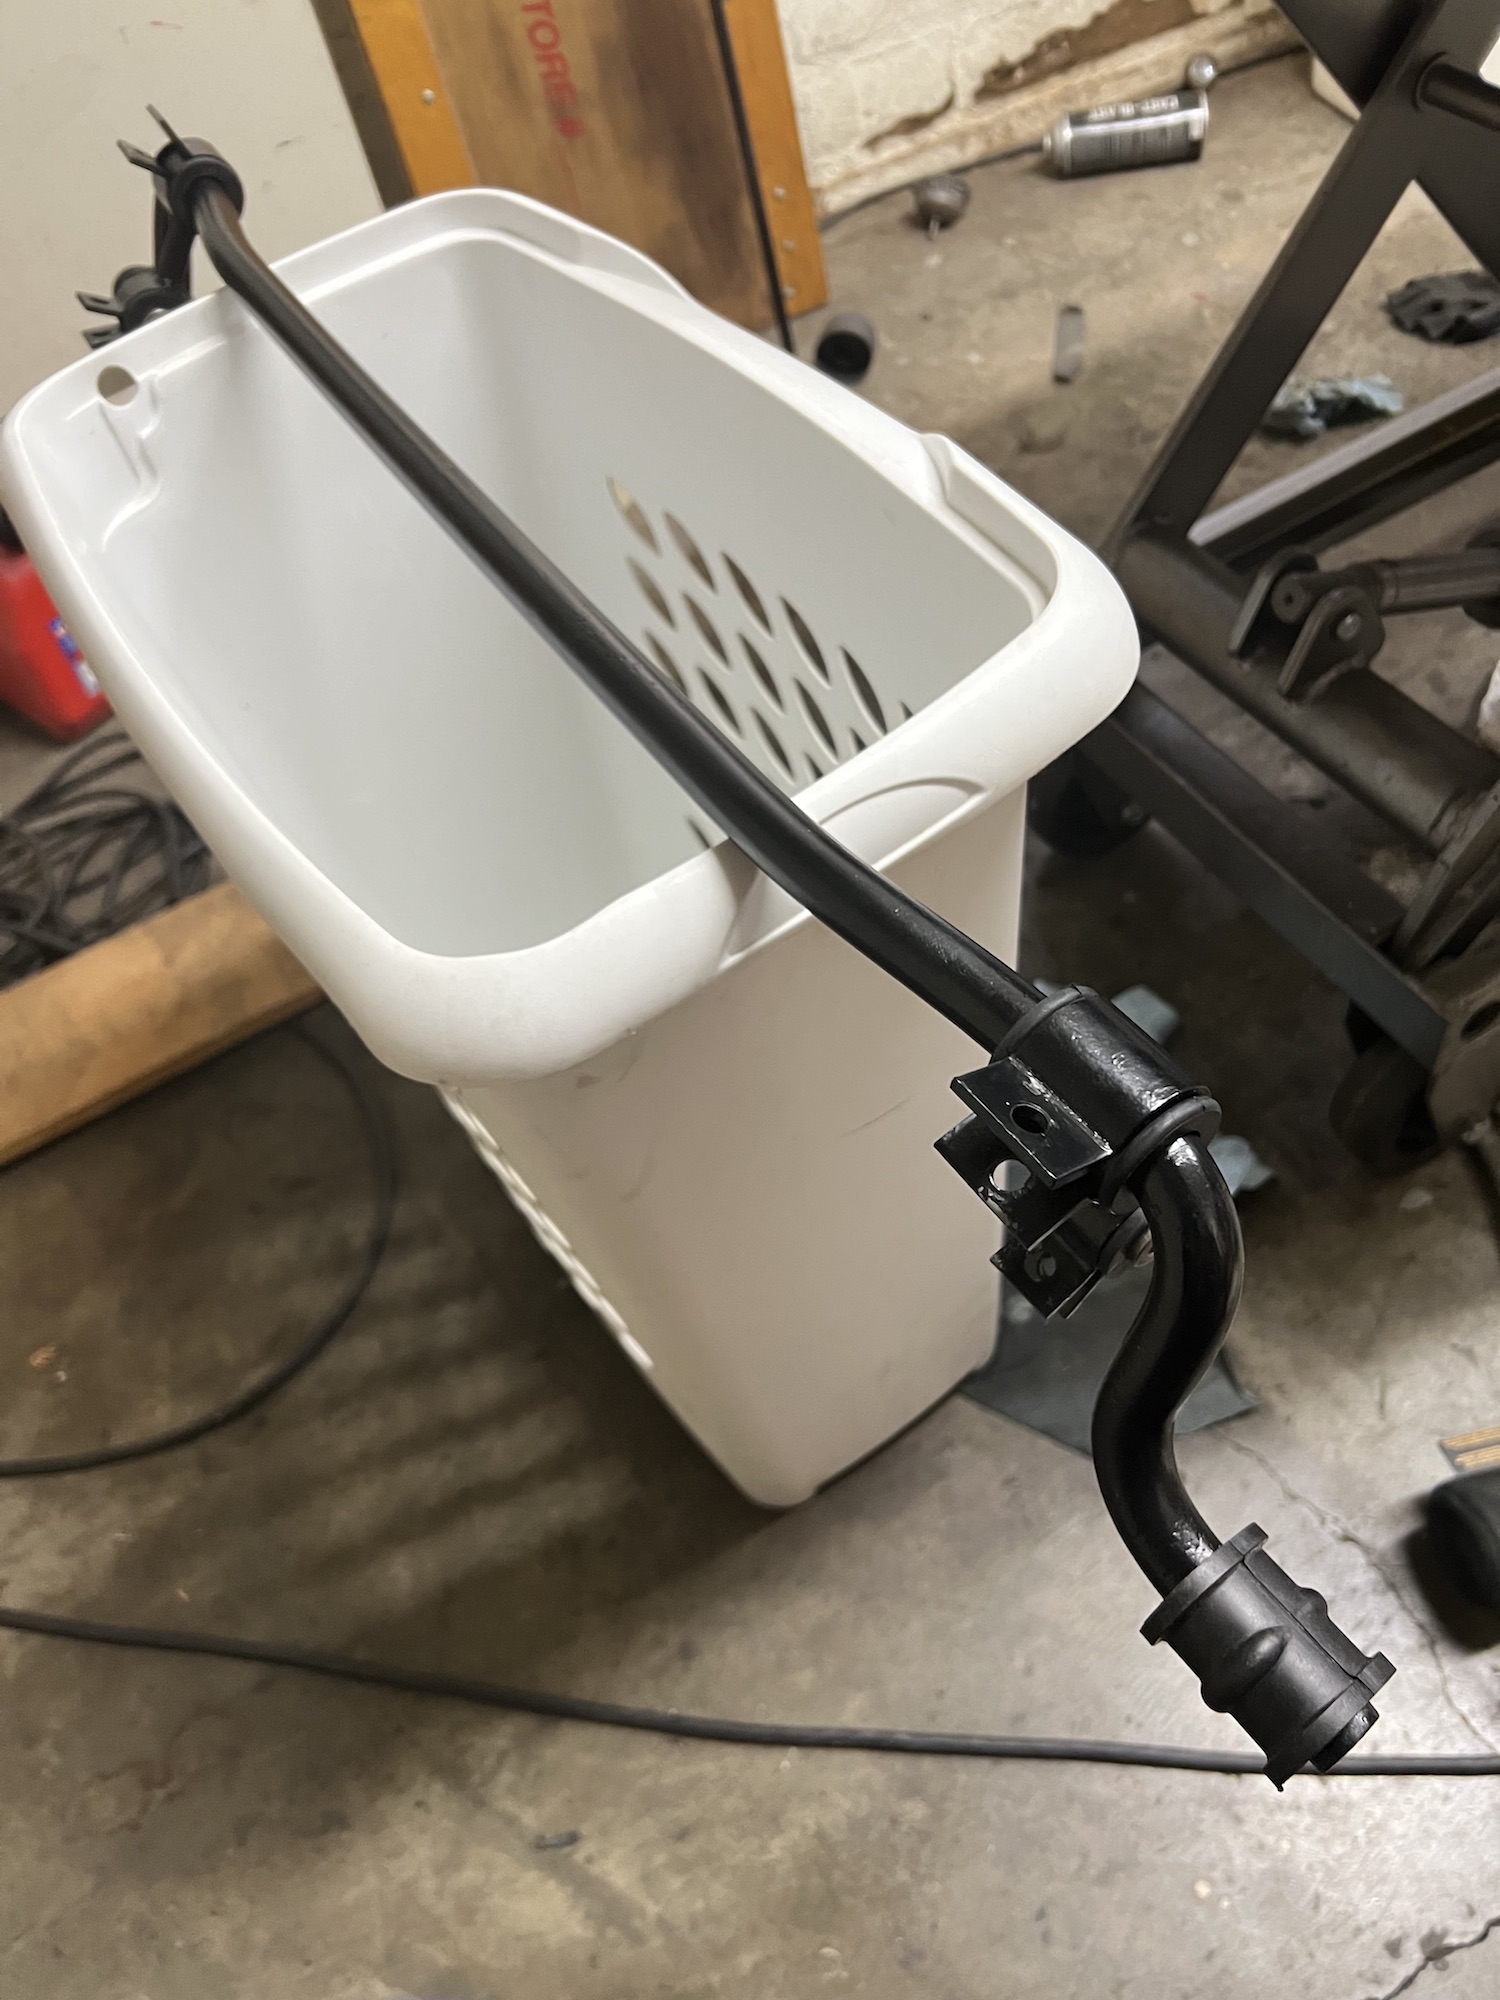
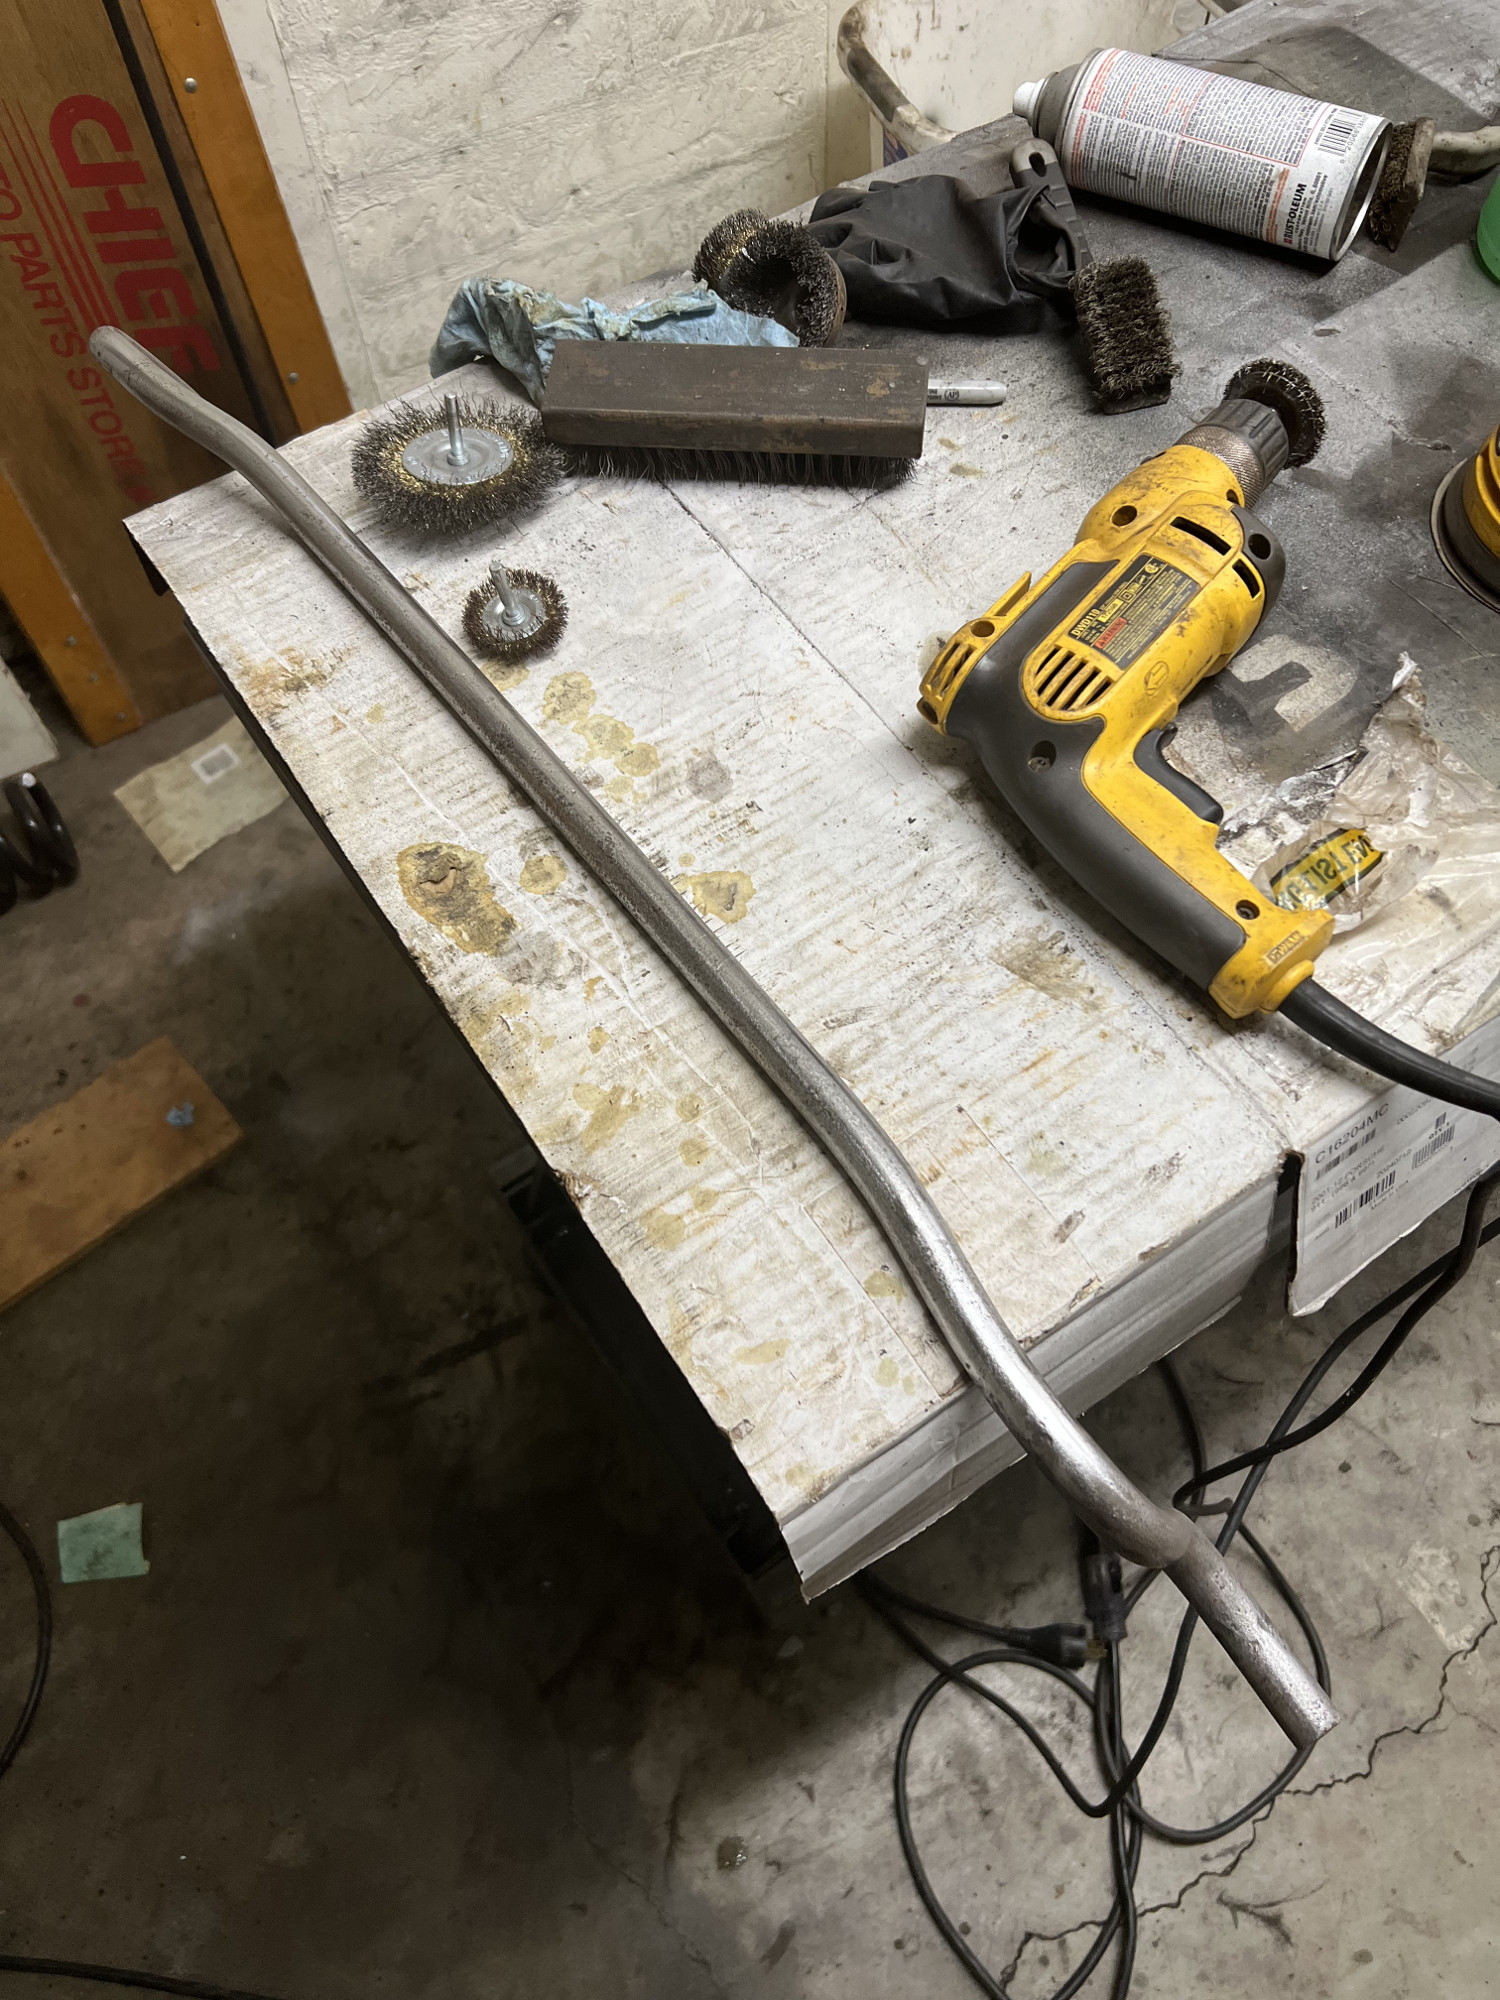
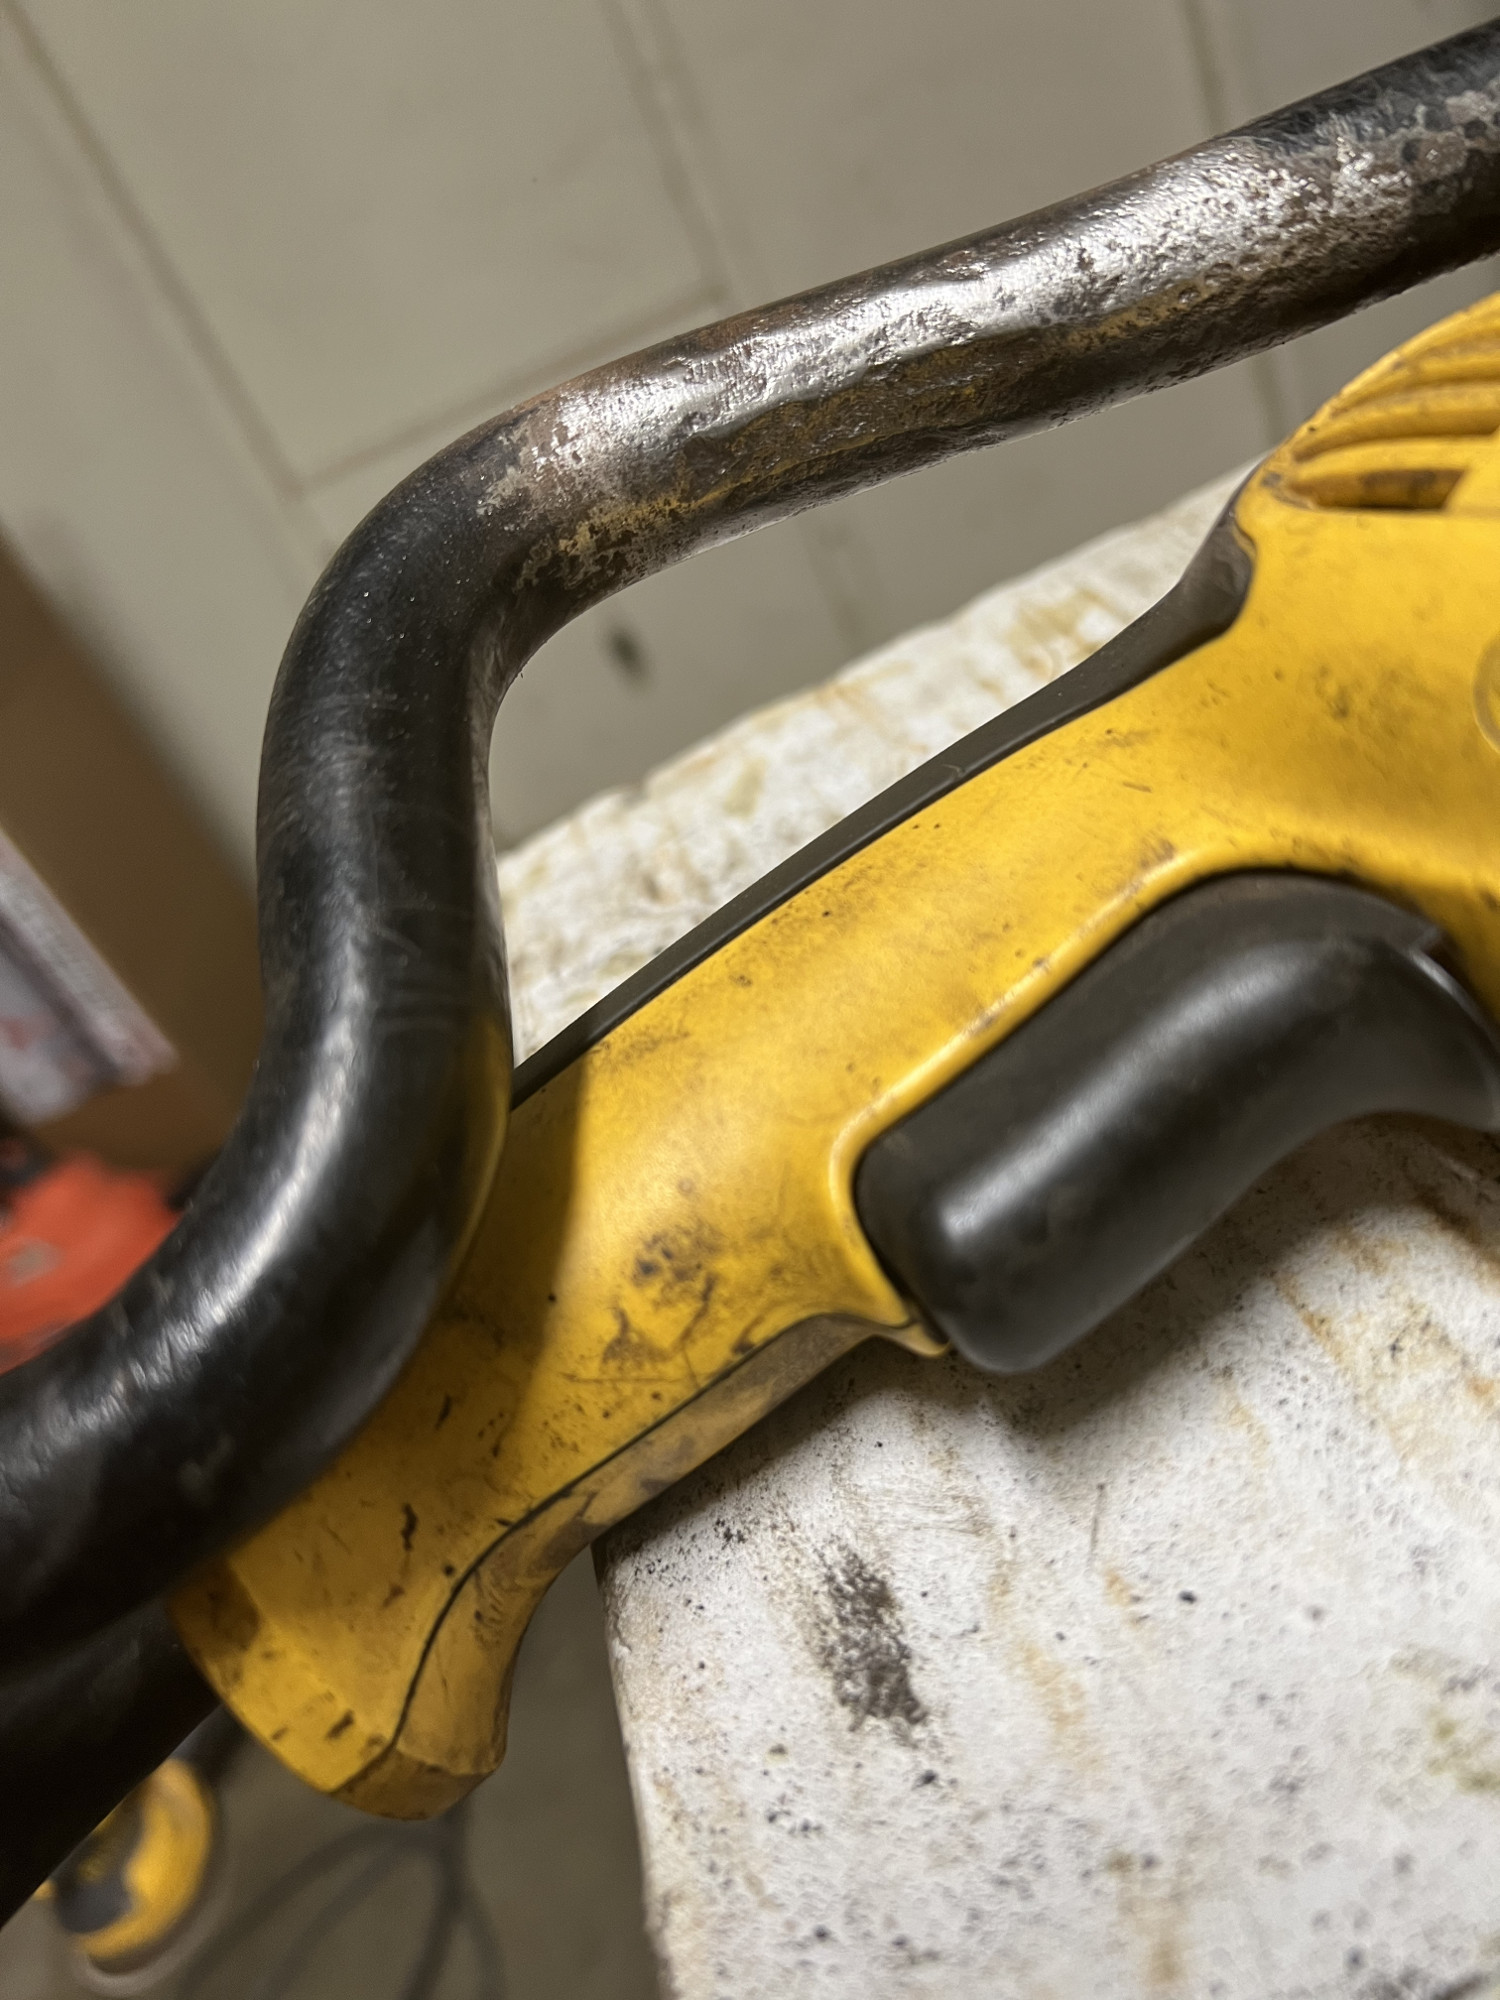
@david #Corvair #AutoRestoration progress.
I tackled cleaning up the front sway bar on the 1964 Corvair.
The bar was pitted slightly under the old bushings, so extensive wire wheel effort was required.
In the end it cleaned up nice and just needs fresh bolts to be install-ready when the carcass comes back from the shop.
I tackled cleaning up the front sway bar on the 1964 Corvair.
The bar was pitted slightly under the old bushings, so extensive wire wheel effort was required.
In the end it cleaned up nice and just needs fresh bolts to be install-ready when the carcass comes back from the shop.

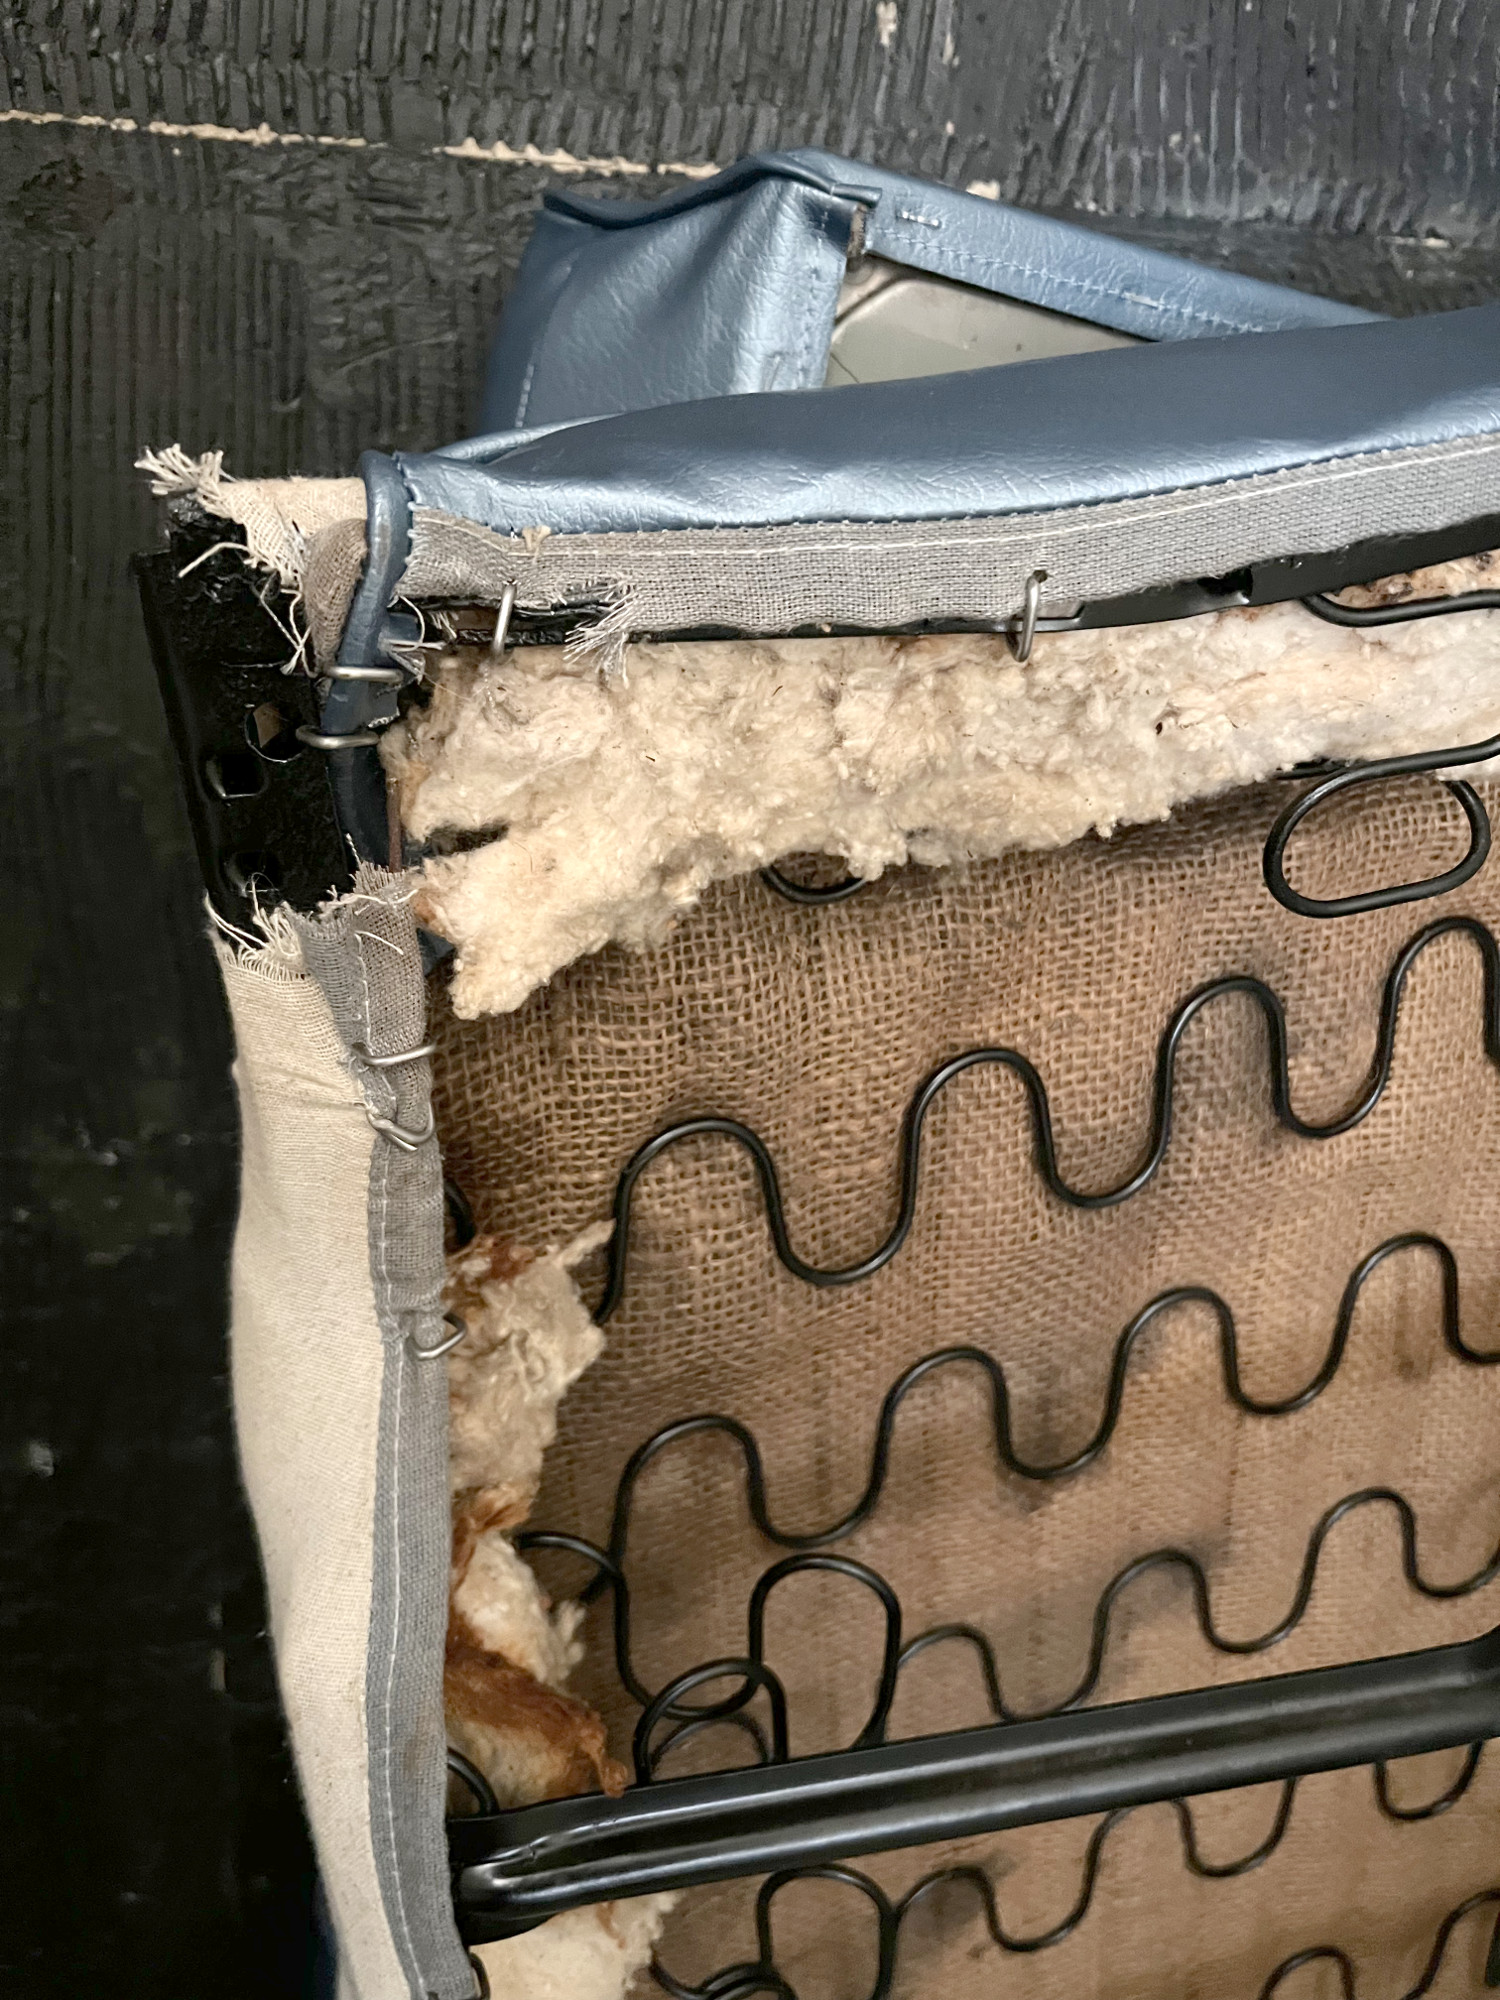
#Corvair #AutoRestoration progress.
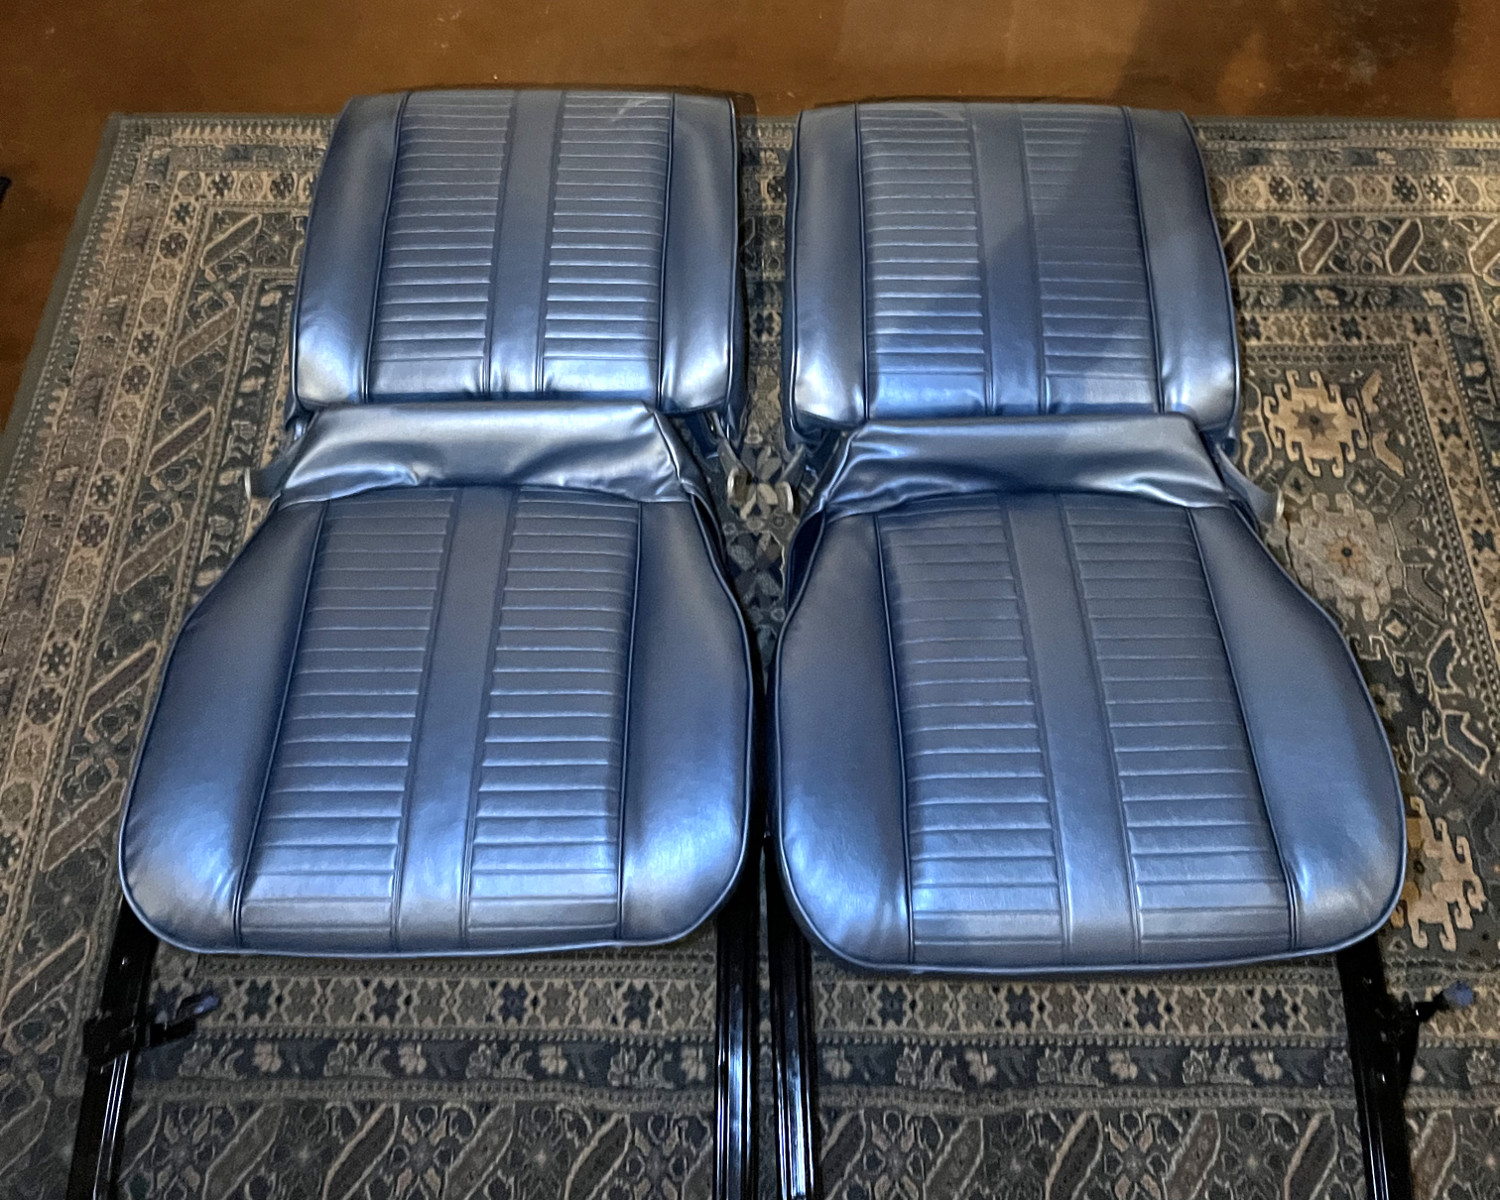
The re-covering of the 1964 Corvair seats using the allegedly superior custom set by Clark's Corvairs, which now in its 50th year, and is the defacto provider of all things Corvair....
Has not filled me with joy.
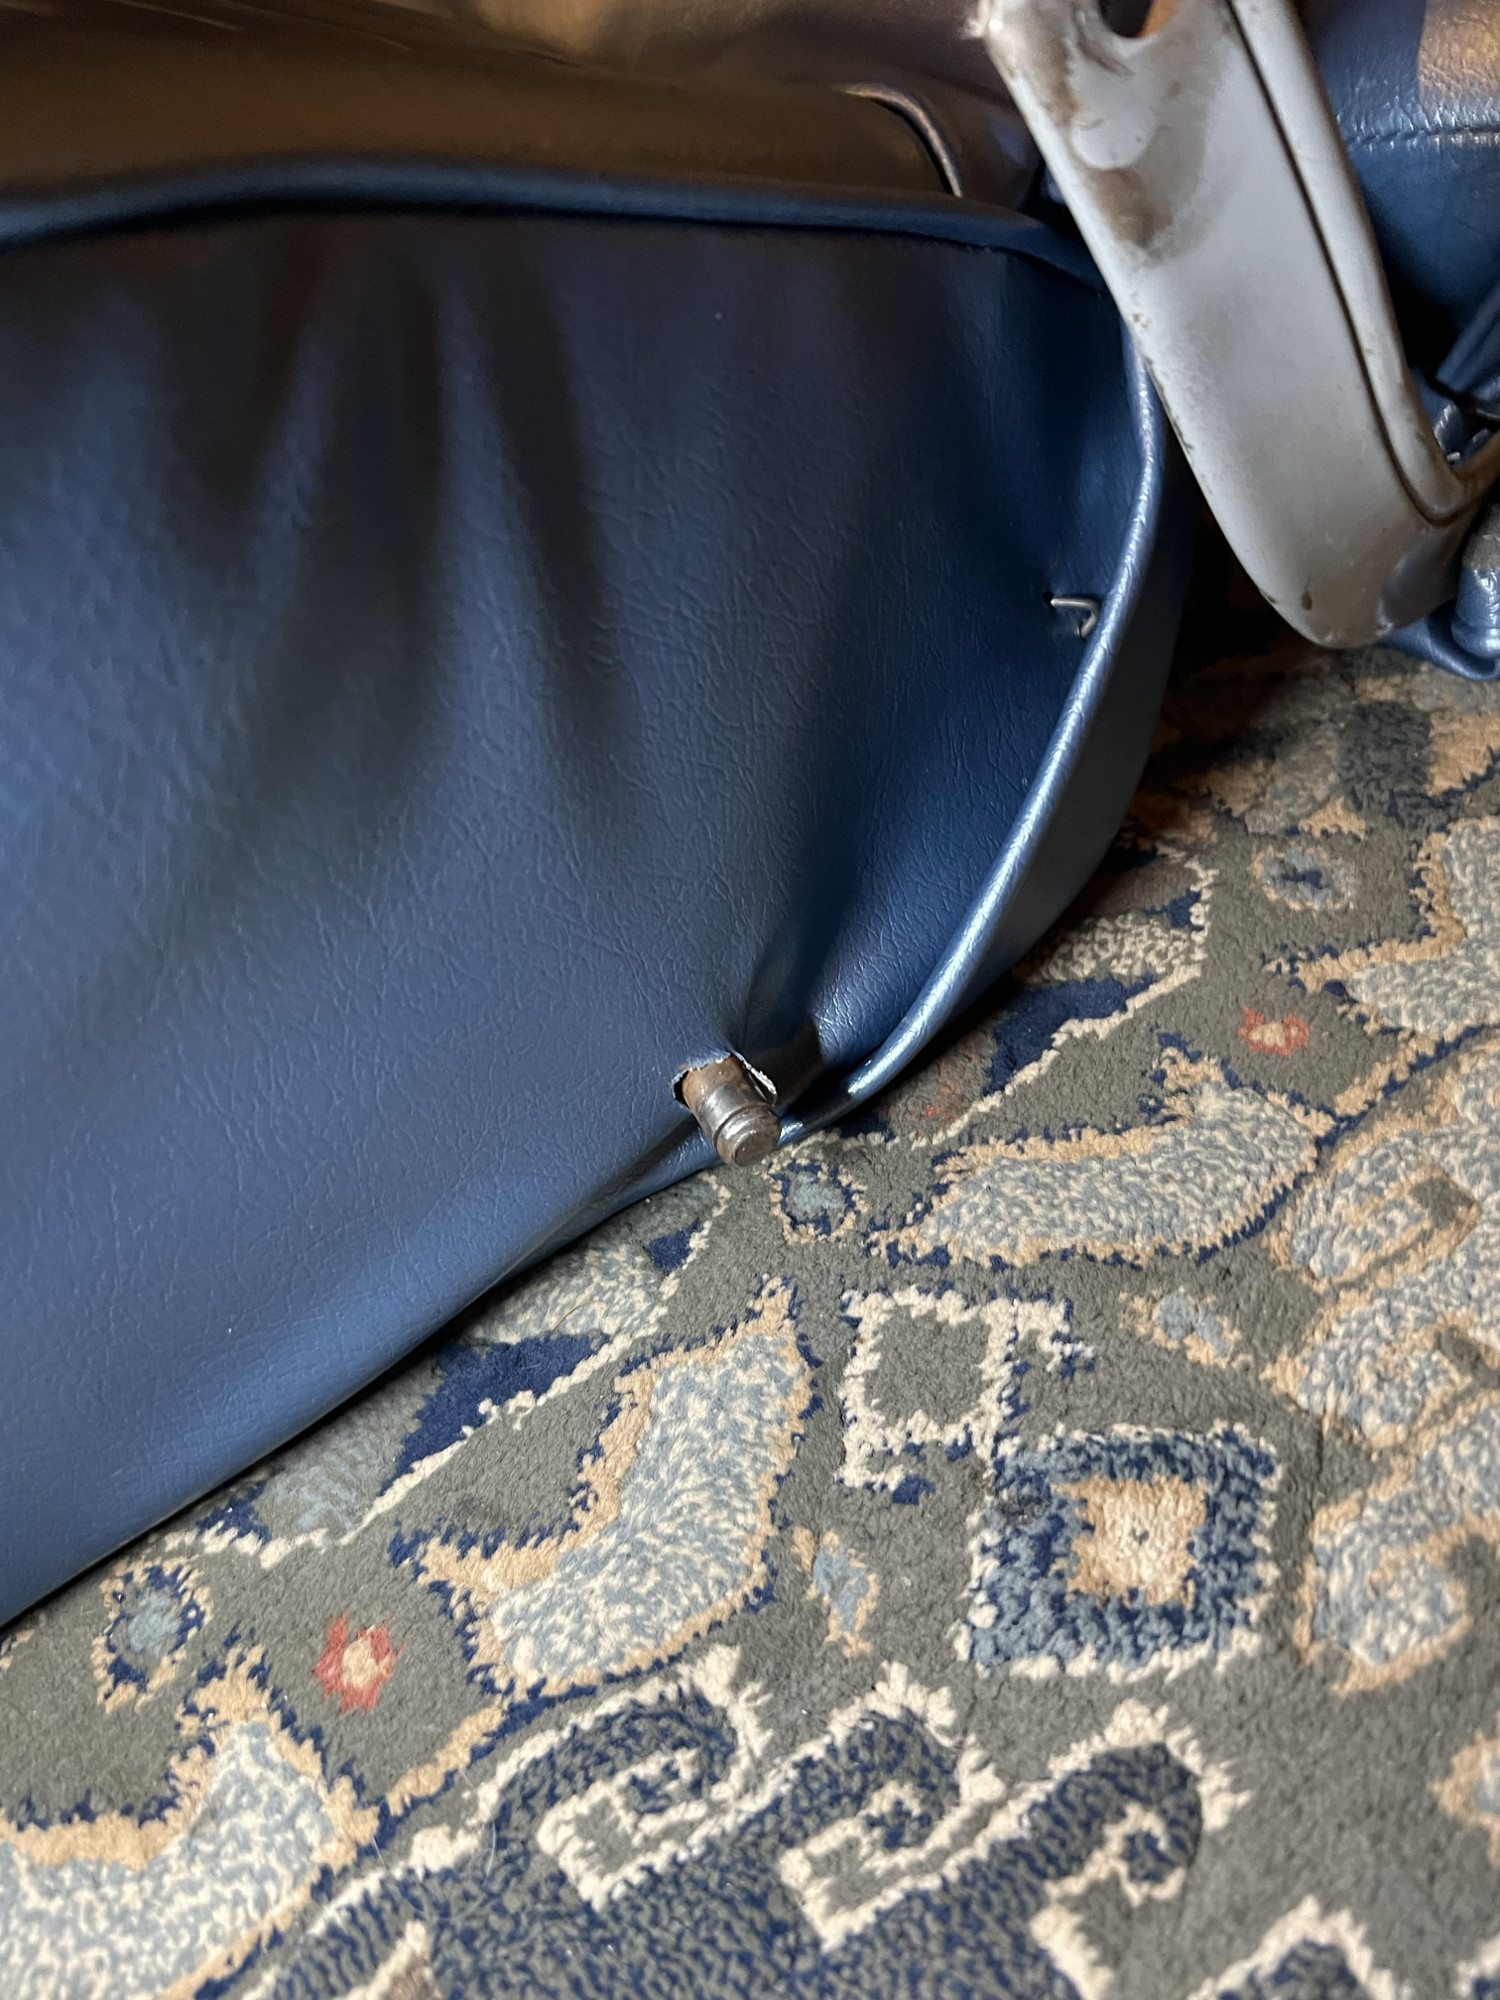
The covering on the back seat was 3" too short - meaning it could not be stretched to fit over the seat frame. The professional installer cut(!) the cloth to get it to fit. The cut will be hidden once installed, but...
Strike #1, Clark's
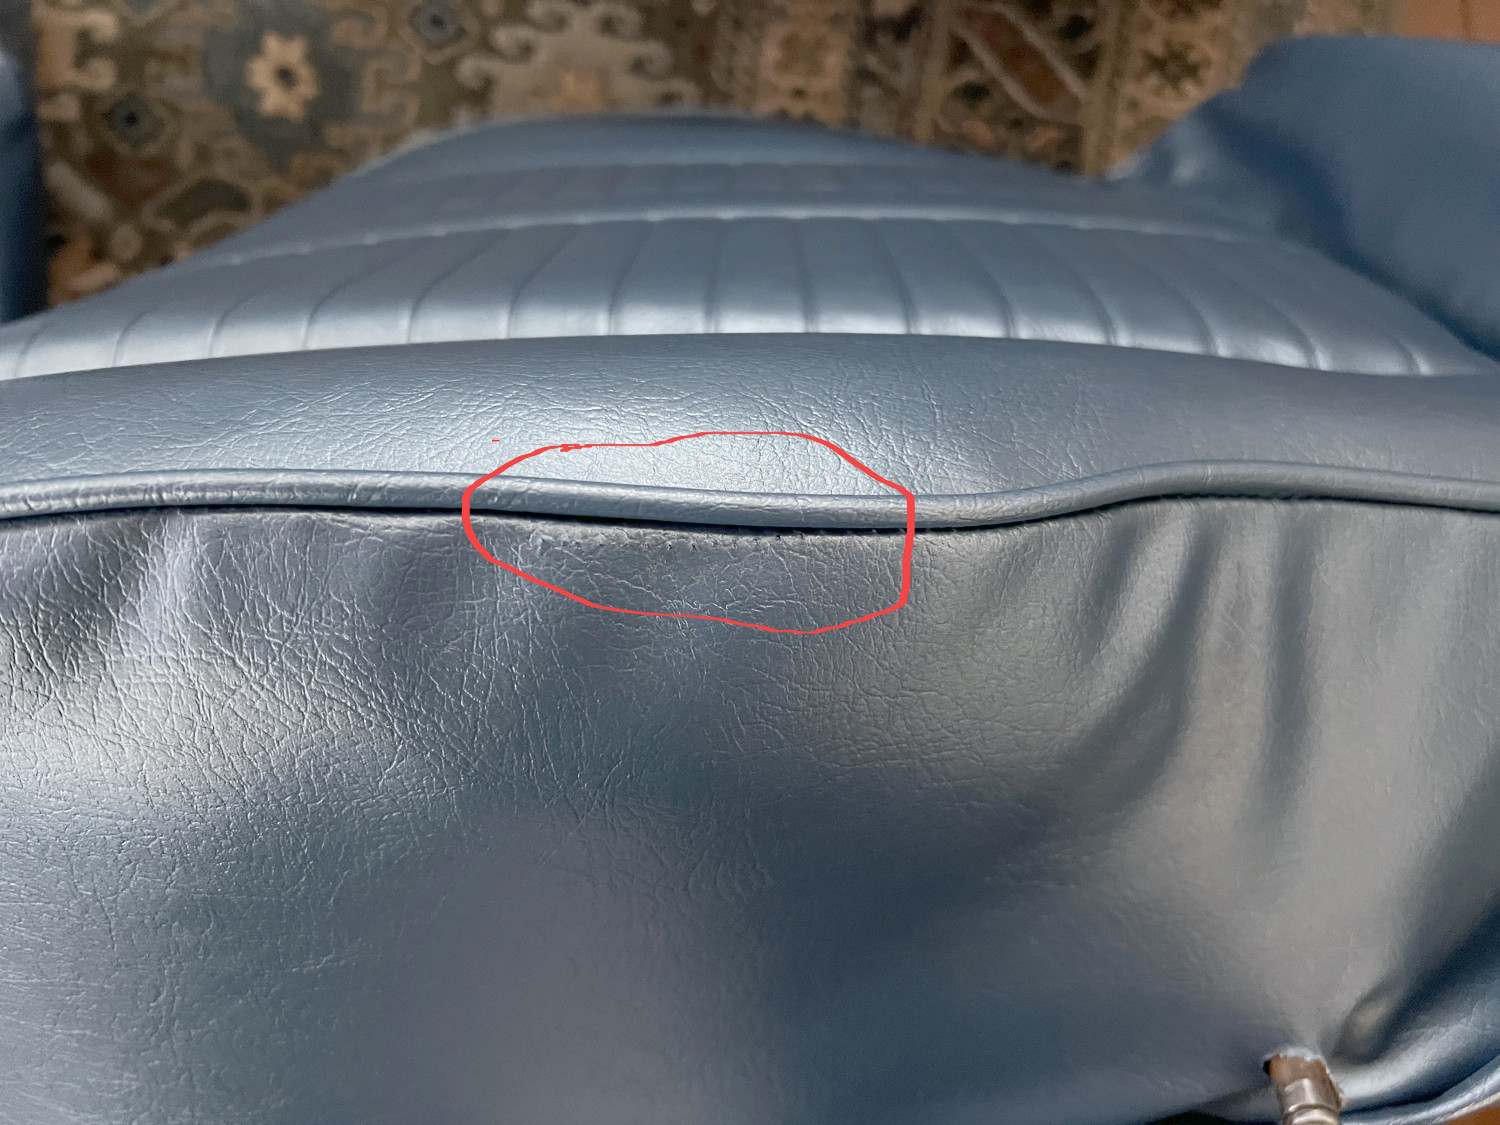
The front seats after installation were found to have a manufacturing defect.
Stike #2, Clark's
The same installer, to my mind, installed the covering too "baggy", so I will have to go in and re-do some of his hogring tie-downs.
Thought I'd splurge and have the "pros" do some work for me... And that work is a let-down. Damnit.
The re-covering of the 1964 Corvair seats using the allegedly superior custom set by Clark's Corvairs, which now in its 50th year, and is the defacto provider of all things Corvair....
Has not filled me with joy.
The covering on the back seat was 3" too short - meaning it could not be stretched to fit over the seat frame. The professional installer cut(!) the cloth to get it to fit. The cut will be hidden once installed, but...
Strike #1, Clark's
The front seats after installation were found to have a manufacturing defect.
Stike #2, Clark's
The same installer, to my mind, installed the covering too "baggy", so I will have to go in and re-do some of his hogring tie-downs.
Thought I'd splurge and have the "pros" do some work for me... And that work is a let-down. Damnit.
#Corvair #AutoRestoration progress.
I've moved onto the rear seat back, which was mounted using staples.
I needed to pry the old/re-usable cardboard off, wire wheel the back support shiny, and then primed.
Not having proper wire/upholstery staples, I made do with regular 3/8" staples. Hopefully they'll hold.
So, seat back mostly done. Just need to re-attach the cardboard and mount the trim once it gets painted the interior color
Client Info
Server: https://mastodon.social
Version: 2025.04
Repository: https://github.com/cyevgeniy/lmst