Understand Light: How to Photograph White on White and Black on Black
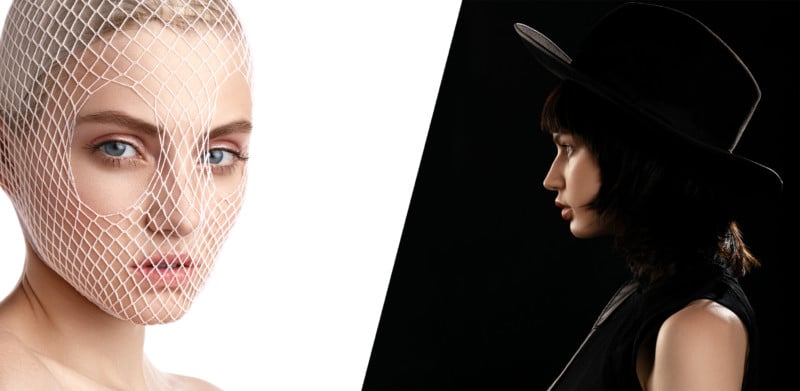
Taking photos of white subjects on white backgrounds or black subjects on black backgrounds is a skill that requires photographers to skillfully bend light in various ways. Photographer Zach Sutton has shared tips on what works best in each scenario.
Also the editor for Lensrentals, Sutton specializes in commercial beauty photography and has extensive experience in studio work. In a recent article, Sutton explains how to approach these tricky lighting situations that can appear daunting for, in particular, beginners.
First of all, even for photographers who primarily use natural light, it is important to understand how that light bounces or is absorbed and thus affects the subject. A simple demonstration of both a white and a black V-flat -- which consists of two large foam boards -- shows the effect the positioning of each of the boards has on the subject's face.
The ability to drastically modify the light with the use of foamboards helps photographers control unwanted light spillage, Sutton explains. For example, if shot with a white background and with two black V-flats positioned on either side of the subject, they will ensure that the backdrop light doesn't spill onto the subject. Similarly, with a black backdrop, V-flats help control the light spill so it doesn't light the backdrop.
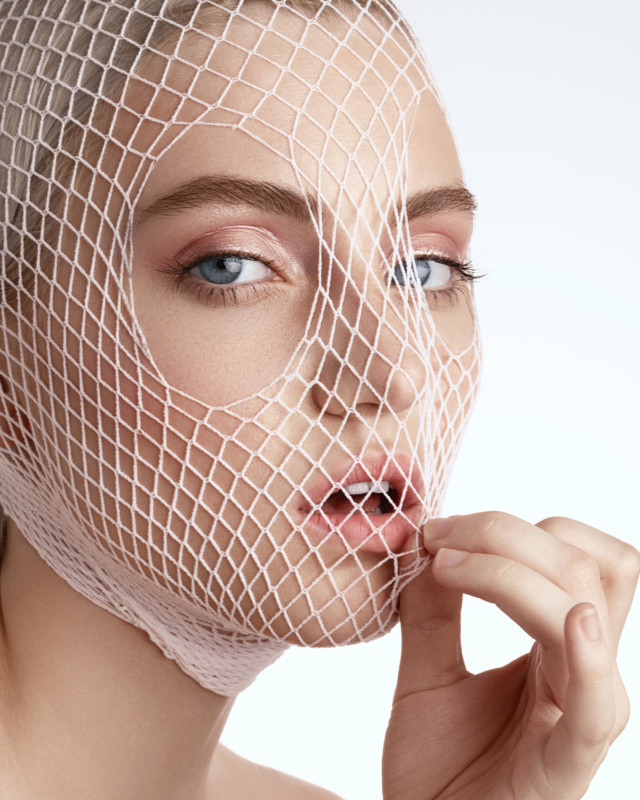
When it comes to shooting white on white, the distance between the subject and the backdrop plays an important role. The farther away the subject is placed from the background, the easier it is to prevent light spill onto either of them. This also means that photographers can better control how each element is lit and avoid blown-out highlights. This is also where a histogram comes in handy as it helps monitor that outcome.
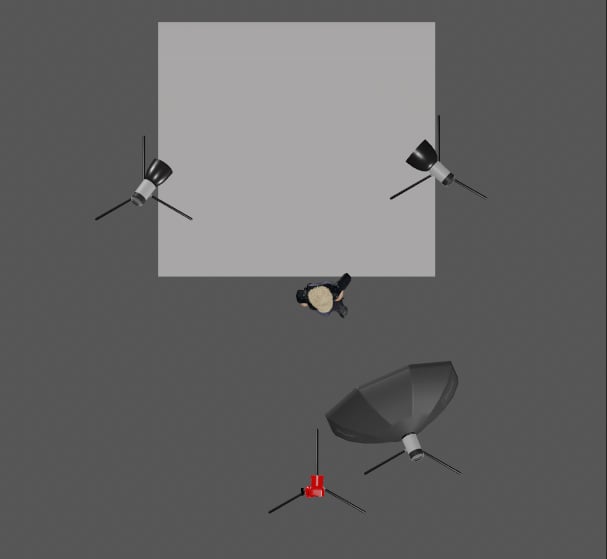
Five-foot octobox camera right. Canon 5D Mark IV and Canon 100mm Macro f/2.8L IS Lighting diagram for the photo above
In a similar manner to how highlights are controlled in a white-on-white scenario, for black-on-black shots, photographers have to pay attention to the shadows. Sutton advises using tools that help control light spills -- such as Snoots, Barndoors, and flags -- as each one of them will assist in different lighting scenarios.
Example of how to properly shoot black on black. Large Octobox camera right. Canon 5d Mark IV & Canon 100mm Macro f/2.8L IS Lighting diagram for the photo above
Sutton also recommends photographers turn on and use their modeling lights to get a visual representation of where the light goes, which can help to fine-tune the rim lights. Another technique that helps avoid light spills is to feather the light, which means that the edge of the lights is used to create a better light fall-off.
As with most techniques, the more photographers learn and experiment with complex scenarios such as white on white and black on black, the more knowledge and tools they will be able to add to their expertise in the future. To cover different variables that affect the photographic outcome, Sutton has also shared advice on how the light placement alters the subject and even how individual flash tube shape and position changes the light quality.
More of Sutton's photography can be found on his website and Instagram and additional photography tips can be found on the LensRentals Blog.
Image credits: All images by Zach Sutton and used with permission.
#educational #equipment #tips #artificiallighting #beauty #light #lighting #lightingmodifier #portrait #studio #studiolighting #studiolights