И снова я сломал атмегу через все ту же #progisp + #usbisp :blobcatjoy: играя настройками фьюзов - Ext.CrystalOsc, но эта "игра" неспроста, после того как я заново оживил контроллер, решил прошить нормально через #usbasp и #avrdudeprog но тут же получил ошибку, даже калибровочные ячейки генератора считать не удалось. Пришлось искать методом тыка ту самую настройку внешнего кристалла в PROGISP :blobcatgrimacing: кажется теперь все серьезно, контроллер не откликается, хотя на выводах #rx_tx есть потенциал... Придется опять отложить контроллер в сторону или уже не суетиться и заказать новую #arduinonano или #arduinoUno или просто закупить #atmega328p и перепаять
#embedded
#troubleshootingfail
#electronics
#USBASP
#troubleshooting и мое открытие для себя.
Дело было вечером, делать было нечего и мне взбрело в голову попробовать прошить контроллер программатором #usbisp ведь с #usbasp я освоился. В общем я использовал #progisp для прошивки #atmega328p у меня получилось, далее я начал исследовать возможности программа ведь при заведении на кнопки не выходило никакой подсказки, в итоге я дошел до загадочной кнопки с подписью "..." как оказалось это для настройки #fuseandlock или просто фьюз битов. Вошел на вкладку #navigation и увлекся тестированием режимов Int.RC.Osc частотой 8 МГц и 128 кГц и доигрался, контроллер перестал прошиваться, даже #usbasp #avrdudeprog не помогли. И сегодня интуитивно меня потянуло заново открыть #progisp и убрать галочки с program и verify flash, установить program и verify eeprom, установить режим '...8МГц 6CK+14CK + 65ms' и прошить файлом пустышкой - avr.eep и оно прошилось, далее я вернул программирование flash, убрал eeprom и залил #hex и все заработало! :frogdance:

Now that I have updated the firmware all the flashlights I could, I also updated my docs site covering the process since parts of it were a bit out of date:
I try to follow the docs on my own site so (a) I don't need to remember every detail and (b) so I can make sure my public docs are still accurate.
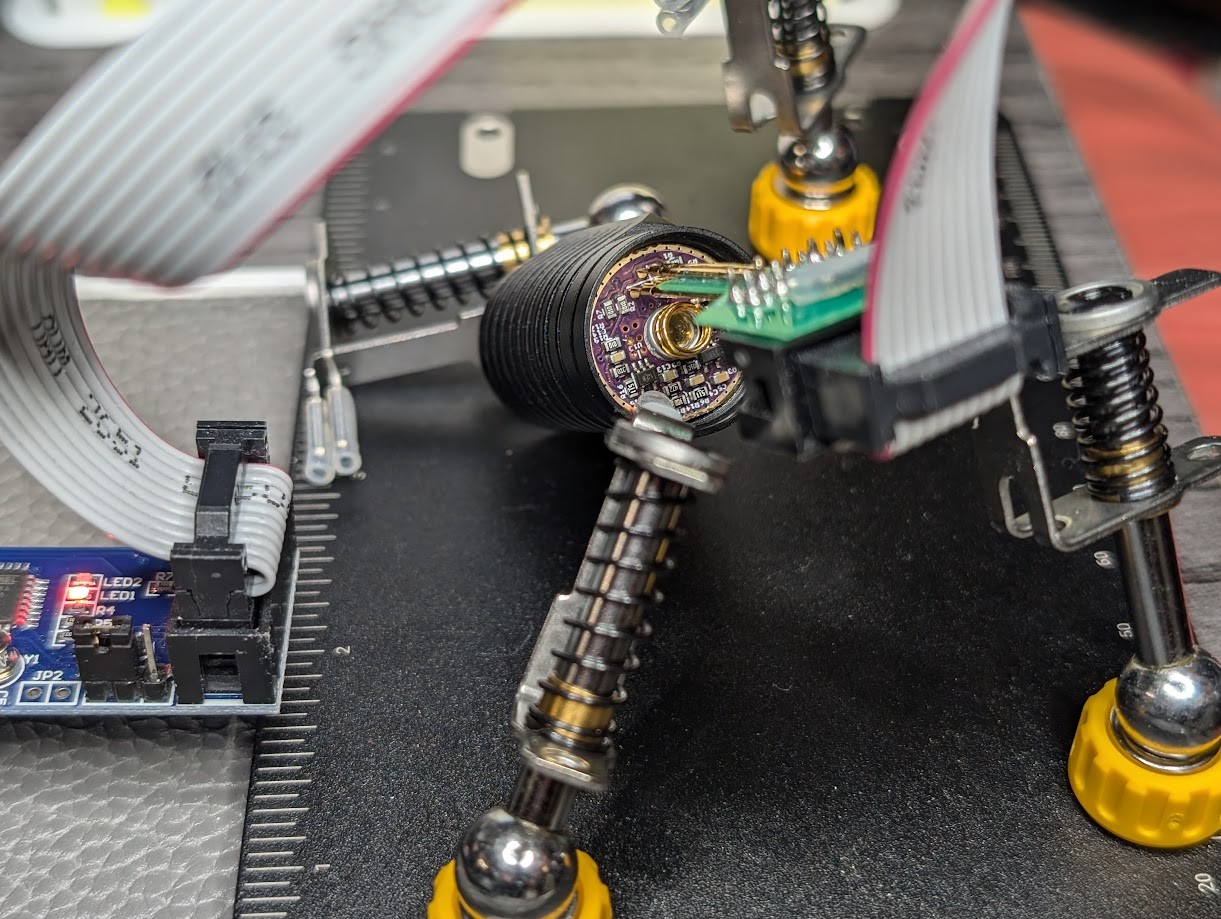
Updating flashlight firmware, which is something normal and sane people do on a Saturday night, right?
This omnifixo is the best I've found at holding things in place but even it can't apply enough pressure on the pogo pins to properly engage them and make a solid connection. However, with it doing most of the alignment I can hold it in place with one hand easily while running avrdude to backup and write the new firmware with the other.
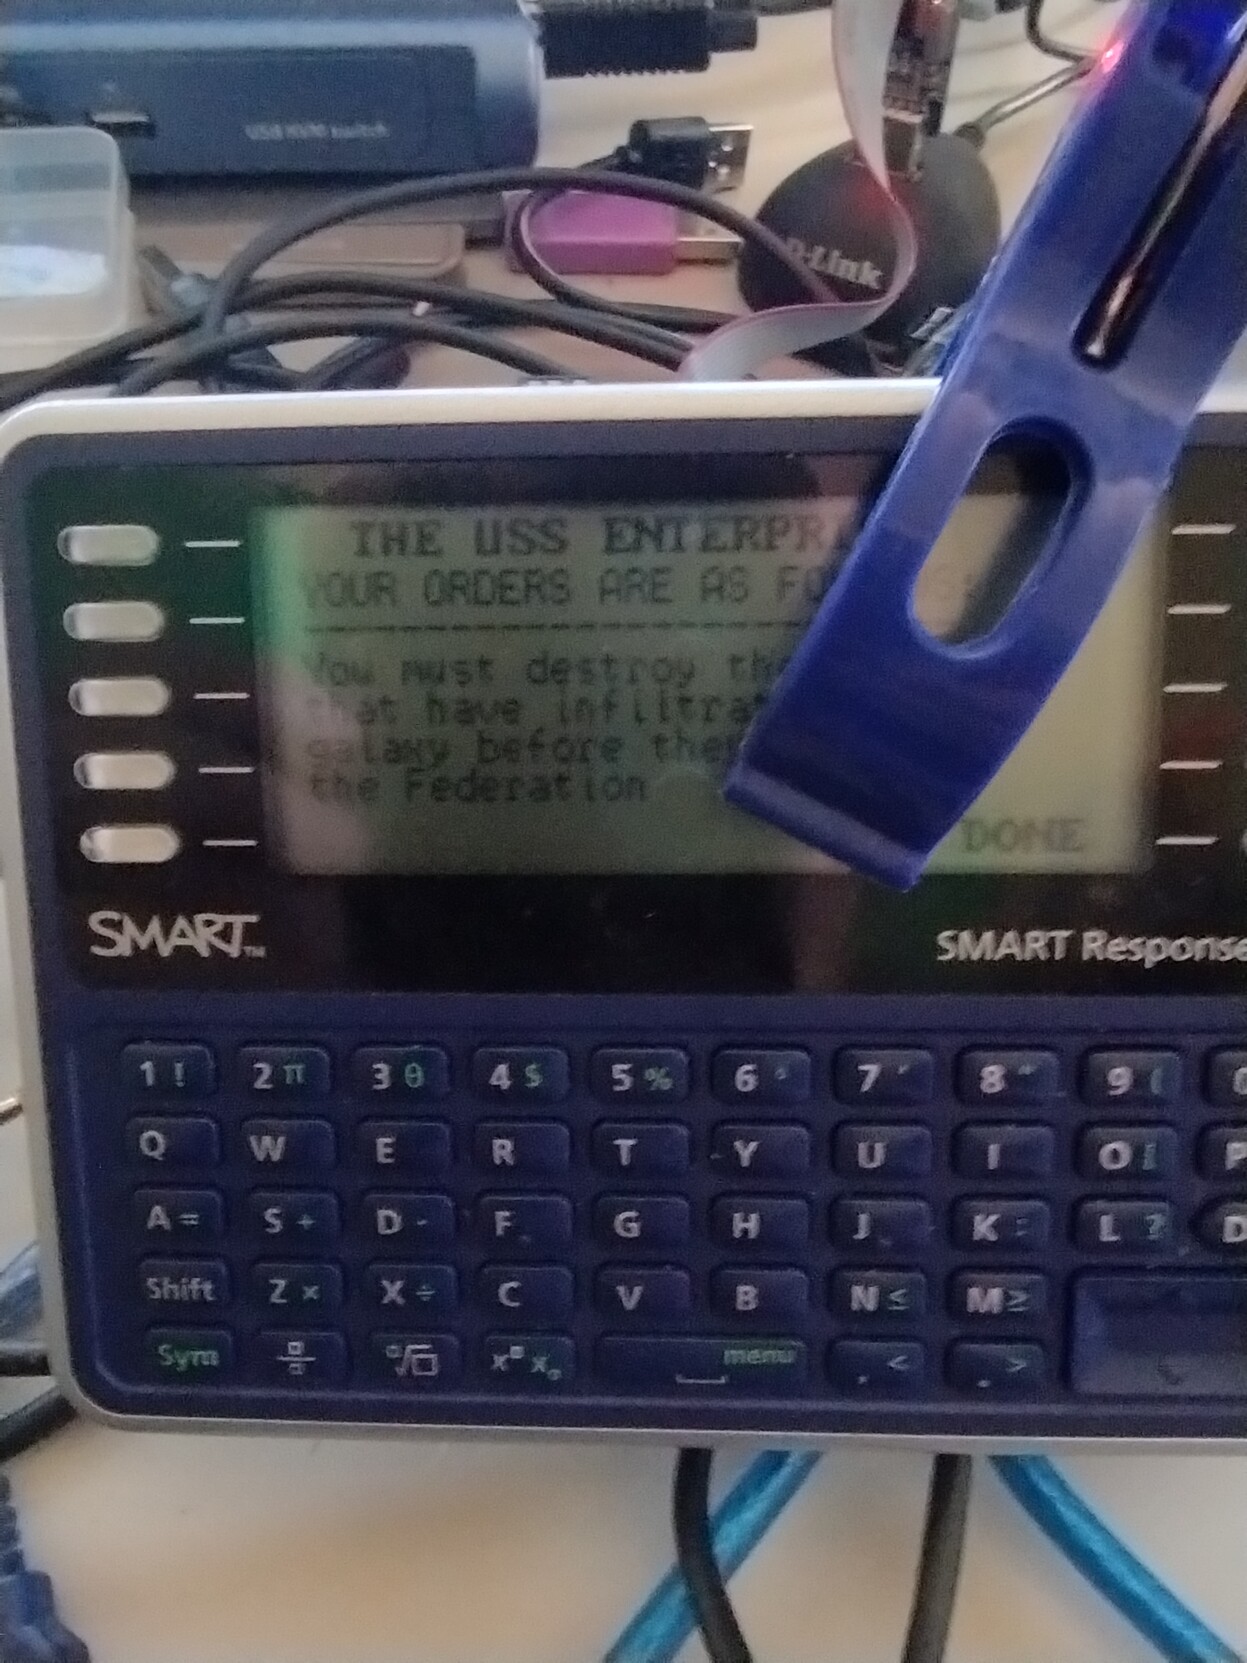
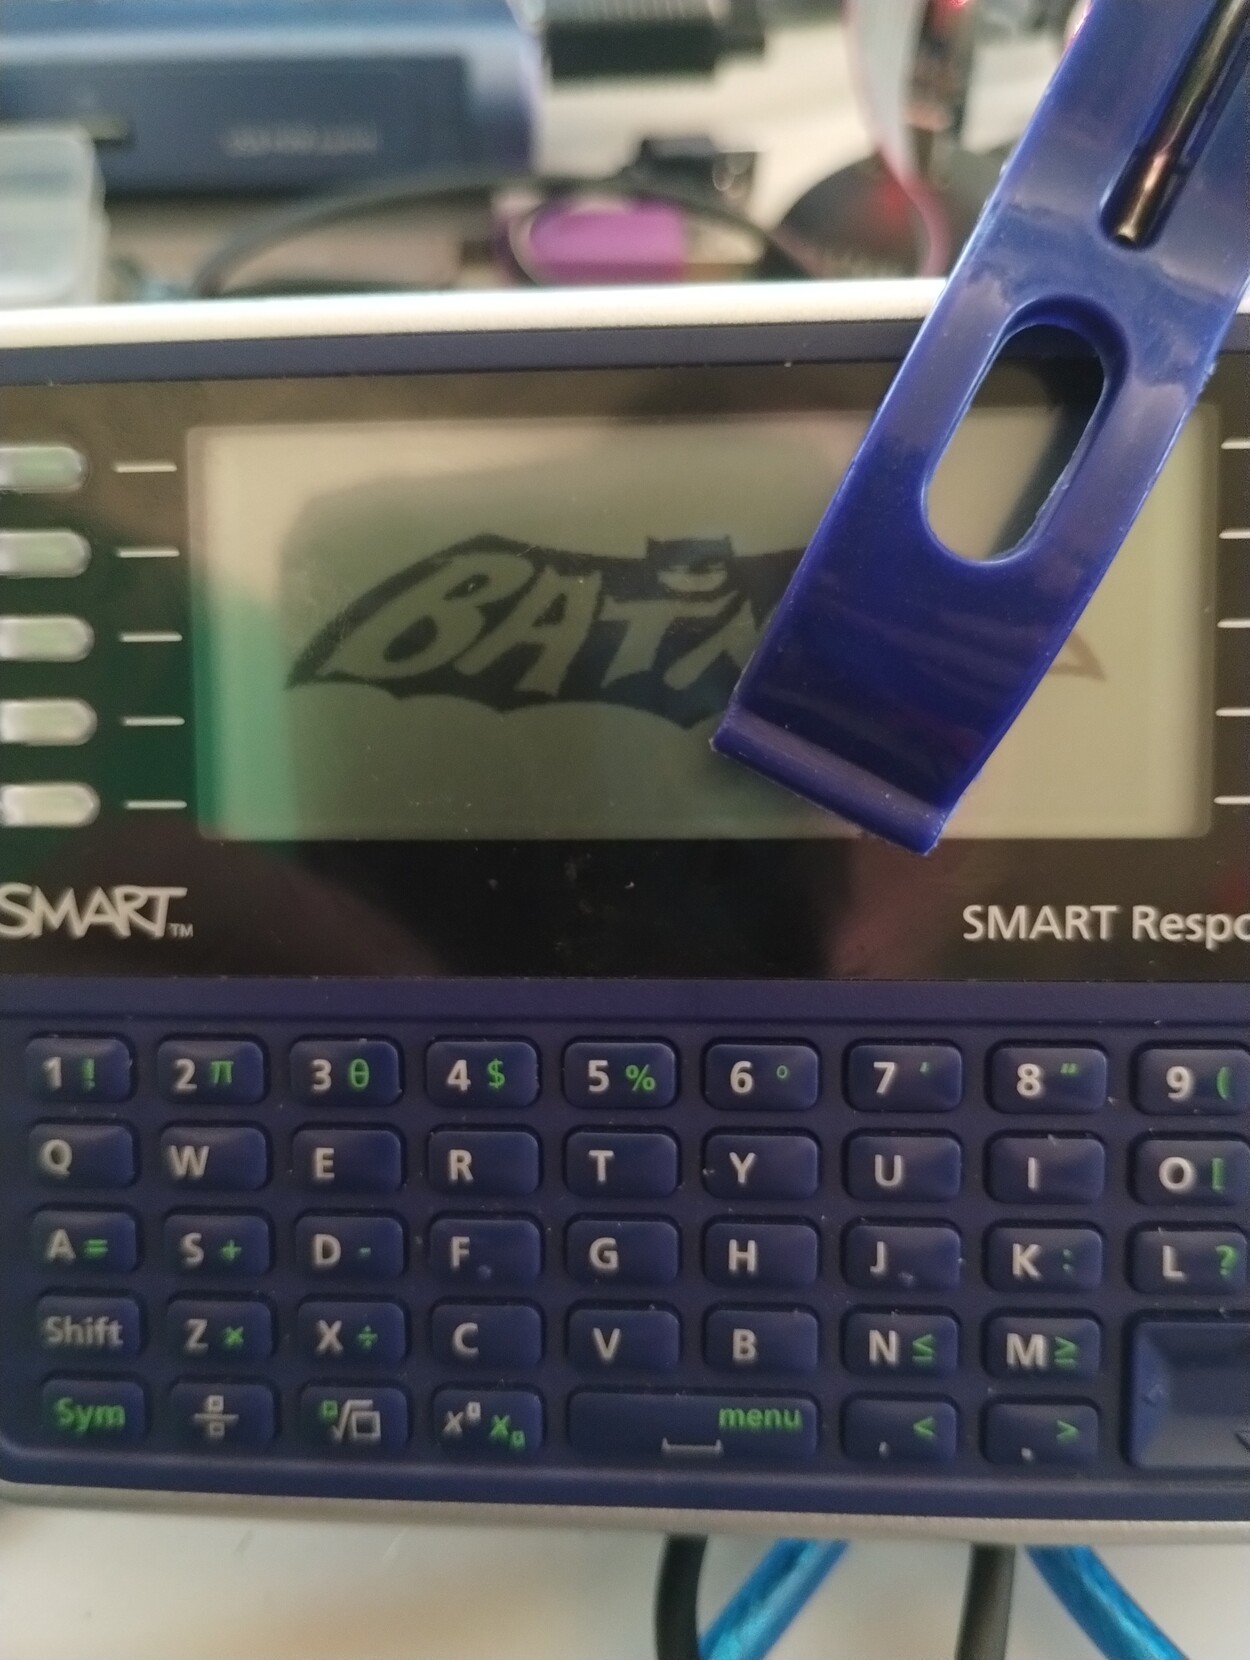
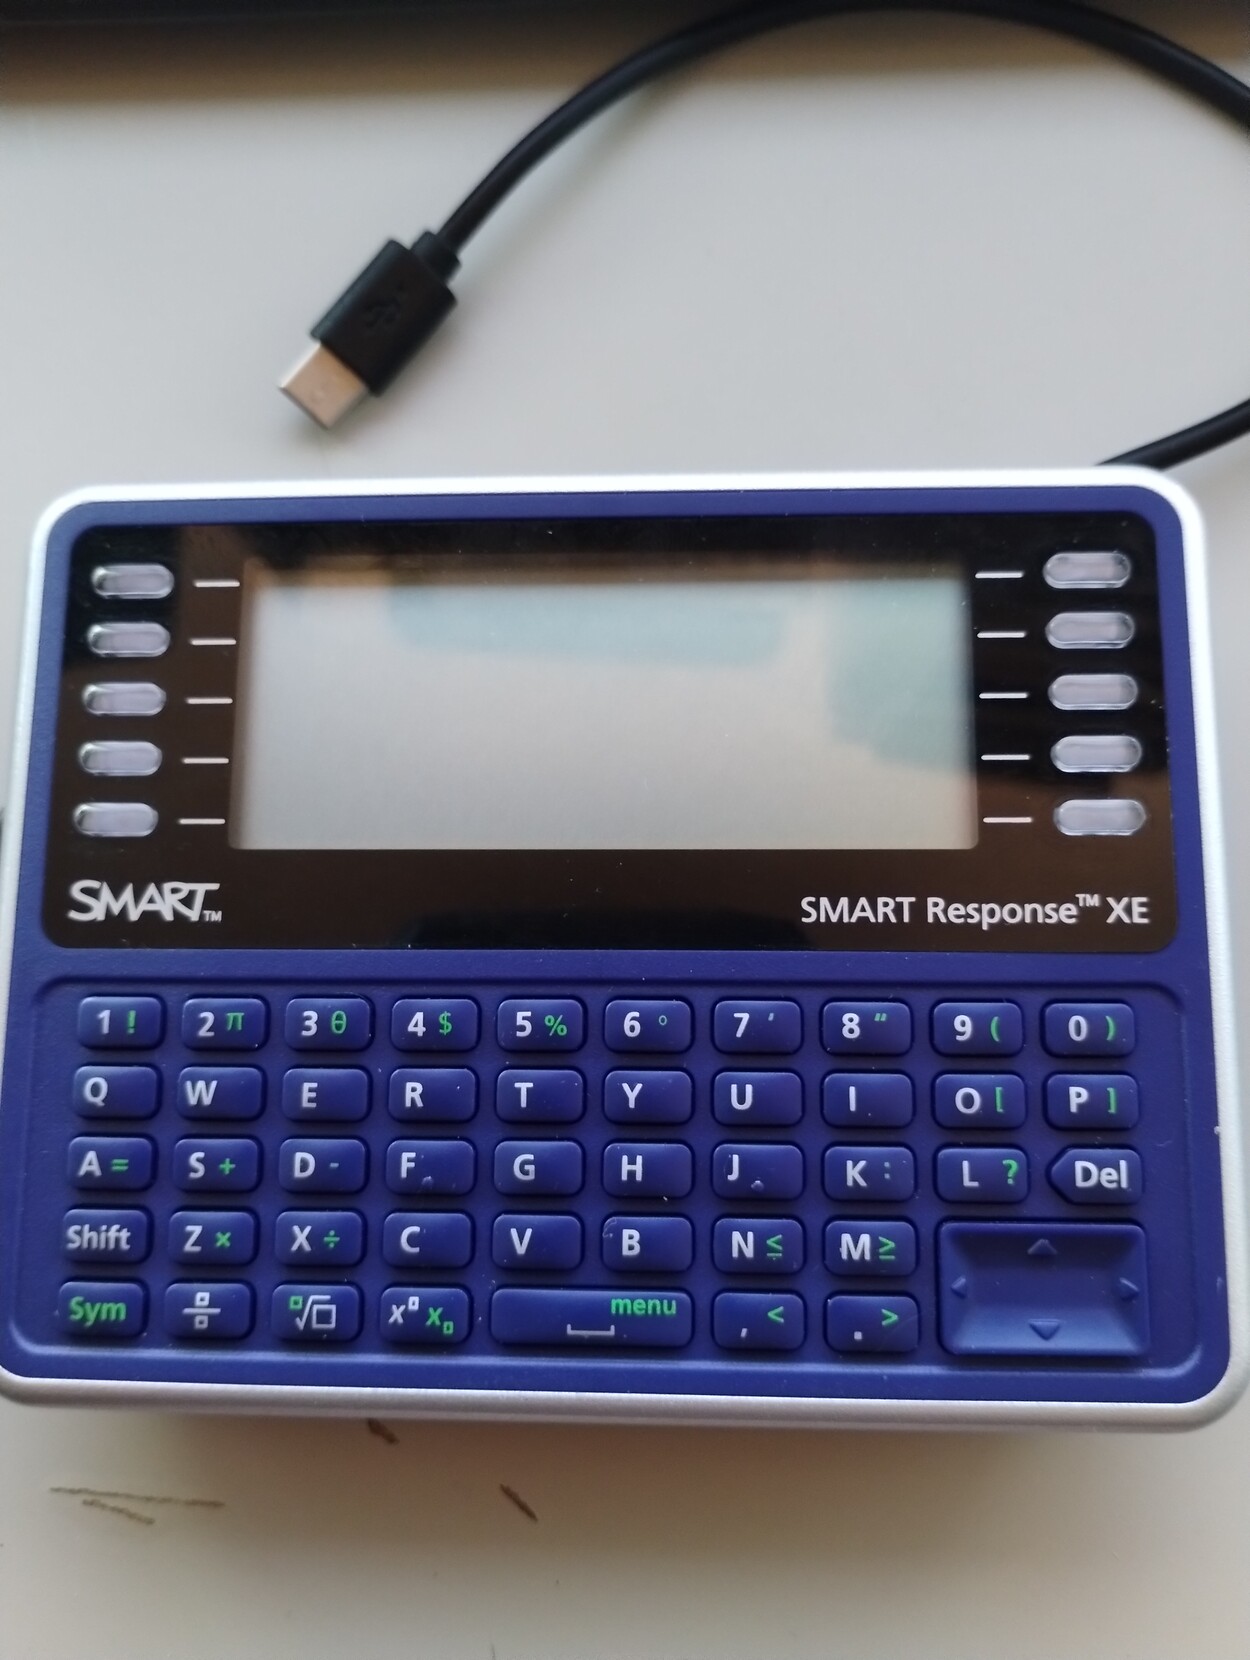
Super Star Trek on a Smart Response XE.
Made by Subsystems
https://github.com/Subsystems-us/Smart-Response-Super-Star-Trek
What is a Smart Response XE? https://hackaday.com/tag/smart-response-xe/
It's an ATmega128RFA1 with graphic display, and keyboard...It has ICSP pins which is how you can program it.
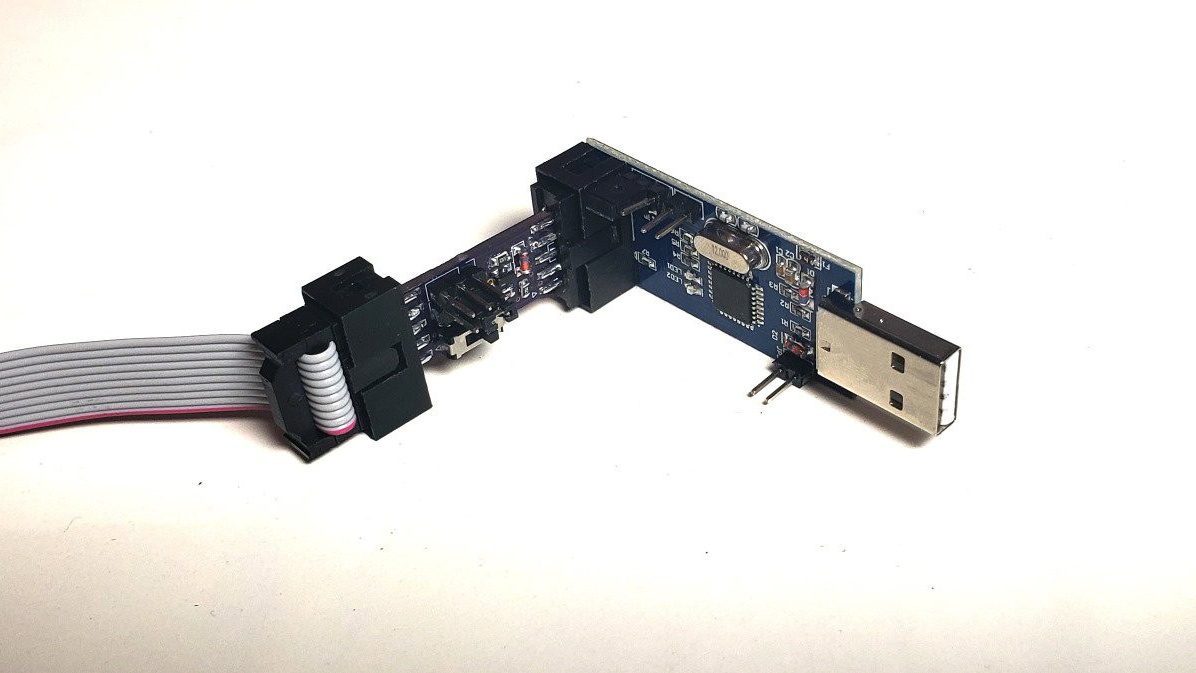
In the pictures you can see the clip I use to hold my #USBasp in place while programming
#retro #text #StarTrek #SuperStarTrek #retroComputing #RetroGame #Arduino
#SmartResponseXE #ATMega128RFA1 #ICSP
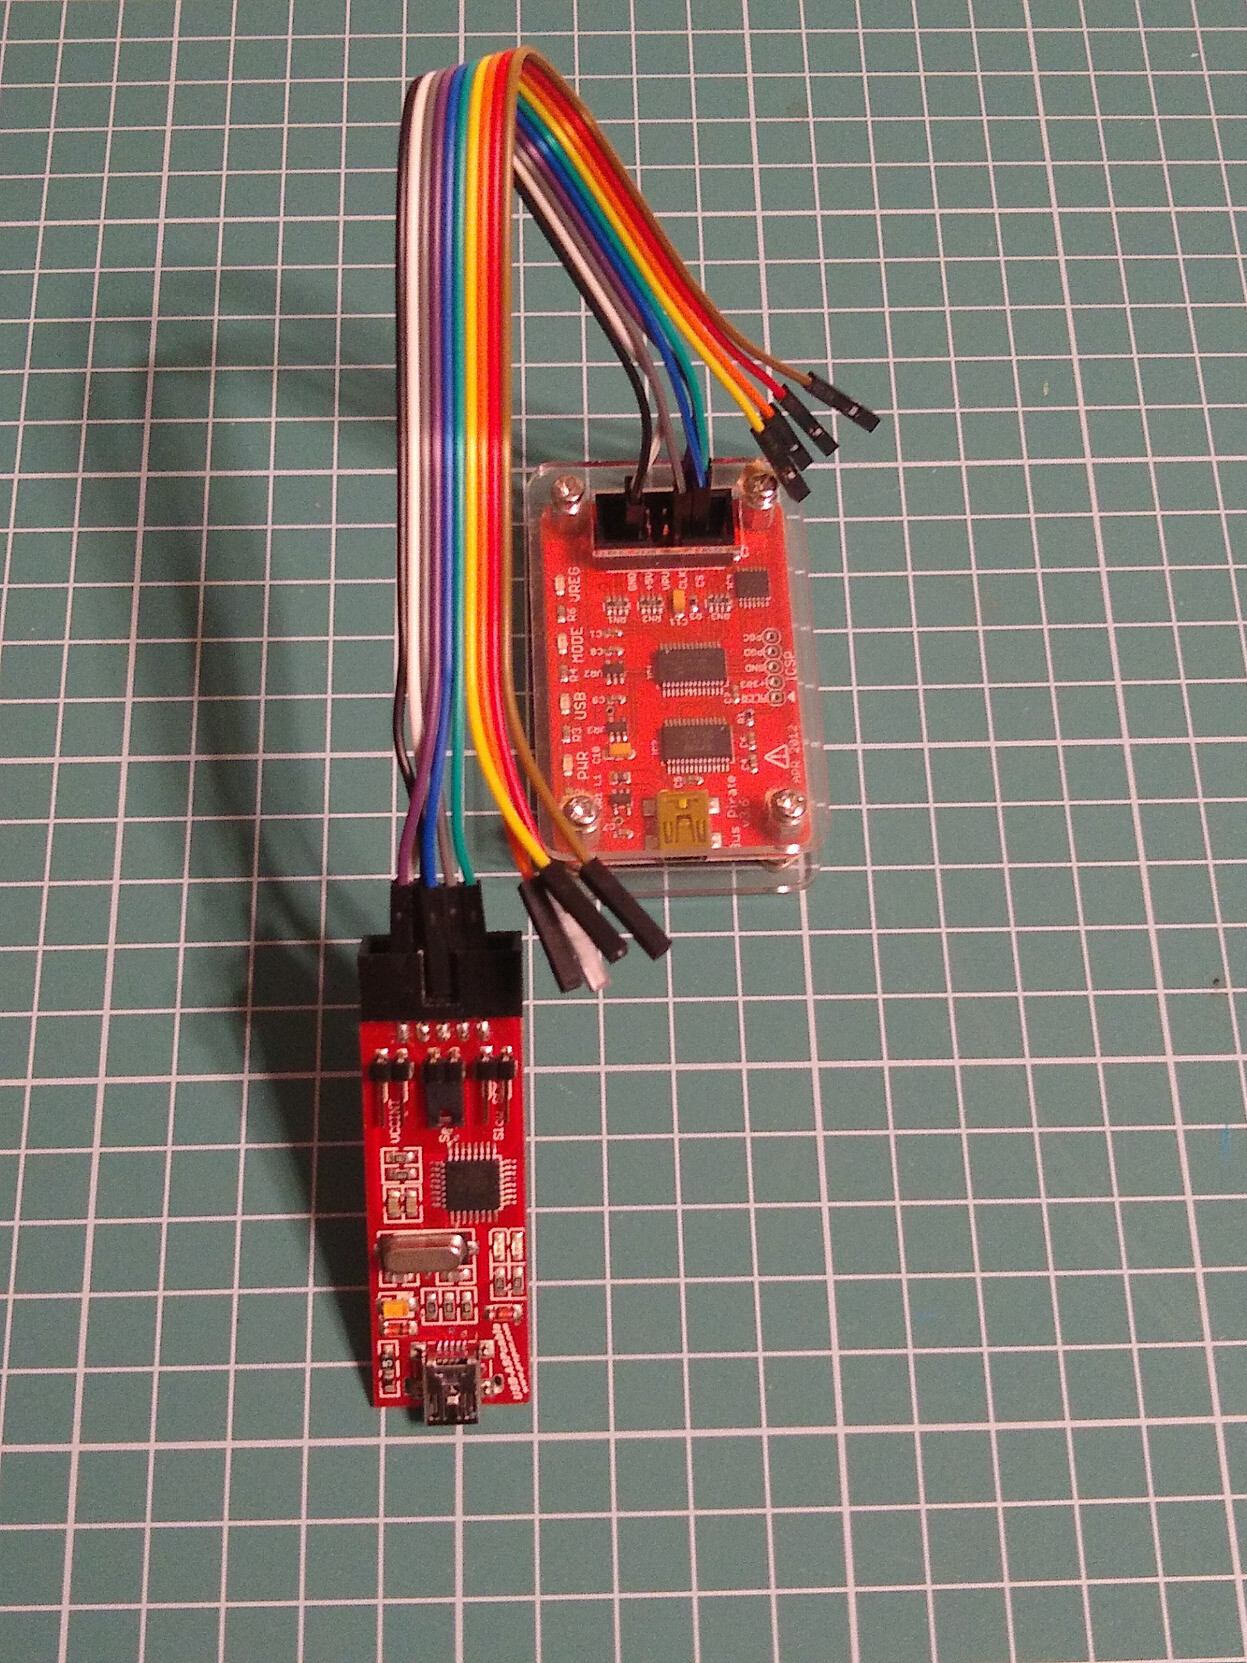
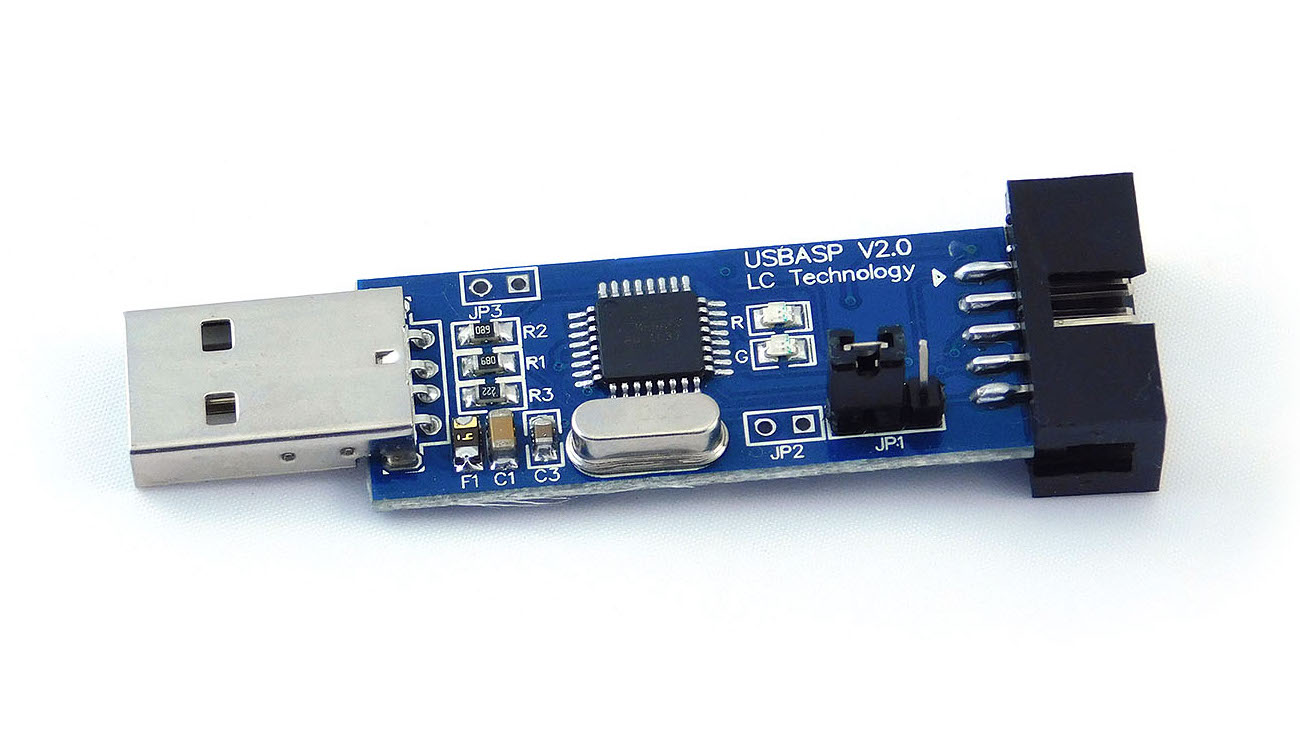
If you wish to flash your #USBasp programmer with a new firmware using #buspirate, you need to short both VCCINT AND Self prog.
HVTPI Primer And Toolkit Equips You For BOM Substitutions
Novel programming interfaces for MCUs might catch us by surprise, but then we inevitably get up to speed with the changes required. Today's bastion is HVTPI - a "12V reset" addition to the TPI we've just started getting used to, and [Sam Ettinger] has shared a simple circuit to teach us all about it, along with PCB files and detailed explanations of how it all works.
HVTPI is an add-on on top of TPI, for which, as Sam explains, you need to hold RST at 12V when TPI would have it be low logic level, and leave it at Vtarget otherwise. For that, he has designed a variety of interposer boards of various complexity and requirements; explaining the choices behind each one and clearing up any misunderstandings that might occur on your way. All of the board files (and the TPI write-up copy) are caringly shared with us in a git repository, too! As a result, if you have an USB-ASP or an Arduino available, now you also have everything to do HVTPI, thanks to Sam's work and explanations.
We've been covering Sam's exploits before, and can't help but be grateful for the stop-and-explain detour along the way. HVTPI being used on very small ATTiny parts, we wonder if something new in the vein of his recent FPC board able to fit and function entirely within a Type-C cable end!
With chip shortages, investigating programming interfaces for small and obscure yet in-stock microcontrollers has been, quite literally, paying off, and if you got some projects that need a MCU but won't consume a whole lot of resources, it could be time to give an ATTiny10 a go. What's the worst that can happen - you make the smallest chiptunes ever?
#attinyhacks #microcontrollers #toolhacks #atmeltpi #attiny #attiny10 #attiny4 #attiny5 #attiny9 #hvtpi #insystemprogramming #isp #tpi #usbasp
Teaching a USBasp Programmer to Speak TPI
Last Fall [Kevin] wanted to program some newer TPI-only AVRs using an old USBasp he had kicking around his lab. Finding an "odd famine of information" and "forums filled with incorrect information and schematics", he decided to set the record straight and document things correctly. He sleuthed out the details and succeeded in reprogramming the USBasp, although he did end up buying a second one in the process.
Designers who use AVR microcontrollers have no shortage of programming interfaces -- we count at least five different methods: ISP/SPI, JTAG, TPI, PDI, and UPDI. We're not sure whether this is variety is good or bad, but it is what it is. [Kevin] discovers that for the particular family of Attiny devices he is using, the ATtiny20, TPI is the only option available.
While he normally builds his designs around ARM Cortex-M chips, [Kevin] needed some glue logic and decided to go with an ATtiny20 despite its unique programming requirements. He observes that the price of the ATtiny20, $0.53 last Fall, was cheaper than the equivalent logic gates he needed. This particular chip is also quite small -- only 3 mm square (a 20-pin VQFN). We would prefer not to use different MCUs and tool chains on a single board, but sometimes the convenience and economics steer the design in that direction.
If you're not familiar with the USBasp, our own [Mike Szczys] covered the breaking story over ten years ago. And if you have a lot of free time on your hands, ditch all these nicely packaged solutions and program your chips using an old USB Hub and a 74HCT00 NAND gate as described in this bizarre hack by Teensy developer [Paul Stoffregen].
#attinyhacks #atmeltpi #attiny20 #insystemprogramming #isp #jtag #usbasp

Client Info
Server: https://mastodon.social
Version: 2025.04
Repository: https://github.com/cyevgeniy/lmst