#camerareviewblogs

alex luyckx unofficialalexluyckx@ծմակուտ.հայ
2022-05-20

Bonus Camera Review Blog – Yashica-12

When it comes to the world of TLRs, I was hooked from the first time I picked one up; in my case, the LOMO Lubitel 2. But the Lubitel was primitive even for the age when it was produced as a simple camera aimed at budding photographers. And while there is a certain character to the images produced by that T-43 lens, I had hit the gear acquisition hard after listening to the Film Photograph Podcast. Thankfully in those days, the cost of cameras had not yet risen, and you could get excellent deals on almost anything. At a local camera show put on by the Photographic Historical Society, I happened across a vendor selling a mixture of TLRs and found the Yashica-12 at the right price. I cannot recall how much I paid for the camera, but he had nothing but praise for the Yashica. He even went so far as to say he used one as a backup to his Rolleiflex. While the Yashica-12 ended up being a short-lived part of my camera collection, overshadowed by the Rolleiflex 2.8F it certainly solidified my love of not only square format but TLRs as a whole.

Camera Specifications
Make: Yashica
Model: Yashica-12
Type: Twin Lens Reflex
Format: Medium Format (120), 6×6
Lens: Fixed, Yashinon 80mm f:3.5
Shutter: Copal-SV Leaf Shutter, 1″ - 1/500″ + Bulb
Meter: Single CdS Cell, ASA-25 - ASA-400
Year of Manufacture: 1967-1970

Background
Founded in 1949, the Yashima Seiki Co of Nagano, Japan, an initial investment of 600$. Founded as a manufacturing firm, Yashima Seiki produced mechanical components for use in clocks and cameras. Small manufacturing firms, alongside larger firms, were a part of the American efforts to rebuild the shattered post-war economy, much like what was happening in Europe. The production line shifted almost entirely to camera components as clocks took on more electronic parts. Yashima went on to start the design of their camera. Basing the design around pre-war Rolleicord cameras, in 1953, the Pidgeonflex hit the market. The TLR was of a simple design, with a red-window style film advance and a Tri-Lausar lens built by a third party based on the triplet design. The Pidgeonflex proved to be a moderate success, and Yashima Seiki rebranded as Yashima Optical Industry Co in 1954. Similarly, the Pidgeonflex became the Yashimaflex; reasonable updates resulted in the Yashicaflex B (Old Model) that same year. But these first designs lacked any internal meters, so Yashima designed the Yashicaflex S, which included a Sekonic designed selenium exposure meter with the cells hidden behind the nameplate. And more cameras were being produced by Yashima, with the Yashicaflex A, which used a unique auto-stop film advance knob and the earliest example of a Yashima built lens, the Yashimar. A metered version, the Yashicaflex AS and a premium optical version, the Yashicaflex C, with a Yashikor lens. After opening a branch in the United States under Yashica, the entire company rebranded to that name in 1957. That same year, Yashica released updated versions of the Yashicaflex, including the Yashica A, Yashica B (new model), and Yashica C. But these retained much of the earlier TLR technologies, including the winding knob with autostop and the red window for film advance. Yashica's TLRs can be a bit of a mess, but the Yashica-Mat introduced the familiar crank advance that also cocked the shutter. They also included the Yashica-Mat LM with an uncoupled selenium meter. In 1964 the Yashica-Mat EM hit the market. While the exposure meter remained based around a selenium cell and uncoupled, the meter readout proved easier to read and translate to the exposure settings. The rise in popularity of 220 film saw an improved metered TLR, the Yashica-24, designed to only take 220 films (24-Exposures of 6×6). The Yashica-24 included the standard crank-advance and used a mercury-based battery to power a coupled meter using a CdS cell. Photographers used a small switch to turn the meter on and off. In 1967 they returned to the traditional 120 film with the release of the Yashica-12. Like the Yashica-24, the Yashica-12 featured a battery-powered CdS coupled meter and the same Yashinon optics (a Tessar design). Still, the power-on switch is integrated into the viewfinder, so the meter receives power as soon as the hood is opened. The Yashica-12 only saw production for a year, when both the 12 and 24 were replaced by a single universal TLR, the Yashica 124, in 1968. The Yashica 124 only saw production for two years, being replaced by the iconic Yashica 124G in 1970. Despite the format now long in the tooth, production lasted until 1986.

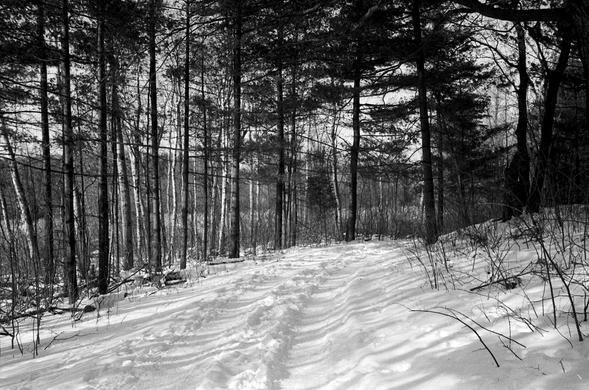
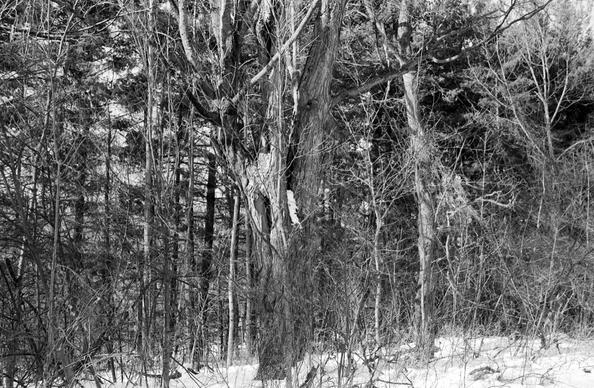
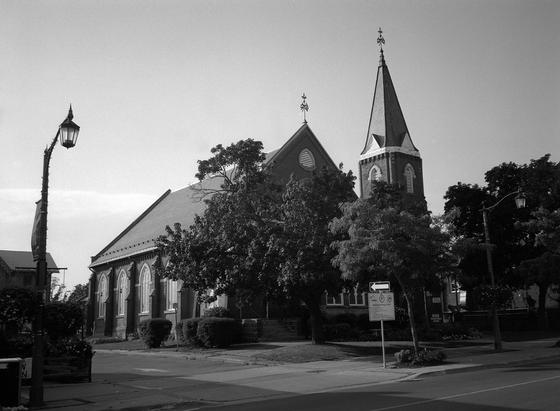
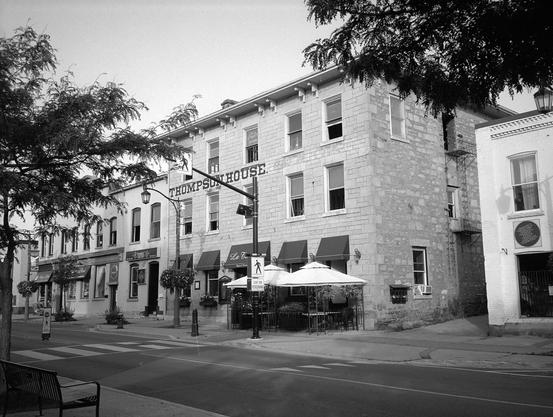
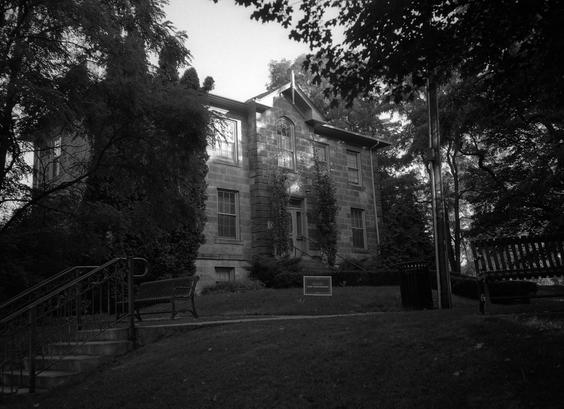
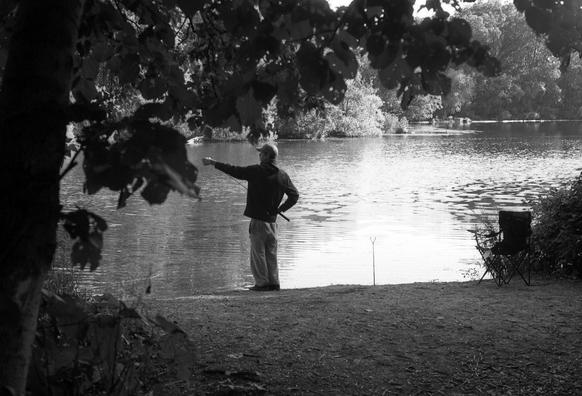
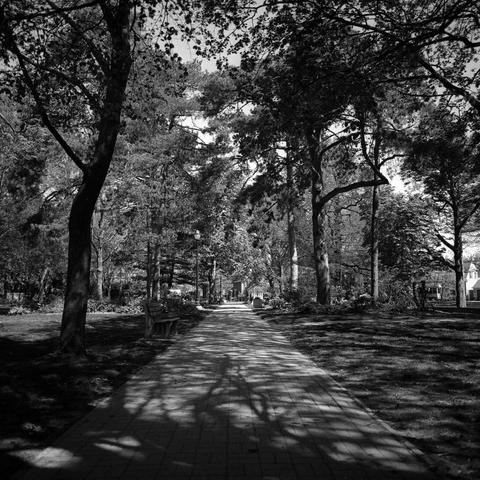
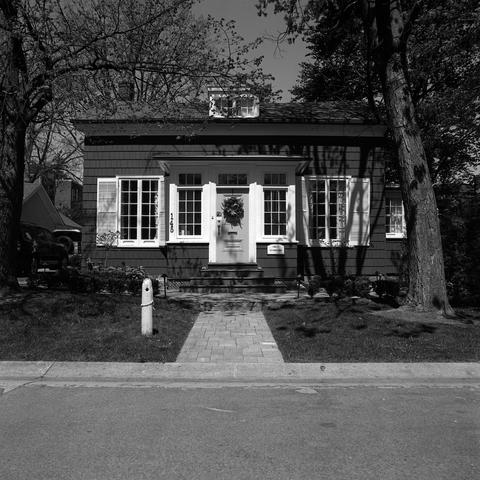
Yashica-12 - Yashinon 1:3.5 f=80mm - Fuji Velvia @ ASA-50 - Processing By: Silvano'sYashica-12 - Yashinon 1:3.5 f=80mm - Fuji Velvia @ ASA-50 - Processing By: Silvano'sYashica-12 - Yashinon 1:3.5 f=80mm - Fuji Velvia @ ASA-50 - Processing By: Silvano'sYashica-12 - Yashinon 1:3.5 f=80mm - Fuji Velvia @ ASA-50 - Processing By: Silvano's

Impressions
At forty yards, you're probably going to think that the camera is some form of Rolleiflex, which isn't surprising how much the mid-century offerings from Franke & Heideckie influenced the Yashica TLRs. The 12 has a clean efficient design, allowing a person to jump quickly between different TLRs as only a few design options are available. The camera has a decent weight to it and was easy to get to know without any manual to help along the way (these were the days before sites had hundreds of PDFs of camera manuals). One of the most noticeable options on the 12 is the CdS metering cell next to the nameplate, and while it does use a mercury battery, the copy I secured still worked through the couple of years that I owned the camera. And what made it even more helpful is that the meter was both coupled and match-needle. The display is right in front of the viewing glass and hood. The twin controls were also easy to operate, and the aperture and shutter speeds displays were clean and easy to read. However, it turned out the camera needed a bit of service initially as it had a sticky shutter, a problem of cameras of its age. Thankfully the Copal-SV shutter is quickly and inexpensively serviced. It was my first experience with Roger at Camtech, who would serve the camera again along with my Rolleiflex. One of the nice additions is having a depth-of-field scale on the focusing knob, which certainly helped when I took the camera out exploring. The 12 worked well both handheld and on a tripod, although nothing stops you from advancing the film before the exposure has been completed, which produced some artistic results, as you can see with some of the images.

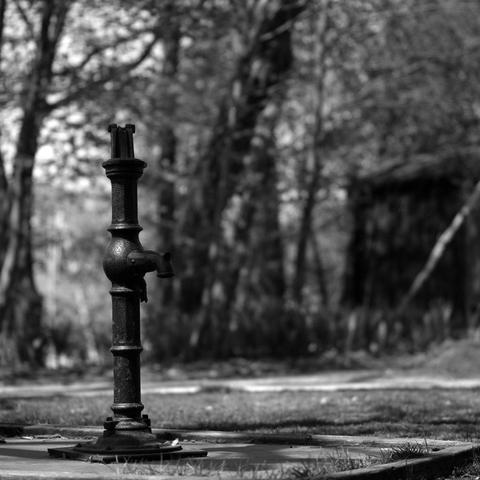
Yashica-12 - Yashinon 1:3.5 f=80mm - Ilford Pan F+ @ ASA-50 - Processing By: Silvano'sYashica-12 - Yashinon 1:3.5 f=80mm - Ilford Pan F+ @ ASA-50 - Processing By: Silvano'sYashica-12 - Yashinon 1:3.5 f=80mm - Ilford Pan F+ @ ASA-50 - Processing By: Silvano'sYashica-12 - Yashinon 1:3.5 f=80mm - Ilford Pan F+ @ ASA-50 - Processing By: Silvano's

Experiences
I jumped to the Yashica-12 from a LOMO Lubitel 2, which are radical opposites and radical opposites when you look at the two cameras side-by-each. Where the Lubitel 2 is essentially an upgraded box camera, the Yashica-12 is a full-blown TLR with plenty of bells and whistles. If the Lubitel 2 got me into TLRs, the Yashica-12 solidified their place in my photographic world. The camera is a perfect starter TLR for someone wanting to get into the format but wants something with a little more quality behind it without breaking the bank with a Rolleiflex or Rolleicord. Loading the camera is straightforward; there's no roller to slide the backing paper through; pull it up and over to your take-up spool, close the back and wind away. Ultimately, I had that issue when I first started using the Rolleiflex; I didn't read the manual. The lightmeter is a simple match needle coupled directly with your exposure controls; it's small but easily read on the top of the nameplate. Making it easy to glance at after making your composition. And because it's a CdS cell, it doesn't fade after time, the downside is that it takes a mercury cell, but you can get an adapter for the cameras. Or shoot with a regular silver oxide cell and make sure you have plenty of latitude on your films. But the camera is completely mechanical so you don't even need to use the meter if you don't like it, there is an accessory shoe to the one side, so mounting a Reveni Labs meter is a perfect option. One of the best additions is that the viewing lens is a full f/2.8, so if you have a clean focusing screen, everything is bright, making composition easy and focusing. There is a big loupe, so even fine focusing is easy. And I can even attest that a slightly dirty screen is easy to use in dull light. I took the Yashica-12 exploring an abandoned building, and I had no issues focusing and composing my shots. Once you're in the groove, the camera is enjoyable, the film advance is automatic and the winder works, with forwarding, turns to advance than a backwards to cock the shutter. If your shutter lags, you'll end up with some exciting results with prolonged exposure, as you see in this review. Once done, the film is easily unloaded and if you're well practised can be completed quickly.

Yashica-12 - Yashinon 1:3.5 f=80mm - Kodak TMax 400 @ ASA-400 - Kodak D-76 (1+1) 9:30 @ 20CYashica-12 - Yashinon 1:3.5 f=80mm - Kodak TMax 400 @ ASA-400 - Kodak D-76 (1+1) 9:30 @ 20CYashica-12 - Yashinon 1:3.5 f=80mm - Kodak TMax 400 @ ASA-400 - Kodak D-76 (1+1) 9:30 @ 20CYashica-12 - Yashinon 1:3.5 f=80mm - Kodak TMax 400 @ ASA-400 - Kodak D-76 (1+1) 9:30 @ 20C

Optics
Don't look down on this camera because the lens is only an f/3.5, there are plenty of excellent TLRs that only have an f/3.5 lens. And the Yashica optics are excellent, the gentleman I purchased the camera from often shot it next to his Rolleiflex at weddings. And I eventually learned about the quality of the Zeiss and Schneider optics and can honestly say that the Yashinon lens is superb. The Yashica-12 features a Yashinon 80mm f/3.5 lens, with four elements in three groups, and is based on the classic 1902 Tessar design by Paul Rudolph, which certainly solidifies the connection between the Yashica TLRs and Rollei TLRs. The lens produces excellent images and is sharp and nearly every aperture. The one thing I did notice is that the lens does not have much of a tendency to flare. It works well with black & white films but where the camera shines is with slide films. I often shoot Velvia and Provia with the camera, and the results are superb. The lens also produces excellent out-of-focus elements and performs without visible fall-off or vignetting. The lens takes all standard Bay-I accessories including filters and lens hoods.

Yashica-12 - Yashinon 1:3.5 f=80mm - Kodak Ektar 100 @ ASA-100 - Processing By: Silvano'sYashica-12 - Yashinon 1:3.5 f=80mm - Kodak Ektar 100 @ ASA-100 - Processing By: Silvano'sYashica-12 - Yashinon 1:3.5 f=80mm - Kodak Ektar 100 @ ASA-100 - Processing By: Silvano'sYashica-12 - Yashinon 1:3.5 f=80mm - Kodak Ektar 100 @ ASA-100 - Processing By: Silvano's

Lowdown
While most people will tend to go with the later multi-format models of the Yashica-124 or desirable Yashica-124G the Yashica-12 sits in an era when you had a choice between 120 and 220 films and needed a camera dedicated to each. One interesting thing is that the Yashica-12 is rare on the used market but if you can find them, they remain relatively affordable, with most averaging between 100-150$ in good working condition. However, the Yashica-124(G) will cost you a fair amount of money, with most going for the lowest 200$ for an as-is to upwards of 650$ for a pristine example. Even the simple Yashica A is running at 300$ and higher on the used market. While the Yashica-12 certainly is not a desirable camera model, it impacted my photography early on and is an excellent starter TLR for someone looking to step up from Soviet or simple TLR examples. And even though a mercury battery powers the meter, a modern cell at 1.5V will work well, and you shouldn't need too much adjustment with current colour negative and B&W films that have plenty of latitudes. And while I certainly didn't miss the 12 after selling it to a friend, I know they got plenty of use out of it before passing it along to the next person.

Further Reading
Don't just take my word on the Yashica-12, you can check out the reviews by other awesome camera reviewers!
Down the Road - Yashica-12 Review
TLRgraphy - The Yashica 12
Geof-Crowl - Review: Yashica 12
TLR Film Camera - Yashica 12 Review
Frugal Photographer - Yashica TLR Cameras

#camerareviewblogs #barbermill #camera #camerareview #canada #dixiepresbyterianchurch #fujifilmvelvia50 #gear #georgetown #ilfordpanf #kodakd76 #kodakektar100 #kodaktmax400 #marmora #mississauga #ontario #review #tlr #toronto #towerautomotive #urbanexploration #urbex #yashica #yashica12

imageUntitledGuest BookStreaks
alex luyckx unofficialalexluyckx@ծմակուտ.հայ
2022-05-02

Camera Review Blog No. 143 – Nikon FE2

I remember the first time I learned about the Nikon FE2; it was one of the early episodes of the Film Photography Podcast, I can't remember which episode it was initially, but I do remember talking to him about the camera when I met up with him at one of the FPP recording sessions back in 2011. The camera didn't particularly interest me; I still had my Nikon F3. But the camera stuck in my head. And even though I have an FE, the FE2 is an excellent addition to the stable as it is a newer camera, a faster shutter, and the viewfinder is one of the brightest in my entire kit.

The Simple FE2 surrounded by a selection of manual focus Nikkor lenses.

Camera Specifications
Make: Nikon
Model: FE2
Type: Single Lens Reflex
Format: 135 (35mm), 36x24mm
Lens: Interchangable, Nikon F-Mount
Shutter: Electronic Titanium vertical-travel focal plane shutter, 8″ - 1/4000″ + Bulb
Meter: TTL Centre-Weighted, 2x Silicon Photo Diode sensors, EV1 ~ EV18 @ ASA-100, ASA-12 - ASA-4000
Year of Manufacture: 1987-2001

Background
Nikon, from the start, had been known for their mechanical offerings. The game-changing Nikon F introduced the idea of a system camera to the SLR and professional photographer market in 1959. The F, despite its flaws, proved a commercial success and the follow-up Nikon F2 in 1971 proved equally successful. But Nikon also produced an equally successful consumer line of cameras, the Nikkormat line. First released in 1965, the Nikkormat FT, FTn and FT2 were heavy-duty mechanical cameras that could use the same lenses as their professional cameras and included a built-in light meter system. But in 1972, Olympus decided to change the game and introduced the Olympus OM-1. The OM system took the idea of an SLR but downsized it, creating a compact but full-featured SLR. Plus, the rise of electronics and semi-automatic exposure control is coming out of Canon and Minolta. Nikon's answer was the Nikkormat EL. Released in 1972, the EL took advantage of the Copal Square shutter allowing for both manual and aperture priority exposure metering. Nikon released an updated version, the EL2, which could accept the new AI lenses and replaced the CdS cells with Silicon Blue Cells for metering. The Nikkormat EL2 and partner Nikkormat FT3 were short-lived as Nikon decided to create a more unified look to their cameras. Taking a new smaller chassis size, and dropping the Nikkormat name, the FT3 became the Nikon FM and the EL2 became the FE, released in 1977 and 1978 respectively. And while the new lineup of cameras was successful in the market, the research team at Nikon were already looking towards the future. Canon's A-1 introduced the idea of an electronic program mode and Olympus OM-4 with an early form of matrix metering. And there was also the matter of producing a faster top shutter speed. In 1982 Nikon released their new FM2, which featured a shutter with a top speed of 1/4000″ through the use of titanium for the shutter curtain. The Matrix meter, a system that used twenty-four SPD cells fed into a single chip, or Automatic multi-program Chip (AMP), combines that with the new faster shutter that was supposed to be the FE2. Instead, that went into the Nikon FA and the FE2 came out in 1987 with the same semi-automatic exposure as before but with the faster shutter. The Nikon FE2 proved a capable camera with new interchangeable focusing screens and a bright viewfinder; Simultaneously, it retained the same match-needle readout; some LEDs in the viewfinder indicated any EV adjustment. Nikon produced only two versions of the FE2, a chrome and a black version, and no special editions or variants were released. Production of both the FE2 and FM2n ended in 2001, but the body style saw a revival with 2006's Nikon FM3a and the influence is seen with the Nikon D f.

Nikon FE2 - AI-S Nikkor 35mm 1:2.8 - Ilford HP5+ @ ASA-400 - LegacyPro L110 (1+31) 6:30 @ 20CNikon FE2 - AI-S Nikkor 35mm 1:2.8 - Ilford HP5+ @ ASA-400 - LegacyPro L110 (1+31) 6:30 @ 20CNikon FE2 - AI-S Nikkor 35mm 1:2.8 - Ilford HP5+ @ ASA-400 - LegacyPro L110 (1+31) 6:30 @ 20CNikon FE2 - AI-S Nikkor 35mm 1:2.8 - Ilford HP5+ @ ASA-400 - LegacyPro L110 (1+31) 6:30 @ 20C

Impressions
If you're familiar with any of the compact series of Nikon SLRs, then the FE2 will be a familiar sight. These are classic and iconic cameras and probably some of the most handsome of all the Nikon's in its simplicity. Probably the most significant and most visible change is the inclusion of the camera model on the front of the camera. While the FE was a small engraving on the camera's rear, the FE2 shouts it loud and proud in the typical block Nikon font that carries on to this day on some models. Most FE to the FE2 is internal, with some external differences. One of the first things you'll notice about the FE2 is that there's no more battery check leaver and light. The second is that the film speed dial has been improved; no more tiny hard to press buttons are needed to release the lock. Instead, you have the traditional lift and turn interface. The small button is still there, but it's far easier to push and control the EV compensation, with settings for +/- two stops in 1/3 stops. The shutter release is also enlarged and is surrounded by a metal collar. Beyond that, all the other controls are the same as the original FE. Internally the camera is entirely different with improved metering, a faster shutter with a top speed of 1/4000″ and a shutter sync speed of 1/250″, which also acts as the mechanical backup for the FE2. The FE2 will also accept both the MD11 and MD12 motor drives, and the hot shoe will accept proprietary Nikon flashes for TTL metering.

Nikon FE2 - AI-S Nikkor 35mm 1:2.8 - Ilford HP5+ @ ASA-400 - LegacyPro L110 (1+31) 6:30 @ 20CNikon FE2 - AI-S Nikkor 35mm 1:2.8 - Ilford HP5+ @ ASA-400 - LegacyPro L110 (1+31) 6:30 @ 20CNikon FE2 - AI-S Nikkor 35mm 1:2.8 - Ilford HP5+ @ ASA-400 - LegacyPro L110 (1+31) 6:30 @ 20CNikon FE2 - AI-S Nikkor 35mm 1:2.8 - Ilford HP5+ @ ASA-400 - LegacyPro L110 (1+31) 6:30 @ 20C

Experiences
If you've worked with Nikon's previous compact SLR offerings, then the FE2 will be a familiar camera. There's no learning curve with these cameras; you can immediately pick one up and know what to do. Probably the most significant improvement over the FE is the big bright viewfinder; I would probably say it's close to 100% coverage and on the same level of brightness as my Minolta Maxxum 9. Even with the grid focusing screen, the FE2 is easy to focus on in almost any lighting condition. The one thing that I find interesting is that they stuck with a standard needle style display for the metering, although the EV adjustment is displayed by LED. Film loading is quick and easy, and having that nice short throw on the film advance helps if you need to shoot fast but don't want to have that MD-12 installed. Once you're in the field, the camera becomes an extension of your hands. It almost becomes transparent, allowing you to focus on image creation. While it is aperture priority metering, I usually find I set the aperture and then have fun; the viewfinder makes things easy with everything I need visible. And then, as Nikon said with the D f , nothing but pure photography. I don't like anything about the FE2, no quirks or oddities. Honestly, it's probably the closest thing to a perfect camera that I've come across. Rewinding is quickly done once the film is done, and mounting the lens requires no special dance.

Nikon FE2 - AI-S Nikkor 35mm 1:2.8 - Eastman Double-X @ ASA-100 - Ilford Ilfotec HC (1+63) 8:00 @ 20CNikon FE2 - AI-S Nikkor 35mm 1:2.8 - Eastman Double-X @ ASA-100 - Ilford Ilfotec HC (1+63) 8:00 @ 20CNikon FE2 - AI-S Nikkor 35mm 1:2.8 - Eastman Double-X @ ASA-100 - Ilford Ilfotec HC (1+63) 8:00 @ 20CNikon FE2 - AI-S Nikkor 35mm 1:2.8 - Eastman Double-X @ ASA-100 - Ilford Ilfotec HC (1+63) 8:00 @ 20C

Optics
Like any manual focus Nikon camera, the available optics are near legendary. The best options for the FE2 are any AI or AI-S lens in manual focus; these will pair perfectly with your FE2. In a pinch, any AF Type-D lenses, those with the aperture ring, will work perfectly on your FE2 also, although focusing might be tricky. Depending on the focusing screen on your camera, you will want a lens that has decent resistance to your focusing ring. I find that the focusing rings are a bit too loose for a focusing screen without a split prism on the autofocus lenses. And with the size of the camera, a longer lens without having a motor drive may throw off the balance of the camera. One thing to note is that Nikon dropped compatibility with pre-AI lenses between the FE and the FE2; your follower lug is fixed in place and can't be flipped up. Mounting your pre-AI lenses could cause damage to your camera. If you're starting your manual focus AI/AI-S lens kit for an FE2, a good starter kit includes a Nikkor 28mm f/3.5, Nikkor 50mm f/1.8 (Pancake), and Nikkor 105mm f/2.5. If you're looking to expand your equipment, maybe the Nikkor 24mm f/2.8, Nikkor 35mm f/2.8, and Nikkor 200mm f/4 will expand your capabilities.

Nikon FE2 - AI-S Nikkor 50mm 1:1.4 - Fujifilm Neopan Acros 100 @ ASA-100 - Ilford Ilfotec LC29 (1+19) 5:00 @ 20CNikon FE2 - AI-S Nikkor 50mm 1:1.4 - Fujifilm Neopan Acros 100 @ ASA-100 - Ilford Ilfotec LC29 (1+19) 5:00 @ 20CNikon FE2 - AI-S Nikkor 50mm 1:1.4 - Fujifilm Neopan Acros 100 @ ASA-100 - Ilford Ilfotec LC29 (1+19) 5:00 @ 20CNikon FE2 - AI-S Nikkor 50mm 1:1.4 - Fujifilm Neopan Acros 100 @ ASA-100 - Ilford Ilfotec LC29 (1+19) 5:00 @ 20C

Lowdown
Yes, it is easier and cheaper to purchase an original FE but hear me out. The FE2 is a newer camera and fixed and improved upon the original FE in several ways. And while you will be paying more for an FE2, they are certainly a more affordable option than the FM2(n) or FM3a and deliver the same level of accuracy in exposure and optical qualities. Overall the FE2 is a capable camera for anyone looking for a good aperture priority camera, maybe as a second body to an F3? Battery-wise, the FE2 uses the same LR44 and, despite driving both the metering system and shutter, last for a long time. And the FE2 can still be repaired by a knowledgeable repair person making it even better to purchase. On the used market, the FE2 runs from between 250$ to 350$. However, some are going for under 200$ and others for over 500$ making it surprisingly affordable compared to its mechanical cousin. Will I be getting rid of my FE? Probably not; I can always keep it as a backup to the FE2. Alternatively, it can be turned into a Presspan. But I can certainly see the FE2 becoming a common camera in my reviews and personal photography.

Video Review Coming - June 2022

Further Reading
Don't just take my word on the FE2, you can check out the reviews by other excellent camera reviewers!
Emulsive - Camera Review: The Nikon FE2
Casual Photophile - Nikon FE2: (Almost) My Favourite Nikon SLR
Ken Rockwell - Nikon FE2 Review
5050 Travelog - Nikon FE2 Review
Filtergrade - The Nikon FE2 Review
CameraGX - The Nikon FE2: one of the very best manual focus SLRs ever

#camerareviewblogs #camera #camerareview #campbellville #canada #eastmandoublex5222 #ecdruryschoolforthedeaf #fujifilmneopanacros100 #gear #ilfordhp5 #ilfordilfotechc #ilfordilfoteclc29 #legacyprol110 #milton #mountsburgconservationarea #nikkor #nikon #nikonfe2 #ontario #review

imageMountsburg In WinterMountsburg In WinterMountsburg In Winter
alex luyckx unofficialalexluyckx@ծմակուտ.հայ
2022-04-19

Camera Review Blog No. 142 – Canon Pellix

I like a camera with history, something unique, a variant or a failed move forward. While I'm a Nikon shooter, Nikon cameras are fairly dull in the broader picture of photographic history. Sure, Nikon cameras often set the standard for photography and technology, but they often played it safe. On the flip side, Canon tried different things, they experimented, and sometimes it worked. Other times it was too early. The Canon Pellix is a fine example of the engineers at the company in the 1960s who wanted to try everything to improve photography. Sadly they were several decades ahead of the game. Thanks to Ori Carmona, who loaded the Pellix and lens out for a review.

Camera Specifications
Make: Canon
Model: Pellix
Type: Single Lens Reflex (Pellical Mirror)
Format: 135 (35mm), 36x24mm
Lens: Interchangable, Canon FL-Mount
Shutter: Cloth Horizontal Travel Focal Plane Shutter, 1″ - 1/1000″ + Bulb
Meter: CdS TTL Meter, EV0.5 ~ EV18 @ ASA-100, ASA-25 - ASA-2000
Year of Manufacture: 1965-1966, QL Version: 1966-1970

Background
The 1960s were an exciting time for the Japanese camera industry. Among them, Canon was initially formed in 1933. They produced the country's first compact 35mm rangefinder, the Hansa Canon (Standard Canon). Of course, they were among the companies tagged by the occupying US forces to help rebuild the shattered economy in the post-war era. Canon focused on rangefinders, but as the century moved to the middle, the single-lens-reflex camera rose in popularity. Canon's first attempt at an SLR is Canon VL in 1956, proved less than popular and had several issues. The 1959 release of the Canonflex resolved these. The interchangeable lens system used a breech-lock system or R-Mount, utterly different from the other bayonet mounts from companies like Nikon, Pentax, and Minolta. But both being rushed into service, the Canonflex and R-Mount flopped. The problem lay with the lenses; the R-Mount and the mechanical coupling to the camera were overly complex, requiring two links once to prime the diaphragm the other to trigger it when the shutter is released. It also proved a pain to mount and dismount lenses, requiring both hands and the camera on a stable surface. At the same time, the R-Mount would survive through several more models with some improvements to the camera body with the R2000, RM and RP. But if Canon wanted to be a player, they needed to fix the R-Mount's foundational issue. Taking their breach-lock, they simplified the design and improved the functionality allowing for coupled metering and renamed it the FL-Mount. The lens mount made its debut in 1964 with the Canon FX; what made the FX notable is that it included match-needle metering with an externally mounted CdS cell. There was nothing new about the FX; Minolta had done this earlier with their SR-7. But Canon had another trick up their sleeve and took the body of the FX and removed one of the critical parts of any SLR, the moving mirror, and in 1965 the Canon Pellix hit the market. Instead, Canon fixed the mirror in place and used a pellicle mirror. Pellicle mirrors have been used in photography for decades. The first example was in 1938 with the Devin tri-colour camera; most pellicle mirror cameras before the Pellix were colour separation cameras. A pellicle mirror is set up to allow a majority of the light through while allowing the minority to reflect. In the case of the Pellix, the mirror allowed two-thirds through while reflecting one-third. The Pellix also introduced open aperture TTL metering. It achieved metering by placing the CdS cell behind the mirror so that exposures are based on the lens's light going through the mirror. This idea was introduced in 1963 with the Topcon RE. Of course, despite simplifying the design and reducing the amount of moving parts and camera shake from the mirror. The biggest issue was the dim viewfinder, the help that Canon released the Pellix with the 58mm f/1.2 lens. Canon did update the Pellix in 1966 with the Quick-Load system, but ultimately the system did not last long, nor did pellicle mirrors reach broad acceptance. And with the release of the new FD-Mount, the Pellix ceased production. Although that didn't stop Canon from using their mirror design again, first with a unique 1972 F-1 High Speed for that year's Olympics, and even Nikon followed suit with the 1976 Nikon F2H (High-Speed). Canon again used their pellicle design for the EOS RT in 1989 using the foundation of the EOS600/630 and the EOS-1N RT. The Sony SLT line of Alpha digital cameras from 2010 uses a pellicle mirror, but that design never took off popularly.

Canon Pellix - Canon Lens FL 50mm 1:1.4 - Ilford HP5+ @ ASA-400 - Ilford ID-11 (1+1) 13:00 @ 20CCanon Pellix - Canon Lens FL 50mm 1:1.4 - Ilford HP5+ @ ASA-400 - Ilford ID-11 (1+1) 13:00 @ 20CCanon Pellix - Canon Lens FL 50mm 1:1.4 - Ilford HP5+ @ ASA-400 - Ilford ID-11 (1+1) 13:00 @ 20CCanon Pellix - Canon Lens FL 50mm 1:1.4 - Ilford HP5+ @ ASA-400 - Ilford ID-11 (1+1) 13:00 @ 20C

Impressions
You can see the mid-sixties design ethos in the Pellix; the design is no-nonsense, there's nothing fancy about the camera body or frame. It's a big, heavy chunk of metal, and despite having no moving parts for the mirror, it's rather clunky. At least the edges are angled off, and the camera is reasonably comfortable to hold. The control layout is common, with everything you need quickly within reach, although a little crowded for someone using the camera while wearing gloves. And not having a solid click between the shutter speeds is a bit off-putting, so you have to remove your eye from the viewfinder. The film advance leaver also is nicely rounded and doesn't dig into the fingers, although there is no plastic cover over the metal. The small shutter release has a collar lock to prevent accidental firing, a nice touch. The accessory shoe is mounted atop the pentaprism, but any flash connected will need a PC sync cord. The placement of the PC port is an interesting one; you have to be careful where you place your fingers as it might drift a little too close, and you could get a bit of a shock if you're not careful. The battery terminal is on the side of the camera near the top, and while designed to accept 1.3V mercury cells, a modern 1.5V will fit and function fine with modern films. The FL-Lens focuses smoothly, although the lack of a split prism will make life difficult if you're not used to focusing without one. The focusing ring is chunky with plenty of grips, and the aperture control ring has a different look and feels with two raised knurled sections to grip and adjust.

Canon Pellix - Canon Lens FL 50mm 1:1.4 - Ilford HP5+ @ ASA-400 - Ilford ID-11 (1+1) 13:00 @ 20CCanon Pellix - Canon Lens FL 50mm 1:1.4 - Ilford HP5+ @ ASA-400 - Ilford ID-11 (1+1) 13:00 @ 20CCanon Pellix - Canon Lens FL 50mm 1:1.4 - Ilford HP5+ @ ASA-400 - Ilford ID-11 (1+1) 13:00 @ 20CCanon Pellix - Canon Lens FL 50mm 1:1.4 - Ilford HP5+ @ ASA-400 - Ilford ID-11 (1+1) 13:00 @ 20C

Experiences
The Pellix is an exciting camera from both a historical perspective and a user perspective. Loading the film is easy thanks to the Canon Quick Load system in fact, you could say that Canon was ahead of the game with the QL feature, making loading the camera as easy as my Maxxum 9 or F5. Pull the leader across into the gap and close the back. When it comes to opening the back, the release is not where you would expect it to be, a tug on the film rewind. The back is opened by a lock key on the camera's baseplate, and make sure to latch it once the film has been loaded, or it will flop open. The camera is not too heavy and makes for a comfortable camera to carry around. If you're used to the Canon Breach Lock mount, then removing and mounting the lens is a breeze, but I would use both hands for this procedure since all FL lenses use the collar locking system. Something Canon did away with with the FD(n) lenses. And the lenses are critical. Remember you're working with a fixed mirror that only bounces a third of the light up to the viewfinder, so if you have a slower lens, the viewfinder will be dim. Thankfully, I was in bright conditions with an f/1.4 lens, so the viewfinder was decently bright. There's no accurate exposure information displayed in the viewfinder itself; focusing is achieved through a small window at the centre with a circle, focus until that centre spot is clear and sharp. Metering is achieved with a match-needle system (sadly not functioning on this copy), with a single needle that you match up to the circle. The controls are smooth and easy to operate, but you have to take your eye off the viewfinder. I noticed how soft the shutter speed dial is; with no click at each stop, it made it a little difficult to feel confident it was set right. Now at this point, you're wondering how to even meter with the Pellix. With the TTL cell behind the mirror, which lets through the remaining 2/3rd of the light, the CdS cell can automatically adjust. In my case, I was working with my Gossen Lunasix, although a Reveni Hot Shoe meter is another excellent choice for an external meter. Here you have two options; the first is to shoot a film with wide latitude, shoot at box speed and the metered settings and develop normally. It's close enough that you'll get good results; the second option is to compensate by adding +0.5 to +1 EV on your meter. Rewinding the film is easy with a traditional release lock on the camera's base and a rewind crank. I think the cold got to the camera as the shutter failed to fire on a majority of the frames and I ended up losing much of that first roll. The one other troublesome thing that I noticed is that despite having excellent glass, stopping down, and being careful focusing is that the images are soft. I'm going to chalk this up to two things, the first being the age of the camera the second being that pellicle mirror. The light to expose the film still has to travel through a mirror to reach the emulsion; I'm sure in brand new condition. The Pellix produced top quality, but add over half of a century, age has probably done its due.

Canon Pellix - Canon Lens FL 50mm 1:1.4 - Ilford FP4+ @ ASA-125 - Ilford Perceptol (Stock) 13:00 @ 20CCanon Pellix - Canon Lens FL 50mm 1:1.4 - Ilford FP4+ @ ASA-125 - Ilford Perceptol (Stock) 13:00 @ 20CCanon Pellix - Canon Lens FL 50mm 1:1.4 - Ilford FP4+ @ ASA-125 - Ilford Perceptol (Stock) 13:00 @ 20CCanon Pellix - Canon Lens FL 50mm 1:1.4 - Ilford FP4+ @ ASA-125 - Ilford Perceptol (Stock) 13:00 @ 20C

Optics
While most of my experience with Canon cameras has been with either the newer FD-Mount or the autofocus EF mount, the difference between the FL-Mount and FD-Mount cameras is minimal. And while you cannot use FD-Mount lenses on an FL-Mount camera, the FL-Mount lenses are built to the same standards as any Canon lens. And while I could list off a standard set of lenses for any FL-Camera, the Pellix offers a unique situation. It again comes down to the pesky pellicle mirror, reflecting only a third of the light entering the camera to the viewfinder you need to be using fast lenses. Sadly this seriously limits what lenses would work the best on the camera. You do want to keep the apertures big, at least f/2.8 under bright and sunny conditions with plenty of light available, but realistically you're going to want at least an f/1.8 or f/1.4. Thankfully, most of Canon's 50mm lenses are superb options, with the f/1.8 and f/1.4 being relatively affordable on the used market. If you're in for a perfect look, then the 58mm f/1.2 is the match you're looking for if you're willing to spend the cash. You might get away with some f/2.5 lenses, including a 35mm, and there's even a unique 38mm f/2.8 lens that is ideally suited for the Pellix thanks to the pellicle mirror. You also can add the 85mm f/1.8 lens for something a little longer. Sadly that's about all the lenses that could work well on the Pellix without causing severe usability issues.

Canon Pellix - Canon Lens FL 50mm 1:1.4 - Ilford FP4+ @ ASA-125 - Ilford Perceptol (Stock) 13:00 @ 20CCanon Pellix - Canon Lens FL 50mm 1:1.4 - Ilford FP4+ @ ASA-125 - Ilford Perceptol (Stock) 13:00 @ 20CCanon Pellix - Canon Lens FL 50mm 1:1.4 - Ilford FP4+ @ ASA-125 - Ilford Perceptol (Stock) 13:00 @ 20CCanon Pellix - Canon Lens FL 50mm 1:1.4 - Ilford FP4+ @ ASA-125 - Ilford Perceptol (Stock) 13:00 @ 20C

Lowdown
If you're a fan of unique cameras, then the Canon Pellix is certainly one worthy of a collection. It is the first commercially successful implementation of a pellicle mirror in an SLR. It indeed showed Canon's desire to try and do something differently. And while ultimately, the use of the pellicle mirror never caught on in a significant way, the Pellix indeed showed what the future could be. Would I use this camera as a daily shooter? Probably not, in my hands, it would probably spend more time sitting on a shelf than in use for a few reasons. The first is the need to use fast lenses to get the best usability, and there is a severe lack of lenses in that area in the FL-Mount catalogue. Second, a mercury cell requires an external meter and adjustments to compensate for the pellicle mirror. And finally, the age of the camera; in this camera's case, I missed a tonne of frames because of shutter issues. Purchasing the Pellix can be tricky; the body alone is between 20-80 dollars, but once you start adding lenses, especially that desirable 58mm f/1.2, the cost jumps to 200-400 dollars. While the Pellix was fun to try and use, I'm glad I can give it back to Ori.

Further Reading
Don't just take my word on the Pellix, you can check out the reviews by other awesome camera reviewers!
Lomography - Canon Pellix
Flynn Marr Photography - Canon Pellix Review
Filmphotography.eu - Canon Pellix Review

#camerareviewblogs #camerareview #canon #canonflmount #canonpellix #centrewellington #elora #gear #ilfordfp4 #ilfordhp5 #ilfordid11 #ilfordperceptol #oakville #ontario #review #sheridancollege

image
alex luyckx unofficialalexluyckx@ծմակուտ.հայ
2022-04-04

Camera Review Blog No. 142 – Canon Pellix

I like a camera with history, something unique, a variant or a failed move forward. While I'm a Nikon shooter, Nikon cameras are fairly dull in the broader picture of photographic history. Sure, Nikon cameras often set the standard for photography and technology, but they often played it safe. On the flip side, Canon tried different things, they experimented, and sometimes it worked. Other times it was too early. The Canon Pellix is a fine example of the engineers at the company in the 1960s who wanted to try everything to improve photography. Sadly they were several decades ahead of the game. Thanks to Ori Carmona, who loaded the Pellix and lens out for a review.

Camera Specifications
Make: Canon
Model: Pellix
Type: Single Lens Reflex (Pellical Mirror)
Format: 135 (35mm), 36x24mm
Lens: Interchangable, Canon FL-Mount
Shutter: Cloth Horizontal Travel Focal Plane Shutter, 1″ - 1/1000″ + Bulb
Meter: CdS TTL Meter, EV0.5 ~ EV18 @ ASA-100, ASA-25 - ASA-2000
Year of Manufacture: 1965-1966, QL Version: 1966-1970

Background
The 1960s were an exciting time for the Japanese camera industry. Among them, Canon was initially formed in 1933. They produced the country's first compact 35mm rangefinder, the Hansa Canon (Standard Canon). Of course, they were among the companies tagged by the occupying US forces to help rebuild the shattered economy in the post-war era. Canon focused on rangefinders, but as the century moved to the middle, the single-lens-reflex camera rose in popularity. Canon's first attempt at an SLR is Canon VL in 1956, proved less than popular and had several issues. The 1959 release of the Canonflex resolved these. The interchangeable lens system used a breech-lock system or R-Mount, utterly different from the other bayonet mounts from companies like Nikon, Pentax, and Minolta. But both being rushed into service, the Canonflex and R-Mount flopped. The problem lay with the lenses; the R-Mount and the mechanical coupling to the camera were overly complex, requiring two links once to prime the diaphragm the other to trigger it when the shutter is released. It also proved a pain to mount and dismount lenses, requiring both hands and the camera on a stable surface. At the same time, the R-Mount would survive through several more models with some improvements to the camera body with the R2000, RM and RP. But if Canon wanted to be a player, they needed to fix the R-Mount's foundational issue. Taking their breach-lock, they simplified the design and improved the functionality allowing for coupled metering and renamed it the FL-Mount. The lens mount made its debut in 1964 with the Canon FX; what made the FX notable is that it included match-needle metering with an externally mounted CdS cell. There was nothing new about the FX; Minolta had done this earlier with their SR-7. But Canon had another trick up their sleeve and took the body of the FX and removed one of the critical parts of any SLR, the moving mirror, and in 1965 the Canon Pellix hit the market. Instead, Canon fixed the mirror in place and used a pellicle mirror. Pellicle mirrors have been used in photography for decades. The first example was in 1938 with the Devin tri-colour camera; most pellicle mirror cameras before the Pellix were colour separation cameras. A pellicle mirror is set up to allow a majority of the light through while allowing the minority to reflect. In the case of the Pellix, the mirror allowed two-thirds through while reflecting one-third. The Pellix also introduced open aperture TTL metering. It achieved metering by placing the CdS cell behind the mirror so that exposures are based on the lens's light going through the mirror. This idea was introduced in 1963 with the Topcon RE. Of course, despite simplifying the design and reducing the amount of moving parts and camera shake from the mirror. The biggest issue was the dim viewfinder, the help that Canon released the Pellix with the 58mm f/1.2 lens. Canon did update the Pellix in 1966 with the Quick-Load system, but ultimately the system did not last long, nor did pellicle mirrors reach broad acceptance. And with the release of the new FD-Mount, the Pellix ceased production. Although that didn't stop Canon from using their mirror design again, first with a unique 1972 F-1 High Speed for that year's Olympics, and even Nikon followed suit with the 1976 Nikon F2H (High-Speed). Canon again used their pellicle design for the EOS RT in 1989 using the foundation of the EOS600/630 and the EOS-1N RT. The Sony SLT line of Alpha digital cameras from 2010 uses a pellicle mirror, but that design never took off popularly.

Canon Pellix - Canon Lens FL 50mm 1:1.4 - Ilford HP5+ @ ASA-400 - Ilford ID-11 (1+1) 13:00 @ 20CCanon Pellix - Canon Lens FL 50mm 1:1.4 - Ilford HP5+ @ ASA-400 - Ilford ID-11 (1+1) 13:00 @ 20CCanon Pellix - Canon Lens FL 50mm 1:1.4 - Ilford HP5+ @ ASA-400 - Ilford ID-11 (1+1) 13:00 @ 20CCanon Pellix - Canon Lens FL 50mm 1:1.4 - Ilford HP5+ @ ASA-400 - Ilford ID-11 (1+1) 13:00 @ 20C

Impressions
You can see the mid-sixties design ethos in the Pellix; the design is no-nonsense, there's nothing fancy about the camera body or frame. It's a big, heavy chunk of metal, and despite having no moving parts for the mirror, it's rather clunky. At least the edges are angled off, and the camera is reasonably comfortable to hold. The control layout is common, with everything you need quickly within reach, although a little crowded for someone using the camera while wearing gloves. And not having a solid click between the shutter speeds is a bit off-putting, so you have to remove your eye from the viewfinder. The film advance leaver also is nicely rounded and doesn't dig into the fingers, although there is no plastic cover over the metal. The small shutter release has a collar lock to prevent accidental firing, a nice touch. The accessory shoe is mounted atop the pentaprism, but any flash connected will need a PC sync cord. The placement of the PC port is an interesting one; you have to be careful where you place your fingers as it might drift a little too close, and you could get a bit of a shock if you're not careful. The battery terminal is on the side of the camera near the top, and while designed to accept 1.3V mercury cells, a modern 1.5V will fit and function fine with modern films. The FL-Lens focuses smoothly, although the lack of a split prism will make life difficult if you're not used to focusing without one. The focusing ring is chunky with plenty of grips, and the aperture control ring has a different look and feels with two raised knurled sections to grip and adjust.

Canon Pellix - Canon Lens FL 50mm 1:1.4 - Ilford HP5+ @ ASA-400 - Ilford ID-11 (1+1) 13:00 @ 20CCanon Pellix - Canon Lens FL 50mm 1:1.4 - Ilford HP5+ @ ASA-400 - Ilford ID-11 (1+1) 13:00 @ 20CCanon Pellix - Canon Lens FL 50mm 1:1.4 - Ilford HP5+ @ ASA-400 - Ilford ID-11 (1+1) 13:00 @ 20CCanon Pellix - Canon Lens FL 50mm 1:1.4 - Ilford HP5+ @ ASA-400 - Ilford ID-11 (1+1) 13:00 @ 20C

Experiences
The Pellix is an exciting camera from both a historical perspective and a user perspective. Loading the film is easy thanks to the Canon Quick Load system in fact, you could say that Canon was ahead of the game with the QL feature, making loading the camera as easy as my Maxxum 9 or F5. Pull the leader across into the gap and close the back. When it comes to opening the back, the release is not where you would expect it to be, a tug on the film rewind. The back is opened by a lock key on the camera's baseplate, and make sure to latch it once the film has been loaded, or it will flop open. The camera is not too heavy and makes for a comfortable camera to carry around. If you're used to the Canon Breach Lock mount, then removing and mounting the lens is a breeze, but I would use both hands for this procedure since all FL lenses use the collar locking system. Something Canon did away with with the FD(n) lenses. And the lenses are critical. Remember you're working with a fixed mirror that only bounces a third of the light up to the viewfinder, so if you have a slower lens, the viewfinder will be dim. Thankfully, I was in bright conditions with an f/1.4 lens, so the viewfinder was decently bright. There's no accurate exposure information displayed in the viewfinder itself; focusing is achieved through a small window at the centre with a circle, focus until that centre spot is clear and sharp. Metering is achieved with a match-needle system (sadly not functioning on this copy), with a single needle that you match up to the circle. The controls are smooth and easy to operate, but you have to take your eye off the viewfinder. I noticed how soft the shutter speed dial is; with no click at each stop, it made it a little difficult to feel confident it was set right. Now at this point, you're wondering how to even meter with the Pellix. With the TTL cell behind the mirror, which lets through the remaining 2/3rd of the light, the CdS cell can automatically adjust. In my case, I was working with my Gossen Lunasix, although a Reveni Hot Shoe meter is another excellent choice for an external meter. Here you have two options; the first is to shoot a film with wide latitude, shoot at box speed and the metered settings and develop normally. It's close enough that you'll get good results; the second option is to compensate by adding +0.5 to +1 EV on your meter. Rewinding the film is easy with a traditional release lock on the camera's base and a rewind crank. I think the cold got to the camera as the shutter failed to fire on a majority of the frames and I ended up losing much of that first roll. The one other troublesome thing that I noticed is that despite having excellent glass, stopping down, and being careful focusing is that the images are soft. I'm going to chalk this up to two things, the first being the age of the camera the second being that pellicle mirror. The light to expose the film still has to travel through a mirror to reach the emulsion; I'm sure in brand new condition. The Pellix produced top quality, but add over half of a century, age has probably done its due.

Canon Pellix - Canon Lens FL 50mm 1:1.4 - Ilford FP4+ @ ASA-125 - Ilford Perceptol (Stock) 13:00 @ 20CCanon Pellix - Canon Lens FL 50mm 1:1.4 - Ilford FP4+ @ ASA-125 - Ilford Perceptol (Stock) 13:00 @ 20CCanon Pellix - Canon Lens FL 50mm 1:1.4 - Ilford FP4+ @ ASA-125 - Ilford Perceptol (Stock) 13:00 @ 20CCanon Pellix - Canon Lens FL 50mm 1:1.4 - Ilford FP4+ @ ASA-125 - Ilford Perceptol (Stock) 13:00 @ 20C

Optics
While most of my experience with Canon cameras has been with either the newer FD-Mount or the autofocus EF mount, the difference between the FL-Mount and FD-Mount cameras is minimal. And while you cannot use FD-Mount lenses on an FL-Mount camera, the FL-Mount lenses are built to the same standards as any Canon lens. And while I could list off a standard set of lenses for any FL-Camera, the Pellix offers a unique situation. It again comes down to the pesky pellicle mirror, reflecting only a third of the light entering the camera to the viewfinder you need to be using fast lenses. Sadly this seriously limits what lenses would work the best on the camera. You do want to keep the apertures big, at least f/2.8 under bright and sunny conditions with plenty of light available, but realistically you're going to want at least an f/1.8 or f/1.4. Thankfully, most of Canon's 50mm lenses are superb options, with the f/1.8 and f/1.4 being relatively affordable on the used market. If you're in for a perfect look, then the 58mm f/1.2 is the match you're looking for if you're willing to spend the cash. You might get away with some f/2.5 lenses, including a 35mm, and there's even a unique 38mm f/2.8 lens that is ideally suited for the Pellix thanks to the pellicle mirror. You also can add the 85mm f/1.8 lens for something a little longer. Sadly that's about all the lenses that could work well on the Pellix without causing severe usability issues.

Canon Pellix - Canon Lens FL 50mm 1:1.4 - Ilford FP4+ @ ASA-125 - Ilford Perceptol (Stock) 13:00 @ 20CCanon Pellix - Canon Lens FL 50mm 1:1.4 - Ilford FP4+ @ ASA-125 - Ilford Perceptol (Stock) 13:00 @ 20CCanon Pellix - Canon Lens FL 50mm 1:1.4 - Ilford FP4+ @ ASA-125 - Ilford Perceptol (Stock) 13:00 @ 20CCanon Pellix - Canon Lens FL 50mm 1:1.4 - Ilford FP4+ @ ASA-125 - Ilford Perceptol (Stock) 13:00 @ 20C

Lowdown
If you're a fan of unique cameras, then the Canon Pellix is certainly one worthy of a collection. It is the first commercially successful implementation of a pellicle mirror in an SLR. It indeed showed Canon's desire to try and do something differently. And while ultimately, the use of the pellicle mirror never caught on in a significant way, the Pellix indeed showed what the future could be. Would I use this camera as a daily shooter? Probably not, in my hands, it would probably spend more time sitting on a shelf than in use for a few reasons. The first is the need to use fast lenses to get the best usability, and there is a severe lack of lenses in that area in the FL-Mount catalogue. Second, a mercury cell requires an external meter and adjustments to compensate for the pellicle mirror. And finally, the age of the camera; in this camera's case, I missed a tonne of frames because of shutter issues. Purchasing the Pellix can be tricky; the body alone is between 20-80 dollars, but once you start adding lenses, especially that desirable 58mm f/1.2, the cost jumps to 200-400 dollars. While the Pellix was fun to try and use, I'm glad I can give it back to Ori.

Further Reading
Don't just take my word on the Pellix, you can check out the reviews by other awesome camera reviewers!
Lomography - Canon Pellix
Flynn Marr Photography - Canon Pellix Review
Filmphotography.eu - Canon Pellix Review

#camerareviewblogs #camerareview #canon #canonflmount #canonpellix #centrewellington #elora #gear #ilfordfp4 #ilfordhp5 #ilfordid11 #ilfordperceptol #oakville #ontario #review #sheridancollege

image
alex luyckx unofficialalexluyckx@ծմակուտ.հայ
2022-03-07

Camera Review Blog No. 141 – KMZ Zenit 3m

The KMZ ЗЕНИТ 3m (Zenit 3m) is a camera that is often bought for only a couple of reasons. The first is the desirable Helios 44 lens; the second is a collector's item. In the overall history of Soviet cameras, the Zenit 3m marked the first popular SLR to come out of the Красногорский механический завод or Krasnogorskiy Mechanicheskiy Zavod (KMZ). Sadly, like many older Soviet cameras, they aren't known for their longevity and often suffer shutter failure. But my good friend John Meadows uncovered his Zenit 3m, and it still works, so he loaded it out to me along with his Helios lens with my M42 Helios in exchange to continue his Only Cafe portraiture project.

Camera Specifications
Make: Красногорский механический завод (Krasnogorskiy Mechanicheskiy Zavod)
Model: ЗЕНИТ 3m (Zenit 3m)
Type: Single Lens Reflex
Format: 135 (35mm), 36x24mm
Lens: Interchangeable, m39 mount
Shutter: Rubberised Silk Horizontal Travel Focal Plane Shutter, 1/30″ - 1/500″ + Bulb
Year of Manufacture: 1962-70

Background
In 1942, to preserve the Juggernaught that was the Soviet optical industry, the Красногорский механический завод or Krasnogorskiy Mechanicheskiy Zavod (KMZ) opened its doors. Initially producing lenses and Leica II copies the FED rangefinder under Zorki. And while the factory did find itself under Nazi occupation during the invasion and work of the Soviet Bloc during World War II (where do you think those Nazi badged Leicas came from?), KMZ got the final word. The Soviet occupation of eastern Germany resulted in a lot of camera technology being brought back to KMZ and other manufacturers. SLRs rose in popularity post-war, and KMZ began to work on their SLR based on the Zorki 1 rangefinder. The rangefinder elements stripped down to the chassis, a mirror box shoe-horned in, and a new pentaprism on the top, the 1952 Zenit would retain the same shutter, film transport and lens mount as the Zorki. The camera's name was later retconned to Zenit-1. A slight improvement in the form of the Zenit C in 1955 added a new mirror pull and a PC flash sync socket. And five years later, the Zenit 3 removed the old rangefinder styled film advance knob and replaced it with a familiar leaver style advance. The Zenit 3 is hailed as one of the cleaned and best-designed SLRs from KMZ. So when they returned it with the Kristall in 1961, which changed almost everything about the KMZ SLRs is unknown. But, Kristall did remove the bottom film loading with a familiar hinged back. Thankfully in 1962, the designers at KMZ returned to the old typical Zenit 3 chassis but kept the idea of a hinged back for film loading; the new Zenit 3m proved a success. The brand was in Cyrillic in the domestic market, while export models used Roman characters and often dropped the 3m. Additionally, the 3m was available under the Zenith, Kalimar, Global, and Revuflex names. It should also be noted that there never was an all-black version of the 3m made, but a special 50th Anniversary of Great October was released in 1967. The 3m outstripped the later Zenit E and ended in 1970.

KMZ Zenit 3m - KMZ Helios-44 58/2 - Ilford HP5+ @ ASA-400 - Ilford ID-11 (1+1) 11:00 @ 20CKMZ Zenit 3m - KMZ Helios-44 58/2 - Ilford HP5+ @ ASA-400 - Ilford ID-11 (1+1) 11:00 @ 20CKMZ Zenit 3m - KMZ Helios-44 58/2 - Ilford HP5+ @ ASA-400 - Ilford ID-11 (1+1) 11:00 @ 20C

Impressions
If you are unfamiliar with earlier copies of Soviet SLRs, then the look of the Zenit 3m might be a bit strange, foreign almost. You can still clearly see the camera's lineage to the Zorki rangefinders, especially around the shutter release/film advance and the shutter speed dial. Even with being a Soviet camera, there is a certain refinement to the overall look of the camera, the smooth and shallow pentaprism. What makes the Zenit 3m all the more interesting is weight, it looks heavy, but it is a comfortable weight. Yet there is functional brutality about the camera; the thing works. It takes pictures but doesn't wax poetic about the process. It's refreshing to go back to this idea of Soviet-era photography. Everything is right where it needs to be, all within reach; the shutter release is a heavy affair, made more accessible by adding a soft release (an addition to the camera by John); the film advance is a big chunk of metal that rotates almost 180 degrees. While the camera makes for a great shelf piece, it is equally impressive when used.

KMZ Zenit 3m - KMZ Helios-44 58/2 - Ilford HP5+ @ ASA-400 - Ilford ID-11 (1+1) 11:00 @ 20CKMZ Zenit 3m - KMZ Helios-44 58/2 - Ilford HP5+ @ ASA-400 - Ilford ID-11 (1+1) 11:00 @ 20CKMZ Zenit 3m - KMZ Helios-44 58/2 - Ilford HP5+ @ ASA-400 - Ilford ID-11 (1+1) 11:00 @ 20C

Experiences
Working with the Zenit 3m is undoubtedly an experience. It has an almost deceptive simplicity from the start. The first thing you need to realise is that there is zero automation with this camera, and it will make you pay for every mistake and make you work for every step. The first thing I noticed is how easy loading film is, which for a camera of this age is excellent; you will have to reset the frame counter manually. Once the film is loaded, the fun begins, and I use the term fun loosely. The camera offers up no lightmeter, and having no accessory shoe, mounting a hot shoe meter is impossible; you can go with sunny 16, but again, and with a top shutter speed of 1/500″ allows you to use an ASA-400 film easily. And speaking of shutter speeds, make sure that you have the film advanced, and shutter cocked before adjusting your shutter speeds. This little quirk is common among Soviet SLRs of the era, and if you forget and try and change those speeds, there is a chance of damaging the already fragile shutter. The viewfinder is decent, and all it does is be a viewfinder, a means to look through the lens and compose your shots and assist with focusing. There is no split prism, so you have to work between focusing wide open then stopping the lens down to see what all is in focus. And despite not having the usual assistance, it isn't too hard when working in the bright sun to nail that focus. You also have to stop down the lens manually; there is no mechanical link between the camera and the lens aperture. Thankfully the Helios-44 does make this task easy, but I'm not sure about other lenses of the era. The shutter release is heavy and takes a fair bit of effort to press to release, and the film advance is near 180 degrees and complains the whole way there and back. Rewinding the film is a two-hand job, with one pressing the release lock while the other rewinds the film. Sadly in my case, the camera did a number on the film and physically damaged the film stock while advancing the film about mid-roll. The result is that the film didn't move properly with the stripped sprockets. But such is life when working with a Zenit of this age, so a word of warning.

KMZ Zenit 3m - KMZ Helios-44 58/2 - Delta 100 @ ASA-100 - Ilford Perceptol (Stock) 15:00 @ 20CKMZ Zenit 3m - KMZ Helios-44 58/2 - Delta 100 @ ASA-100 - Ilford Perceptol (Stock) 15:00 @ 20CKMZ Zenit 3m - KMZ Helios-44 58/2 - Delta 100 @ ASA-100 - Ilford Perceptol (Stock) 15:00 @ 20C

Optics
There are plenty of exceptional optics out there for the Zenit 3m, all Russian. And before you turn your nose up at these lenses, understand that among the bounty taken during the occupation of Eastern Germany, Carl Zeiss was among the factories plundered by the Red Army. The most desirable lens is the m39 mount Helios 44, thanks mainly to the ability to render the out-of-focus areas with a lovely swirl (but many lenses do that). Interestingly enough, many Russian photographers turned their nose up at the Helios lens. There is plenty of excellent Soviet lenses out there, additional Helios glass, Industar, MIR, and Jupiter. Some good choices include the Helios-44 mentioned above, Industar-50, Mir-1, and Tair-11; the unfortunate thing is that the camera is the least of your worries with the rise of adapting for mirrorless bodies. The glass is starting to creep up in price. However, the one thing to watch out for is which glass you use. In the specifications, I was careful to note that the camera has an m39 mount, not Leica Thread Mount. While the nitpickers out there might say, 'aren't they the same thing'? Not all m39 is LTM and vice-versa; on Soviet cameras of this era, the thread pitch is different, meaning the two aren't interchangeable. So don't expect to mount that Summitar and Elmar lens on your Zenit 3m.

KMZ Zenit 3m - KMZ Helios-44 58/2 - Delta 100 @ ASA-100 - Ilford Perceptol (Stock) 15:00 @ 20CKMZ Zenit 3m - KMZ Helios-44 58/2 - Delta 100 @ ASA-100 - Ilford Perceptol (Stock) 15:00 @ 20CKMZ Zenit 3m - KMZ Helios-44 58/2 - Delta 100 @ ASA-100 - Ilford Perceptol (Stock) 15:00 @ 20C

Lowdown
The Zenit 3m is a tractor, not a roadster. It gets the job done without too much fluff; if you treat it right and slowly, it will do the job without being flashy about the gig. One surprising thing is that the camera is still affordable on the used market! Despite the desire for old Soviet glass for mirrorless and cinecameras, a Zenit 3m will cost you between 20-90 dollars; there are a few above 100$ and some well below, and almost all of them come with lenses. Most in the standard range don't expect a Helios lens; most will have an Industar-50 attached, which is no slouch of a lens either, but you will pay more for those with the Helios (for reasons). Of course, it is buyer beware as there is always the chance that you get one with a failed shutter. Thankfully being a Soviet camera, you may even be able to repair it yourself with only essential tools and a bit of online reading. If you're into Soviet Cameras from either a collecting or photographic standpoint, the Zenit 3m is undoubtedly a worthy camera for your toolkit or collection.

Video Review - Coming May 2022

Further Reading
Don't just take my word on the Zenit 3m; you can check out the reviews by other excellent camera reviewers!
Kosmo Foto - Zenit 3m Review
Helios Lens - Zenit 3m: A Short Camera Review
John's Cameras - Zenit 3m Review
Lomography - My Second Encounter with the Russians: Zenit 3M!
The Camera Collection - Zenit 3m Review
Tom Tiger - Zenit 3m Review
Lens Beam - Zenit 3m Review

#camerareviewblogs #camera #camerareview #canada #gear #ilforddelta100 #ilfordhp5 #ilfordid11 #ilfordperceptol #kmz #kmzhelios44582 #kmzzenit3m #krasnogorskiymechanicheskiyzavod #oakville #ontario #review #zenit3m

image
alex luyckx unofficialalexluyckx@ծմակուտ.հայ
2022-02-07

Camera Review Blog No. 140 – Nikon FM10

This won't be the first time that I have a Nikon camera that is Nikon in name only. Remember the Nikkorex? While not the same idea, while the Nikkorex line was contracted out to another manufacturer, the Nikon FM10 is a straight-up rebrand (with some modifications) of an existing camera. The Nikon FM10 is one of many cameras built on the Cosina CT-1 Super/CT-1G chassis and dressed up to look like a Nikon. And I'll give Nikon and Cosina one thing, the FM10 seems a lot like a Nikon right down to the red stripe.

Camera Specifications
Make: Cosina
Model: Nikon FM10
Type: Single Lens Reflex
Format: 135 (35mm), 36x24mm
Lens: Interchangable, Nikon F-Mount
Shutter: Vertical Travel, Metal Focal Plane Shutter, 1″ - 1/2000″ + Bulb
Meter: TTL Centre-Weighted SBC, EV2 ~ EV19 @ ASA-100, ASA-25 - ASA-3200
Year of Manufacture: 2006-Present

Background
Cosina, compared to Nikon, is a younger company, initially formed in 1959 as a lens maker. Although they quickly branched off into camera manufacturing and became famous as a contract company building cameras from their lineup but rebranding them for many first and second-tier companies. Their first SLR came out in 1968; the Hi-Lite saw the earliest point where Cosina built more under other names other than Cosina. Most came with the 'universal' lens mount, the Pentax K. The Cosnia CT-1 became one of the most valuable and often adapted chassis from the Cosina lineup. Released in 1979 with little fanfare, the CT-1 was among many similar cameras released through the 1970s and did little to up the ante on the camera market. It was metal internals and a plastic body, but it came with the reliable Copal Square shutter. The CT-1 is little more than a footnote in the catalogue of budget SLRs of the decade; it even featured the universal mount, which at the time was the Pentax K-Mount right from the factory. And Cosina would happily make the CT-1 for anyone who had the money; if you've seen piles of budget SLRs from the 1970s, chances are it's a CT-1. In 1982, the CT-1 got an update, the CT-1A. The CT-1A replaced the old analogue needle with an LED display indicator and updated the power source to a pair of LR44 batteries. The CT-1A also featured updated exterior cosmetics and added a second CdS cell for open aperture TTL metering. The final update, the CT-1 Super, further improved upon the CT-1A came out in 1990. You have similar stylings with the addition of a handgrip and a shutter that topped out at 1/2000″, but those are the only two differences. The Super became the basis of many manufacturers' cameras as simple student cameras, the Canon T60, Nikon FM10 and FE10, and the Olympus OM2000 sees their base on the Super. The FM10 saw some additional changes to the Super. First is the pentaprism, which has a smoother, flatter look (similar to the CT-1G), and a more rounded body. Nikon also insisted on adding a meter activation button, multi-exposure, and depth-of-field preview, which other rebrands and the stock model lack.

Nikon FM10 - AI-S Nikkor 35mm 1:2.8 - Ilford HP5+ @ ASA-400 - Ilford ID-11 (Stock) 7:30 @ 20CNikon FM10 - AI-S Nikkor 35mm 1:2.8 - Ilford HP5+ @ ASA-400 - Ilford ID-11 (Stock) 7:30 @ 20CNikon FM10 - AI-S Nikkor 35mm 1:2.8 - Ilford HP5+ @ ASA-400 - Ilford ID-11 (Stock) 7:30 @ 20CNikon FM10 - AI-S Nikkor 35mm 1:2.8 - Ilford HP5+ @ ASA-400 - Ilford ID-11 (Stock) 7:30 @ 20C

Impressions
Despite knowing that the FM10 isn't built by Nikon, the contract with Cosina did a convincing job that the FM10 is a Nikon, at least where it counts. First of all, you have the Champaign finish that seemed prevalent in the late 1990s through early 2000s that got featured on several of the last consumer and prosumer cameras from the two-digit series (think F75). And most important is the iconic red stripe along with a handgrip. And you know, despite the chunky look of the original CT-1, you have to hand it to the designers at Cosina by the time they got to the CT-1 Super and CT-1G variant; they have a superb looking SLR. The camera itself is plastic and doesn't have much weight, but it still feels solid in your hand; the camera layout is clean and easy to get accustomed to. The shutter speed dial carries forward the same set of speeds, with the film speed being a pull-up and set; the shutter release is big and has a satisfying release, although it is challenging to get that half-push to activate the meter. The metering activation button is a much easier means of getting that reading. The viewfinder is undoubtedly lacking in brightness but isn't too bad when working outdoors and features a similar LED layout as the FM2n with a plus, minus, and circle symbol that illuminate, green for the circle and red for the + - marks. The film advance has a tremendous short throw but does feel a bit flimsy but not enough to make me scared of breaking it, and the shutter has a satisfying feel and sound. Overall, it's not a bad camera to take out, but it wouldn't be my first choice.

Nikon FM10 - AI-S Nikkor 35mm 1:2.8 - Ilford HP5+ @ ASA-400 - Ilford ID-11 (Stock) 7:30 @ 20CNikon FM10 - AI-S Nikkor 35mm 1:2.8 - Ilford HP5+ @ ASA-400 - Ilford ID-11 (Stock) 7:30 @ 20CNikon FM10 - AI-S Nikkor 35mm 1:2.8 - Ilford HP5+ @ ASA-400 - Ilford ID-11 (Stock) 7:30 @ 20CNikon FM10 - AI-S Nikkor 35mm 1:2.8 - Ilford HP5+ @ ASA-400 - Ilford ID-11 (Stock) 7:30 @ 20C

Experiences
Well, the camera is undoubtedly plastic fantastic. Although the FM10 looks like a Nikon, it certainly does not feel like a Nikon. Don't get me wrong, the camera itself is functionally a surprisingly friendly camera to operate. The controls are well laid out, and the camera is lightweight, making it a perfect camera to carry around all day without feeling overburdened. It's also well balanced, even with the heavier optics installed on the front. But it can also give you a false sense of security; this is not a camera I would want to drop as it would probably shatter. Operating the camera is an easy task; film loading occurs how you would do on any other 35mm SLR and loads quickly. The film advance acts as the on/off switch for the camera, so pulling it out will release the shutter lock. The biggest problem is how the meter activates; while you can use the traditional half-push on the shutter release, it takes a bit more force to bring the release down to that half-push; I accidentally tripped the shutter once. It's easier to use the meter activation button on the lens mount, easily accessed when holding the camera. While not as bright as other cameras, the viewfinder offers a decent experience; having the LED readouts for over/under/correct is excellent, plus the symbols themselves are illuminated, so working with them in low light is easy. Plus, you'll know you have the proper exposure with the green illuminated circle.

Nikon FM10 - AI-S Nikkor 35mm 1:2.8 - Ilford HP5+ @ ASA-400 - Ilford ID-11 (Stock) 7:30 @ 20CNikon FM10 - AI-S Nikkor 35mm 1:2.8 - Ilford HP5+ @ ASA-400 - Ilford ID-11 (Stock) 7:30 @ 20CNikon FM10 - AI-S Nikkor 35mm 1:2.8 - Ilford HP5+ @ ASA-400 - Ilford ID-11 (Stock) 7:30 @ 20CNikon FM10 - AI-S Nikkor 35mm 1:2.8 - Ilford HP5+ @ ASA-400 - Ilford ID-11 (Stock) 7:30 @ 20C

Optics
The one thing that makes the FM10 an okay camera to use is that it takes the Nikon F-Mount; it would seem rather odd to have a Nikon branded camera that mounted Pentax lenses! The FM10 will accept any AI lens in the Nikon catalogue, including AI, AI-S and AF Type D. Although I find that the dedicated manual focus lenses work best on the camera. Plus, having that F-Mount allows for plenty of third party options. And while the lens mount on the camera is metal, I found that when mounting and dismounting the lenses, it seems a little stiff, almost plastic, and if I applied too much force, I would break something. Probably the camera, my Nikkor lenses are sturdy optics, and it would take a lot to break them. From what I've read, the camera originally shipped with a kit lens, the Zoom Nikkor 35~70mm 1:3.5~4.8, a classic optic that dates to 1979, with early versions shipping with the Nikon EM and Nikon FG. The lens that shipped was built specifically for the FM10 and FE10. Although the source of that lens remains a mystery, I'll tend to lean towards that the lens is OEM Nikkor glass, not Cosina. While you can pair the camera with your range of Nikkor glass, the form factor does lend itself to the Series E set of lenses. And before you dismiss the Series E, there are some dogs in the lineup, but some true gems. It also will pair well with Cosina-Voigtlander SL II line of lenses.

Nikon FM10 - AI-S Nikkor 35mm 1:2.8 - Ilford HP5+ @ ASA-400 - Ilford ID-11 (Stock) 7:30 @ 20CNikon FM10 - AI-S Nikkor 35mm 1:2.8 - Ilford HP5+ @ ASA-400 - Ilford ID-11 (Stock) 7:30 @ 20CNikon FM10 - AI-S Nikkor 35mm 1:2.8 - Ilford HP5+ @ ASA-400 - Ilford ID-11 (Stock) 7:30 @ 20CNikon FM10 - AI-S Nikkor 35mm 1:2.8 - Ilford HP5+ @ ASA-400 - Ilford ID-11 (Stock) 7:30 @ 20C

Lowdown
Despite having no Nikon heritage or linage, the FM10 does get dealt a bad hand from the start. However, this downside can be seen in a positive light. There is nothing wrong with the Nikon FM10; it is a well-made manual camera that I found a rather enjoyable camera to shoot. Sadly, like any camera that ends up in the hands of a celebrity, the prices on the used market for what the camera is have jumped. But these are entirely bonkers; most fees for a camera body and a lens run between 150-180$, and without a lens, they're between 80-130$, so if you have F-Mount lenses that work, you won't have to spring for the higher prices. There are, of course, larger kits and cameras that have the original boxes, manuals and other accessories that run at 200$ and higher. But if you're looking for a bit of workhorse to introduce someone to photography and working with a metered manual camera, then an FM10 won't be a significant investment. Or if you're like me and want a camera that is a bit of a beater that if it dies, you aren't screwed out of a bunch of money as if you dropped your FM3a.

Video Review Coming Later in 2022!

Further Reading
Don't just take my word on the FM10, you can check out the reviews by other awesome camera reviewers!
Kosmo Foto - Nikon FM10 Review
Japan Camera Hunter - Camera Geekery: Nikon FM10 Review
Johnny Martyr - Defending the Nikon FM10
Lomography - Nikon FM10 Review
Richard Haw - Review: Nikon FM10

#camerareviewblogs #camerareview #canada #cosinact1g #gear #ilfordhp5 #ilfordid11 #nikonfm10 #ontario #review #stmarys

image
alex luyckx unofficialalexluyckx@ծմակուտ.հայ
2022-01-03

Camera Review Blog No. 139 – Canon EF

I admit that I haven't used many of them for Canon cameras because I'm primarily a Nikon shooter. But there's something special about a unique camera within the overall history of a camera manufacturer, and when it comes to Canon, that camera is the EF. Not to be confused because these days, when you match Canon and EF, you're talking about their line of Autofocus lenses for the EOS system in the EF-Mount. But before the name was applied to lenses, it was a model of Canon cameras. Often passed over in general history, the EF is unique for two reasons: it was the first camera to use a vertical-travel metal shutter (the iconic Copal Square). It also offered up some form of electronics and semi-automatic exposure control. Special thanks to Bill Smith for loaning this beauty out for a review!

Camera Specifications
Make: Canon
Model: EF
Type: Single Lens Reflex
Format: 135 (35mm), 36x24mm
Lens: Interchangable, Canon FD-Mount
Shutter: Hybrid Electro-Mechanical Vertical travel metal focal-plane shutter, 1/1,000 - 1/2″ (11-Step, Mechanical), 1″ - 30″ (6-Steps, Electronic).
Meter: Centre Weighted Averaging SPD Photocell, EV -2 ~ EV18 at ASA-100, ASA-12 - ASA-3200
Year of Manufacture: 1973 - 1978

Background
Canon stands as Japan's first producer of a compact 35mm. Founded in 1933, the company had their prototype, the Kwanon. After three years, the first rangefinder, the Hansa Canon, hit the public market. Canon focused solely on camera bodies, while Nikon supplied the lenses at least until 1940. Canon continued its focus on rangefinders in the post-war era, even into the mid-century when more companies were moving to an SLR format. But the march of time would see Canon release their first SLR, the Canonflex, in 1959. The Canonflex used a breech-lock bayonet mount for their interchangeable lenses, known as the R-Mount today. Canon continued production of the R-Mount cameras until 1962 when they updated their mount to the FL-Mount with 1964's FX and FP SLRs. The FL-Mount cameras included the innovative Pellix, which used a semi-transparent mirror. It was the 1971 release of the Canon F-1 that introduced the final iteration of the Canon breech-lock mount, the FD-Mount. But the F-1 remained at its core an all-manual camera and the release of the Konica Auto-Reflex T with shutter-priority semi-automatic metering. Taking the existing F-1 form-factor, Canon fixed the focusing screen and prism forming the body of the EF but instead of using their horizontal cloth shutter, purchased a shutter from a third party. The legendary Copal Square Shutter gives the EF the status of the first Canon SLR with a vertical travel metal shutter. But also a hybrid shutter with the faster speeds being mechanical down to 1/2″ while the 1″ to 30″ speeds being controlled electronically. It also provided the camera with shutter priority semi-automatic exposure metering capacity using a centre-weighted averaging silicon photodiode. While often playing backseat to the more popular F-1, the EF is a proof of concept camera that sold for $460 (USD) (~460$ CAD) when it came out in 1973; that's about USD 2,900 today (~3,500$ CAD). Many Canon cameras came in both Chrome and Black finishes, the EF like the F-1 came in only black, and no special editions or variants were released. Production ceased in 1978; the lessons learned went into creating the Canon A-1 and the next camera with a vertical travel metal shutter, the T50, came out in 1983.

Canon EF - Canon Lens FD 50mm 1:1.8 S.C. - Ilford Delta 100 @ ASA-100 - Adox Rodinal (1+50) 14:00 @ 20CCanon EF - Canon Lens FD 50mm 1:1.8 S.C. - Ilford Delta 100 @ ASA-100 - Adox Rodinal (1+50) 14:00 @ 20CCanon EF - Canon Lens FD 50mm 1:1.8 S.C. - Ilford Delta 100 @ ASA-100 - Adox Rodinal (1+50) 14:00 @ 20CCanon EF - Canon Lens FD 50mm 1:1.8 S.C. - Ilford Delta 100 @ ASA-100 - Adox Rodinal (1+50) 14:00 @ 20C

Impressions
You can see Canon's use of the F-1 as a foundation to the EF at a distance. The camera is designed around an all-metal body and, more importantly, the Copal Square shutter. The body is well laid out and carries many of the typical design elements of cameras of the era with angled off corners allowing it to be easily held in hand comfortably. The design is clean, with all your controls well laid out. My favourite feature is the shutter speed dial, it's mounted around the shutter release, but the front section sits out slightly from the top plate, making it easy to manipulate with your index finger without having to remove your eye from the viewfinder. There's a dedicated on/off switch, with the switch popping the film advance leaver out ala Nikon, but you cannot accidentally pull it out and power on the machine, so it does save the batteries. And speaking of batteries, the camera runs on a pair of mercury cells, with each cell being housed in its holders side-by-side. It's an interesting configuration. The film advance lever moves smoothly, and the shutter sound is delightfully authoritative. The camera asks to be used, and you want to use it as soon as you pick one up.

Canon EF - Canon Lens FD 50mm 1:1.8 S.C. - Ilford Delta 100 @ ASA-100 - Adox Rodinal (1+50) 14:00 @ 20CCanon EF - Canon Lens FD 50mm 1:1.8 S.C. - Ilford Delta 100 @ ASA-100 - Adox Rodinal (1+50) 14:00 @ 20CCanon EF - Canon Lens FD 50mm 1:1.8 S.C. - Ilford Delta 100 @ ASA-100 - Adox Rodinal (1+50) 14:00 @ 20CCanon EF - Canon Lens FD 50mm 1:1.8 S.C. - Ilford Delta 100 @ ASA-100 - Adox Rodinal (1+50) 14:00 @ 20C

Experiences
Despite primarily shooting Nikon cameras, the EF is a great camera to work with and was easy enough for me to pick up as many of the standard functions and controls are in the same place. It is truly a camera for the photographer. It's well balanced in hand with a good weight, enough to know that the camera is there without being overly burdensome. Despite lacking the Canon Quick Load system, the camera is easy to load and doesn't require much fiddling. The camera features an on/off switch, which when you flip up to the on position will pop the film advance leaver you, then when you switch it off, you need to put that leaver flush to the camera body. One of the best parts of working with the camera is the viewfinder; it's bright, clear, and easy to focus on despite not having a split prism. Although the best part is the amount of information displayed, you have a full range of shutter speeds, including which one is selected along the bottom of the finder. A needle on your right side indicates which aperture the camera has selected when in shutter priority mode or in manual mode, which aperture you need to set the lens to. And that is my one big problem, is that there's no way in the viewfinder to see which aperture you have selected on the lens. While the metered manual is possible, it's the best run in semi-automatic mode. And to set that put the lens' aperture ring to the green A. Probably the best feature is that the shutter speed selector is easily adjusted without needing to remove your eye from the finder. The dial juts out from the camera's body, allowing you to move it with your index finger quickly. The film advance has a decent throw and a quick return. Although I found myself keeping my thumb on the winder and guiding it back, I don't know why I picked that up. Mounting and dismounting the lens can be troublesome if you're not used to the old-style breech-lock with the collar locking device, but you don't have to only go with those lenses. You can use the newer style FD lenses with the button release. Probably what I find the best about the EF, it gets out of the way and lets me enjoy the process of making images with the camera.

Canon EF - Canon Lens FD 50mm 1:1.8 S.C. - Agfa APX 100 @ ASA-100 - Ilford Ilfotec HC (1+31) 7:00 @ 20CCanon EF - Canon Lens FD 50mm 1:1.8 S.C. - Agfa APX 100 @ ASA-100 - Ilford Ilfotec HC (1+31) 7:00 @ 20CCanon EF - Canon Lens FD 50mm 1:1.8 S.C. - Agfa APX 100 @ ASA-100 - Ilford Ilfotec HC (1+31) 7:00 @ 20CCanon EF - Canon Lens FD 50mm 1:1.8 S.C. - Agfa APX 100 @ ASA-100 - Ilford Ilfotec HC (1+31) 7:00 @ 20C

Optics
Optical quality is something you do not have to worry about with any Canon FD lens. These early lenses bore close similarity to the older FL lenses, and you can use these lenses on the EF but with stop-down metering only. Best to stick with actual FD lenses. The lenses feature a locking collar in the form of a silver ring at the back of the lens. The idea was to reduce wear on the lens' delicate parts. And it shows as many original FD lenses are in excellent condition. What makes the FD mount even more impressive than from the start was future proof; you can run these lenses on a fully auto-exposure camera. If you are looking for period-appropriate lenses, the old style with the locking collar is the best match. Canon produced prime lenses from 14mm to 800mm, and a tonne of zoom lenses; probably some of the best choices for a quick and helpful setup include the 24 or 28mm lenses with an f/2.8 aperture, a 50mm f/1.8 S.C. or f/1.4 S.S.C. and for something longer either the 100mm or 135mm lens. If a one-and-done lens is a better option, you have fewer options for fixed aperture zooms; a 35-70mm f/4 is your best option for an excellent all-around 'kit' lens. If you go with the New FD lenses, FD(n), these will lack that S.C. or S.S.C. markings as all the FD(n) lenses have that desirable S.S.C. coating.

Canon EF - Canon Lens FD 50mm 1:1.8 S.C. - Agfa APX 100 @ ASA-100 - Ilford Ilfotec HC (1+31) 7:00 @ 20CCanon EF - Canon Lens FD 50mm 1:1.8 S.C. - Agfa APX 100 @ ASA-100 - Ilford Ilfotec HC (1+31) 7:00 @ 20CCanon EF - Canon Lens FD 50mm 1:1.8 S.C. - Agfa APX 100 @ ASA-100 - Ilford Ilfotec HC (1+31) 7:00 @ 20CCanon EF - Canon Lens FD 50mm 1:1.8 S.C. - Agfa APX 100 @ ASA-100 - Ilford Ilfotec HC (1+31) 7:00 @ 20C

Lowdown
If you're the type of photographer who wants a little bit of automation in their FD kit but doesn't like the idea of a plastic SLR, then the EF is a good camera for you. With all-metal construction, a solid and reliable shutter and shutter-priority metering well, you've described the EF. The Canon EF also is a great overall camera if you want something unique, reliable, and has excellent performance. The camera is surprisingly affordable on the used market if you can find one among the lenses list. The ones that I managed to find run between 80-130$ and often comes with a lens. I can honestly see this camera being a perfect second body paired with a Canon F-1(n) or New F-1, or a great addition to a completist's collection of Canon FD mount cameras. I know that if my camera kit had a more Canon foundation, the EF would undoubtedly be one to add.

Video Review - Release in late January.

Further Reading
Don't just take my word on the Canon EF, you can check out the reviews by other awesome camera reviewers!
Mike Eckman - Canon EF Review
Imaging Pixel - Canon EF Review
Medium - Film Camera Review: Canon EF
Canon Classics - Canon EF Review

#camerareviewblogs #adoxrodinal #agfaapx100 #camera #camerareview #canada #canon #canonef #ef #gear #ilforddelta100 #ilfordilfotechc #milton #oakville #ontario #review

imageTowerReachingHemstreet
alex luyckx unofficialalexluyckx@ծմակուտ.հայ
2021-12-06

Camera Review Blog No. 138 – Nikon D750

And now for something completely different. I know I'm better known for my reviews of film-based cameras, but I have reviewed a digital camera here before, back when I got the camera that this one replaced. In fact, the Nikon D750 marks two, not three things. First, it marks a return to an SLR as my digital camera; second, it marks the return to the Nikon Digital system. And finally, a digital camera that I like using a lot. It's not to say the a6000 was an unenjoyable camera to operate; the only complaint was that the system continued to be limited. Yes, I could use almost all my manual focus lenses through adapters, but I only had a single native lens for the camera. So back in 2020, when I started fleshing out the idea of superseding the a6000 as a primary digital, I needed to make a list of requirements. Because that's what you do as a trained systems analyst and information technology professional, you use those skills to make a major decision. I looked at my two major autofocus lens systems, Minolta Maxxum and Nikon F. That meant that I could go with a Sony or Nikon because I did not want yet another camera system, I don't have the room, and I also wanted to have the ability to share lenses. I also needed the camera to be a full-frame that being the 36x24mm form factor because having used crop sensors for my entire life in digital cameras and having used 35mm for so long; I wanted to have my lenses acting the same way on either my 35mm SLR or my digital SLR. While Nikon has many options, Sony has two, the a99 and the recently released a99II. I also would not be averse to a used camera. But when I compared my two lens systems, I have more lenses for Nikon, double when you count the manual focus lenses, which do count because they're all (save one, but it's a PC lens) compatible with Nikon digitals. Nikon became the clear winner, with the initial choice being a D f , but then I realized I needed the camera also to handle video, which the D f does not. Then while chatting with the fine folks at Burlington Camera about this conundrum, the D750 was forwarded. After some looking and chatting with fellow Alliance members, the D750 became the clear winner.

Camera Specifications
Make: Nikon
Model: D750
Type: Single Lens Reflex
Sensor: 24x36mm CMOS Sensor, 24.93 megapixels
Storage: SD Card Slot (2x)
Lens: Interchangeable, Nikon F-Mount
Shutter: Electronically controlled vertical-travel focal-plane shutter, 1/4000″ - 30″ + Bulb, Time
Meter: TTL Exposure Metering, RGB Sensor, EV 0 ~ EV20 @ ISO-100, ISO-100 - ISO-12800
Autofocus: Nikon Advanced MultiCam-3500, Phase Detection TTL Meter
Year of Manufacture: 2014 - 2020

Nikon D750 with the Nikkor 50mm 1:1.4D lens without the MB-D16 Grip
Nikon D750 with the Nikkor 50mm 1:1.4D lens and the MB-D16 Grip

Background
The history of digital image capture is a modern one. Simultaneously, many cameras I've reviewed in the past can trace their linage back to the mid to late 19th century; digital imaging is certainly one from the mid 20th century. The earliest examples of what would become the key to digital imaging began in 1953, and the principle of complementary symmetry was introduced by George Sziklai. Bell Labs produced the first Metal-Oxide-Semiconductor field-effect transistor in 1959 based on Sziklai's work. RCA's Paul Weimer's TFT Complementary Circuits in 1962 laid the basis for a CMOS or Complementary Metal-Oxide Semiconductor. Willard Boyle and George E. Smith from Bell Labs worked on a product to produce semiconductor bubble memory and use MOS technology to find a digital storage medium rather than magnetic. Boyle and Smith hit on the idea of creating a series of MOS capacitors in a row and use an electrical signal to charge them, and in 1969, the idea of a Charge Bubble Device. A paper in 1970 listed the idea of these Charged Coupled Devices or CCD to use them for memory, delay line, shift register, or an imaging device. Two companies latched onto the idea of using these CCDs and CMOS devices as imaging sensors: the first, a California computer firm, Cromemco. While the company produced Z80 based microcomputers, a happy accident saw them determine that a CMOS memory chip (1024 byte chip) with the opaque chip cover replaced by glass could record an image. By 1974 with the Altair 8800 microcomputer's arrival, they could use that as a digitizer to render and display their digital images. In 1975 they introduced the Cyclops with a resolution of 32×32 pixels. When paired with a modified Altair 8800 that used a device to save programs also designed by Cromemco and a graphics card to connect the computer to a TV, they could produce a commercially viable digital imaging system. Little did the California company know that a Kodak engineer Steve Sasson had been tasked with a similar project by the photographic giant on the other side of the United States. Sasson giving a 100×100 pixel CCD sensor, was determined to find some photographic use for CCD technology. Sasson built a beast. The Sasson Camera produced a 100×100 pixel black & white image using a lens taken from a Super8 camera, a standard audio cassette recorder, sixteen batteries, and an analogue-to-digital converter. But unlike the Cyclops, Kodak kept the Sasson camera under wraps, not wanting to undercut their film production. But the genie was out of the bottle, and the idea of digital images took off, and the application of digital imaging was many and numerous and not just for the average person.

Nikon D750 + AF Nikkor 28-105mm 1:3.5-4.5DNikon D750 + AF Nikkor 35mm 1:2DNikon D750 + AF-S Nikkor 14-24mm 1:2.8GNikon D750 + AF Nikkor 35mm 1:2D

The two big giants in the film were soon developing their digital image sensors, Kodak and Fuji. And by the 1980s, the race to release a digital camera was about to come to a close. Kodak, under a government contract, released their first sensor, the M1, in 1987, a CCD sensor with a resolution of 1 megapixel. They managed to modify a Canon F-1 to accept the chip and a 60 megabyte SCSI hard drive that had space to store 60 images. A SCSI (Small Computer System Interface) was key as it was the fastest method to read/write files to a hard drive. But the Kodak Tactical Camera never went beyond the prototype phase. Nikon began developing their own digital camera as early as 1986, the first being the prototype SVC or Still Video Camera with digital capture and analogue storage. Nikon would take these lessons and begin the parallel development of digital camera technology. The first would drop in 1988 proved to be the year digital hit the stage. Both Fuji and Nikon released their first digital cameras. Nikon's QV-1000C, based around a 380,000-pixel sensor, was a full SLR with interchangeable lenses (QV-Mount, two lens options) and touted as a Still Video Camera. However, the real winner was Fuji's offering, the DS-1P that included a memory card that could store ten images. Prototype DS-1P would be further refined and turn into the world's first digital camera to be sold commercially, the DS-X. The slim DS-X looked like the day's point-and-shoot cameras, albeit smaller, and took a credit card-sized 2MB memory card. That same year, Kodak released their prototype digital SLR or DSLR, the ECam D-5000, the ultimate grandfather of all future DSLRs, based around their 1.3-megapixel sensor. Rather than pursue their camera design, Kodak instead decided to get digital cameras into professional photographers' hands to take existing film SLRs and convert them into digital cameras. Nikon would do something similar taking the Nikon F4 and working on behalf of NASA convert it into a digital camera.

Nikon D750 + AF DC-Nikkor 105mm 1:2DNikon D750 - AF Nikkor 28-105mm 1:3.5-4.5DNikon D750 - AF Nikkor 28-105mm 1:3.5-4.5DNikon D750 - AF-S Nikkor 14-24mm 1:2.8G

The Kodak Digital Camera System (DCS) was an adapted Nikon F3. The F3 was an ideal choice given that the camera was already popular among photojournalists, had electronics, notably the contacts for the MD-4 drive. These could allow the camera to properly interface with the CCD image sensor and the massive Digital Storage Unit (DSU) that had to be carried on the shoulder that held the processor and storage for the images. Storage was a traditional 200MB SCSI drive with space to store 156 RAW images or 600 JPG compression. Other options for the DSU included a keyboard to caption images, a modem to transmit the images to the home office, and even a JPG compression board. Released in 1991, the DCS 100, as its name was retconned to later, sold for 20,000$ for the base model. Overall, 987 units were sold. But the DCS 100 was not exactly user friendly and not exactly easily used in the field with the DSU over your shoulder or in a backpack. Kodak, taking advantage of improvements in miniaturization, released the DCS 200 in 1992. Using a Nikon F-801s, the DCS 200 was an all in one unit that added a massive sensor and processor unit that stuck out like a big battery pack and motor drive (think about the massive system used on the Nikon F and F2 to get an idea). The trouble was that storage was reduced to an 80Mb SCSI drive. During these early systems, the sensors continued to be CCD based, but in 1993 CMOS sensors began to appear, but usually in smaller lower-quality roles such as webcams, imaging devices like fax machines and copiers, and later cellphones (the first being in 1999). Kodak's next offering, the DCS 400, came out in 1994 and was based around the Nikon F90x and featured for the first time solid-state memory in the form of a PCMCIA card and a 1.5 megapixel sensor, though later models, namely the DCS 460 in 1995 came with a 6.1 megapixel sensor. While Kodak continued to adapt both Nikon and Canon film SLRs for their purposes, Nikon wanted in on the game and teamed up with Fuji to make it happen. The Nikon NASA F4 or NASA Electronic Still Camera (ESC) was an advanced set of accessories that first flew aboard the Space Shuttle Discovery (STS-48). The centre of the system was a heavily modified F4 equipped with a 1 megapixel monochrome CCD sensor that captured a square image at 1024×1024 resolution; most camera functions were controlled by a Wildcard 88 computer based around an Intel 80C88 8MHz processor. Storage was removable hard drives that stored 40 images. The remaining items were called HERCULES or Hand-held Earth-oriented Real-time Cooperative, User-friendly, Location, targeting, and Environmental System.

Nikon D750 - AF Nikkor 35mm 1:2DNikon D750 - AF Nikkor 28-105mm 1:3.5-4.5DNikon D750 - AF Nikkor 35mm 1:2DNikon D750 - AF Nikkor 35mm 1:2D

In 1995 Nikon and Fuji released the E2/Fujix DS-505. The camera-based around a 2/3rd inch CCD sensor with a 1.3-megapixel resolution. With such a small size, the sensor carried a rating between ISO-800 and ISO-3200, or equivalent to ISO-50 to ISO-200 for a full-frame sensor. The E2 also took standard Nikon F-Mount lenses; the E2s/Fujix DS-515 had triple the frame rate and buffer size from the E2/505 models. Storage was on a solid-state PCMCIA card and could be downloaded to a computer via SCSI or directly connected to a TV for viewing. Moderate improvements in 1996 resulted in the E2N/DS-505a and E2Ns/DS-515a. Nikon and Fuji further improved the E-Series in 1999, now using a Nikon F100 as the base for the camera, results in the E3 and E3s or Fujix DS-560 and DS-565. They again used that small CCD sensor with a 1.4-megapixel resolution but improved metering and autofocus. But the problem remained that the E-Series remained a bulky camera, small by the standards set by the Kodak DCS series, but still not a clean design. When Kodak released the DCS 600 in 1999 based around the Nikon F5 that looked like a proper SLR and only slightly larger than a stock F5, Nikon knew they had to up their game. Nikon would use their F5 as a starting point but designed the internals from the ground up. Starting as far back as 1996, Nikon envisioned a larger sensor, smaller than a standard 35mm negative, but rather an APS negative, the "Classic" format (APS-C) of 23.7×15.6mm. The trouble was that no sensor manufacturer would sign on to help Nikon. While I'm unclear which company signed on, I would guess either Fuji or Sony decided to manufacture the new sensor for Nikon. The same year Kodak released the DCS 600, Nikon struck back with the D1, and Kodak's hold over the digital SLR market wavered for the first time. The Nikon D1 featured a 2.7 megapixel APS-C sized CCD sensor or a DX-format, as Nikon would call them.

Nikon D750 - AF-S Nikkor 28-70mm 1:2.8DNikon D750 - AF-S Nikkor 28-70mm 1:2.8DNikon D750 - AF-S Nikkor 28-70mm 1:2.8DNikon D750 - AF-S Nikkor 28-70mm 1:2.8D

The D1 used the Compact Flash format (2GB max size) first introduced in 1994 and an IEEE 1394 (Firewire) connector to download to your computer. Nikon would release two other variants of the D1, the D1H and D1X. Full-Frame, 36x24mm sensors, began to see a limited release in 2000 with Canon and Pentax dabbling in the format, and CMOS sensors were beginning to catch on for wider use in digital cameras. In 2002 Nikon released a semi-pro DSLR, the D100. Despite being named the D100, the camera took more after the Nikon F80 than the F100. Based around a 6.1-megapixel DX CCD sensor, the D100 offered up a USB interface to connect to your computer. It proved popular enough that Nikon further improved the design and released in 2005 the D200 with a 10.1-megapixel DX sensor. The D200 offered up a tonne of improvements for autofocus and metering that Nikon used in their F6. In 2007, CMOS sensor technology had surpassed that of CCDs and Nikon installed a Full-Frame of FX sensor in their new D3 rated at 12.1 megapixels. Similarly, the D300 was released that same year using a DX CMOS sensor at 12.3 megapixels. By 2008, HD video (720p initially) began to show up in DSLRs with the D90 from Nikon and Canon's EOS 5D Mark II is the first to feature the option. In 2008 Nikon downsized their D3 and released the D700, the first semi-pro DSLR with a range of professional features and 12.1 megapixel CMOS FX sensor. While the D700 was replaced by the improved D800 and a more advanced consumer D600 came out, the cancellation of the D700 in 2012 left a small gap in Nikon's lineup. The 2012 Nikon Df introduced a retrostyled DSLR based around a Nikon FM3a and introduced lightweight materials and a 16 megapixel FX sensor. The follow up to the D700 came out in 2014, the Nikon D750. And the D750 offered up many features not yet seen in a professional or semi-pro level DSLR. The 24 megapixel FX sensor was of an all-new design with improved sensitivity. It also added a tilting screen and WiFi. And even improved video functions and audio control. But also put all of this into a lightweight package. The camera proved popular enough that despite being cancelled in 2020, the D780 continued that linage.

Nikon D750 - AF-S Nikkor 28-70mm 1:2.8DNikon D750 - AF Nikkor 28-105mm 1:3.5-4.5DNikon D750 - AI Nikkor 28mm 1:3.5Nikon D750 - AF Nikkor 50mm 1:1.4D

Impressions
I did not expect the D750 to be small; I honestly believe that the camera is actually smaller than my D300 and just a touch bigger than my D70s. Either way, despite being small, I used the camera for much of the year without getting the additional battery grip. I eventually got the grip to provide that second battery when out photographing at events and video work that requires a bit more power consumption. And the grip does add that needed balance for the larger lenses in my collection, my f/2.8 trio being the primary reason. While I find the grip a necessary accessory if you're only shooting short primes and smaller zooms, you won't need that grip unless you're doing a lot of shooting and need that second battery. And one thing that the grip does add is the capacity to run the camera on AA batteries, and the tray comes with the grip as a standard accessory when you buy the grip. But honestly, the D750 is an amazing lightweight camera for what it can produce. If you're used to working with Nikon cameras, adapting to the D750s is easy, and the funny part is that the digital camera has more dials on it than my F5, such as the mode dial! But there are a lot of buttons on the camera. Thankfully the manual is handy in keeping track of what does what; the best thing you can actually do is figure out which buttons you need to do what you want with the camera. As long as you can quickly get to those buttons, the rest don't matter too much. I quickly found that all the buttons you need for general still photography operation are easily reached and close to where your hands sit. That said, a couple of buttons are a little too close to other buttons, and I often push the wrong one. The biggest one I have is the metering mode and the record button for video. In the winter, I would often press the meter mode button rather than the record button. Thankfully I always confirm on the camera that it's actually recording before I go and step in front of the camera. Another button that proved a bit troublesome early on is the focus mode. That traditional two-position switch allows you to select either Auto-Focus or Manual Focus, but in the centre is an actual button. You press that button and then use both command dials to set the focus mode (single or continuous) along with the focus group mode (there are a lot!). Other than that, the camera's controls are well laid out, and the shutter button is rather clean, and the shutter sound is quiet but still satisfying. The external connections to the camera are easily accessed, the dual card slots are behind a sliding cover, and simple hinged covers for your shutter cable, along with headphones and microphone (make sure you plug your microphone into the right plug. Sadly the D750 uses a different connector for the remote shutter cable than the cable I have for my F5 (which I originally purchased for my D300). The connector is the same as my D70s! Ah well, I made a point to order a new one with a few more advanced features than the stock Nikon version.

Nikon D750 - AF-S Nikkor 28-70mm 1:2.8DNikon D750 - AF DC-Nikkor 105mm 1:2D
Nikon D750 - AI-S Nikkor 105mm 1:2.5Nikon D750 - AF-S Nikkor 28-70mm 1:2.8D

Experiences
Having plenty of experience working with Nikon SLRs, both digital and 35mm, makes using the D750 a breeze. And I can honestly say it is like coming home after a long time away. While I'm used to a big heavy camera, the smaller form of the D750 is still comfortable in hand and easily used with or without a grip. I can honestly say that when I start to retake trips where size is an issue on the camera kit, I will be okay using the camera without a grip and a single lens, and it is rather compact and easy to use. All the buttons are easily accessed, and it is a nice blend of physical and menu-based controls. As I mentioned in the previous paragraph, the layout is intuitive and easily figured out with minimal manual checking. The one downside is that a battery grip helps with the balance if you are using larger lenses. My prime lenses (35/2D, 50/1.4D, and 105/2D) along with my cheap zoom (28-105/3.5-4.5D) are great on the camera without the grip when I get into my larger fixed aperture zoom lenses (14-24/2.8G, 28-70/2.8D, and 70-200/2.8G) that grip is a lifesaver. When it comes to battery life, if you're only working with still photography, then the battery has a long life. Honestly, I can be out shooting for a couple of weeks before it needs a charge. And having that grip double the life span of a charge and adds the option of using AA batteries (stock, the tray comes with the MB-D16)! The autofocus can be a bit touchy at times, especially when working in fully automatic mode. Sometimes, it does have a hard time locking onto a focus point, but having that focus mode button right there allows easy adjustment of the focus mode on the fly. But the autofocus speed on both the older Type-D lenses and newer AF-S lenses is snappy and accurate. Exposure wise, the camera has an excellent meter, which is no surprise; I have never met a Nikon meter that was not bulletproof. The camera's viewfinder is big and bright, no matter the lens you have on the camera. And there is plenty of feedback in the lens, including an electronic rangefinder to help with manual focus with both your AF and MF lenses. The D750 also features a live view mode which is good and helpful combined with the articulated screen. I know that it would have been a lifesaver back in my exploring days. Especially at Photech, where I most certainly needed a respirator but using an SLR (D70s), I could not use the viewfinder while wearing the mask. The one interesting bit with the camera is the inclusion of dual SD slots; while this is nothing new, it is the first camera I've used that includes this feature. Originally I thought it was only a gimmick, but I'm starting to see the value in having these two slots. When I was shooting my first day out on my railroad project, I put in two cards, one card to store the still images, while the second card captured all the video files. Keeping the two separate so I did not accidentally import the video into my Lightroom library. But you can do so much more, it can act as cascade storage, so when one card fills up, it goes onto the second card without swapping them out, or on professional jobs, set them to duplicate so that the files are recorded on both cards in case, one card dies on you. Plus, the D750 has the capacity to support cards up to 256GB, which, even when shooting RAW format, is over 4,000 images per card which is insane!

Nikon D750 - AF-S Nikkor 70-200mm 1:2.8GNikon D750 - AF-S Nikkor 70-200mm 1:2.8GNikon D750 - AF-S Nikkor 70-200mm 1:2.8GNikon D750 - AF-S Nikkor 14-24mm 1:2.8G

Starting last year, I started working a bit more with video and producing content for my YouTube channel (you can see an example below), which is one of the main reasons for going with the D750 rather than a D f. And Nikon certainly put a lot of thought into the video system of the D750. I'm happy with the quality of the video I get from the camera. Working with the camera both in front of and behind the camera is an interesting experience. I haven't been able to figure out how to get the autofocus system to work well and in a consistent manner. I've gone to work with the lens in manual focus mode, pre-focusing and having the aperture stopped down to help with ensuring the subject (me) is in focus when in front of the camera. It is far easier to have someone working the camera. But there is also the audio quality; Nikon included a standard phone jack for an external microphone and one for your headphones as well. And it works with standard third-party equipment, I've worked with Rhode wireless microphones and an on-camera shotgun microphone, and both have delivered excellent audio quality. The internal microphone isn't anything to sneeze at either and is great for capturing ambient sound and even has wind cancellation, which again isn't perfect, but not bad for internal microphones, oh and it records in stereo.

Nikon D750 - AF Nikkor 28-105mm 1:3.5-4.5DNikon D750 - AF-S Nikkor 28-70mm 1:2.8DNikon D750 - AF-S Nikkor 70-200mm 1:2.8GNikon D750 - AF Nikkor 28-105mm 1:3.5-4.5D

Optics
One of the best parts of the D750 is the sheer amount of lenses available for use with the camera. At the same time, you cannot use your original Non-AI lenses unless they have been converted or AI'd, every other lens, AI, AI-S, Series E, AF (not F3AF), D-Type, G-Type, and E-Type. And also, AF requires an in-camera autofocus motor and AF-S lenses. That is a lot of glass and a lot of classic lenses. And perfect for a photographer in the same position as I'm in that has a massive collection of Nikkor optics. One of the biggest concerns is that the smaller manual focus lenses often look diminutive on these modern bodies. And sure, some do, but the short primes like the 50/1.4, 35/2.8, and 28/3.5 look rather good on the D750. Similarly, despite being small, the camera handles most of my prime lenses well, mainly my D-Type lenses. Sure the balance is thrown with my heavy zooms (14-24/2.8G and 70-200/2.8G), but it isn't too bad. But that isn't all the tricks the D750 has up its sleeve. The camera has a crop sensor mode that will only activate the appropriate elements of the imaging sensor when you attach a DX lens to the camera. That means that if you upgrade from a DX to an FX camera, you don't have to rush out and update all your lenses. The drawback is that you will have a smaller image being produced. But it makes a great stop-gap in the interim. And yes, you can also manually activate this mode and use it with your full-frame lenses. And the one thing that the D750 does support is the latest lens type from Nikon, the E-Type ( not Series E ), which uses an electromagnetic aperture rather than a mechanical link. I don't plan to update my AF-S lenses to the new type, but I'm happy with my kit.

Nikon D750 - AI Nikkor 28mm 1:3.5Nikon D750 - AF Nikkor 35mm 1:2DNikon D750 - AF-S Nikkor 28-70mm 1:2.8DNikon D750 - AF Nikkor 28-105mm 1:3.5-4.5D

Image Quality
While your lens choice has a lot to do with your image quality, I remember those first few shots trying the camera out in almost any condition I could get, and each time, the D750 delivered superb results. One thing that surprised me is how good the images look right out of the camera; in the past, I've always found digital images shot in RAW (NEF) format a little flat on the contrast. And I will boost those settings in Lightroom. But I have actually had to pull those settings back, or it over-saturates the images. One of the big complaints that I've read about the D750 is how it renders skin tones. But it may be me or my eye, but I've done several portraits with the camera and cannot find an issue with the skin tones. When it comes to low-light photography, the D750 shines. I have not shot the camera higher than ISO-3200, but even there, the noise is negligible, so much so that I don't even make any noise reduction in post-processing. And I regularly shoot the camera between ISO-400 and ISO-1600 without giving it a second thought. The one thing that I noticed with the camera is that there's not as much latitude in the way of recovery of details lost in highlights; on the a6000, I could clean up those highlights without a second thought or bracketing stacking images (HDRi). While not a bad thing, it is the one thing that I noticed between the two. The D750 is excellent and provides an enjoyable experience; while I've mainly been in front of the camera and setting everything up manually, I cannot complain about the footage quality. While you cannot do 4K on the camera (which is okay, I don't need that level of quality for YouTube videos on film photography), the 1080p 30fps is perfectly acceptable. And the audio controls built-in allow for wind cancellation, audio gain, and stereo recording with the built-in microphones.

Nikon D750 - AF Nikkor 28-105mm 1:3.5-4.5DNikon D750 - AF Nikkor 28-105mm 1:3.5-4.5DNikon D750 - AF Nikkor 28-105mm 1:3.5-4.5DNikon D750 - AI-S Nikkor 200mm 1:4

Lowdown
After going to a mirrorless system for several years, it felt far better to go back to my routes with a Nikon SLR. The D750, despite its age, is still an amazing camera with plenty of years of life left in the system. At the same time, you can use it easily with or without the grip making it perfect for travel. Not to mention the sheer level of compatibility with every lens I have in my tool kit. If you're looking for a way back into Nikon DSLRs, then even a used D750 will suit you well, but honestly, going with a D780 is an excellent choice. While Nikon is moving more into their mirrorless Z-System, an F-Mount will remain my Nikon camera of choice for many years to come. I'd like to give a special shoutout to Mike Eckman, Stephen Dowling, and Alan Duncan who both proved invaluable in making sense out of the history of digital imaging and this post would have suffered without their amazing input. Not bad for a group of mainly film shooters eh?

Further Reading
Don't just take my word on the D750, you can check out the reviews by other awesome camera reviewers!
Full Stop - Nikon D750 heads to the Cape
Photography Life - Nikon D750 Review
DPReview - Nikon D750 Review
Ken Rockwell - Nikon D750 Review
Digital Camera World - Nikon D750 Review
Imaging Resource - Nikon D750 Review
ShotKit - Nikon D750 Review

#camerareviewblogs #cambridge #camera #camerareview #canada #canadianwarplaneheritagemuseum #d750 #digital #dslr #elora #fx #gear #georgetown #guelph #hamilton #historicfortyork #kingston #milton #mississauga #niagaraonthelake #nikkor #nikon #nikond750 #nikondigital #oakville #ontario #review #stjacobs #toronto #uxbridge #woodstock
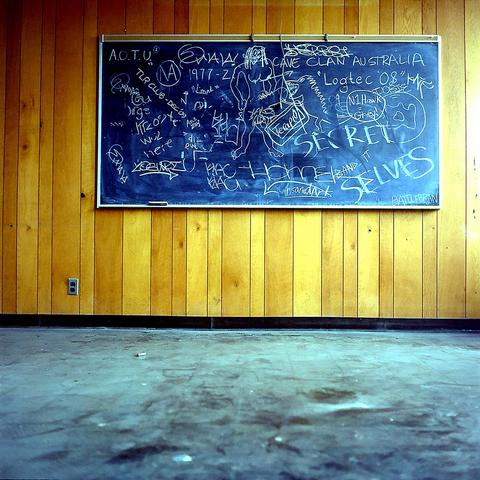

imageIn the AirGreat LightGreat Day
alex luyckx unofficialalexluyckx@ծմակուտ.հայ
2021-11-01

Camera Review Blog No. 137 – Fujifilm GA645Zi Professional

When it comes to medium format cameras, there are two formats that I've always been drawn to, the iconic 6×6 square and the slightly smaller 6×4.5 or 645. I've run with a Pentax 645 and more recently the Mamiya m645. I have shot with other medium format cameras, 6×9, 6×7, and 6×8 and even larger exposure sizes. But I keep on coming back to 645; it's great for everyday shooting and gives you that larger image size than 35mm. But the cameras are often bulky unless you go with a folder. But what about the best of both worlds? Enter the Fujifilm GA645Zi, the third version of the GA645 series from Fuji and the zoom lens. While far from perfect, it was on the shortlist when I was looking at bringing a medium format camera to Europe in 2015. While not a small camera by any stretch, it is fairly compact for what it is and does. Thanks to James Lee for loaning the camera out for a review!

Camera Specifications
Make: Fujifilm
Model: GA645Z i
Type: Point-And-Shoot
Format: 120/220, 6×4.5
Lens: Fixed, Super-EBC Fujinon 1:4.5-6.9 f=55-90mm
Shutter: Electronic Inter-Lens Shutter, 1/700 - 2″ + Bulb
Meter: Centre-Weighted SPD, EV3 ~ EV19 @ ASA-100, ASA-25 - ASA-1600
Autofocus: Hybrid Active/Passive IR focusing, ∞ - 1.0m
Year of Manufacture: 1998

Background
Fujifilm's G-Series of cameras grew out of the growing tourist industry in Japan. While Fuji had never been a major part of the growing camera industry in post-war Japan, they produced an excellent line of cameras into the 1960s and 1970s, usually under the Fujica brand name. But many of these were 35mm, and the need for a larger negative for better quality images as needed. Banking on the larger negative size from 120/220 film, their first 6×7 rangefinder with interchangeable lenses, the GM670, was first released in 1968. Others quickly followed using various other negative sizes that you can get with medium format roll films, the iconic Texas Leica, or the 6×9 offering. These were excellent cameras because they offered a similar experience to the fixed and interchangeable 35mm rangefinders in a bigger format. But these cameras were also large and could be unwieldy, so in the 1980s, Fuji added a new negative size to their lineup, the GS645 series. As the name indicated, the camera shot in the 6×4.5 format allowing the photographer sixteen frames per roll of 120 (double with 220) but still provided a negative larger than 35mm. The initial offering of the GS645 came equipped with a 75mm f/3.5 lens and a built-in light meter and rangefinder focusing. The lens itself is mounted on a bellows to present a modern folding camera. While the camera did have a meter, it was not coupled but did allow the user to set the exposure manually. A second version, the GS645W, came with a wide-angle 45mm lens but lacked the rangefinder, so it was scale focus. A second version, the GS645W, returned the idea of a rangefinder but with a 60mm lens. In 1995 the GS645 series upgraded with the GA645 and GA645W; these were auto-exposure and auto-focus, which brought the camera series into the modern era. The GA645 featured a 60mm lens and the GA645W a 45mm lens and moved to a full rigid body without any folding parts. Fuji improved the camera's ergonomics, metering, and focusing systems releasing the GA645 i and GA645W i in 1997, which each featured the same lenses as before. But these both were fixed focal length cameras, so in 1998 Fuji released their first and only zoom lens model of the GA645 series, the GA645Z I which comes with a 55-90mm zoom lens with four different focus points, 55, 65, 75, and 90 and unlike the past offerings the GA645Z i came not in black but a beautiful metallic champaign colour. However, a black version was released in 1999.

Fujifilm GA645Zi - Super-EBC Fujinon Zoom Lens 1:4.5-6.9 f=55-90mm - Fujifilm Neopan Acros 100 @ ASA-100 - Ilford Ilfotec HC (1+47) 7:00 @ 20CFujifilm GA645Zi - Super-EBC Fujinon Zoom Lens 1:4.5-6.9 f=55-90mm - Fujifilm Neopan Acros 100 @ ASA-100 - Ilford Ilfotec HC (1+47) 7:00 @ 20CFujifilm GA645Zi - Super-EBC Fujinon Zoom Lens 1:4.5-6.9 f=55-90mm - Fujifilm Neopan Acros 100 @ ASA-100 - Ilford Ilfotec HC (1+47) 7:00 @ 20CFujifilm GA645Zi - Super-EBC Fujinon Zoom Lens 1:4.5-6.9 f=55-90mm - Fujifilm Neopan Acros 100 @ ASA-100 - Ilford Ilfotec HC (1+47) 7:00 @ 20C

Impressions
If you're familiar with the Japanese camera industry of the 1990s, you'll quickly realise that the GA645Zi follows that same design aesthetic of the premium compact cameras coming from Kyocera under names like Yashica and Contax. And the GA645Zi certainly reminds me in many ways of the Contax G2. While these cameras were also available in black, personally, I prefer this champaign/metallic colouration. Despite being big, the camera itself fits well in hand; the added grip on the one side with the shutter release at an angle reminds me of the vertical grip on the VC-9 for the Maxxum 9. The mode dial doubles as your on/off switch, and there is a functional lock to prevent accidental power on or off and mode switch. The dial also acts as the means to set the ISO, not the best choice in my view, but it is on the opposite side of the off position from the modes. There is also a single command dial that allows you to help load the film and adjust settings; the dial does everything depending on the mode (adjusting exposure settings, manually focusing the camera, et al.). The weak point for the camera is the rear LCD screen; in the example I reviewed, several elements were starting to fade but eventually warmed up with use, but it did make the setting that initial ISO difficult, which may lead to mis-exposed frames. The zoom lens toggle is well placed but irregularly labelled, so you often don't know which way to toggle it to zoom in or out. The one nice touch is that the GA645Zi, despite being modern, uses a standard mechanical cable release. The viewfinder is bright with plenty of information, including exposure settings, frame lines, and a centre mark to help point out your focus point and metering point.

Fujifilm GA645Zi - Super-EBC Fujinon Zoom Lens 1:4.5-6.9 f=55-90mm - Fujifilm Neopan Acros 100 @ ASA-100 - Ilford Ilfotec HC (1+47) 7:00 @ 20CFujifilm GA645Zi - Super-EBC Fujinon Zoom Lens 1:4.5-6.9 f=55-90mm - Fujifilm Neopan Acros 100 @ ASA-100 - Ilford Ilfotec HC (1+47) 7:00 @ 20CFujifilm GA645Zi - Super-EBC Fujinon Zoom Lens 1:4.5-6.9 f=55-90mm - Fujifilm Neopan Acros 100 @ ASA-100 - Ilford Ilfotec HC (1+47) 7:00 @ 20CFujifilm GA645Zi - Super-EBC Fujinon Zoom Lens 1:4.5-6.9 f=55-90mm - Fujifilm Neopan Acros 100 @ ASA-100 - Ilford Ilfotec HC (1+47) 7:00 @ 20C

Experiences
If you're looking for a fast camera, you've come to the wrong one. Despite everything, the GA645Zi is a slow camera in many aspects. Thankfully the loading film is not one of them. The spools are secured in place, and small red buttons will release the lower stands, allowing you to remove and install the new roll of the film easily. Pull the leader across, insert it into the take-up spool, then use the command dial to advance. You will want to apply slight pressure on the backing paper making sure not to pressure the shutter curtain. Settle your finger to the left of the take-up spool cavity with your left hand and use your right to give the command dial a couple of turns. This will ensure proper tension is applied before you close the film door preventing 'fat' rolls. You also do not have to advance it to an arrow point; once you have the film wound slightly onto the take-up spool, close the door, press the shutter release, and the camera automatically advances to the first frame. Like other 645 cameras of this type, the native orientation is a portrait, and the camera is most comfortable and optimized for being held in this position. Thankfully you can run it easily in landscape orientation without being too uncomfortable; make sure to have that shutter button at the top when being held for the best comfort. In the field, the biggest weakness in the camera is the autofocus system; using a hybrid active/passive IR system does tend to hunt for focus or miss-focus in some cases. Best to have that centre target on the subject first, then recompose. The viewfinder is bright, offering up an indicator for the camera's focus, a centre target point for both focusing and metering, as well as bright lines for assistance in composition. It also zooms in and out with the lens, making it easier to compose at the current focal length. You also will see the exposure settings for both aperture and shutter speed. I only ran the camera in full program mode, but it will give you a selection of your set aperture or shutter speed in the semi-automatic modes. There is also a certain lag for the camera to lock onto the focus when you half-press the release and another lag from full press to the camera taking the photo. The zoom is also fairly slow to extend or retract the lens. The one nice feature with the camera is that it will imprint all the image values on the negative rebate if you so choose, visual EXIF data! You can choose if you want this data recorded or not using the 'data' button on the back of the camera. Despite this, the camera is fairly easy to operate in the field, and what impressed me is that it takes a standard mechanical cable release.

Fujifilm GA645Zi - Super-EBC Fujinon Zoom Lens 1:4.5-6.9 f=55-90mm - Rollei RPX 400 @ ASA-400 - FA-1027 (1+14) 9:00 @ 20CFujifilm GA645Zi - Super-EBC Fujinon Zoom Lens 1:4.5-6.9 f=55-90mm - Rollei RPX 400 @ ASA-400 - FA-1027 (1+14) 9:00 @ 20CFujifilm GA645Zi - Super-EBC Fujinon Zoom Lens 1:4.5-6.9 f=55-90mm - Rollei RPX 400 @ ASA-400 - FA-1027 (1+14) 9:00 @ 20CFujifilm GA645Zi - Super-EBC Fujinon Zoom Lens 1:4.5-6.9 f=55-90mm - Rollei RPX 400 @ ASA-400 - FA-1027 (1+14) 9:00 @ 20C

Optics
The functionality of the camera isn't the only slow aspect of the camera. The lens is equipped with a Super-EBC Fujinon lens; the optical quality is nothing to turn up one's nose towards. I've used plenty of Fujinon glass from their large format to 35mm offerings, and these are superb lenses with excellent optical construction and image quality. And for a medium format point-and-shoot, this is an excellent lens. With focal lengths between 55mm and 90mm, it gives you a basic 'kit' style zoom lens for the camera, and it has the aperture range to match; at 55mm, the maximum aperture is f/4.5, but once you hit 90mm, you're at f/6.9. Not exactly what you find in an average kit lens for the 35mm format. However, don't let that stop you from using the camera; despite the slow lens, the optical quality is excellent, with sharp images at any aperture with a wonderful rendering of the out-of-focus elements. There's no fall-off at wide-open apertures, and the lens does not flare when faced with indirect light. The coating renders both colour and b&w films well with good contrast.

Fujifilm GA645Zi - Super-EBC Fujinon Zoom Lens 1:4.5-6.9 f=55-90mm - Cinestill BwXX @ ASA-250 - Adox Rodinal (1+50) 9:00 @ 20CFujifilm GA645Zi - Super-EBC Fujinon Zoom Lens 1:4.5-6.9 f=55-90mm - Cinestill BwXX @ ASA-250 - Adox Rodinal (1+50) 9:00 @ 20CFujifilm GA645Zi - Super-EBC Fujinon Zoom Lens 1:4.5-6.9 f=55-90mm - Cinestill BwXX @ ASA-250 - Adox Rodinal (1+50) 9:00 @ 20CFujifilm GA645Zi - Super-EBC Fujinon Zoom Lens 1:4.5-6.9 f=55-90mm - Cinestill BwXX @ ASA-250 - Adox Rodinal (1+50) 9:00 @ 20C

Lowdown
While this is far from a perfect camera, the GA645Zi is a solid performing camera. A good option if you want that big 645 negatives and have space constraints. The GA645Zi will give you all of this in a compact camera, and the zoom lens will allow you to have a basic 'kit lens' setup without needing to juggle separate lenses and no need to include an external meter. The camera does take CR123A batteries, so if you are taking it out into the backwoods, take a couple of spares. But these cameras are far from cheap; you're going to be paying between 1,700 to 2,300 on the used market. And it would be best to buy one from a Japanese seller where these cameras were mainly sold. Also, make sure that the camera is functional, as they are difficult if not impossible to repair. I'll admit, I like the GA645Zi, but not enough to drop that much money, so I'll stick to my Mamiya m645.

Further Reading
Don't just take my word on the GA645Z i , you can check out the reviews by other awesome camera reviewers!
Emulsive - Fujifilm GA645Zi Review
Photo Jottings - Fuji GA645Zi 55mm-90mm Review
Shoot It With Film - A Comprehensive Review of the Fuji GA645
FilmPhotography.Blog - First thoughts on the Fujifilm GA645Zi
theWSreviews.com - Fujifilm GA645Zi
Dante Stella - Fuji GA645 family of autofocus 6×4.5 cameras
Nick Carver - Fuji GA645Zi Archives

#camerareviewblogs #adoxrodinal #camera #camerareview #canada #cinestillbwxx #crawfordlake #fa1027 #fujifilmga645ziprofessional #fujifilmneopanacros100 #ga645zi #gear #ilfordilfotechc #milton #ontario #review #rolleirpx400

imageKnoxThompson HouseThe House
alex luyckx unofficialalexluyckx@ծմակուտ.հայ
2021-10-04

Camera Review Blog No. 136 – Minolta XD

I'll admit, I have a soft spot for manual focus Minolta cameras. And the Minolta lineup is a unique cross-section of camera technology through the post-war 20th Century. All my early experience with photography came in various Minolta cameras, from my family's Riva Zoom to my first personal camera, the Hi-Matic 7s and the first SLRs in the SR-T 102 X-7a. More recently, the XE-7 has been my Minolta SR-Mount of choice. But the XE-7 lead me down the rabbit hole of the 1970s of Minolta's technology-sharing agreement with Ernst Leitz because, of course, there was something better. And that something better is the Minolta XD, or in this case, the XD-11. The same camera, only a different market. While they are a bit more expensive on the used market, thankfully, when you're in a good group of film photographers, there is always someone who has the camera you want to give a test run. Thanks to Bill Smith for loaning this beautiful camera out for its review!

Camera Specifications
Make: Minolta
Model: XD (Japan), XD-11 (North America), XD-7 (Europe)
Type: Single Lens Reflex
Format: 135 (35mm), 24x36mm
Lens: Interchangable, Minolta SR-Mount (MD)
Shutter: Metal Verical Travel Focal Plane, 1/1000″ - 1″ + Bulb
Meter: SBC Centre-Weighted TTL EV1 ~ EV18 @ ASA-100, ASA-12 - ASA-3200
Year of Manufacture: 1977-1984

Background
The XD is a camera with a rich history and is seen as the next step forward in Minolta's marked improvements of their SLR cameras and technologies behind them. Minolta's first entry into the SLR world came in 1958. The SR-2 and SR-1 cameras used a bayonet lens mount known as the SR-Mount. Minolta made several advancements on the SR line through the next five years, with the last camera being released in 1962, the SR-7. The next step for Minolta was implementing TTL or Thru-The-Lens metering, which came in 1966 with the SR-T line of cameras. But it wasn't only TTL metering; Minolta mounted two metering cells one through the lens, the other on the body calling the system CLC or Contrast Light Compensation. CLC is held up as the first semi-intelligent metering system for SLRs. To achieve this, Minolta had to modify its lens mount to allow aperture settings to be mechanically communicated to the camera body while still an SR-Mount; these new lenses are often called MC-Mount. The SR-T line of cameras is a bit of a rabbit hole, with various versions of models and parallels running all the way to the 1980s. But by the end of the 1960s, Minolta was already looking ahead to an improved CLC and a professional system camera, the X-Series. The X-1 (alternatively the XM or XK depending on the market) featured various modifications and customizations in line with Nikon and Canon's offerings from earlier decades. One of the features was a semi-automatic exposure metering prism along with a motor drive and other accessories. In 1972 Minolta would enter a technology-sharing agreement with Ernst Leitz, and in 1973 did release the X-1 to mixed reviews. But they were already moving forward with a proper aperture priority camera in cooperation with Leitz and Copal. In 1974 they released the XE (or XE-7) that featured the new Letiz-Copal Shutter, expanded use of microprocessors and a design based on the X-1. Leitz's version, the Leicaflex R3 is more of a cousin to the XE. The two cameras share a similar look and shutter but are two completely different cameras with different metering systems and lens mounts internally. Production of the XE ended in 1977 with the release of the next entry in the X-Series, the XD (XD-11 or XD-7 depending on the market). The XD saw a few improvements over the XE; first, it had three modes, two semi-automatic and one manual. In addition to the standard aperture priority, it also features a shutter priority mode. Giving the camera shutter priority required Minolta to modify the SR-Mount again to give the lens the ability to receive the aperture settings from the camera based on the selected shutter speed. These new lenses are technically still an SR-Mount but are denoted by MD. The XD is not a full program (auto-exposure) camera. Leitz's version is the Leicaflex R4; the two cameras are more like cousins than brothers. A version with fewer features, the XD-5, was also released that removed six features found on the XD. The XD also had a special 50th Anniversary version. In 1981 Minolta would release their first full auto-exposure camera, the X-700 taking the lessons and using the same MD lens as the XD. But the X-Series would be one of Minolta's most prolific camera lines, with the XG series being added on and production lasting well into the autofocus age.

Minolta XD11 - Minolta MD Rokkor-X 45mm 1:2D - Ilford Delta 100 @ ASA-100 - Adox FX-39 II (1+9) 8:00 @ 20CMinolta XD11 - Minolta MD Rokkor-X 45mm 1:2D - Ilford Delta 100 @ ASA-100 - Adox FX-39 II (1+9) 8:00 @ 20CMinolta XD11 - Minolta MD Rokkor-X 45mm 1:2D - Ilford Delta 100 @ ASA-100 - Adox FX-39 II (1+9) 8:00 @ 20CMinolta XD11 - Minolta MD Rokkor-X 45mm 1:2D - Ilford Delta 100 @ ASA-100 - Adox FX-39 II (1+9) 8:00 @ 20C

Impressions
I'll admit, the XD is a handsome camera, all black and metal construction with a handsome leatherette covering the body that gives the camera the flavour of old-school wealth. That should be of no surprise given its Leicaflex cousin, the R4. Designed around the smaller SLR form factor that at this point gained popularity after Olympus released the OM series of cameras back in 1972, something Minolta missed out on in the XE. But the camera may look small, but it has a decent weight behind it, making it well balanced. The controls are well placed, and having the shutter speed dial slightly sticking out from the top plate makes it easy to manipulate without removing your eye from the finder. The camera's viewfinder is bright for its age, and the dual option scale is well illuminated with red LED lights and switches between aperture and shutter speeds depending on the auto-exposure mode. Physical windows will display your aperture and shutter speeds in manual mode, with the LED illuminating the recommended shutter speed. These windows will also show up in the auto-exposure modes, with shutter speeds displayed in Shutter Priority with an auto aperture scale and vice versa in aperture priority mode. The XD also includes options to attach the Minolta Autowinder D or Motor Drive 1. The one control I have an issue with is the EV adjustment, a small leaver around the rewind knob and film speed dial. I'm sure that it will lock in place in the new condition, having to push it in and adjust the EV, sadly. In this example case, there is no safety lock, and on my first roll through the camera, I found that the leaver adjusted itself on several occasions. It would not be the first time I encountered this particular annoyance, the other being on the Contax G2 that had an easy to adjust EV compensation dial.

Minolta XD11 - Minolta MD Rokkor-X 45mm 1:2D - Ilford Delta 100 @ ASA-100 - Adox FX-39 II (1+9) 8:00 @ 20CMinolta XD11 - Minolta MD Rokkor-X 45mm 1:2D - Ilford Delta 100 @ ASA-100 - Adox FX-39 II (1+9) 8:00 @ 20CMinolta XD11 - Minolta MD Rokkor-X 45mm 1:2D - Ilford Delta 100 @ ASA-100 - Adox FX-39 II (1+9) 8:00 @ 20CMinolta XD11 - Minolta MD Rokkor-X 45mm 1:2D - Ilford Delta 100 @ ASA-100 - Adox FX-39 II (1+9) 8:00 @ 20C

Experiences
If you're used to working with the small format SLRs of the era then the XD is a perfect fit. It does have a similar size and weight to cameras like the Nikon FE or Olympus OM. Despite the small size, the camera carries a good weight in hand without it being overly heavy. Loading the film is no different from the XE, but that first frame does pop up quickly, so once you have that first pull, get the door closed and advance from there. Thankfully you don't have to worry about opening the back accidentally, as Minolta included their film indicator, although it is far smaller than on the XE. Mounting and dismounting the lens is easy with the release button on the side of the lens mount and has an easy red dot indicator. The viewfinder is excellent, bright and has a clear split prism for focusing. Bright red LEDs indicate either the shutter speed or aperture selected by the camera in the two semi-automatic modes, with the scale changing depending on that mode. You also have physical windows to show your aperture or shutter speed (or both). The shutter speed wheel is easily adjusted without removing your eye from the viewfinder as the dial is slightly out from the top of the camera body. The film advance is short and smooth. Accuracy on the meter is decent, but you do have to watch out for that EV compensation switch; the copy I was working with did change easily, and I did shot on all three rolls a couple of frames where it had been adjusted.

Minolta XD11 - Minolta MD Rokkor-X 50mm 1:1.7 - Rollei RPX 100 @ ASA-100 - Adox FX-39 II (1+9) 7:30 @ 20CMinolta XD11 - Minolta MD Rokkor-X 50mm 1:1.7 - Rollei RPX 100 @ ASA-100 - Adox FX-39 II (1+9) 7:30 @ 20CMinolta XD11 - Minolta MD Rokkor-X 50mm 1:1.7 - Rollei RPX 100 @ ASA-100 - Adox FX-39 II (1+9) 7:30 @ 20CMinolta XD11 - Minolta MD Rokkor-X 50mm 1:1.7 - Rollei RPX 100 @ ASA-100 - Adox FX-39 II (1+9) 7:30 @ 20C

Optics
When it comes to optics, you cannot go wrong with Rokkor. Also, by this point in the life of Minolta and Rokkor glass, you're starting to get a handful of lenses that are based on Leitz optical designs. And to be honest, I have not bet a Rokkor lens, both fixed and interchangeable, that I thought was a terrible glass. I'm sure they're out there; I have not encountered one. Like the previous SLR offerings from Minolta, the XD uses the SR-Mount for their lenses. But like the Pentax K and Nikon F, the SR mount on the XD is an updated version of the original mount found on the SR-2. As the XD offered two different semi-automatic exposure modes, aperture priority and shutter priority. Changes to how the lens interfaces with the camera were needed on both the camera side and the lens side. While Minolta already had the means to allow the aperture to be communicated to the camera, they needed a way to send aperture information to the lens when in shutter priority. These new lenses are noted with the term MD. They will allow you to run the camera in both aperture and shutter priority (MD will also work in the auto-exposure mode in later model X-Series Cameras like the X700). Now you can use the older MC lenses, but you will be limited to manual and aperture priority modes. Some of my favourite lenses to work with on the camera is the Rokkor-X 45mm f/2 and W.Rokkor-X 28mm f/2.8 these are smaller low-profile lenses that allow you to keep that small form factor presented by the XD.

Minolta XD11 - Minolta MD Rokkor-X 50mm 1:1.7 - Rollei Paul & Reinhold @ ASA-320 - Adox FX-39 II (1+9) 8:00 @ 20CMinolta XD11 - Minolta MD Rokkor-X 50mm 1:1.7 - Rollei Paul & Reinhold @ ASA-320 - Adox FX-39 II (1+9) 8:00 @ 20CMinolta XD11 - Minolta MD Rokkor-X 50mm 1:1.7 - Rollei Paul & Reinhold @ ASA-320 - Adox FX-39 II (1+9) 8:00 @ 20CMinolta XD11 - Minolta MD Rokkor-X 50mm 1:1.7 - Rollei Paul & Reinhold @ ASA-320 - Adox FX-39 II (1+9) 8:00 @ 20C

Lowdown
I do have to admit; I like the XD11. It is a solid step up from the XE-7 without going to the fully plastic later models of the X-Series; I'm again talking about the X-700 and other X variants along with the XG models. But I'm not about to rush out and buy one, but if my XE ever dies, I will probably replace it with an XD11 or look for the feature reduced XD-5. The one thing about these cameras is that they have probably the greatest range in prices on the used market. I've seen some that are under 100$ and ones in the 200-300$ range. If you are looking to buy one, make sure to buy it from a trusted source and have a chance to try out the camera first to make sure it is fully functional. Try and get one in the price range of 170-200$ and if you are going through eBay, look for cameras from Japan. While they are getting old, their electronics are still stable, but if something does go wrong, see if you can get your hands on a parts camera with the part you need before sending it off for repair. In closing, the XD11 is an excellent camera, no matter which version you get.

Further Reading
Don't just take my word on the Minolta XD, you can check out the reviews by other awesome camera reviewers!
Mike Eckman - Minolta XD11 Review
Down The Road - Minolta XD11 Review
Casual Photophile - Minolta XD 35mm Camera Review
Japan Camera Hunter - Camera Geekery - Minolta XD11 Review
Lens QA Works - Minolta XD Review
Michael Wernburg - Review: Minolta XD
Frozen Wasteland - What I Learned Shooting #3 - Minolta XD-11: A Tribute
Digital To Film - Minolta XD11 Review
678 Vintage Cameras - Minolta XD: An Ode to the Endling
Shutterbug - Classic Cameras - Minolta’s XD-11 - Wait 'Til You See How Good You Can Be With Minolta

#camerareviewblogs #adoxfx39ii #brantford #camera #camerareview #canada #gear #hamilton #ilforddelta100 #milton #minolta #minoltaxd #ontario #review #rokkor #rolleipaulreinhold #rolleirpx100 #waterdown #xd11 #xd7

imageThe Old BridgeBitingGazibo
alex luyckx unofficialalexluyckx@ծմակուտ.հայ
2021-09-07

Camera Review Blog No. 135 – LOMO Smena Symbol

I always seem to want to come back for more. One of my first experiences with a Soviet camera was a Smena 8m, this was a gift from my good friend Michael Raso, and the camera was interesting, to say the least. There wasn't anything bad with it; it was pretty unique and produced excellent images. It was hard to work with, too much to do, too fickle, and I wasn't getting to know the camera well enough. So I passed it onto another photographer who went on to use the camera to produce awesome results. There wasn't anything wrong with the 8m; I think the problem was me. Since then, I have gotten much better with these cameras, knowing their quirks and letting me know what they like to do. The saying is try, in Soviet Russia, the Camera tells the photographer what to do. I've since found two excellent Soviet cameras for my kit, the Zenit E and Lomography LOMO LC-A+, which technically isn't Soviet, but it is made in China so, close? So when a Smena Symbol showed up at my door, I was not about to turn down the refined Smena 8m; this humble camera has all the things you liked about the 8m, but with a far better user experience.

Camera Specifications
Make: ЛОМО (LOMO)
Model: Смена Символ (Smena Symbol) aka Cosmic Symbol
Type: Point-And-Shoot
Format: 135 (35mm), 36x24mm
Lens: Fixed, ЛОМО T-43 4/40 (3-Element, f/4 - f/16)
Shutter: Leaf, 1/15″ - 1/250″ + Bulb
Year of Manufacture: 1973-1993

Background
The Smena or Смена line of cameras are ones designed by GOMZ (Gosudarstvennyi Optiko-Mekhanicheskii Zavod) is the oldest optical equipment producer in the USSR for the youth market. The idea was to produce a simple 35mm point-and-shoot viewfinder camera to encourage the next generation of photographers. The first model, the Смена came out in 1953, a zone focus bakelite bodied camera using a simple triplet design T-22 40mm f/4.5. The second version, the Смена-2 came out in 1955 was the same camera as the Смена but added flash synchronization. These cameras both proved popular that in 1958, GOMZ released updated versions, the Смена-3 and Смена-4. These both featured a redesigned film advance system, and the 3 has a self-timer and flash sync. But problems in production saw the 3 and 4 face reliability issues, and production ceased in 1960; the original two models continued until 1962. The same year, GOMZ rebranded to ЛООМП (LOOMP) Leningrad Optical and Mechanical Association. That same year, they redesigned the Смена line and produced two new models, the Смена-5 and Смена-6. These new models now used plastic rather than bakelite in the body construction and far sleeker body design, and a large dial-type film advance. The difference between the 5 and 6 came with the lens, the 5 using a T-42 40mm f/5.6, and the 6 used a T-43 40mm f/4 lens. The new models were a hit, and ЛООМП began to think of the export market, much like the KMZ Zenit E had started to bring in much-needed currency, the Смена-8 was designed for the export market and came out in 1963. The Смена-8 or Smena-8 was also available as the Cosmic 35, or Global 35 used the same basic design as the Смена-6 including the T-43 lens but used a standard take-up spool rather than a cassette that was found in the 5 and 6. In 1965, ЛООМП took on the more familiar brand ЛОМО or LOMO (Leningradskoe Optiko Mechanichesckoe Objedinenie). There were several other Смена cameras produced, with the Смена-9 being the last to use the new body style. In 1967 the Смена-11 introduced a new box styled body, which ЛОМО would re-release the Смена-8 in the new style, the Смена-8m. There are no differences other than the visual look between the 8 and 8m, and the popularity only grew with over 21,000,000 units produced. But the 8m had plenty of functional flaws such as the weight, two-step film advance/shutter cock, an awkward rewind, and a tendency to have the camera shake thanks to a rough shutter release. To address these concerns ЛОМО released in 1973 the Смена Символ or Smena Symbol. The Символ was also sent to the western markets, as the Cosmic Symbol or Revue 135 Symbol. While basically an improved 8m, the Символ used a combined film advance/cocking lever mounted on the lens barrel, a traditional hot shoe and film rewind knob. The Symbol brand came from icons indicating weather conditions for setting the shutter speed, apertures linked to film speed and focus icons for setting your focal point. Traditional numerical indicators are located on the bottom of the lens barrel regarding the shutter speed and focus. The Символ never achieved the same popularity as the 8m, but still saw over 10,000,000 units produced before production ceased in 1993. It should also be noted that the 8m continued production until 1995.

ЛОМО Смена Символ - ЛОМО T-43 4/40 - FPP Wolfman 35 @ ASA-100 - Ilford Ilfotec HC (1+63) 12:00 @ 20CЛОМО Смена Символ - ЛОМО T-43 4/40 - FPP Wolfman 35 @ ASA-100 - Ilford Ilfotec HC (1+63) 12:00 @ 20C

Impressions
If you've worked with a Smena 8m before, the Symbol will be a familiar camera to work with; while it retains much of the classic shape, there have been several changes where they count. The camera maintains a similar weight and size to the 8m, with the lens and viewfinder being in the same place. But there are some notable differences in the positioning of the controls. The first thing is that the shutter release has been relocated to the lens barrel, a rather long release, but it is comfortable shooting and holding the camera. And there is a decent weight behind the release. Honestly, I've never seen a configuration like the one on the Symbol before, and I like the layout. The film advance is in the traditional spot on the camera's back and acts both to advance the film and cock the shutter, no more two-step. Exposure controls are on the lens proper, with the shutter speed noted in symbols on the top of the barrel and traditional numerical designators on the bottom. Your apertures are located on the front of the lens, tied to film speeds, and include traditional numbers. The rear door is a bit more stand out from the camera body, which threw me at first. The door uses a traditional latch, and the rewind button is on the bottom and a traditional rewind knob.

ЛОМО Смена Символ - ЛОМО T-43 4/40 - FPP Wolfman 35 @ ASA-100 - Ilford Ilfotec HC (1+63) 12:00 @ 20CЛОМО Смена Символ - ЛОМО T-43 4/40 - FPP Wolfman 35 @ ASA-100 - Ilford Ilfotec HC (1+63) 12:00 @ 20C

Experiences
Despite being a better camera than the 8m, the Symbol is not without its flaws. The first is loading the film; the take-up spool in the Symbol is not what I would call normal. Usually, there's something to hold the film in place or a spot to insert the tail. These are not present on the Symbol or have fallen off in the case of my copy. After a bit of work, I did find a small claw that will grab a sprocket hole and pull the film along, but only when the back is closed. After reading the manual, I cannot match what I see on the camera with the manual. I did have some issues with frame spacing throughout the roll despite adjusting the tension. I will also note that the frame counter was also not working in my copy; no big deal, only an annoyance. Once out in the field, the camera worked okay. The never-ready case added a much-needed strap and made it comfortable to use in the field. The shutter release and advance worked smoothly and certainly helped with being speedy. The viewfinder proved handy in framing up shots; while not a perfect match, it does allow you to get a general idea. The camera itself is a guess or zone focus, but if you're shooting wide with stopped-down apertures, you won't have too much difficulty. But again, an external rangefinder might help out if you're not totally comfortable. The rewind button does not need to be held down to handle the rewind, although mine is a bit rough on the rewind, so I'll chalk that up to age/build quality. The camera has no means for metering built-in, so you'll need to use Sunny-16 or an external meter. In my case, because there's a decent hot-shoe, I went with my ReveniLabs hot-shoe meter, which did an excellent job. The only problem is that the camera's shutter speeds are off.

ЛОМО Смена Символ - ЛОМО T-43 4/40 - FPP Wolfman 35 @ ASA-100 - Ilford Ilfotec HC (1+63) 12:00 @ 20CЛОМО Смена Символ - ЛОМО T-43 4/40 - FPP Wolfman 35 @ ASA-100 - Ilford Ilfotec HC (1+63) 12:00 @ 20C

Optics
If there is one thing that the optical designers a LOMO were excellent at was a good performing triplet lens. And one of the biggest things that I always loved about the 8m was that T-43 lens, which first drew me back to the Smena Symbol. While not particularly fast at f/4 and a 40mm fixed focal length, it offers up an excellent lens for regular shooting and primarily for outdoor work unless you want to balance a flash on the camera. Optically, the lens has many characters with fall off and vignetting at the corners at the wider apertures, but that goes away when you stop it down. There's also a lovely swirl at f/4 in your out-of-focus elements especially rendering complex backgrounds. But once you start to stop down past f/8, you lose that character but end up with solid, sharp images.

ЛОМО Смена Символ - ЛОМО T-43 4/40 - FPP Wolfman 35 @ ASA-100 - Ilford Ilfotec HC (1+63) 12:00 @ 20CЛОМО Смена Символ - ЛОМО T-43 4/40 - FPP Wolfman 35 @ ASA-100 - Ilford Ilfotec HC (1+63) 12:00 @ 20C

Lowdown
Like any Soviet camera, buyer beware, these weren't built to Western standards of quality, but you do get a camera that is easy for you to learn repair work. In my case, I think the shutter is a bit off, but I was able to recover some of these images easily. While initially unsure, I'm rather happy with the Smena Symbol; it gives me everything I liked about the 8m but none of what I didn't like. On the used market, the Symbol will run you between 30-70$, but if you are spending that upper prince mark, it might be best to ensure that the camera is functional, tested, and maybe new seals added. While the camera isn't for everyone, if you're comfortable with manual metering, zone focus and a bit of uncertainty, the Smena Symbol is a solid choice to expand your Soviet camera collection.

Further Reading
Don't just take my word on the Smena Symbol, you can check out the reviews by other awesome camera reviewers!
Matt's Classic Cameras - Smena Symbol
Kosmo Foto - The Humble Soviet Camera that made it up Mt. Everest
Austerity Photo - The Cosmic Comrade
Lomography - An Unbiased Review of the LOMO Smena Symbol
35mmc - 5 Frames with a Smena Symbol - Nathalie Porter & Matt Evans
Blinded By the Light - Smena Symbol Review
Imaging Pixel - Smena Symbol Review
BKS Picture Blog - Smena Symbol Review

#camerareviewblogs #camera #camerareview #canada #elora #fppwolfman35 #gear #ilfordilfotechc #lomo #lomosmenasymbol #ontario #review #smenasymbol

image
alex luyckx unofficialalexluyckx@ծմակուտ.հայ
2021-08-02

Camera Review Blog No. 134 – Hasselblad 503cx

The Hasselblad V-System, one that has achieved legendary status within the photographic community. I'm surprised that I actually own the original 500c, and while I don't use it as much as I used to, it remains a popular tool in my kit. But what about going with something a little newer? The original 500c saw its initial release in 1957 and certainly has flaws, but as a system camera, it started something. While the 503cx isn't the newest horse in the stable, it adds a pile of features that makes up a greatly improved camera system but allows the use of the older accessories. And while I have a couple of older lenses and magazines for the back, my good friend James Lee was more than happy to loan out almost his entire kit for the 503cx to review. And what a camera it is, familiar yet improved, and the same joy to use as the 500c.

The Hasselblad 503cx seen here with Planar 80mm f/2.8 T* and a PME 45 Degree Metered Finder. Also pictured are the Distagon 50mm f/4 and the Sonar 150mm f/4 lenses.

Camera Specifications
Make: Hasselblad
Model: 503c/x
Type: Single Lens Reflex
Format: Multiple, Back Dependent (120/220 Standard, 6×6)
Lens: Interchangable, Hasselblad V-Mount
Shutter: Compur Leaf Shutter, 1″ - 1/500″ + Bulb
Year of Manufacture: 1989 - 1994

Background
Hasselblad as a camera company can trace back to a chance meeting between the son of Franz Victor Hasselblad, Arvid Vikor and George Eastman during Arvid’s 1885 honeymoon in London, England. Arvid’s father operated a trading company in Sweeden that dated back to 1841 and sold household goods. Arvid and George reached an agreement to allow the F.W. Hasselblad & Co company to be the sole distributor of Eastman’s photographic supplies. Fritz saw the photographic supplies more as a means to feed Arvid’s love of photography, more than a means for profit. Yet by 1908 the photographic division began profitable enough to create Hasselblad Fotografisk AG. Arvid’s son Karl wanted to further the company’s photographic prowess and sent his son, Victor, to study under the great photographic companies. In 1924 Victor went to Dresden, Germany, the world’s centre of the photographic industry. Karl would work in factories, shops, and labs. During his time he became a noted photographer himself, and in 1926 he moved to the United States. George Eastman would take the great-grandson of his old friend under his wing as a protege, at least until Eastman’s death by suicide in 1934. Victor, encouraged by all his learned, began to publish his work and returned to his native Sweeden in 1937 and opened up his own Photographic business, selling, processing, print, and building cameras. Victor, who had been tinkering with the idea of building his camera, got a boost when the Sweedish airforce presented him with an ariel camera from a downed Luftwaffe aircraft. Victor would produce the HK-7 in 1941, which would become a successful camera used by the Sweedish airforce. The death of his father saw Victor appointed as head of Hasselblad Fotografisk in 1943. The move gave Victor access to a wider range of skills, including workers who produced timepieces and watches. He turned the entire company towards the production of an improved surveillance camera, the SKa-4. By the end of the war, Hasselblad had produced some 342 cameras. With the end of the war, Victor turned everything he learned with the HK-7 and SKa-4 to produce a high-quality civilian camera. The design of the camera came from the SKa-4 and refined by noted SAAB designer Siten Sason. The war and partition of Europe made acquiring German optics had Victor turn to the United States, and Kodak gladly supplied their high-quality Ektar lenses. In 1948 the Hasselblad 1600F was reviled. The early model 1600F proved over-engineered and incredibly complex, which gave a bit of a poor reputation in reliability. A second version released in 1950 fixed some issues, but again suffered several of the same problems. Most of these were focused on the shutter, which required constant attention to maintain shutter speed accuracy. Hasselblad returned to the drawing board and in 1953 released the 1000F, it retained the focal plane shutter like the 1600F but proved far simpler with the internal workings. It also replaced the Kodak optics with Carl Zeiss optics, which helped lower the cost. A timely and favourable review by the American magazine, Modern Photography, put the 1000F on a pillar and launched Hasselblad into the limelight and made them a household name. But they weren’t done yet, to further improve on the reliability of the Hasselblad and decided to take a massive risk. The risk came in the form of the Hasselblad 500c released in 1957. Hasselblad decided to replace the focal plane shutter with a lens mounted Compur shutter, the risk was that leaf shutter cameras were often associated with a consumer camera, not professional. But Hasselblad continued to use high-quality Zeiss optics, and introduce the idea of a system camera. Users could swap out the lens, finder, and even the film back. And the film backs can be swapped out mid-roll thanks to a darkslide. Professionals flocked to the new camera that proved a huge winner and set a new benchmark for a professional camera. The 500c caught the eye of NASA, the American space program, who set up a contract to put Hasselblad cameras in space. The NASA contract the 500c became the base for the Hasselblad 500EL (and Electronic 500c) in 1965. Production of the 500c ended in 1970 with the introduction of the improved 500c/m. But the 500c/m could still use all the old backs, lenses, and finders, production of the c/m continued until 1994. During this time, Hasselblad also released the 503cx in 1988. While primarily the same camera as the c/m, the 503cx included several improvements. It came standard with an improved Acute Matte focusing screen and Palpas coating to cut back any internal reflections. Most important is an internal TTL flash meter. Production of the 503cx continued until 1994, but the logical replacement, the 503cw did not see release until 1997 and added an improved Acute Matte D screen and a gliding mirror system for improved use of telephoto lenses.

Hasselblad 503cx - Carl Zeiss Distagon 4/5- T* - Rollei RPX 400 @ ASA-200 - Rollei Supergrain (1+12) 6:15 @ 20CHasselblad 503cx - Carl Zeiss Distagon 4/5- T* - Rollei RPX 400 @ ASA-200 - Rollei Supergrain (1+12) 6:15 @ 20CHasselblad 503cx - Carl Zeiss Distagon 4/5- T* - Rollei RPX 400 @ ASA-200 - Rollei Supergrain (1+12) 6:15 @ 20CHasselblad 503cx - Carl Zeiss Distagon 4/5- T* - Rollei RPX 400 @ ASA-200 - Rollei Supergrain (1+12) 6:15 @ 20C

Impressions
What surprises me the most about the 503cx is that it is no heavier or no lighter than my 500c but it certainly performs better than the older model (no surprise). In a common setup, that being the 80mm f/2.8, A12 back, and a waist-level finder, it is a surprisingly compact camera to carry around and is well balanced and doesn't weigh you down too much. The one thing I do recommend is a good strap. The only that I borrowed came with a beautiful hand-crafted leather strap from my good friend Mark Rossi of Due North Leather. Despite being similar to the older model, the 503cx does have some different controls, namely an ASA setting wheel to help with the internal flash TTL meter. If you're familiar with the 500 series, then using the 503cx will be like riding a bicycle, it might take a bit if you're unfamiliar, but once you got it, you can easily use any camera in the system. The one thing that I did like was on the modern lenses, it is far easier to adjust the exposure settings since they are no longer coupled (like they are on my old chrome units) and there are leavers to help make the settings and differences in textures to help determine with dial does what setting. Probably the best addition is the viewfinder, the Acute Matte screen is bright and clean and makes focusing without the magnifier easy, but when doing close work the magnifier helps out a great deal. Focusing the lenses is smooth and the winder is equally smooth and the shutter, mirror, and doors make a delightful clunk when you take a photo.

Hasselblad 503cx - Carl Zeiss Distagon 4/5- T* - Rollei RPX 400 @ ASA-200 - Rollei Supergrain (1+12) 6:15 @ 20CHasselblad 503cx - Carl Zeiss Distagon 4/5- T* - Rollei RPX 400 @ ASA-200 - Rollei Supergrain (1+12) 6:15 @ 20CHasselblad 503cx - Carl Zeiss Distagon 4/5- T* - Rollei RPX 400 @ ASA-200 - Rollei Supergrain (1+12) 6:15 @ 20CHasselblad 503cx - Carl Zeiss Distagon 4/5- T* - Rollei RPX 400 @ ASA-200 - Rollei Supergrain (1+12) 6:15 @ 20C

Experiences
If you have used any of the 500-Series, or V-System then working with the 503cx will be both familiar and a little different. If you look at a Hasselblad the first time you probably will think that the camera is a bear to use, and you'd be right, they aren't the best when it comes to economics. But remember that the cameras were designed on a former surveillance camera designed to be mounted in an aeroplane. Yet, being a user of a 500c, the 503cx proved an easy experience. But there are a couple of things that add to the Hasselblad experience with the newer body. The first is the screen, the 503cx comes with not only the ability to change out focusing screens but having the stock Acute Matte focusing screen, which is big, bright, and makes focusing with or without the magnifier. And that goes for any lens, I've had the chance to use the 50/4, 80/2.8, and 150/4 and the screen remain bright and easy to use. And using the waist level finder is probably the most natural means to use the 503cx (or any V-System camera). Although I also had a chance to use the camera with a PME finder, not the older version (45° Metered Prism) but the PME finder. And it actually works well both mounted on a tripod but also handheld, although a handgrip would make life a little easier. The one thing that should be noted is that the PME finder is metered but displays in EV (Exposure Value) which is handy for older C lenses, which include the EV on the lens body, newer lenses lack. The one strange Despite everything, the camera is a joy to use, and surprisingly compact when properly equipped.

Hasselblad 503cx - Carl Zeiss Distagon 50mm 1:4 T* - Fomapan 100 @ ASA-100 - FA-1027 (1+14) 9:00 @ 20CHasselblad 503cx - Carl Zeiss Planar 80mm 1:2.8 T* - Fomapan 100 @ ASA-100 - FA-1027 (1+14) 9:00 @ 20CHasselblad 503cx - Carl Zeiss Planar 80mm 1:2.8 T* - Fomapan 100 @ ASA-100 - FA-1027 (1+14) 9:00 @ 20CHasselblad 503cx - Carl Zeiss Sonar 150mm 1:4 T* - Fomapan 100 @ ASA-100 - FA-1027 (1+14) 9:00 @ 20C

Optics
One of the biggest draws to the 500-Series from Hasselblad is the optics. And if you look at Hasselblad overall they have always used excellent optics, from the early focal plane shutter models using Kodak Ektar lenses to the current batch of Carl Zeiss optics. And the best part is that you can use any V-Mount lens, although for best compatibility you will want to stick with C or CF lenses. While a T* coating is a nice addition, it does help a lot with flare issues that the lenses suffer from, especially the Planars, but a good hood will help reduce the flare. I tried to be careful but did catch some flare a couple of times with the 50mm f/4 Distagon. The 503cx looks excellent with the all-black lenses, you will pay a bit more for the newer optics, the Chrome lenses (C) are older but excellent as well and if you are only using a leaf shutter, then you don't have to worry about focal plane support. The only thing to worry about is ensuring that you mount and dismount while the shutters are cocked to avoid damaging the body and the lens.

Hasselblad 503cx - Carl Zeiss Sonar 150mm 1:4 T* - JCH Streetpan 400 @ ASA-400 - Rollei Supergrain (1+12) 7:00 @ 20CHasselblad 503cx - Carl Zeiss Planar 80mm 1:2.8 T* - JCH Streetpan 400 @ ASA-400 - Rollei Supergrain (1+12) 7:00 @ 20CHasselblad 503cx - Carl Zeiss Planar 80mm 1:2.8 T* - JCH Streetpan 400 @ ASA-400 - Rollei Supergrain (1+12) 7:00 @ 20CHasselblad 503cx - Carl Zeiss Planar 80mm 1:2.8 T* - JCH Streetpan 400 @ ASA-400 - Rollei Supergrain (1+12) 7:00 @ 20C

Lowdown
While the 503cx isn't a camera that you need, if you are looking for an update from an older model, say a 500c then a 503cx might be the camera you're looking for. And the best part is that if you're already invested in the 500-series all you're going to be looking for is the camera body proper. However, they are not cheap on the used market. The bodies on their own will run between 1,500 and 2,100 dollars, and between 3,500 to 5,000 for a complete kit (lens, back, body, and finder). Surprisingly, being a newer unit, they are less expensive than 500cm units. The one thing to watch out for is to ensure the back is for 120 film, while you can use 120 film in a back designed for 220 film, you will lose one frame and start getting frame spacing issues. These backs are called A12 or 12 as opposed to A24 or 24. But these are well made and easily repaired and maintained by trained technicians. The funny part about Hasselblads is that they do carry their value well, even the older models and given the late 20th Century age of the 503cx they will carry more. If you're not into film or want to use these cameras for digital photography, you can, the Hasselblad CFV II 50C offers up a 50-megapixel CMOS sensor. And it also works with older units. As I started, Hasselblads aren't always cameras that you need, they are cameras that you want. But the one thing they can deliver is excellent image quality and a strange experience.

Further Reading
Don't just take my word on the 503cx, you can check out the reviews by other awesome camera reviewers!
35mmc - 5 Frames with the Hasselblad 503cx
5050 Travelog - Hasselblad 503cx Review
Munkeat Photography - Hasselblad 500cm/503cx Review
Film Advance - The Hasselblad Travel Camera

#camerareviewblogs #camera #camerareview #canada #carlzeiss #fa1027 #fomapan100 #gear #hasseblad503cx #hasselblad #jchstreetpan400 #oakville #ontario #palmerston #review #rolleirpx400 #rolleisupergrain #streetsville

imageGeorge SquareThe Blue HouseThe Old Pump
alex luyckx unofficialalexluyckx@ծմակուտ.հայ
2021-07-02

Camera Review Blog No. 131 – Nikon Nikkormat EL

You're probably wondering why I'm reviewing a Nikkormat EL when I've reviewed a Nikon FE. The reason is simple; the Nikkormat EL is the FE's foundation, the original Nikon electronic semi-automatic camera. This means that to understand where the FE comes from, I needed to try out an EL. That was my first mistake; the second mistake was shooting a second roll through the Nikkormat EL. I don't think this mistake is a bad thing. The camera worked perfectly in both rolls; the mistake was that now I want a Nikkormat EL. It's an easy-to-use camera, especially if you've used an FE or FE2, and is a joy to use. Special thanks to my good friend and brother in the film, Bill Smith, for loaning out the Nikkormat EL for a review.

Camera Specifications
Make: Nikon
Model: Nikkormat EL
Type: Single Lens Reflex
Format: 135, 36x24mm
Lens: Interchangable, Nikon F-Mount
Shutter: Electromagnetic vertical focal-plane shutter, 4″ - 1/1000″ + Bulb
Meter: Centre Weighted, TTL CdS Meter, EV1 ~ EV18 @ ASA-100, ASA-25 - ASA-1600
Year of Manufacture: 1972-6

Background
Like all Nikon SLRs, the Nikkormat EL can trace its heritage to the original Nikon F from 1959. Nikon aimed the F at the professional photographer market. Several other companies like Canon and Minolta were targeting the consumer market. Nikon's early attempts were ultimately failures, namely the Nikkorex line. In 1965 that all changed when they released the Nikkormat FT, using the same care and precision they did with the F and had a hit. The Nikkormat FT used the same F-Mount as the F and could accept all the same Auto-Nikkor lenses allowing amateur photographers to access the same quality optics but with a camera body at a fraction of a cost. Plus, the FT used the same match needle single CdS cell exposure system as the Phototomic T head for the F. But the FT had its own troubles and in 1967 Nikon released the Nikkormat FTn that resolved a lot of the earlier issues and added the now-famous 60/40 centre-weighted metering. It also allowed the camera to accept lenses with an aperture range of f/1.2 to f/32. While Nikon continued to be known for solid mechanical and manual cameras with the release of the F2 in 1971, they also began experimenting with semi-automatic exposure and the use of electronics in their cameras. Nikon would not be the first. That milestone came back in 1966 by East German camera giant Pentacon with the Praktica Electronic that used circuits rather than gears to control shutter timing. Plus, Nikon wanted to make full use of the Copal Square shutter's abilities that used electromagnets to control the virtual metal focal-plane shutter. The FTn used the Copal Square but remained a mechanical camera. Nikon had produced an attachment to allow for shutter priority semi-automatic exposure on the F2, but it was always an add on, not a native function. The Nikkormat EL, released in 1972, marked a radical shift. The camera operated with electronic circuits, a Copal Square shutter, and included aperture priority semi-automatic exposure. And did it all with existing Auto-Nikkor (non-AI) lenses. These were also smaller than the all-mechanical FTn. The EL saw production for only a few years before an improved version, the Nikkormat ELW hit the market, and production ceased in 1976. The ELW added contacts for a motor winder and an improved Copal shutter that increased the slowest speed to eight seconds. The ELW would be among the final cameras to bear the Nikkormat name, as in 1977, the EL2 came out with the Nikon name. The EL2 would release the CdS cell with a Silicon Blue Cell for metering and allowed for AI lenses. But production of the EL2 was short, as the Nikon FE came out shortly afterwards as part of the new line of cameras built in response to the Olympus OM-System.

Nikon Nikkormat EL - AI-S Nikkor 35mm 1:2.8 - Rollei Superpan 200 @ ASA-200 - Adox Atomal 49 (Stock) 10:30 @ 20CNikon Nikkormat EL - AI-S Nikkor 35mm 1:2.8 - Rollei Superpan 200 @ ASA-200 - Adox Atomal 49 (Stock) 10:30 @ 20C

Impressions
The first thing that I noticed about the Nikkormat EL is how similar and different the camera is compared to the other Nikkormats. Having worked with both an FT3 and FTn, the EL offers up a much smaller profile. While the mechanical Nikkormats have a taller prism profile, while the EL has a far more squat profile on the prism. It actually reminds me of a Kyiv-19 or Nikon FA. The camera is also smaller and a touch lighter than its mechanical cousins. But is larger and heavier than the later FE. The look and feel of the EL are similar to other Nikkormats but with some improvements for a better look and feel than the FTn. The camera is well laid out with all the common controls where you would expect them. The film advance is smooth and blissfully short, allowing rapid advance, and the shutter release is equally smooth. The film speed selector is around the film rewind and has a catch to prevent accidental adjustment. There is a similar lock on the shutter speed dial, which engages when you set the camera to Aperture Priority (A). There is also a catch that prevents the camera's accidental opening back, something that you see in all processional and semi-pro camera offerings from Nikon. The viewfinder is clean and simple, with a display that shows either the metered shutter speed and the selected shutter speed so that in manual mode, you can use a match-needle style to set your exposure setting. When the camera is off, the needle rests at the 1/15th speed. You use the half-pull method to power on the camera. There's even a battery check indicator on the back of the camera's top plate. But here's the biggest issue with the camera, the power comes from a battery, but rather than on the bottom of the camera, the battery is located inside the mirror box, behind the mirror. To change it, you need to lock up the mirror and open the compartment. It can be difficult to do and could, if done wrong, could damage the mirror.

Nikon Nikkormat EL - AI-S Nikkor 35mm 1:2.8 - Rollei Superpan 200 @ ASA-200 - Adox Atomal 49 (Stock) 10:30 @ 20CNikon Nikkormat EL - AI-S Nikkor 35mm 1:2.8 - Rollei Superpan 200 @ ASA-200 - Adox Atomal 49 (Stock) 10:30 @ 20C

Experiences
If you have worked with any Nikon camera from the 1960s to 1980s, using the Nikkormat EL will be a breeze. And I honestly felt far more comfortable with the EL and found it far smoother to operate than my FE. And if you're comfortable with an FE, the EL is almost the same camera. The one thing that I did find uncomfortable is the camera weight. Despite the small size, the EL is a heavy camera. Despite the added weight, the camera is well balanced, and the controls are in the right spot. Despite needing that older style lens mount, being a semi-automatic aperture indexing means that mounting the lens is simple; the camera will automatically detect the maximum aperture. In the field, the camera is a pleasure to use, loading film is simple, and the camera is smooth to operate. While not as bright, the viewfinder of the EL is clean and clear. With the shutter speeds clearly listed, the downside is that the aperture is not. The split viewfinder makes focusing easy. Despite having older CdS cells, the metering and auto-exposure system is dead-on perfect. The day I was out shooting, the camera for this review did not have the best lighting condition, and the film being used (Rollei Superpan 200) is not always the easiest. But the camera nailed everything perfectly (and the Adox Atomal 49 did a good job as well). In addition to these, the camera proved smooth in operation from film advance, loading, rewinding, and picture taking.

Nikon Nikkormat EL - AI-S Nikkor 35mm 1:2.8 - Rollei Superpan 200 @ ASA-200 - Adox Atomal 49 (Stock) 10:30 @ 20CNikon Nikkormat EL - AI-S Nikkor 35mm 1:2.8 - Rollei Superpan 200 @ ASA-200 - Adox Atomal 49 (Stock) 10:30 @ 20C

Optics
The EL was designed to work with Pre-AI or Auto-Nikkor lenses, which provides you with a wide range of awesome lenses. One of the best parts is that these pre-AI optics are often less expensive on the used market. That means that the camera requires a direct mechanical link using a pin-and-claw interface rather than a milled section of the lens mount and a follower on the camera. A good option for a three-lens kit for an EL would be a Nikkor-H 28mm (either an f/2.8 or f/3.5), a Nikkor-H 50mm f/2 (amazing lens), and a Nikkor-P 105mm f/2.5 (get the Sonnar design for a classic look). However, you can use your AI and AI-S lenses with the EL after a fashion. While all Nikon lenses produced after 1977 are either AI or AI-S, not all these lenses are created equal. Because the camera required that pin-and-claw interface, you can only mount lenses that still have that claw (or rabbit ear) on the lens. I'm lucky in the sense that all but one of my manual focus lenses have this claw still in place and I did use an AI-S in the creation of this review. But one of the best parts is that being the EL does have semi-automatic indexing, which means no shuffle when mounting the lens.

Nikon Nikkormat EL - AI-S Nikkor 35mm 1:2.8 - Rollei Superpan 200 @ ASA-200 - Adox Atomal 49 (Stock) 10:30 @ 20CNikon Nikkormat EL - AI-S Nikkor 35mm 1:2.8 - Rollei Superpan 200 @ ASA-200 - Adox Atomal 49 (Stock) 10:30 @ 20C

Lowdown
When I shot that second roll through the EL, I had to keep telling myself I didn't need another Nikon SLR. And yet, there is something satisfying with shooting the EL that feels different from the FE. While offering up a similar experience with semi-automatic metering, the camera itself is far heavier. It offers up that oddly mechanical feel to it that the FE does not have. The EL does not command a high price (which also doesn't help me). You can get a working camera for under 100$. The biggest issue is that these cameras are not easy to repair due to the electronics' hardwired nature, and many repair technicians will not touch the EL. There is always the EL2, but these are rare on the used market due to the short production run and the FE preference. But if you want a piece of Nikon history and camera history for that matter, the EL makes an excellent addition to your toolkit. These are solid hardworking cameras that are the perfect choice if you have a large collection of pre-AI glass and want that semi-automatic exposure in a heavy-duty camera.

Nikon Nikkormat EL - AI-S Nikkor 35mm 1:2.8 - Rollei Superpan 200 @ ASA-200 - Adox Atomal 49 (Stock) 10:30 @ 20CNikon Nikkormat EL - AI-S Nikkor 35mm 1:2.8 - Rollei Superpan 200 @ ASA-200 - Adox Atomal 49 (Stock) 10:30 @ 20C

Further Reading
Don't just take my word on the Nikkormat EL, you can check out the reviews by other awesome camera reviewers!
Down the Road - Nikon Nikkormat EL Review
Johnny Martyr - Nikkormat, Brutish & Beautiful
Casual Photophile - All about the Nikkormat Series - A Retrospective
Thorley Photographics - Nikkormat EL
Photographic Hardware - A brief outline of the Nikkormat EL manual focus SLR film camera
Photo Utopia - Nikkormat EL Review

#camerareviewblogs #adoxatomal49 #camera #camerareview #canada #gear #georgetown #nikkor #nikkormat #nikkormatel #nikon #ontario #review #rolleisuperpan200

image
alex luyckx unofficialalexluyckx@ծմակուտ.հայ
2021-06-07

Camera Review Blog No. 132 – Nikon F-401/N4004

Am I crazy for reviewing a camera that you can have for a song? Maybe? But I'm out here to talk about a camera that many will pass over due to age and the slow autofocus speeds. But when it comes to cameras in the history of photography, the F-401 fits in a strange little niche often forgotten next to the more advanced cameras of the day and, of course, the almighty F90/N90(x/s). And while I have given away the F90, and it gets far more use with its new owner, when I saw the F-401 offered up for free, I jumped on the camera. For two reasons, the first being evident that it came up in researching the background of the F90. As a completist, I like to review cameras that would lead to the iconic cameras, proof of concepts, like the FA, leading to the modern matrix metering that we love in our Nikon SLRs today. The second being I review so few cheap-and-cheerful cameras on my blogs; I realise I need to do that more since the expensive gear is only getting more expensive as the years go on. Special thanks to Nancy again for providing this lovely camera for the review.

Camera Specifications
Make: Nikon
Model: F-401 or N4004
Type: Single Lens Reflex
Format: 135 (35mm), 36x24mm
Lens: Interchangeable, Nikon F-Mount
Shutter: Electromagnetic Vertical Travel Focal Plane Shutter, 1″ - 1/2000″ + Bulb
Meter: Triple Sensor Meter, EV1 ~ EV19 @ ASA-100, ASA-25 - ASA-5000
Autofocus: Nikon AM200 AF Sensor (TTL Phase Detection)
Year of Manufacture: 1987-9

Background
The 1970s had brought rapid change to the photographic industry, and Nikon decided that they would begin experimenting with an autofocus system, showing off a prototype lens in 1971. While history is vague on what happened with that lens, Nikon would continue to work with manual focus SLRs for the time being. It wasn't until the end of the decade that some of the first practical autofocus systems were released. Polaroid released their sonar-based system for their instant cameras, and Konica and Canon are releasing their passive and active autofocus system respectively in the last two years of the 1970s. Camera makers focused their earliest autofocus efforts on point-and-shoot cameras. Soon Minolta, Pentax, Chinon, and Nikon raced to build an effect autofocus SLR. Pentax came in first with the Pentax ME F in 1981. The ME F is important to this story because it used lenses with the focus motor built into the lens body and a passive TTL phase-detection system that used contrast to pick the appropriate focus point. Nikon took these two elements and built their first autofocus SLR in 1983. Using their darling professional SLR, the F3 as the foundation Nikon built a new finder that included the autofocus detection sensor, a passive TTL system. The DX-1 prism finder required a section set of batteries (AAA if I'm reading the manual correctly). The real market for autofocus would be sports and action photographers; the first (and only) two lenses released for the system were an 80mm and 200mm telephoto. Ultimately the system did not succeed and any plans for more focal lengths scrapped. In 1985 Minolta dropped the α-7000 (Dynax (Europe), Maxxum (North America)) and changed the game completely. The 7000 would set the standard for autofocus SLRs in both function and appearance. And Nikon took notice. A year later, they released their first successful autofocus SLR, the F-501 (N2020 for US markets). Unlike Minolta and Canon, learning from the F3AF, Nikon opted to maintain their historic F-Mount and put the autofocus motor inside the camera body itself. This resulted in no cross-compatibility with the F3AF, which ended up a dead-end system. The F-501 did share that same blocky, hard angle, 1980s VCR look of the 7000. The F-501 suffered from slow autofocus, and the metering system was still a 60/40 centre-weighted sensor. Nikon would release a follow-up in 1987, the F-401 (N4004), aimed at the entry-level market. The F-401 used an improved autofocus sensor module (AM200) and a triple-sensor meter (not true matrix). The F-401 would also be the first Nikon SLR to use two control dials to set the shutter speed and aperture. These dials would also be used to set the camera into AE mode or semi-automatic shutter priority, or aperture priority. And the camera also featured manual exposure mode. Nikon would take these improvements and put many into the Nikon F4 and F-801 cameras. The F-401 received a much-needed update in 1989 with the F-401x, which surprisingly saw continued production until 1998 when the Nikon F60 superseded it0.

Nikon F-401 - AF Nikkor 50mm 1:1.4D - FPP Film Love @ ASA-200 - FPP D96 (Stock) 8:00 @ 20CNikon F-401 - AF Nikkor 50mm 1:1.4D - FPP Film Love @ ASA-200 - FPP D96 (Stock) 8:00 @ 20C

Impressions
If there's one thing the F-401 has going for, it is the camera's layout and looks. You can easily see where the design behind the later F90 comes from; gone are the sharp lines of the early 1980s. The camera is lightweight and feels good in the hand, and the controls are minimal and located in logical places. Despite its age, there's been no degradation of the rubberized coating on the camera body sections. However, the white "Nikon" script is filthy. I attempted to clean it with isopropyl alcohol but without any results. Despite being an entry-level camera, you can see some of Nikon's future design elements being tested on the F-401, notably the twin command dials for exposure control. One dial controls the lens aperture the other controls the shutter speed. The shutter release is pleasing, and the release is loud, as is the drive, which might be due to age again. While the built-in flash is visible, it does need to pop up to fire and is not that useful, but most older Nikon Speedlights (like the SB-24) work perfectly. The camera's viewfinder is a major failing in the camera; it's rather dim, even with an f/1.4 lens attached. There's also zero feedback in the viewfinder; your aperture and shutter speed are not displayed. The only indicator is when the camera hits focus.

Nikon F-401 - AF Nikkor 50mm 1:1.4D - FPP Film Love @ ASA-200 - FPP D96 (Stock) 8:00 @ 20CNikon F-401 - AF Nikkor 50mm 1:1.4D - FPP Film Love @ ASA-200 - FPP D96 (Stock) 8:00 @ 20C

Experiences
The one thing I did not expect with this camera is frustration. While powered by standard AA batteries, I found myself reseating them to get the camera to power on and needed to remember to take the batteries out or else they would go flat. I'll chalk that up to age. Loading the film proved easy enough, with the camera automatically loading the roll without any trouble, even a thinner based film. As I mentioned in the previous paragraph, even in the bright lights with a fast lens, the viewfinder proved dim and with little feedback in exposure settings. Having the pair of control wheels did make the camera operate familiarly. And while the control dials did have the appropriate labels for the settings, I much prefer that information in the viewfinder to adjust them without taking my eye away from the composition. I ended up running the camera in full AE to save myself the trouble. The metering, while not perfect, is okay. The biggest concern, if you haven't already guessed, is the autofocus. It's slow; it hunts and often misses the focus. Which made me happy I only had a twenty-four exposure roll because, by shot twenty, I was getting annoyed. But hey, this was still the early days of Nikon autofocus. And if you're wondering, yes, the camera also suffered from a light leak, but hey, when your review is going to be bad, you might as well embrace the terribleness.

Nikon F-401 - AF Nikkor 50mm 1:1.4D - FPP Film Love @ ASA-200 - FPP D96 (Stock) 8:00 @ 20CNikon F-401 - AF Nikkor 50mm 1:1.4D - FPP Film Love @ ASA-200 - FPP D96 (Stock) 8:00 @ 20C

Optics
One of the best (one of the few) aspects of the F-401 is the optics. Nikon has an excellent line of autofocus lenses out there, and the F-401 supports almost all the lens in the autofocus line. From the original AF Nikkor line to the D-Type and G-Type lenses because the camera has the controls to adjust the aperture on the body proper. That means you need to set your lenses with an aperture ring to the camera's highest number to work. I'm unsure if manual focus lenses will work with the camera, although I'm sure they do in Aperture Priority mode. And yes, even AF-S lenses, the only ones that won't work will be the latest Nikkor lenses, the E-Type (not to be confused with the Series E) that use an electromagnetic aperture. The period-appropriate lenses for the F-401 are the AF Nikkor line.

Nikon F-401 - AF Nikkor 50mm 1:1.4D - FPP Film Love @ ASA-200 - FPP D96 (Stock) 8:00 @ 20CNikon F-401 - AF Nikkor 50mm 1:1.4D - FPP Film Love @ ASA-200 - FPP D96 (Stock) 8:00 @ 20C

Lowdown
I can see this camera being something; if you're not wanting to spend a lot of money and have autofocus Nikon glass, then an F-401 is both a blessing and a curse. On the used market, the prices vary greatly. Some are up above the 100$ mark and are approaching even the 200$ mark; for what the camera is, I don't recommend paying over 100$ for an F-401 (both the S and X variants). On average, they run between 60-80$. Some lower, but that's a fair price, even better if they have a lens attached. Would I recommend this as a good camera? No, would I recommend it as an entry-level SLR for a new photographer or a child? Yes, providing you haven't spent too much on the camera in the first place.

Nikon F-401 - AF Nikkor 50mm 1:1.4D - FPP Film Love @ ASA-200 - FPP D96 (Stock) 8:00 @ 20CNikon F-401 - AF Nikkor 50mm 1:1.4D - FPP Film Love @ ASA-200 - FPP D96 (Stock) 8:00 @ 20C

Further Reading
Don't just take my word on the F-401/N4004, you can check out the reviews by other awesome camera reviewers!
Canny Cameras - Nikon F401 Review - The £1.50 SLR
Photographic Hardware - Nikon F-401/N4004 Review
Tinkering With Cameras - Nikon F401/N4004 Review
Low End Mac - Nikon N4004/F-401 Review

#camerareviewblogs #camera #camerareview #canada #fppd96 #fppfilmlove #gear #nikkor #nikon #nikonf401 #nikonn4004 #oakville #ontario #review

image
alex luyckx unofficialalexluyckx@ծմակուտ.հայ
2021-06-04

Bonus Camera Review – Minolta X-7a

Much of my early years of photography were taken up with the Minolta system. From my initial gateway camera, the Hi-Matic 7s to my first SLR the SR-T 102. The next step in my journey would be some level of automation, and for that, in stepped the X-7a. A gift from a church member who was no longer using the camera gifted me the camera and a single lens. But having a set of Minolta SR lenses already, I had an excellent selection of optics. And the camera would be my first experience with a motor drive, go through some of my earliest explorations and be the last camera I used for an all-film PYPS weekend.

The only surviving picture of my X-7a system minus the motor drive and probably the first 'camera system' photo I ever took.

Camera Specifications
Make: Minolta
Model: X-7a (alternately X-370)
Type: Single Lens Reflex
Format: 135 (35mm), 24x36mm
Lens: Interchangeable, Minolta SR-Mount
Shutter: Quartz Horizontal Focal Plane Shutter, 4″ - 1/1000″ (A), 1″ - 1/1000″ (M) + Bulb
Meter: 1x TTL SBC Centre-Weighted Cell, EV-1 ~ EV18 @ ASA-100, ASA-12 - ASA-3200
Year of Manufacture: 1985-90

Minolta X-7a - Minolta MD 50mm 1:1.7 - Kodak Max 400Minolta X-7a - McKinnon 28mm 1:2.8 - Kodak Max 400

Background
The Minolta X-7a comes from the Minolta highly successful X-Series that started with the Minolta/Leica collaboration that first resulted in the XE and XD. Minolta would take the lessons learned in 1981 and released their own full PSAM camera, the X-700, which was a quick commercial success for Minolta. This spawned a series of other cousin cameras in the X-Series. While these cameras would lack full PSAM, going for an aperture priority plus manual mode. The first of these is the X-500/X-570, followed by the X-300. If you're familiar with the Maxxum line of cameras, you'll probably be able to guess what Minolta was doing at this point. The X-700 is aimed at the advanced amateur/semi-pro market, the X-500 is the upper reaches of the consumer market, and the entry-level cameras is the X-300. So, where does the X-7a fit in? Is it a cousin of the X-700 with fewer features? Well, you would be somewhat right. The X-7a is an all-black version of the X-370, a chrome/black two-tone version of the X-300 for the North American market. To ensure you're keeping up at this point, the X-300 is an all-black semi-automatic (aperture priority) entry-level SLR in all-black. A two-tone version for the North American market has the X-7a, which is the same camera but all black. Despite Minolta's prowess in R&D, they do make their camera models super confusing. To make things simple, I will be using X-7a from now on. There are three big differences between the X-500 and X-7a: the mode/shutter speed dial is fully covered with a single dial at the front to adjust the mode and shutter speeds in manual function. Second, there is no depth of field preview and, finally, no off the film plane flash metering. What makes it interesting is that the X-7a continued production until 1990, well into Minolta's move towards autofocus.

Minolta X-7a - Minolta MD 50mm 1:1.7 - Kodak Max 400Minolta X-7a - Minolta MD 50mm 1:1.7 - Kodak Max 400

Impressions
When it comes to the 1980s X-Series camera, they all look fairly similar. Clean, plastic, all the right controls in all the right places. While some noted differences from the X-700, if you've used any of the mid-1980s X-Series cameras, you can easily use the X-7a. The camera itself is small, almost too small for my personal tastes, so I picked up a Motor Drive for my camera in one of my first solo trips into Toronto. But with the small size, it can take up next to no space in your camera bag and allows you to carry around a great deal of more lenses. Despite being plastic, the camera did have a decent weight in hand without being overly heavy. The one thing that I did with the camera is the shrouded shutter speed indicator; it is a sleek look and only shows a single speed in the window or "A" for semi-automatic mode (Aperture Priority). I actually feel that Minolta is what made me prefer aperture priority to shutter priority for semi-automatic functions. The adjustment dial is small but won't be too much of an issue unless you're wearing heavy gloves, but if it's that cold, you probably should not have the X-7a out! The shutter button is a typical Minolta of the age with a soft-touch with a half-press to activate the metering. The viewfinder for the camera's market is decent, with an LED dot display on the side for displaying the shutter speed.

Minolta X-7a - Minolta MD 50mm 1:1.7 - Konica-Minolta VX400-SIIMinolta X-7a - Minolta MD 50mm 1:1.7 - Konica-Minolta VX400-SII

Experiences
As a second SLR, the X-7a became an excellent step in my own photographic journey and what I look for in a camera. Having learned on an all manual camera that is a tank, moving to something a bit more refined and semi-automatic proved an excellent second step. Aimed at the entry-level market, the camera is simple in use and functionality. The camera is lightweight and easy to handle; loading the camera is simple and is probably easier to load than my SR-T. The one trick that I learned quickly when loading film is to set the shutter speed manually to allow for quicker loading and advancing to the first exposure. In the field, the camera performed well; I shot mostly consumer films with the X-7a, mainly C-41 films colour, some B&W. But I also shot slide film, and the meter handled all the different latitudes. But as I mentioned in the previous paragraph, adding on a Minolta Motor Drive 1 remains one of the best additions to the camera as it added in that extra balance I had needed going from the SR-T to an X-Series. And the X-7a would end up shaping my like of aperture priority. Even when I went to digital and the Nikon system and ditching the Minolta, I was happy when I picked up Nikon F3 and got almost the same experience.

Minolta X-7a - Minolta MD 50mm 1:1.7 - Fujichrome Sensia 400Minolta X-7a - Minolta MD 50mm 1:1.7 - Fujichrome Sensia 400

Optics
At least for younger me, one of the best parts is that the X-7a maintained the old SR-Mount for Minolta lenses, allowing me to use all my existing glass. One thing to note is that at this point in the game is that the SR-Mount had two different classes, the older MC and the newer MD. The MD lenses were needed if you were using full Program or Shutter priority mode, so on the X-700 or XD cameras. This means that you can easily use the older SR/MC lenses with your X-7a, and there are plenty of excellent Minolta and third party optics available for these cameras. Personally, if you stick to a 28mm, 50mm, and a short portrait-length lens and you'll be set. But there are some other excellent optics along the way. The Rokkor-X 45mm f/2 is a good pancake lens and will look excellent on the smaller format. But the best part is that many of these lenses are fairly inexpensive on the used market.

Minolta X-7a - Minolta MD 50mm 1:1.7 - Agfa APX 400Minolta X-7a - Minolta MD 50mm 1:1.7 - Agfa APX 400

Lowdown
What surprises me the most is that on the used market, these cameras are not cheap. For an X-300, you're looking at paying between 140-230$, a little less for the X-370, those range between 80-110. And probably that is what makes the X-7a a true hidden gem, being that it is pretty much the same camera as the X-300/X-370 but with a different name bag, you can pick up an X-7a for under 100$ on the used market, most being priced between 35-80$ and some even come with lenses. If you're looking for an inexpensive second body for your X-System or an inexpensive Minolta SLR, then I wouldn't say no to an X-7a, and while my days working with these cameras have moved towards more of the 1970s with the XE and XD cameras, I do still have a soft spot for the X-7a, so much so that I ran an XG-M for a few months before passing it along to another photographer.

Minolta X-7a - Minolta MD 50mm 1:1.7 - Ilford Super XP2Minolta X-7a - Minolta MD 50mm 1:1.7 - Ilford Super XP2

Further Reading
Don't just take my word on the Minolta X-7a, you can check out the reviews by other awesome camera reviewers!
Eric Constantineau - Minolta X-7a Review
Casual Photophile - Minolta X-7a Reivew
Daniella Bassett - Minolta X-300 Review
Lomography - Minolta X-300: A Beautiful Analogue Camera

#camerareviewblogs #agfaapx400 #baysville #camera #camerareview #campcarin #canada #fujichromesensia400 #gear #gravenhurst #hamilton #ilfordsuperxp2 #kodakmax400 #konicaminoltavx400sii #minolta #minoltax300 #minoltax370 #minoltax7a #ontario #oshawa #pyps #review #richmondhill #rokkor #toronto

imageThe Minolta SystemGTKYGCamp Fire
alex luyckx unofficialalexluyckx@ծմակուտ.հայ
2021-05-18

Camera Review Blog No. 131 – Lomography LOMO LC-A+

![image](https://live.staticflickr.com/65535/50711056987_95d46ef5be_b.jpg" width=)

Suppose a singular camera relaunched the love of film photography and sparked the inspiration of hundreds if not thousands of photographers. That camera is the LOMO LC-A. While this particular camera is not an LC-A, it is, in the proper fashion of the original LC-A, a direct successor and continuation on the inspiration given by that fateful day in 1991, but more on that later. The LC-A+ is Lomography's answer to providing the classic look that gave the latter days of the Soviet Bloc rich saturated colours and heavy contrast. First released in 2006 after the closure of the original LOMO production lines for the LC-A, the LC-A+ added many featured that Lomography photographers were seeking. And while I had no desire to spend money on a new LC-A+, when one turned up at my doorstep, I wasn't going to say no.

Camera Specifications
Make: Phenix Optical Company for Lomography International
Model: LOMO LC-A+
Type: Point-And-Shoot
Format: 135 (35mm), 36x24mm
Lens: Fixed, Lomography Minitar-1 1:2.8 32mm (3 Elements in 3 Groups), f/2.8 - f/16
Shutter: Focal Plane Leaf Shutter, 1/500″ - Unlimited
Meter: 1x CdS Cell, EV2 ~ EV17 @ ASA-100, ASA-100 - ASA-1600
Year of Manufacture: 2005-Current

Background
The story of the LC-A+ does not start in Prague, Vienna, or even St. Petersburg; it starts in Nakano, Japan. In the early 1980s, Cosina released the CX-1 and, in quick succession, the CX-2. These cameras where compact zone-focus point-and-shoot cameras. Offering full Auto-Exposure and limited Aperture Priority AE control, when you picked an aperture, the camera defaulted to a shutter speed of 1/45″ designed for use with a flash. As the story goes, in 1981, a CX-1 or CX-2 ended up in the hands of General Igor Petrowitsch Kornitzky. Kornitzy, right-hand-man to the Minister for Industry and Defence in the USSR. General Kornitzky invited his good friend Michail Panfilowitsch Panfiloff to take a closer look at the camera. History is foggy, which CX ended up on the General's desk. Both men enamoured with the camera, the rugged metal construction, the five-element 35mm f/2.8 lens, and Auto-Exposure controls. It was like nothing the Soviet camera industry had seen. Panfilov, being the director of the ЛОМО (LOMO), Ленинградское Оптико Мечаничесцкое Обйединение (Leningrad Optico Mechanical Association), turned to his top engineer to design a Soviet version of the CX-2. Mikhail Grigorievich Kholomyanski began to design the new camera, but rather than make a direct copy which might anger the Japanese camera maker Cosina. He made plenty of changes to the design. Kholomyanski turned to Mr Tarabukin to make a copy of the 35mm f/2.8 lens. The goal set out by General Kornitzky, and Director Panfiloff was to create a camera for the masses that allowed full AE and a brilliant optical experience. The new camera would not be the first attempt by LOMO to design an auto-exposure camera. They had several prototypes through the 1970s, but the guts of the CX-2 marked a major leap forward for the Soviet camera industry. The prototype arrived later in 1981 and did not meet Kornitzky's criteria. The design too far removed from the CX-2 and the Tarabukin lens would increase the camera's overall cost and make it out of the range of most citizens. The USSR did not need a camera for the export market, the camera, now called the ЛОМО Компакт Автомат (LOMO Compact Automatic, or Kompact Automat), would be strictly for the domestic market or out to the wider Soviet Bloc. Kholomyanski, shaken by the General's anger, returned to his drawing board and, hoping to avoid a one-way trip to a Siberian Gulag, designed a camera far closer to the CX-2 just different enough to avoid infringement of the Cosina Design. He also handed the lens design over to Lev Sakin, who produced a triplet design lens for the Kompact Automat, calling the 32mm f/2.8 lens the Minitar 1. The second prototype arrived in 1982 and met with some success in a test market of St. Petersburg, as LOMO prepared to move into mass production of the Kompact Automat. To ensure success, they had built a second version of the camera, calling it the Смена-18, a near copy of the Kompact Automat but offered up a fully mechanical camera. Both the Смена-18 and Смена-19 were presented to General Kornitzky for his final approval and green-light to being mass-produced. Now please, the general gave the nod to both the Смена 18 and 19. And mass production started in 1984. And while LOMO did produce the Смена-19 a replacement to the Смена Символ (Smena Symbol), itself an improvement on the Смена 8m, with a selenium meter akin to the Olympus Trip 35, production lasted from 1985-9 and only in a limited fashion. the Смена-18 was shoved in a safe and never spoken of again. Instead, the St. Petersburg LOMO plant began pumping out the Kompact Automat in 1984 at a rate of 1,000 units per month. LOMO employed some 1,200 workers on the Kompact Automat assembly line, 500 directly responsible for final assembly. A majority of these workers were young women who's fine motor control helped with the small design. The camera proved an overnight success and quickly moved out into the Soviet Bloc, with some of the popular spots being Cuba, Vietnam, the German Democratic Republic (East Germany), Poland, Ukraine, and Czechoslovakia. LOMO even produced a limited number branded as the Zenith Lomo found their way west of the Iron Curtain. Little did LOMO know that their little camera would capture the final years of Soviet Russia. Even still in 1986, LOMO produced a special version for the 27th Anniversary of the Communist Party. The same year they produced an improved version, the LK-M with a better shutter and a standard threaded cable release, but few were ever produced. The fall of the Berlin Wall in 1989 marked the beginning of the end after a series of revolutions throughout the Soviet Bloc began to see a flood of western cameras that were far superior to many produced in the east. By 1991 even the USSR fell, and sales of the LC-A tanked. Just as many East wanted cameras from the West, many Western travellers were taking advantage of the newly opened borders. One group of students from Vienna found themselves in a Prague junk shop in the newly christened Czech Republic. Among the many wares, they found a Kompact Automat, or LC-A as they were called. Buying the camera that they had never seen before, they quickly fell for the vignetted optics, rich saturation and deep contrast. Not to mention the simplicity of the operation. When they returned to Vienna, they took several more LC-A cameras with them and in 1992 founded the Lomographic Society International, or simply Lomography. Using the LC-A as their flagship, they promoted a new photography style, one based on gut instinct and less than perfect cameras. They got their hands on as many LC-As as they could and began to fix, refurbish, and sell the cameras. Despite the second wave, by 1994, LOMO had closed up the LC-A production line. Lomography had plenty of cameras to choose from, but even these were becoming scarce, hard to find and rising in price as demand increased. Rather than face the loss of their flagship, they travelled to St. Petersburg. After several rounds of negotiations with LOMO and the city's mayor, one Vladimir Putin (yes, that Putin), they struck on a new deal to restart production of an improved LC-A. The 1997 version of the LC-A remained mostly unchanged from the original version but featured a standard threaded shutter release, ASA markings instead of GOST, and an improved shutter. LOMO ramped up production of the new LC-A to near Soviet-era levels, and Lomography happily sold the camera into the hands of waiting photographers. But by 2005, LOMO faced two problems. The first being that many of their workforce on the LC-A line had been part of the original run and were starting to age or die, plus LOMO could no longer afford to keep such a niche product in a high-tech world. And in 2005, it officially ended the LC-A. But truly like the original LC-A, Lomography reinvented their original camera and licensed production to Phenix Optical in China. The new LC-A+ took many of the improvements made to the 1997 version of the LC-A, such as a threaded shutter release, ASA scale, and improved shutter reliability. A few grams of weight was shaved by switching the camera body to plastic rather than metal. A set of groves allowed for different lens accessories, removable door allowed for a Fuji Instax Mini back. And the Chinese copy of the Minitar 1 a near-perfect copy of the original LOMO lens, although Lomography did have a limited release of LC-A+ RL that had an original LOMO lens mounted. But Lomography did not stop there; they also released the LC-W with a wide-angle lens and the LC-A+ 120, a medium format version of the camera shooting a 6×6 image.

Lomography LOMO LC-A+ - Lomography Minitar 1 1:2.8 32mm - FPP Wolfman 100 @ ASA-100 - Ilford Ilfotec HC (1+63) 12:00 @ 20CLomography LOMO LC-A+ - Lomography Minitar 1 1:2.8 32mm - FPP Wolfman 100 @ ASA-100 - Ilford Ilfotec HC (1+63) 12:00 @ 20C

Impressions
If you're not used to Lomography cameras, you might be a little concerned at how plastic the camera feels, it's light, and it feels like you might break it by looking at it wrong. And while the camera does have its weak spots, and you do have to be a little careful with it, it is of decent construction. In true Soviet form, the original LC-A was of all-metal construction, but the new LC-A+ is almost all plastic, some metal bits, but it is mainly plastic. But all this and small design makes the camera insanely practical as a pocket camera that you can carry around everywhere without any weight considerations. Control-wise, there is little that you need to worry about on the camera; the two main items are marked and in an excellent spot for how you hold the camera. The focus leaver, which allows you to focus from infinity to 0.8m, is located on the left and controlled by your index finger. Second, the shutter release is located in a comfortable spot for your index finger. The film advance is a dial-type but has rounded knurls, so it doesn't dig into your fingers in cold weather. The film speed control is awkward to operate, being hidden in a nook with a gear-like dial. You do have speeds between 100 and 1600 which isn't too bad, but you do not have any slow speeds. One note is that the actual meter sensor is not TTL, there's a small dome above the film speed indicator. Make sure you don't cover that with your hands when out, or your camera's meter reading is thrown out of whack. The on/off switch is under the front lens housing, the multi-exposure button, and the battery compartment. While there's no hardware for a neck strap, a wrist strap is present and is helpful.

Lomography LOMO LC-A+ - Lomography Minitar 1 1:2.8 32mm - FPP Wolfman 100 @ ASA-100 - Ilford Ilfotec HC (1+63) 12:00 @ 20CLomography LOMO LC-A+ - Lomography Minitar 1 1:2.8 32mm - FPP Wolfman 100 @ ASA-100 - Ilford Ilfotec HC (1+63) 12:00 @ 20C

Experiences
If there's one thing that I can generally describe, my experience with the LC-A+ is fun. Yes, despite any flaws or, as we say in the IT world, 'features' the LC-A+ is an enjoyable camera to use. And I can honestly see why it became super popular both in the original run and today in the Lomography circles. The camera is small and lightweight and adds nothing to any camera kit, and can be carried in a pocket. Loading the camera is easy, with the back being released by the spring release by pulling up the rewind knob. Here's one of the camera's weak spots; as soon as you pull up the rewind knob, you'll feel a structural weakness. While mine has not broken, I'm also careful. Loading the film is straightforward, advancing and clicking advance and click motion until you get to the '1' on the film counter. While compact, the camera fits well in hand, and the only real trouble I see is blocking off the exposure sensor. The shutter release is big, and there's a satisfying click when the shutter is triggered. The viewfinder is big and bright but offers zero feedback or help in correcting for parallax. But if you're shooting an LC-A+, there's a chance that you don't care too much, but the viewfinder is close to what the lens sees. The only feedback that you get is a single red LED that lights up to indicate that there is enough charge in the battery to operate the camera. Once there, just point-and-shoot to your heart's content. The camera also has a hot shoe, but you're want to use a smaller flash not to throw off the camera's balance. Rewinding the film is triggered by a release button on the bottom of the camera, and there's enough clearance to use the rewind knob without adjusting its height. Despite the simplicity, the camera is a joy to use, even for me given that I'm used to feature-rich cameras with tonnes of feedback and details in the viewfinder, joy in simplicity. Of course, the camera is far from perfect. You will face spacing issues, and missed exposures in strange lighting conditions, and your own hand blocking that metering eye.

Lomography LOMO LC-A+ - Lomography Minitar 1 1:2.8 32mm - FPP Wolfman 100 @ ASA-100 - Ilford Ilfotec HC (1+63) 12:00 @ 20CLomography LOMO LC-A+ - Lomography Minitar 1 1:2.8 32mm - FPP Wolfman 100 @ ASA-100 - Ilford Ilfotec HC (1+63) 12:00 @ 20C

Optics
Next to the LC-A's auto-exposure functionality, the next most significant draw to this camera is the lens. As I mentioned in the camera history, the original Cosina camera had a far more complex lens. Still, the Soviet optics designers created a three-element lens that produces a sharp image. This Minitar lens is a gem among Soviet camera designs, and while the LC-A+ that I had does not have an original Russian lens. If you have a Lomography produced LC-A made 2005-7, the lens is an original one, built at the LOMO factory under contract, with original parts (and in some cases workers). When production shifted to China from 2007 onwards, the lens is made to the same specifications by their Chinese factory. Of course, you can still get a Russian made lens marked with an RL designator, but you will pay an extra premium. The lens produces a unique image that is almost tied to those early days of Lomography and the last days of the Soviet Bloc, rich saturated photos and plenty of contrast. The lens has a decent sharpness for a three-element lens but does have plenty of vignetting at the corners when wide open.

Lomography LOMO LC-A+ - Lomography Minitar 1 1:2.8 32mm - FPP Wolfman 100 @ ASA-100 - Ilford Ilfotec HC (1+63) 12:00 @ 20CLomography LOMO LC-A+ - Lomography Minitar 1 1:2.8 32mm - FPP Wolfman 100 @ ASA-100 - Ilford Ilfotec HC (1+63) 12:00 @ 20C

Lowdown
While it will never be a primary camera for me, well, it might for special days like International Communist Camera Day or World Toy Camera Day, I certainly can see it coming along on trips, photo walks, and just being in the pocket or bag if I need a quick run and gun. While I only have shot black & white film through the camera, I certainly plan on trying out more colour film to see that rich deep saturation that the Minitar-1 renders. If you are looking for one of these, it's going to be buyer beware. There is still plenty of original LC-As floating around, and you can get some for under 100$ on the used market. Honestly, unless it were new-old stock in the original sealed box, I wouldn't pay more than 100$. Most are averaging 40-70$ on the used market. If you are looking for one, target sellers from the former Bloc countries, Ukraine, which was a famous market for the LC-A, even the Czech Republic and Russia. But remember, the cameras are starting to get old and not many people can fix them. Plus, the original models are known for dodgy shutters. You can still buy an LC-A+ new direct from Lomography, and as I've said in this review, they are excellent, fun, and worth some money. New LC-A+ cameras will cost you a fair nickel. You're looking at 350$ for the basic model. The Wide-Angle version is around 500$, and the Medium Format LC-A is 600$. They are a little cheaper on the used market, but there aren't many on the market (no surprise there), but I did see the ones in the 130-250$ range. In this case, buy new to ensure a good working model and support the fine folks at Lomography. The LC-A is the camera for the masses, simple, easy to use, and designed, like all Soviet-era cameras, to bring photography to the masses. It did so, twice, not bad for a Soviet copy of a Japanese camera that seems to have overshadowed its original.

Further Reading
Don't just take my word on the LC-A+, you can check out the reviews by other awesome camera reviewers!
Kosmo Foto - Lomo LC-A+ Review
35mmc - Lomo LC-A+ Review – love it or hate it…. or both?
Lomography.com - Lomo LC-A+ : Review as a LC-A+ newbie

Looking for reviews of the OG camera check out these excellent LOMO LC-A Reviews!
Kosmo Foto - Lomo LC-A review
James Cockcroft - The Lomo LC-A: A Review
Ryan Shockey Davis - Lomo LC-A Review: Comprehension of the Necessities
Film Shooters Collective - Lomo LC-A Review
Film Wasters - Looking past the Hype - an honest review of the LOMO LC-A

#camerareviewblogs #cambridge #camera #camerareview #canada #fppwolfman100 #galt #gear #ilfordilfotechc #lomolca #lomography #ontario #review

alex luyckx unofficialalexluyckx@ծմակուտ.հայ
2021-05-03

Camera Review Blog No. 131 – Lomography LOMO LC-A+

Suppose a singular camera relaunched the love of film photography and sparked the inspiration of hundreds if not thousands of photographers. That camera is the LOMO LC-A. While this particular camera is not an LC-A, it is, in the proper fashion of the original LC-A, a direct successor and continuation on the inspiration given by that fateful day in 1991, but more on that later. The LC-A+ is Lomography's answer to providing the classic look that gave the latter days of the Soviet Bloc rich saturated colours and heavy contrast. First released in 2006 after the closure of the original LOMO production lines for the LC-A, the LC-A+ added many featured that Lomography photographers were seeking. And while I had no desire to spend money on a new LC-A+, when one turned up at my doorstep, I wasn't going to say no.

Camera Specifications
Make: Phenix Optical Company for Lomography International
Model: LOMO LC-A+
Type: Point-And-Shoot
Format: 135 (35mm), 36x24mm
Lens: Fixed, Lomography Minitar-1 1:2.8 32mm (3 Elements in 3 Groups), f/2.8 - f/16
Shutter: Focal Plane Leaf Shutter, 1/500″ - Unlimited
Meter: 1x CdS Cell, EV2 ~ EV17 @ ASA-100, ASA-100 - ASA-1600
Year of Manufacture: 2005-Current

Background
The story of the LC-A+ does not start in Prague, Vienna, or even St. Petersburg; it starts in Nakano, Japan. In the early 1980s, Cosina released the CX-1 and, in quick succession, the CX-2. These cameras where compact zone-focus point-and-shoot cameras. Offering full Auto-Exposure and limited Aperture Priority AE control, when you picked an aperture, the camera defaulted to a shutter speed of 1/45″ designed for use with a flash. As the story goes, in 1981, a CX-1 or CX-2 ended up in the hands of General Igor Petrowitsch Kornitzky. Kornitzy, right-hand-man to the Minister for Industry and Defence in the USSR. General Kornitzky invited his good friend Michail Panfilowitsch Panfiloff to take a closer look at the camera. History is foggy, which CX ended up on the General's desk. Both men enamoured with the camera, the rugged metal construction, the five-element 35mm f/2.8 lens, and Auto-Exposure controls. It was like nothing the Soviet camera industry had seen. Panfilov, being the director of the ЛОМО (LOMO), Ленинградское Оптико Мечаничесцкое Обйединение (Leningrad Optico Mechanical Association), turned to his top engineer to design a Soviet version of the CX-2. Mikhail Grigorievich Kholomyanski began to design the new camera, but rather than make a direct copy which might anger the Japanese camera maker Cosina. He made plenty of changes to the design. Kholomyanski turned to Mr Tarabukin to make a copy of the 35mm f/2.8 lens. The goal set out by General Kornitzky, and Director Panfiloff was to create a camera for the masses that allowed full AE and a brilliant optical experience. The new camera would not be the first attempt by LOMO to design an auto-exposure camera. They had several prototypes through the 1970s, but the guts of the CX-2 marked a major leap forward for the Soviet camera industry. The prototype arrived later in 1981 and did not meet Kornitzky's criteria. The design too far removed from the CX-2 and the Tarabukin lens would increase the camera's overall cost and make it out of the range of most citizens. The USSR did not need a camera for the export market, the camera, now called the ЛОМО Компакт Автомат (LOMO Compact Automatic, or Kompact Automat), would be strictly for the domestic market or out to the wider Soviet Bloc. Kholomyanski, shaken by the General's anger, returned to his drawing board and, hoping to avoid a one-way trip to a Siberian Gulag, designed a camera far closer to the CX-2 just different enough to avoid infringement of the Cosina Design. He also handed the lens design over to Lev Sakin, who produced a triplet design lens for the Kompact Automat, calling the 32mm f/2.8 lens the Minitar 1. The second prototype arrived in 1982 and met with some success in a test market of St. Petersburg, as LOMO prepared to move into mass production of the Kompact Automat. To ensure success, they had built a second version of the camera, calling it the Смена-18, a near copy of the Kompact Automat but offered up a fully mechanical camera. Both the Смена-18 and Смена-19 were presented to General Kornitzky for his final approval and green-light to being mass-produced. Now please, the general gave the nod to both the Смена 18 and 19. And mass production started in 1984. And while LOMO did produce the Смена-19 a replacement to the Смена Символ (Smena Symbol), itself an improvement on the Смена 8m, with a selenium meter akin to the Olympus Trip 35, production lasted from 1985-9 and only in a limited fashion. the Смена-18 was shoved in a safe and never spoken of again. Instead, the St. Petersburg LOMO plant began pumping out the Kompact Automat in 1984 at a rate of 1,000 units per month. LOMO employed some 1,200 workers on the Kompact Automat assembly line, 500 directly responsible for final assembly. A majority of these workers were young women who's fine motor control helped with the small design. The camera proved an overnight success and quickly moved out into the Soviet Bloc, with some of the popular spots being Cuba, Vietnam, the German Democratic Republic (East Germany), Poland, Ukraine, and Czechoslovakia. LOMO even produced a limited number branded as the Zenith Lomo found their way west of the Iron Curtain. Little did LOMO know that their little camera would capture the final years of Soviet Russia. Even still in 1986, LOMO produced a special version for the 27th Anniversary of the Communist Party. The same year they produced an improved version, the LK-M with a better shutter and a standard threaded cable release, but few were ever produced. The fall of the Berlin Wall in 1989 marked the beginning of the end after a series of revolutions throughout the Soviet Bloc began to see a flood of western cameras that were far superior to many produced in the east. By 1991 even the USSR fell, and sales of the LC-A tanked. Just as many East wanted cameras from the West, many Western travellers were taking advantage of the newly opened borders. One group of students from Vienna found themselves in a Prague junk shop in the newly christened Czech Republic. Among the many wares, they found a Kompact Automat, or LC-A as they were called. Buying the camera that they had never seen before, they quickly fell for the vignetted optics, rich saturation and deep contrast. Not to mention the simplicity of the operation. When they returned to Vienna, they took several more LC-A cameras with them and in 1992 founded the Lomographic Society International, or simply Lomography. Using the LC-A as their flagship, they promoted a new photography style, one based on gut instinct and less than perfect cameras. They got their hands on as many LC-As as they could and began to fix, refurbish, and sell the cameras. Despite the second wave, by 1994, LOMO had closed up the LC-A production line. Lomography had plenty of cameras to choose from, but even these were becoming scarce, hard to find and rising in price as demand increased. Rather than face the loss of their flagship, they travelled to St. Petersburg. After several rounds of negotiations with LOMO and the city's mayor, one Vladimir Putin (yes, that Putin), they struck on a new deal to restart production of an improved LC-A. The 1997 version of the LC-A remained mostly unchanged from the original version but featured a standard threaded shutter release, ASA markings instead of GOST, and an improved shutter. LOMO ramped up production of the new LC-A to near Soviet-era levels, and Lomography happily sold the camera into the hands of waiting photographers. But by 2005, LOMO faced two problems. The first being that many of their workforce on the LC-A line had been part of the original run and were starting to age or die, plus LOMO could no longer afford to keep such a niche product in a high-tech world. And in 2005, it officially ended the LC-A. But truly like the original LC-A, Lomography reinvented their original camera and licensed production to Phenix Optical in China. The new LC-A+ took many of the improvements made to the 1997 version of the LC-A, such as a threaded shutter release, ASA scale, and improved shutter reliability. A few grams of weight was shaved by switching the camera body to plastic rather than metal. A set of groves allowed for different lens accessories, removable door allowed for a Fuji Instax Mini back. And the Chinese copy of the Minitar 1 a near-perfect copy of the original LOMO lens, although Lomography did have a limited release of LC-A+ RL that had an original LOMO lens mounted. But Lomography did not stop there; they also released the LC-W with a wide-angle lens and the LC-A+ 120, a medium format version of the camera shooting a 6×6 image.

Lomography LOMO LC-A+ - Lomography Minitar 1 1:2.8 32mm - FPP Wolfman 100 @ ASA-100 - Ilford Ilfotec HC (1+63) 12:00 @ 20CLomography LOMO LC-A+ - Lomography Minitar 1 1:2.8 32mm - FPP Wolfman 100 @ ASA-100 - Ilford Ilfotec HC (1+63) 12:00 @ 20C

Impressions
If you're not used to Lomography cameras, you might be a little concerned at how plastic the camera feels, it's light, and it feels like you might break it by looking at it wrong. And while the camera does have its weak spots, and you do have to be a little careful with it, it is of decent construction. In true Soviet form, the original LC-A was of all-metal construction, but the new LC-A+ is almost all plastic, some metal bits, but it is mainly plastic. But all this and small design makes the camera insanely practical as a pocket camera that you can carry around everywhere without any weight considerations. Control-wise, there is little that you need to worry about on the camera; the two main items are marked and in an excellent spot for how you hold the camera. The focus leaver, which allows you to focus from infinity to 0.8m, is located on the left and controlled by your index finger. Second, the shutter release is located in a comfortable spot for your index finger. The film advance is a dial-type but has rounded knurls, so it doesn't dig into your fingers in cold weather. The film speed control is awkward to operate, being hidden in a nook with a gear-like dial. You do have speeds between 100 and 1600 which isn't too bad, but you do not have any slow speeds. One note is that the actual meter sensor is not TTL, there's a small dome above the film speed indicator. Make sure you don't cover that with your hands when out, or your camera's meter reading is thrown out of whack. The on/off switch is under the front lens housing, the multi-exposure button, and the battery compartment. While there's no hardware for a neck strap, a wrist strap is present and is helpful.

Lomography LOMO LC-A+ - Lomography Minitar 1 1:2.8 32mm - FPP Wolfman 100 @ ASA-100 - Ilford Ilfotec HC (1+63) 12:00 @ 20CLomography LOMO LC-A+ - Lomography Minitar 1 1:2.8 32mm - FPP Wolfman 100 @ ASA-100 - Ilford Ilfotec HC (1+63) 12:00 @ 20C

Experiences
If there's one thing that I can generally describe, my experience with the LC-A+ is fun. Yes, despite any flaws or, as we say in the IT world, 'features' the LC-A+ is an enjoyable camera to use. And I can honestly see why it became super popular both in the original run and today in the Lomography circles. The camera is small and lightweight and adds nothing to any camera kit, and can be carried in a pocket. Loading the camera is easy, with the back being released by the spring release by pulling up the rewind knob. Here's one of the camera's weak spots; as soon as you pull up the rewind knob, you'll feel a structural weakness. While mine has not broken, I'm also careful. Loading the film is straightforward, advancing and clicking advance and click motion until you get to the '1' on the film counter. While compact, the camera fits well in hand, and the only real trouble I see is blocking off the exposure sensor. The shutter release is big, and there's a satisfying click when the shutter is triggered. The viewfinder is big and bright but offers zero feedback or help in correcting for parallax. But if you're shooting an LC-A+, there's a chance that you don't care too much, but the viewfinder is close to what the lens sees. The only feedback that you get is a single red LED that lights up to indicate that there is enough charge in the battery to operate the camera. Once there, just point-and-shoot to your heart's content. The camera also has a hot shoe, but you're want to use a smaller flash not to throw off the camera's balance. Rewinding the film is triggered by a release button on the bottom of the camera, and there's enough clearance to use the rewind knob without adjusting its height. Despite the simplicity, the camera is a joy to use, even for me given that I'm used to feature-rich cameras with tonnes of feedback and details in the viewfinder, joy in simplicity. Of course, the camera is far from perfect. You will face spacing issues, and missed exposures in strange lighting conditions, and your own hand blocking that metering eye.

Lomography LOMO LC-A+ - Lomography Minitar 1 1:2.8 32mm - FPP Wolfman 100 @ ASA-100 - Ilford Ilfotec HC (1+63) 12:00 @ 20CLomography LOMO LC-A+ - Lomography Minitar 1 1:2.8 32mm - FPP Wolfman 100 @ ASA-100 - Ilford Ilfotec HC (1+63) 12:00 @ 20C

Optics
Next to the LC-A's auto-exposure functionality, the next most significant draw to this camera is the lens. As I mentioned in the camera history, the original Cosina camera had a far more complex lens. Still, the Soviet optics designers created a three-element lens that produces a sharp image. This Minitar lens is a gem among Soviet camera designs, and while the LC-A+ that I had does not have an original Russian lens. If you have a Lomography produced LC-A made 2005-7, the lens is an original one, built at the LOMO factory under contract, with original parts (and in some cases workers). When production shifted to China from 2007 onwards, the lens is made to the same specifications by their Chinese factory. Of course, you can still get a Russian made lens marked with an RL designator, but you will pay an extra premium. The lens produces a unique image that is almost tied to those early days of Lomography and the last days of the Soviet Bloc, rich saturated photos and plenty of contrast. The lens has a decent sharpness for a three-element lens but does have plenty of vignetting at the corners when wide open.

Lomography LOMO LC-A+ - Lomography Minitar 1 1:2.8 32mm - FPP Wolfman 100 @ ASA-100 - Ilford Ilfotec HC (1+63) 12:00 @ 20CLomography LOMO LC-A+ - Lomography Minitar 1 1:2.8 32mm - FPP Wolfman 100 @ ASA-100 - Ilford Ilfotec HC (1+63) 12:00 @ 20C

Lowdown
While it will never be a primary camera for me, well, it might for special days like International Communist Camera Day or World Toy Camera Day, I certainly can see it coming along on trips, photo walks, and just being in the pocket or bag if I need a quick run and gun. While I only have shot black & white film through the camera, I certainly plan on trying out more colour film to see that rich deep saturation that the Minitar-1 renders. If you are looking for one of these, it's going to be buyer beware. There is still plenty of original LC-As floating around, and you can get some for under 100$ on the used market. Honestly, unless it were new-old stock in the original sealed box, I wouldn't pay more than 100$. Most are averaging 40-70$ on the used market. If you are looking for one, target sellers from the former Bloc countries, Ukraine, which was a famous market for the LC-A, even the Czech Republic and Russia. But remember, the cameras are starting to get old and not many people can fix them. Plus, the original models are known for dodgy shutters. You can still buy an LC-A+ new direct from Lomography, and as I've said in this review, they are excellent, fun, and worth some money. New LC-A+ cameras will cost you a fair nickel. You're looking at 350$ for the basic model. The Wide-Angle version is around 500$, and the Medium Format LC-A is 600$. They are a little cheaper on the used market, but there aren't many on the market (no surprise there), but I did see the ones in the 130-250$ range. In this case, buy new to ensure a good working model and support the fine folks at Lomography. The LC-A is the camera for the masses, simple, easy to use, and designed, like all Soviet-era cameras, to bring photography to the masses. It did so, twice, not bad for a Soviet copy of a Japanese camera that seems to have overshadowed its original.

Further Reading
Don't just take my word on the LC-A+, you can check out the reviews by other awesome camera reviewers!
Kosmo Foto - Lomo LC-A+ Review
35mmc - Lomo LC-A+ Review – love it or hate it…. or both?
Lomography.com - Lomo LC-A+ : Review as a LC-A+ newbie

Looking for reviews of the OG camera check out these excellent LOMO LC-A Reviews!
Kosmo Foto - Lomo LC-A review
James Cockcroft - The Lomo LC-A: A Review
Ryan Shockey Davis - Lomo LC-A Review: Comprehension of the Necessities
Film Shooters Collective - Lomo LC-A Review
Film Wasters - Looking past the Hype - an honest review of the LOMO LC-A

#camerareviewblogs #cambridge #camera #camerareview #canada #fppwolfman100 #galt #gear #ilfordilfotechc #lomolca #lomography #ontario #review

image
alex luyckx unofficialalexluyckx@ծմակուտ.հայ
2021-05-03

Camera Review Blog No. 131 – Lomography LOMO LC-A+

Suppose a singular camera relaunched the love of film photography and sparked the inspiration of hundreds if not thousands of photographers. That camera is the LOMO LC-A. While this particular camera is not an LC-A, it is, in the proper fashion of the original LC-A, a direct successor and continuation on the inspiration given by that fateful day in 1991, but more on that later. The LC-A+ is Lomography's answer to providing the classic look that gave the latter days of the Soviet Bloc rich saturated colours and heavy contrast. First released in 2006 after the closure of the original LOMO production lines for the LC-A, the LC-A+ added many featured that Lomography photographers were seeking. And while I had no desire to spend money on a new LC-A+, when one turned up at my doorstep, I wasn't going to say no.

Camera Specifications
Make: Phenix Optical Company for Lomography International
Model: LOMO LC-A+
Type: Point-And-Shoot
Format: 135 (35mm), 36x24mm
Lens: Fixed, Lomography Minitar-1 1:2.8 32mm (3 Elements in 3 Groups), f/2.8 - f/16
Shutter: Focal Plane Leaf Shutter, 1/500″ - Unlimited
Meter: 1x CdS Cell, EV2 ~ EV17 @ ASA-100, ASA-100 - ASA-1600
Year of Manufacture: 2005-Current

Background
The story of the LC-A+ does not start in Prague, Vienna, or even St. Petersburg; it starts in Nakano, Japan. In the early 1980s, Cosina released the CX-1 and, in quick succession, the CX-2. These cameras where compact zone-focus point-and-shoot cameras. Offering full Auto-Exposure and limited Aperture Priority AE control, when you picked an aperture, the camera defaulted to a shutter speed of 1/45″ designed for use with a flash. As the story goes, in 1981, a CX-1 or CX-2 ended up in the hands of General Igor Petrowitsch Kornitzky. Kornitzy, right-hand-man to the Minister for Industry and Defence in the USSR. General Kornitzky invited his good friend Michail Panfilowitsch Panfiloff to take a closer look at the camera. History is foggy, which CX ended up on the General's desk. Both men enamoured with the camera, the rugged metal construction, the five-element 35mm f/2.8 lens, and Auto-Exposure controls. It was like nothing the Soviet camera industry had seen. Panfilov, being the director of the ЛОМО (LOMO), Ленинградское Оптико Мечаничесцкое Обйединение (Leningrad Optico Mechanical Association), turned to his top engineer to design a Soviet version of the CX-2. Mikhail Grigorievich Kholomyanski began to design the new camera, but rather than make a direct copy which might anger the Japanese camera maker Cosina. He made plenty of changes to the design. Kholomyanski turned to Mr Tarabukin to make a copy of the 35mm f/2.8 lens. The goal set out by General Kornitzky, and Director Panfiloff was to create a camera for the masses that allowed full AE and a brilliant optical experience. The new camera would not be the first attempt by LOMO to design an auto-exposure camera. They had several prototypes through the 1970s, but the guts of the CX-2 marked a major leap forward for the Soviet camera industry. The prototype arrived later in 1981 and did not meet Kornitzky's criteria. The design too far removed from the CX-2 and the Tarabukin lens would increase the camera's overall cost and make it out of the range of most citizens. The USSR did not need a camera for the export market, the camera, now called the ЛОМО Компакт Автомат (LOMO Compact Automatic, or Kompact Automat), would be strictly for the domestic market or out to the wider Soviet Bloc. Kholomyanski, shaken by the General's anger, returned to his drawing board and, hoping to avoid a one-way trip to a Siberian Gulag, designed a camera far closer to the CX-2 just different enough to avoid infringement of the Cosina Design. He also handed the lens design over to Lev Sakin, who produced a triplet design lens for the Kompact Automat, calling the 32mm f/2.8 lens the Minitar 1. The second prototype arrived in 1982 and met with some success in a test market of St. Petersburg, as LOMO prepared to move into mass production of the Kompact Automat. To ensure success, they had built a second version of the camera, calling it the Смена-18, a near copy of the Kompact Automat but offered up a fully mechanical camera. Both the Смена-18 and Смена-19 were presented to General Kornitzky for his final approval and green-light to being mass-produced. Now please, the general gave the nod to both the Смена 18 and 19. And mass production started in 1984. And while LOMO did produce the Смена-19 a replacement to the Смена Символ (Smena Symbol), itself an improvement on the Смена 8m, with a selenium meter akin to the Olympus Trip 35, production lasted from 1985-9 and only in a limited fashion. the Смена-18 was shoved in a safe and never spoken of again. Instead, the St. Petersburg LOMO plant began pumping out the Kompact Automat in 1984 at a rate of 1,000 units per month. LOMO employed some 1,200 workers on the Kompact Automat assembly line, 500 directly responsible for final assembly. A majority of these workers were young women who's fine motor control helped with the small design. The camera proved an overnight success and quickly moved out into the Soviet Bloc, with some of the popular spots being Cuba, Vietnam, the German Democratic Republic (East Germany), Poland, Ukraine, and Czechoslovakia. LOMO even produced a limited number branded as the Zenith Lomo found their way west of the Iron Curtain. Little did LOMO know that their little camera would capture the final years of Soviet Russia. Even still in 1986, LOMO produced a special version for the 27th Anniversary of the Communist Party. The same year they produced an improved version, the LK-M with a better shutter and a standard threaded cable release, but few were ever produced. The fall of the Berlin Wall in 1989 marked the beginning of the end after a series of revolutions throughout the Soviet Bloc began to see a flood of western cameras that were far superior to many produced in the east. By 1991 even the USSR fell, and sales of the LC-A tanked. Just as many East wanted cameras from the West, many Western travellers were taking advantage of the newly opened borders. One group of students from Vienna found themselves in a Prague junk shop in the newly christened Czech Republic. Among the many wares, they found a Kompact Automat, or LC-A as they were called. Buying the camera that they had never seen before, they quickly fell for the vignetted optics, rich saturation and deep contrast. Not to mention the simplicity of the operation. When they returned to Vienna, they took several more LC-A cameras with them and in 1992 founded the Lomographic Society International, or simply Lomography. Using the LC-A as their flagship, they promoted a new photography style, one based on gut instinct and less than perfect cameras. They got their hands on as many LC-As as they could and began to fix, refurbish, and sell the cameras. Despite the second wave, by 1994, LOMO had closed up the LC-A production line. Lomography had plenty of cameras to choose from, but even these were becoming scarce, hard to find and rising in price as demand increased. Rather than face the loss of their flagship, they travelled to St. Petersburg. After several rounds of negotiations with LOMO and the city's mayor, one Vladimir Putin (yes, that Putin), they struck on a new deal to restart production of an improved LC-A. The 1997 version of the LC-A remained mostly unchanged from the original version but featured a standard threaded shutter release, ASA markings instead of GOST, and an improved shutter. LOMO ramped up production of the new LC-A to near Soviet-era levels, and Lomography happily sold the camera into the hands of waiting photographers. But by 2005, LOMO faced two problems. The first being that many of their workforce on the LC-A line had been part of the original run and were starting to age or die, plus LOMO could no longer afford to keep such a niche product in a high-tech world. And in 2005, it officially ended the LC-A. But truly like the original LC-A, Lomography reinvented their original camera and licensed production to Phenix Optical in China. The new LC-A+ took many of the improvements made to the 1997 version of the LC-A, such as a threaded shutter release, ASA scale, and improved shutter reliability. A few grams of weight was shaved by switching the camera body to plastic rather than metal. A set of groves allowed for different lens accessories, removable door allowed for a Fuji Instax Mini back. And the Chinese copy of the Minitar 1 a near-perfect copy of the original LOMO lens, although Lomography did have a limited release of LC-A+ RL that had an original LOMO lens mounted. But Lomography did not stop there; they also released the LC-W with a wide-angle lens and the LC-A+ 120, a medium format version of the camera shooting a 6×6 image.

Lomography LOMO LC-A+ - Lomography Minitar 1 1:2.8 32mm - FPP Wolfman 100 @ ASA-100 - Ilford Ilfotec HC (1+63) 12:00 @ 20CLomography LOMO LC-A+ - Lomography Minitar 1 1:2.8 32mm - FPP Wolfman 100 @ ASA-100 - Ilford Ilfotec HC (1+63) 12:00 @ 20C

Impressions
If you're not used to Lomography cameras, you might be a little concerned at how plastic the camera feels, it's light, and it feels like you might break it by looking at it wrong. And while the camera does have its weak spots, and you do have to be a little careful with it, it is of decent construction. In true Soviet form, the original LC-A was of all-metal construction, but the new LC-A+ is almost all plastic, some metal bits, but it is mainly plastic. But all this and small design makes the camera insanely practical as a pocket camera that you can carry around everywhere without any weight considerations. Control-wise, there is little that you need to worry about on the camera; the two main items are marked and in an excellent spot for how you hold the camera. The focus leaver, which allows you to focus from infinity to 0.8m, is located on the left and controlled by your index finger. Second, the shutter release is located in a comfortable spot for your index finger. The film advance is a dial-type but has rounded knurls, so it doesn't dig into your fingers in cold weather. The film speed control is awkward to operate, being hidden in a nook with a gear-like dial. You do have speeds between 100 and 1600 which isn't too bad, but you do not have any slow speeds. One note is that the actual meter sensor is not TTL, there's a small dome above the film speed indicator. Make sure you don't cover that with your hands when out, or your camera's meter reading is thrown out of whack. The on/off switch is under the front lens housing, the multi-exposure button, and the battery compartment. While there's no hardware for a neck strap, a wrist strap is present and is helpful.

Lomography LOMO LC-A+ - Lomography Minitar 1 1:2.8 32mm - FPP Wolfman 100 @ ASA-100 - Ilford Ilfotec HC (1+63) 12:00 @ 20CLomography LOMO LC-A+ - Lomography Minitar 1 1:2.8 32mm - FPP Wolfman 100 @ ASA-100 - Ilford Ilfotec HC (1+63) 12:00 @ 20C

Experiences
If there's one thing that I can generally describe, my experience with the LC-A+ is fun. Yes, despite any flaws or, as we say in the IT world, 'features' the LC-A+ is an enjoyable camera to use. And I can honestly see why it became super popular both in the original run and today in the Lomography circles. The camera is small and lightweight and adds nothing to any camera kit, and can be carried in a pocket. Loading the camera is easy, with the back being released by the spring release by pulling up the rewind knob. Here's one of the camera's weak spots; as soon as you pull up the rewind knob, you'll feel a structural weakness. While mine has not broken, I'm also careful. Loading the film is straightforward, advancing and clicking advance and click motion until you get to the '1' on the film counter. While compact, the camera fits well in hand, and the only real trouble I see is blocking off the exposure sensor. The shutter release is big, and there's a satisfying click when the shutter is triggered. The viewfinder is big and bright but offers zero feedback or help in correcting for parallax. But if you're shooting an LC-A+, there's a chance that you don't care too much, but the viewfinder is close to what the lens sees. The only feedback that you get is a single red LED that lights up to indicate that there is enough charge in the battery to operate the camera. Once there, just point-and-shoot to your heart's content. The camera also has a hot shoe, but you're want to use a smaller flash not to throw off the camera's balance. Rewinding the film is triggered by a release button on the bottom of the camera, and there's enough clearance to use the rewind knob without adjusting its height. Despite the simplicity, the camera is a joy to use, even for me given that I'm used to feature-rich cameras with tonnes of feedback and details in the viewfinder, joy in simplicity. Of course, the camera is far from perfect. You will face spacing issues, and missed exposures in strange lighting conditions, and your own hand blocking that metering eye.

Lomography LOMO LC-A+ - Lomography Minitar 1 1:2.8 32mm - FPP Wolfman 100 @ ASA-100 - Ilford Ilfotec HC (1+63) 12:00 @ 20CLomography LOMO LC-A+ - Lomography Minitar 1 1:2.8 32mm - FPP Wolfman 100 @ ASA-100 - Ilford Ilfotec HC (1+63) 12:00 @ 20C

Optics
Next to the LC-A's auto-exposure functionality, the next most significant draw to this camera is the lens. As I mentioned in the camera history, the original Cosina camera had a far more complex lens. Still, the Soviet optics designers created a three-element lens that produces a sharp image. This Minitar lens is a gem among Soviet camera designs, and while the LC-A+ that I had does not have an original Russian lens. If you have a Lomography produced LC-A made 2005-7, the lens is an original one, built at the LOMO factory under contract, with original parts (and in some cases workers). When production shifted to China from 2007 onwards, the lens is made to the same specifications by their Chinese factory. Of course, you can still get a Russian made lens marked with an RL designator, but you will pay an extra premium. The lens produces a unique image that is almost tied to those early days of Lomography and the last days of the Soviet Bloc, rich saturated photos and plenty of contrast. The lens has a decent sharpness for a three-element lens but does have plenty of vignetting at the corners when wide open.

Lomography LOMO LC-A+ - Lomography Minitar 1 1:2.8 32mm - FPP Wolfman 100 @ ASA-100 - Ilford Ilfotec HC (1+63) 12:00 @ 20CLomography LOMO LC-A+ - Lomography Minitar 1 1:2.8 32mm - FPP Wolfman 100 @ ASA-100 - Ilford Ilfotec HC (1+63) 12:00 @ 20C

Lowdown
While it will never be a primary camera for me, well, it might for special days like International Communist Camera Day or World Toy Camera Day, I certainly can see it coming along on trips, photo walks, and just being in the pocket or bag if I need a quick run and gun. While I only have shot black & white film through the camera, I certainly plan on trying out more colour film to see that rich deep saturation that the Minitar-1 renders. If you are looking for one of these, it's going to be buyer beware. There is still plenty of original LC-As floating around, and you can get some for under 100$ on the used market. Honestly, unless it were new-old stock in the original sealed box, I wouldn't pay more than 100$. Most are averaging 40-70$ on the used market. If you are looking for one, target sellers from the former Bloc countries, Ukraine, which was a famous market for the LC-A, even the Czech Republic and Russia. But remember, the cameras are starting to get old and not many people can fix them. Plus, the original models are known for dodgy shutters. You can still buy an LC-A+ new direct from Lomography, and as I've said in this review, they are excellent, fun, and worth some money. New LC-A+ cameras will cost you a fair nickel. You're looking at 350$ for the basic model. The Wide-Angle version is around 500$, and the Medium Format LC-A is 600$. They are a little cheaper on the used market, but there aren't many on the market (no surprise there), but I did see the ones in the 130-250$ range. In this case, buy new to ensure a good working model and support the fine folks at Lomography. The LC-A is the camera for the masses, simple, easy to use, and designed, like all Soviet-era cameras, to bring photography to the masses. It did so, twice, not bad for a Soviet copy of a Japanese camera that seems to have overshadowed its original.

Further Reading
Don't just take my word on the LC-A+, you can check out the reviews by other awesome camera reviewers!
Kosmo Foto - Lomo LC-A+ Review
35mmc - Lomo LC-A+ Review – love it or hate it…. or both?
Lomography.com - Lomo LC-A+ : Review as a LC-A+ newbie

Looking for reviews of the OG camera check out these excellent LOMO LC-A Reviews!
Kosmo Foto - Lomo LC-A review
James Cockcroft - The Lomo LC-A: A Review
Ryan Shockey Davis - Lomo LC-A Review: Comprehension of the Necessities
Film Shooters Collective - Lomo LC-A Review
Film Wasters - Looking past the Hype - an honest review of the LOMO LC-A

#camerareviewblogs #cambridge #camera #camerareview #canada #fppwolfman100 #galt #gear #ilfordilfotechc #lomolca #lomography #ontario #review

image

Client Info

Server: https://mastodon.social
Version: 2025.04
Repository: https://github.com/cyevgeniy/lmst