How to Design and 3D Print a Perfect-Fitting Custom Bottle Cap Using Fusion 360: A Comprehensive Step-By-Step Guide
1,523 words, 8 minutes read time.
ANYCUBIC High Speed 3D Printer Filament 1.75mmDesigning and 3D printing a custom bottle cap can be an exciting project, whether you’re trying to replace an old one, modify a product, or just experiment with new designs. The process involves using precise measurements and tools to create a 3D model, and then transforming that model into a physical object using a 3D printer. One of the most popular programs for creating 3D designs is Autodesk Fusion 360. Fusion 360 offers a user-friendly interface that enables both beginners and experienced designers to create accurate and detailed 3D models.
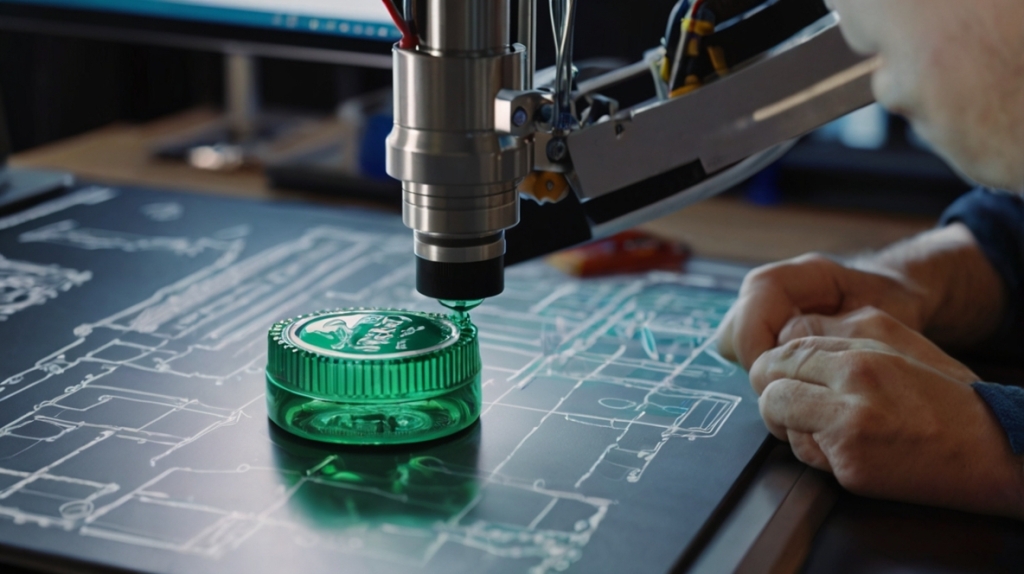
The first thing you’ll need is a bottle to work with. For this example, we’re using a shampoo bottle, but the technique can be applied to any bottle that has a threaded neck. The shape and size of the bottle neck are critical because the thread needs to match the cap exactly. In this case, we need to make a cap that fits perfectly over the bottle’s threaded neck, making sure that it screws on tightly but isn’t too tight or too loose.
The process begins by taking measurements of the bottle. The most important measurements to capture are the height, pitch, major diameter, and minor diameter of the threads. Start with measuring the height of the lid, which is the distance from the bottom of the lid to the top of the neck where it sits. This is a critical dimension because it determines how deep the cap will need to be. For example, if the height is 12mm, the cap’s interior will also need to be that deep to sit correctly on the bottle.
Once the height is measured, the next key dimension is the pitch of the threads. The pitch refers to the distance between the peaks of adjacent threads, typically measured in millimeters. For a smooth fit, you’ll want to match this measurement precisely when designing your 3D model. In the case of this bottle, the pitch was determined to be 4mm. This is important because the threads need to align correctly to create a smooth rotation when you screw the cap on.
Next, measure the major and minor diameters. The major diameter is the overall diameter of the bottle’s threads, measured from the outermost points of the threads. This gives you the largest possible diameter for your cap’s interior. The minor diameter is the inner diameter of the bottle neck, measured from the innermost points of the threads. These measurements help you design the cap to ensure that it fits properly without being too tight or too loose.
Once you’ve gathered your measurements, it’s time to move into Fusion 360 to begin the design process. First, open Fusion 360 and create a new project. Before creating any models, it’s a good idea to set up parameters in Fusion 360. Parameters allow you to modify key dimensions like the cap’s diameter, height, and wall thickness, making future edits easier. Set the diameter of the inside of the cap to 32.4mm, factoring in a small clearance for the cap to fit over the bottle neck comfortably. The height should be set to the height of the lid, which in this case is 12mm.
Now that your parameters are set up, it’s time to create the basic shape of the cap. Start by creating a cylinder with the diameter and height you’ve set as parameters. This cylinder will form the basic structure of your cap. Once the cylinder is created, you’ll need to thicken the walls of the cap. Fusion 360 allows you to shell the inside of the cylinder, effectively creating a hollow cap. Adjust the thickness of the walls to 1.2mm. This thickness is important because it allows for a solid structure without being too bulky, especially when 3D printing.
With the basic structure in place, the next step is to add the threads to the inside of the cap. Fusion 360 makes this step easy with its coil feature, which can create threaded patterns. When creating the coil, set the diameter to the inside cap diameter, making sure that the coil’s pitch matches the measurement you took earlier. The coil will generate the threaded pattern that matches the bottle’s neck, ensuring that the cap can screw on and off easily. The height of the coil should match the pitch of the threads, which is 4mm in this case.
To ensure that the threads fit properly, consider using an external or internal triangle profile for the coil. External threading points outward, while internal threading points inward. In most bottle caps, the threads are internal, so you’ll choose the internal threading option in Fusion 360. Be mindful of the section size, as too large of a section can cause the threads to be too wide, which may prevent the cap from fitting. A section size of around 1.5mm to 2mm typically works well for most applications. Once the coil is created, check the fit of the threads by projecting the major and minor diameters to see if the cap fits well on the bottle.
Now that the threads are added, it’s time to finalize the design by making some refinements. You may want to chamfer the edges of the threads to smooth out any sharp corners, making the cap easier to screw on and off. This can be done by selecting the edges of the threads and applying a chamfer of around 0.5mm. You should also check the clearance between the threads and the bottle neck. It’s important to have a little bit of space, typically around 0.2mm, to ensure that the cap fits comfortably and can be screwed on easily without excessive force. If necessary, you can adjust the parameters and make minor changes to the design to improve the fit.
Once you are satisfied with the design, you can combine the various bodies in Fusion 360 into a single object. This will make it easier to export the file for 3D printing. Before exporting, check your design one last time for any inconsistencies or issues that might affect the print. It’s a good idea to review the dimensions and check the clearances again to ensure that the cap will fit as expected. If everything looks good, export the design as an STL file, which is the standard file format for 3D printing.
With the STL file ready, it’s time to load it into your 3D printer’s slicing software. Adjust the settings in your slicing software, including the layer height, infill, and print speed, to ensure that the print quality is high. For a cap, you’ll want to use a material like PLA or PETG, as these materials are durable and have good thread retention. Once the print is complete, carefully remove the cap from the printer and test the fit on the bottle.
If the cap fits well, congratulations! You’ve successfully designed and 3D printed a custom bottle cap. If it’s too tight or too loose, you can always go back into Fusion 360 and make adjustments. You can change the inside diameter of the cap, the section size of the coil, or even the wall thickness to get the perfect fit. With Fusion 360’s parametric design capabilities, making these adjustments is quick and easy.
3D printing allows you to create custom solutions for a variety of projects. Whether you’re designing bottle caps, replacement parts, or prototypes, the process remains the same. By carefully measuring the dimensions, designing the model in Fusion 360, and fine-tuning the fit, you can create accurate and functional 3D prints that serve your needs.
If you’re new to 3D printing or just getting started with Fusion 360, this project serves as a great introduction to the world of parametric design and 3D modeling. With a little practice, you can begin designing more complex projects and experimenting with different types of 3D prints. The skills you develop through this process will be valuable for many other types of designs in the future.
We hope you found this guide helpful and that it inspires you to dive deeper into the world of 3D design and printing. If you’re looking for more tips, tutorials, and innovative ideas, be sure to subscribe to our newsletter. Stay updated with the latest in design, technology, and 3D printing to keep your creativity flowing and your projects on the cutting edge. Happy designing, and enjoy the power of 3D printing!
D. Bryan King
Sources
- How 3D Printing Changed the Way We Think About Manufacturing
- 3DPrint.com
- Fusion 360 Official Website
- Instructables: How to 3D Print Your Own Bottle Caps
- All3DP
- Fusion 360 Overview (Autodesk)
- 3D Hubs – 3D Printer Guide
- MakerBot Blog
- Shop Therapy Website
- Shop Therapy: Measure Existing Threads to 3D Print a New Cap/Lid
- Thingiverse: 3D Printing Designs
- SolidWorks for 3D Design
- Tinkercad: 3D Design for Everyone
- CAD Software Options for 3D Printing
- 3Ders.org: News and Resources on 3D Printing
Disclaimer:
The views and opinions expressed in this post are solely those of the author. The information provided is based on personal research, experience, and understanding of the subject matter at the time of writing. Readers should consult relevant experts or authorities for specific guidance related to their unique situations.
Related Posts
Rate this:
#3DDesign #3DDesignAdjustments #3DDesignForBeginners #3DDesignProjects #3DModeling #3DModelingTutorial #3DPrintCap #3DPrintTutorial #3DPrintedCap #3DPrinting #3DPrintingAtHome #3DPrintingGuide #3DPrintingProcess #3DPrintingTutorialForBeginners #advanced3DDesignTips #AutodeskFusion360 #AutodeskFusion360Tutorial #bottleCapDesign #bottleCapFit #bottleCapFitment #bottleCapReplacement #bottleCapThreadMeasurement #bottleThreading #cap3DPrintingTips #capDesignForBeginners #capDesignTips #capDesignTutorial #capThreadingTutorial #creatingBottleCapThreads #creatingCustomSolutions #custom3DModels #custom3DPrint #customBottleCapDesign #design3DModelForCap #designAPerfectFitCap #designingBottleCaps #DIYBottleCap #Fusion360ParametricDesign #Fusion360Tutorial #makingCustomBottleCaps #parametric3DDesign #printACustomCap #printing3DModels #printingInPLAOrPETG #printingReplacementParts #printingWithFusion360 #stepByStep3DDesign #threadDesign #threadDesignForCap