Unlocking the Future of Design: How Fusion 360 and AI Are Revolutionizing Complex Designs
1,762 words, 9 minutes read time.
In the world of design, complexity is no longer something to fear—it’s an opportunity to push boundaries. Whether you’re creating advanced prototypes or fine-tuning intricate geometries, modern tools like Fusion 360 have transformed the process of designing and modeling. But what truly sets the stage for the next generation of design is the integration of artificial intelligence (AI) into the design workflow. In this post, we’ll explore how Fusion 360 empowers designers to build complex designs and how AI is becoming an essential tool in this journey.
The Power of Fusion 360: A Game-Changer for Complex Designs
Fusion 360 is a powerful, cloud-based 3D design tool developed by Autodesk that is rapidly becoming the go-to software for engineers, designers, and architects. Whether you’re a seasoned professional or just starting out in CAD, Fusion 360’s versatility is unmatched, particularly when it comes to handling complex designs.
Fusion 360 integrates parametric, direct, and mesh modeling, which makes it capable of handling the most intricate designs. This combination of modeling methods enables users to approach their projects in a more flexible and efficient way. Whether you’re designing intricate assemblies, mechanical parts, or even intricate organic shapes, Fusion 360 provides the tools and features you need to execute those designs with precision and ease.
One of the most powerful aspects of Fusion 360 is its ability to work seamlessly in both the design and manufacturing stages. It allows for real-time collaboration, cloud-based data storage, and a range of features that are particularly helpful for professionals working with complex geometries. This makes it possible for a team of designers, engineers, and manufacturers to collaborate in real time, ensuring that every aspect of the project is on track.
How AI Enhances the Design Process
Artificial intelligence has been making significant strides in design, and its impact on CAD tools is no exception. AI, in the context of CAD software like Fusion 360, is used to optimize design workflows, reduce the time spent on repetitive tasks, and generate solutions that might not be immediately obvious to the designer. By integrating AI into the design process, users can significantly improve their productivity and design quality.
One of the most exciting advancements in AI-driven design is generative design. Generative design uses AI algorithms to explore multiple design alternatives based on the user’s input requirements. For example, you can define parameters like material types, weight limits, and strength needs, and the software will generate multiple design iterations that meet those criteria. In other words, you tell the AI what you need, and it generates a range of possible solutions, saving you time and opening up innovative design possibilities that you may not have considered.
Autodesk’s Fusion 360 offers a powerful generative design feature, allowing designers to experiment with shapes and structures that are optimized for functionality. Generative design is particularly useful when designing parts that need to be strong yet lightweight, such as those used in the aerospace and automotive industries. By automating the iterative process of design, AI enables engineers to test and refine complex designs faster than ever before.
For instance, according to an article from Engineering.com, AI’s use in CAD design is rapidly accelerating, with generative design tools becoming more integrated into mainstream software. AI’s role in reducing the environmental impact of design by suggesting lighter, more efficient solutions is one of its most transformative benefits.
Fusion 360’s Versatility in Handling Complex Designs
Fusion 360 offers a range of tools that make it perfect for managing complex designs. Whether you’re working on a single component or an entire assembly, the software provides intuitive workflows that allow for precise control over every aspect of your design. For example, the ability to create and manipulate sketches is vital when designing intricate parts. Fusion 360 allows you to sketch directly on surfaces, add constraints, and create precise relationships between different elements of your design.
Another key feature is the ability to use the “Shell” command for hollowing out objects. This method is invaluable when designing parts like prongs or brackets, which require uniform wall thickness. Fusion 360 allows users to hollow out objects in a clean and controlled way, maintaining the integrity of the design without the need for overly complex geometry.
Moreover, the software’s ability to handle assemblies makes it easier to design multi-part structures. With Fusion 360, you can manage large assemblies efficiently, ensuring that each part fits together correctly while maintaining precision across the whole project. The cloud-based platform also makes collaboration seamless, as team members can access, edit, and share files in real time.
AI’s Role in Design Simulation and Testing
Fusion 360 doesn’t just allow you to design—it also lets you simulate the real-world behavior of your designs. AI-driven simulation tools enable designers to test how their models will perform under stress, thermal conditions, and motion. These simulation tools, combined with AI, help designers optimize their designs to ensure they perform as intended.
Fusion 360’s integrated simulation tools are particularly beneficial when it comes to predicting the performance of complex designs. Designers can use the software to analyze how a part will behave in real-world conditions, including structural stresses and thermal effects. With the help of AI, these simulations can be adjusted and optimized, resulting in more efficient designs that are both functional and durable.
The use of AI in simulation also reduces the time spent on prototyping and physical testing, which can be costly and time-consuming. By identifying potential weaknesses in a design before it is ever built, AI saves both time and money. According to a recent post on Forbes, AI-driven simulations are revolutionizing the product design process, allowing companies to iterate more quickly and reduce development costs.
Complex Assemblies: How Fusion 360 Keeps It Simple
One of the greatest challenges of designing complex products is managing assemblies that consist of many parts. Fusion 360 simplifies this process by offering robust assembly management tools. It allows you to create components, link them together, and control how they move relative to each other. Whether you are designing mechanical components or an entire vehicle system, Fusion 360 makes it easy to manage the relationships between parts.
Fusion 360’s timeline-based design history also offers a non-destructive way to track changes made to your project. Every modification made to a component is recorded in a timeline, which means you can easily go back to previous versions of the design if necessary. This ensures that complex designs remain flexible and adaptable as new ideas and changes emerge.
Moreover, Fusion 360’s cloud-based system allows multiple users to work on the same project, making collaboration easy for teams that may be working from different locations. As design changes are made, everyone on the team can see and update the project in real-time, ensuring that the entire design process is fluid and efficient.
Real-World Applications of Fusion 360 and AI
The combination of Fusion 360 and AI has proven to be a game-changer for many industries. One of the most notable examples is the aerospace industry, where weight is a critical factor in design. By using generative design powered by AI, engineers can create parts that are both strong and lightweight, reducing fuel consumption and improving overall performance.
Similarly, the automotive industry has embraced Fusion 360 for creating complex components and assemblies. In a recent success story highlighted by Engineering.com, automotive engineers were able to use AI-driven generative design to optimize the geometry of car parts, reducing material usage while maintaining structural integrity. The result was a more sustainable and cost-effective design.
Another industry seeing the benefits of Fusion 360 is robotics. The need for precision and flexibility in robotic designs makes Fusion 360 an ideal tool for creating complex parts that must interact with one another. AI-driven simulations allow designers to test and refine robotic systems before they are built, which helps reduce errors and improve the overall design process.
The Future of Design: AI, Fusion 360, and What’s Next
Looking ahead, the future of design is inextricably tied to advancements in AI. The integration of AI with tools like Fusion 360 is enabling designers to unlock new levels of innovation, making complex designs more achievable than ever before. As AI continues to evolve, it’s likely that we will see even more sophisticated design tools emerge, offering even greater automation and optimization.
Generative design will likely become even more advanced, with AI systems able to analyze more variables and propose even more optimized design solutions. Additionally, machine learning algorithms will continue to improve, allowing designs to be tested and refined in real-time, further streamlining the design process.
Conclusion: Join the Future of Design
As we’ve seen, the fusion of AI and Fusion 360 is a powerful combination that’s changing the way designers approach complex challenges. Whether you’re an engineer, designer, or hobbyist, using AI-driven tools can help you achieve designs that are not only more efficient but also more innovative.
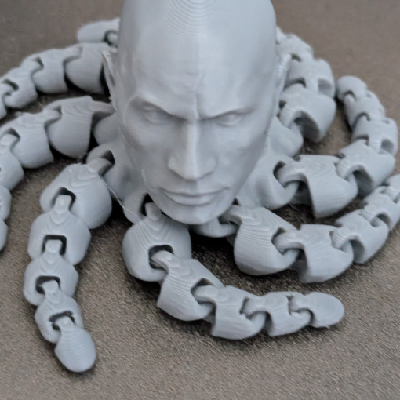
If you’re looking to dive deeper into the world of Fusion 360 and AI-driven design, don’t hesitate to subscribe to our newsletter for more insights and updates. And if you’re interested in seeing these techniques in action, check out the video from [Author’s Name] on how to create complex prongs in Fusion 360—where they dive deeper into the practical side of these methods [Insert Video Link]. We’d love to hear your thoughts, so feel free to join the conversation by leaving a comment below!
This document, powered by cutting-edge technologies and real-world examples, is just the beginning. The possibilities are endless when you combine creativity with AI-driven precision. Keep pushing the boundaries of design!
D. Bryan King
Sources
- Fusion 360 Overview – Autodesk
- Why Use Fusion 360 for CAD?
- Overview of Fusion 360 CAD Modeling Tools
- What is Generative Design in Fusion 360?
- What is Fusion 360?
- What Is Generative Design and Why Should You Care?
- The Future of AI in Product Design and Manufacturing – Forbes
- How AI Is Changing CAD Design for the Better – Engineering.com
- How AI is Accelerating the Future of Design and Manufacturing – 10x Genomics
- AI Design in Autodesk Tools
- Artificial Intelligence and Computer-Aided Design – IntechOpen
- AI Is the Future of Design in Industrial Products – Design World
- How AI Is Transforming the Manufacturing Process – Automate
- AI in the Design Process – ScienceDirect
- Fusion 360 Blog – Tips and Techniques
Disclaimer:
The views and opinions expressed in this post are solely those of the author. The information provided is based on personal research, experience, and understanding of the subject matter at the time of writing. Readers should consult relevant experts or authorities for specific guidance related to their unique situations.
Related Posts
- Leveraging Online Resources to Master Fusion 360 Date August 30, 2024
- Mastering the Fusion 360 Emboss Tool: The Ultimate Guide for 3D Printing Enthusiasts Date April 4, 2025
- Mastering Modifier Meshes for Stronger, Smarter 3D Prints Date December 13, 2024
#3DDesignAutomation #3DDesignSoftware #3DModelingSoftware #advanced3DDesign #advancedDesignTechniques #AIDesignAutomation #AIDesignSoftware #AIForAerospaceDesign #AIForAutomotiveDesign #AIInCAD #AIInDesign #AIInManufacturing #AIInProductDesign #AISimulation #AISimulationsInCAD #AIToolsForComplexAssemblies #AIToolsForEngineers #AIDrivenDesign #AIDrivenGenerativeDesign #AIDrivenPrototyping #AIPoweredDesign #andAIDrivenOptimization #AutodeskCADSoftware #AutodeskFusion360 #CADCollaborationTools #CADGenerativeDesign #CADModeling #CADTools #cloudCollaborationInCAD #cloudBasedDesign #complexDesign #designAutomation #designOptimization #designSimulationSoftware #directModeling #fusion360 #Fusion360Features #Fusion360ForComplexDesigns #Fusion360ForEngineers #Fusion360ForPrototyping #Fusion360Tutorial #Fusion360Tutorials #generativeDesign #generativeDesignAI #generativeDesignProcess #machineLearningDesign #machineLearningInCAD #machineLearningInDesign #meshModeling #parametricModeling #precisionDesign #simulationInFusion360