#vanconversion

I've made a bench for #PaddyTheCaddy.

It pulls out in 2 sections to make 3/4 of a bed. The remaining 1/4 will be at this end and built onto a folded down middle row seat.

Bits aren't straight. Some of the joints and screws are woeful and I've already identified things to improve or correct but, overall, I'm well chuffed with that. Look what I made! 😃

#VanConversion
#MicroCamper
#VWCaddy

A bench seat along the driver's side trim in the rear of a VW Caddy. It is made of a wooden frame which has slats on top. 
In the trim pockets there's a roll of kitchen roll and other useful things.
There's a tiny blue and white striped mug on top of the bench just to mess with the viewer's sense of scale.
2026-02-04

TIL: The NEC has an article on electrical systems in RVs. Article 551 in my rather old copy.

2nd TIL: A lot of #vanconversion folks online have no idea.

😬

I'm starting to believe that I will eventually have a #campervan.

The frame of the bench is secured to the floor.
I've built the small section of pull-out bed. (Subject to some minor additional fettling.)

I'm identifying lessons at every stage. #PaddyTheCaddy2 is going to be AMAZING!!

#MicroCamper
#PaddyTheCaddy
#VanConversion
#VWCaddy

Inside a small red van. There's a wooden rectangular (ish) frame with plywood and 7 slats on top.Inside the same van. 4 of the interleaved 7 slats have been pulled out to make the end of a bed which is wider than the bench.

Something I've learned from my #PaddyTheCaddy #VanConversion is that I simply cannot do anything straight.

I can't saw straight, drill straight, screw straight.
Everything is not quite right. It doesn't help that most of Wickes' wood comes from the boomerang plantation, but it's not ALL their fault.

My job list incudes sanding down wonky joints. One particularly offensive corner may need to be covered in soft furnishings.

Ah, well. I doubt it'll keep me awake when I'm camping. Disappointing, though, as I do try my best! 🤦🏻‍♀️🙄😁

2026-01-28

One of the funniest parts of the #vanconversion project so far was cleaning out the voids in the walls and doors. There was one particularly deep pocket in the passenger rear wall that the previous owner had apparently used as a garbage bin. Tons of nails, screws, washers, joist hangers, a roll of drywall tape, bullet casings, discarded tools, and more. There was a rusty flush cut saw and a caulk gun. I wish now I'd taken a picture. No wonder the thing rattled so bad!

2026-01-25

Couple #vanconversion updates: last weekend I installed the nifty folding bus seat and finished patching all the holes in the floor. Today I bought the 1" XPS foam sheets that will insulate the floor and the 1/2" plywood that will go over that. I'm on the fence whether to install it floating or glue it down. This evening I got some of the butyl sound proofing down.

One of the funnest parts of this project has been working on stuff with my youngest and brainstorming about cool stuff to do with it. Tonight he decided we should put in medical equipment so it can double as an ambulance. 😂

A folding bus bench seat installed behind the captains chairs in a van.Metalized sound proofing installed in strips on the van's metal floor.

#PaddyTheCaddy's bench seat is coming along. I've made most of the fixed frame. I planned to put 2 more legs in the middle but I'm sitting on the loose slats now and it seems quite sturdy, so I'll have a think about that.

The fixed slats will be spread along the length with gaps between them. The gaps will be filled with a sliding, pull-out set of slats which makes the bench into a bed.

The bench is only just over a metre long as the bed will extend over one of the folded down 2nd row seats.

Some of my woodwork is awful but I've been learning as I go and I wouldn't want it to look TOO professional. 😁

#VanConversion
#VWCaddy

A rectangular frame made out of soft, pale wood. In each corner is a leg which is thicker wood than the rest of the frame. There are 4 slats of wood resting on top along with an offcut of the same wood.
The frame is inside a small van which has a vinyl floor

There are bits of red tape showing the location of hidden screws and clips.

Making this #VanConversion bed for #PaddyTheCaddy reminds me of one of my favourite jokes.

Q: What is the difference between a Duck?

A: One of its legs is too far apart.

A rectangular frame of light coloured wood with legs in 3 of the corners.  The wood is clamped to 2 work benches. There is garage clutter in the background.

I could do with a jig, but this is no time for dancing - I have a bed to build.

#PaddyTheCaddy
#VanConversion

A corner joint of  3 pieces of soft wood. There are various clamps and pencil marks. A hand, in fingerless gloves, supports one piece. One tiny move can throw everything out of true.
2025-12-31

Hugo wünscht im Namen von Camper Homes: Einen guten Rutsch ins Jahr 2026!

Ein Jahr voller Planung, Umbau, Tests, Entscheidungen und Fortschritte liegt hinter uns. Alles hat Hugo ein Stück weitergebracht.

Danke an alle, die uns dieses Jahr begleitet haben mit Interesse, Feedback, Fragen oder einfach stillem Mitlesen.
2026 steht schon in den Startlöchern – mit neuen Ideen, neuen Herausforderungen und jeder Menge Lust, weiterzumachen.

Kommt gut rüber und bleibt gesund!

#GutenRutsch #HappyNewYear #Neujahr #Vanlife #VanConversion #Campervan #FiatDucato #Selbstausbau #DIYVan
#Ausbauprojekt

Ein dunkelgrauer Fiat Ducato namens „Hugo“ steht in einer festlichen Silvesterkulisse. Im Hintergrund explodieren bunte Feuerwerke. Auf dem Fahrzeug hängt eine „Happy New Year“-Girlande, auf dem Dach sitzt ein Partyhut. Daneben stehen eine Sektflasche und ein gefülltes Glas. Im Bild steht der Text: „Hugo wünscht einen guten Rutsch ins Jahr 2026!“.

I find sawing wood very satisfying.

I'm making a bench/bed for #PaddyTheCaddy.

#VanConversion
#VWCaddy

A piece of 44mm square section wood being sawn with a handsaw. The wood is clamped to a workbench and to another one which is out of view. On the workbench there's a notebook, some sandpaper and a square. There's a Union Flag mat on the cold garage floor.
2025-12-23

Letzte Woche war Hugo noch einmal als Transporter unterwegs.
Er hat Material für seinen späteren Ausbau ins Lager gebracht: Holzplatten für den zukünftigen Boden, Aluprofile für den Dachträger sowie Teile für sein Bett.

Noch ist davon nichts verbaut – alles liegt sauber sortiert bereit und wartet auf die nächsten Bauabschnitte. Genau diese Vorbereitungsphase ist ein wichtiger Teil des Projekts, damit später alles reibungslos zusammenpasst.

Über die Weihnachtszeit legen wir nun bewusst eine kurze Pause ein. In dieser Zeit kümmern wir uns darum, die CNC fertig aufzubauen und betriebsbereit zu machen. Sobald das erledigt ist, geht es mit Hugos Ausbau konzentriert weiter.

Manchmal bedeutet Fortschritt eben auch: kurz innehalten, vorbereiten und dann mit neuem Schwung weitermachen.

#Ausbau #AusbauProjekt #CamperVan #CamperVanConversion #DIY #DIYVan #FiatDucato #Kastenwagen #Kastenwagenausbau #Prototyp #Selbstausbau #VanConversion #VanLife

Aluprofile in Hugos Laderaum durch Spannbänder gesichert.Holzplatten in Hugos Laderaum durch Spannbänder gesichert.

In case anyone is wondering how my #PaddyTheCaddy #VanConversion is coming along, this is my attempt at designing a bed.

I'm rubbish at drawing, either by hand or by computer, but a simple not-to-scale sketch is helping me to work things out. The different colours are only to help me see what connects to what, although maybe a mauve and mustard colour scheme would look good?

More detail in the Alt Text.

A coloured line drawing. There's a pale blue 3D box with a total of 4 weight-bearing supports. The long side of the box has a separate green frame. On top of the box are a mix of yellow and purple slats which are massively too big but give me an idea of the construction technique. The yellow slats are fixed to the blue frame. The purple slats are attached to the green frame, which slides out.
"NOT TO SCALE" is printed above the drawing.

@strypey @joshsjunkdrawer This is a really interesting article about just how awful YouTube has become.

I watch YouTube a lot and I've been getting more and more uncomfortable with it but it's where all the How To videos are which are helpful for my #VanConversion project.

If I do ever post videos of my own, which I have considered doing, I'll use an alternative platform.

Recently I've been watching YouTube How To videos on my laptop via an Albanian VPN and get no adverts. It makes the viewing experience so much nicer. I don't know what effect this has on monetisation for the video creators. Unfortunately, I'm still getting adds on my TV.

2025-12-03

Die letzte Woche stand ganz im Zeichen von Tests, Feinschliff und wichtigen Fortschritten bei Hugo.
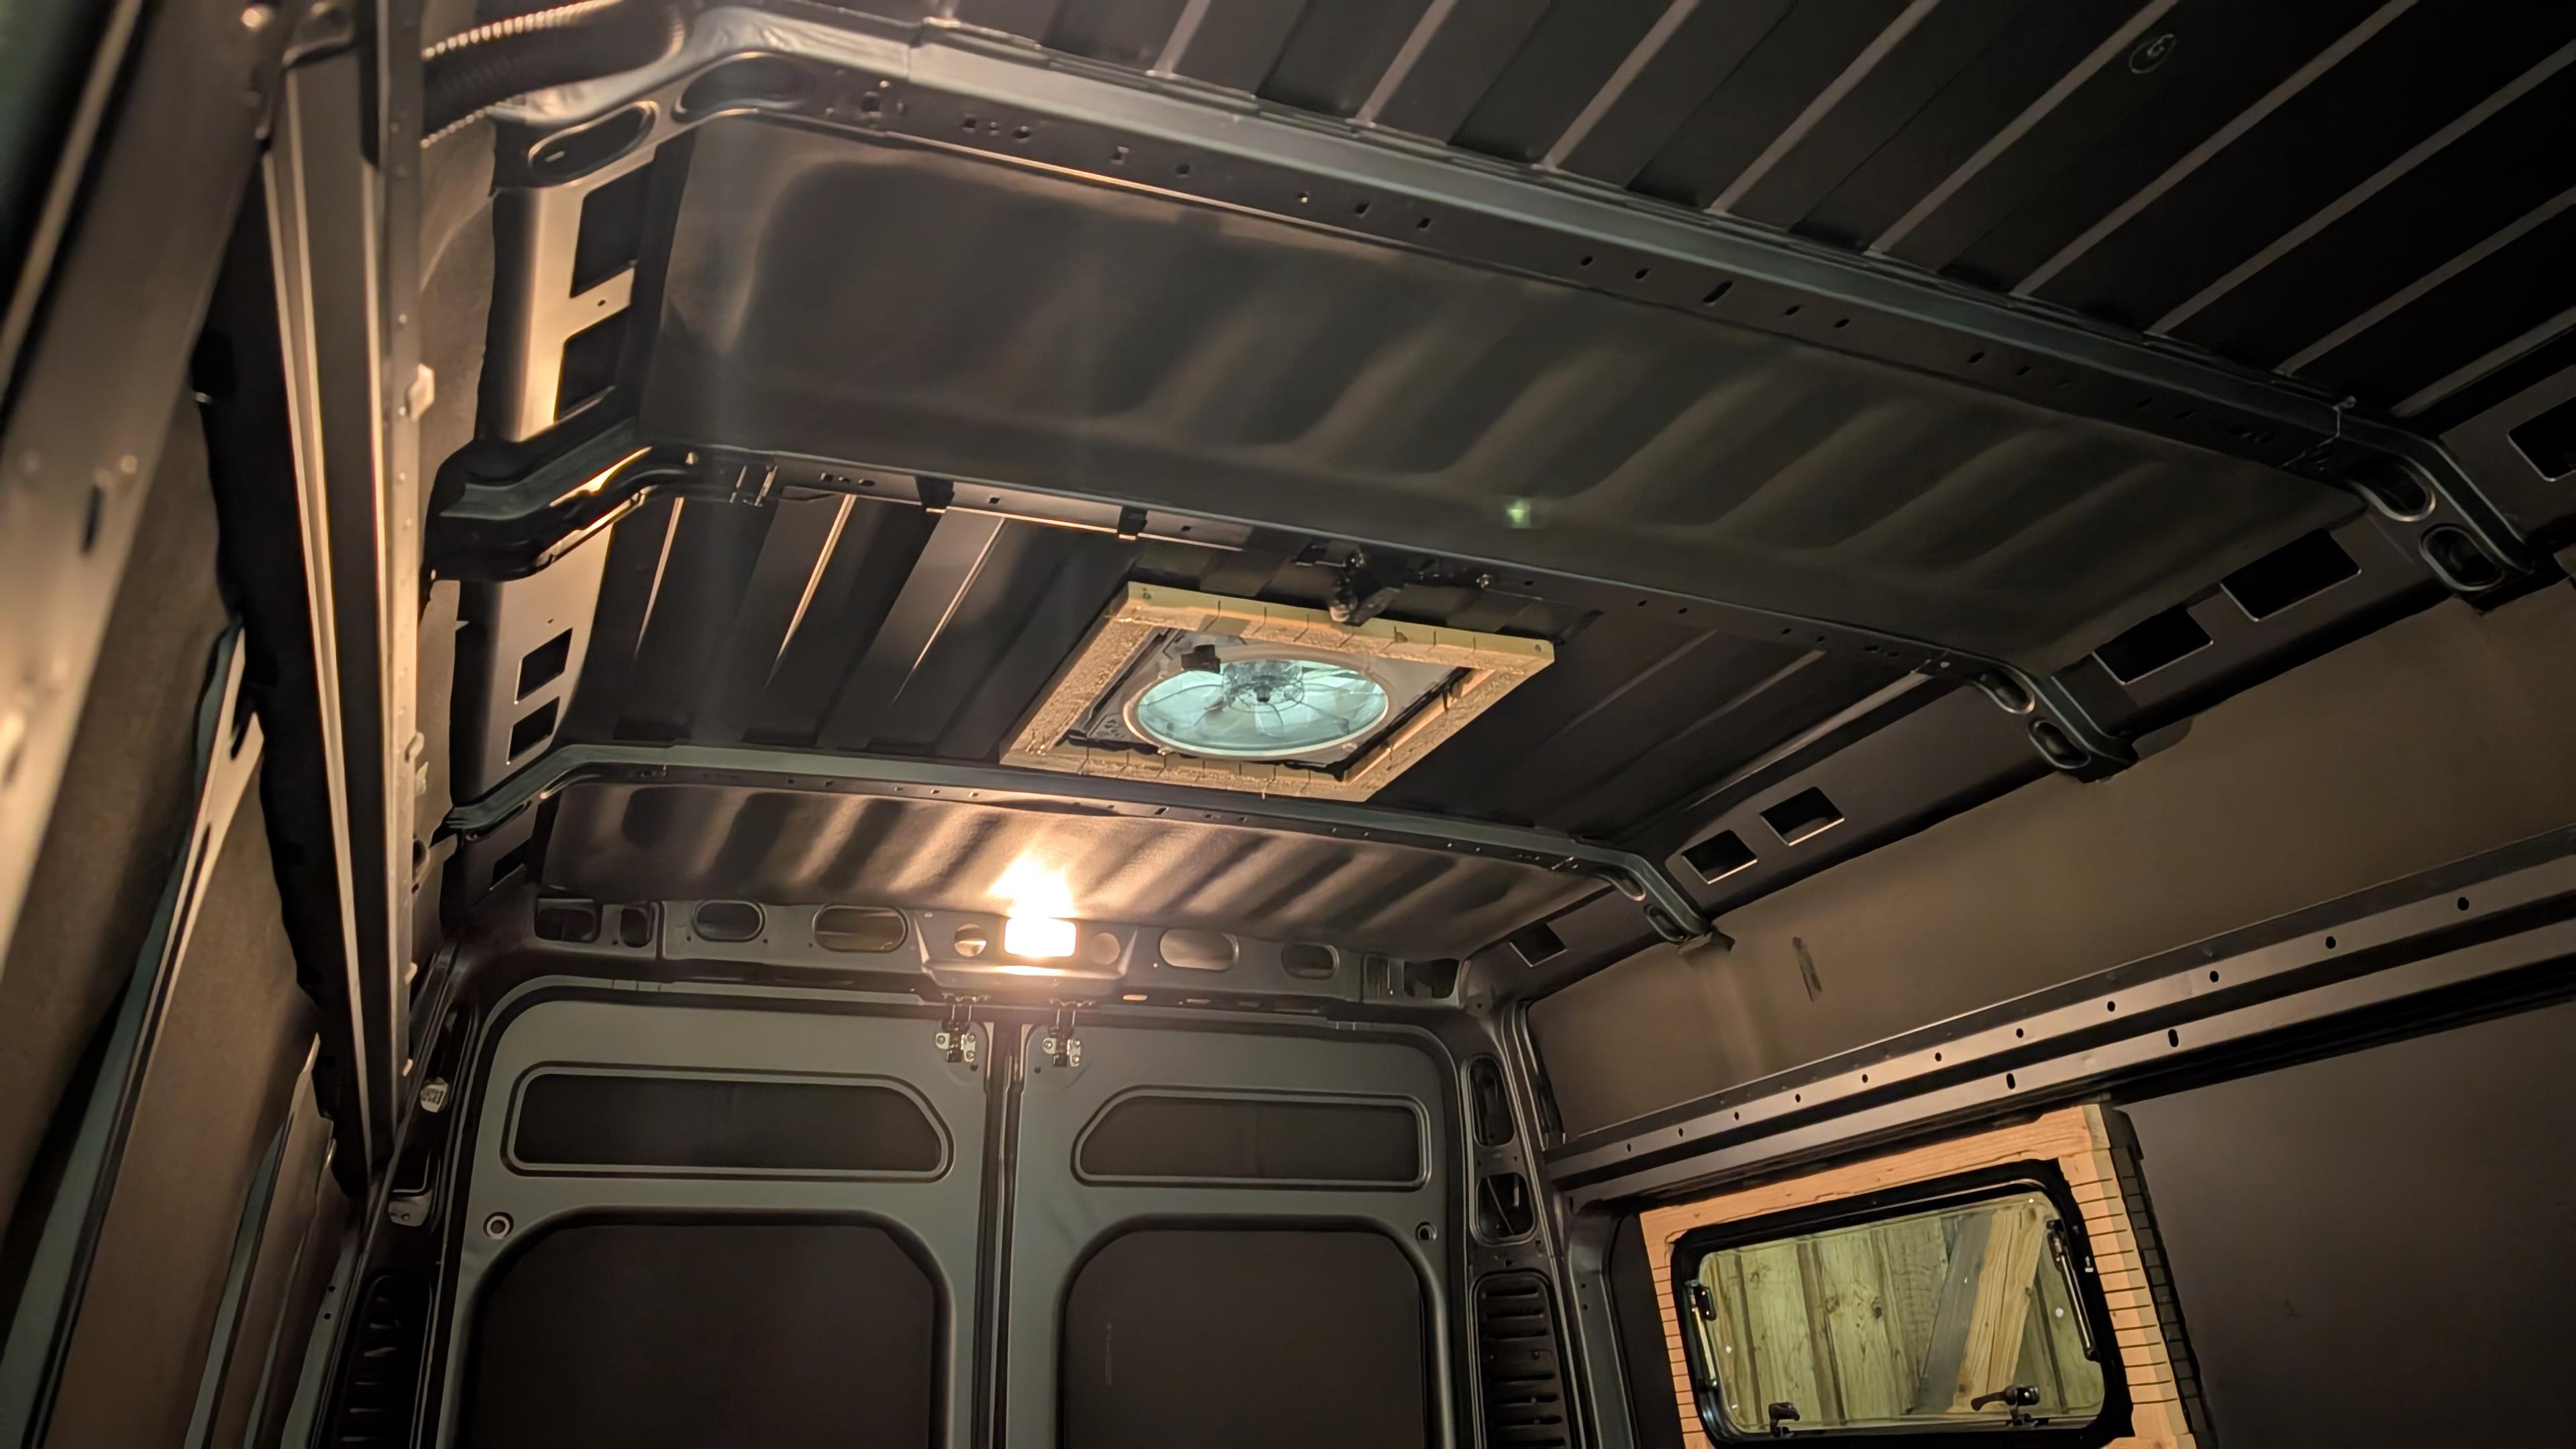
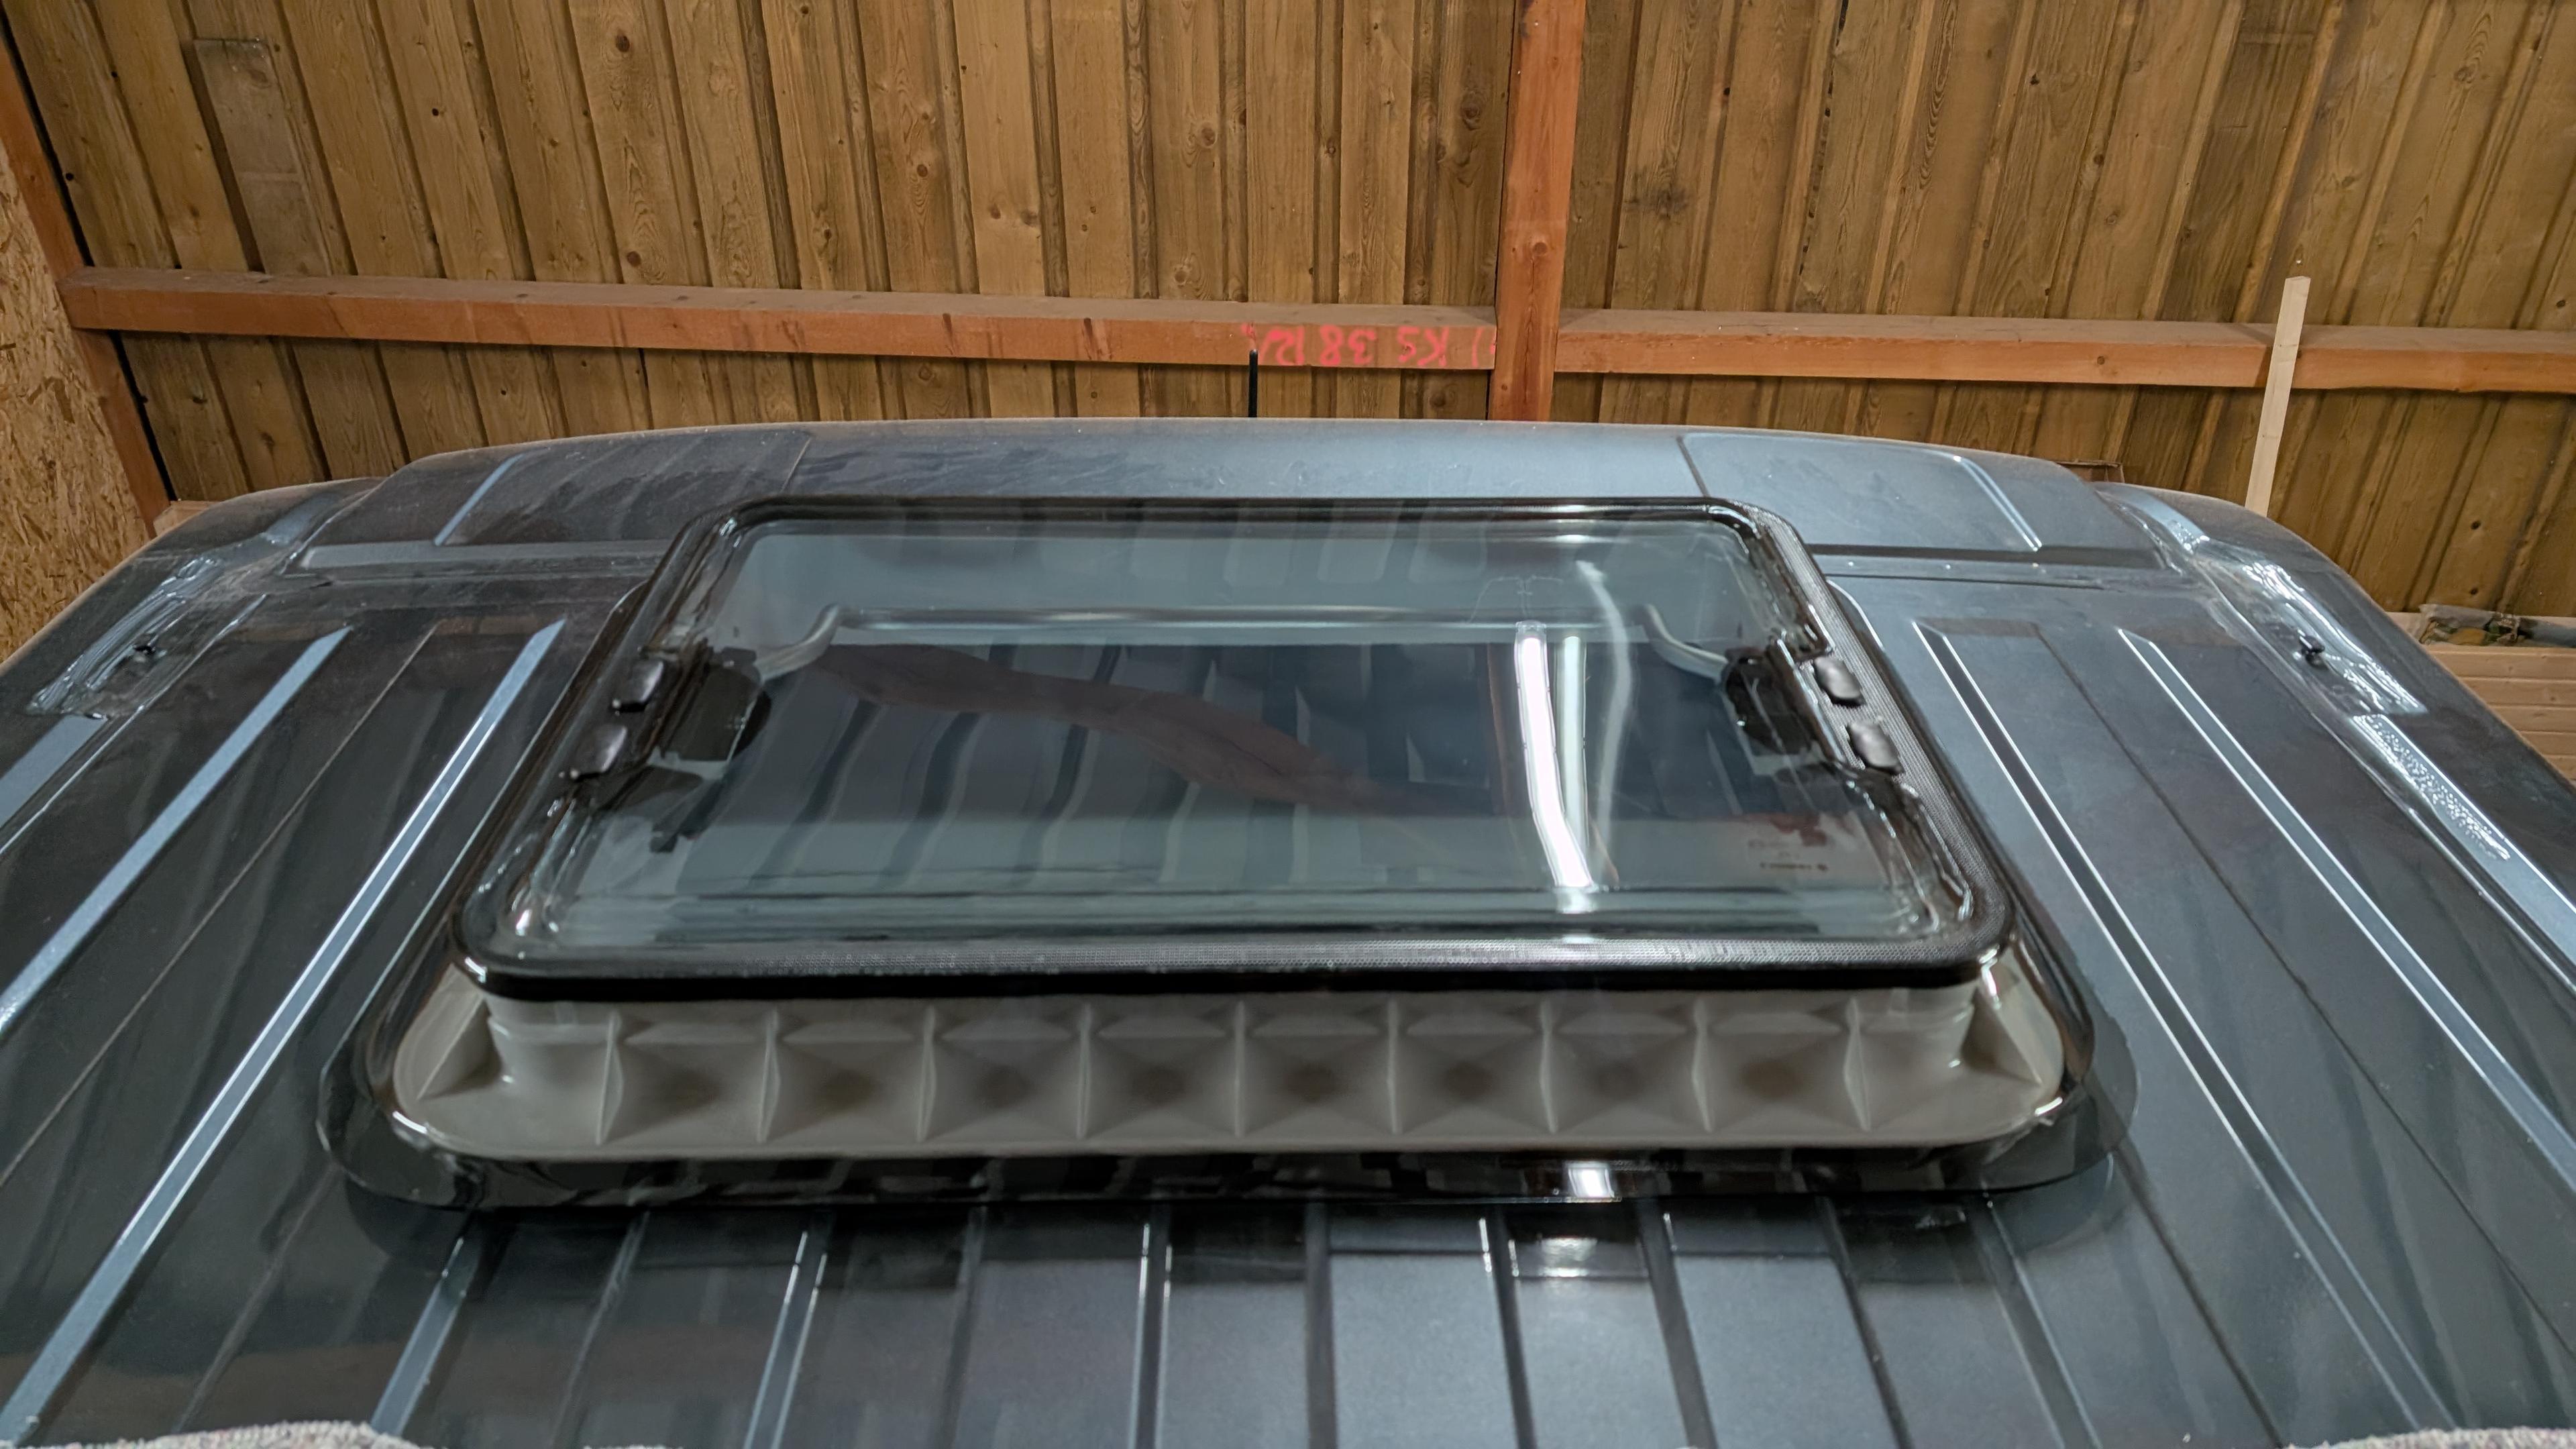
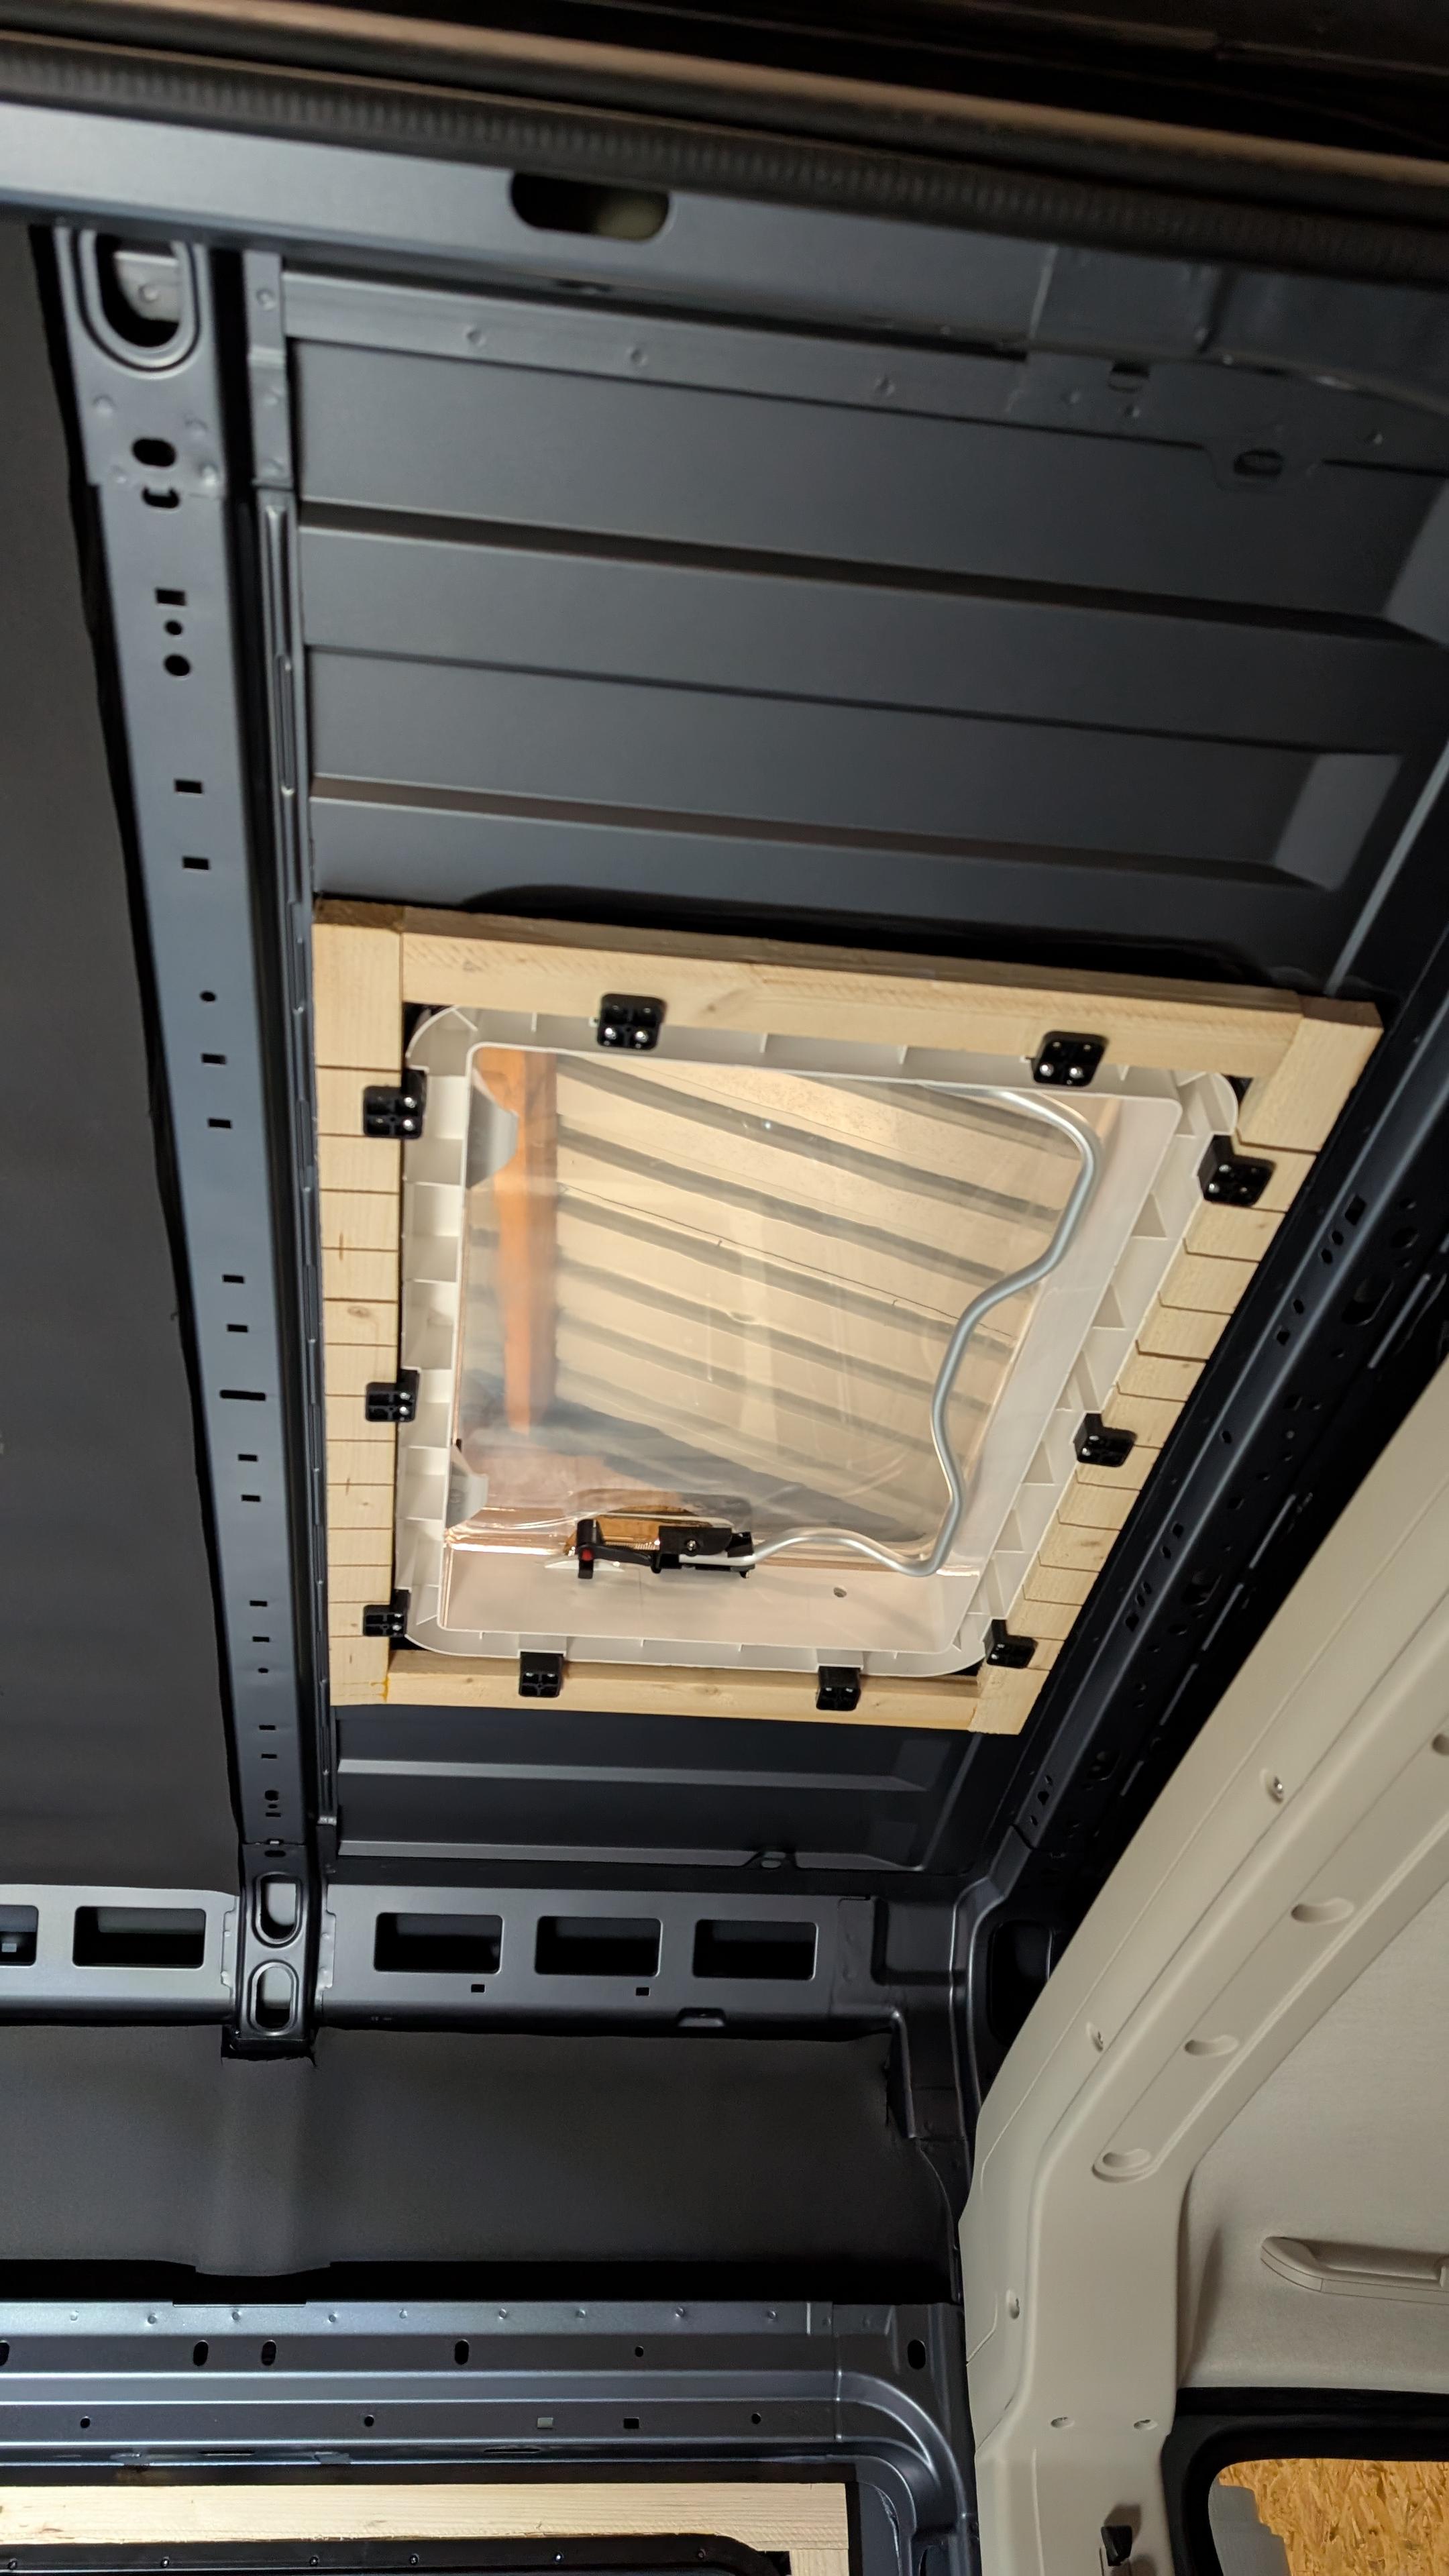
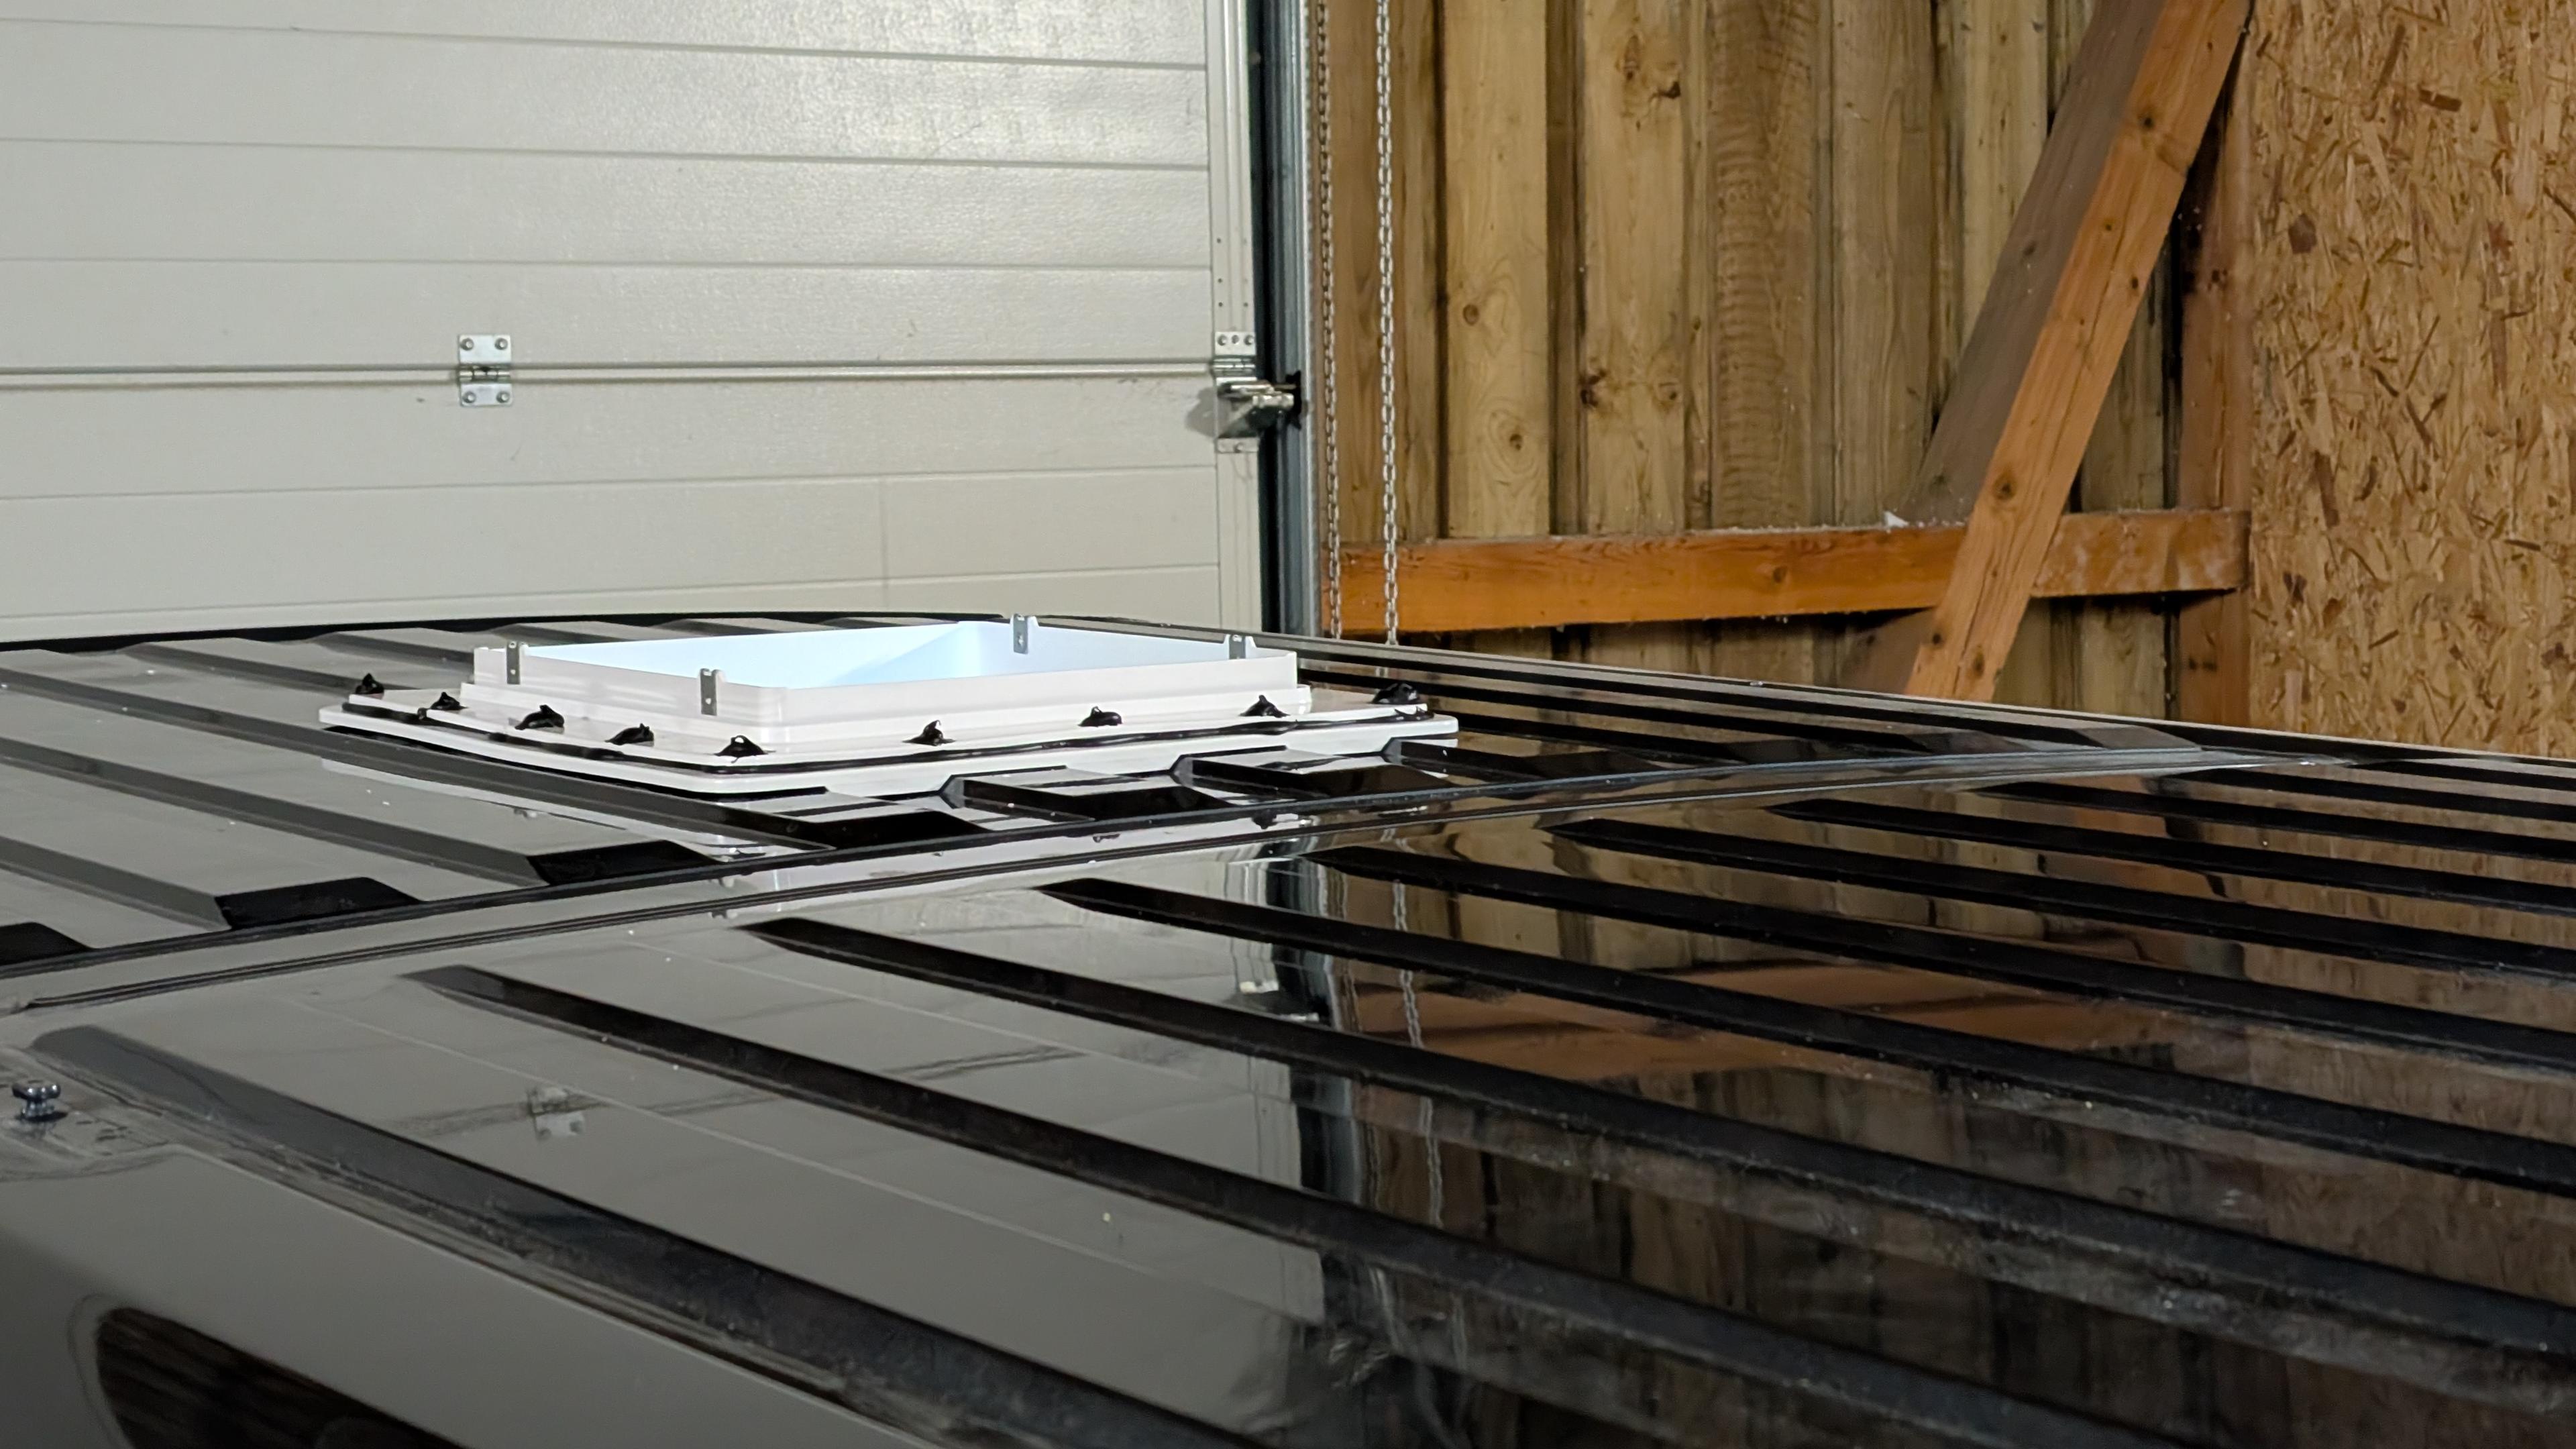
Wir haben alle neu eingesetzten Fenster – an den Seiten und im Dach – sowie den MaxxFan gründlich geprüft. Ergebnis: Alles ist dicht, stabil und sitzt exakt so, wie es soll. Ein gutes Gefühl, bevor die nächsten Ausbauschritte starten!

Parallel dazu haben wir viele Materialien für den Möbelbau ausgewählt, verglichen und bestellt. Alles, was wir für die ersten Tests brauchen, ist auf dem Weg zu uns.

Auch unsere CNC nimmt weiter Gestalt an. Stück für Stück wächst sie zu dem Werkzeug heran, das uns später millimetergenaue Möbelteile für Hugo liefern soll.

Beim Armaflex sind wir ebenfalls fast am Ziel: Bis auf eine Stelle am Dach ist die komplette Dämmung bereits sauber verklebt. Der Unterschied im Innenraum ist jetzt schon spürbar.

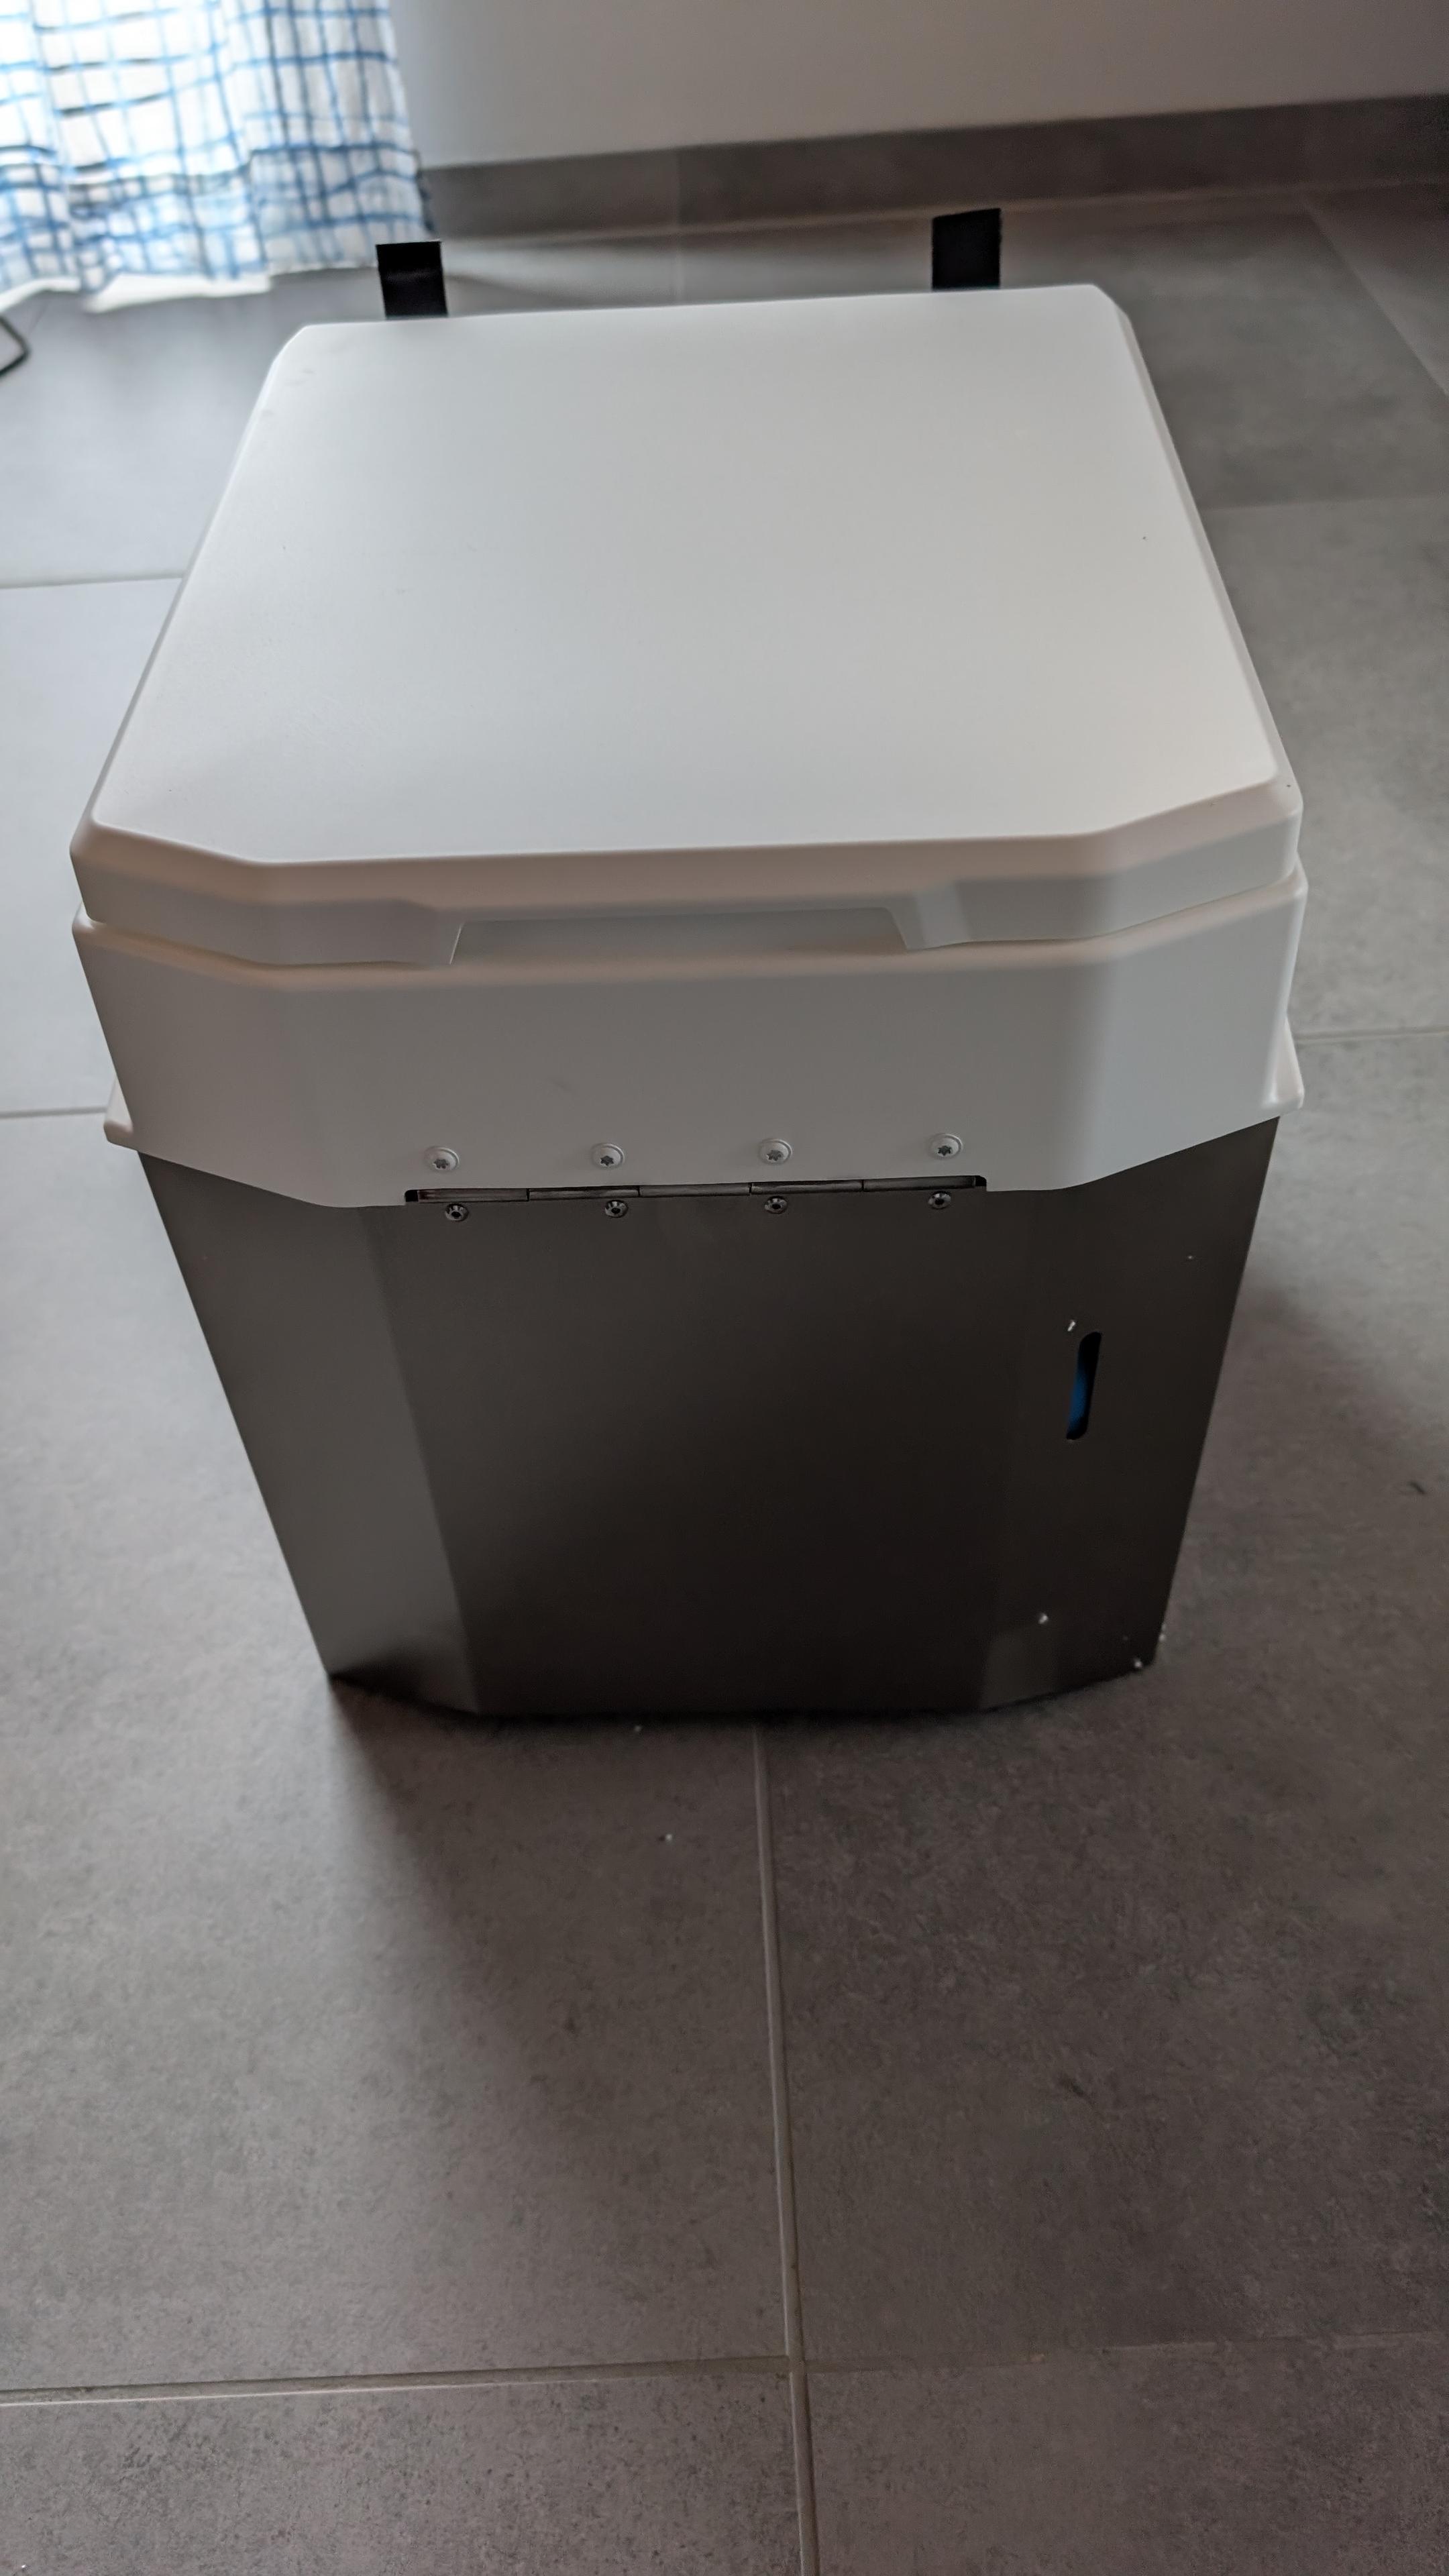
Und als kleines Highlight kam heute auch die BioTioo 2.0 an – ein weiterer Schritt Richtung autarkem, komfortablem Camperleben.

Langsam aber sicher fügt sich alles zusammen. Auf in die nächste Runde!

#Armaflex #Ausbau #AusbauProjekt #BioTioo #CamperVan #CamperVanConversion #DIY #DIYVan #FiatDucato #Kastenwagen #Kastenwagenausbau #Prototyp #Selbstausbau #VanConversion #VanLife

Die BioTioo 2.0Hugo, unser Fiat Ducato, auf einem Parkplatz von seiner linken Seite sichtbar.Das Dachfenster mit Armaflex drumherum

Yes, of course I'm testing #PaddyTheCaddy's new solar panel. Why else would I be standing in a gale staring at a cloudy sky?

#VanConversion

Looking up, past the silhouette of next door's house, at a cloudy sky.
There are tantalising bright spots, where the sun may think of popping out, but the strong wind is quickly spreading the cloud over any gaps.

2/2

I'm looking at Black Friday deals for a power station and fridge. The Alpicool C9 fridge seems ideal but I can't decide between the C9 and the C9PT.

I'm wary of under speccing the power station but neither do I want something that's physically too big.

The size of the fridge and planned sink probably means I'll only have a single burner stove but, with a kettle and pan and pot stand, I'll be able to make better use of the single burner than I can in my tent with just a pan.

So, lots to think about. The plan is probably:

1. Order fridge.
2. Determine power requirements.
3. Order power station.
4. Design kitchen based around sink, stove, fridge.
5. Design and build bed.
6. Build kitchen.

#VWCaddy #PaddyTheCaddy #VanConversion

#PaddyTheCaddy #VanConversion update.

After finishing the floor, I seemed to run out of steam and needed a break. I also needed to give some time to the household and other tasks which had been backing up.

I'm refocused now, although I'm in a circle of decisions. My design will depend on what equipment I buy, but I need to buy the equipment which will fit into the design.

I experimented with some steel square-section tubing to make the bed and/or kitchen. This was originally used in Mum's van. It might be suitable for the kitchen but I think the bed will be made from wood.

1/2

#VWCaddy

2025-11-21

Hugo hat seinen MaxxFan bekommen!

Damit ist sein äußeres Erscheinungsbild endlich komplett. Keine offenen Stellen mehr im Dach oder der Seite – von außen ist Hugo jetzt genau so, wie wir ihn uns vorgestellt haben. Robust, funktional und bereit für alles, was kommt.

Ab jetzt verlagert sich der Fokus nach innen. Die nächsten Schritte bestehen vor allem aus Planung und Design der Inneneinrichtung im CAD. Möbel, Technik, Stauraum, Grundriss – alles wird digital durchdacht, bevor die erste Platte zugeschnitten wird.

Sobald es wieder wärmer wird, geht es auch mit der Dämmung weiter. Das restliche Armaflex wird dann verklebt, damit Hugo auch thermisch fit für jede Jahreszeit wird.

Außen fertig. Innen in Planung. Der nächste spannende Abschnitt startet jetzt.

#Ausbau #AusbauProjekt #CamperVan #CamperVanConversion #DIY #DIYVan #Ducato #Fiat #FiatDucato #Kastenwagen #Kastenwagenausbau #MaxxFan #Prototyp #Selbstausbau #VanConversion #VanLife

Der Maxxfan von innen.
2025-11-20

Heute war ein echter Meilenstein-Tag für Hugo.

Wir haben den Rahmen für den MaxxFan geklebt – wieder millimetergenaue Arbeit, saubere Vorbereitung der Flächen und ruhige Hände beim Ausrichten. Direkt danach folgten die Adapterrahmen für die Dachhaube und den MaxxFan, die jetzt perfekt sitzen und die Basis für eine dauerhaft dichte und stabile Montage bilden.

Anschließend haben wir die Dachhaube eingesetzt. In dem Moment, in dem sie eingepasst und fixiert war, wirkte Hugos Dach das erste Mal fast „fertig“. Es ist unglaublich, wie so ein einzelnes Bauteil die gesamte Außenwirkung verändert.

Bis auf den letzten Step – die Befestigung des MaxxFan mit vier finalen Schrauben – ist Hugos äußere Hülle nun bereit.

Ab jetzt geht’s verstärkt ins Innenleben: Planung, Ausbau, Technik.
Ein riesiger Schritt für Hugo – vom Transporter hin zu einem echten Camper.

#Ausbau #AusbauProjekt #CamperVan #CamperVanConversion #DIY #DIYVan #Ducato #Fiat #FiatDucato #Kastenwagen #Kastenwagenausbau #MaxxFan #Prototyp #Selbstausbau #VanConversion #VanLife

Die Dachhaube von außenBefestigte Dachhaube von innenRahmen ohne MaxxFan von außen

Client Info

Server: https://mastodon.social
Version: 2025.07
Repository: https://github.com/cyevgeniy/lmst