The WebStick is a Small, Cheap NAS https://hackaday.com/2023/09/09/the-webstick-is-a-small-cheap-nas/ #NetworkHacks #networking #ESP8266 #hosting #microsd #storage #esp12f #nas
#esp12f
Liberating the ESP8266 from its Development Board
While the ESP32 is clearly a superior piece of hardware, we think you'll agree that the ESP8266 is just too useful not to have a dozen or so kicking around the parts bin at any given time. Cheap, easy to use, and just enough capabilities to bring your projects into the wonderful world of IoT. But if you really want to get the most out of it, you'll eventually have to skip the development board and start working with the bare module itself.
It can be a scary transition, but luckily, [Ray] has collected some notes that should prove helpful for anyone looking use modules like the ESP-12F in their own custom PCBs. From different tips on making sure the power-hungry modules get enough juice, to cost cutting measures that help reduce the ancillary parts needed in your circuit design, it's a worthwhile read for new and experienced ESP8266 wranglers alike.
An auto-reset circuit with the CH340C
For example, [Ray] talks a bit about using the infamous GPIO10 pin. This pin is on the rear of the ESP8266 module, and on many development boards, it isn't even connected. That's because its internally hooked up to the ESP8266's SPI flash chip, and using it can cause problems if you're not careful. But as explained in the blog post, as long as you make sure the flash mode is set to "dual IO" (DIO), then GPIO10 can be used just like any other free pin.
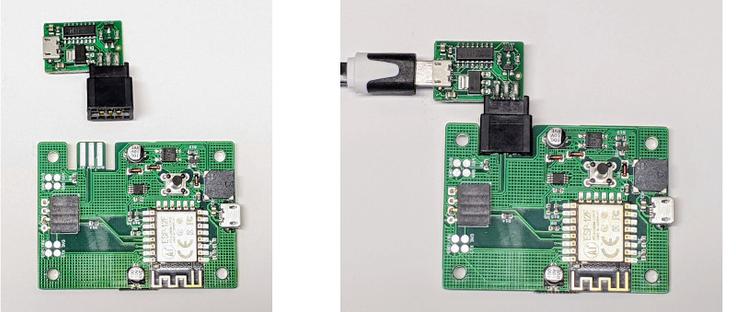
We also really liked the tip [Ray] shares at the end for making your boards more easily programmable. Sure you can leave an unpopulated header on the board, or fiddle with some pogo pin setup, but his edge connector approach is quite clever. Just slip the programmer on for the initial burn, and then after that you can update over the air.
There's no denying how easy it is to throw something together with an ESP8266 development board, but we've covered so many incredible projects that have made use of the bare module's diminutive dimensions that you'll ultimately be missing out if you don't cut out the middle-man.
#microcontrollers #parts #circuitdesign #custompcb #esp12f #esp8266
Hacked IKEA Air Quality Sensor Gets Custom PCB
Last month we brought word of the IKEA VINDRIKTNING, a $12 USD air quality sensor that could easily be upgraded to log data over the network with the addition of an ESP8266. It only took a couple of wires soldered to the original PCB, and since there was so much free space inside the enclosure, you didn't even have to worry about fitting the parasitic microcontroller; just tape it to the inside of the case and button it back up.
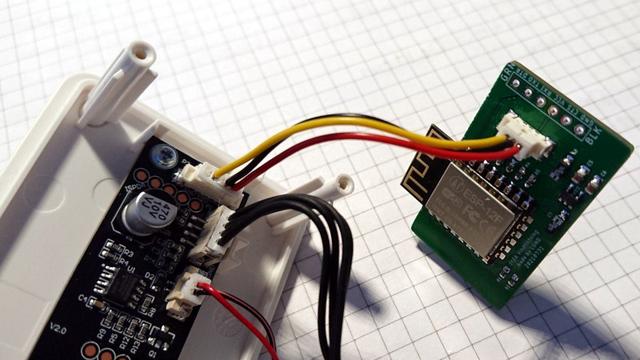
Now we've got nothing against the quick and dirty method around these parts, but if you're looking for a slightly more tidy VINDRIKTNING modification, then check out this custom PCB designed by [lond]. This ESP-12F board features a AP2202 voltage regulator, Molex PicoBlade connectors, and a clever design that lets it slip right into a free area inside the sensor's case. The project description says the finished product looks like it was installed from the factory, and we're inclined to agree.
Nothing has changed on the software side, in fact, the ESP-12F gets flashed with the same firmware [Sören Beye] wrote for the Wemos D1 Mini used in his original modification. That said [lond] designed the circuit so the MCU can be easily reprogrammed with an FTDI cable, so just because you're leaving the development board behind doesn't mean you can't continue to experiment with different firmware builds.
It's always gratifying to see this kind of community development, whether or not it was intentionally organized. [lond] saw an interesting idea, found a way to improve its execution, and released the result out into the wild for others to benefit from. It wouldn't be much of a stretch to say that this is exactly the kind of thing Hackaday is here to promote and facilitate, so if you ever find yourself inspired to take on a project by something you saw on these pages, be sure to drop us a line.
#hardware #microcontrollers #airquality #custompcb #esp12f #esp8266 #ikea #retrofit #sensor
I finally got around to wiring up and flashing a standalone #ESP12f module. It is now running one of my custom #NodeMCU builds and a tiny script to light up the builtin LED.. Yay! 🎉✨
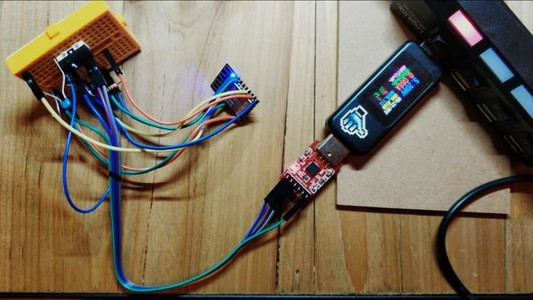
I am using a 1k and a 15k resistor plus a 0.1uF capacitor, just like https://circuits4you.com/2016/12/14/reset-programming-esp8266/amp/ but I didn't have 10k at hand, so what. ^^ The button isn't yet connected so to reset I just short the cap with an extra wire for now. :D


