#hifirepair

✨ justada :polish_cow:adaofgreengables@eldritch.cafe
2025-11-03

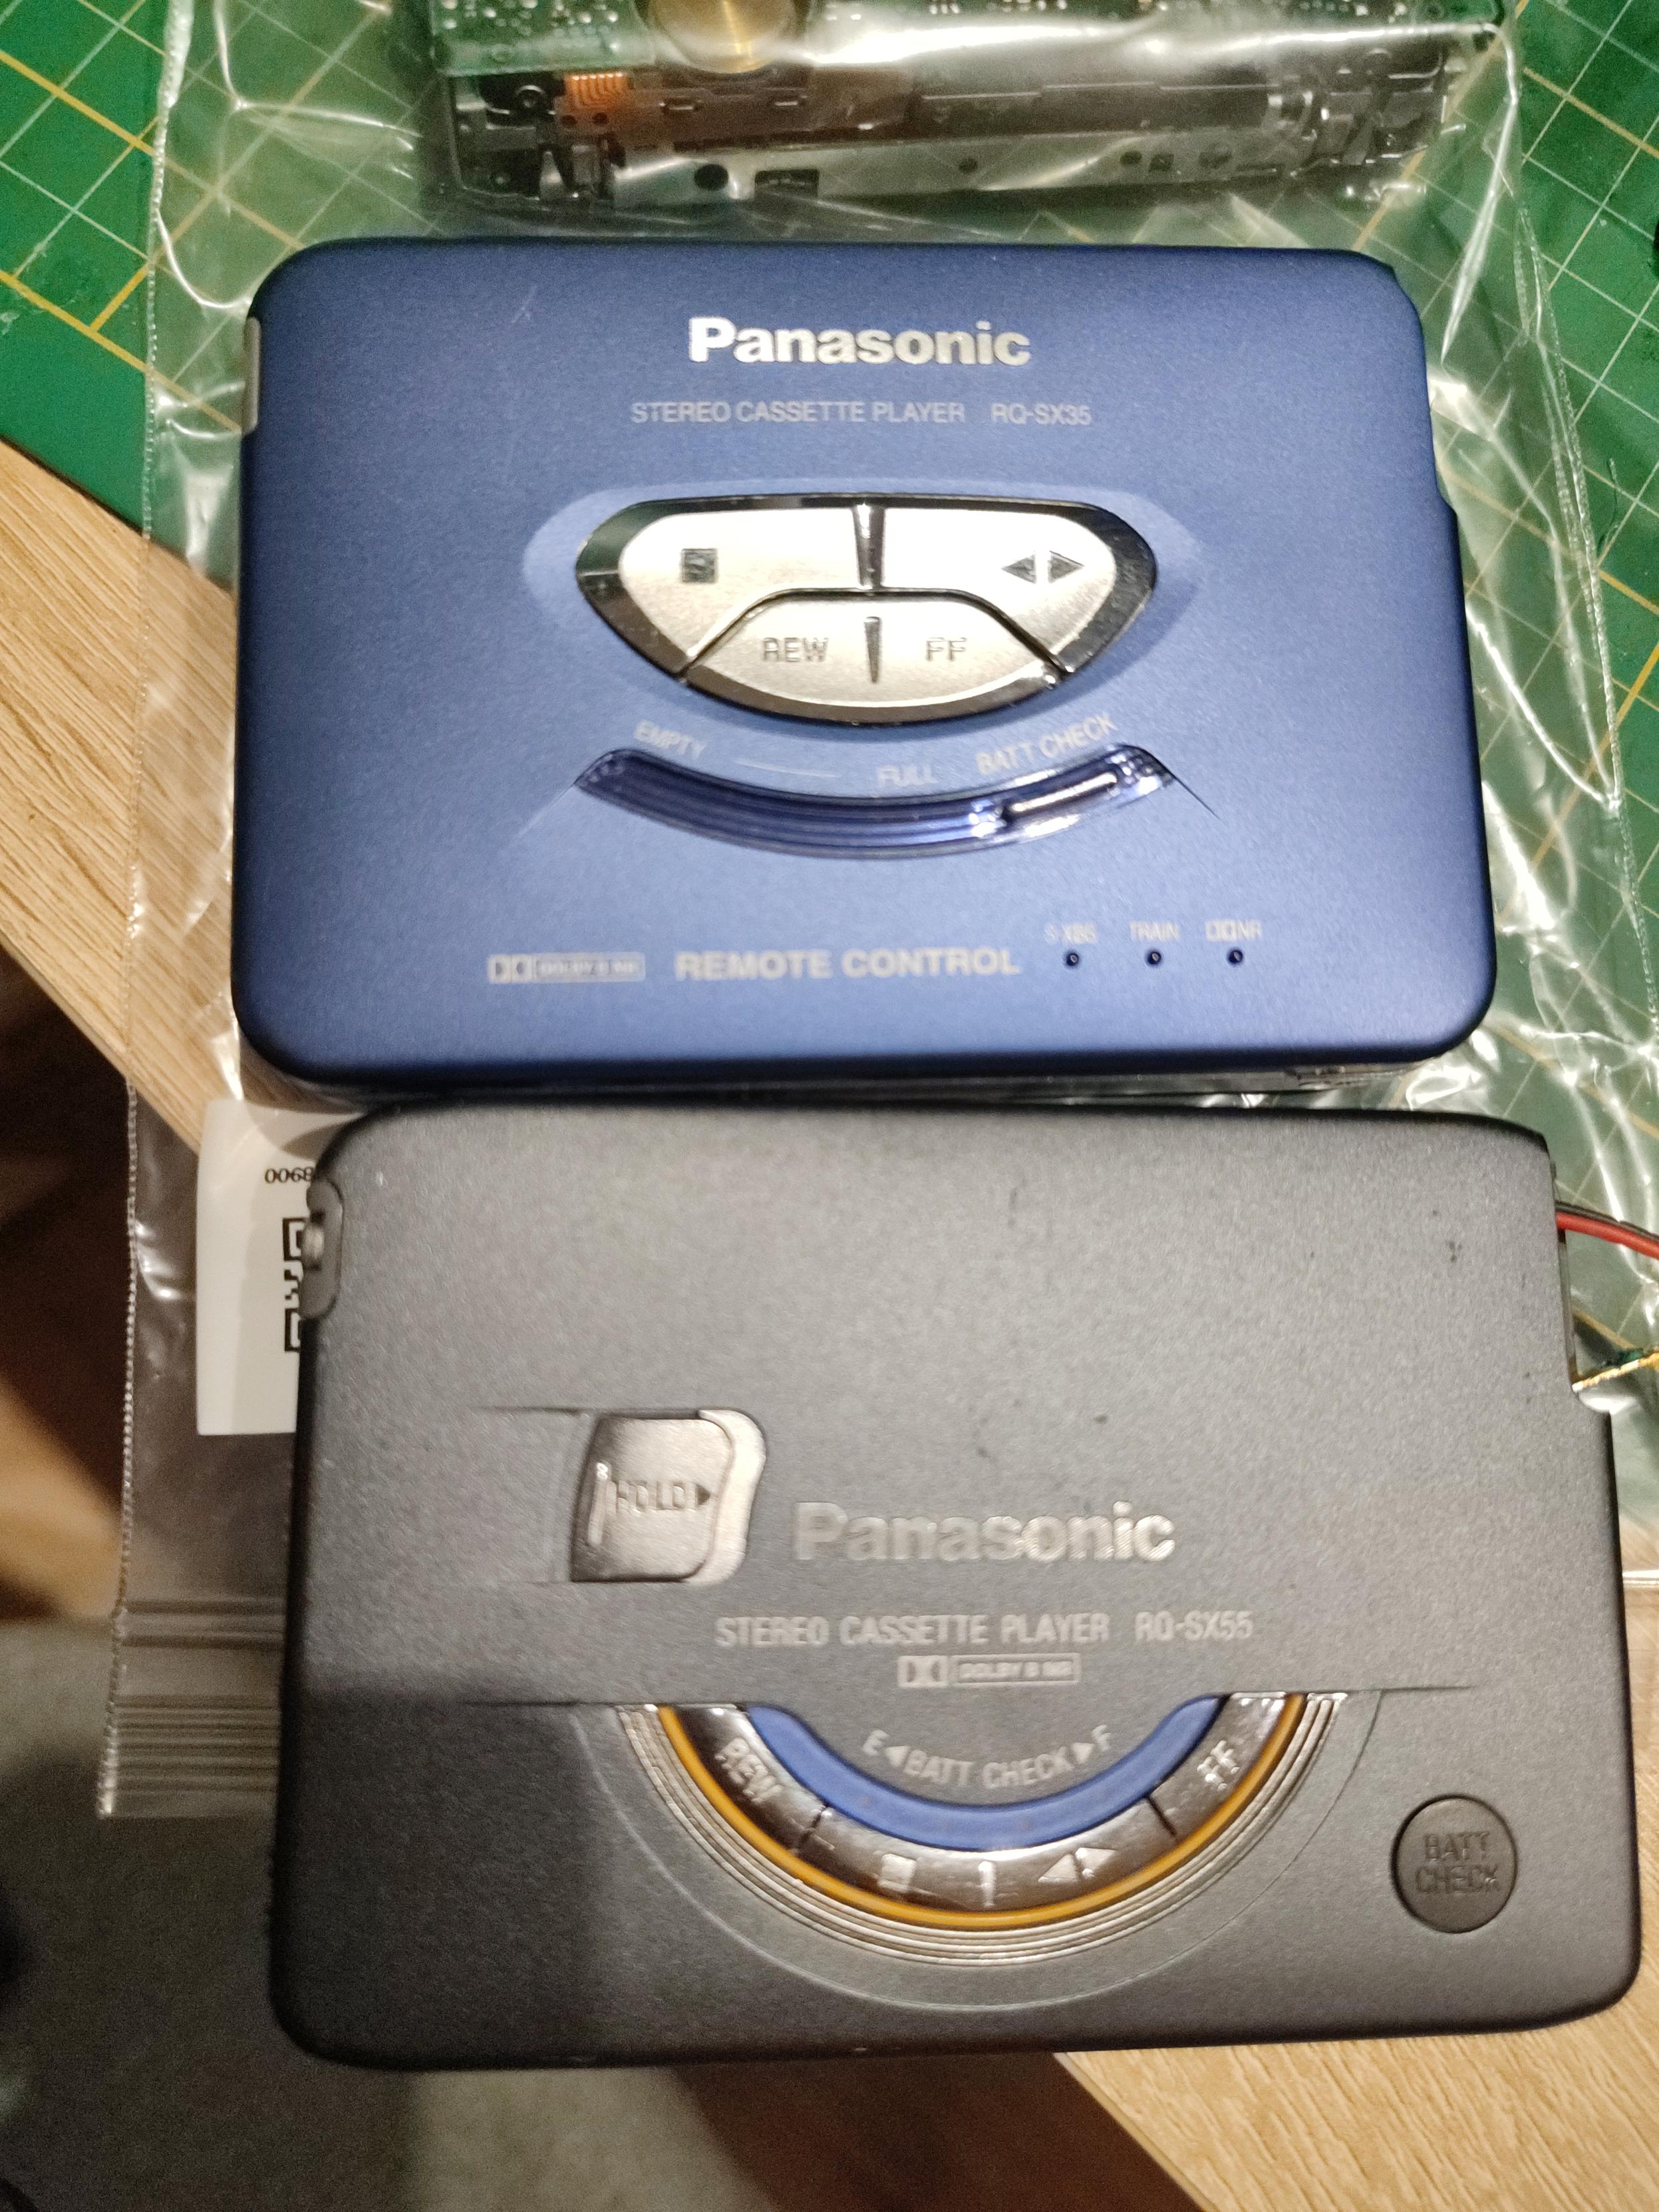
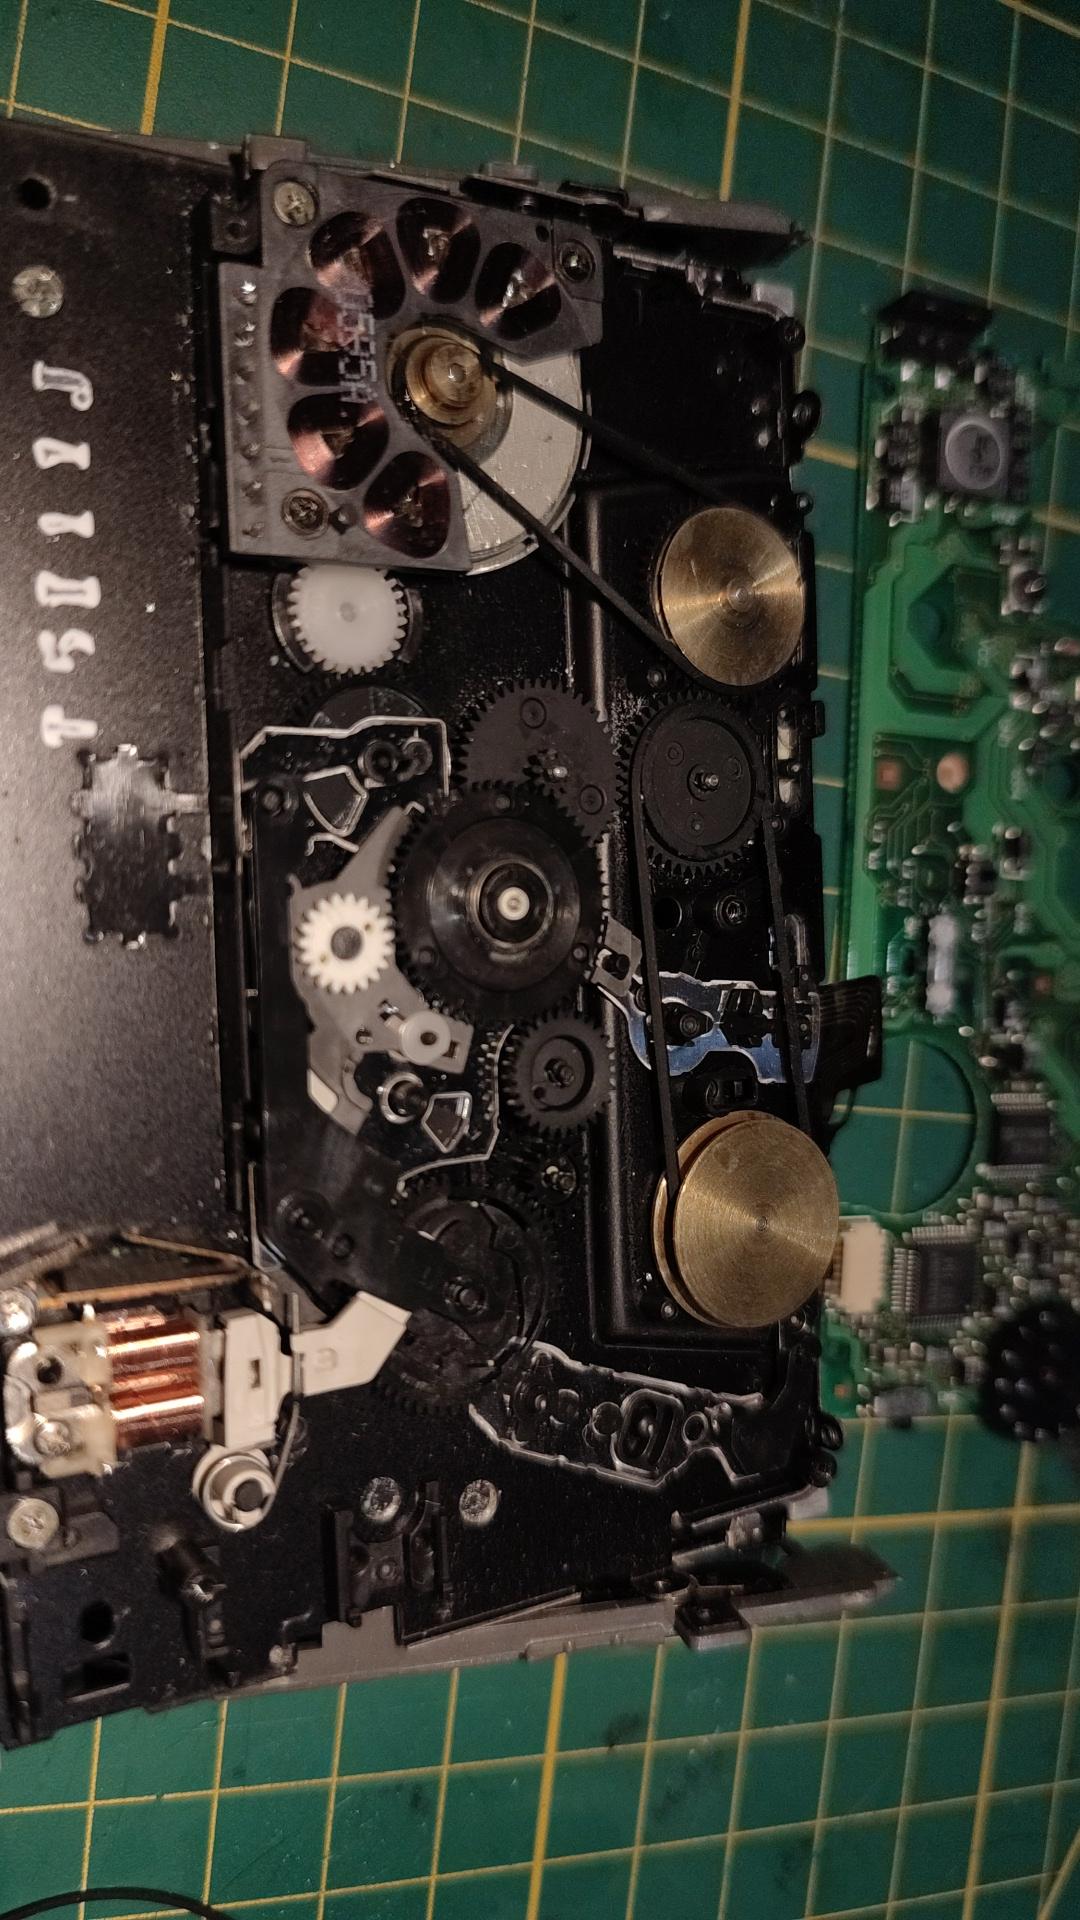
I just got these two beautiful tape players imported from Japanese flea market :blob_cat_aww: Both need belt replacements of course, however i begin to understand why panasonic players turned out to be the sturdiest. The designs are very compact and straightforward.

Pictured inside is the rq-sx55 model, after receiving new belts. These were not perfect fit but at least i confirmed that it does still play audio! :blob_cat_melt_love:

#hifi #hifirepair #analogaudio #repair #panasonic

✨ justada :polish_cow:adaofgreengables@eldritch.cafe
2025-11-02

Okay this is rather embarrassing interior i must say. I was having issues with it the moment i bought it and decided to have a look inside. Label reads Sony TC-FX120. I ended up selling it, because i couldn't get it to work properly.

#analogaudio #hifirepair #hifi #tapes #cassette

2025-10-22

#makers #AudioTech #engineer does anyone have any experience with, or can point me towards, how to replace a blown STK4211-v audio amplifier chip with a discrete built module? I’m looking for something that has been reverse engineered (ideally) or a module I can adapt and add into existing circuitry. #help #hifirepair

Tobias Klausmannklausman@mas.to
2025-10-05

At this point, I had sunk so much time and effort in, I didn't want to just ditch it, and nobody would take it off my hands for more than a buck. Luckily, somebody on ebay is selling parts off of one of these amps, and for fifty bucks, I shall have a replacement transformer soon! Two actually, but at that price, it would be stupid to try and wait for a single one to be sold. All in all, looks like this might still have a happy ending.

(3/3)

#repair #righttorepair #hifirepair

A picture from the ebay listing for the pair of replacement tranformers. I only really need one, but buying both was cheap enough, and it's unlikely that a single transformer would show up any time soon.
Tobias Klausmannklausman@mas.to
2025-10-05

T1 did compensate for some of that (running the amp proper), but the power indicator runs off T2 entirely. So I had a burned out winding, and the transformer is of course not manufactured anymore and there's no readily available replacement type. Testing the amp for power levels, it made barely 25W, when it is specced at 72W. So while it works for the usual room level of noise, it still bothered me that it was halfway broken.

(2/3)

#repair #righttorepair #hifirepair

The SU-8080 amp with the cover removed. In the far/top left, the two transformers are visible, the left of which is the damaged one. Naturally, this is completely invisible from the outside.
Tobias Klausmannklausman@mas.to
2025-10-05

So here's a bit of a rollercoaster on the #repair of the #Technics SU-8080. Last time I posted about this thing, everything except the power indicator seemed (FORESHADOWING) to work right. The Sm specifies the indicator to be a 6.3V/0.4A bulb, but replacing it did... nothing. As soon as a load of even a few Kohms is in, the voltage just goes away. After some searching and lotsa help from the EEVblog forum, it turns out that the BLU-WHT winding of T2 is shot.

(1/n)

#righttorepair #hifirepair

Schematic of  the parts of the amp that are mentioned in the post. The two paths of current to/from the bulb are highlighted. The setup is odd in that the two connections got to two different secondary windings of the transformer. In the working case, the resultant voltage would be about ten volts, which is then dropped to 6.3V or so by two resistors.
Tobias Klausmannklausman@mas.to
2025-10-04

The #Technics SU-8080 is coming along nicely. All switches and pots have been cleaned, many elec caps have been replaced (most of them had started to leak). Replaced the dreadful speaker terminals. Still left to do: bias/DC adjustment and figuring out something really weird going on with the power indicator.

#hifirepair #righttorepair #repair

The internals of a Technics SU-8080 hifi amplifier. The tone board is at the front, with the mainboard to the right rear and the two power transformers and (shrouded) filter cap bank at the left back. There are a lot of wires running to and fro, and the center is dominated by and assembly of heat sinks.The internals of a Technics SU-8080 hifi amplifier. Rear view. The tone board is at the back, with the mainboard to the left front and the two power transformers and (shrouded) filter cap bank at the rigjt. There are a lot of wires running to and fro, and the center is dominated by and assembly of heat sinks.The rear of a Technics SU-8080 hifi amplifier. The focus is on the speaker terminals which have been replaced by more traditional binding posts.
Tobias Klausmannklausman@mas.to
2025-09-25

A mess worse than I thought. One channel isn't working on _some_ inputs. One of the protection boards is rattling loose. The input selector feels like it has glue in it and one of the preamp voltage regulators has a corner missing. Fun, fun, fun.

#electronics #righttorepair #hifirepair #hifi #repair

A Technics SU-8080 sitting on it's side, cables an PCBs and potentiometers and switches everywhere. Not a single connection is plugged.A Technics SU-8080 main PCB, everything is dirty and dusty. One voltage regulator is missing a corner, though it's easy to miss.A Technics SU-8080 tone PCB. There is a lot of dirt everywhere and all the cables are soldered in instead of being plugged as a slightly more modern (late 80s) amp would have.
Tobias Klausmannklausman@mas.to
2025-09-07

Quick Sunday Morning Project: replacing the speaker terminals on a Luxman LV-103. The original set was vaguely ok, but the Plastic has started to fade, which is always a sign of impending brittleness, and the old set does not accept banana plugs.

So I got a replacement set from speaker-terminal.com (highly recommended!). I've already done the L-525 I mentioned yesterday, but it was so simple a procedure that I completely forgot to take pics.

#hifirepair #righttorepair #repair #electronics

The original speaker terminals of a Luxman LV-103 amplifier next to the replacement mentioned in the post. The new set is a simpler PCB setup, and the terminals are full-size binding posts with banana-plug (4mm) holes. Their plastic coverings are transparent plastic, whereas the old set had opaque red/black coverings.Inside view of the newly installed terminals. The wires running to the posts are in rainbow colors.Outside view of the new terminals. There are a total of eight terminals (plus and minus, left and right channels, speaker sets A and B). The terminals look almost as if they are original (the transparent plastic indicates that they are newer than the amps 1988 vintage).
Tobias Klausmannklausman@mas.to
2025-09-06

Today's labor: replaced all the elec caps in this pic (this is post-replacement), and replaced some styroflex ones with PP foil caps (blue rectangles). Amplifier is a Luxman L-525 I am refurbishing for a friend.

#repair #righttorepair #hifirepair

The main PCB of a Luxman L-525 amplifier. There are a lot of electronic components, all THT (no surface-mount devices). Most of the replaced electrolytic caps are smaller than their predecessors were, which is visible due to the silk screen markings for the original components. At the right edge there are four small blue rectangles, which are polypropylene foil capacitors, that have replaced big chunky (and sensitive) polystyrol capacitors.
Tobias Klausmannklausman@mas.to
2025-04-29

Current patient: Harman-Kardon PM655 Vxi.

At the moment the right channel is only about 5% of the volume of the left one. Since this amp can be split (pre- vs. main amp) it was easy to find the problem is with the main amp section. Next step is to figure out what's wrong. There are several options, like a broken rail voltage supply or one of that ~15 transistors that precede the main output ones (those I've already checked).

#electronics #hifirepair #hifi #repair #RigthToRepair

A HK PM655 Vxi amp, opened up and upside down, on an electronics workbench. The service manual with the annotated PCB is in the background. Also visible is a Keysight 34461A DMM and assorted other tools.
2024-12-14

Ein weiterer Grund für ihre anhaltende Beliebtheit ist die Möglichkeit, das Gerät selbst zu warten oder restaurieren zu lassen. Ersatzteile und technische Dokumentationen sind nach wie vor verfügbar, was die B77 zu einer nachhaltigen Anschaffung macht.

#AudioRestaurierung
#VintageRestoration
#AnalogRevival
#HiFiRepair
#ClassicAudioRepair
#DIYRestoration
#BandmaschinenRestaurierung

2023-08-29
Close frame of an upside down black cylindrical capacitor, removed from a stereo receiver.
2023-08-28

Changing out large dual capacitors for modern twin caps in a venerable Marantz 2285b receiver. 3D printed pucks to hold the new (much smaller) capacitors in the original cap clamps. #makershour #Marantz #hifirepair #badcaps #3dprinting

Close frame of a large, black capacitor and it’s retaining clamp.The retaining clamp and the newly 3D printed ‘puck’ which will hold the new capacitorsThe white 3D printed puck installed in the original clamp.

Client Info

Server: https://mastodon.social
Version: 2025.07
Repository: https://github.com/cyevgeniy/lmst