Jean-Michel Jarre explains DIY tape looping: "In those days we had no sequencers"
https://www.youtube.com/watch?v=-6AxwNQCSxQ
#PeaceLoveMusic #JeanMichelJarre #MusicProduction #Sequencer #Tape #Looping #Music #Beat
Jean-Michel Jarre explains DIY tape looping: "In those days we had no sequencers"
https://www.youtube.com/watch?v=-6AxwNQCSxQ
#PeaceLoveMusic #JeanMichelJarre #MusicProduction #Sequencer #Tape #Looping #Music #Beat
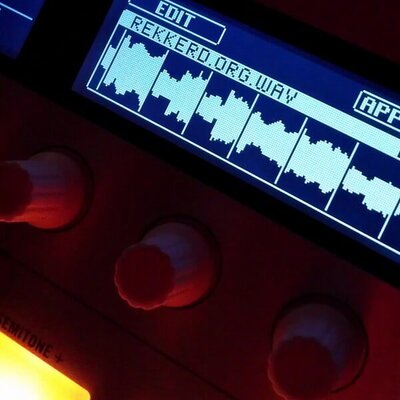
Drummer-1: One-click drum pattern generator with built-in humanization and dual MIDI/audio export https://rekkerd.org/drummer-1-one-click-drum-pattern-generator-with-built-in-humanization-and-dual-midi-audio-export/

Ah wait, is it literally this?
Cwejman S1 MKII - Sync Sound Study II
Lmao man this Euclidean sequencer on the Digitone is cool. You don't even need creativity for the rhythm when you have writer's block. And such a convenient tool squeezed into the same box as the sound generators.
I was expecting something like the Make Noise Rene but this is kind of different. Not sure why it's called Euclidean, maybe it's because the rhythm always has to resolve to a predefined boundary.

Cwejman S1 MKII - Sync Overdrive Feedback Study
Bandcamp Friday! Here is a new album from the D*Time Zone.
Slow rotating arcs of sound. Energy moving outward, light folding into darkness, signals echoing through space.
https://dtime.bandcamp.com/album/spirals-of-silence
If you choose to support today it goes directly to the music.
For a limited time the full discography is available with a 90% discount.
#ambient #berlinschool #synthesizer #soundscape #electronicambient #sequencer #spaceambient

Jazz Sketch: Simple harmonic tool for making and learning jazz music updated to v1.6 https://rekkerd.org/jazz-sketch-simple-harmonic-tool-for-making-and-learning-jazz-music-updated-to-v1-6/

WIMS Studio updates WoodPecker MIDI Sequencer to v2.5 https://rekkerd.org/wims-studio-updates-woodpecker-midi-sequencer-to-v2-5/
#AAX #AU #AUv3 #iOS #Sequencer #VST #Woodman'sImmaculateMapleSyrupStudio

Save 46% on Looperator multi-effect sequencer plugin by Sugar Bytes https://rekkerd.org/sugar-bytes-looperator-multi-effect-sequencer-plugin-sale/
#AAX #AU #MultiFx #PluginBoutique #Sale #Sequencer #slicer #SugarBytes #VST

TD4 4-bit Sound
Over on my other blog, I spentt a fair bit of time looking at the TD4 4-bit CPU. One of the things I wanted to do with my NAND Oscillators and Logic Sequencer PCB was hook up the address/select pins to something else. And with three select pins, allowing the choice between 8 notes, what better to connect it to, than a 4-bit CPU?
https://makertube.net/w/aroDZYM2BHYpoB9QLJvHnk
Warning! I strongly recommend using old or second hand equipment for your experiments. I am not responsible for any damage to expensive instruments!
If you are new to microcontrollers, see the Getting Started pages.
Parts list
The Setup
The most obvious thing in my mind, is to hook up three of the four outputs to the three selection pins of the NAND sequencer, so that is what this post explores.
The NAND PCB needs the jumpers removing, which disconnects the pot-driven oscillators. Then the three select/address lines can be connected to three of the four resistors supporting the OUTPUT LEDs of the TD4, as shown above.
It is also possible to use the POWER header pins to power the NAND PCB too.
Any of the variants of TD4 I’ve built could be used, but I’ve shown above where they would need to be connected on the original. In the end I actually soldered four header pins to the appropriate side of the resistors on my own PCB version of the TD4 as shown below. A bit crude, but it does the job.
Connecting these over to the NAND sequencer and hooking up power gives me the following.
The Code
The simplest way to create a sequence is a set of OUT xx instructions where the least significant 3 bits (so values 0 to 7) map onto the three possible notes played by the NAND sequencer.
This is the simple LED OUTPUT code from Part 3 of my series, but this continually toggles between the lowest and highest notes.
0000 OUT 0001   # 1000 1101
0001 OUT 0111   # 1110 1101
0010 JMP 0000   # 0000 1111
A counter can be used to play all 8 notes. Note that in this code B will go from 0 to 15 (b0000 to b1111) but only the last three bits select notes. This means that the sequence will count from b000 to b111 twice for each pass through this loop with the top bit being ignored.
0000 ADD B,0001  # 1000 1010
0001 OUT B       # 0000 1001
0010 JMP 0000    # 0000 1111
There are only two speeds though, 1Hz and 10Hz so the above, which has three instructions, has a tempo of 20 bpm (1 note every 3 seconds) or 200 bpm (approx 3 notes every second). The tempo can be slowed down in steps of 1 second or 1/10 second by moving the JMP an instruction further down and back-filling with other instructions (ADD A,0 or b00000000 is a good one, and is essentially equivalent to a NOP).
The following code uses the INPUT as a counter in a loop to provide a partly configurable tempo.
0000 IN A        # 0000 0100    A = INPUT
0001 OUT B       # 0000 1001    OUTPUT = B                  # Plays the note in B
0010 ADD B,0001  # 1000 1010    B = B + 1
0011 ADD A,1111  # 1111 0000    A = A + (-1)                # Loops until A = 0
0100 JNC 0000    # 0000 0111    JUMP IF NO CARRY TO 0000    # Jump back to start for next note
0101 ADD A,0     # 0000 0000    Optional additional NOPs
0110 JMP 0011    # 1100 1111    JUMP to 0011                # Else keep counting
This is still only cycling through each note individually though, but that is kind of what an 8-step sequencer would do.
To get more creative with the programmability of the sequencer requires a series of OUT instructions and NOPs between them, for example:
0000 OUT 0000    # 0000 1101    OUTPUT = 0000 # Play note 000
0001 OUT 0010    # 0100 1101    OUTPUT = 0010 # Play note 010
0010 ADD A,0     # 0000 0000    A = A + 0     # NOP
0011 OUT 0001    # 1000 1101    OUTPUT = 0001 # Play note 001
0100 OUT 0100    # 0010 1101    OUTPUT = 0100 # Play note 100
0101 ADD A,0     # 0000 0000    A = A + 0     # NOP
0110 ADD A,0     # 0000 0000    A = A + 0     # NOP
0111 OUT 0110    # 0110 1101    OUTPUT = 0110 # Play note 110
1000 OUT 0101    # 1010 1101    OUTPUT = 0101 # Play note 101
1001 OUT 0011    # 1100 1101    OUTPUT = 0011 # Play note 011
1010 ADD A,0     # 0000 0000    A = A + 0     # NOP
1011 ADD A,0     # 0000 0000    A = A + 0     # NOP
1100 ADD A,0     # 0000 0000    A = A + 0     # NOP
1101 OUT 0111    # 1110 1101    OUTPUT = 0111 # Play note 111
1110 ADD A,0     # 0000 0000    A = A + 0     # NOP
1111 ADD A,0     # 0000 0000    A = A + 0     # NOP
This last programme is the one running in the video at the start of this post.
Closing Thoughts
I appear to have made a sound card for a 4-bit CPU 🙂
One thing I am quite keen to do is connect up the sequencer’s select pins to the TD4’s address lines, as I’d like to be able to have some incidental (accidental?) music that appears as a result of the CPU just running any other normal programme.
To do this I’d need to either hook into the output of the PC register or the input to the HC154 ROM decoder.
In fact, it would be really interesting to be able to hook up any sets of four signals – so the INPUT selector, or even the control decoding logic – just to see what it sounds like as the CPU is running normal code. That might require a special build of the CPU though.
I also have an address line spare of course, so it would also be interesting to use that to select between two NAND sequencers to give me a 16 step sequence.
Kevin


A new one from the D*Time Zone!
Venture into the shadows behind the waves.
https://dtime.bandcamp.com/album/hidden-currents
#ambient #berlinschool #synthesizer #soundscape #electronicambient #sequencer #spaceambient

Nach dem Update von #apple #logicpro auf Version 12 kommt beim Start von Logic folgende Meldung (Bild):
Kennt jemand Abhilfe? Ansonsten lieber nicht updaten!!
Ich habe mein #backup (Logic 11.2.2) einfach wieder installiert.

NAND Oscillators and Logic Sequencers
I’ve had a bit of a play with logic based synthesizes in the past, but not in anger. However I’ve recently picked up “Make: Electronic Music From Scratch” by Kirk Pearson from Dogbotic.
It is excellent and a good chunk of that is based on circuits using the CD4093 Quad NAND chip, so I’ve started messing around properly with that again for a bit.
https://makertube.net/w/tJat6R4RqNqvvExkpWTgpA
Warning! I strongly recommend using old or second hand equipment for your experiments. I am not responsible for any damage to expensive instruments!
If you are new to electronics, see the Getting Started pages. Or better yet, buy their book 🙂
NAND Oscillators
As shown in the book, using a Schmitt Trigger NAND or NOT gate is a good, and relatively understandable, way to get a simple oscillator going. It is almost a “Hello World” of electronic music and has been covered and repeated all over the Internet!
Here are a few good references to dig into what is going on:
Most circuits hook up a capacitor and potentiometer and there is an instant, tunable oscillator, but I’d like to see what is involved in generating specific frequencies, for a reason that might become clear later (in at least in a future blog post if not).
The All About Circuits page has a detailed breakdown of how the voltage, resistance, capacitance and frequency all relate to each other, and eventually, assuming a 50% duty cycle square wave, ends up with the following formula:
VT+ and VT- are the threshold voltages for the Schmitt trigger turning on and off. This will depend on the device in use, the supply voltage, and even the temperature (apparently) but for a CD4093, I’ve found the following extract of a datasheet:
So taking the operation at 25 degrees and 5V, the typical values are 3.3V and 2.3V respectively, but minimum values could be 2.6V to 1.4V. Putting these into the equation I can work out the constant 2ln(VT+/VT-) to be anything between 0.722 and 1.238. This isn’t particularly helpful…
Ok, so I can see why people just use tunable potentiometers…
So after some messing around with some capacitors and potentiometers, I seem to get a fairly decent range with a 1uF capacitor and 10K pot, so that is probably the way to go, using a trimpot to “tune” to notes I want.
At this point a simple monophonic keyed oscillator is possible, so that is what I’ll look at next,
The Basic Circuit
Here is a simple switched version of the previous circuit, with three “keys” and hence three possible notes.
The schematic for the above is as follows:
This makes it a little easier to see what is going on. Essentially we have three different resistor values available, but which one gets connected to the circuit is dependent on one of the switches being pressed.
In principle there could be as many switches and potentiometers as we like. And this is essentially the principle behind the Oskitone Poly555 except that is using a 555 timer circuit rather than a NAND oscillator, and actually the Oskitone has an individual, tunable, oscillator per key which allows for whole keyboard polyphony.
Note, that if two or more switches are pressed at the same time, then we’ll end up with several resistors in parallel giving a lower total resistance. This means that the resulting note would change as a result. So I guess one could argue that there are more possible notes than just three, but I’m not sure they’d be particularly useful notes…
A Step (or 8) Further
I’m not particularly interested in building a circuit with lots of switches on a breadboard, but some of the other circuits in the book have planted some interesting ideas.
Later on in the book, a few other chips are added to the mix:
I won’t spoil the fun here (buy the book, I’m not linked to it – I bought my own copy, but it really is good), but it has really paved the way for me to reconsider how to use logic chips with oscillators.
What I’m interested in now is using the CD4051 analog multiplexer in place of the switches of the previous circuit, allowing me to “address” a note to be played by the oscillator.
The CD4051 datasheet has this diagram showing how it works:
This allows one of 8 circuits to be made, depending on the values of ABC, which are binary coded through the 8 values from 000 (0) to 111 (7).
The book pairs this with a CD4040 to count through the 8 values and hence produces a 8-step pitch sequencer from three chips, 8 pots, and a few passive components. But I want to drive the three address lines in a different way.
For now I’m going to connect each one up to each of the spare NAND oscillators – the 4093 has four NAND gates in total. The idea is that each of the bits will be controlled by a different oscillator, so as they go on and off in various combinations I’ll get what might feel like a fairly random selection between 0 and 7, and thus a fairly random note. I’m hoping for some interesting combinations as the they count in and out of phase.
But at this point I’m not even going to attempt to wire this up on a breadboard, so I’ve gone ahead and had a PCB built.
PCB Design
In the design I’ve included a jumper between each controlling oscillator and the sequencer, which allows the possibility of something externally controlling the sequence. I’ve also included two GND connections for use too.
I’ve also included jumper headers for power in and (audio) signal out. Note: the output signal is a 0-5V square wave signal and it is wired to the tip and shield of a TRS socket. The ring is left unconnected so either a mono or stereo lead can be used.
There are one or two silkscreen erratas on this board:
It might have been more useful to allow the channel select jumpers to be directly jumpered to GND, allowing me to test each oscillator in isolation, by grounding the other two channel inputs. But that can be done with leads.
So, with hindsight, there is something I should have changed on this design. The three oscillators as described are generating audio frequencies, but to drive the sequences I really want them to be acting as low-frequency oscillators. To do this, the capacitors should be swapped from 100nF to something more like 22uF, and the pots are better as 100K pots.
Unfortunately this doesn’t fit so well on the PCB – well the capacitors don’t anyway. The following highlights where the capacitors should be placed, and their polarity, instead. But it should be doable.
Bill of Materials:
Here is a photo of a finished build:
Closing Thoughts
This was a really nice diversion. I do like the idea of using digital signals from something to select notes, so I’ll definitely come back to that at some point.
I’m not entirely sure I have anything of particular musical interest yet. But for now, it has shown some of the principles, and the book has really set off a number of ideas about using logic chips with oscillators. So I’ll come back to that at some point too.
Kevin


Stepic 1.6 Dub Ambient Live Set Walkthrough by Martin Stürtzer https://rekkerd.org/stepic-1-6-dub-ambient-live-set-walkthrough-by-martin-sturtzer/

Polaris music-making app now available for iOS/AUv3 https://rekkerd.org/polaris-music-making-app-now-available-for-ios-auv3/

Noise Engineering introduces Multi Repetitor algorithmic percussion sequencer https://rekkerd.org/noise-engineering-introduces-multi-repetitor-algorithmic-percussion-sequencer/