
Anyone have experience with #diy PCB etching? I want to get started with making some pcbs and I've found a lot of videos on how to do the process but can't find a list of what I need to get started.
#electonics

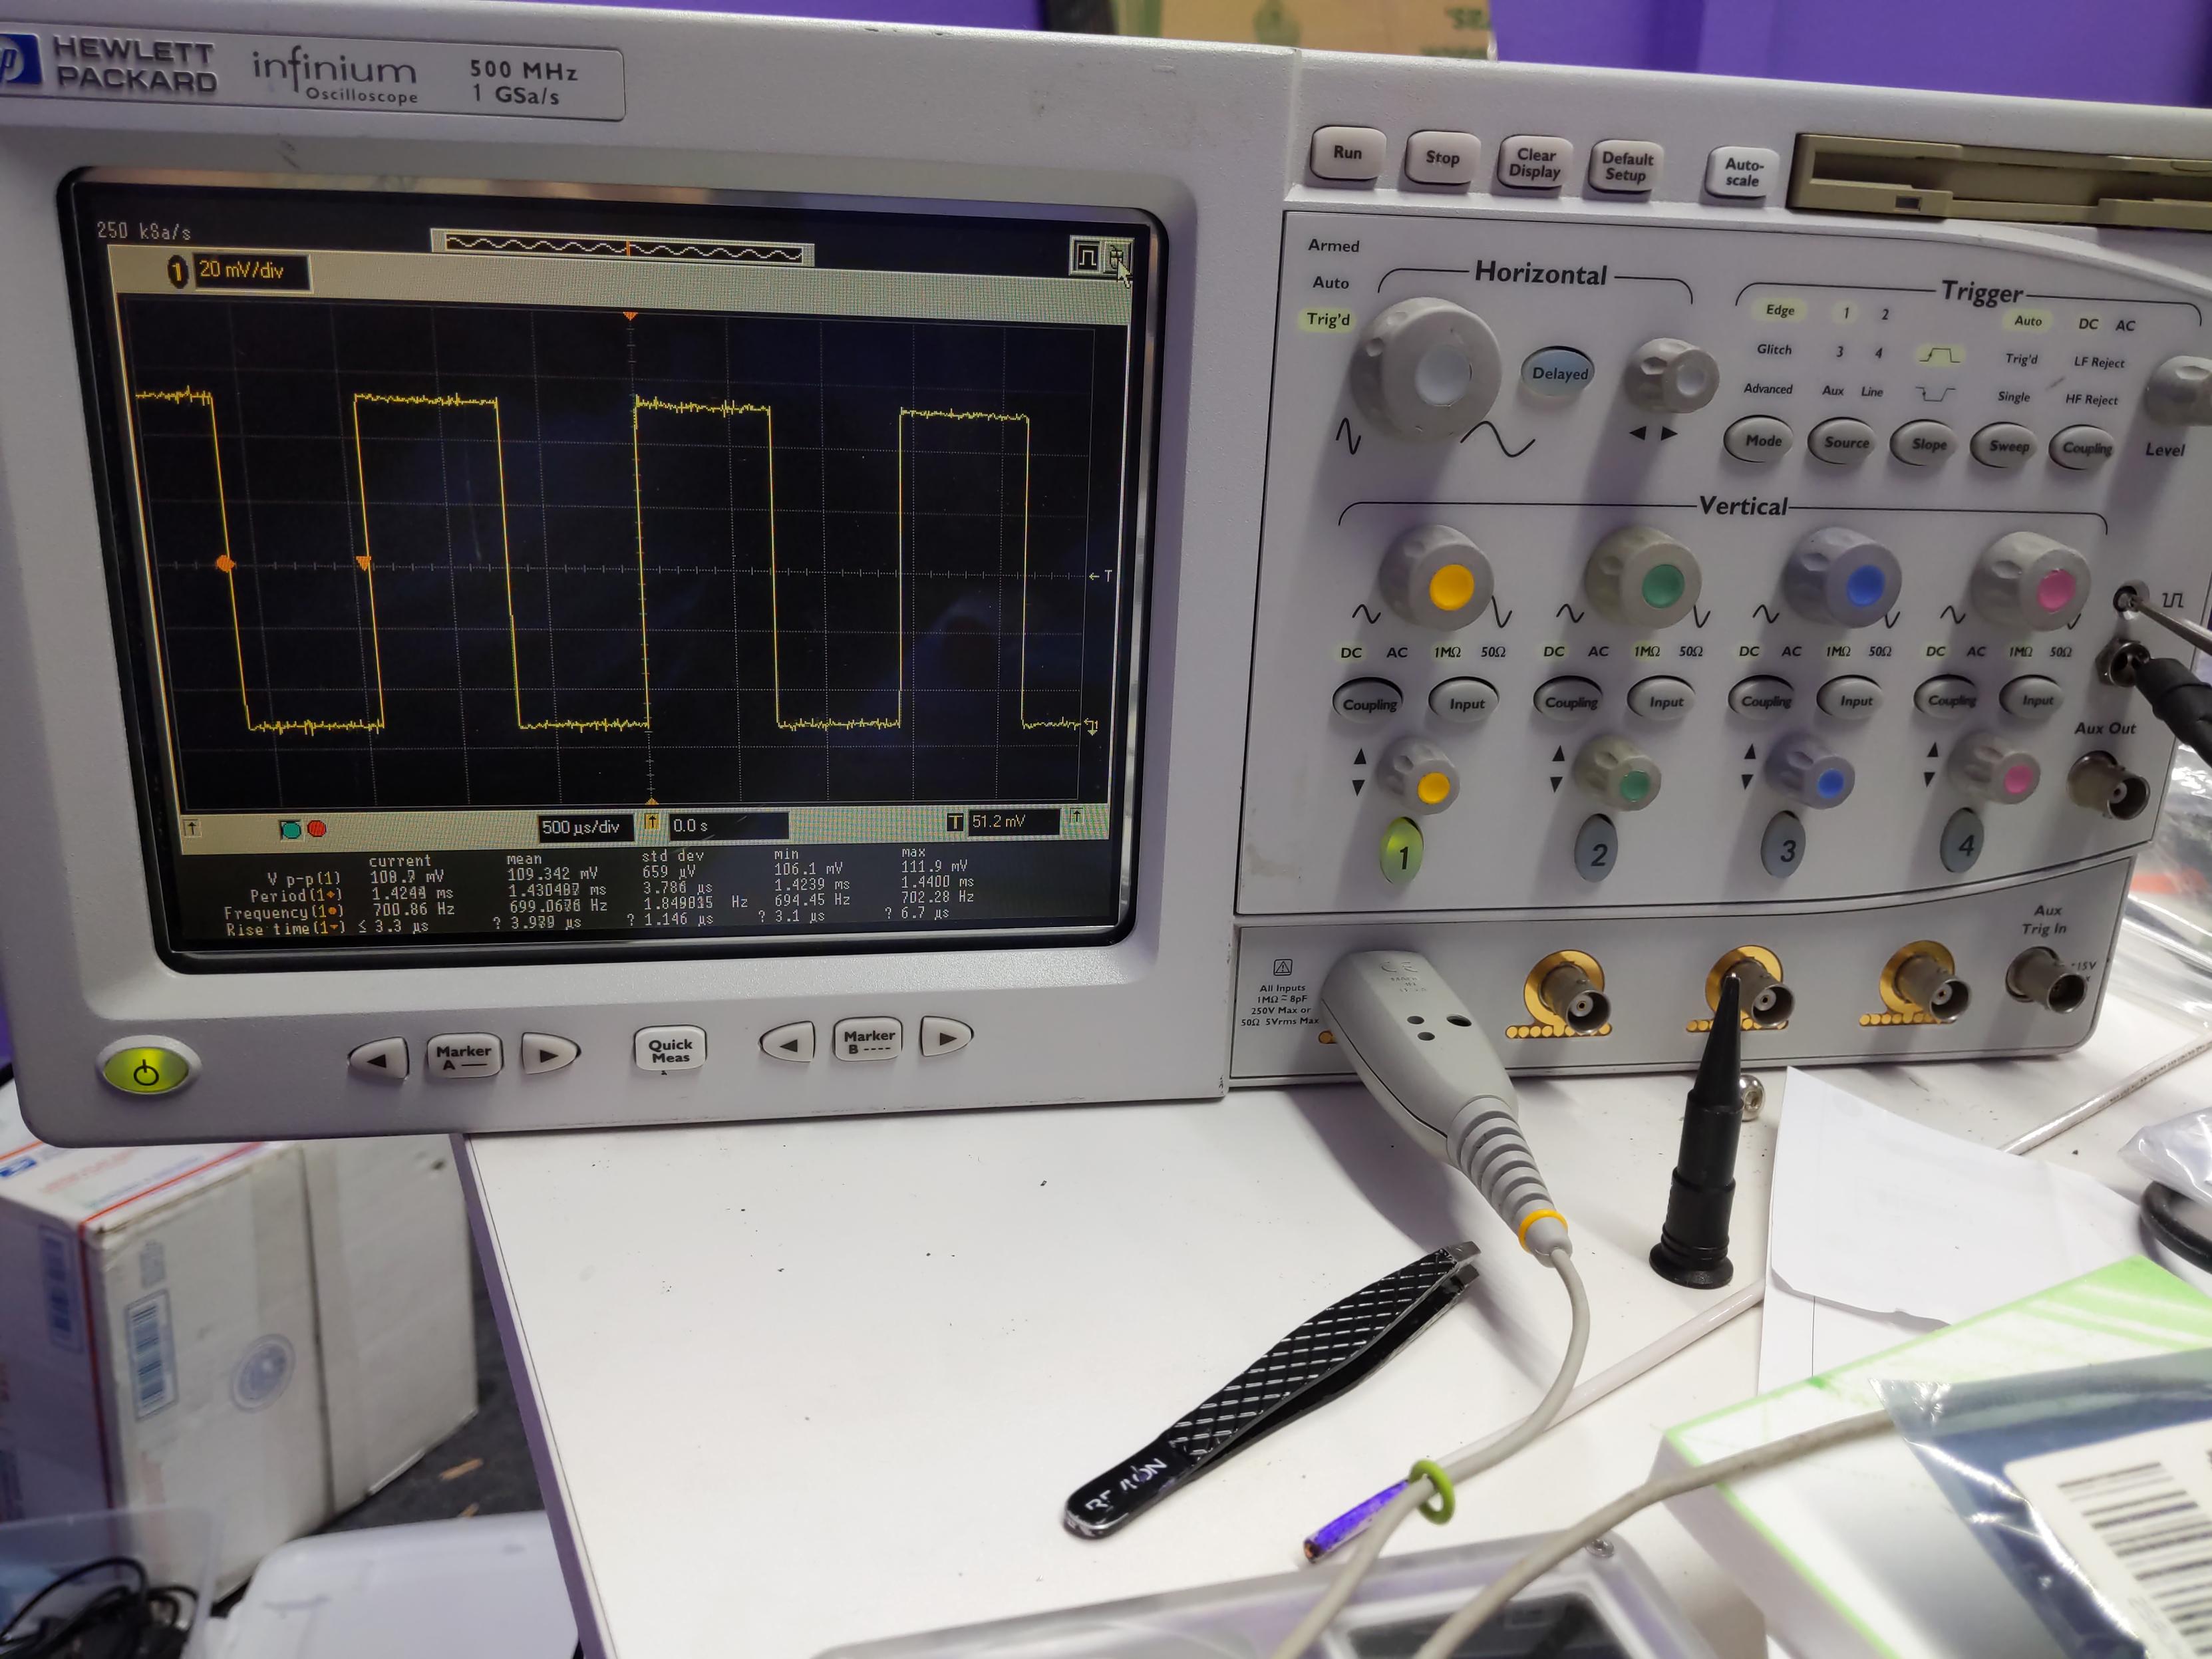
got my Project Oscilloscope to boot tonight :3
it is the kind that is based on a 1990s PC motherboard that kinda bricks itself if the RTC battery dies, and also the RTC battery is epoxied into the RTC itself, and also I needed to buy a period-accurate keyboard to recover from that
will eventually get/build one of the mod kits that puts a replaceable battery on top of a pin-compatible RTC, but my bodge wires will do for now
#electonics #theWorkshop

2025.12.07
<自分用の小さなAudio Amp.を製作>
余っている部品を使って音出し確認用の小さなAudio Ampを作った。
入力は、L・Rのライン入力とBluetooth。
出力は、モノラル。
電源は、USBアダプタから供給する。
小さなスピーカーを作業机の側に置いて、このアンプとスマートフォンをBluetooth接続して使う。
普段はビンテージショップから依頼されてこの様な回路を使ったBluetoothスピーカーを作っているが、自分用に作るとなると面倒なので欲しいと思っていてもずっと先延ばししていた。


Je me suis fait un petit circuit imprimé rigolo pour tester la sérigraphie en halftone. J'ai voulu me faire plaisir. Je pense que j'ai passé une étape sur le côté artistique de mes PCB. C'est vraiment chouette. Vivement que j'ai des idées sympa pour faire des #kits #electronique pour les scouts lors du #jotajoti
#HamRadio #diy #electonics

Well of course I installed an LED 😂.
At first I went with a blue one but then decided to make it really special and put in an RGB LED. Because why not? 🙌🏻
https://www.youtube.com/shorts/xRUq2M6AjfM
Now the mod is complete. Next stop - replacing tone sucking pedals with decent ones and maybe wiring power underneath. But no rush there - I really doubt I'll ever play outside of my place again 😂.
#dunlopcrybaby #wah #crybaby #crybaby535q #mod #diy #pedalboard #guitar #mxr #soldering #electonics #tinkering
A simple but satisfying fix...
A basic press on battery powered light brought home from a local pre-school were it is used as a learning aid.
It was not turning on, and changing the batteries (4x AA) did not help. Opening it up I saw the problem. The bulb was blown! Also, it was directly soldered to the switch, so replacing it would not be a simple swap.
Instead, I replaced it with a couple of LEDs and a 150R resistor. Then, some hot melt glue to hold it all in place ✔️
2024.10.20
預かっていたテレビの改造を終えて引き渡すことができたので肩の荷がおりた。
https://mastodon.social/@741CE/113328468181884756
次はWorkshop Tool(工房で使う道具)の製作に取りかかろう。
直巻モーターの回転制御回路を自作します。
回路はこれで良いと思う。
自分で使う物なので急ぎはしないし、外観も気にしない。
ちゃんとしたケースは値段が高いのでジャンク品のパソコンの電源のケースを使う予定。

Hot plate solder
#hamradio #electonics #JOTAJOTI
I put some IC
#hamradio #electonics #JOTAJOTI
Manual Solder paste
#hamradio #electonics #JOTAJOTI
@jmrubillon I was wondering if there was something like, say, blue LEDs are 50 times more luminous than green LEDs, but our eyes are 10 times more sensitive to green than blue. So a resistor ratio of 5 - 1, would make the two appear equal, thus when mixed the result would be a balanced cyan. Similarly for yellow, when mixing red and green.
I only want to use the 3 primaries plus yellow and cyan, and the LEDs are either on or off.
I accept that I may be overlooking many facts...
Trying/struggling to "balance" the LEDs in my RGB LED...
Each LED in the RGB package has a different forward voltage so I have worked out the resistor values to give a current to each LED of around 6mA.
However, I am finding that, say, yellow (red + green) is a little too green.
I know that some LED colours are brighter for the same current, and our eyes are more sensitive to some colours than others.
Has anyone managed to work out resistor values/ratios to balance all this?
11 turn. 31uH. What is the type of matierial of this tore ?
#HamRadio #qrp #electonics
I needed some more LEDs, so when I spotted a box containing many colours, sizes and types and, I thought that was just the ticket. Lots of LEDs and lots of colours what could go wrong, I mean can you have too many LEDs - 350 isn't too many, is it 😉
This is what arrived! Not like the picture at all 😱
Now to be fair, they are the colours and type exactly as per the label in the lid - I tested 1 of each to be sure. However, I think I would cry if I dropped the box and mixed them up!

Making progress on my PCB editor software suite. Named MangoCAD after a family pet (African Grey) that recently passed. Will be file compatible with a certain bird-themed software product. Still very alpha level and can't actually edit anything yet, but showing promise. Open Source here for the morbidly curious: https://github.com/maehem/mango-cad #mangocad #javafx #java #PCB #electonics


NE555 Waveform Generator kit... Construction progress update 2.
Active parts, IC socket and header pins soldered.
As has already been commented upon, the PCB is in a handy clamp. This securely holds the PCB on the edges and allows me to place the components on the top side, then flip it for soldering.

I may be 50 but I still like taking things apart and putting them together again. In this case, the thumb joystick in the Joy-Con is worn out, so I'm replacing all the switches & springs.
#ThereIFixedIt #electonics #nintendoswitch
In today's awesome solution in search of a project: a $19 RPi Pico glued to the back of a 1.28" LCD screen, with an accelerometer angled gyro. Add a battery and you have a watch that can be programmed with MicroPython.

I finally assembled this ancient Adafruit PiGRRL Zero that I've had floating around for... oh, like four years? Started a new game of Pokémon Red with my 13 y/o along for the ride. Looking forward to experimenting with this and tinkering with the case & buttons. Already know I need to redesign the ABXY buttons, I'm pressing multiple switches any time I depress a single button. I can really tell it was designed to print in flexible filament. #electonics #retrogaming #raspberrypi
Client Info
Server: https://mastodon.social
Version: 2025.07
Repository: https://github.com/cyevgeniy/lmst