
#Kostümshooting in #Stade: hier mit Ole. #Barock-#Rokoko-#Kostüm von #KostümwerkStade.
Zum Ausleuchten des #Model|s habe ich eine #Softbox und einen #Durchlichtschirm benutzt.
#portrait #photography #portraits #nikon #portraitgermany #portraitsmadeingermany #tfphamburg #tfpgermany #tfpshooting #portraitfotografie #modelhamburg #männerportrait #manportrait #shooting
#Softbox

Mit Claudia ging es mit blauem Kleid in den Wald. Ein tolles #Shooting in #Hamburg. Diesmal eingefärbter #Blitz mit #Softbox, um eine tiefstehende Sonne zu simulieren. #Vintage-Sytle per #Lightroom.
#portrait #photography #portraits #photoshoot #nikon #portraitgermany #portraitsmadeingermany #tfphamburg #tfpgermany #tfpshooting #girlportrait #portraitfotografie #modelhamburg #frauenporträt #womanportrait
#portrait #photography #portraits #photoshoot #nikon #portraitgermany #portraitsmadeingermany #tfphamburg #tfpgermany #tfpshooting #girlportrait #portraitfotografie #modelhamburg #frauenporträt #womanportrait

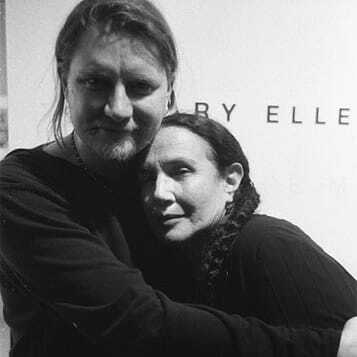
#Goldshooting mit hobbymodel_steffi_hh. Zusammen mit einer Visagistin erschufen wir einen echt abgefahrenen Look im #Studio.
Eingesetzt habe ich einen #Blitz mit goldfarbener Folie für den Hintergrund. Zum Ausleuchten des #Model|s habe ich eine #Softbox und einen #Durchlichtschirm benutzt.
#portrait #photography #portraits #photoshoot #nikon #hamburg #portraitsmadeingermany #portraitgermany #tfphamburg #tfpgermany #tfpshooting #girlportrait #portraitfotografie #modelhamburg #placefacehh #frauenporträt #womanportrait #shooting #gold

Ich wollte unbedingt ein #schwarzweiß-#Charakterporträt. Bernhard war sofort zur Stelle. ;) Eingesetzt habe ich eine #Softbox und so konnte ich ein #Lowkey-#Portrait knipsen.
#nikon #hamburg #portraitsmadeingermany #tfphamburg #tfpgermany #tfpshooting #germanportraiture #hamburg #bestager #portraitfotografie #modelhamburg #männerporträt #manportrait #blackandwhite
#nikon #hamburg #portraitsmadeingermany #tfphamburg #tfpgermany #tfpshooting #germanportraiture #hamburg #bestager #portraitfotografie #modelhamburg #männerporträt #manportrait #blackandwhite

#Kostümshooting in #Stade: #Kostüm von #KostümwerkStade.
Zum Ausleuchten des #Model|s habe ich eine #Softbox und einen #Durchlichtschirm benutzt.
#portrait #photography #portraits #nikon #portraitgermany #portraitsmadeingermany #tfphamburg #tfpgermany #tfpshooting #portraitfotografie #modelhamburg #frauenporträt #womanportrait #Kostümwerkstatt #shooting
Zum Ausleuchten des #Model|s habe ich eine #Softbox und einen #Durchlichtschirm benutzt.
#portrait #photography #portraits #nikon #portraitgermany #portraitsmadeingermany #tfphamburg #tfpgermany #tfpshooting #portraitfotografie #modelhamburg #frauenporträt #womanportrait #Kostümwerkstatt #shooting

Cool #Steampunk im #Studio: Don't mess with nadievageek. Könnte auch ein Bandfoto sein. ;)
Eingesetzt habe ich einen #Durchlichtschirm und eine #Softbox. Der Hintergrund wird durch einen weiteren #Blitz erhellt.
#portrait #photography #portraits #model #photoshoot #nikon #hamburg #portraitgermany #portraitsmadeingermany #tfphamburg #tfpgermany #tfpshooting #girlportrait #instapic #portraitfotografie #modelhamburg #placefacehh #frauenporträt #womanportrait #blackandwhite #schwarzweiß


Light Your Shots Like Never Before with the Digitek DLSF 65 Lantern Softbox 65cm!
Achieve soft, omni-directional light with a 270° beam spread that transforms your setup in minutes. Perfect for photographers and videographers looking for versatility and efficiency.
Offer Price: Rs. 2,599.00
M.R.P: Rs. 3,995.00
Shop Now: https://zurl.co/hys42
#DigitekLighting #Softbox #PhotographyLighting #VideoLighting #BowensMount #LanternSoftbox #StudioLighting

SmallRig’s New Parabolic Softboxes Set Up in Seconds https://petapixel.com/2025/07/17/smallrigs-new-parabolic-softboxes-set-up-in-seconds/ #Equipment #parabolic #Lighting #lighting #smallrig #softbox #News #fp60 #fp90

Portrait without a face | Gesichtsloses Portrait
Part of my "Portrait" collection
https://pixelfed.social/c/803244182941181262
(works only in a browser)
#portrait #tfp #tfpshooting #tfpmodel #bed #bett #bettdecke #vorhang #baldachin #unterrock #shooting #model #modelshooting #lostplace #bedroom #blanket #female #indoor #flash #godox #softbox #golden #pillow #funny #hidden #sony #sonya7riva
+++ Lust zu shooten. Einfach PN :-) +++
Freu mich auf feedback.


Lisää testausta kuvausvalojen tee-se-itse softboxeilla. Lampun ja hunajakennon välissä on nyt vaalea leivinpaperi pehmentämässä varjoja. Seuraava projekti on askarralla sama vanhasta kukkaruukusta toisen kameran päällä olevaan lamppuun. 💡
#valokuvaus #videokuvaus #valaistus #lampunvarjostin #askartelu #softbox #striimaus #streaming #etätyö #syksy #PhilipsHue
Tein itse, säästin. Askartelin muovikiposta, pahviarkista ja voirasiasta softboxin eli valonmuokkaimen pieneen pöytälamppuun. Tarpeet maksoivat muutaman euron. Prototyyppi ainakin toimii ihan odotetusti. 💡
Toki hunajakenno-osasta voisi piirtää ohjelmalla kunnollisen 3D mallin ja käydä tulostamassa se vaikka kirjaston 3D printterillä mutta ehkä myöhemmin. Hidasta touhua sekin on.
#valokuvaus #videokuvaus #valaistus #PhilipsHue #lampunvarjostin #askartelu #softbox #striimaus #syksy

Behind The Scenes photo of the Executioner's Capelet w/ our flash setup. We all worked together as a team to make this book come together. TTArtisans 35mm f2 here with an M10. Dress by rock star designer @heartlessrevival
.
.
#iceland #icelandphotography #icelandtrip #icelandadventure #icelandtravel #traveliceland #icelandroadtrip #landscapephotography #adventure #knitting #knittinginspo #ocfphotography #behindthescenesphotoshoot #offcameraflash #beautydish #softbox #portraitartwork #leica


Rotolight’s New Parabolic Softboxes are a Bit Confusing
#lighting #news #led #modifier #parabolic #r120 #r90 #rotolight #softbox #softlight
What is Fill Light in Photography?
#educational #lighting #101 #basics #fill #filllight #guide #introduction #light #modifier #ringlight #scrim #softbox #threepointlighting #tips #umbrella
Profoto Launches Magnetic Octa Softbox for A and C-Series Strobes
#equipment #news #clic #lighting #lightingequipment #lightshaping #magnetic #octa #octabox #profoto #profotoclicsoftboxocta #softbox #softlight #speedlights #strobes


Look Beyond the Softbox to Spice Up Your Portrait Lighting
What kind of lighting do you use as a portrait photographer? Softboxes are great and popular, but that also makes them potentially overused and boring. If you want to spice up your portrait lighting, you can look into expanding your toolbox beyond the softbox and into other kinds of lighting.
Why You SHOULD Use a Softbox
First, let's take a look at some reasons why you should choose the trusty softbox for your portrait shoot.
“Good” Light in No Time
Some light shaping tools are definitely fairly easy to use. You really can’t go wrong with putting a softbox on your light and firing away. Especially now, when many brands such as Profoto or Godox have added TTL to their lights. It has become almost effortless these days to get good light quickly.
The reason I say "good light," and not my personal mantra of "no light is good or bad," is because softbox lighting has become synonymous with good. We all like a nice soft-lit portrait -- at least it seems that most photographers and viewers of photos do.
Any beginner who has little to no knowledge of light will be blown away by the difference a front-facing Speedlite and a softbox will have. I know I was when I first put a softbox on a light. Back then, it seemed like the new breakthrough in my work. Yet, doing the usual perfect light setup for portraits soon became boring and I couldn’t stand making the same picture over and over.
After all, I’m not aiming to be a one-hit-wonder like a-ha or Los Del Rio. I’d rather be like David Bowie and reinvent my work from album to album.
Softboxes Are Everywhere
Another reason to use softboxes is a lot more subtle. It's that they are simply everywhere. For example, if you rent a studio, you’re likely to find a softbox on a light. For someone who just came to the studio and knows next-to-nothing about light, it will seem only intuitive to wheel the big light in.
Some might even mistakenly believe that the softbox is a permanently attached part of the light (this is an actual story I heard from someone). In a way, your mindset may be the product of people ubiquitously using softboxes.
Why You Should Consider Looking Beyond the Softbox
Softboxes are great, yet I tend to use a variety of light shaping tools for my work, and softboxes actually come out rather rarely. How come?
Crafting Different Aesthetics
The key to fashion photography these days is to craft an aesthetic rather than execute a setup. Naturally, this implies being able to use any light modifiers and make the light from them fit the brief. Softbox lighting is akin to creating a light setup without giving it too much thought.
I have found that photographers are often scared to go outside of their comfort zone and pick something different up. That is rather perplexing to me, as there is an endless stream of photos out there that have been lit in exactly the same way. In fact, it can be its own genre of work: boring softbox photos.
Thus, the first reason to not use softbox lighting is that it is potentially boring.
Standing Out
If you want to make it in the fashion industry, you need to have a way of standing out. Art buyers get thousands of emails a day from various photographers, and when they end up choosing someone, they will inevitably pick someone they remembered. It is unlikely to be an artist whose work looks like everybody else's.
I’m not saying to not have softbox lighting in your portfolio at all -- I’m inviting you to not be afraid to change your light and make it more unique.
Another reason to stay away from softboxes is for educational purposes. There are over hundreds of different light shaping tools that are manufactured specifically for photographers. There are an infinite amount of objects that can influence light. You can take a simple shower curtain and create some unique looks with it. Another one is a water bottle, one more is a fancy window, and of course, let’s not forget about prisms and mirrors just to name a few.
In the grand scheme of things, it is apparent that softboxes are very much the tip of the iceberg when it comes to lighting. How much more can you create if you choose to raid your local rental house and ask for a Hardbox instead of the softbox?
The Profoto Hardbox light shaping tool creates an extremely hard light that mimics direct sunlight.
A portrait captured with the Profoto Hardbox.
Understanding the Raw Nature of Light
Spicing up your light by making a different choice than softboxes will also help you understand not only how individual modifiers work, but also how light works in its raw form. This can be helpful when you start working with scrims, flags, and other modifiers that allow you to sculpt light around the subject.
Sculpting is perhaps the highest form of light shaping, where you are carving out a statue out of raw material. That way, you will be able to pick a light shaping tool that suits you, and if that is a softbox, you will be able to be smarter about using it. Perhaps you will choose to place a grid on your softbox, or perhaps you will angle it in a weird way you hadn't considered before, or maybe you will put a black flag in front of it because that’s what you need.
This knowledge will only accumulate if you choose to be different from most photographers and not be content with only using softboxes.
A mix of soft and hard light. Soft light on the face, and hard light on the heel.
Parting Thoughts
I want to stress that I don’t think softboxes are bad or that you are stupid or incompetent for using them. On the contrary, they are fantastic tools that have a purpose to serve, and that purpose is to create soft diffused light. That light isn't good or bad. It can be appropriate for portraiture or any genre when you make the conscious choice to use such modifiers.
But a softbox is not the right modifier for getting other types of light if that’s what you actually need. The way to be at one with all modifiers is by always keeping an open mind and not being afraid to change sets or rent out a modifier you never tried before. Allow yourself to make lighting mistakes, have mishaps, or even choose the "wrong" modifier at times. If you are unaware of what is not fitting, how can you know what is?
Image credits: All photographs by Illya Ovchar.
#educational #inspiration #lighting #advice #fashion #fashionphotography #ideas #illyaovchar #lightmodifiers #opinion #portrait #portraitphotography #portraiture #softbox #tip
How to Make a DIY Softbox for Free
Almost anything can be used as a light modifier. As long as it interacts with light in one way or another, it can be considered a light modifier. In this article, I will show you how to build a do-it-yourself (DIY) softbox with things you likely already have around at home.
As long as you have these basic ingredients, you should not have to pay any additional cost to make the softbox, which can deliver even and diffused light for your photography. If for some reason you lack something like a light bulb or some aluminum foil, you may have to make a quick trip to the store and spend a little bit of money.
Beginning photographers may feel intimidated by the expensive light modifiers on the market that are often used by professionals, but the goal of the article is to demonstrate that expensive modifiers are not necessary to create high-quality images.
If I were just starting out in photography now, I would not be even looking at investing in Profoto or Broncolor equipment right away. A DIY softbox is more than enough for many types of introductory shoots. Sure, there will be some obvious differences between the results of high-end and DIY gear, especially to a trained eye, but you can still use a DIY softbox for shaping light as long as you know what you’re doing.
What You Will Need to Build a DIY Softbox
Here are the ingredients you will need to gather for this homemade lighting project.
- A Light Source. This can be anything from an IKEA flashlight to a Speedlite. I will make a softbox that can accommodate a light bulb, but you can pick a different light source and adjust the modifier to fit your specification.
- Two Cardboard Boxes. One will serve as the foundation and the other as the reflector inside. Ideally, they will be of the same size.
- Aluminum Foil. To create the reflective surface inside the softbox. Ideally, it should not be too crumpled
- Diffusion Material. This could be a shower curtain, baking paper, tracing paper, etc.
- A Hot Glue Gun. To glue the pieces of the softbox together and fix the light source in place
- A knife and Scissors.
- Tape.
- Permanent Marker.
Once you have all the items on the checklist, it's time to build!
Step-by-Step Instructions on Building a DIY Softbox
Step #1. Prepare the Cardboard Box
Take your cardboard box and cut off the lid flaps.
Step #2. Mount a Light to Cardboard
Create a hole in the back of the box so that you can fit your light source through it. In my case, I used a desk lamp and made a hole large enough to fit the base of my light bulb through. There are several ways you can hold your softbox in place. I was able to use the light bulb to hold the softbox in place.
For extra safety, you may want to use a hot glue gun or tape the light to the softbox. Bear in mind you may find it difficult to remove it afterward. If you choose to use my method, make a hole slightly smaller than the light bulb base, that way you will push through the bulb and it will hold in place fairly well.
It is best to use an LED bulb and not a filament one as they tend to get hot and your setup may catch fire.
Step #3. Make Measurements on the Box
Now to make the reflector. As this requires measurements, it will likely be the most difficult step of this tutorial. You need to measure the width and length of your box. In my case, the longer edge was 12.5in/32cm and the shorter edge was 9.5in/24cm.
The next thing you need to measure is the part of the box where the bulb will be. I figured that an opening measuring 3in/8cm long and 2in/5cm wide would be sufficient. It is best to base your measurement on the dimensions of your light. Once you have that, measure the length from the corner of your box to the corner of your light source square.
Step #4. Cut out Trapezoids from Cardboard
You will need to cut out two different trapezoids: one for the longer edge and one for the shorter edge. Take a piece of cardboard that will measure exactly the same as your longer edge and put it inside the softbox. Make a dot where the cardboard meets the edge of the softbox as well as a dot where it meets the light source square.
Then you want to connect the dots and cut out the reflector sides. Make sure that the slanted edges measure the same length.
Step #5. Tape the the Pieces Together
Cut out each side and tape together the four reflector sides and then insert them inside the softbox body. Now make sure to tape together the reflector and the softbox.
Step #6. Add the Aluminum Foil
Now you want to put aluminum foil inside. I recommend not cutting it into shapes as it can be difficult. It is also okay to simply cover the inside of the reflector in aluminum foil. The aluminum foil has to be slightly crumpled so that it catches and reflects light in many directions. Make sure to use plenty of tape to hold the aluminum foil in place.
Step #7. Add Diffusion to the Front
Finally, to diffuse your light source, you can put some baking paper (or any other diffuse material) on top of your softbox. This will even out the light. Remember that diffusion is not the same as soft light.
Voila! The DIY softbox is complete!
Shooting Photos with the DIY Softbox
Once I finished building the DIY softbox, I took my iPhone and shot a few simple images with this setup. Here is a product shot I did with my new softbox:
This is a simple perfume image that could be used for e-commerce. I noticed that the bottle lights up in an interesting way when the light comes through it, so I placed my softbox at the bottom of the frame to bring that out.
An Alternative to a DIY Softbox
If you don’t want to bother with building a softbox and cutting various shapes out of cardboard, you can also go with an alternative method. Frankly, I use this method all the time, both with flash and constant lights, even on large sets with decent budgets.
What I do is use shower curtains.
Frankly, I don’t know why more people don’t do this. A shower curtain is essentially a large diffusion material/fabric that is a lot more affordable than a dedicated scrim. The great thing about shower curtains is that you can set them up quickly and even cut them to create custom light patterns.
There are multiple reasons to use a softbox. If your reason is to create diffused light, then you can opt for a shower curtain and get results that may be just as good. In fact, if you want to create ultra-soft and diffused light, then a shower curtain is a better DIY option. The reason I would use a DIY softbox is when I need to reduce the spill of light to a maximum. Another reason would be if the light source isn’t all that strong.
Parting Thoughts
Almost anything can be a light-shaping tool if you’re creative about how you use it. I encourage you to experiment with everyday objects to find interesting light qualities, and the easiest way to do so is to take a flashlight and shine it through or on things you see.
#doityourself #equipment #lighting #tutorials #build #cheap #diy #free #homemade #howto #illyaovchar #lowcost #makeshift #softbox #stepbystep #thrifty #tutorial
Client Info
Server: https://mastodon.social
Version: 2025.07
Repository: https://github.com/cyevgeniy/lmst