#hackspaces

Anyone know of any #hackspaces in North London?

2024-12-25

Seasonal greetings to all our members. We hope that you got lots of splendidly techy toys.

We would also like to send greetings and to all other #Hackspaces and #Makespaces around the world.

Hackerspace Krakówhskrk@hackerspace.pl
2024-12-04

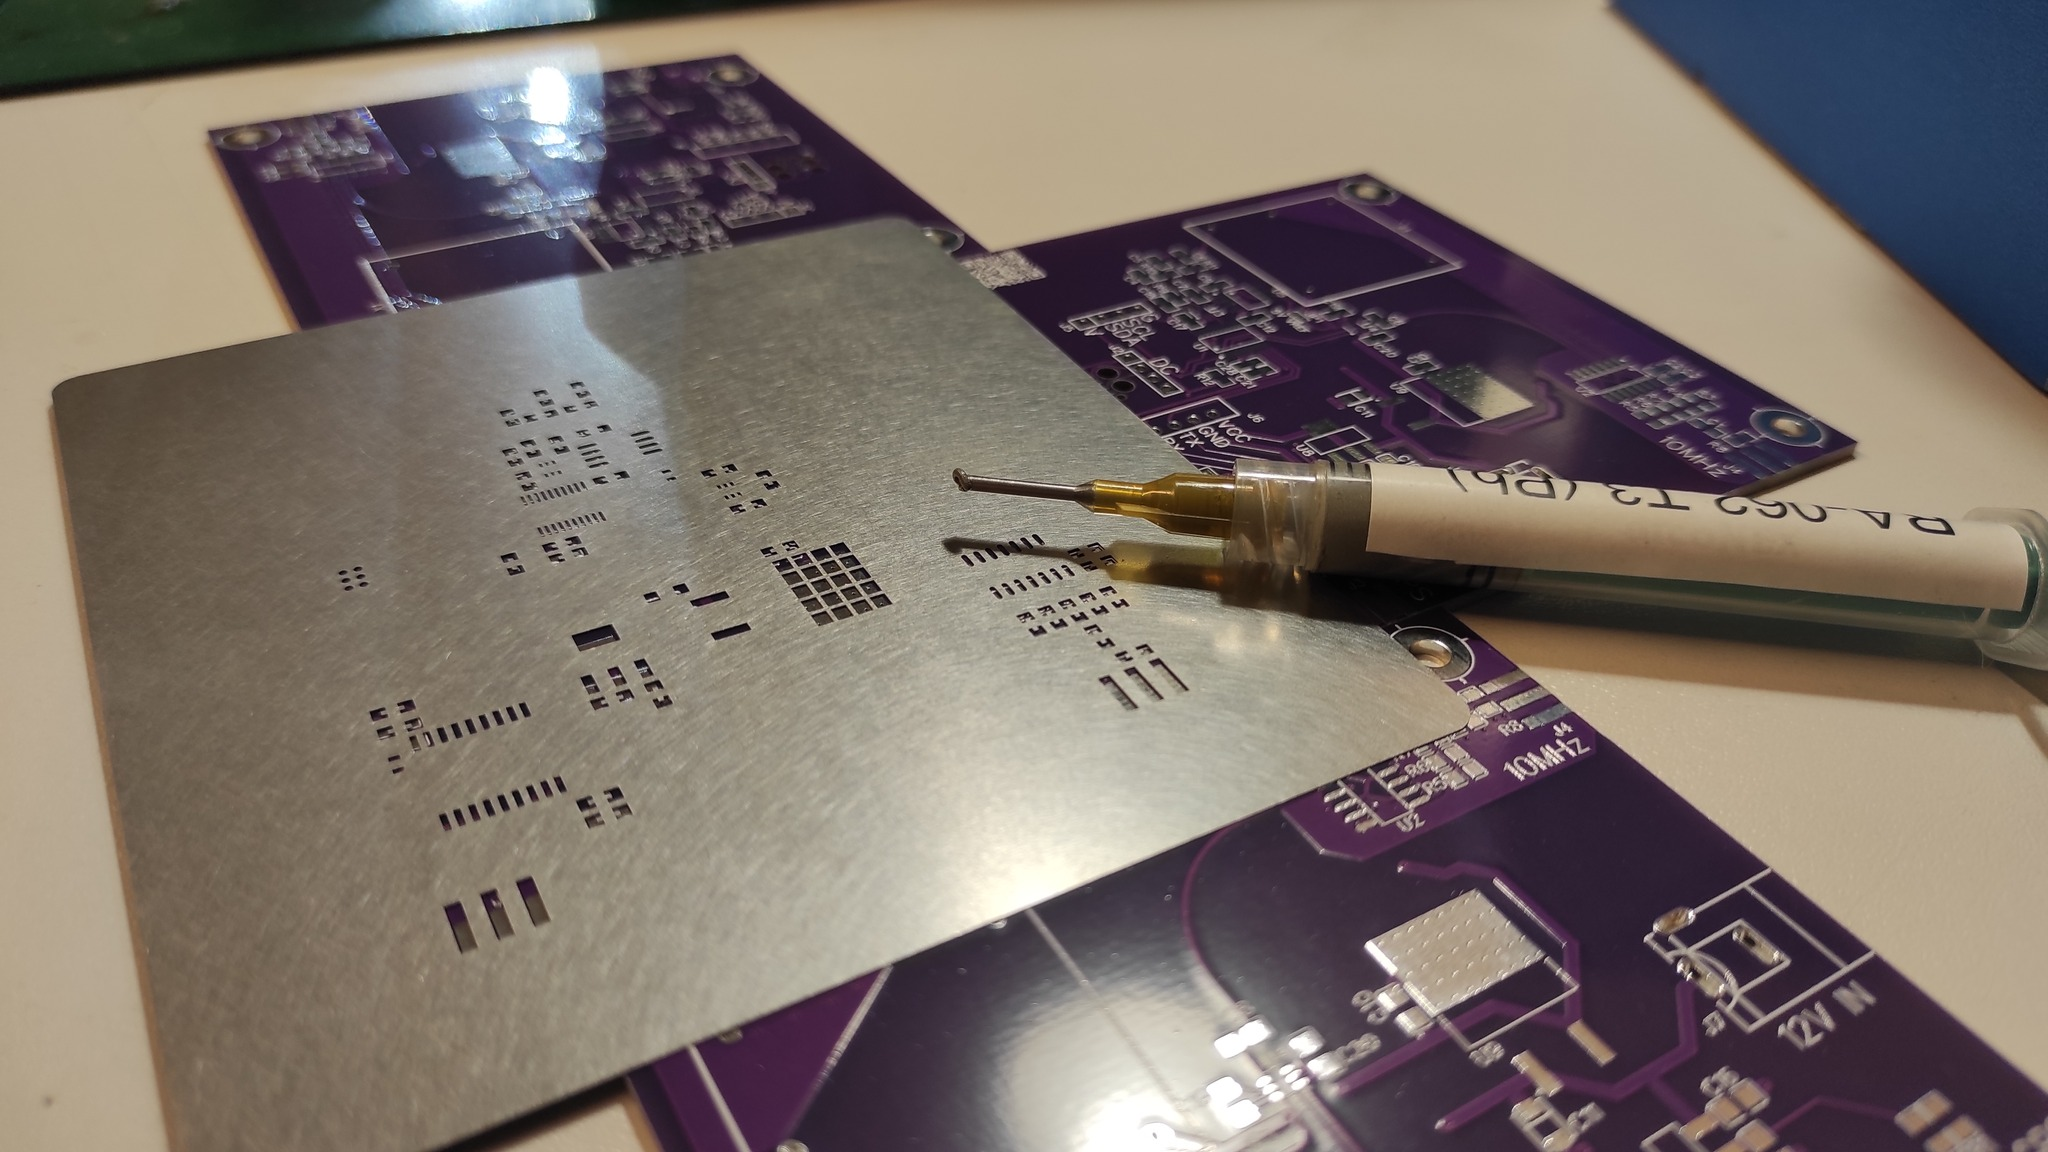
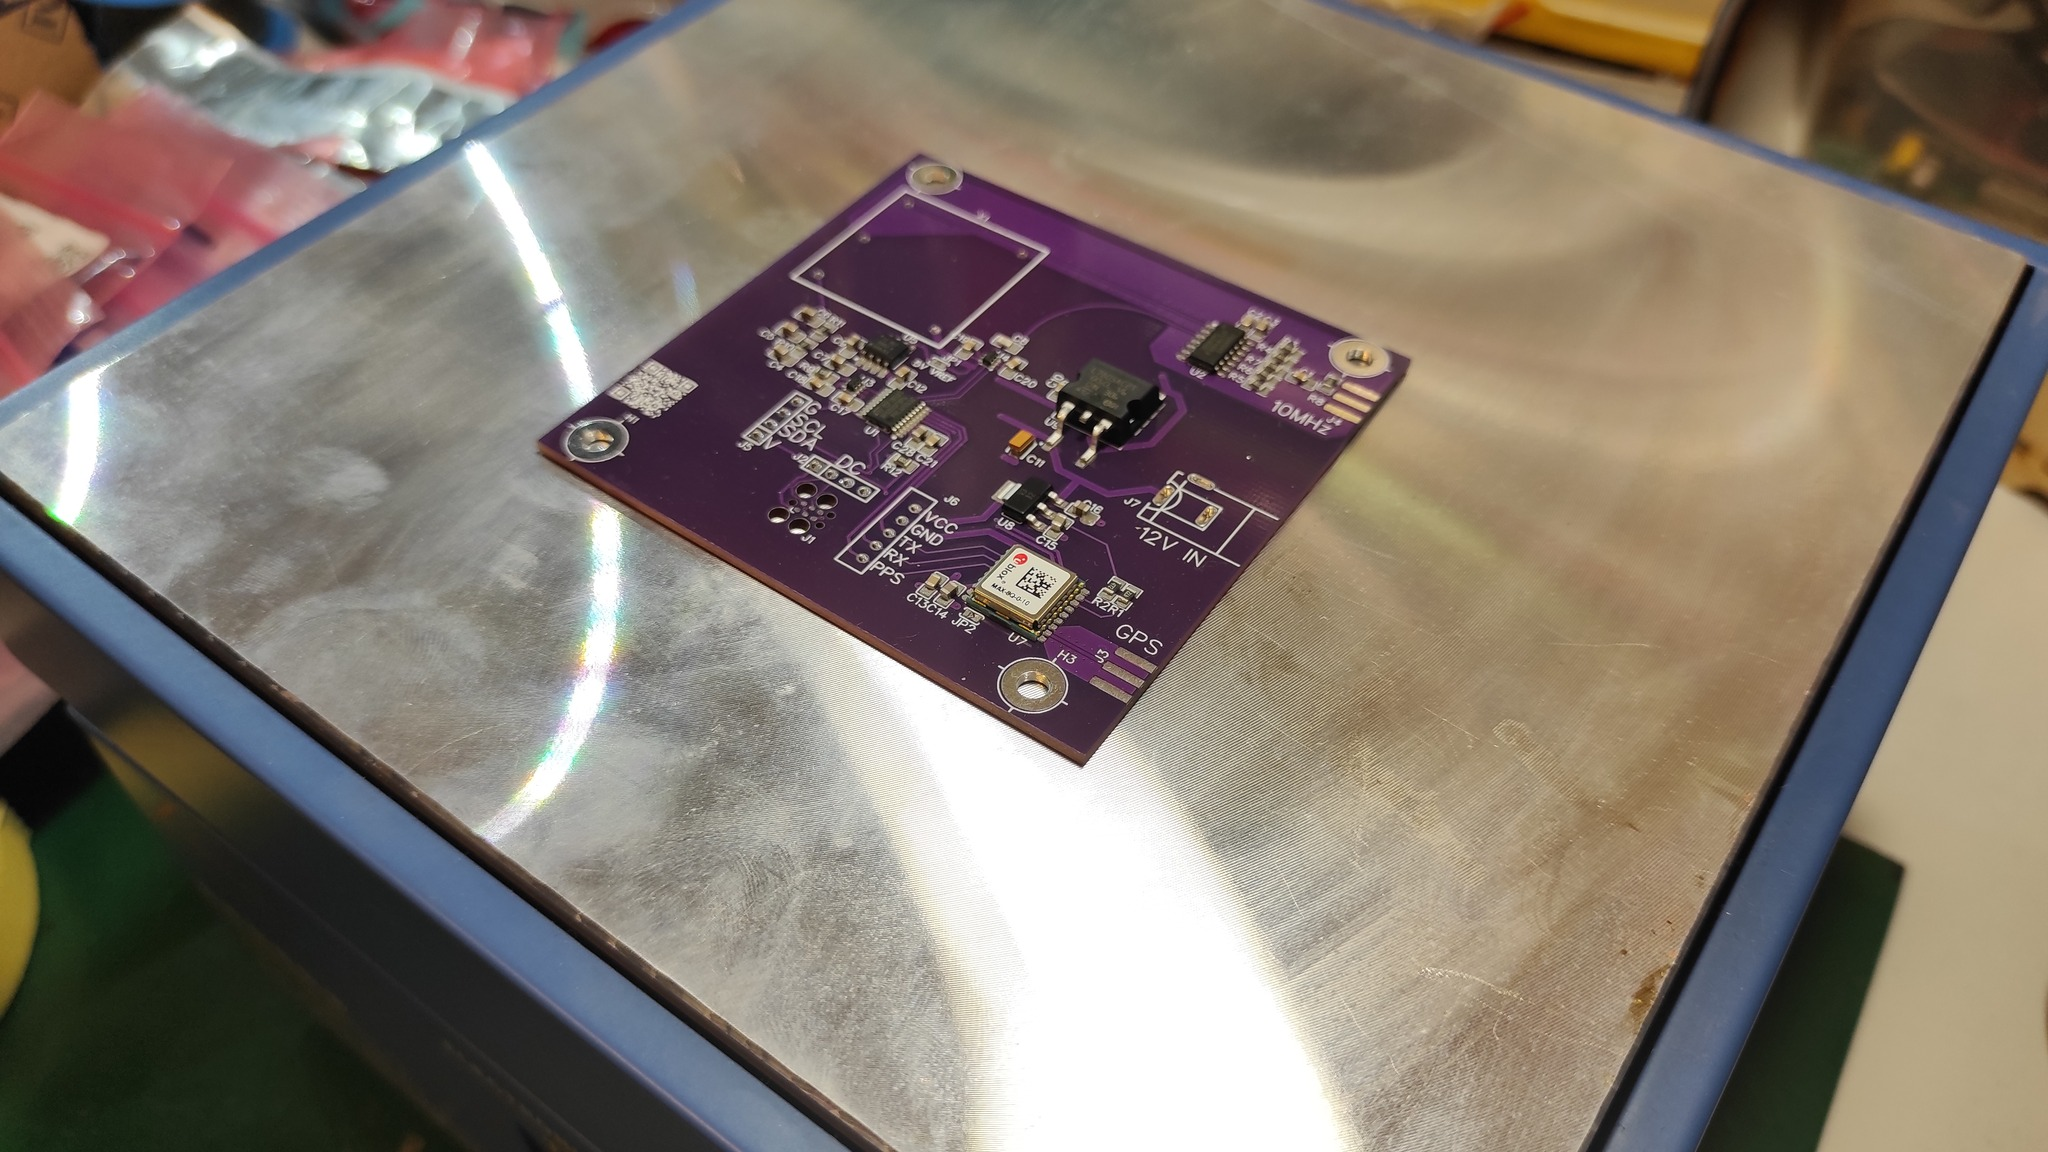
First, apply the stencil and paste, then place the components, and off to the hotplate!
Quick and easy SMD soldering!

#diy #soldering #hackspace #hackerspace #hackspaces #hackerspaces #electronics

The photo shows a solder paste stencil and a syringe filled with solder paste lying atop a purple PCB. The stencil has cutouts perfectly aligned with the PCB's soldering pads, allowing precise application of paste. In the background, more PCBs are visible, hinting at a small-scale assemblyThe photo displays the same purple PCB now placed on a metallic hotplate. The PCB is partially populated with small surface-mount components ready to be soldered. The reflective surface of the hotplate adds a polished, technical look to the setup.
Hackerspace Krakówhskrk@hackerspace.pl
2024-12-02

It might splash water everywhere, but it sharpens knives beautifully!

#knives #knife #sharpening #hackerspace #hackspace #hackerspaces #hackspaces #hskrk

Hackerspace Krakówhskrk@hackerspace.pl
2024-12-02

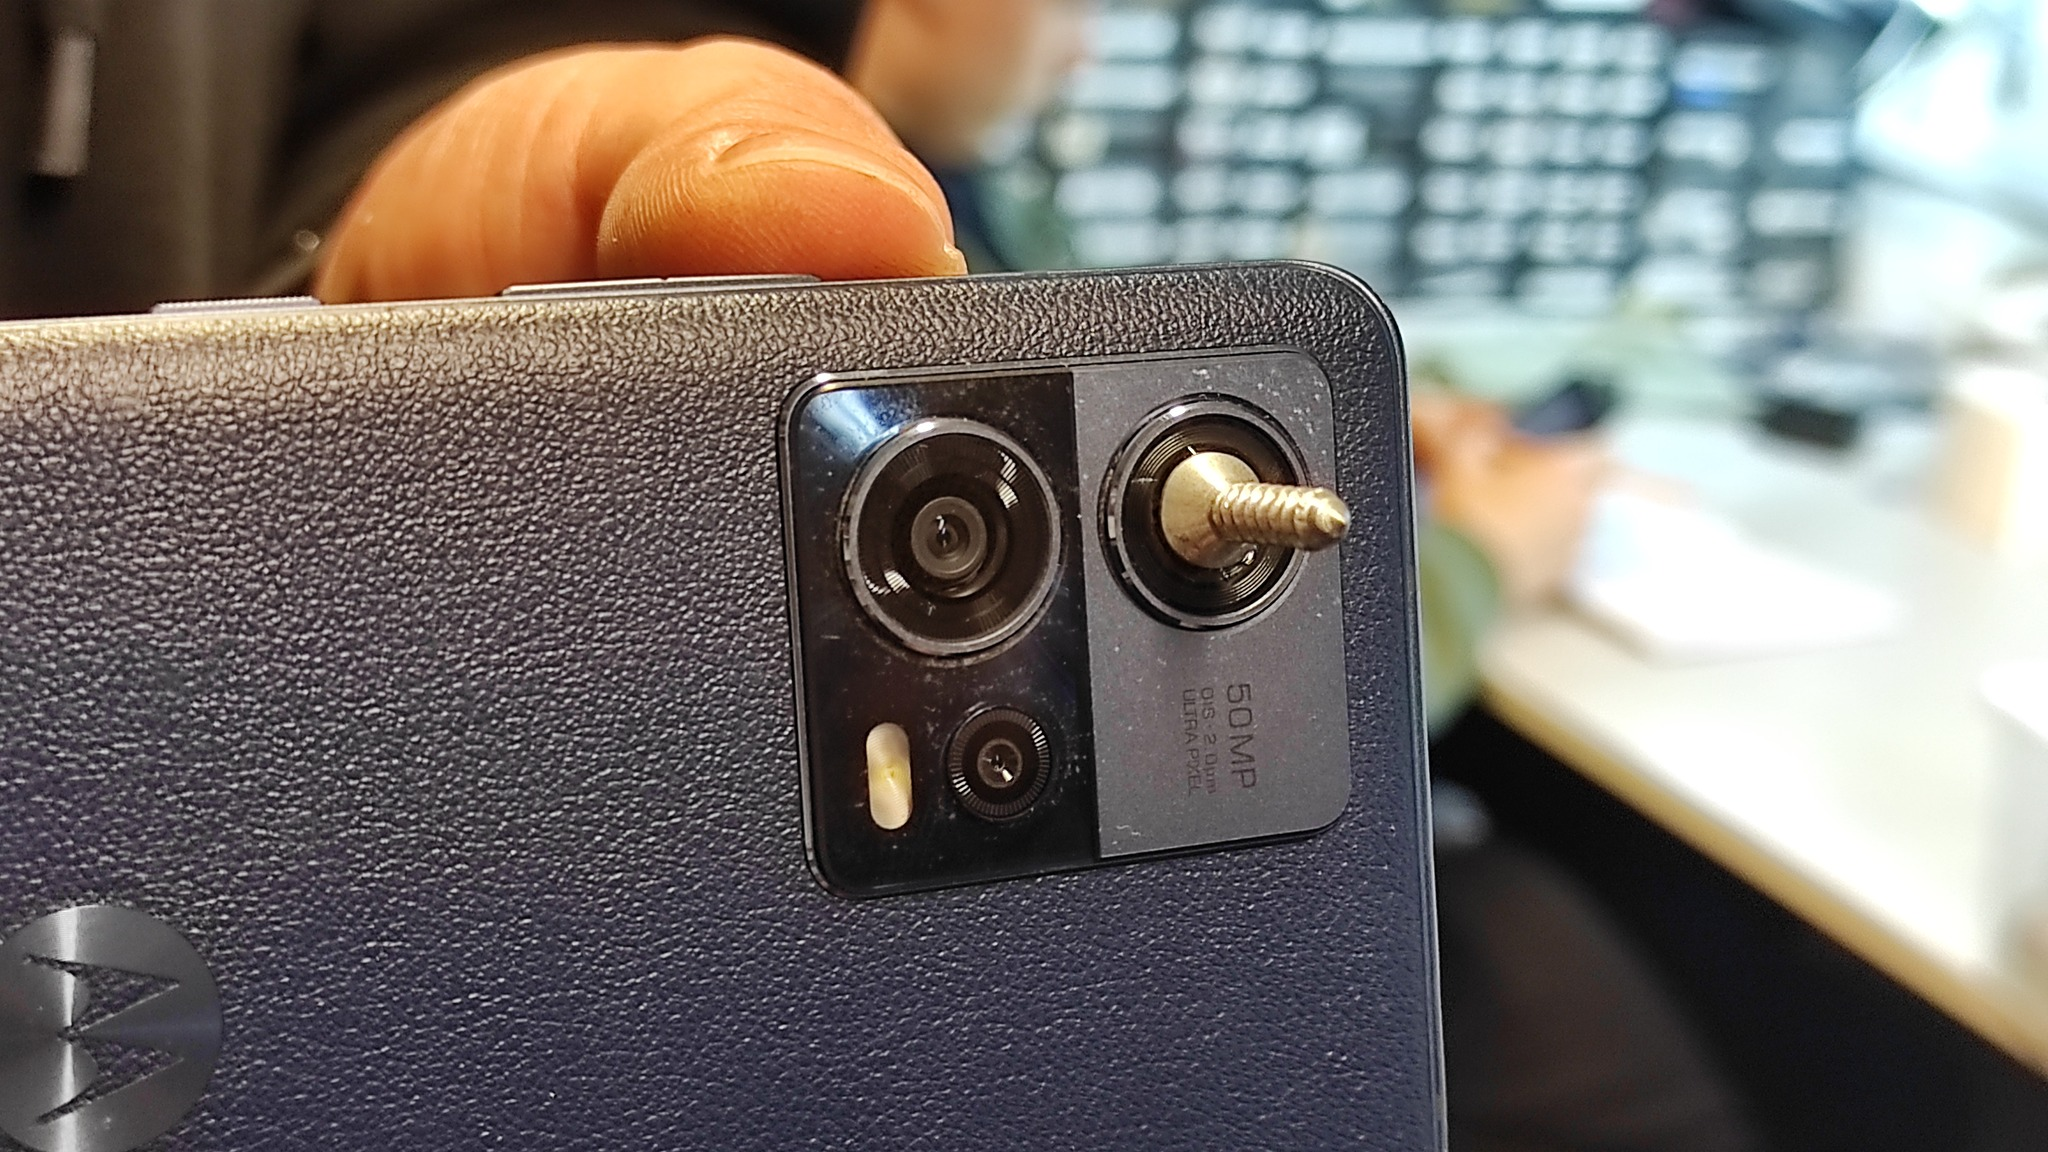
It might look like a clickbait still from a random YouTube video, but removing a cracked camera lens on a phone requires some creativity. Without professional tools, one clever approach is to glue a screw to the broken glass and gently pull it out.

The ingenuity and resourcefulness of people at our Friday Nighthack sessions never fail to impress!

#diy #righttorepair #hskrk #hackspaces #hackerspaces #hackspace #hackerspace #electronics

A close-up of a Motorola phone’s rear camera, where a short metal screw is glued to the cracked glass lens. The screw head adheres to the lens, illustrating a creative DIY repair technique. In the blurred background, an electronics lab is visible, featuring shelves and cases filled with electronic components.
Hackerspace Krakówhskrk@hackerspace.pl
2024-12-02

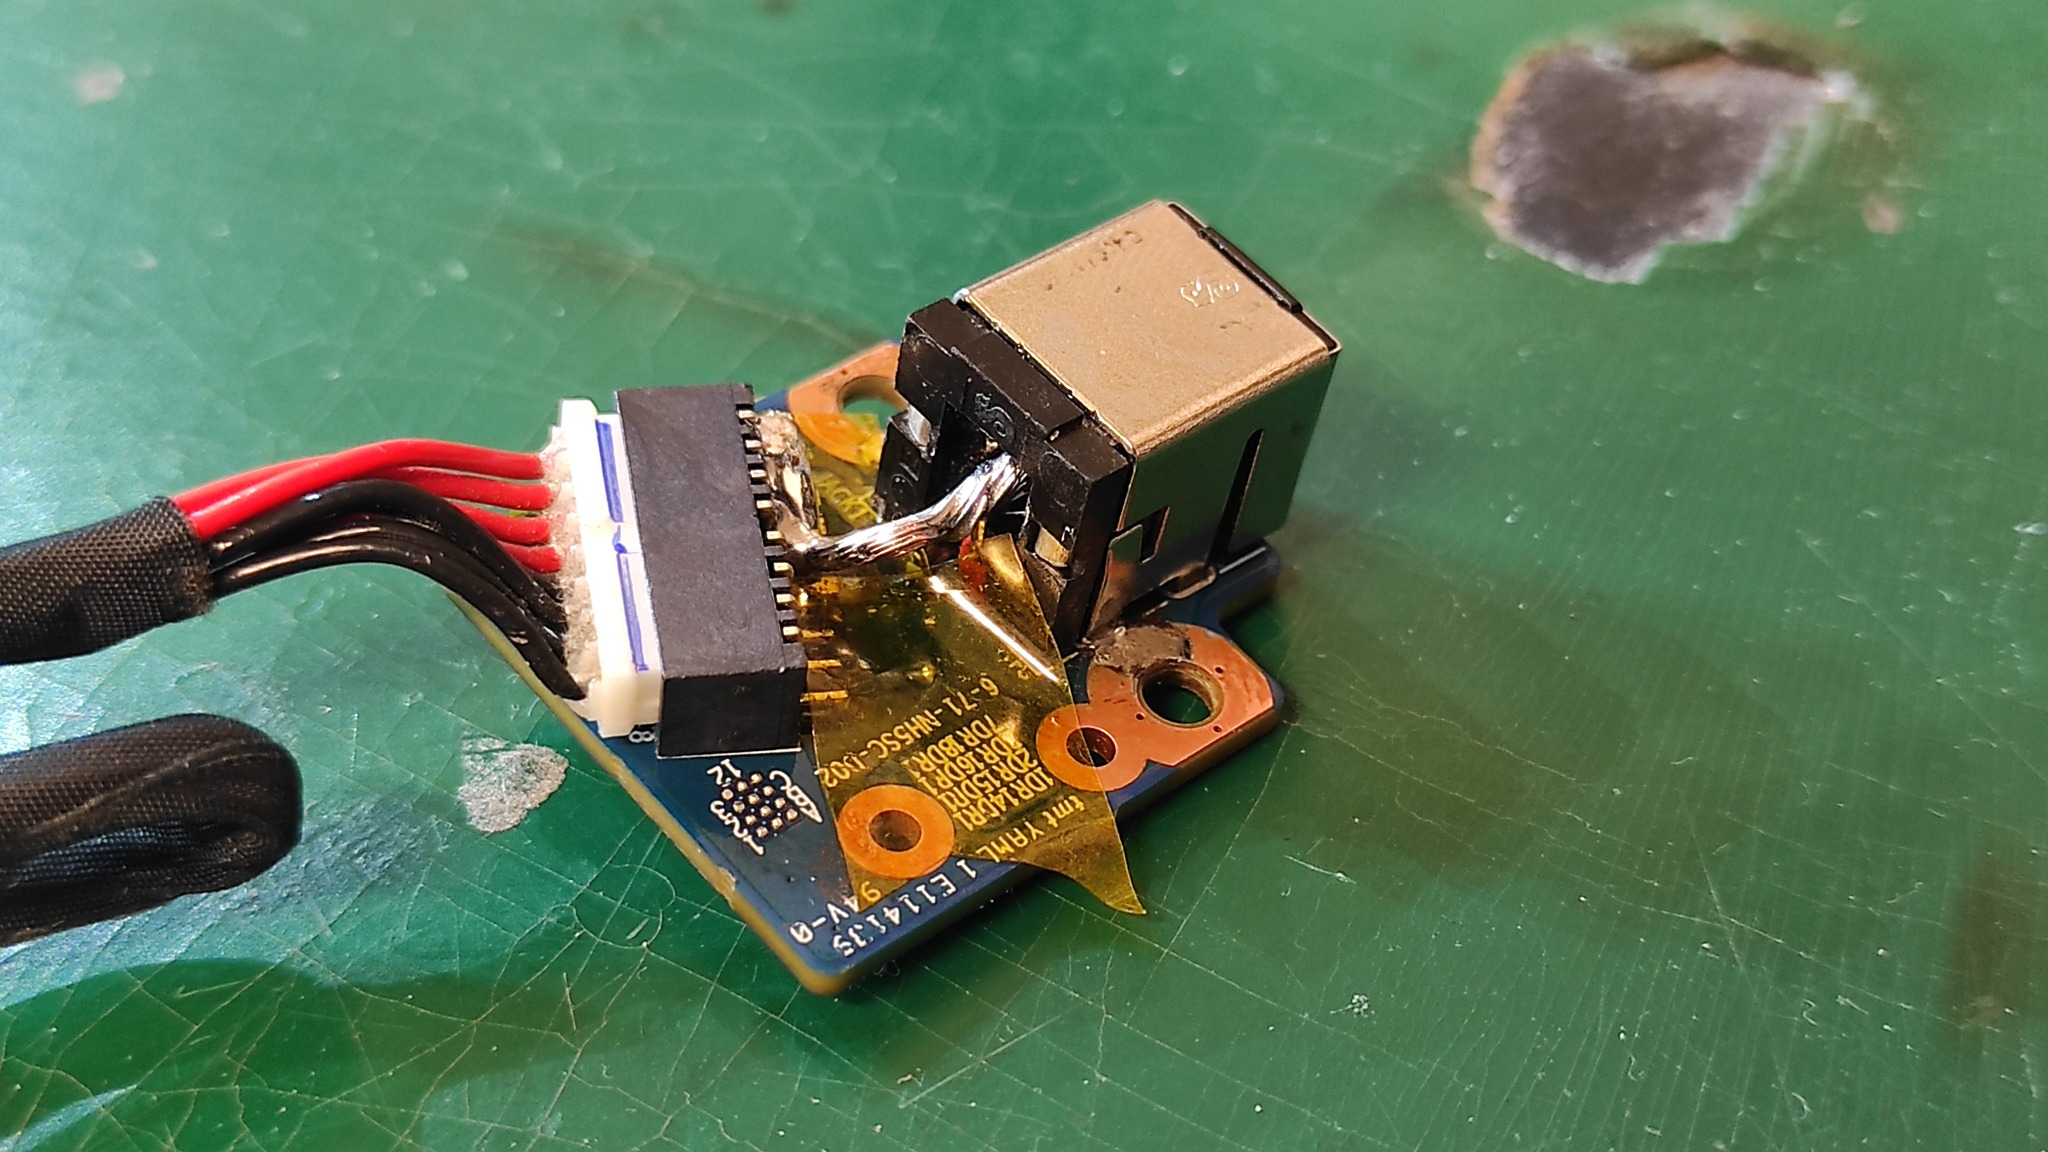
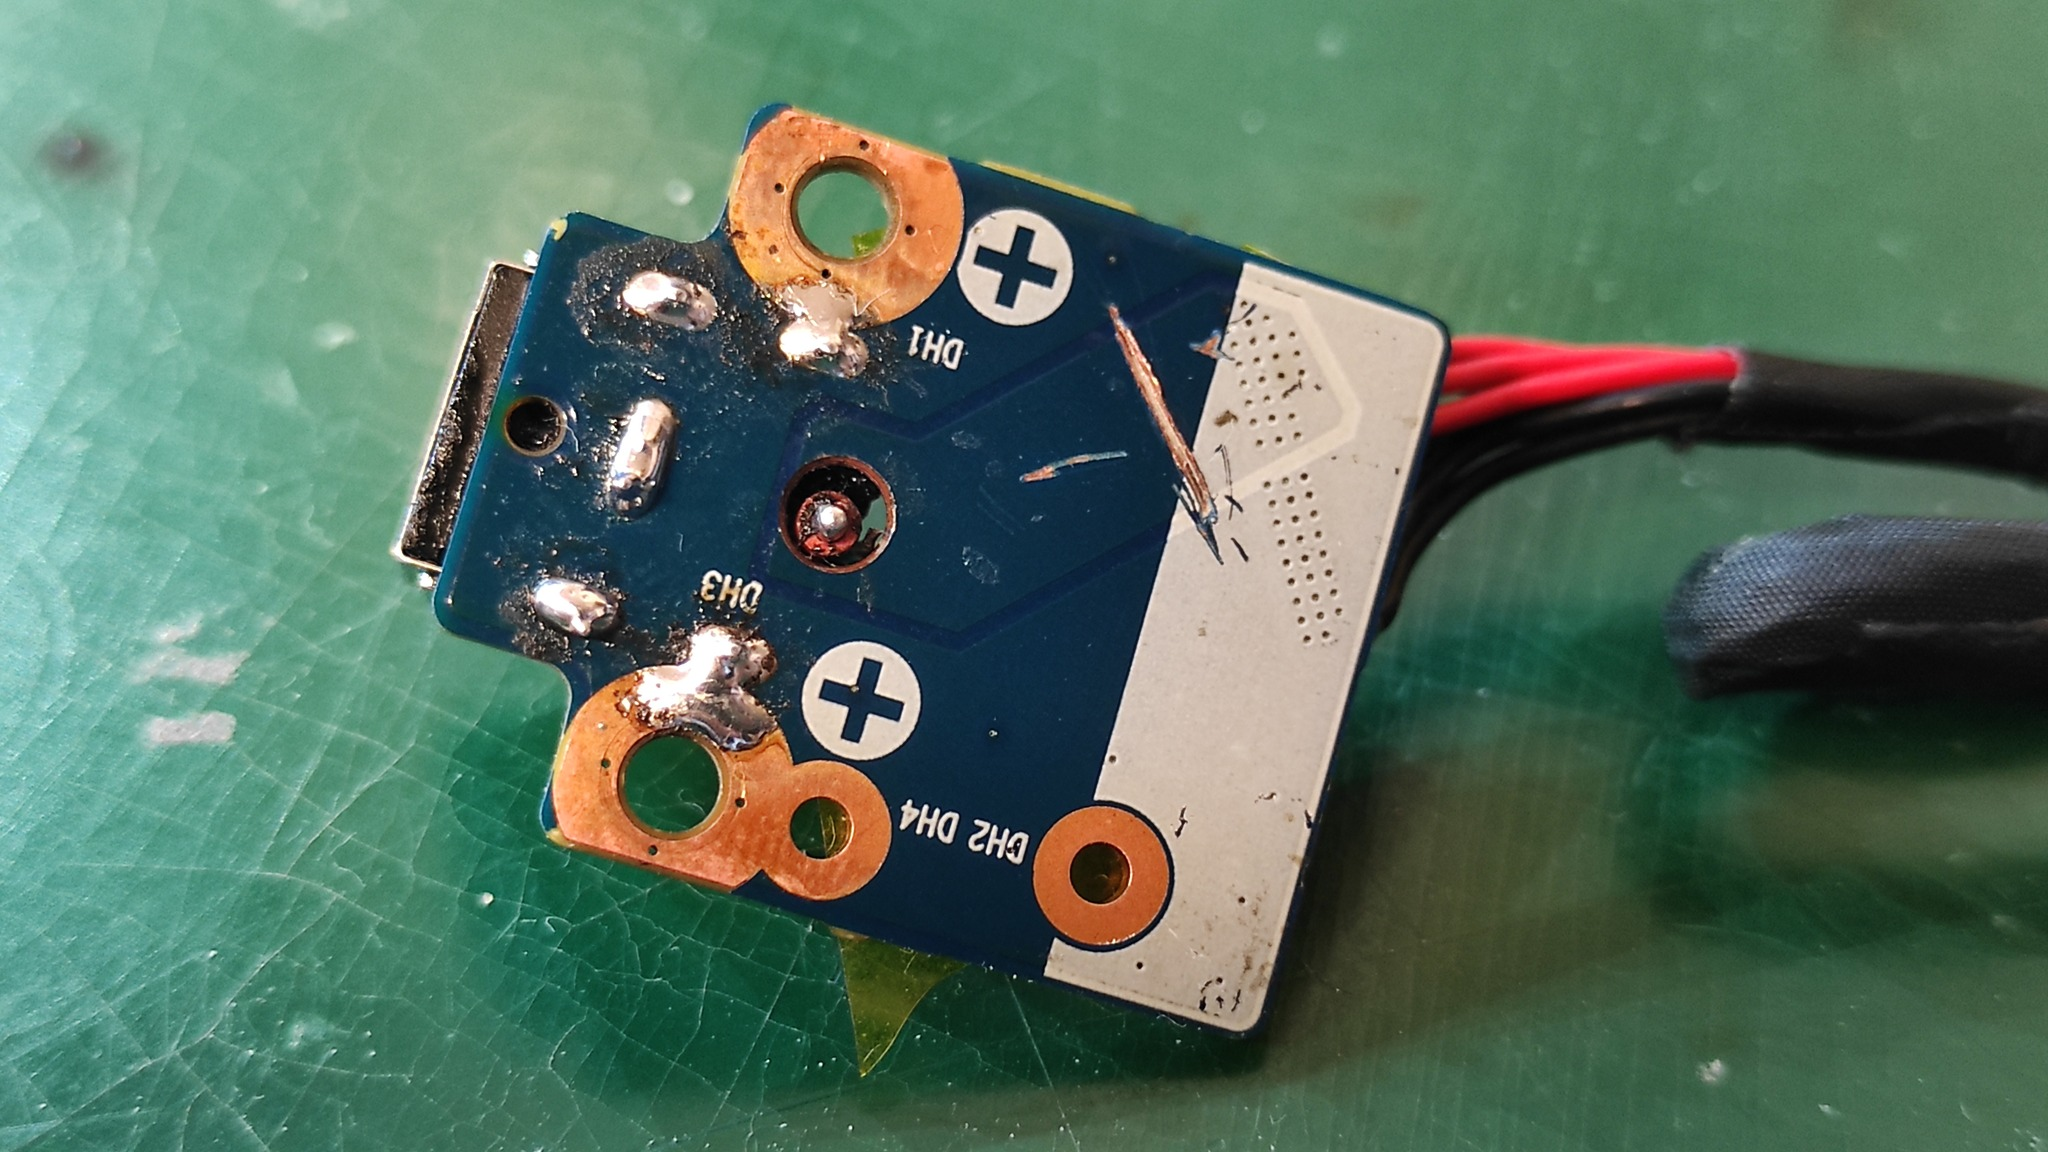
Sometimes, unexpected and even borderline improper things happen during our Nighthack events—like repairing a laptop power board belonging to one of our members! We're happy to report that the laptop is now fully operational, and so is its owner. 🛠️💻

P.S. Nighthacks (our open fridays) are happening each week! Join us from 8 PM onward.
Always stay up-to-date with our events on Meetup meetup.com/pl-PL/hackerspacekr

#diy #righttorepair #hskrk #hackspaces #hackerspaces #hackspace #hackerspace #electronics

A close-up view of a small circuit board with a repaired laptop power module. The wires are neatly soldered, and Kapton tape is used for insulation.The underside of the same circuit board, showcasing soldered connections and mounting points.
Hackerspace Krakówhskrk@hackerspace.pl
2024-05-06

New toy alert!
Whether you're into knife-making or just want to spruce up your kitchen tools, this one's for you.
Introducing the Tormek T4 slow-speed grinder with various attachments.

#knifemaker #knifemaking #sharpening #tools #hackspace #hackspaces #hskrk #hackerspaces

Hackerspace Krakówhskrk@hackerspace.pl
2024-05-06

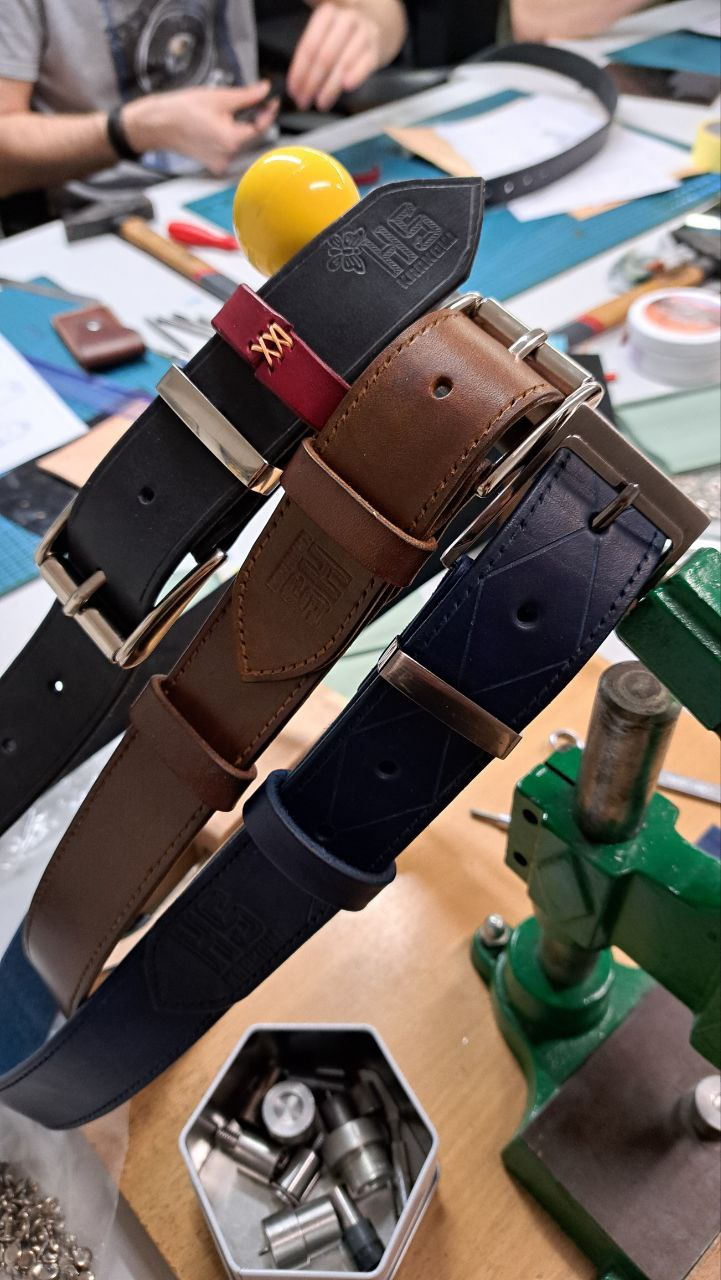
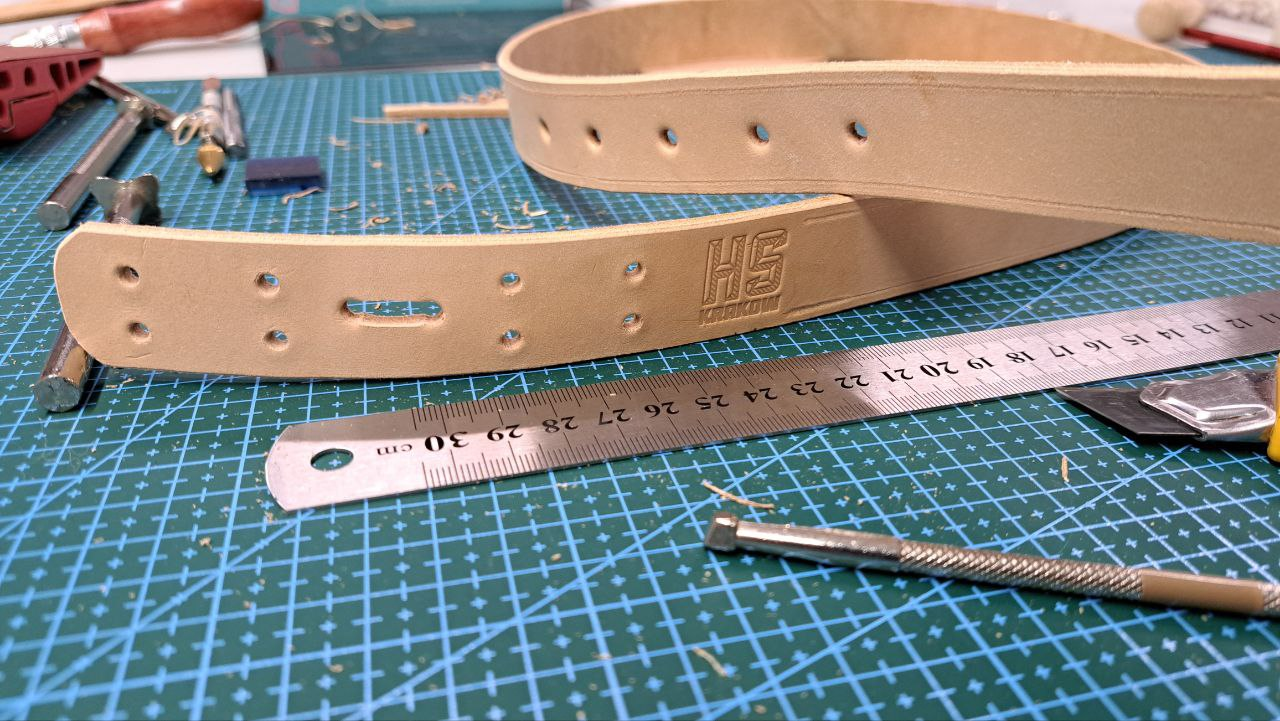
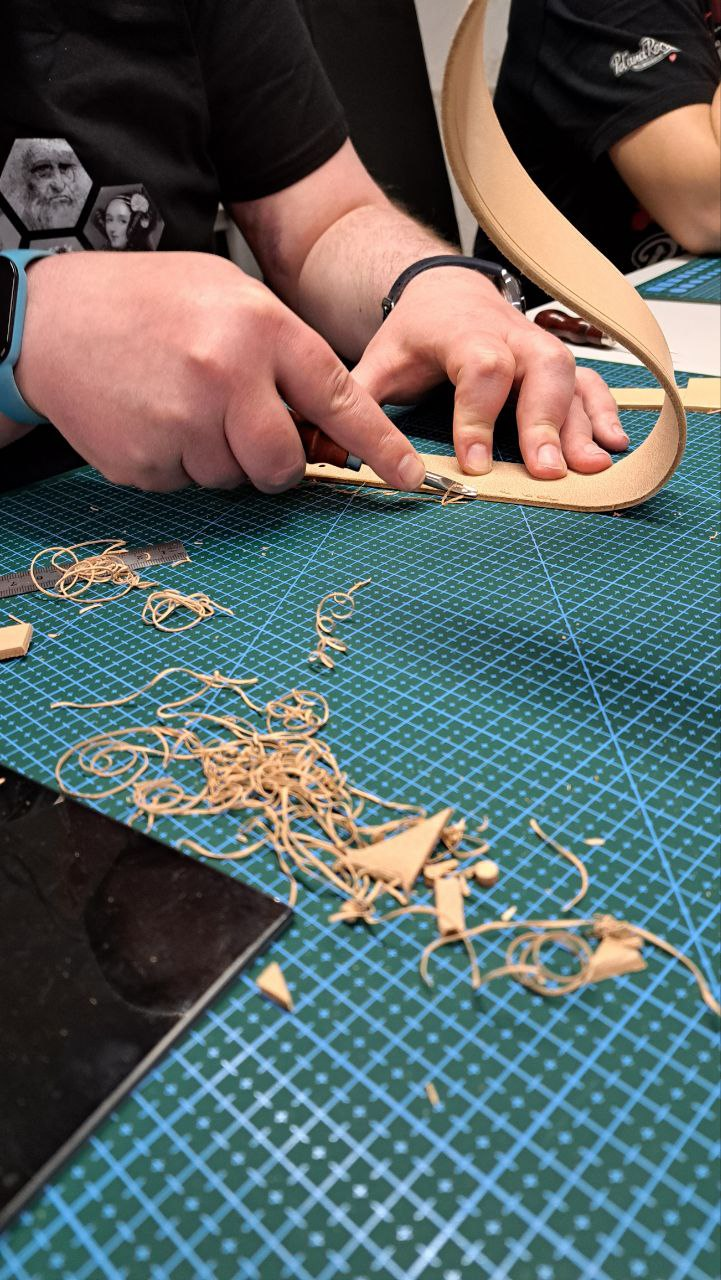
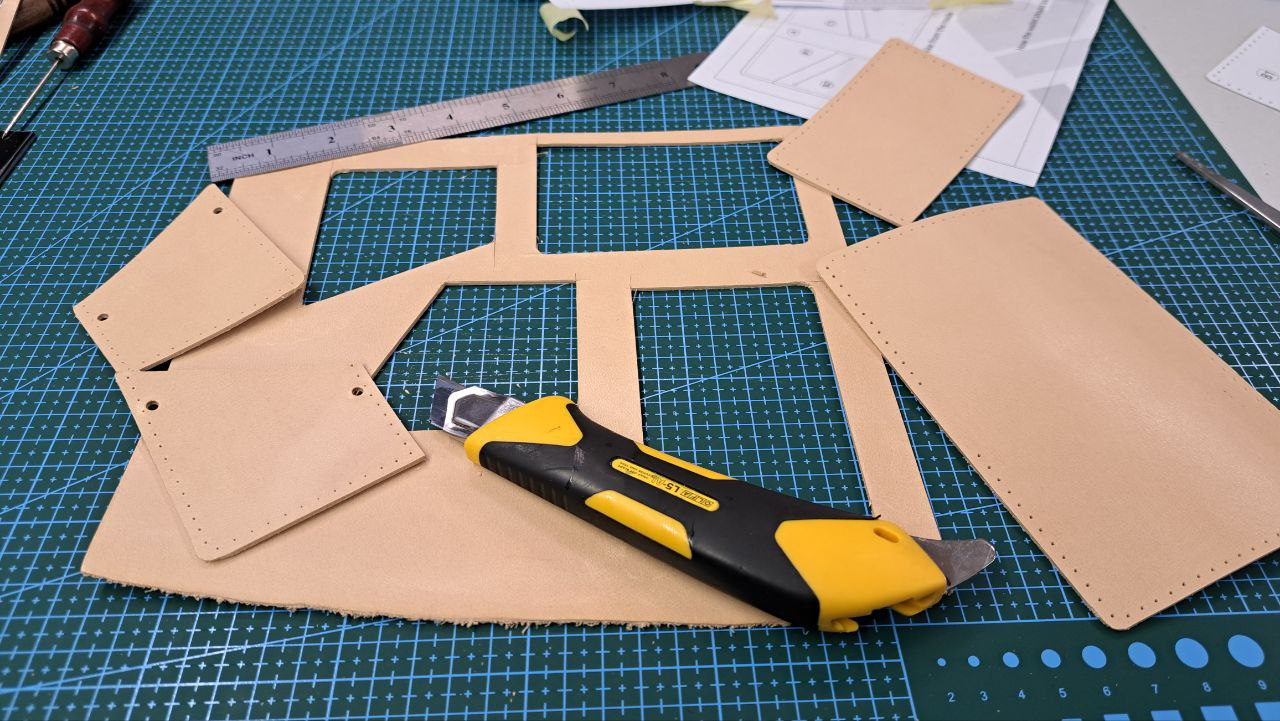
Fabryka Rzeczy Fajnych (eng. The Cool Stuff Factory) - our friendly leather workshop is back in action at our hackerspace. Another edition of workshops is behind us, and new items have been created, which will serve the participants for years to come. Thank you!

#diy #hackerspaces #hackerspace #hackspaces #leatherworking #craft #crafting #hskrk

Three leather straps hanging on a handle, one black with a red leather slot stitched with light brown thread, the second brown, and the third navy blue. Each of them has the Hackerspace Kraków logo embossed on the leather, more or less prominently displayed. Tools are visible on the table, and in the background, someone is working on creating their strap.A strap made of light, raw, uncolored leather lying on a cutting mat. The Hackerspace Kraków logo is embossed on it, and next to it lies a metal ruler and leatherworking tools.The photo shows the hands of a person working on leather, specifically performing edge beveling - a process of cutting the leather edge at a 45-degree angle to ensure a smooth transition for easier edge polishing later on. Visible on the table are leather scraps and shavings resulting from this process.The photo shows a sheet of leather from which rectangular pieces have been cut, likely for a wallet or pouch. On the sheet, placed on a cutting mat, lies a wallpaper knife. In the background, there is a piece of paper with a template or cutting scheme.
Hackerspace Krakówhskrk@hackerspace.pl
2024-05-02

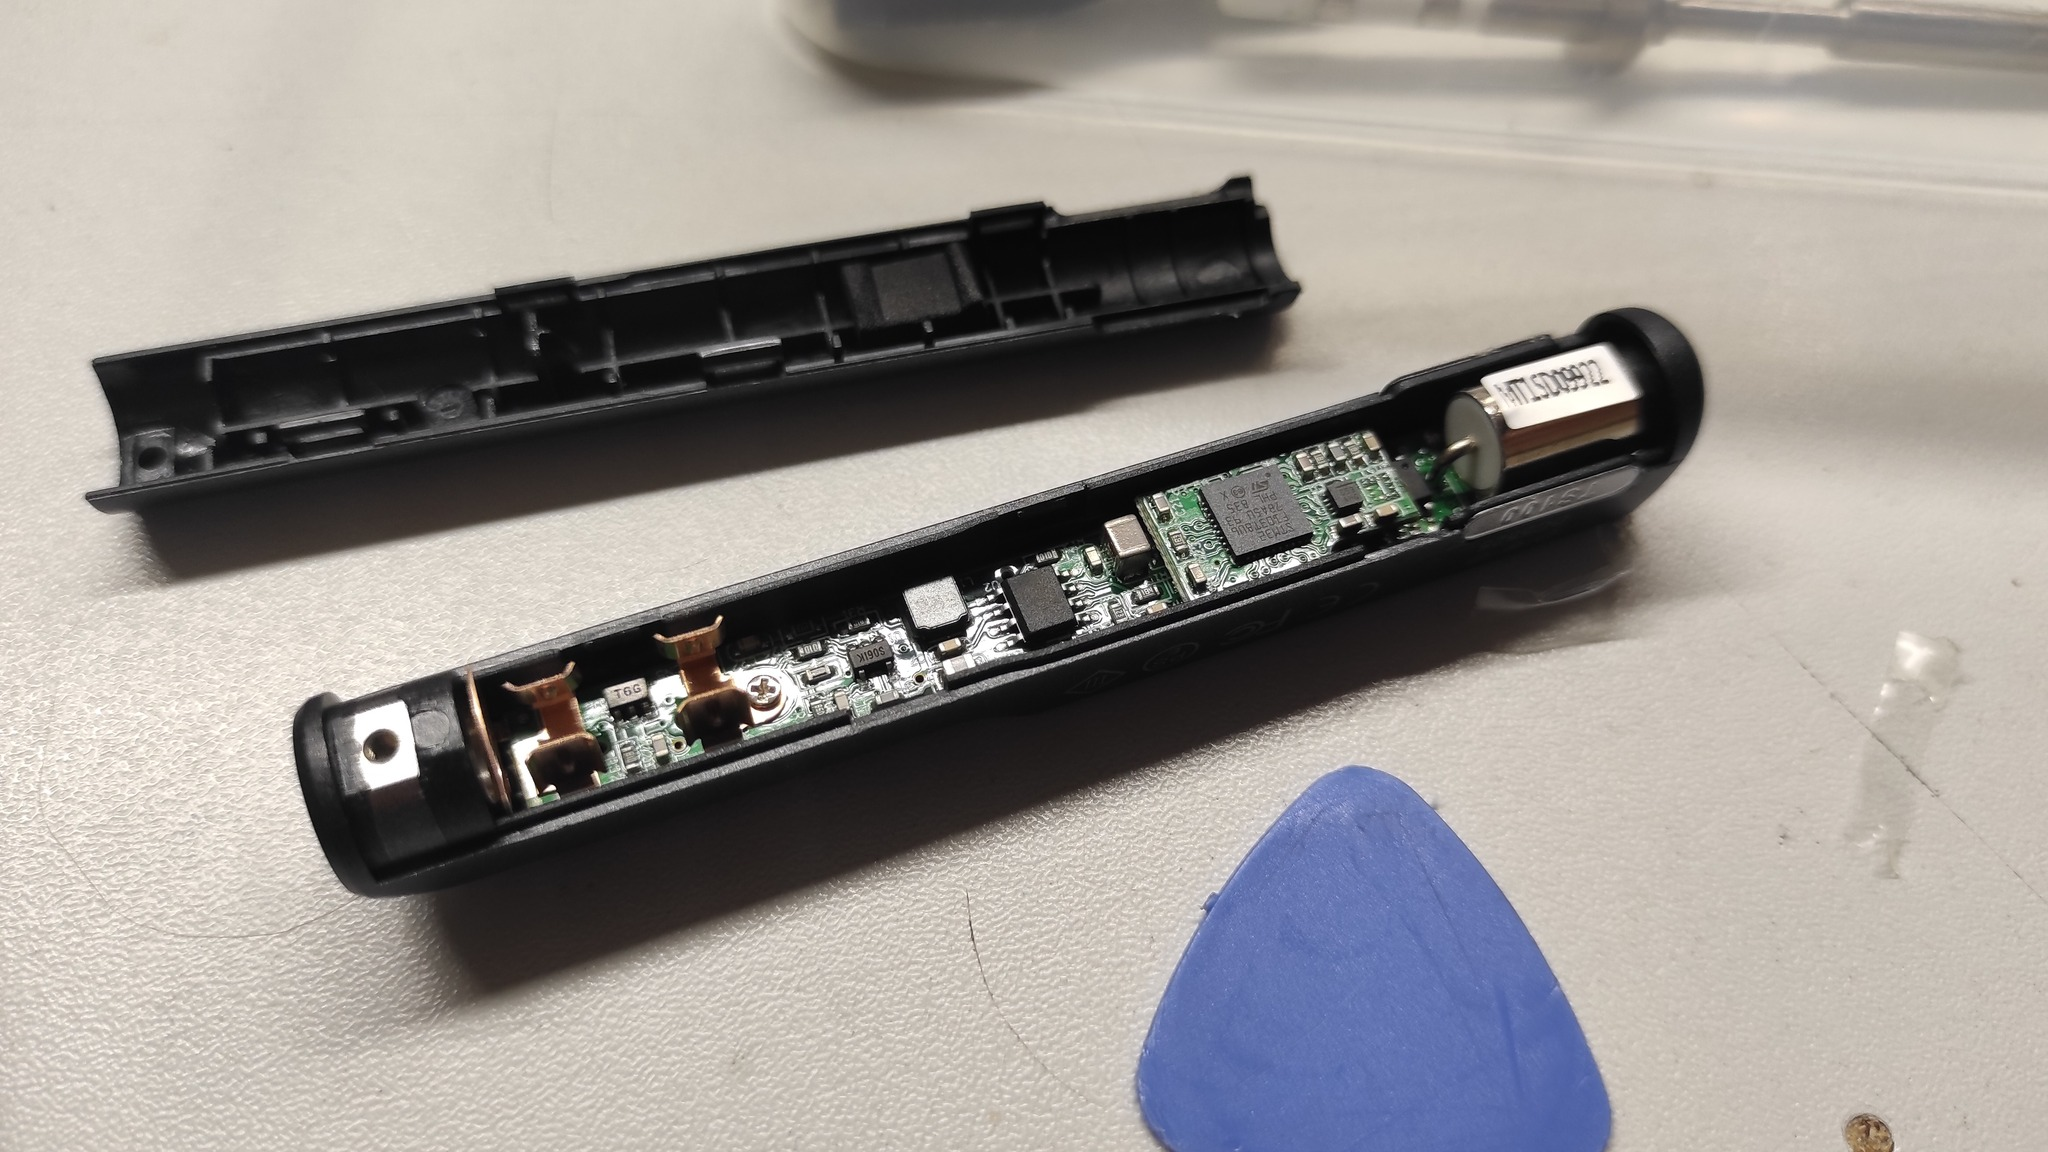
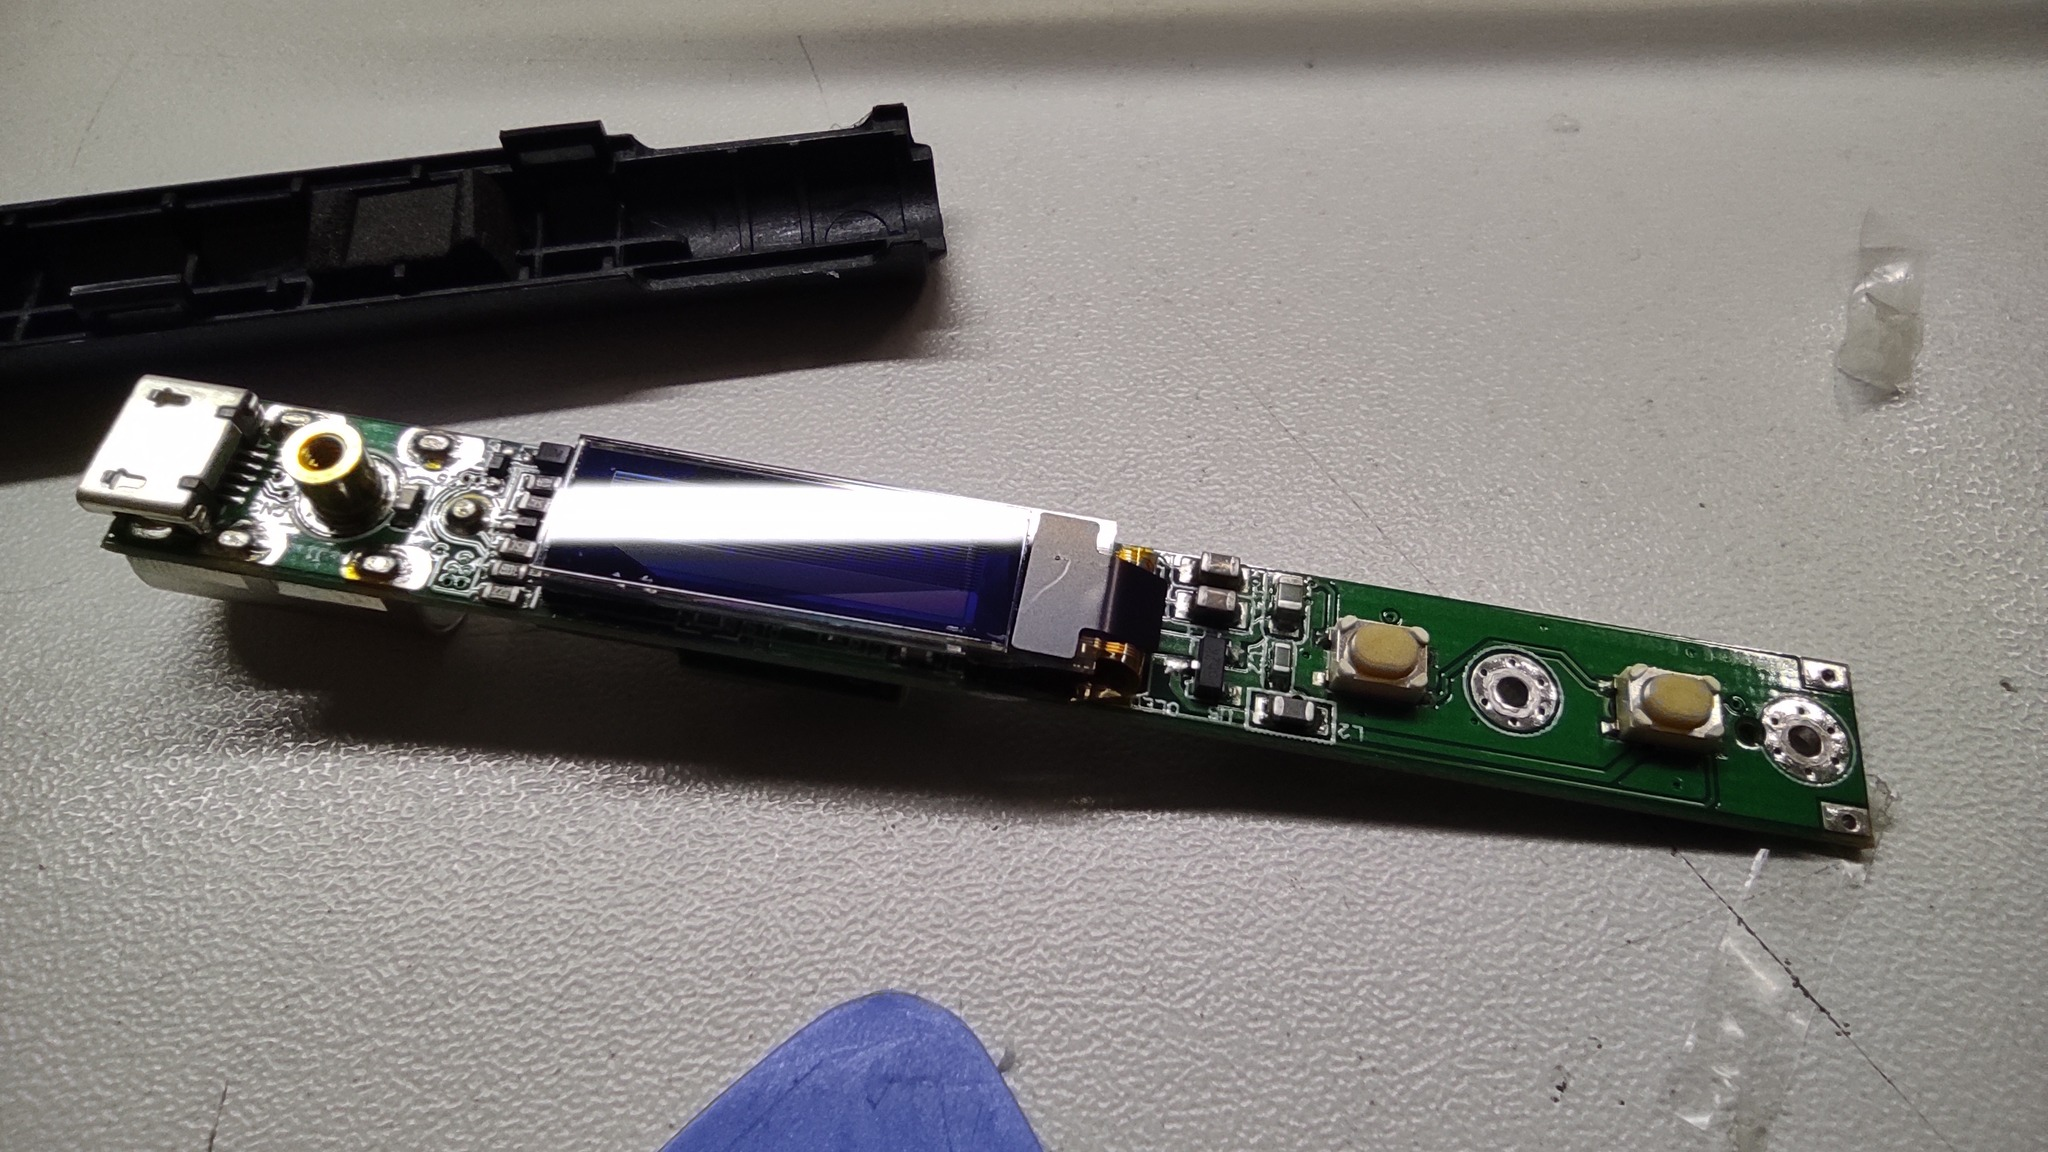
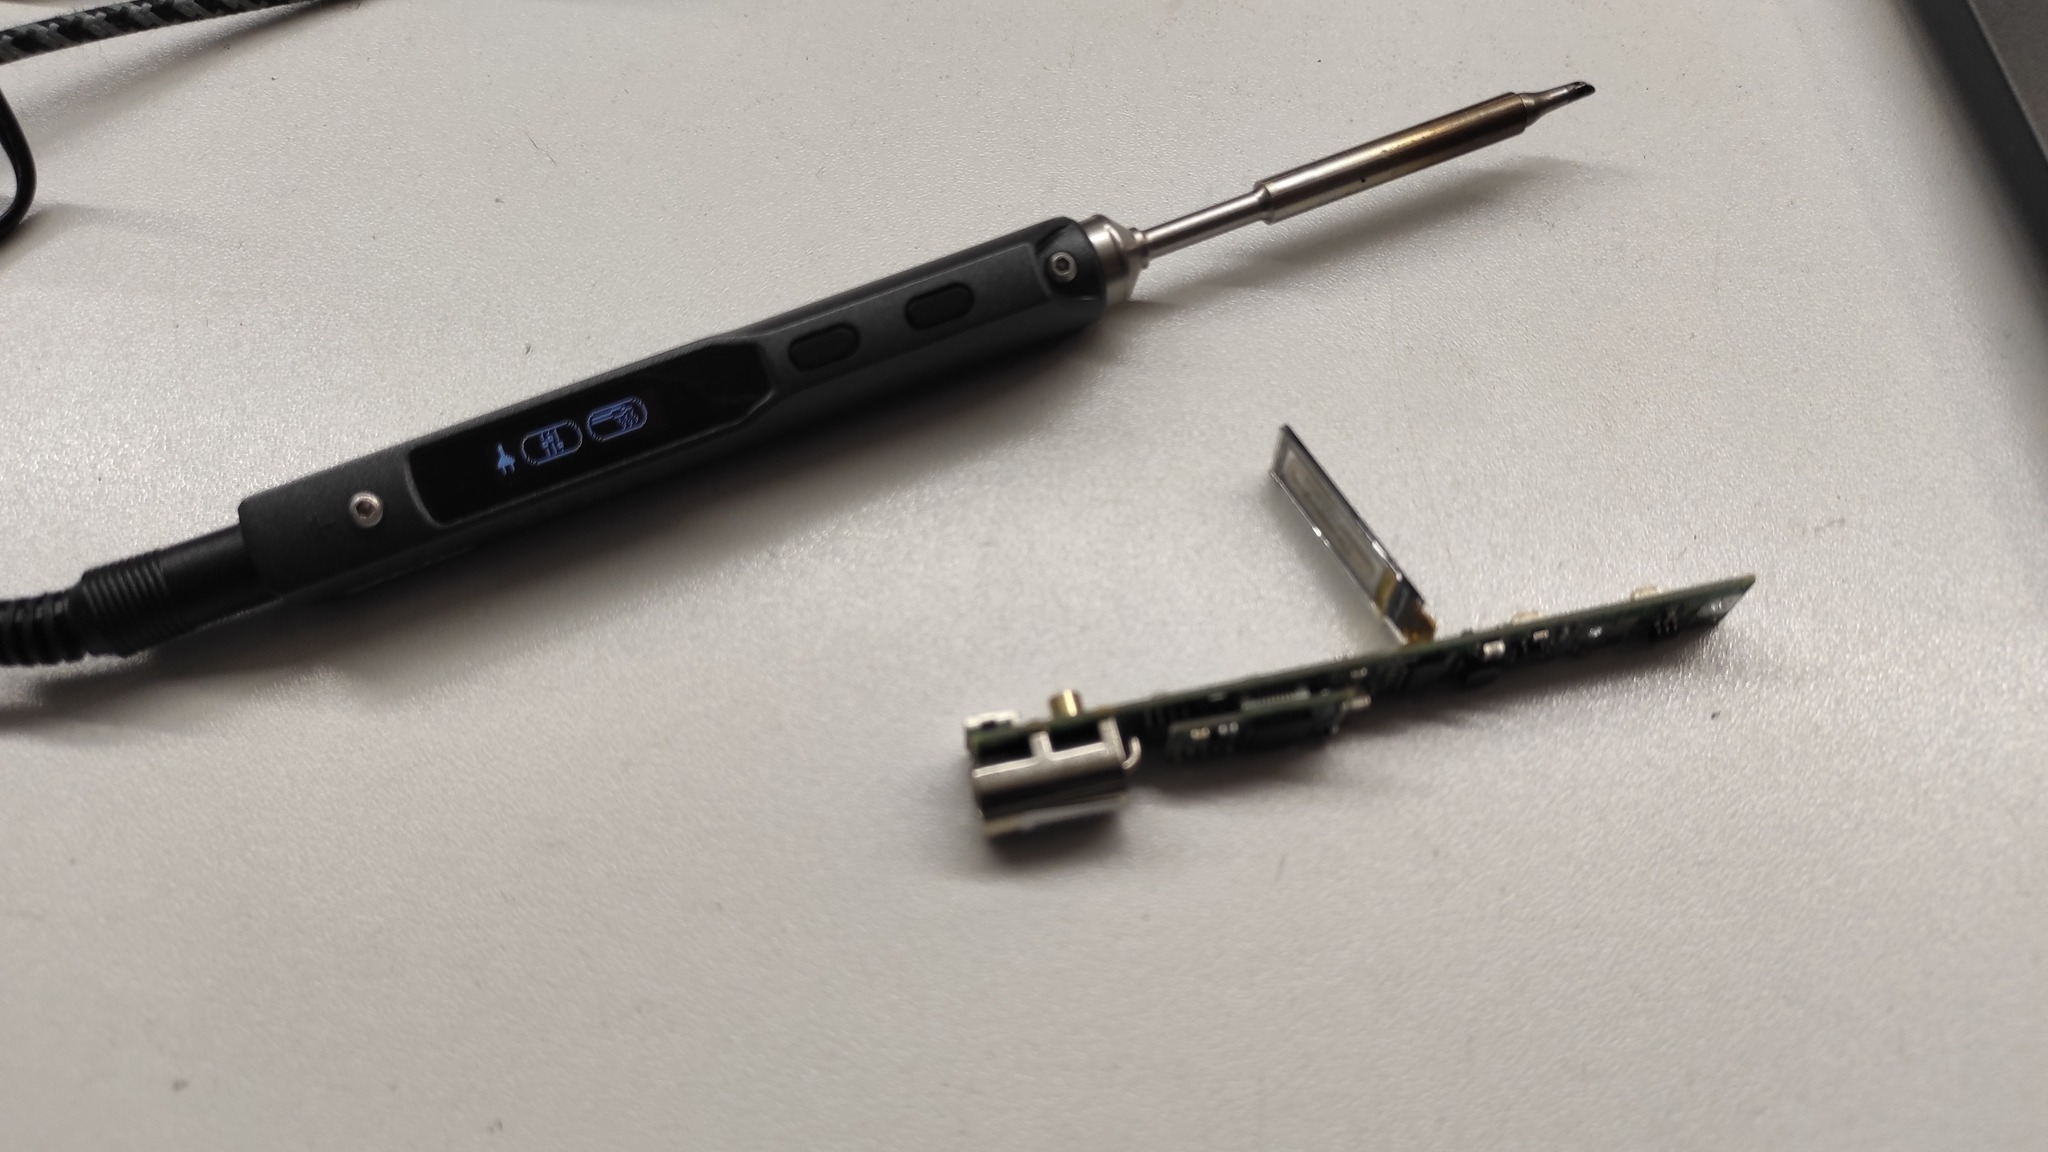
At the last nighthack, we used the TS-100 soldering iron to replace the OLED display in another TS-100 unit. We need to go deeper?

And since things got interesting in general, the nighthack ended late...

#soldering #repair #diy #hackerspace #OLED #hskrk #hackerspaces #hackspaces #ts100

A TS-100 soldering iron case lying open on the table, revealing the printed circuit board inside. The other part of the case and a plastic prying tool for opening cases are visible nearby.A TS-100 soldering iron PCB lying on the table, removed from both halves of the case. One part of the case and a plastic prying tool for opening cases are visible nearby.The PCB of a TS-100 soldering iron lying next to a fully assembled and operational TS-100 soldering iron.The OLED display on a ribbon cable lying on the laptop keyboard.
Fediverse Meeting Ruhrfedimeet@ruhr.social
2024-04-21

Wir werden auf dem #fedimeetruhr24 neben vielem anderen, auch über das Thema „ #Administration und #Technik“ sprechen und haben dafür nun viele #Hackspaces im #Ruhrgebiet angeschrieben. Wir freuen uns auf euch!

Es bleibt aber ein Treffpunkt für die gesamte Community! Mehr unter fedimeet.ruhr.social

@chaospott @daslabor @duisentrieb @UN_Hack_Bar @chaosdorf @fossag @space47 @c3re @ctdo #fablab #luenen
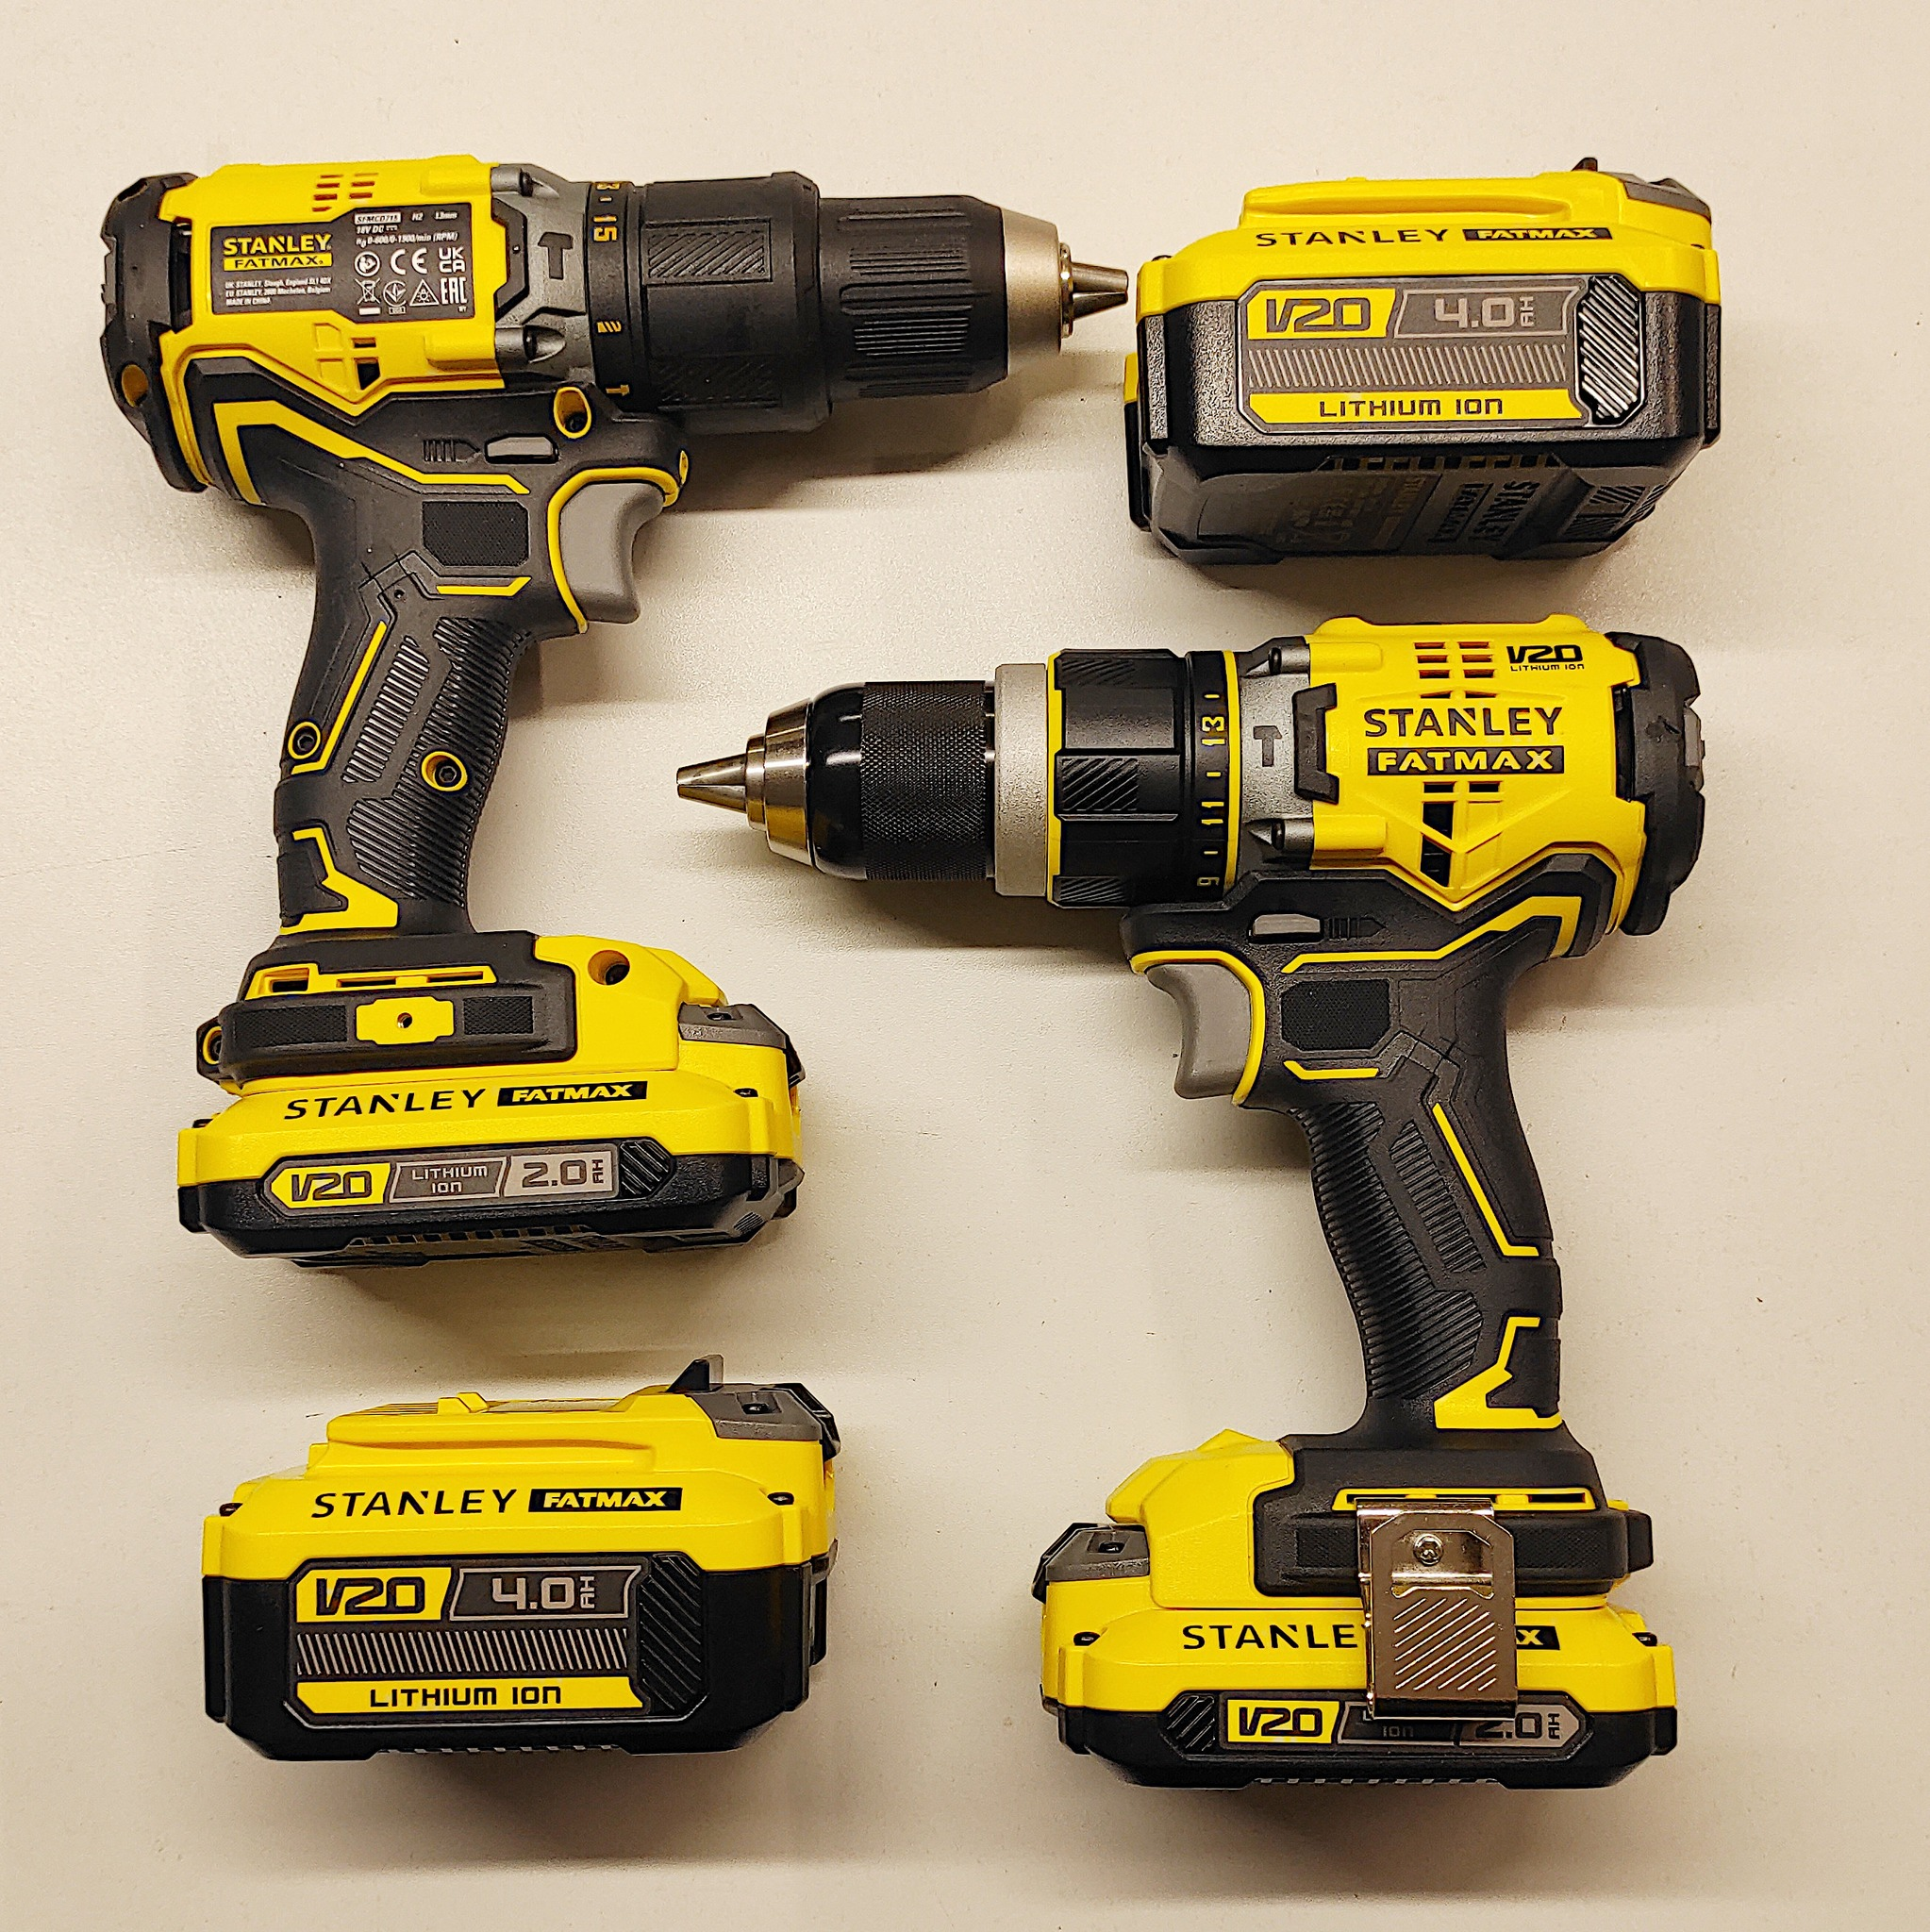
Hackerspace Krakówhskrk@hackerspace.pl
2024-04-20

New toys alert!
Sometimes one screw gun just isn't enough, so we've added two more robust BLDC screw guns to our arsenal. Plus, a set of four batteries to keep them powered up.
Happy screwing!

#hskrk #hackerspace #hackerspaces #hackspaces #newtoys #powertools

On the left side of the square layout, there's a Stanley FatMax screw gun with an additional battery positioned underneath it. On the right side, there's a battery with the screw gun placed horizontally and facing in the opposite direction directly above it. The tools and batteries complement each other in shape of a square, with the chuck of the screw gun on the right aligning with the handle of the screw gun on the left. The dimensions of the batteries complement the length and height of the screw guns.
Hackerspace Krakówhskrk@hackerspace.pl
2024-04-14

Late-night tinkering with the router, which was begging for an update. To stay connected, it's nice to hook up with some serial action, but our Mikrotik doesn't have one. It does have USB, though, which is where the USB-RS232 adapter comes into play, followed by a null-modem cable, then another RS232-USB adapter, and finally into the laptop.
In the end, everything works beautifully, and the two gigabit connections from ITH are blazing fast!

#hackerspace#hskrk #hackspaces #networking #mikrotik

In the photo, a patch panel with sockets labeled from 6 to 15 is visible. Below it is the Mikrotik RB5009UG+S+, with variously colored Ethernet cables, one SFP, and a power cable plugged into it, along with a USB cable. The continuation of this cable is described in the post and visible in subsequent photos. Below the Mikrotik, a fiber optic patch panel is visible.The photo shows the other end of the cable plugged into the USB port of the Mikrotik - a transparent blue RS232 connector on a silver-shiny cable plugged into one end of a null-modem cable terminated with female RS232 connectors on both sides. The null-modem cable is fastened with Velcro as its full length is not needed, so it can be coiled up to serve as an adapter. Also visible in the photo is a mini CNC milling machine, the 3040T, located under the hackerspace network cabinet.The wide-angle photo captures the entire scene, showcasing an open network cabinet containing the aforementioned Ethernet patch panel, Mikrotik router, fiber media converter, and fiber patch panel. A cable hangs from the cabinet, connected via a null-modem cable to a laptop placed below. On the laptop's monitor, the Mikrotik terminal is visible, displaying the characteristic "MikroTik" ASCII MOTD from the MikroTik RouterOS. Additionally, the photo shows a CNC 3040T milling machine and its controlling computer, spindle controller, and a large metal control cabinet for the CNC with various red and green buttons and indicators. In the middle of the cabinet is a yellow-red mushroom emergency stop button. Each button and indicator is labeled with a sticker, while yellow stickers on top of the control cabinet indicate required training. Above the power supply cabinet, a fire extinguisher and a Cisco 79xx series phone, part of the Hackerspace's VoIP installation, are mounted on the wall.
Hackerspace Krakówhskrk@hackerspace.pl
2024-04-13

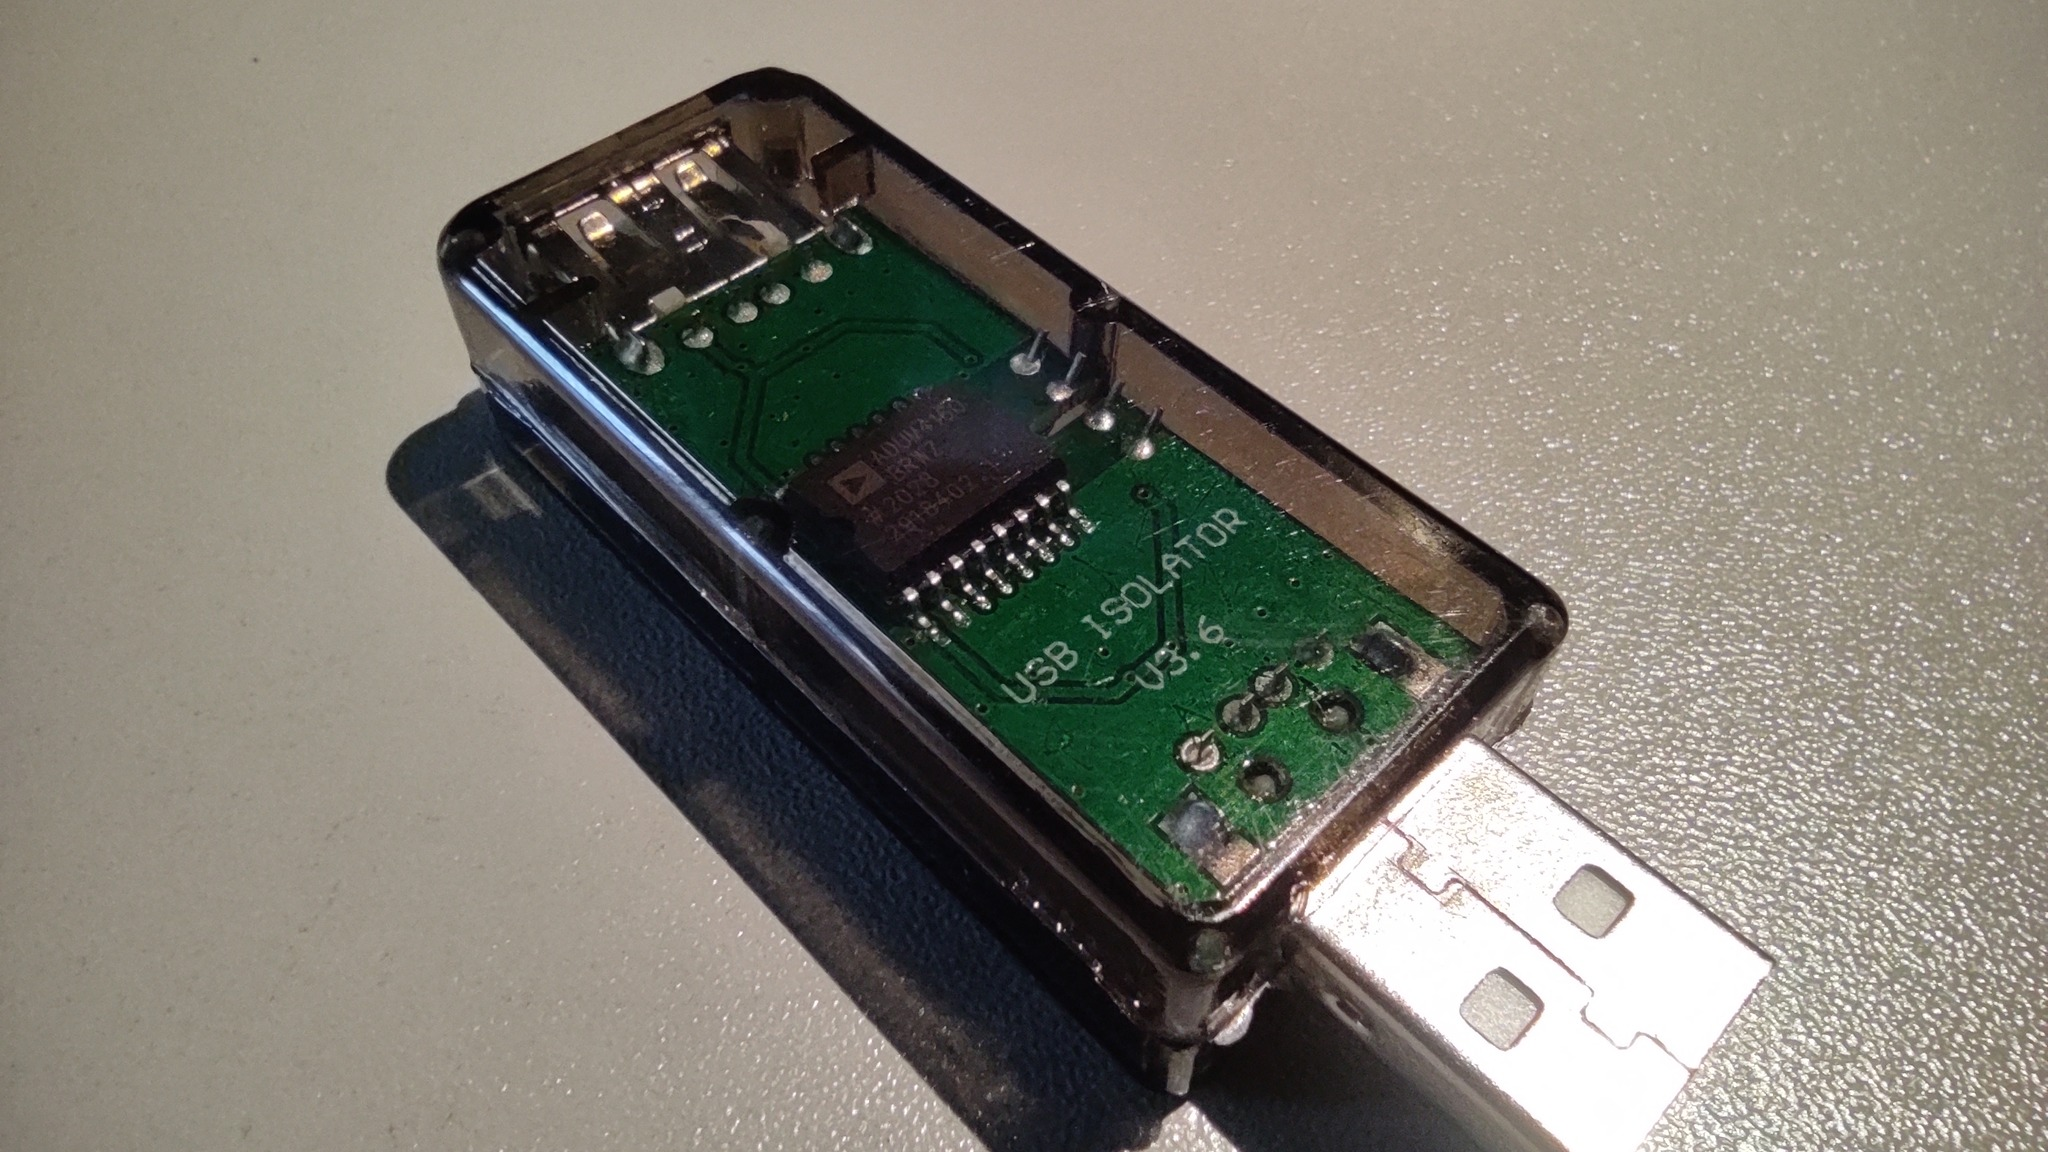
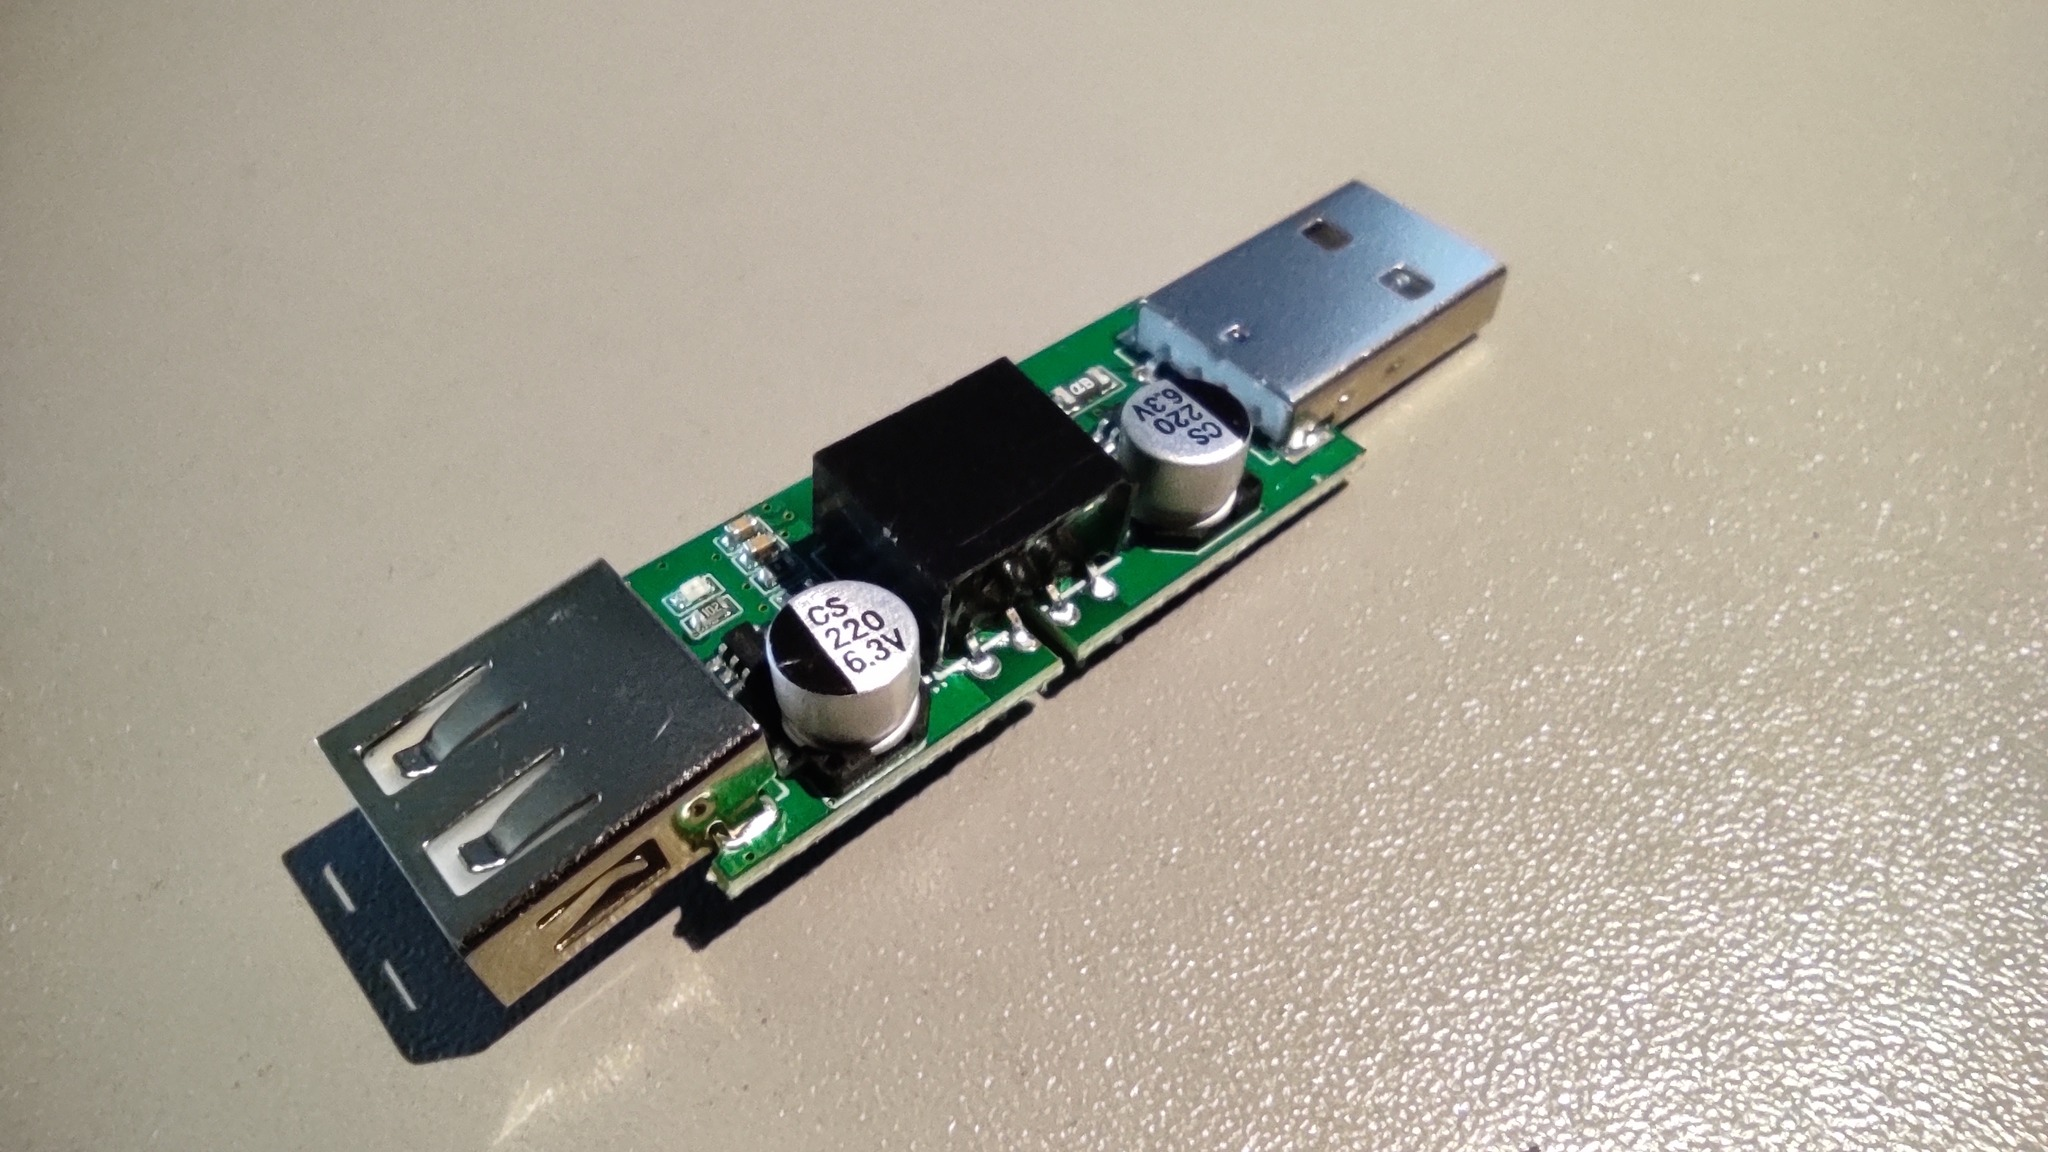
The USB isolator met its end. It was, of course, an experiment conducted well beyond any standard procedures, but still intriguing. The isolator survived 4 kV applied between the USB data lines on both sides, but 20 kV did the trick.

Video in reply toot, 1/🧵

#hskrk #hackerspaces #hackspaces #esd #hacking

The mentioned 'USB isolator v3.6' on a wooden desk, with a green wire attached to one of the protruding pins on the USB-A plug, visible alongside the ESD gun tip applied to the socket side.The ESD gun display, EM Test brand, shows the following:

On the left: Standard 150pF/150R
On the right: Icon of a full battery and 'CD'
In large letters: '+4.0kV' next to 'Auto 1.0s', '10', and a down arrow
Below: 'Level 1 Bleed ON'
At the bottom: 'Start' and 'Edit' above the buttons, explaining their functions.
Hackerspace Krakówhskrk@hackerspace.pl
2024-04-10

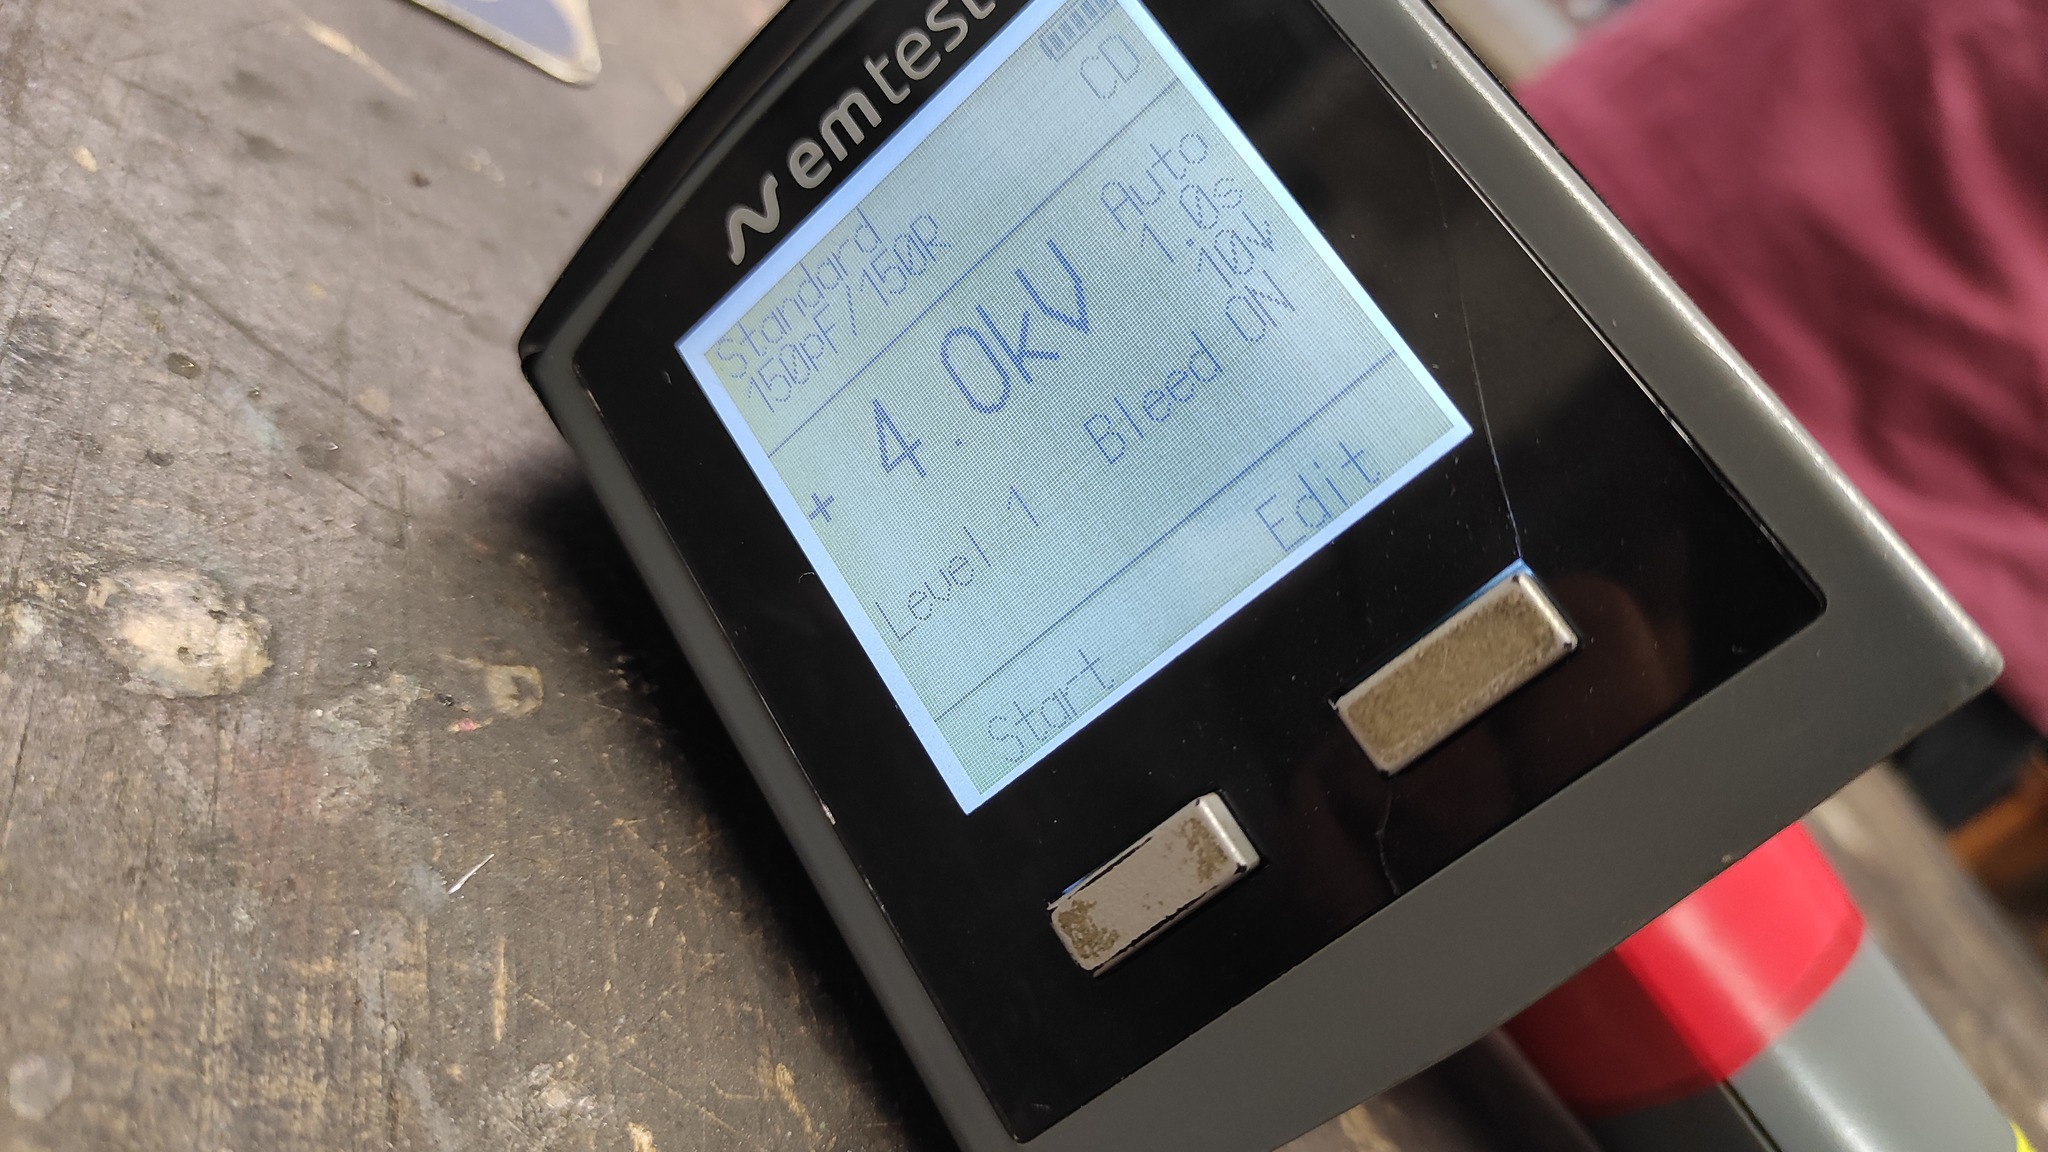
The mailman delivered a package straight from China. Inside: the cheapest USB isolator money can buy. But why? To put it to the test! We'll subject it to high voltage from the ESD tester and see how much punishment it can take!

#hskrk #hackerspaces #hackspaces #esd #hacking

In the photo, there's an electronic circuit board with a USB-A plug, housed in a dark translucent casing with rounded, smooth edges. The label 'USB ISOLATOR v3.6' is clearly visible.In this photo, the circuit is seen removed from the dark translucent casing, with a USB-A plug visible - male on one side, female on the other. In the center, between them, is a voltage converter surrounded on both sides by electrolytic capacitors labeled 'gs 220 6.3v.' Also visible are other surface-mount passive components.The same PCB, but positioned 'face down' - visible traces on the PCB and a circuit with the label 'adum4160'.
panigrcpanigrc
2024-04-05
Hackerspace Krakówhskrk@hackerspace.pl
2024-04-05

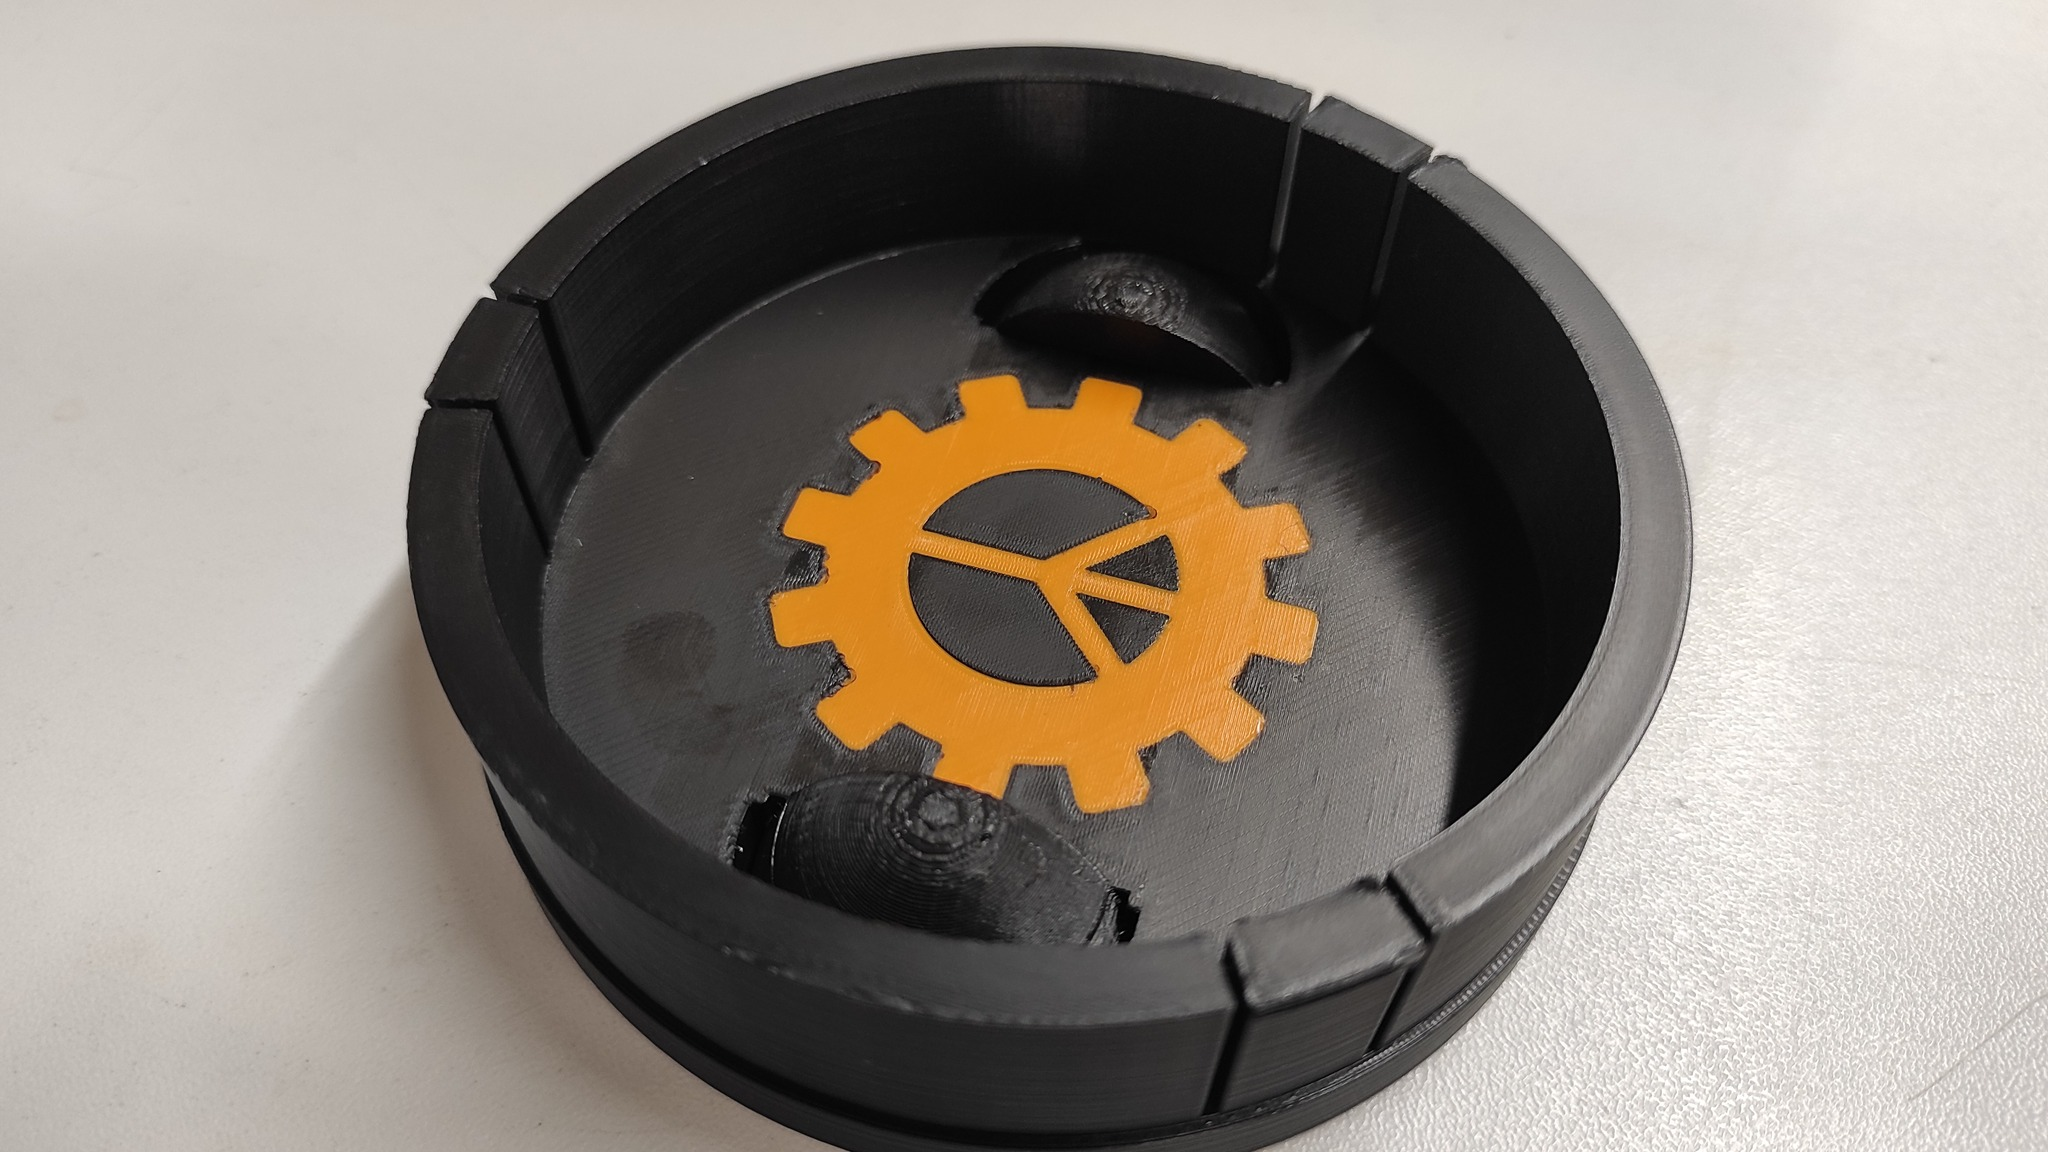
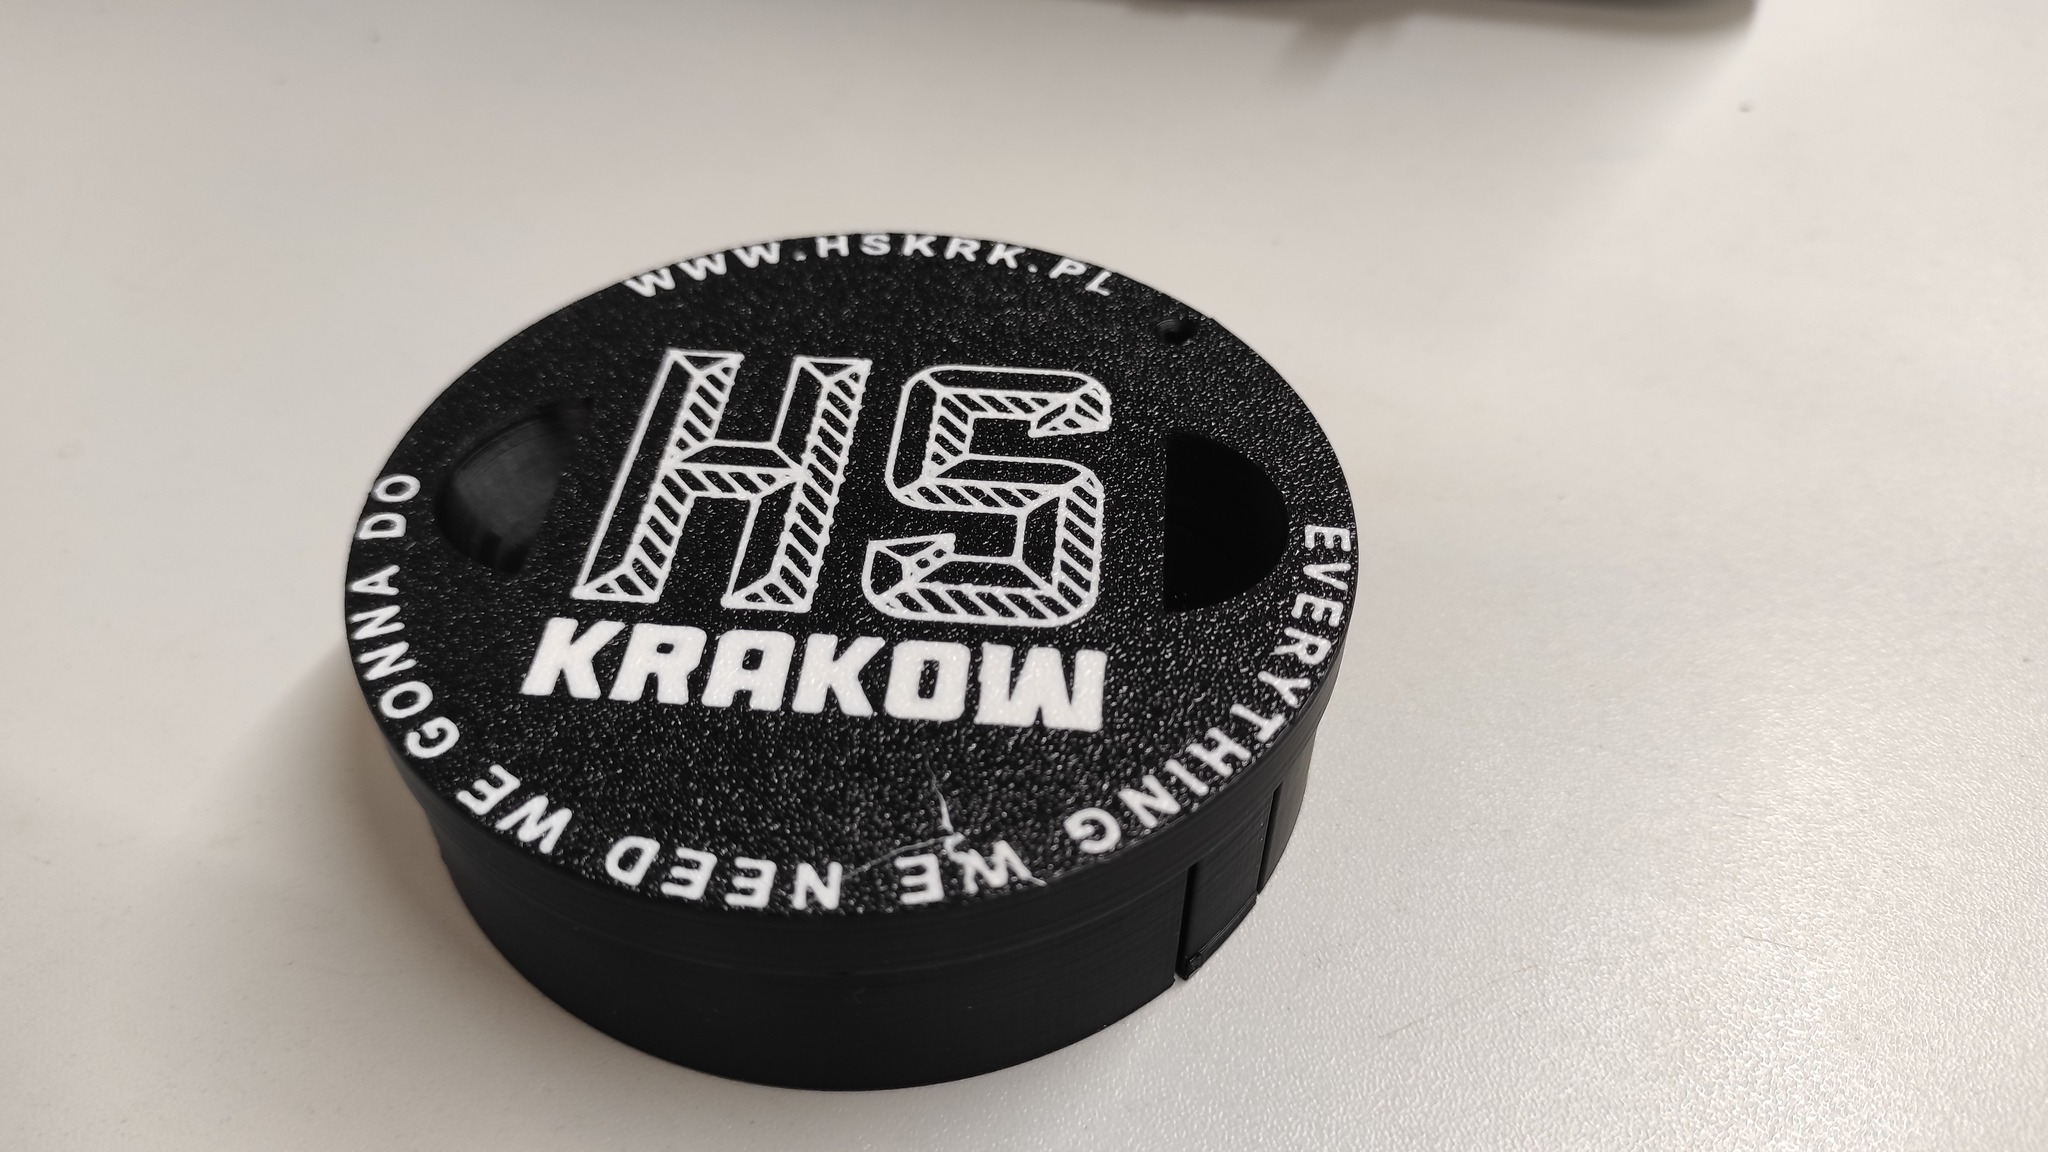
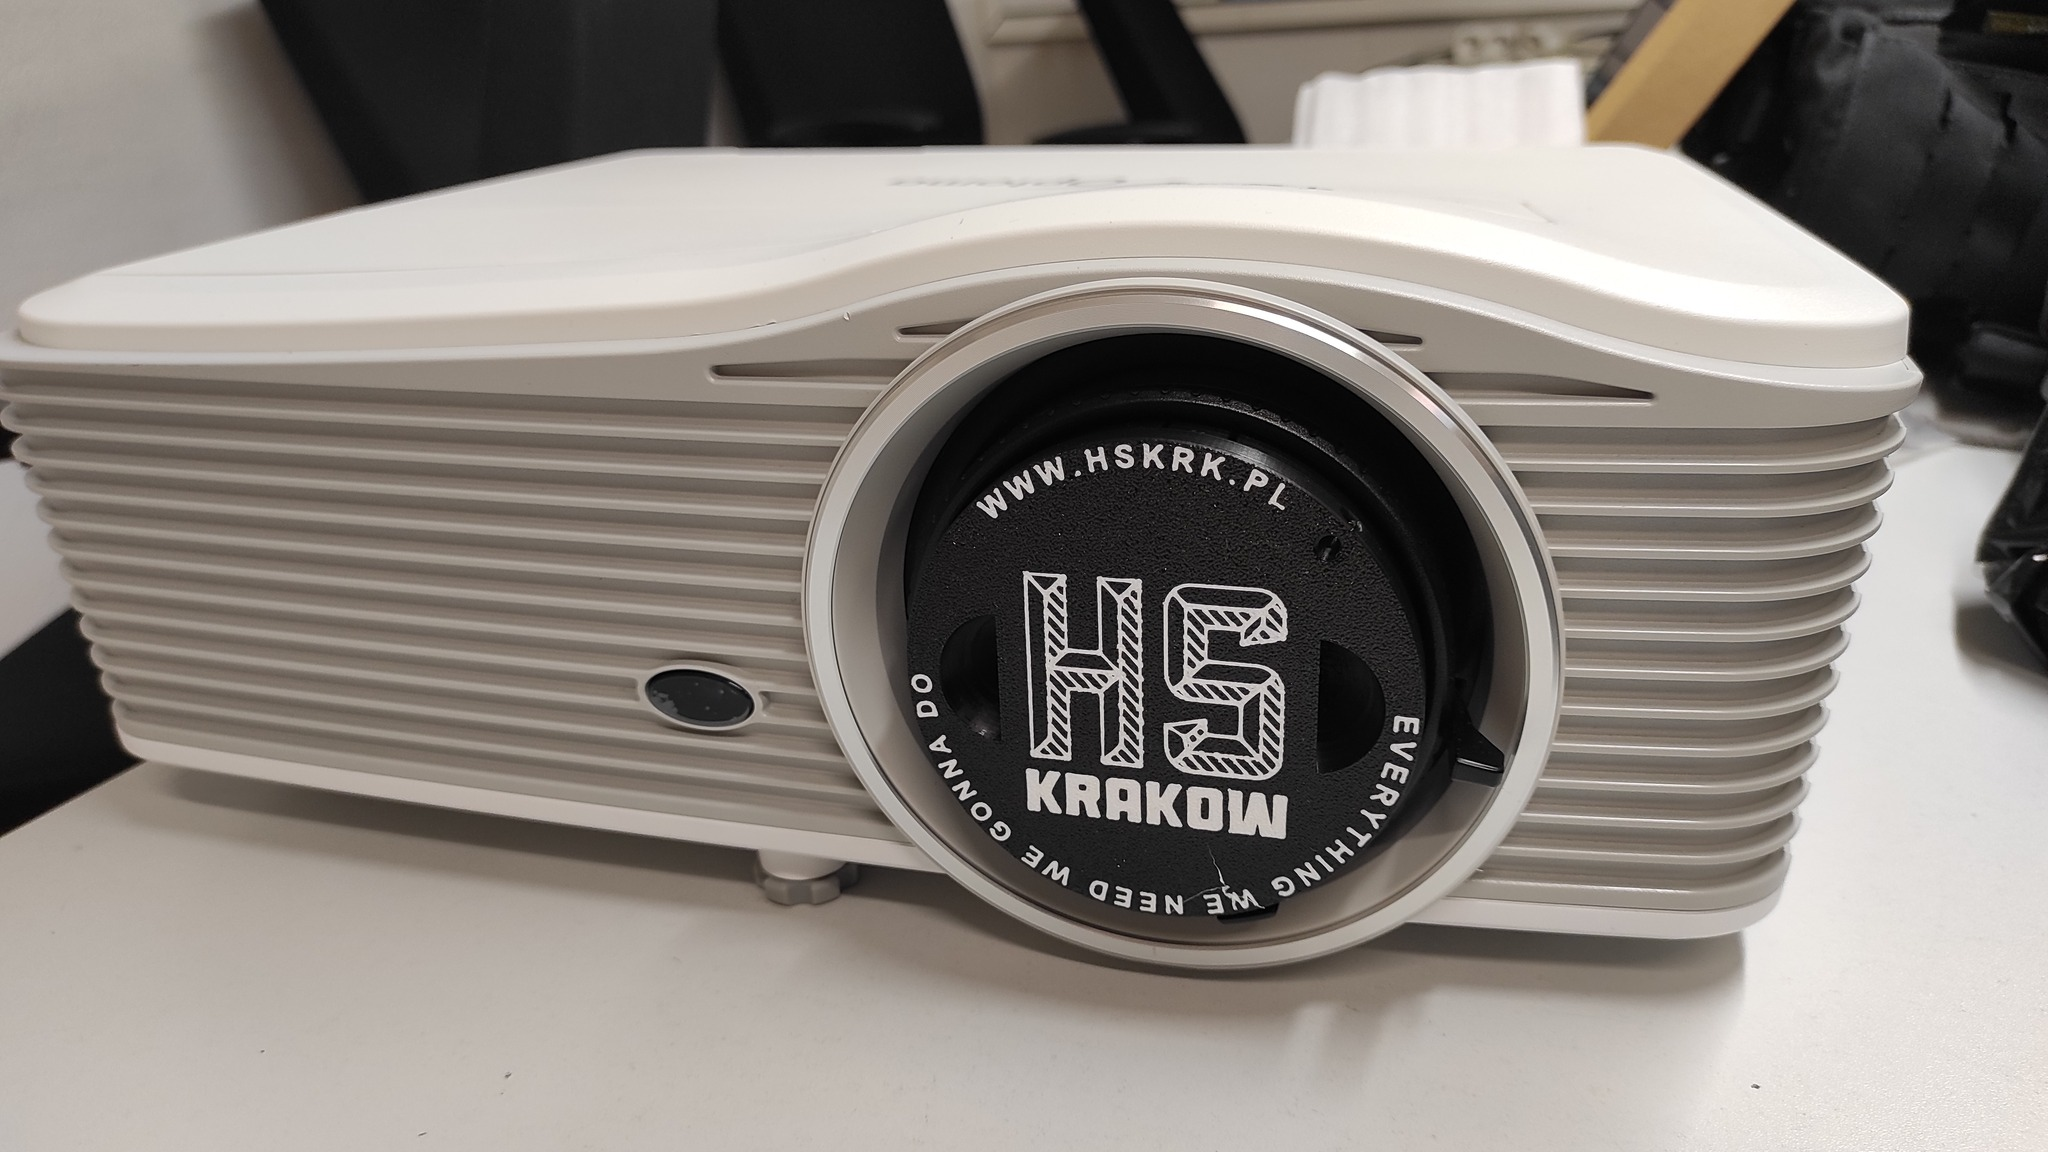
We bought a projector. A bright one for events like Hackerspace Pol'and'rock or the Technical Gathering of Ham Radio Operators in Burzenin. Unfortunately, it came without a lens cap. And the lens is large, so no standard cap fit. But that's what a 3D printer is for, right?

#DIY #3DPrinting #SteamDeck #hskrk #hackerspace #hackerspaces #hackspace #hackspaces

Inside of the mentioned projector lens cap, with the base featuring the printed logo of Hackerspace Pol'and'Rock, which is a vivid orange gear with a peace sign in the center.Exterior of the projector lens cap, the front-facing wall features the printed logo of Hackerspace Kraków, surrounded by the text - at the top 'www.hskrk.pl' and at the bottom 'everything we need we gonna do.' The print was most likely done on the textured sheet of the 3D printer table, which can be inferred from the specific roughness.The lens cap placed on the mentioned projector, which is positioned on the table in the softroom.
Hackerspace Krakówhskrk@hackerspace.pl
2024-04-05

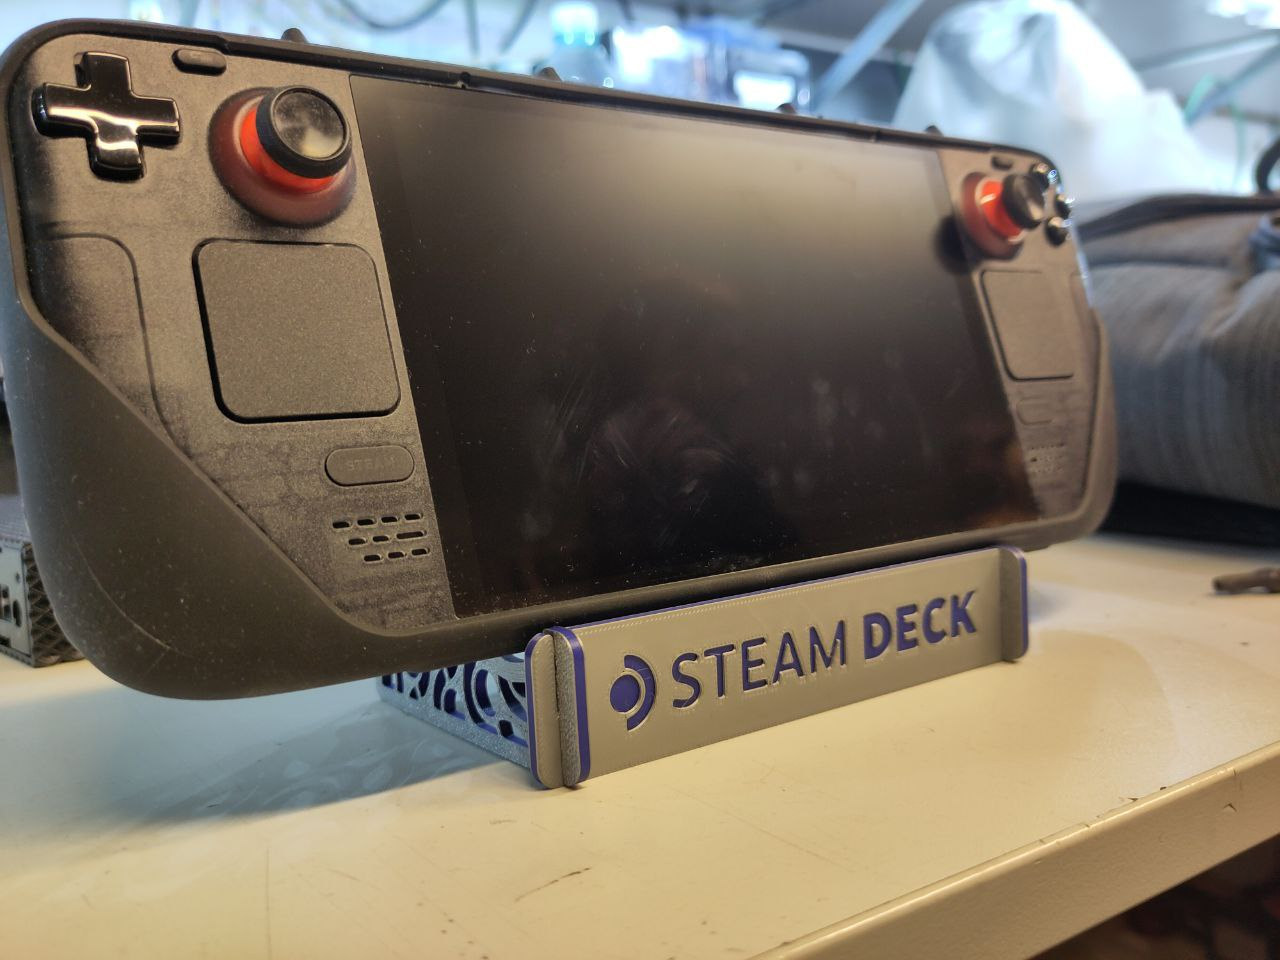
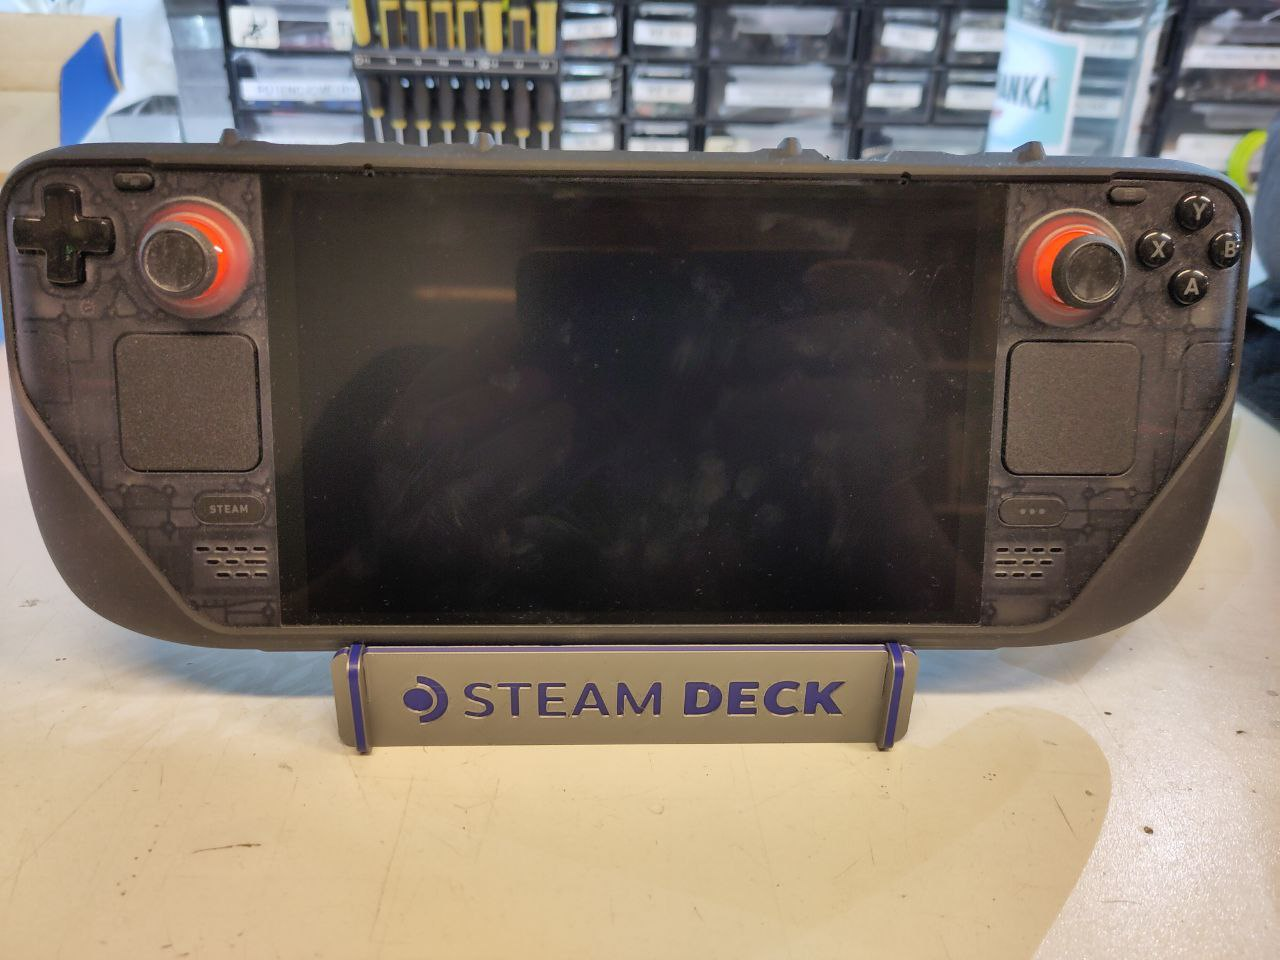
The newly purchased printer can print in multiple colors so well that the printed stand for the Steam Deck could be mistaken for engraved laminate!

#DIY #3DPrinting #SteamDeck #hskrk #hackerspace #hackerspaces #hackspace #hackspaces

The photo shows a Steam Deck placed on a stand printed on a 3D printer. The stand consists of four flat modules interlocked perpendicularly in the shape of rectangles with rounded corners. The front module is printed in a way that the shape of the Steam Deck logo is omitted from the print, giving the impression that it has been cut out of this module. Similarly, the side modules feature decorative 'cutouts' in various shapes. The modules are printed in such a way that the first and last layers are gray, while the inner layers are purple. This gives the impression that the entire piece is made of engraving laminate. The controller and stand are placed on the workbench in the electronic lab, with small electronic parts drawers and precision screwdrivers visible in the background.Same controller and its stand, but from other perspective, more from the front.
Leigh Hackspaceleigh_hackspace
2024-02-24

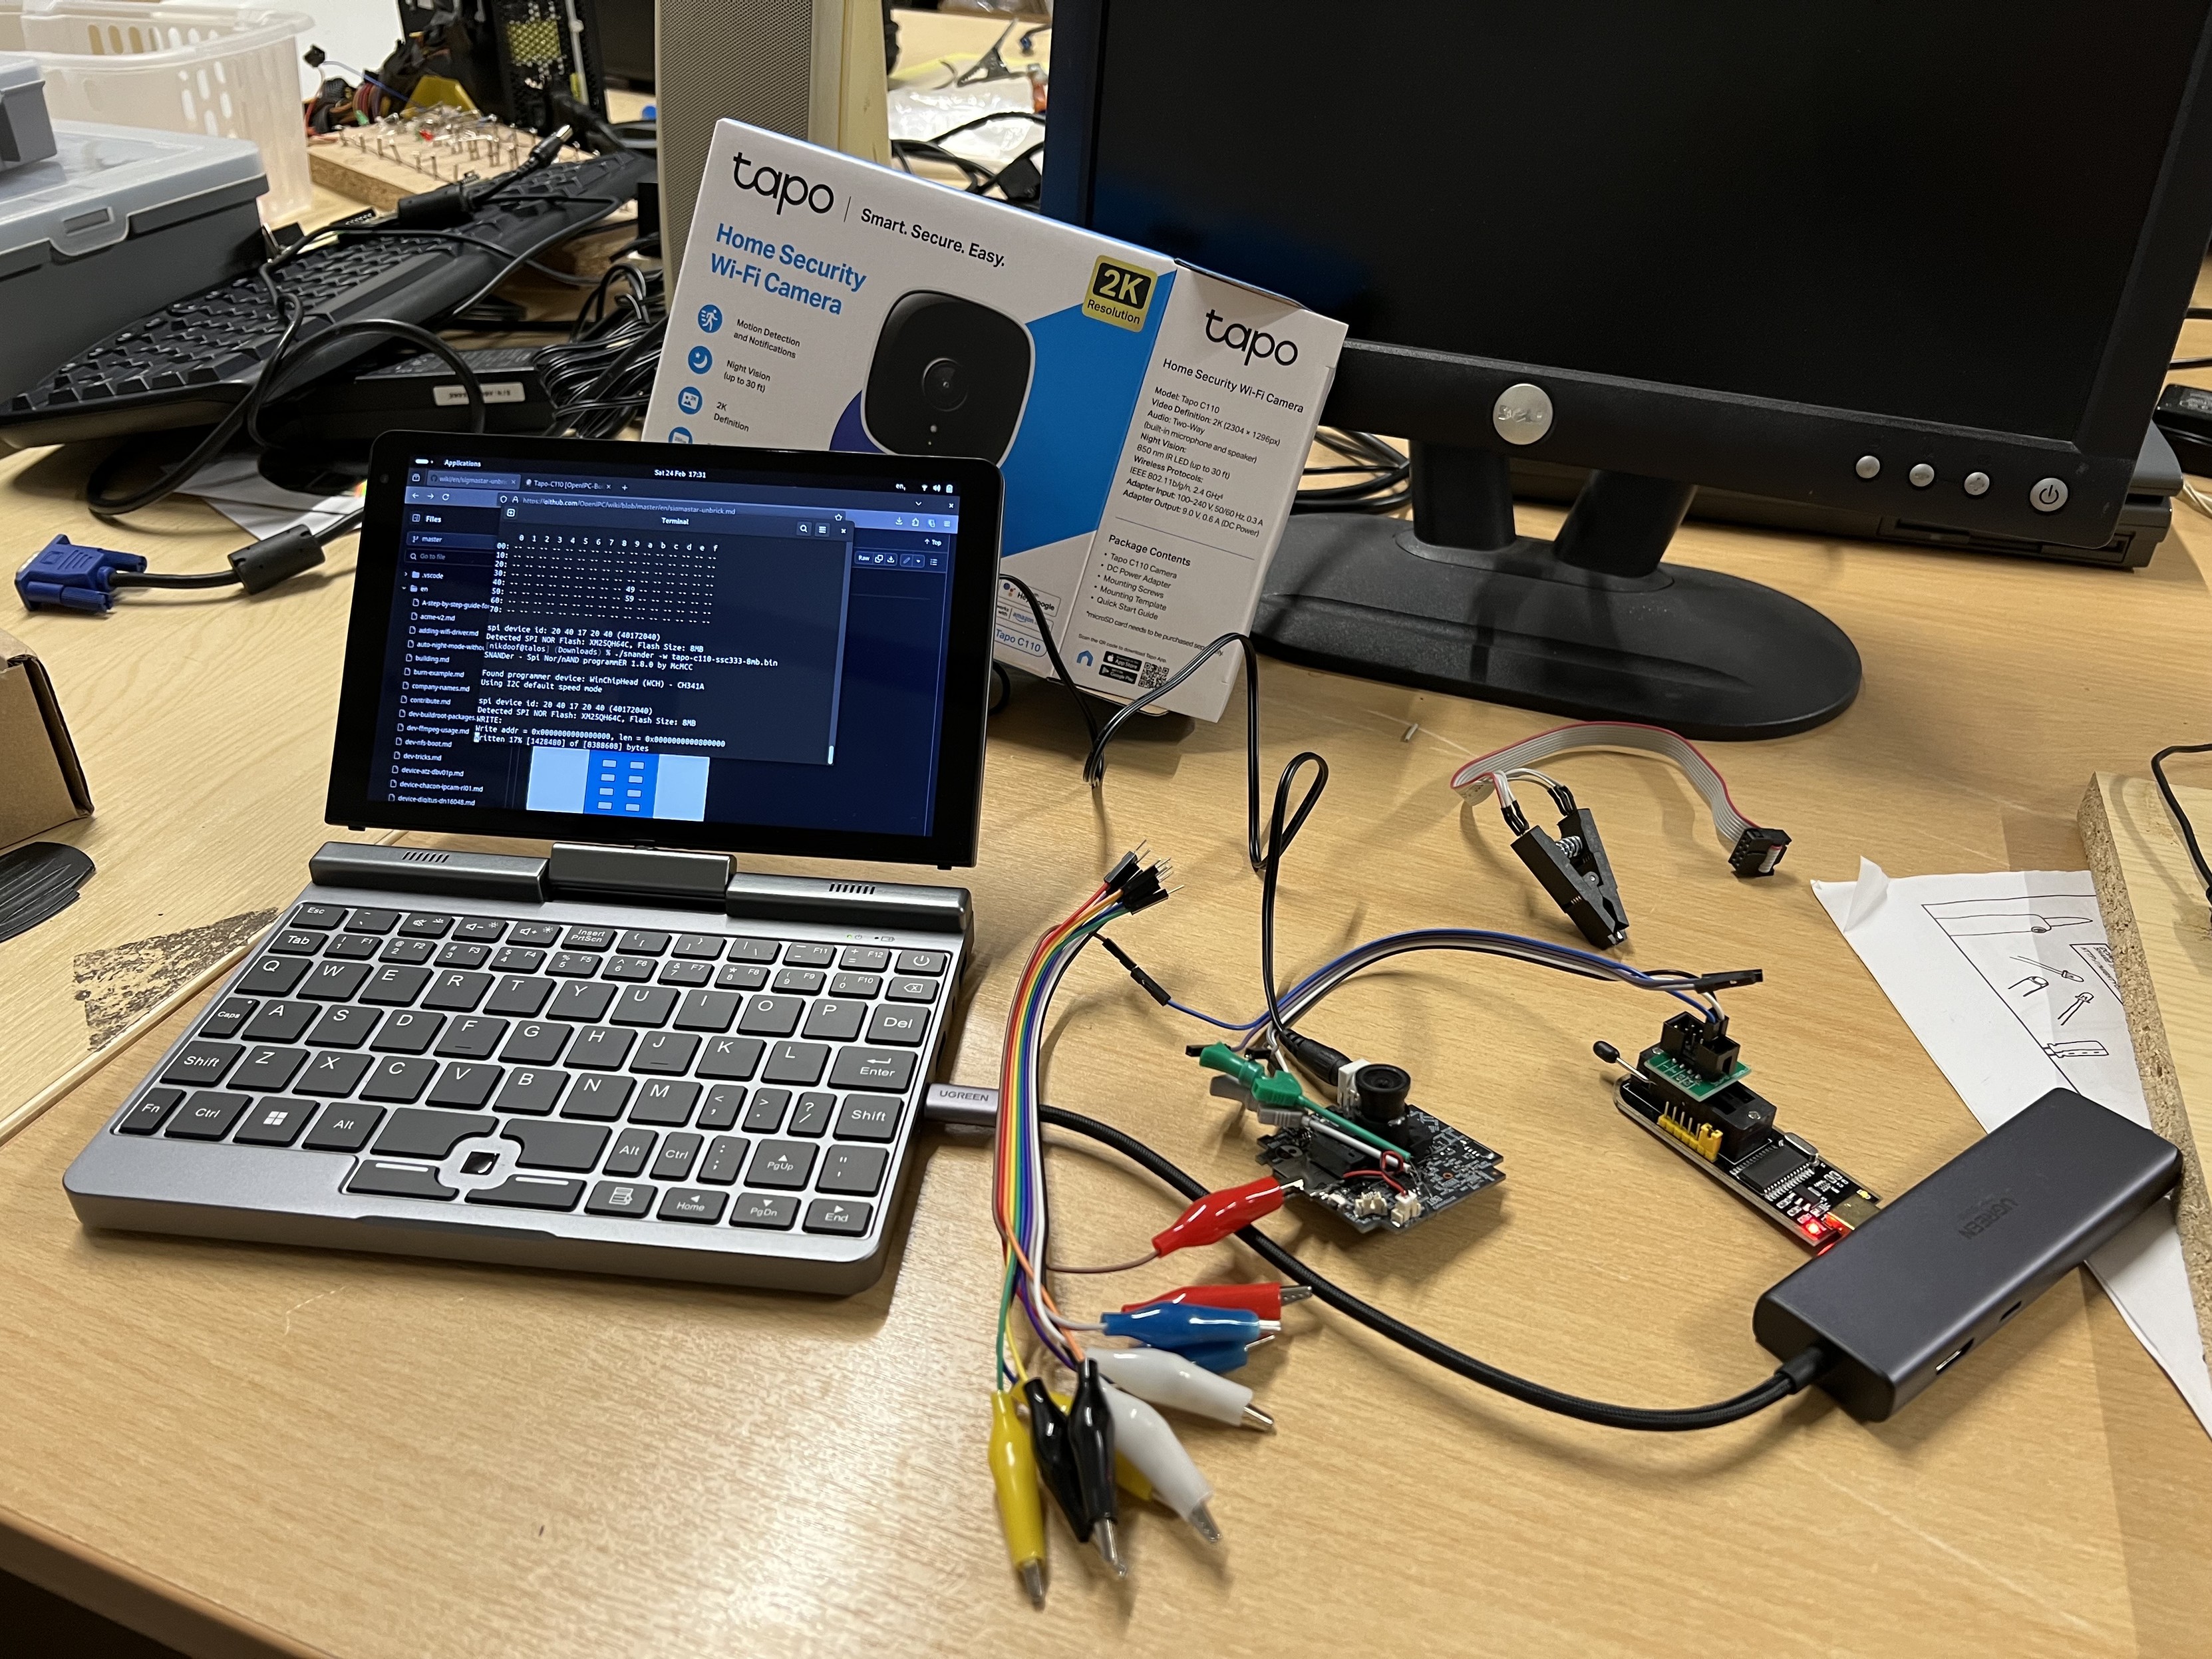
Today, @nikdoof is flashing a Tapo C110 with the hackspace built firmware.

2024-02-17

Hot take: #Hackspaces sind keine #Psychiatrie

All JLCPCB need now is a laser cutting service and they have a Hackspace As A Service.

#hackspaces

Screenshot of options from JLCPCB

Standard PCB/PCBA
Advanced PCB/PCBA
SMT-Stencil 
3D/CNC

Client Info

Server: https://mastodon.social
Version: 2025.04
Repository: https://github.com/cyevgeniy/lmst