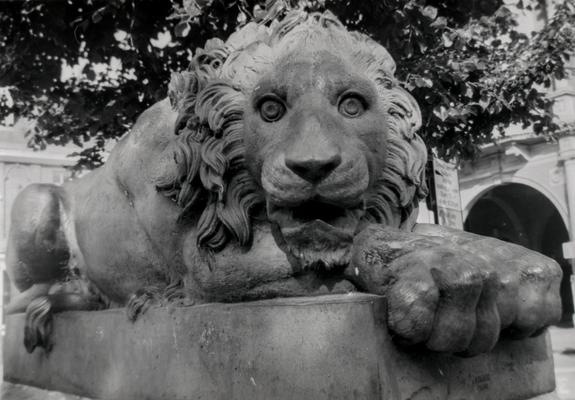
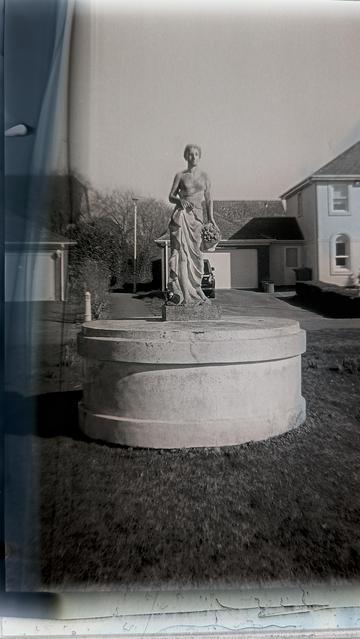
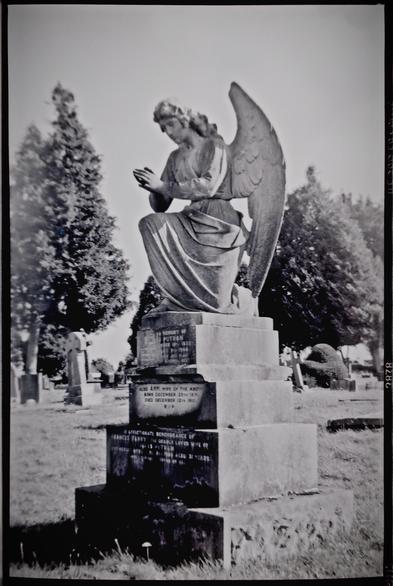
Another shot on the vintage #AgfaClack #120Film #MediumFormatCamera The whole operation went a lot smoother than last time. I think the new developing tank was my secret weapon. #FiImIsNotDead Hooray!
#AgfaClack
A far more successful attempt at #120Film #MediumFormantPhotography using the #AgfaClack Perhaps #FilmIsNotDead after all
I took these pictures with an Agfa Clack; seemingly a very popular box camera from the 1950s/1960s as they're easy to find. I found mine in my family's attic.
It's doing great still.
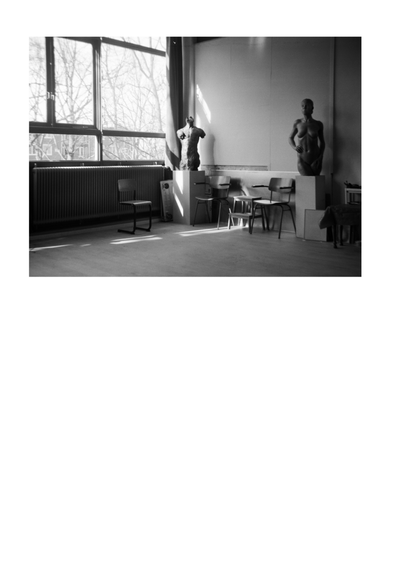
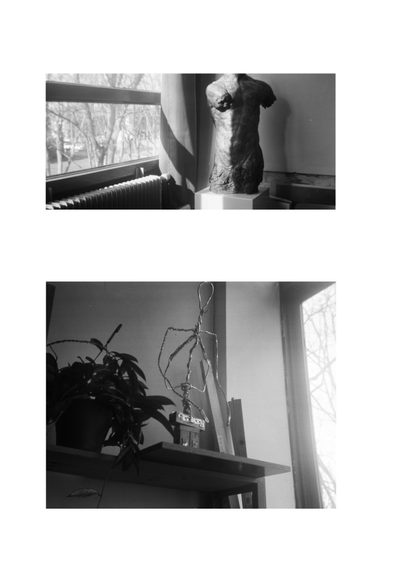
📸 Agfa Clack
🎞️ Ilford HP5
#analog #filmphotography #believeinfilm #filmisnotdead #blackandwhite #ilford #120format #vintagecamera #boxcamera #agfaclack #sculpture #studio #sunlight
#filmphotography #believeinfilm #filmisnotdead #midformat #120mm #blackandwhite #vintagecamera #agfaclack #print #communitydarkroom #ilford #experiment #analog
📸 Agfa Clack
🎞️ Ilford HP5 Plus 400
📌 Amsterdam
#filmphotography #filmisnotdead #believeinfilm #blackandwhite #ilfordhp5 #iso400 #vintagecamera #agfaclack #120mm #analogphotography #architecture #city #fog
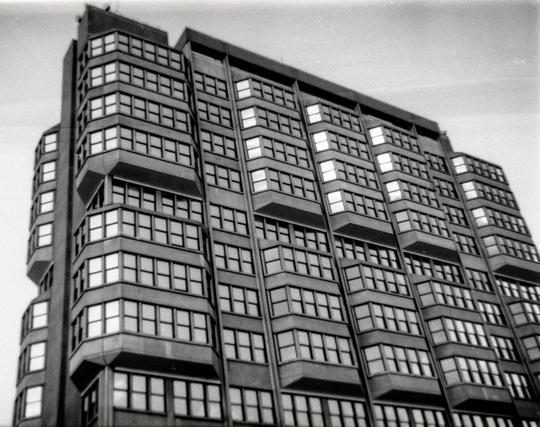
Here we've arrived at the first decades after WWII, a time of recovery and fresh beginnings.
The camera I used for this picture is from that same time.
📸 Agfa Clack
🎞️ Ilford HP5 Plus 400
📌 Amsterdam Nieuw-West
#filmphotography #believeinfilm #filmisnotdead #blackandwhite #ilfordhp5 #iso400 #vintagecamera #agfaclack #boxcamera #analogphotography #architecture #modernism
Another example. I'm not sure where the fault lies. Is it the #AgfaClack is it the equally antiquated #PollyminTank or is it just me? Perhaps I will try another camera next time. #FilmIsNotDead but it could be more appreciative of all the good will.
I may have moved the camera after all, while I was convinced I stayed still — I guess it's not easy to not move at all.
(I do have a tripod, but I feel exaggerated when dragging that around.)
This night was also densely foggy though.
📸 Agfa Clack
🎞️ Ilford HP5 Plus 400
📌 Amsterdam
#filmphotography #believeinfilm #filmisnotdead #blackandwhite #ilfordhp5 #iso400 #vintagecamera #agfaclack #night #fog
I love the simplicity of this camera. It's essentially just a box. And everything's mechanic — no need for a charger, which I consider a luxury in 2025.
📸 Agfa Clack
🎞️ Ilford HP5 Plus 400
📌 Amsterdam
#filmphotography #filmisnotdead #believeinfilm #ilfordhp5 #400iso #grainisgood #blackandwhite #vintagecamera #agfaclack #analogphotography #dusk #blurry #moved
Yet another Agfa Clack? This time we’re going to try a pinhole conversion.
My experiments with pinhole photography have never been really satisfactory. Firstly there was the pinhole option on the Diana F+, and then I discovered digital pinhole photography and the worst lens in the world, the Thingyfy Pinhole Pro. Yes, I could have bought myself a dedicated pinhole camera, like the Ondu or similar, but I really wanted to make my own.
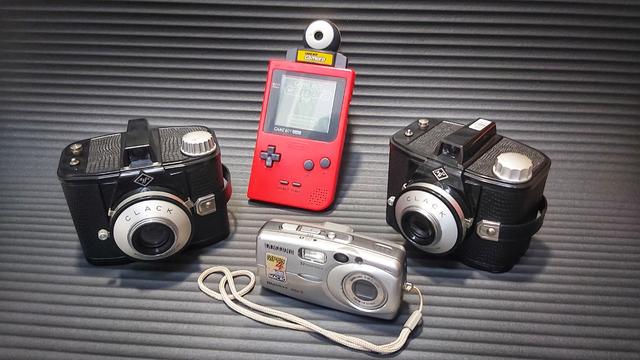
A pinhole photograph taken with th Diana F+ using Lomography Redscale film.Actually, I’ve had a home-made wine box pinhole camera on the go since, I don’t know when, but I’m not sure that’s never going to be finished. Which brings me to the Agfa Clack. To date I have three Agfa Clacks. There’s my ‘original’ Clack, the one I bought first and used for the Frugal Film Project in 2023. The second was bought to flip the lens, but the film wind-on knob was broken and I’ve never used it, and the third I added to replace the second one and flip the lens, which worked beautifully.
Back in the woods with my favourite old tree and a flipped lens Agfa Clack.But now I’ve added a fourth to my collection and one might wonder, what on earth for? Well this time I would like to convert the venerable Clack to a pinhole camera, quite a common thing to do, so far as I can tell. Of course this one was in the ‘Not Passed’ category of the Kamerastore website, and is described as having ‘a significant amount of dust inside the optics that will affect image quality, but it is otherwise functional.’ Well, a little bit of dust will be no obstacle, seeing as I intend to rip out its innards anyhow (carefully, of course) before reassembling it with a pinhole behind the shutter mechanism.
The Clack is a simple 120 roll film box camera introduced by Agfa in 1954. It will produce eight 6x9cm images per roll of film and has a fixed shutter speed of 1/30s (plus bulb) and two aperture settings, for sunny or cloudy weather (approximately f16 and f11, respectively.) It also features a ‘close-up’ lens or a yellow filter depending on the model. The early models were made of metal and the later versions of moulded plastic.
Taking apart a Clack is the easiest camera conversion ever. First remove the silver ring by unscrewing the single screw underneath the lens turret. Then twist the cover and it should pop off, revealing the lens above the shutter and aperture mechanism.
The lens is held in place with a couple of pins and a single screw. Undo this screw and lift off the lens. Below is the aperture and shutter fixed to a plastic plate with two screws. Undo these and prise off the plate. You won’t be able to lift it much, though, since the two wires that power the flash are soldered to contacts under the plate. These wires need to be cut to fully remove the plate.
Underneath the plate is a hole which opens to the camera body. The pinhole needs to be fixed here. It is possible, apparently, to just place this centrally over the hole and screw the plate back in place, but my pinhole kept on moving and I ended up glueing it in place. Just make sure that the pinhole is centred in the hole. Once the pinhole is in place, the camera can be reassembled.
And that’s it. Except that for me it wasn’t quite. Although the lens is normally removed, I read somewhere that replacing the lens can give a bit extra sharpness, so I thought I would give that a try. However, what I did was take the lens, remove it from the holder and then flip it. Hopefully, this will give a slightly sharper pinhole image with distortion around the edges: the Deakinizer effect.
The distance of the pinhole to the focal plane (the focal length) of the Clack is about 72mm, and the pinhole aperture was 0.3mm, so by dividing the the focal length by the diameter of the pinhole we get an f-number of f240. I’ll use this measurement to determine the exposure time depending on the speed (ISO) of the film that I’ll be using.
Hopefully I’ll be able to get the flipped lens pinhole Agfa Clack out before the current Shitty Camera Challenge ends in January, but I’ve got a fair few things to do before then. If you are on Mastodon, you can now follow this blog directly. Just go to Mastodon and follow the ‘Snapshot’ WordPress account at @keithdevereux.wordpress.com. All new posts will be automatically updated to your timeline.
#Agfa #AgfaClack #Blurry #Camera #Clack #Dreamy #LensFlip #LensReverse #Pinhole
Another round in the battle with #120film. This time using some very expired #Ilford #FP4Plus and an #AgfaClack. I am wondering if the problem with the #DaylightTank is #Fomapan The FP4 loaded perfectly. The images are ropey but never-the-less I got the correct number of exposures (all 8 massive 6x9 ones) with no #lightleaks and developed it at home. #photo #photography #BelieveInFilm #AnaloguePhotography #FilmIsNotDead it's just a bit under the weather.
My first year with the Frugal Film Project was a mixed bag. For a start it was really only ten months, we were away on holiday during August and apart from a few days in October when I took an Agfa Clack clone instead of the Clack that month was a washout. I also didn’t get out and about as much as I had intended and my outings weren’t as adventurous as I had hoped. I was also continually challenged with the Clack (or rather Clacks as they both had the same issue) by ‘fat’ rolls, where the film and backing paper did not wrap tightly around the take-up spool.
Despite all of these challenges, it was an enjoyable year and I really got to love my Agfa Clacks by the end of the year I had two Clacks on the go: the conventional Agfa Clack and a second model that I cleaned up and flipped the single lens. This produced photographs with a lovely radial blur around the outside of the image. I also explored multiple exposures, trichromes, and even the Vortoscope, three mirrors clamped together in a triangle shape like an open-ended kaleidoscope.
In Early December I took the flipped lens Agfa Clack with me to try some trichromes. Sadly, by my own fault I completely underexposed the images, so right at the tail end of the month I tried again. I headed to Águas Boas and made trichromes of my favourite views, the bandstand in the park and a lonely tree that sits in a field raised above the road. I also grabbed shots of a Christmas decoration by the roadside and the window of a derelict house. The lab I use in Aveiro only has a mask for 6×7 sized frames, not 6×9, the format of the Agfa Clack. So I end up with some strangely frames trichromes from time to time. Yes, I can scan the images again with the DigitaLiza Max, but sometimes I really like how these oddly framed trichromes come out.
I already have my film/camera combination ready for next year’s Frugal Film Project, in fact by the time this post is published (or is it ‘dropped’ in the modern vernacular) I’m sure I will have already posted my first images. Looking forward to seeing you all in 2024.
If you are on Mastodon, you can now follow this blog directly. Just go to Mastodon and follow my WordPress account at @keithdevereux.wordpress.com@keithdevereux.wordpress.com. All new posts will be automatically updated to your timeline on Mastodon.
#Agfa #AgfaClack #Camera #Clack #Experimental #Fomapan #FrugalFilmProject #Retro #Trichrome #TrichromeEverything #Vintage
Last year, Stephen Dowling of Kosmo Photo asked a group of camera bloggers to write about three cameras they discovered in 2022 and what each one meant to them. Well, I gatecrashed this party and came up with the three cameras that I had most enjoyed using during the year: The dainty little Ikkosha Start 35k with its homemade 35mm Bolta spools, the self-converted full-spectrum Panasonic Lumix DMC-TZ8, and the Kodak ‘Handle’, which I successfully adapted to work with Instax Square film.
This year I found myself experimenting with lots of different cameras and techniques, both film and digital, and there were some real favourites among them. For the first time I also took part in some annual ‘challenges’ besides my favourite, the Shitty Camera Challenge. So without further ado, let’s get going.
The Agfa Clack
My first favourite camera this year is the Agfa Clack, possibly the nicest ‘box’ camera I have ever used. At the end of 2022 I decided that I would participate in the Frugal Film Project. This is a one-film/one-camera challenge devised and established by Sherry Christensen a few years ago. The idea is to use the cheapest film you can find and a camera that costs less than 75€ and shoot one roll of film each month for the calendar year. It can be any subject or any theme and each month the images are posted to social media.
I chose a camera that I had wanted for a long time, the Agfa Clack, which cost 29€ from the Kamerastore website. The Clack is as simple as a camera can be. Made between 1954—1965 it features a single shutter speed of about 1/30s and two apertures of f/11 and f/14. It takes 120 film and produces eight 6×9 cm images on a curved film plane. My film of choice was Fomapan Retro 100, a black and white negative film made in the Czech Republic. With a box speed of 100 ISO but a purported latitude of between 50—400 ISO, I thought this would be ideal for the Agfa Clack. With its 1/30s shutter speed I could set it at f/11 and use filters and still get decently exposed images.
It was great fun, travelling around and taking photos with the Agfa Clack, but throughout the year I was plagued with ‘fat’ rolls, when the film roll and paper backing doesn’t wrap tightly around the take-up spool. I thought that this might be the fault of the film stock, so I tried a different film stock … and got a fat roll. I had one further idea, that the mechanism wasn’t holding the film tightly, and invested 10€ in another Agfa Clack with a broken wind-on knob. Unfortunately the spring in the new camera wasn’t compatible and that idea was unsuccessful.
I also found out that the Agfa Clack is great for lens flipping. It has a single meniscus lens that can be dismounted, turned over and replaced to give a stunning blur effect around the outside of the image, the Deakiniser effect named after the film cinematographer Roger Deakin, who developed the technique. Even though I was still getting fat rolls, I was reluctant to use my original Clack so I found a third camera online, also for 10€ but with a fungus-ridden lens, took it apart, cleaned it and flipped the lens.
This was excellent, the ‘Deakinized’ images were coming out lovely, but I was still suffering with ‘fat’ rolls with this ‘new’ Clack so perhaps it’s something to do with modern 120 film stock. Who knows? Eventually, I found a piece of firm sponge in the local supermarket and glued this underneath the take-up spool. So far this simple hack seems to have cured the fat roll issue.
I tried several techniques with the Agfa Clack and the Frugal Film Project throughout the year; regular black and white photography, trichromes, and even the Vortoscope, a triangle of mirrors clamped together, and it was a wonderful experience. Next year I hope to take part in the Frugal Film Project 2024, and who know, perhaps that camera will appear in this list next year.
The Samsung Digimax U-CA3
As anyone who I follow or who follows me on social media will know, I am a sucker for early noughties digicams. Like most journeys with my resurgent interest in all things photography it started with a Kamerastore Outlet Box, when I picked up a range of digicams for just a few Euros, including my full-spectrum Panasonic Lumix DMC-TZ8 that featured in this list last year.
I also discovered the existence of ‘generic’ cameras that crop up on the CEX website quite regularly. Normally these are low resolution (nowadays) cameras from reputable brands like Nikon, Olympus and Canon (one of my favourite generic cameras was a beautiful condition Canon Powershot G5 for 2-3€) but you don’t actually know what you will receive until the package drops through the letterbox.
So I was a little underwhelmed when I opened one package to find a Samsung Digimax U-CA3. It was the middle of a Shitty Camera Challenge when I spotted a ‘generic’ 3MP camera which I thought would be ideal to convert to full-spectrum, and for 1€ (plus 2,50€ for delivery) it was cheap enough that if I screwed up I could just bin it without feeling too bad. I pressed ‘comprar’ (buy) and added it to my basket. A few days later a well packed jiffy bag arrived in the post containing a Samsung Digimax U-CA3, the charger and some cables.
Upon charging the camera I realised that it used a Memory Stick Pro Duo (the shorter version of the Sony memory stick) for storing image files. This wasn’t really an issue as it worked quite happily with the Memory stick from the PlayStation Portable, but I wanted a dedicated card for the Samsung. A few days later I had a fully working Samsung Digimax.
Of course, the first thing I wanted to do was to check out its infrared sensitivity. So I attached it to a mini tripod, grabbed my little wallet of filters and went across the road to photograph my favourite tree (actually two trees) and abandoned well on a patch of scrubland. After taking several photographs, with and without filters, the digital aerochromes were spectacular with beautiful pastel red vegetation and natural looking buildings and skies. I was amazed, and although my intention was to make this camera full-spectrum, after such amazing results I decided to leave it as it was.
I’ve been out with the Samsung Digimax U-CA3 several times, and each time it’s produced some wonderful digital aerochromes, like this one of the Ponte Pedonal de Ligação Baixa de Santo António in Aveiro, which is a wonderful metal structure surrounded by trees that I knew would look spectacular as a digital aerochrome.
The Nintendo Gameboy
I don’t think anything needs to be said about the Gameboy … but I’m going to anyway. I’ve been the proud owner of a Gameboy console and the Gameboy Camera since January 2023, and it’s my favourite camera of all time. I managed to get my hands on one for the Shitty Camera Challenge, and since I’ve had one it’s been hard to put down. I’m also convinced that the Gameboy was the factor that tipped the scales into my becoming Shitty Camera Challenge Champion for the #1990sCameraChallenge, probably the single most important achievement of my whole life. 😉
The Gameboy Camera is a 0.0.014MP monochrome camera that records four shades of grey to produce super low resolution funtographs (as Gameboy photographs are known). Using the Gameboy camera looks simple enough, but in truth one needs to master a few steps to produce really nice images. The Gameboy camera is actually a full spectrum device — the sensor has no infrared cut filter to stop wavelengths outside the visible spectrum from showing on the image — so in full sunlight using an infrared cut filter will make trees and the sky look natural.
Although getting good results can be still quite hit-and-miss, the Gameboy can produce some lovely monochrome funtographs. But with a little work it can also produce some striking trichromes too, and even digital aerochromes in infrared. Making infrared trichromes, digital aerochromes, emulating the look of the defunct film Kodak Aerochrome, is one of my favourite pastimes, and I attempt this with all new cameras, often with mixed success. The first Gameboy trichromes/aerochromes were really awful, but with a little practise they’ve started to come out quite nicely.
If I could I would use the Gameboy all of the time, but I’m trying loads of other things so I forcibly cut myself off from it for a while — I went cold turkey. One of the things I’m working on at the moment is to get a c.1925 Kodak 1A Autographic Jr back up and running, which is certainly a work in progress, and I’ve also just invested in a similar period 9×12 large format camera that I hope I can use with Instax Wide film. That might even become my camera of choice for the 2024 Frugal Film Project. So there’s certainly a lot going on and I hope the 2024 entry of this series will be quite different (though with more Gameboy funtographs).
If you are reading this and fancy entering your own three cameras, please go ahead, and if you could add a link to this post, that would be awesome. If you fancy reading more top three cameras from this year then they can be found at the links below:
Stephen Dowling, Kosmo Foto: Three Cameras of 2023
Jim Graves, My Journey onto Photography: My Top Three Cameras of 2023
Shawn Granton, The Urban Adventure League: My top three film cameras for 2023: Recency bias, the Honeymoon period, and plateauing
Have a good year and see you in 2025.
#1990sCameraChallenge #2Bit #Aerochrome #AgfaClack #Digicam #FrugalFilmProject #Funtography #Gameboy #Infrared #Nintendo #PixelArt #Retro #Shittycamerachallenge #Trichrome #Vintage
I'm a bit of a sucker for the Agfa Clack series of cameras, so when I spotted a Vredeborch Felica, a Clack 'clone' from West Germany, I could not resist. #ArtAdventCalendar #MediumFormat #AgfaClack
For the first time I took part in the annual Frugal Film Project. I chose an Agfa Clack and Fomapan Retro film, which was not without its trails an tribulations, but of course, one of the first things I had to try was ... trichromes. #ArtAdventCalendar, #AgfaClack, #Trichrome, #Fomapan, #Retro, #FrugalFilmProject, #TrichromeEverything,
After trying different films in the Agfa Clack, different cameras with Fomapan Retro, I was still getting ‘fat’ rolls in both Agfa Clacks, the original and the ‘flipped lens’ version. My last resort was to cut some pieces of sponge and put them inside the body of the camera. Glued underneath the film take-up spool, the idea was that the sponge would keep the roll tight enough that we won’t get ‘fat’ rolls any more.
There was no #FrugalFilmProject roll for October as since I had ventured with the Vredeborch Felica it had done little else but rain, rain, rain. However, the weather broke around tge beginning of November and I took the original Agfa Clack with sponge-modification and the Vortoscope to Aveiro. It was more a test of the sponge modification than a real entry for the Frugal Film Project, but I also wanted to try the Vortoscope and some multiple exposures.
The results were spectacular. For the first time I had beautifully exposed frames, no light leaks and, best of all, a tightly wound roll of film. I was really happy with how the Vortoscope behaved as well, although it was difficult to properly frame it, the missed Melia Ria Hotel is a good example.
I also tried a few multiple exposures, too, again with mixed success. That said, my aim was really to test whether I had beaten the ‘fat’ roll issue and it was certainly the most tightly wound roll I’ve seen for a long time. It was just the first roll, but all being well the issue is resolved. Huzzah!
If you are on Mastodon, you can now follow this blog directly. Just go to Mastodon and follow my WordPress account at @keithdevereux.wordpress.com@keithdevereux.wordpress.com. All new posts will be automatically updated to your timeline on Mastodon.
#Agfa #AgfaClack #Camera #Clack #Experimental #Fomapan #FrugalFilmProject #Retro #Vintage #Vortoscope
I was really thrilled with the first roll of film put through the sponge-modified Agfa Clack. Vortograph of the railway lines in Oiã. #Vortoscope, #Agfa, #Clack, #AlvinLangdonCoburn, #AgfaClack, #Fomapan, #FrugalFilmProject,
It’s been a funny old month, but today I managed to get out with the Agfa Clack and take some photos for June. This time it was just under the wire, but I had a plan to make some trichromes of the new street art that had been commissioned by the local council.
Unfortunately, the curse of the ‘fat rolls’ struck again. A ‘fat roll’ is where the paper and film doesn’t wrap tightly around the film take up spool. If you squeeze it then you can feel it is loose and the likelihood is that light will cause fogging on some of the images, especially near the end of the roll.
I’m beginning to think that the fat roll situation is not caused by the Clack, or by my general incompetence, but by a poorly rolled batched of Fomapan. What I will do at some stage is try a different kind of film in the camera, I think the Clack and Lomochrome Turquoise would get on very well, but in the meantime I will just have to put up with it.
So my plan to make a trichrome of the street art was a bit of a bust, which is a shame since in the morning light the rose is a lovely shade of red. I did take another trichrome of a long abandoned house (one of my favourite subjects in Oiã), which was much more successful.
On the two remaining frames I experimented with multiple exposures, which was a complete failure and I haven’t bothered with that one, and the Vortoscope. If you are not familiar with the Vortoscope it’s like an open kaleidoscope; three mirrors fixed together in a triangle shape. Originally developed at the beginning of the 20th century, the Vortoscope shatters its subjects into a myriad pieces.
I chose a black and white garage door, that I also used with the Gameboy, and again the results were spectacular. One month I am certainly going to devote the whole roll to Vortoscope imagery.
#Agfa #AgfaClack #Camera #Clack #Film #Filmisnotdead #Fomapan #FrugalFilmProject #Retro #Shootfilmbenice #Trichrome #Vortoscope
Auswahl getroffen.📸🎞 + mein Liebling die Olympus XA 🥰 #camera #analog #120mmfilm #110mm #agfaclack #photography #agfamatic #pocket
