The Easiest Way to Build Your First Dipole Antenna: A Beginner’s Guide for Future Ham Radio Operators
1,938 words, 10 minutes read time.
If you’re dreaming of getting your amateur radio license someday, one of the most rewarding and practical steps you can take right now is building your very first dipole antenna. This simple yet effective antenna is a staple in the ham radio world and serves as the perfect introduction to understanding how antennas work. But don’t worry—this guide isn’t about the license exam itself. Instead, it’s designed to help you get hands-on experience with something that will become the backbone of your radio setup. Building a dipole antenna will deepen your knowledge, boost your confidence, and get you closer to speaking on the airwaves.
What Exactly Is a Dipole Antenna, and Why Should You Care?
At its core, a dipole antenna is one of the simplest types of antennas you can build and use. It’s essentially two equal lengths of wire stretched out in a straight line, with the radio feed line connected at the center. The magic of the dipole lies in its balanced design, which efficiently radiates radio signals when the length of the wires matches the wavelength of the frequency you want to use.
One of the reasons it’s the go-to antenna for beginners is its straightforward construction and the fact that it doesn’t require expensive or complicated equipment to get started. The American Radio Relay League describes the dipole antenna as the foundation of many ham stations, prized for its simplicity and effectiveness.
Not only is it a practical tool for transmitting and receiving signals, but it’s also a fantastic educational project. By building your own dipole, you’re diving headfirst into the physics of radio waves, antenna resonance, and impedance matching—all key concepts that will serve you well as you advance in amateur radio.
Why Build Your Own Dipole? The Benefits Are Bigger Than You Think
You might be wondering: why build when you can just buy an antenna? There are several good reasons to roll up your sleeves and make your own. First, building a dipole antenna is incredibly cost-effective. You only need basic materials like wire, a center insulator, and some coax cable, which means you can build a quality antenna for under $20 in most cases. This is a huge advantage when you’re just starting out and might be on a tight budget.
Second, nothing beats the satisfaction of operating a radio system with an antenna you built yourself. This hands-on experience builds confidence and helps demystify the technical side of amateur radio. It’s one thing to study antenna theory in a book, but it’s another to measure, cut, and test your own antenna and see it work in real time.
Finally, constructing your own dipole antenna allows you to tailor it exactly to your needs. Whether you want to build an antenna for 40 meters, 20 meters, or any other band, you have complete control over the design. Plus, you gain valuable troubleshooting skills that will make maintaining and optimizing your station easier down the road.
Gathering What You Need: Simple Materials for a Simple Antenna
Building a dipole antenna doesn’t require a trip to a specialty electronics store or a massive investment in tools. The materials list is short and straightforward, and most of these items are easy to find.
You’ll need a length of insulated wire for the antenna elements. Copper wire is common because it’s a great conductor, but aluminum or other metals can also work. The wire should be sturdy enough to hold its shape when stretched out, yet flexible enough to handle some bending during installation.
At the center of your dipole, you’ll need a feed point where the coaxial cable from your radio connects to the antenna wires. This is often done using a center insulator or a small piece of non-conductive material like plastic or wood to keep the two sides of the antenna separated while securing the connection points.
Coaxial cable is used as the feed line to carry the radio frequency energy from your transmitter or receiver to the antenna. RG-58 or RG-8X coax are common choices for dipoles because they’re affordable and have acceptable loss characteristics at HF frequencies.
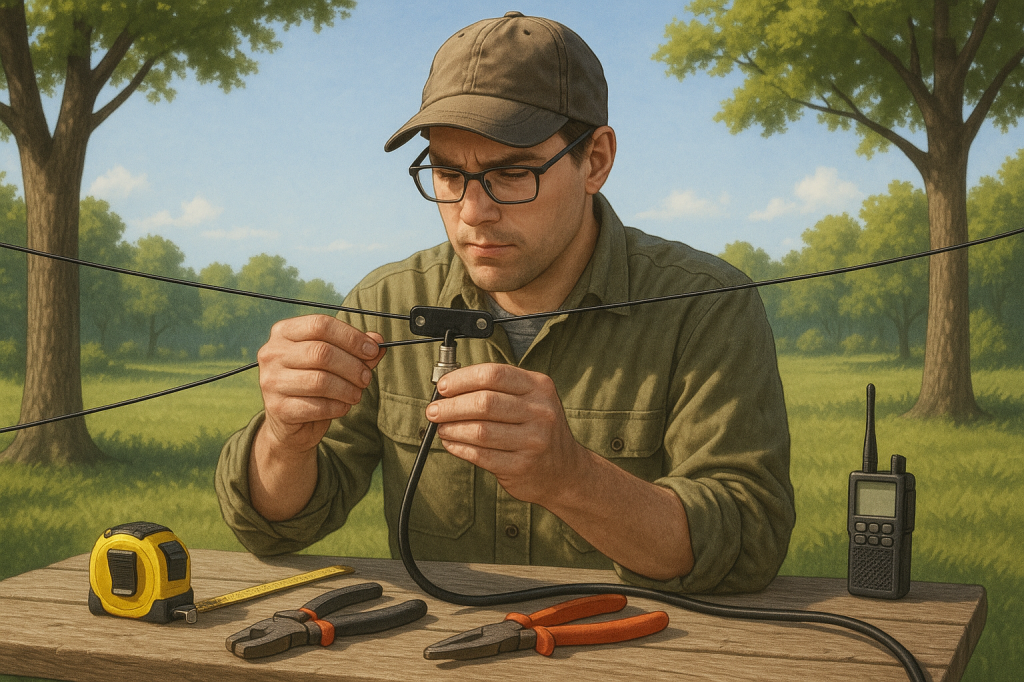
You might also want some rope or wire to hang your antenna from trees, poles, or your roof, and basic tools like wire cutters, pliers, and a tape measure. While optional, an antenna analyzer or SWR (Standing Wave Ratio) meter can be invaluable in testing and tuning your antenna once it’s up.
Getting the Length Right: How to Calculate Your Dipole’s Size
One of the most critical steps in building a dipole is calculating the correct length of your antenna elements. The performance of your antenna depends heavily on this because the wires need to resonate at the frequency you want to use.
A simple and widely used formula to find the total length of a half-wave dipole in feet is:
Length (feet) = 468 / Frequency (MHz)
For example, if you want to build a dipole for the 40-meter amateur band, which centers around 7.1 MHz, you would calculate:
468 ÷ 7.1 = approximately 65.9 feet total length.
This total length is then split into two equal halves, so each leg of the dipole would be about 32.95 feet.
It’s worth noting that this formula is a practical approximation, and factors such as wire thickness, height above ground, and nearby objects can slightly affect the antenna’s resonant frequency. For beginners, the formula is accurate enough to get you on the air, and any small tuning can be done after installation.
If you prefer metric units, a similar formula applies:
Length (meters) = 143 / Frequency (MHz)
This formula helps you plan your build based on your local preferences.
Step-by-Step: How to Build Your Dipole Antenna
Once you have your materials and have done the calculations, the building process itself is straightforward but rewarding. Start by cutting two equal lengths of wire according to your calculations.
At the center, attach the two wire ends to your feed point. This can be done by soldering or using mechanical connectors to ensure a solid electrical connection. Then, connect the coax shield (outer conductor) to one wire and the coax center conductor to the other. The center insulator keeps the two wires electrically isolated but physically connected at the center.
After your feed point is ready, you’ll need to insulate and secure the ends of the antenna wires to prevent movement and corrosion. Using end insulators, available at ham radio shops or made from durable plastic or wood, helps keep the antenna stretched and supports the weight.
Next, choose your mounting points. Many amateur operators prefer to hang the antenna horizontally between two trees or poles, about 20 to 30 feet above ground if possible. This height provides a good balance of radiation efficiency and accessibility. If you don’t have space for a horizontal dipole, an inverted V configuration—where the center is high and the ends slope down—is a good alternative that uses less horizontal space.
Secure the antenna firmly but allow some slack in the supporting ropes to avoid stress during wind or weather changes. Weatherproof your connections with electrical tape or shrink tubing for durability.
Testing Your Antenna: How to Know It Works
Once installed, it’s important to test your antenna to ensure it’s functioning correctly. The easiest method is to check continuity with a simple multimeter to make sure there are no breaks in the wire.
Using an SWR meter, you can measure how well the antenna is matched to your transmitter. A low SWR (close to 1:1) means most of your radio energy is being transmitted and not reflected back, which protects your equipment and improves performance. If you don’t have an SWR meter, an antenna analyzer is even better, giving detailed information about resonance and impedance.
You can also simply tune your radio to the target frequency and listen for signals or try transmitting at low power to see how well your antenna performs. The first contacts you make will be a thrilling confirmation of your efforts.
Optimizing Your Dipole for Better Performance
Even a simple dipole benefits from some thoughtful placement and tuning. Height is crucial; the higher your antenna, the better your signal can travel, especially on lower HF bands. Orientation matters too—generally, dipoles radiate best broadside (perpendicular) to the wire, so positioning it toward areas where you want to make contacts can help.
Avoid running your antenna too close to metal objects, power lines, or buildings, which can distort the radiation pattern or cause interference. Using insulating supports and ensuring your feed line runs straight down from the center reduces unwanted coupling and losses.
If your SWR reading is high, you can trim the antenna wires slightly to bring the resonance closer to your desired frequency. Start by shortening each leg in small increments, testing after each change.
Common Pitfalls to Dodge
While building a dipole is straightforward, beginners often stumble on a few key points. One frequent mistake is not isolating the two antenna wires properly at the center feed point, which can cause shorts and prevent the antenna from working.
Using poor-quality or excessively thin wire can lead to breakage or poor conductivity, and improper feed line connections can introduce losses or damage your radio.
Another common issue is neglecting to test the antenna before final installation. Taking the time to verify continuity and SWR early saves frustration later.
Finally, placing your antenna too low or too close to obstructions limits its effectiveness. Planning your installation carefully will pay off in better signals and more successful contacts.
How Building Your Dipole Antenna Sets You Up for Success
Building a simple dipole antenna is more than just a project—it’s a foundational experience that prepares you for a lifetime in amateur radio. You’ll gain practical skills that make licensing and future station upgrades less intimidating. Understanding antenna fundamentals through your own build lets you troubleshoot problems, experiment with different designs, and ultimately communicate more effectively.
As one experienced ham radio operator puts it, there is no substitute for hands-on experience. Building and tuning your own antenna is the fastest way to learn and the best way to really understand how radio works.
Final Thoughts and Next Steps
Getting your hands dirty by building your first dipole antenna is a fantastic step toward your amateur radio goals. It’s affordable, educational, and incredibly satisfying. Whether you’re aiming to get your license tomorrow or next year, this experience will serve you well.
If you found this guide helpful, we’d love for you to stay connected. Subscribe to our newsletter for more beginner-friendly ham radio tips and projects. And don’t be shy—join the conversation below by leaving a comment with your questions, experiences, or photos of your own dipole antenna builds. Let’s learn and grow together on this exciting journey!
D. Bryan King
Sources
- ARRL – What is a Dipole Antenna?
- eHam – How to Build a Simple Dipole Antenna
- Ham Universe – Dipole Antenna Basics
- KB6NU – Simple Dipole Antenna Build Guide
- Radio World – Build a Basic Dipole Antenna
- WB0ZRL – Dipole Antenna Construction
- Electronics Notes – Dipole Antenna Basics
- Giangi Radioworld – Dipole Antenna Explained
- QRZ.com – Simple Dipole Antenna Guide
- Instructables – Build a Basic Dipole Antenna
- KB6NU – Ham Radio Antennas for Beginners
- Electronics Tutorials – Dipole Antenna
- VA3IUL – Dipole Antenna How-To
- All About Circuits – Dipole Antennas Explained
- YouTube – How to Build a Simple Dipole Antenna
Disclaimer:
The views and opinions expressed in this post are solely those of the author. The information provided is based on personal research, experience, and understanding of the subject matter at the time of writing. Readers should consult relevant experts or authorities for specific guidance related to their unique situations.
Related Posts
- Master the Art of DIY Antenna Building: Essential Tips and Tricks for Beginners Date January 15, 2025
- Unlocking the Power of Communication: Understanding the Importance of Antennas in Amateur Radio Date March 19, 2025
- Baluns & Ununs: The Unsung Heroes of Antenna Building and Signal Matching Date December 18, 2024
#affordableHamAntenna #amateurRadioAntenna #AmateurRadioBasics #amateurRadioStationSetup #antennaAnalyzer #antennaBuildingGuide #antennaConstruction #antennaInstallation #antennaMaintenance #antennaOptimization #antennaResonance #antennaSafety #antennaTesting #antennaTheory #antennaTroubleshooting #antennaTuning #beginnerHamRadioProject #bestAntennaForHamRadio #buildDipoleAntenna #buildingAntennaAtHome #coaxialCableAntenna #dipoleAntenna #dipoleAntennaDesign #dipoleAntennaFeeding #dipoleAntennaLengthCalculation #dipoleAntennaMaterials #dipoleAntennaPlans #dipoleAntennaSetup #dipoleAntennaTutorial #dipoleVsVerticalAntenna #diyAntennaProject #diyHamRadioAntenna #halfWaveDipole #hamRadioAntenna #hamRadioBeginners #hamRadioCommunity #hamRadioEquipment #hamRadioLearning #hamRadioProjectIdeas #hamRadioTips #hfAntenna #hfDipoleAntenna #howToBuildDipole #radioAntennaForBeginners #radioWaveAntenna #simpleDipoleBuild #swrMeterUse #wireAntenna