New post 🗝️
Okay, here's the markdown version of your comprehensive guide to setting up SSH keys, formatted for readability.
https://www.mitim.net/2025/05/ssh-key-creation-and-usage?g=5
#SSH #Hardening #SSHkeys #CyberSecurity
#sshkeys

🚀✨ Breaking news for the 2050s: SSH keys don't scale, and guess what? SSH certificates do! 🎉 Apparently, the world is just waking up to this groundbreaking revelation—only took a few decades. 🙄🔑🔐
https://infisical.com/blog/ssh-keys-dont-scale #SSHkeys #SSHcertificates #Cybersecurity #TechNews #Innovation #HackerNews #ngated
🔐 Simplify your SSH workflow on KDE Plasma!
Learn how to use KDE Wallet and ksshaskpass for secure, seamless key management.
Read more on Medium: https://blog.schoenwald.aero/streamline-your-ssh-workflow-with-kde-plasmas-wallet-and-ksshaskpass-e22f49b6a07a
Suggestions for improvement are welcome, let's discuss!
#Linux #KDEPlasma #OpenSSH #SSHKeys #TechTips
Want to manage your deployments securely with DeployHQ? Learn how to create SSH keys from the command line using 5 different algorithms and configurations.
#SSHKeys #DeployHQ #Security #DevOps #ServerManagement
While Linux is generally more secure than other operating systems, it is not immune to threats. This lesson covers essential security practices, including the role of antivirus and antimalware solutions.
#linux #LinuxSecurity #CyberSecurity #Antivirus #Antimalware #LinuxServerProtection #LinuxDesktop #CyberProtection #TechSavvy #FirewallConfiguration #IntrusionDetection #RealTimeScanning #SSHKeys #StrongPasswords #RegularUpdates #LinuxSafety #SecureLinux
https://linuxexpert.org/how-to-protect-a-linux-server-or-desktop/
Vorhaben: Rechner neu installieren und dabei alles dokumentieren.
Eine Sache, die mir bzgl. #SSH unklar ist: Kann ich mein .ssh-Verzeichnis der alten Installation auf die neue Installation übertragen und mit den schon vorhandenen #SSHKeys immer noch ne Verbindung zu meinem #PiHole herstellen?
Oder MUSS ich mir definitiv neue Keys erstellen? 🤔
:BoostOK: #FollowerPower
Hackers use malicious npm packages on GitHub to steal SSH keys. Stay cautious! #cybersecurity #npmsecurity #SSHkeys
Managing SSH Keys on Reclaim Hosting
https://archive.reclaim.tv/videos/watch/af743844-4b70-4383-b4c7-4a08d7ab6594
Der neue #Cybersecurity Digest von HiSolutions ist da! Topthema des Monats:
👉 Wenn die Sicherheitsappliance die Lücke ist
Weitere Themen:
👉 Wenn der Sicherheitsmitarbeiter die Lücke ist
👉 Datenaustauschplattform mit unerwünschten Nebenfunktionen
👉 Trojanisierte #sshkeys
👉 Eine Sicherheitslücke ausnutzen, um eine Sicherheitsfunktion umzusetzen
Jetzt lesen ▶️ https://www.hisolutions.com/detail/digest-juni-2023
🇵🇱 Nowy wpis na blogu! / 🇬🇧 New blog post!
YunoHost – backup [ENG 🇬🇧]
#archivist #backup #borgbackup #cron #crontab #linux #nano #opensource #restic #scp #selfhosted #ssh #sshkeys #vps #yunohost
Autor: @to3k@tomaszdunia.pl
🇵🇱 Nowy wpis na blogu! / 🇬🇧 New blog post!
YunoHost – kopia zapasowa
#archivist #automatyzacja #backup #borgbackup #cron #crontab #kluczessh #kopiazapasowa #linux #nano #opensource #restic #scp #selfhosted #ssh #sshkeys #vps #yunohost #zadaniacron
Autor: @to3k@tomaszdunia.pl
YunoHost – self-hosting in a friendly form [ENG 🇬🇧]
🇵🇱 Przejdź do polskiej wersji tego wpisu / Go to polish version of this post
In my previous post, I described how to get free access to a pretty good VPS – Oracle Cloud Free Tier. Today, I’ll present one of my proposals for what can be done with it, specifically showing how to turn such a server into a center for running self-hosted solutions in a simple way. We will install on it a tool, or rather a system, called YunoHost, which is used to run services and stands out for its very user-friendly graphical interface that allows even non-technical people to dive into the world of self-hosting. YunoHost is open-source software that, under a clear visual layout, has very well-written code that takes care of the proper technical configuration and security of the services that will be run on it.
EDIT: One of the readers rightly pointed out that not everyone wants to install YunoHost in the Oracle cloud and are here to learn how to do it, for example, on a machine that already has the Debian operating system installed. I recommend these people skip straight to the YunoHost Installation section.
Preparation
As I mentioned in the introduction, in the further part of this post, we will need a server in Oracle Cloud, which I wrote about in the post Free VPS with 4 OCPU, 24GB RAM and 200GB disk. Writing this tutorial, I assume that you, dear Reader, have already created an account on Oracle Cloud, launched an instance on it as I described, opened ports 80 and 443, enabled IPv6 support, and know how to connect via SSH. As always, I recommend using the convenient and free (for what we need) tool Termius.
Meeting the above conditions, we can get to work!
Installing Debian on the Oracle instance
If your created instance is 100% as I described, it means that you have installed the Ubuntu system on it. YunoHost only works on Debian, which is not on the list of available systems from Oracle. It’s not a big problem, just an additional step to convert our Ubuntu to Debian. We will use a ready-made script available on GitHub at this link.
UPDATE 2023-11-05: I have determined that it is important to add in this place that the above script will not work on every VPS! It works correctly on Oracle, but there has been a case where a remote server (not on Oracle) was completely killed using this script (the server did not recover after a restart, and it had to be rebuilt from scratch). Please keep this in mind.
Let’s connect to our VPS via SSH. Then let’s download the aforementioned script:
curl -fLO https://raw.githubusercontent.com/bohanyang/debi/master/debi.shLet’s give it permissions to execute:
chmod a+rx debi.shNow we need to perform an important step that is necessary for the proper execution of later actions. We need to share our SSH public key, which we use to log in to this server, and which will be able to be downloaded and used by the installer. We need to provide the installer with the key that will be placed on the newly installed Debian system. Without this, after completing the installation and conversion from Ubuntu to Debian, we would lose access to our server! There are many ways to do this, but I will present one that requires only an account on GitHub.
Instructions on how to add an SSH public key to your server on GitHub:
- If you don’t have an account on GitHub yet, you need to create one.
- After logging in, click on your avatar in the upper right corner and select Settings from the dropdown menu.
- In the Access section on the left, select SSH and GPG keys, and then on the right, click the green New SSH key button.
- In the window that appears, enter any name you want to identify this key in the Title field, leave Authentication Key as the Key type, and in the Key text field, enter your public SSH key.
- Important: Make sure to upload your public, NOT private key! The public key can be openly shared with anyone on the internet and poses no security risk to your server. However, the private key should be kept confidential and never shared anywhere, as it is the key that provides access to your server.
- Confirm by clicking the green Add SSH key button.
For clarity, I am presenting below the format of a sample public key:
ssh-rsa AAAAB3NzaC1yc2EAAAADAQABAAAAgQCvYkO7T45XKg95Jhj69xvzO+E74hdzO+KTeNLOsA2RwzAEeKkZCLGT1l3tWNZ57BuK0Umt5qbHOye/gTOAsY+kekIsyN27bzTlKx4O7GfmYIYNsByX0nj76JBCfcxazUwLCxIu6TC8Q+/1KGpwqfBV8rwLD0MEbFVm5ruSaEFDWw== blogtomaszduniaThe SSH key that has been shared will be available at:
https://github.com/<Your_GitHub_login>.keys
Now that we have shared our public SSH key, we can proceed with the installation of Debian on our server. We run the script:
sudo ./debi.sh --version 11 --authorized-keys-url https://github.com/<Your_GitHub_login>.keysNote that you need to modify the content of this command by changing the phrase <Your_GitHub_login> to the appropriate value corresponding to your GitHub account name.
Now that everything is ready, we can start the installation by restarting the machine with the following command:
sudo shutdown -r nowWe will of course be disconnected from the server. The process may take a few minutes, so be patient if you can’t connect to it immediately. In the meantime, we will also need to change the login details for SSH, as we will now be logging in to a completely different system. The username we will log in with will change. The old user was named ubuntu, and the new one is debian.
PS: If you feel the need to do so, after completing the installation, you can remove your public SSH key from GitHub.
YunoHost Installation
Once the configuration of Debian is completed, we can connect to the server. From this moment on, the instructions are universal for any device with Debian installed. First of all, update the system and its packages:
sudo apt updatesudo apt upgrade -yThen, install the necessary components:
sudo apt install htop curl unzip tmux -yNext, we will use the tmux (Terminal Multiplexer) tool, which in short allows for creating and managing multiple virtual terminals. Start a tmux session:
tmux new -s yunoWe switch to the root account:
sudo -iWe download the YunoHost installation script and start the installation:
curl https://install.yunohost.org | bashThe installation process is simple and there is practically nothing to do during it, so I won’t describe it in detail. After it is finished, we will receive a message that further configuration will take place through the browser by going to the following address:
https://<server_ip>/
This is how we do it, meaning we open the browser, enter the appropriate address, and confirm. We should see a warning that the connection may not be secure. This is a familiar behavior of the browser, which is dictated by the fact that we do not have an SSL certificate installed for this domain. At this stage, it is not important. We click through this warning, looking for a button that says I accept the risk and want to continue or something similar, the exact wording depends on the browser you are using.
We will see the YunoHost welcome screen, which congratulates us on a successful installation and encourages us to further configure it. So we click the Start button [1]. In the main domain settings, we define the alias under which this administrative panel (and user panel) will be available, so we set up the alias that will allow us to avoid using the server’s IP address as a link to our YunoHost. There are two options: you can attach your external domain (or subdomain) here or use subdomains provided by YunoHost. They may end with:
- nohost.me
- noho.st
- ynh.fr
To avoid complications, we will use the second option, so we select the I don’t own a domain… option [2], type in the chosen character string in the Domain name text field [3], and confirm with the Next button [4]. On the next page, we create an administrator account. We fill in the fields: username [5], Full name [6], and enter the password twice [7]. We confirm with the Next button [8]. I probably don’t need to remind anyone here that the password should be strong enough as it is the only protection for our administrative panel against unauthorized access, and this whole infrastructure is available on the open Internet. Finally, we will be asked to confirm with the OK button [9]. After all this, we just have to wait for the process to finish, and we will be taken to the main control panel.
It is important that from now on, you should connect to the server using the credentials provided during the administrator account creation. Therefore, do not log in as the user debian but as the newly created user and use the new password instead of the SSH key. After the first login, it is good to return to logging in using SSH keys. I described how to do it here. It is also important to disable password authentication through the YunoHost web interface by going to (Main control panel) -> Tools -> YunoHost settings -> SSH section -> Password authentication -> change it to No, not by editing the sshd_config file as described in this post. Of course, both methods will work the same, but by editing the file from the terminal, YunoHost will later report it as an error that it has detected its modification, which can cause configuration conflicts.
Basic configuration – preparing to work
After entering the main control panel of YunoHost, I recommend that you first go to System update. The system will be immediately scanned for packages that can be updated. After scanning is completed, confirm by clicking the green Update all packages button at the bottom. After starting the first services, it will also be possible to update them from this menu. After seeing two messages – All system packages are up to date! and All programs are up to date! – return to the main panel.
Next, the place we should check is Diagnostics. It is a smart YunoHost tool whose task is to scan our configuration and check if everything is set correctly. After the scan is complete, we will see four types of markers:
- Blue – informational, presenting important information but not requiring action,
- Green – confirming that a certain parameter is set correctly,
- Yellow – indicating that something is not set correctly, but it is not a critical function,
- Red – critical, indicating that something important is set incorrectly and thus something may not work properly.
It is reasonable to address the issues marked in red first. In my case, the diagnostic tool reported a problem that I have correctly opened ports 22, 80, and 443, but opening ports 25, 587, 993, 5222, and 5269 is also required for proper operation. The other red markers were in the Email section, but we will not worry about them now because they are caused by the fact that port 25 is currently closed.
We were pointed out which ports to open, so let’s do it. I have described how to do it in Oracle Cloud quite extensively here (using the example of ports 80 and 443). The only difference is that we need to make the changes only from the Oracle interface (add appropriate Ingress Rules), because YunoHost will take care of everything from the server side. Remember to also open ports in the IPv6 addressing range. After making the changes, we run the diagnostic process again.
In my case, there were still two red markers related to mail handling. Both indicate a problem with sending mail, because despite opening port 25, it seems closed, and there is also a problem with reverse DNS. This is probably due to the fact that some cloud service providers block the ability to send mail from their offered servers, and it seems that Oracle belongs to this group. It can be bypassed by using an appropriate relay, but we will not deal with it today.
Since we have the biggest problems under control, let’s move down a level and pay attention to the yellow markers. In my case, the first problem reported in yellow was the issue of enabling the backports repositories in the package manager. Backports repositories are special repositories that contain newer software versions originally developed for newer versions of Linux distributions. They are used to provide users of older Linux distributions with access to newer software without the need to update the entire operating system to a newer version. Installing software from the backports repository can lead to instability or conflicts, so YunoHost suggests that we do not use them, and we will follow this advice and disable them from the package manager list.
First of all, let’s determine which repositories we are dealing with:
sudo grep -nr backport /etc/apt/sources.list* In response to this command, I received the following result:
/etc/apt/sources.list:10:# see https://www.debian.org/doc/manuals/debian-reference/ch02.en.html#_updates_and_backports/etc/apt/sources.list:14:# bullseye-backports, previously on backports.debian.org/etc/apt/sources.list:15:deb http://deb.debian.org/debian bullseye-backports main/etc/apt/sources.list:16:deb-src http://deb.debian.org/debian bullseye-backports mainAs we can see, the keyword backport, which we are looking for, appears four times in the file /etc/apt/sources.list in lines 10, 14, 15, and 16, of which the first two are commented out, so to speak, disabled, but without removing them from the list. We need to do the same with lines 15 and 16 of this file. So let’s go to the package manager repository list file and add the # symbol where needed:
sudo nano /etc/apt/sources.listSave the file and exit it.
For security purposes, let’s scan the system again using a diagnostic tool. In my case, it looks like no more issues were found, so the system seems ready for further actions.
Base Backup
Basic configuration completed. At this stage, it’s a good practice to make a backup of a clean system, which can be easily restored if needed. I always make such a backup, and in addition to periodic backups, I also make extra copies before launching each new service (application).
Backups are performed in the (Main control panel) -> Backup -> Local archives (local) -> green button on the right +New backup. The backup can be downloaded from the graphical web interface or from the terminal, e.g., through some automation. The backups are stored on the server under the path – /home/yunohost.backup/archives/<backup_creation_date>.tar.
What’s next?
I will talk about what can be done next using YunoHost on another occasion. The purpose of this post was only to show how to install YunoHost and I think it is a good basis for future posts, in which I will describe in more detail how to run various services in such a configured environment. The list of applications (services) that can be run using YunoHost is available here and it must be admitted that it is extensive. Some of the more interesting options include:
- code-server – self-hosted version of Visual Studio Code editor,
- Discourse – discussion forum,
- Domoticz – smart home system,
- FreshRSS – RSS aggregator,
- Gitea – source code management,
- Grafana – analytical tool,
- Home Assistant – smart home system,
- n8n – automation tool,
- Mastodon – social network,
- Nextcloud – file sharing and collaboration platform,
- Nitter – alternative front-end for Twitter,
- PeerTube – self-hosted version of YouTube,
- phpMyAdmin – MySQL database management,
- Pi-hole – DNS server,
- Pixelfed – self-hosted version of Instagram,
- Roundcube – email client,
- Transmission – torrent (P2P) client,
- Vaultwarden – self-hosted version of Bitwarden password manager,
- Wallabag – read-it-later content aggregator,
- WireGuard – VPN server,
- WordPress – blogging platform,
- WriteFreely – blogging platform like WordPress but in the Fediverse.
And these are just a few quick selections because there is a lot more and I probably missed a few truly interesting and/or unknown (to me) services. There are also a lot of interesting positions on the waitlist for implementation.
If you liked this post then you can support me! 🙂
#backports #Backup #Cloud #Debian #Firewall #FreeTier #GitHub #GUI #Linux #OpenSource #Oracle #Port22 #Port25 #Port443 #Port5222 #Port5269 #Port587 #Port80 #Port993 #SelfHosted #SSH #SSHKeys #Termius #tmux #Ubuntu #VPS #YunoHost

🇵🇱 Nowy wpis na blogu! / 🇬🇧 New blog post!
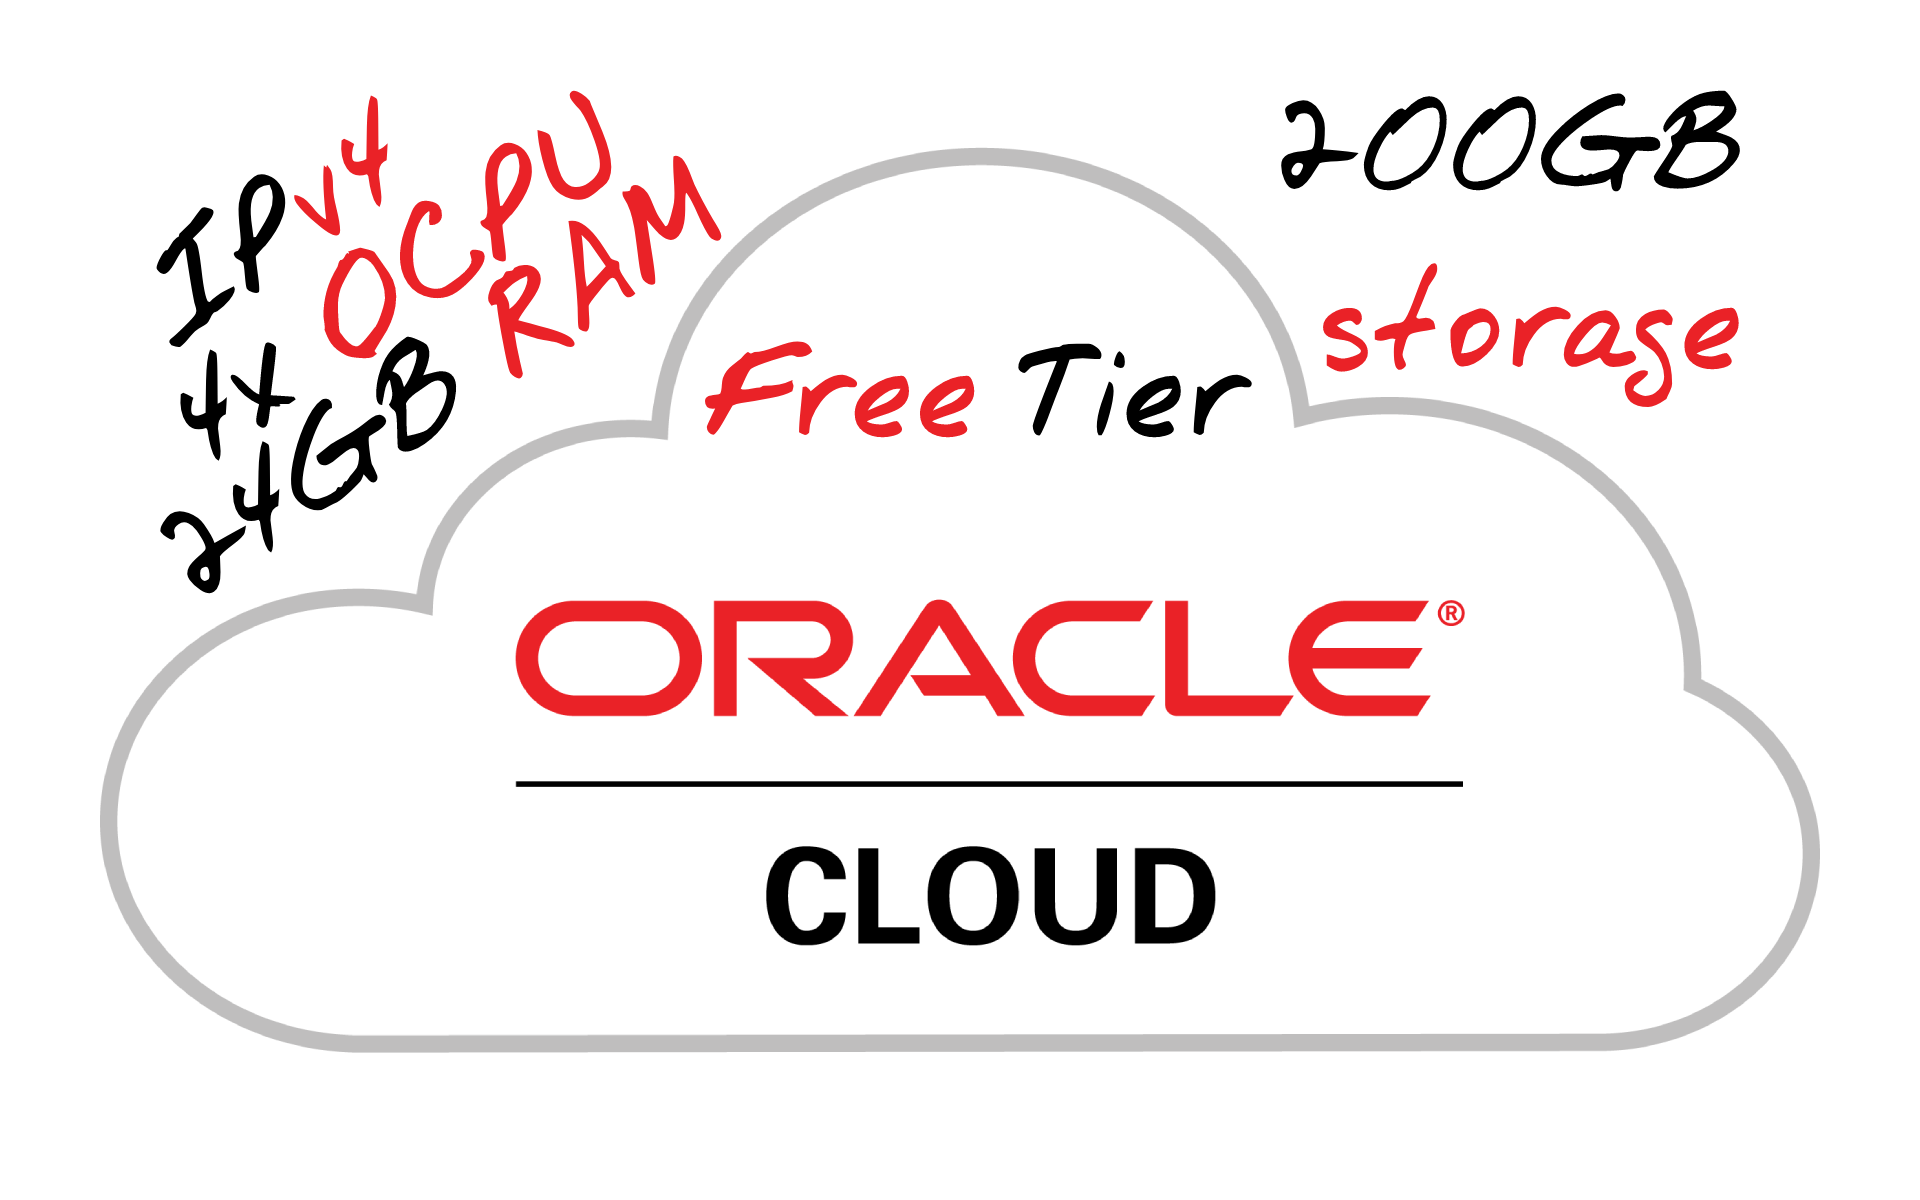
Free VPS with 4 OCPU, 24GB RAM and 200GB storage [ENG 🇬🇧]
#amd #amperea1 #arm #cloud #cpu #ddns #firewall #freetier #http #https #ocpu #oracle #port22 #port443 #port80 #ram #selfhosted #ssh #sshkeys #termius #ubuntu #vm #vps
Autor: @to3k@tomaszdunia.pl
🇵🇱 Nowy wpis na blogu! / 🇬🇧 New blog post!
Home server – basic configuration [ENG 🇬🇧]
#bash #debian #firewall #ipadonly #linux #nano #odroid #passwd #raspberrypi #script #skrypt #ssh #sshkeys #termius #ubuntu #ufw #update #upgrade
Autor: @to3k@tomaszdunia.pl
https://blog.tomaszdunia.pl/serwer-domowy-podstawowa-konfiguracja-eng/
YunoHost – self-hosting w przyjaznej formie
🇬🇧 Go to english version of this post / Przejdź do angielskiej wersji tego wpisu
W poprzednim wpisie opisałem jak uzyskać darmowy dostęp do całkiem niezłego VPSa – Oracle Cloud Free Tier. Dzisiaj przedstawię jedną z moich propozycji co można z nim dalej zrobić, a konkretnie pokażę jak, w prosty sposób, zmienić taki serwer w centrum do uruchamiania rozwiązań self-hosted. Zainstalujemy na nim narzędzie, czy może raczej system, YunoHost, które służy do uruchamiania usług, a wyróżnia się tym, że posiada bardzo przyjazny interfejs graficzny, który pozwala na zanurkowanie w świecie self-hosting’u nawet osobom niezbyt technicznym. YunoHost jest oprogramowaniem open-source, które pod przejrzystą oprawą wizualną posiada bardzo dobrze napisany kod, który sam zadba o prawidłowe skonfigurowanie od strony technicznej i bezpieczeństwo usług, które będą na nim uruchomione.
EDIT: Jeden z Czytelników słusznie zauważył, że nie wszyscy chcą instalować YunoHost w chmurze Oracle, a są tutaj, żeby dowiedzieć się jak to zrobić np. na maszynie, która już posiada zainstalowany system operacyjny Debian. Tym osobom polecam przeskoczyć od razu do rozdziału Instalacja YunoHost.
Przygotowanie
Tak jak wspomniałem we wstępie, w dalszej części tego wpisu będziemy potrzebować serwera w Oracle Cloud, o który pisałem we wpisie Darmowy VPS z 4 OCPU, 24GB RAMu i dyskiem 200GB. Pisząc ten poradnik zakładam, że masz już, drogi Czytelniku, założone konto na Oracle Cloud, uruchomiłeś na nim instancję tak jak to opisałem, otworzyłeś jej porty 80 i 443, włączyłeś obsługę IPv6 oraz umiesz się połączyć poprzez SSH. Jak zawsze polecam do tego celu skorzystać z wygodnego i darmowego (w zakresie tego co jest nam potrzebne) narzędzia Termius.
Spełniając powyższe warunki możemy przystąpić do działania!
Instalacja Debiana na instancji Oracle
Jeżeli stworzona przez Ciebie instancja jest w 100% tak jak to opisałem to znaczy, że masz na niej zainstalowany system Ubuntu. YunoHost działa jedynie na Debian’ie, którego nie ma na liście dostępnych systemów od Oracle. Nie jest to wielki problem, a jedynie dodatkowy krok do wykonania, w którym przekonwertujemy nasze Ubuntu właśnie w Debian’a. Wykorzystamy do tego gotowy skrypt dostępny na GitHub pod tym linkiem.
AKTUALIZACJA 2023-11-05: Uznałem, że istotne jest dodać w tym miejscu, że powyższy skrypt nie zadziała na każdym VPSie! Na Oracle działa jak należy, ale zdarzył mi się już przypadek całkowitego zabicia serwera zdalnego (nie na Oracle) przy użyciu tego skryptu (serwer nie wrócił do sprawności po restarcie i wymagane było postawienie go od nowa). Miejcie to proszę na uwadzę.
Połączmy się z naszym VPS poprzez SSH. Następnie pobierzmy w/w skrypt:
curl -fLO https://raw.githubusercontent.com/bohanyang/debi/master/debi.shNadajmy mu uprawnienia do uruchamiania się:
chmod a+rx debi.shTeraz musimy wykonać istotny krok, który jest niezbędny do prawidłowego wykonania późniejszych działań. Chodzi o udostępnienie swojego publicznego klucza SSH, którego używamy do logowania na tym serwerze, a który będzie mógł być pobrany i wykorzystany przez instalator. Chodzi o to, że musimy dostarczyć instalatorowi klucz, który wrzucony zostanie na nowo zainstalowany system Debian. Bez tego po zakończeniu instalacji i konwersji Ubuntu w Debiana utracilibyśmy dostęp do naszego serwera! Jest wiele sposobów aby to zrobić, ja jednak przedstawi taki, do którego będziemy potrzebowali jedynie konta na GitHub.
Instrukcja jak dodać na GitHub publiczny klucz SSH do swojego serwera:
- Jeżeli jeszcze nie masz konta na GitHub to należy je założyć.
- Następnie po zalogowaniu klikamy na nasz awatar w prawym górnym rogu i z rozwiniętej listy wybieramy Settings.
- Po lewej w sekcji Access wybieramy SSH and GPG keys po czym po prawej stronie znajdujemy zielony przycisk New SSH key i naciskamy go.
- W oknie, które wyskoczy w polu Title wpisujemy dowolną nazwę jaką ten klucz będzie się identyfikował, jako Key type zostawiamy Authentication Key, a w pole tekstowe Key wpisujemy nasz publiczny klucz SSH.
- Ważne: Upewnij się, że wrzucasz swój publiczny, a NIE prywatny, klucz! Klucz publiczny może być jawny i udostępniony dla wszystkich w Internecie i nie jest to żadne zagrożenie bezpieczeństwa dla Twojego serwera. Natomiast klucza prywatnego należy strzec jak oka w głowie i nie udostępniać go nigdzie, gdyż to właśnie on jest niezbędny do uzyskania dostępu do Twojego serwera.
- Potwierdzamy zielonym przyciskiem Add SSH key.
Dla pewności przedstawiam poniżej wygląd przykładowego klucza publicznego:
ssh-rsa AAAAB3NzaC1yc2EAAAADAQABAAAAgQCvYkO7T45XKg95Jhj69xvzO+E74hdzO+KTeNLOsA2RwzAEeKkZCLGT1l3tWNZ57BuK0Umt5qbHOye/gTOAsY+kekIsyN27bzTlKx4O7GfmYIYNsByX0nj76JBCfcxazUwLCxIu6TC8Q+/1KGpwqfBV8rwLD0MEbFVm5ruSaEFDWw== blogtomaszduniaTak udostępniony klucz SSH będzie dostępny pod adresem:
https://github.com/<Twój_login_na_GitHub>.keys
Teraz gdy już udostępniliśmy nasz publiczny klucz SSH możemy kontynuować instalację Debian’a na naszym serwerze. Uruchamiamy skrypt:
sudo ./debi.sh --version 11 --authorized-keys-url https://github.com/<Twój_login_na_GitHub>.keysZwróć uwagę, że musisz zmodyfikować treść tego polecenia zmieniając frazę <Twój_login_na_GitHub> na odpowiednią wartość odpowiadającą nazwie Twojego konta na GitHub.
Wszystko gotowe możemy rozpocząć instalację, a realizuje się to poprzez ponowne uruchomienie maszyny poleceniem:
sudo shutdown -r nowZostaniemy oczywiście rozłączeni z serwerem. Proces może potrwać nawet kilka minut, więc zachowaj spokój, jeżeli nie od razu będzie można się do niego podłączyć. W międzyczasie będziemy musieli także zmienić jeszcze dane do logowania przez SSH, gdyż teraz będziemy logowali się do zupełnie innego systemu. Zmianie ulegnie nazwa użytkownika, na którego będziemy się logować. Stary użytkownik nazywał się ubuntu, a nowy to debian.
PS: Jeżeli czujesz wewnętrzną potrzebę to po zakończeniu instalacji możesz już usunąć swój publiczny klucz SSH z GitHuba.
Instalacja YunoHost
Gdy konfiguracja Debian’a zostanie już zakończona to będziemy mogli połączyć się z serwerem. Od tego momentu instrukcja jest uniwersalna dla dowolnego urządzenia z zainstalowanym Debian’em. W pierwszej kolejności oczywiście aktualizacja systemu i jego pakietów:
sudo apt updatesudo apt upgrade -yNastępnie instalujemy niezbędne składniki:
sudo apt install htop curl unzip tmux -yDalej skorzystamy z narzędzia tmux (Terminal Multiplexer), które w skrócie pozwala na tworzenie i zarządzanie wieloma wirtualnymi terminalami. Uruchamiamy sesję tmux:
tmux new -s yunoPrzechodzimy na konto root:
sudo -iPobieramy skrypt instalacyjny YunoHost i rozpoczynamy instalację:
curl https://install.yunohost.org | bashProces instalacji jest banalny i praktycznie nic nie trzeba robić w jego trakcie, więc nie będę opisywał go szczegółowo. Po zakończeniu otrzymamy informację, że dalsza konfiguracja będzie przebiegała już z poziomu przeglądarki po wejściu na adres:
https://<ip_serwera>/
Tak też robimy, czyli otwieramy przeglądarkę, wpisujemy stosowny adres i potwierdzamy. Naszym oczom powinno pojawić się ostrzeżenie o tym, że połączenie może nie być bezpieczne. Jest to nam dobrze znane zachowanie przeglądarki, które podyktowane jest tym, że nie mamy zainstalowanego certyfikatu SSL dla tej domeny. Na tym etapie nie jest to istotne. Przeklikujemy się przez to ostrzeżenie szukając przycisku Akceptuję ryzyko i mimo to chcę kontynuować lub coś w tym stylu, dokładna treść zależy od tego jakiej przeglądarki używasz.
Naszym oczom ukaże się ekran powitalny YunoHost, który gratuluje nam pomyślnej instalacji i zachęca do dalszej konfiguracji. Naciskamy zatem przycisk Rozpocznij [1]. W ustawieniach domeny głównej definiujemy pod jakim adresem dostępny będzie ten panel administracyjny (oraz panel użytkownika), czyli ustawiamy alias, który sprawi, że nie będziemy musieli używać adresu IP serwera jako odnośnika do naszego YunoHost. Opcje są dwie: można podpiąć tutaj swoją domenę (lub subdomenę) zewnętrzną lub skorzystać z subdomen udostępnionych przez YunoHost. Mogą się one kończyć na:
- nohost.me
- noho.st
- ynh.fr
Żeby zbytnio nie komplikować sprawy skorzystamy właśnie z tego drugiego rozwiązania, a więc wybieramy opcję Nie posiadam domeny… [2], w pole tekstowe Nazwa domeny [3] wpisujemy wybrany przez nas ciąg znaków i potwierdzamy przyciskiem Dalej [4]. Na następnej stronie tworzymy konto administratora. Wypełniamy pola: nazwa użytkownika [5], Imię i nazwisko [6] i dwa razy podajemy hasło [7]. Zatwierdzamy przyciskiem Dalej [8]. Chyba nie muszę tutaj nikogo pouczać, że hasło powinno być odpowiednio mocne, bo jest ono jedynym zabezpieczeniem naszego panelu administracyjnego przed nieuprawnionym dostępem, a cała ta infrastruktura jest dostępna w otwartym Internecie. Na koniec zostaniemy jeszcze poproszeni o finalne potwierdzenie przyciskiem OK [9]. Po tym wszystkim pozostaje nam już tylko czekać na zakończenie procesu, po czym zostaniemy przeniesieni do głównego panelu sterowania.
Istotne jest to, że od teraz do serwera należy łączyć się wykorzystując poświadczenia podane podczas tworzenia konta administratora. A więc nie logujemy się na użytkownika debian tylko nowoutworzonego i wykorzystujemy nowe hasło, a nie klucz SSH. Po pierwszym logowaniu dobrze jest z powrotem wrócić do logowania się przy użyciu kluczy SSH. Jak to zrobić opisałem tutaj. Istotne jest też, aby wyłączenie możliwości uwierzytelnienia hasłem wykonać z poziomu interfejsu webowego YunoHost poprzez wejście w (Główny panel sterowania) -> Narzędzia -> Ustawienia YunoHost -> sekcja SSH -> Password authentication -> zmienić na Nie, a nie poprzez edycję pliku sshd_config tak jak to opisałem w tym wpisie. Oczywiście obie formy zadziałają tak samo, z tym że edytując plik z poziomu terminala sprawimy, że YunoHost będzie nam później zgłaszał jako błąd, iż wykrył jego modyfikację, co może powodować konflikt w konfiguracji.
Podstawowa konfiguracja – przygotowanie do pracy
Po wejściu do głównego panelu sterowania YunoHost polecam w pierwszej kolejności wejść do Aktualizacja systemu. System zostanie od razu przeskanowany w poszukiwaniu pakietów, które można zaktualizować. Po zakończeniu skanowania potwierdzamy na dole zielonym przyciskiem Aktualizuj wszystkie pakiety. Po uruchomieniu pierwszych usług to właśnie z poziomu tego menu będzie można je również zaktualizować. Po zobaczeniu dwóch komunikatów – Wszystkie pakiety systemowe są aktualne! i Wszystkie programy są aktualne! – wracamy do panelu głównego.
Następnie miejsce, w które powinniśmy zajrzeć to Diagnostyka. Jest to sprytne narzędzie YunoHost, którego zadaniem jest przeskanowanie naszej konfiguracji i sprawdzenie czy wszystko jest ustawione prawidłowo. Po zakończeniu skanowania zobaczymy cztery rodzaje markerów:
- niebieskie – informacyjne, przedstawiające pewne istotne informacje, ale nie wymagające działania,
- zielone – potwierdzające, że dany parametr jest ustawiony prawidłowo,
- żółte – wskazujące, że coś nie jest ustawione prawidłowo, ale nie jest to kluczowa funkcja,
- czerwone – krytyczne, które określają, że coś istotnego jest ustawione nieprawidłowo i tym samym coś przez to może działać nieprawidłowo.
Rozsądnym będzie zająć się w pierwszej kolejności problemami zaznaczonymi na czerwono. W moim przypadku narzędzie diagnostyczne zgłosiło problem z tym, że prawidłowo otwarte mam porty 22, 80 i 443, jednak do poprawnego działania potrzebne jest jeszcze otwarcie portów 25, 587, 993, 5222 i 5269. Pozostałe czerwone markery widniały w sekcji Email, ale nie będziemy się nimi teraz przejmować, bo są one spowodowane tym, że port 25 jest na ten moment zamknięty.
Wskazano nam palcem, które porty należy otworzyć, więc zróbmy to. To jak to zrobić w Oracle Cloud opisałem dość szczegółowo tutaj (na przykładzie portów 80 i 443). Jedyna różnica jest taka, że zmiany musimy wprowadzić jedynie od strony interfejsu Oracle (dodać odpowiednie Ingress Rules), bo od strony serwera wszystko załatwi za nas YunoHost. Pamiętaj, aby otworzyć również porty w zakresie adresacji IPv6. Po wprowadzeniu zmian zapuszczamy proces diagnostyki jeszcze raz.
W moim przypadku zostały jeszcze dwa czerwone markery związane z obsługą poczty. Oba wskazują na problem z wysyłaniem, bo pomimo otwarcia port 25 wydaje się zamknięty, a także jest problem z reverse DNS. Jest to prawdopodobnie spowodowane tym, że część dostawców usług chmurowych blokuje możliwość wysyłania poczty z oferowanych przez siebie serwerów i wygląda na to, że Oracle należy do tego grona. Da się to obejść poprzez skorzystanie z odpowiedniego przekaźnika (po ang. relay), ale nie będziemy dzisiaj się tym zajmować.
Skoro największe problemy mamy w miarę ogarnięte to zejdźmy poziom niżej i zwróćmy uwagę na żółte markery. W moim przypadku pierwszym problemem zgłaszanym na żółto był temat dopuszczenia repozytoriów backports (z ang. wsteczne porty) w menedżerze pakietów. Repozytoria backports to specjalne repozytoria, które zawierają nowsze wersje oprogramowania, które zostały pierwotnie opracowane dla nowszych wersji dystrybucji Linux’a. Są używane, aby zapewnić użytkownikom starszych wersji dystrybucji Linux’a dostęp do nowszego oprogramowania bez konieczności aktualizacji całego systemu operacyjnego do nowszej wersji. Zainstalowanie oprogramowania z repozytorium backports może prowadzić do niestabilności lub konfliktów, dlatego YunoHost podpowiada nam, aby ich nie stosować, a my posłuchamy tej rady i wyłączymy je z listy menedżera pakietów.
W pierwszej kolejności ustalmy, o które repozytoria chodzi:
sudo grep -nr backport /etc/apt/sources.list* Ja w odpowiedzi na to polecenie otrzymałem następujący wynik:
/etc/apt/sources.list:10:# see https://www.debian.org/doc/manuals/debian-reference/ch02.en.html#_updates_and_backports/etc/apt/sources.list:14:# bullseye-backports, previously on backports.debian.org/etc/apt/sources.list:15:deb http://deb.debian.org/debian bullseye-backports main/etc/apt/sources.list:16:deb-src http://deb.debian.org/debian bullseye-backports mainJak widać słowo kluczowe backport, którego szukamy występuje czterokrotnie w pliku /etc/apt/sources.list w liniach 10, 14, 15 i 16, z czego pierwsze dwie są liniami zakomentowanymi, czyli niejako wyłączonymi, ale bez usuwania ich z listy. Pozostaje nam zrobić to samo z liniami 15 i 16 tego pliku. Wejdźmy zatem do pliku z listą repozytoriów menedżera pakietów i dodajmy znak # gdzie trzeba:
sudo nano /etc/apt/sources.listPlik zapisujemy i wychodzimy z niego.
Dla pewności przeskanujmy system jeszcze raz przy użyciu narzędzia do diagnostyki. W moim przypadku wygląda na to, że nie znaleziono więcej problemów, więc system wydaje się gotowy do dalszych działań.
Bazowa kopia zapasowa
Podstawowa konfiguracja zakończona. Na tym etapie dobrą praktyką będzie zrobienie sobie kopii zapasowej czystego systemu, którą w razie czego będzie można w łatwy sposób przywrócić. Ja zawsze robię taką kopię plus poza cyklicznymi backup’ami wykonuję jeszcze dodatkowe kopie przed uruchomieniem każdej nowej usługi (aplikacji).
Kopie zapasowe wykonuje się w (Główny panel sterowania) -> Kopia -> Lokalne archiwa (local) -> zielony przycisk po prawej +Nowa kopia. Tak utworzoną kopię można pobrać z poziomu graficznego interfejsu webowego lub z poziomu terminala np. poprzez jakąś automatyzację. Kopie znajdują się na serwerze pod ścieżką – /home/yunohost.backup/archives/<data_wykonania_kopii>.tar.
Co dalej?
O tym co dalej można zrobić korzystając z YunoHost opowiem przy innej okazji. Celem tego wpisu było jedynie pokazanie jak zainstalować YunoHost i jest to, wydaje mi się, dobra baza do kolejnych wpisów, w których już bardziej szczegółowo opiszę jak uruchamiać różne usługi na tak skonfigurowanym środowisku. Katalog aplikacji (usług) jakie można uruchomić przy użyciu YunoHost jest dostępny tutaj i trzeba przyznać, że jest obszerny. Z ciekawszych pozycji wskazałbym:
- code-server – edytor kodu Virtual Studio Code w wersji self-hosted,
- Discourse – forum dyskusyjne,
- Domoticz – system do smarthome,
- FreshRSS – agregator RSS,
- Gitea – zarządzanie kodem źródłowym,
- Grafana – narzędzie analityczne,
- Home Assistant – system do smarthome,
- n8n – narzędzie do automatyzacji,
- Mastodon – sieć społecznościowa,
- Nextcloud – chmura na pliki,
- Nitter – alternatywny front-end dla Twittera,
- PeerTube – Youtube tylko self-hosted,
- phpMyAdmin – zarządzanie bazami MySQL,
- Pi-hole – serwer DNS,
- Pixelfed – Instagram tylko self-hosted,
- Roundcube – klient poczty e-mail,
- Transmission – klient torrent (P2P),
- Vaultwarden – menedżer haseł Bitwarden w wersji self-hosted,
- Wallabag – agregator trześci do przeczytanie później (po ang. read it later),
- WireGuard – serwer VPN,
- WordPress – platforma do blogowania,
- WriteFreely – platforma do blogowania jak WordPress ale w Fediverse.
I to są tylko wybrane wyrywkowo na szybko, bo jest tego dużo dużo więcej i pewnie pominąłem kilka naprawdę interesujących i/lub nieznanych mi usług. Jest też sporo ciekawych pozycji w waitlist’cie (z ang. liście oczekujących) do implementacji.
Jeżeli podobał Ci się ten wpis to możesz mnie wesprzeć! 🙂
#backports #Backup #Cloud #Debian #Firewall #FreeTier #GitHub #GUI #KluczeSSH #KopiaZapasowa #Linux #OpenSource #Oracle #Port22 #Port25 #Port443 #Port5222 #Port5269 #Port587 #Port80 #Port993 #SelfHosted #SSH #SSHKeys #Termius #tmux #Ubuntu #VPS #YunoHost
Curious if anyone has looked into using #webfinger #sshkeys and #activitypub to prevent #fediverse message spoofing? I’m not a crypto expert, and would probably need to happen server-to-server, but might it be useful?
Client Info
Server: https://mastodon.social
Version: 2025.04
Repository: https://github.com/cyevgeniy/lmst