#Milestone4 — #IonicScroll
#ModulatingSpirals https://pixelfed.social/p/Splines/792906324854792619
#ReverseEngineer #ImageScans https://pixelfed.social/p/Splines/793215298082967733
#ScrollSurface #scaffolding https://pixelfed.social/p/Splines/793597613908557570
#SecondaryCurves https://pixelfed.social/p/Splines/794105734853818690
#Sweeping with #TertiaryCurves https://pixelfed.social/p/Splines/794203007066866034
#Smoothness with #SurfaceBlend https://pixelfed.social/p/Splines/794868875707070193
Solid #Scroll https://pixelfed.social/p/Splines/795276076797088402
#Milestone3 — #IonicColumn https://pixelfed.social/p/Splines/792803978865652429
#Milestone2 — Classic #IonicEntablature https://pixelfed.social/p/Splines/791021871062069787
#Milestone1 — #IonicPedestal https://pixelfed.social/p/Splines/790752092700055739
#TertiaryCurves
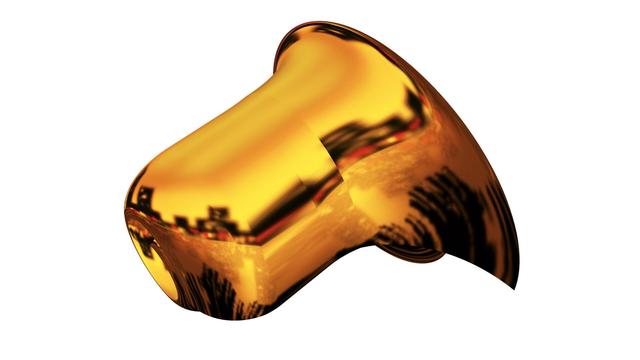
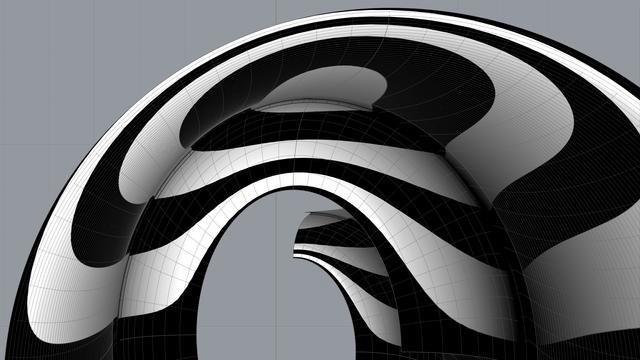
After we diligently sweep the remaining sections of the #scroll surface as described in https://pixelfed.social/p/Splines/794203007066866034, we get a complete surface ready for a quality check using a #surfaceAnalysis tool known as #environmentMapping.
Environment mapping is similar to #textureMapping that I used in https://pixelfed.social/p/Splines/790701780235593999 to give a marble look to a finished design, except that the purpose of an #environmentMap is not to create a finished design, but just to temporarily wrap an image on a surface to check it by "eye."
Here, we see the scroll surface with a polished gold environment map. For many uses, this surface is adequate. But if you are looking for perfection, you will not be able to ignore the #banding on the scroll surface, precisely at each interstitial location — There are 5 distinct bands from 6 #modulatingSpirals.
The banding is caused by our #tertiaryCurves which are #continuous over the scroll surface, but not #smooth. Mathematically speaking, the tertiary curves are not #continuouslyDifferentiable over their entire length. So, is it time for #quaternaryCurves and sweeping the scroll surface again, section by section?
There is an easier way to achieve a smooth patina on the scroll surface using #surfaceBlend. We used #curveBlend, specifically #tangencyBlend in https://pixelfed.social/p/Splines/791723063470910081 and https://pixelfed.social/p/Splines/791794072490907090, and #arcBlend in https://pixelfed.social/p/Splines/792616677005177924.
To build the scroll surface using surface blends, we keep only the front 5 sections and the rear five section intact. That is because these sections are the most definitionally rich and impart the whole surface its distinctive look.
We discard the bands immediately adjacent to the front and rear bands — ones that are 14 units and 7 units deep. Then we split the remaining middle band that is 25 units deep into 18 and 7, with the larger section biased toward the front.
Continuation of https://pixelfed.social/p/Splines/794199123072358090
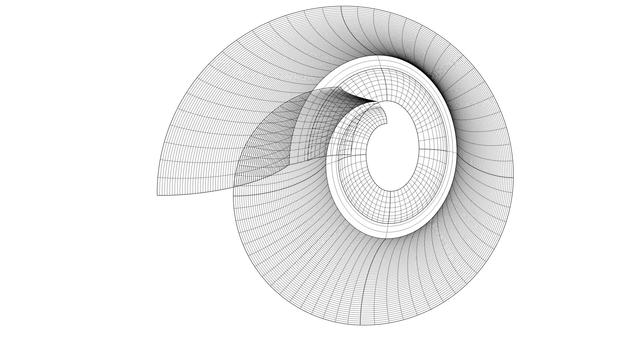
After you have rebuilt all the #spiral arcs as well as the projected #secondaryCurves into #tertiaryCurves, it is finally time to sweep the scroll surface, but remember to do it one section at a time.
Use one section of a spiral arc and the corresponding arc in the next interstitial as #railCurves. Then, #sweepTwoRails, using one section of the tertiary curves on each end of the rails.
This diagram shows 5 sections of the swept surfaces in front and 5 sections in the back.
The remaining ones will be built similarly but require further processing to make the whole surface smooth.
With the #secondaryCurves derived from #primaryCurves in https://pixelfed.social/p/Splines/794105734853818690, we are almost ready to sweep the #scroll surface. I say "almost" because there is at least one more refinement needed before we can use any of these curves.
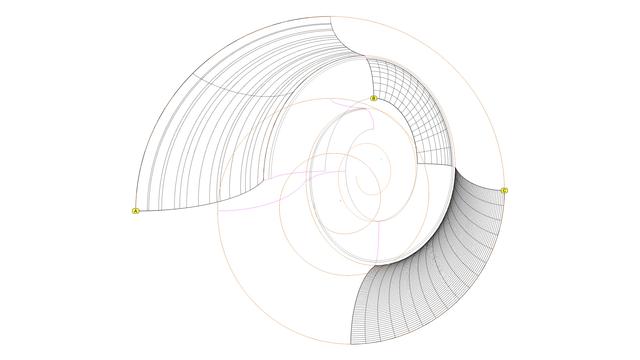
Look at the front view of three sections of the scroll surface labeled A, B, and C, and you will see a qualitative difference among them. Surface A appears crude and surface C appears refined, while surface B lies somewhere in between. While B and C are both acceptable, A is not.
The difference is due to two factors — the nature of the curves themselves and the degree of precision used.
Surface A is built using the circular arc sections for #volute #spiral (original and scaled) as #railCurves and the secondary curve sections as #sweepingCurves. The nature of the two sets of curves is different. Straight lines are 1st-degree curves, #circular or #conic sections (including ellipse) are 2nd-degree curves, but the projected sweeping curves (secondary curves) are 3rd-degree #NURBS curves.
Sweeping 3rd-degree NURBS curves along 2nd-degree arcs does not produce a salubrious effect. So we #rebuild the arcs into a 3rd-degree curve using the #CAD tool. When we do that, we are able to control how close the rebuilt curve should be to the original arcs in terms of precision.
I rebuilt each arc in the spirals using 16 subsections, and the effect is visible in surface C.
Look at surface A again. The cross-section arcs appear unevenly spaced compared to those of the other surface sections. To fix that, I also rebuilt the projected NURBS curves (secondary curves) to obtain what I call #tertiaryCurves.
For the frontmost sections, I rebuilt the sweeping curves using 64 subsections, and for the rear sections, I rebuilt them with 8 subsections.
Experiment with what produces pleasing results, but remember that higher precision curves require more processing time as well as more storage space.
The classic #IonicScroll is the most complex of all components in the #IonicOrder mainly because it is poorly documented, if at all, and even poorly understood. It is as if the classical architects deliberately concealed its enigmatic design secrets within the confines of a smooth elegant shell that could only be revealed after intense study and analysis.
I got this impression because I spent years searching for credible and actionable documentation on how to recreate this beautiful design in a #CAD tool. In the Age of Internet and Social Media, my web searches always disappointed me because the results lacked something vital in one respect or another. Over the years, I created hundreds of versions of the scroll that looked so perfect and pleasing that I thought I had cracked it, only to find some flaw or another in my work.
So, it is with caution that I present my work on the scroll in the hopes that someone will build upon this knowledge and either validate the design, or correct it and share it with me and the rest of the world.
Looking back at my progress, I'm now surprised at how remarkably simple and elegant the design is that defied familiar geometrical construction techniques I had been using until now.
As I mentioned in my introductory post, this design can be recreated by drawing simple 2-dimensional lines and circular arcs, but instead of just #primaryProfileCurves, we will use up to three additional sets of curves — #secondaryCurves, #tertiaryCurves, and #quaternaryCurves — each derived from the previous set.
I extracted the #primaryCurves after a lengthy trial-and-error process that involved #curveFitting image scans from #Vignola’s book, #RegolaArchitettura. I had to #reverseEngineer the details because the measurements have either been lost, or are locked away in some library.
Even though we start with lines and arcs, the end results are always #NURBS curves and surfaces, but everything is done by the CAD tool, and no additional math is needed.
Client Info
Server: https://mastodon.social
Version: 2025.04
Repository: https://github.com/cyevgeniy/lmst


