
#Sensor #Bosch #BME680 als #Thermometer, #Barometer, #Hygrometer und VOC-Meter nutzen
#RaspberryPi #Raspi #Pico #RP2040 #Maker #DIY #Mikrocontroller #Elecrow #LoRa #BMP280 #BME280 #AHT20 #VOC #Gase #I2C #Luftqualität #Luftdruck #Temperatur
#Sensor #Bosch #BME680 als #Thermometer, #Barometer, #Hygrometer und VOC-Meter nutzen
#RaspberryPi #Raspi #Pico #RP2040 #Maker #DIY #Mikrocontroller #Elecrow #LoRa #BMP280 #BME280 #AHT20 #VOC #Gase #I2C #Luftqualität #Luftdruck #Temperatur
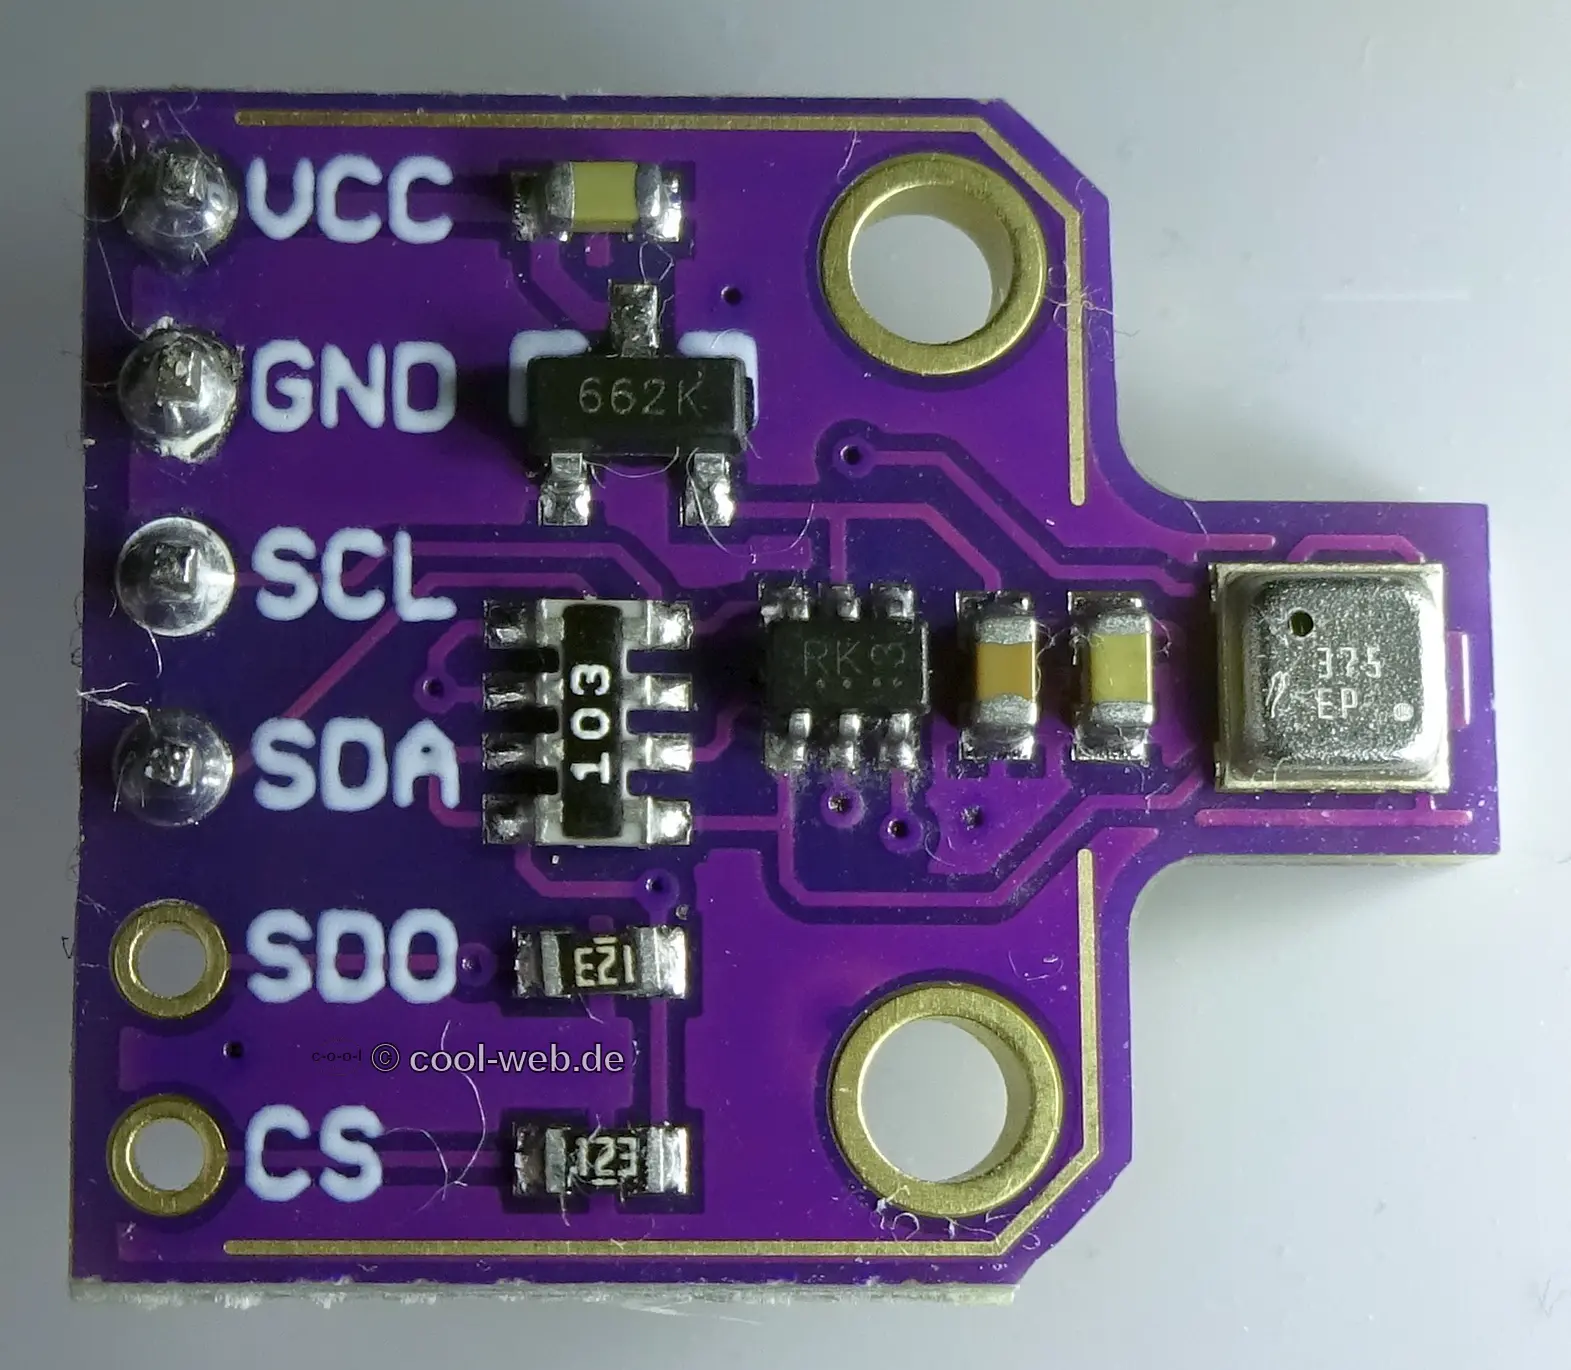
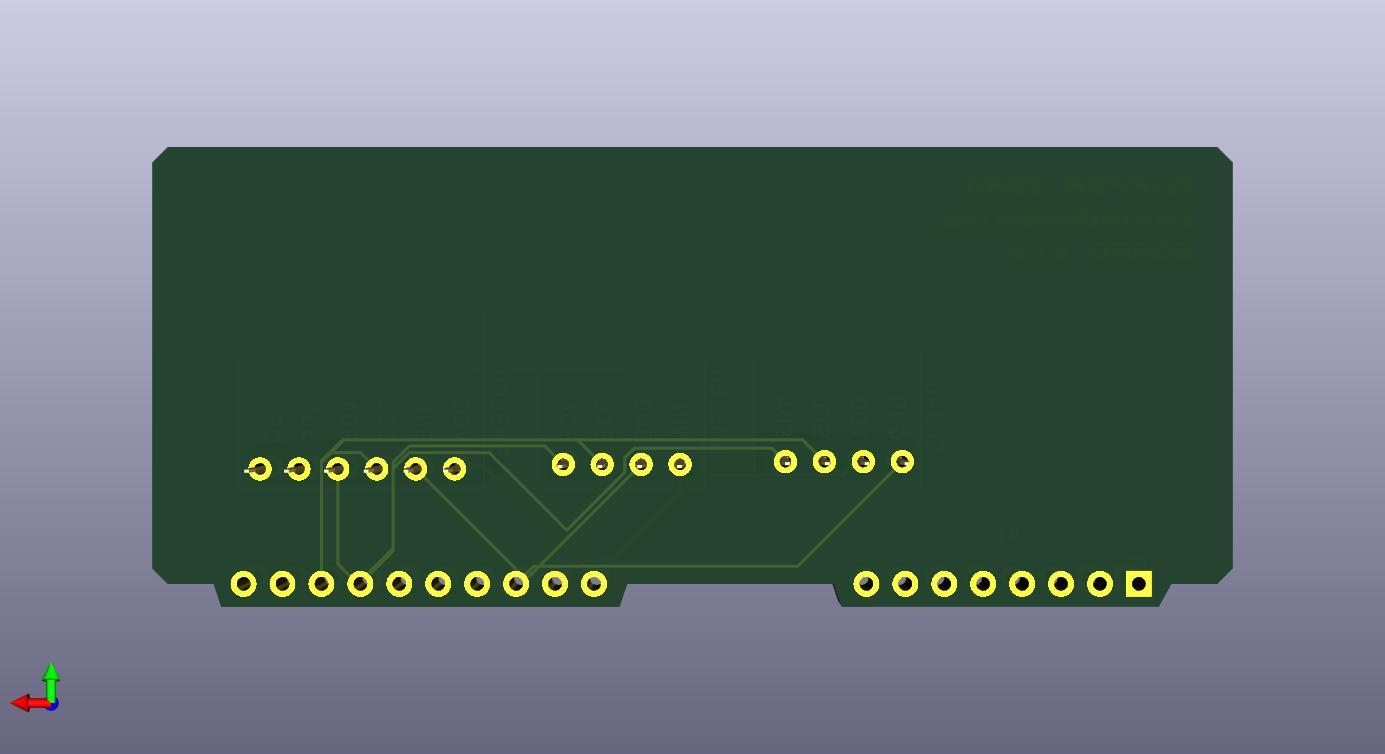
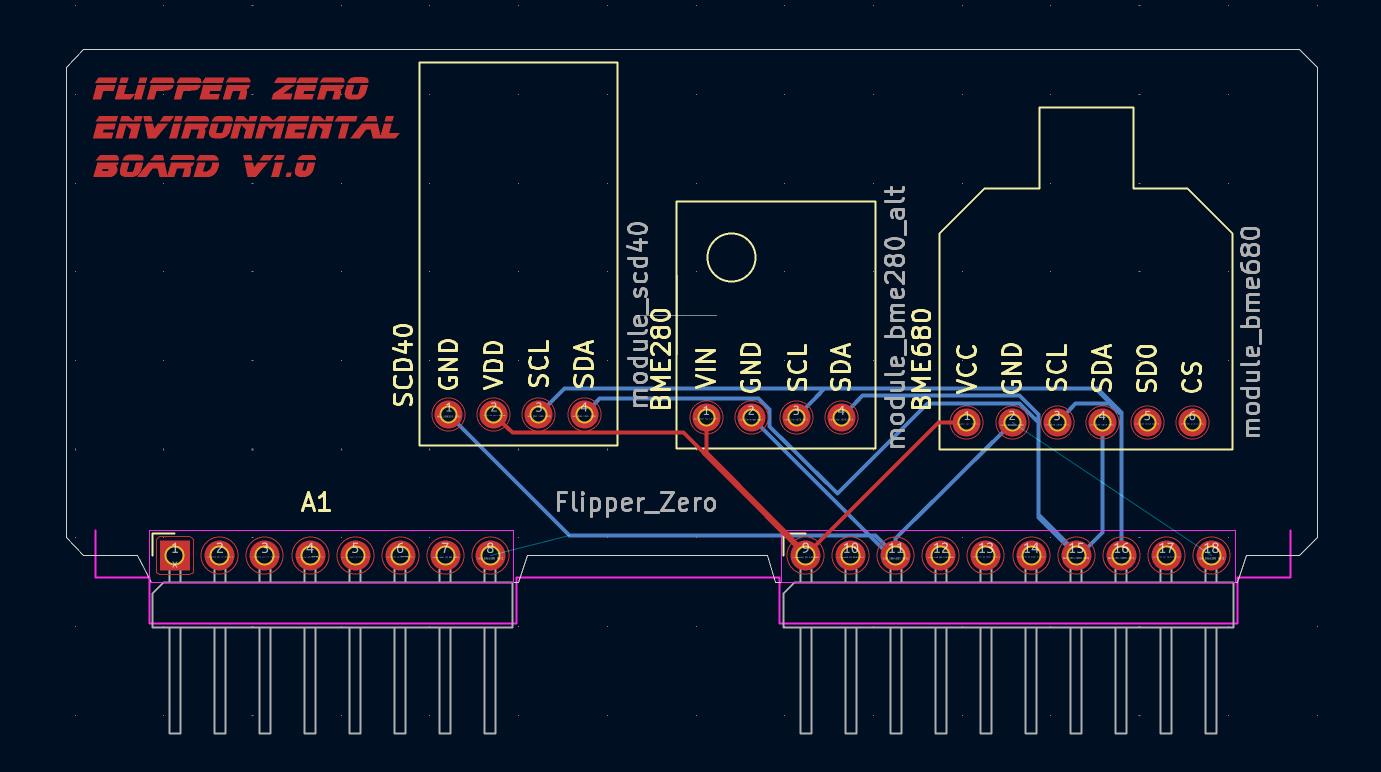
Nachdem ich heute entdeckt habe das man sich schon für ca. 7€ inkl. Porto Platinen professionell erstellen lassen kann habe ich mal KiCad ausprobiert für ein Flipper Zero Board mit meinen Sensoren.
KiCad zeigt mir noch zwei Fehler an für die 2 GND Verbindungen, die laut KiCad zu Pin 8 und 18 gehen sollen.
Die 2 Leiterbahnen sind aber korrekt mit Pin 11 verbunden.
#FlipperZero #Flipper #hardware #sensors #diy #SCD40 #BME680 #BME280 #KiCad

"Stoßlüften" (Shock ventilation) works.
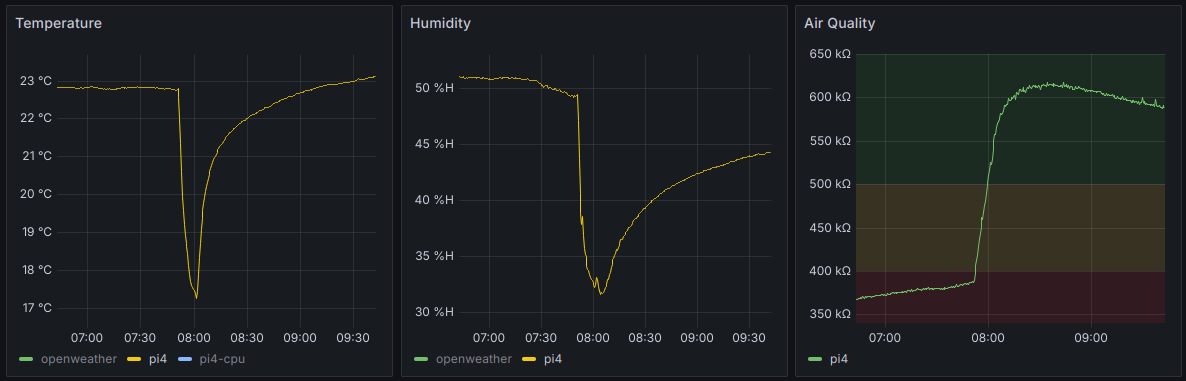
The #BME680 component seems awfully unreliable after all
Its VOC is wild, and the temperature measurements are consistently 2°C too high (compared with commercially available sensors)
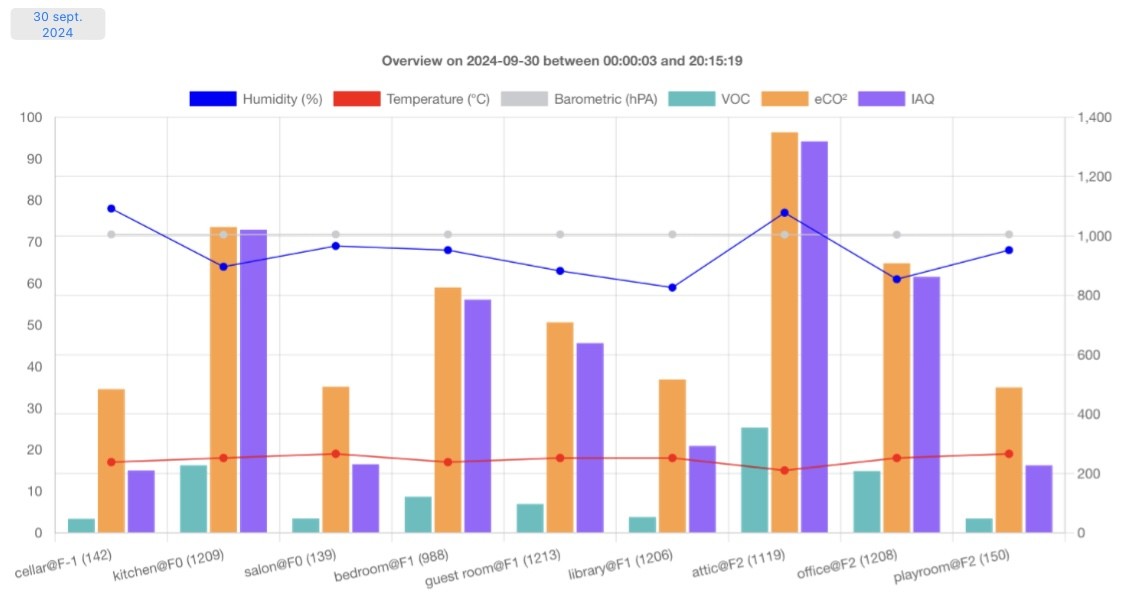
Today I soldered a few more of my custom air quality thingies, flashed them with the exact same program as the other ones, gave them a USB adapter and plugged them in their own spot in the house
They automatically found their path in the mesh, then they started sharing and recording their readings, which automatically appeared in my dashboard, and all I had to do was rename them there
In the picture, the number in the parentheses is the number of readings for the day (more or less one per minute) and all bars and lines represent average readings for the day; I have one graph per room to get the timelines
Humidity and temperature are on the left axis, all the other are on the right axis
(Looks like the one in the bedroom crashed again)
The one in the attic is missing however long it took me to solder the new things, since that’s the one I unplugged to use as a template
This morning my ISP had an outage and I restarted their router, which happens to power my rpi0 with the web server for this project
And I forgot to restart that web server, so I lost all data from today
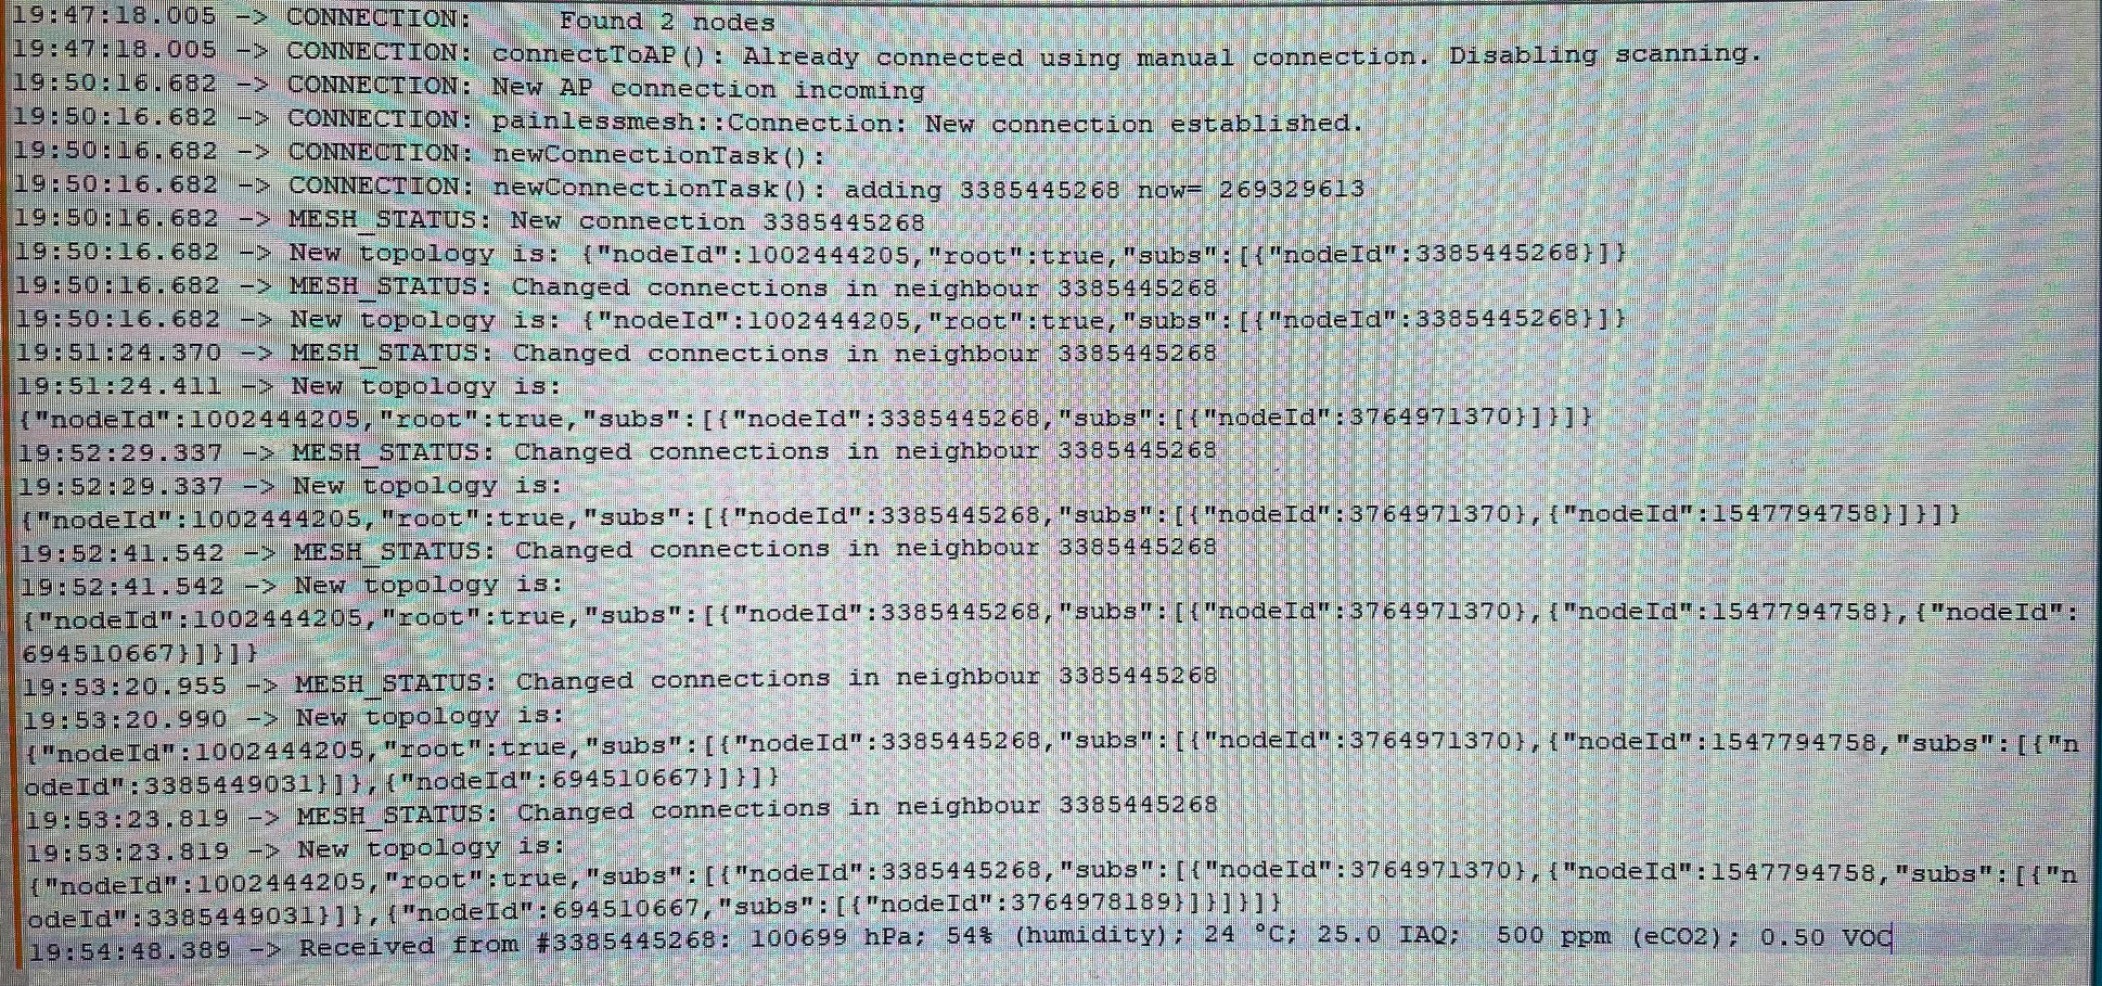
But before that, it was performing beautifully. There were 844 records for each node since last night, like clockwork. I happen to have cleared my previous data last night, so all the nodes were running and already on a stable mesh at the time.
Each sensor has been broadcasting its readings every three seconds, at which point my server decides to ignore most readings until the 1 minute mark (per sensor) and I’m happy that not one minute was lost for half a day of recording
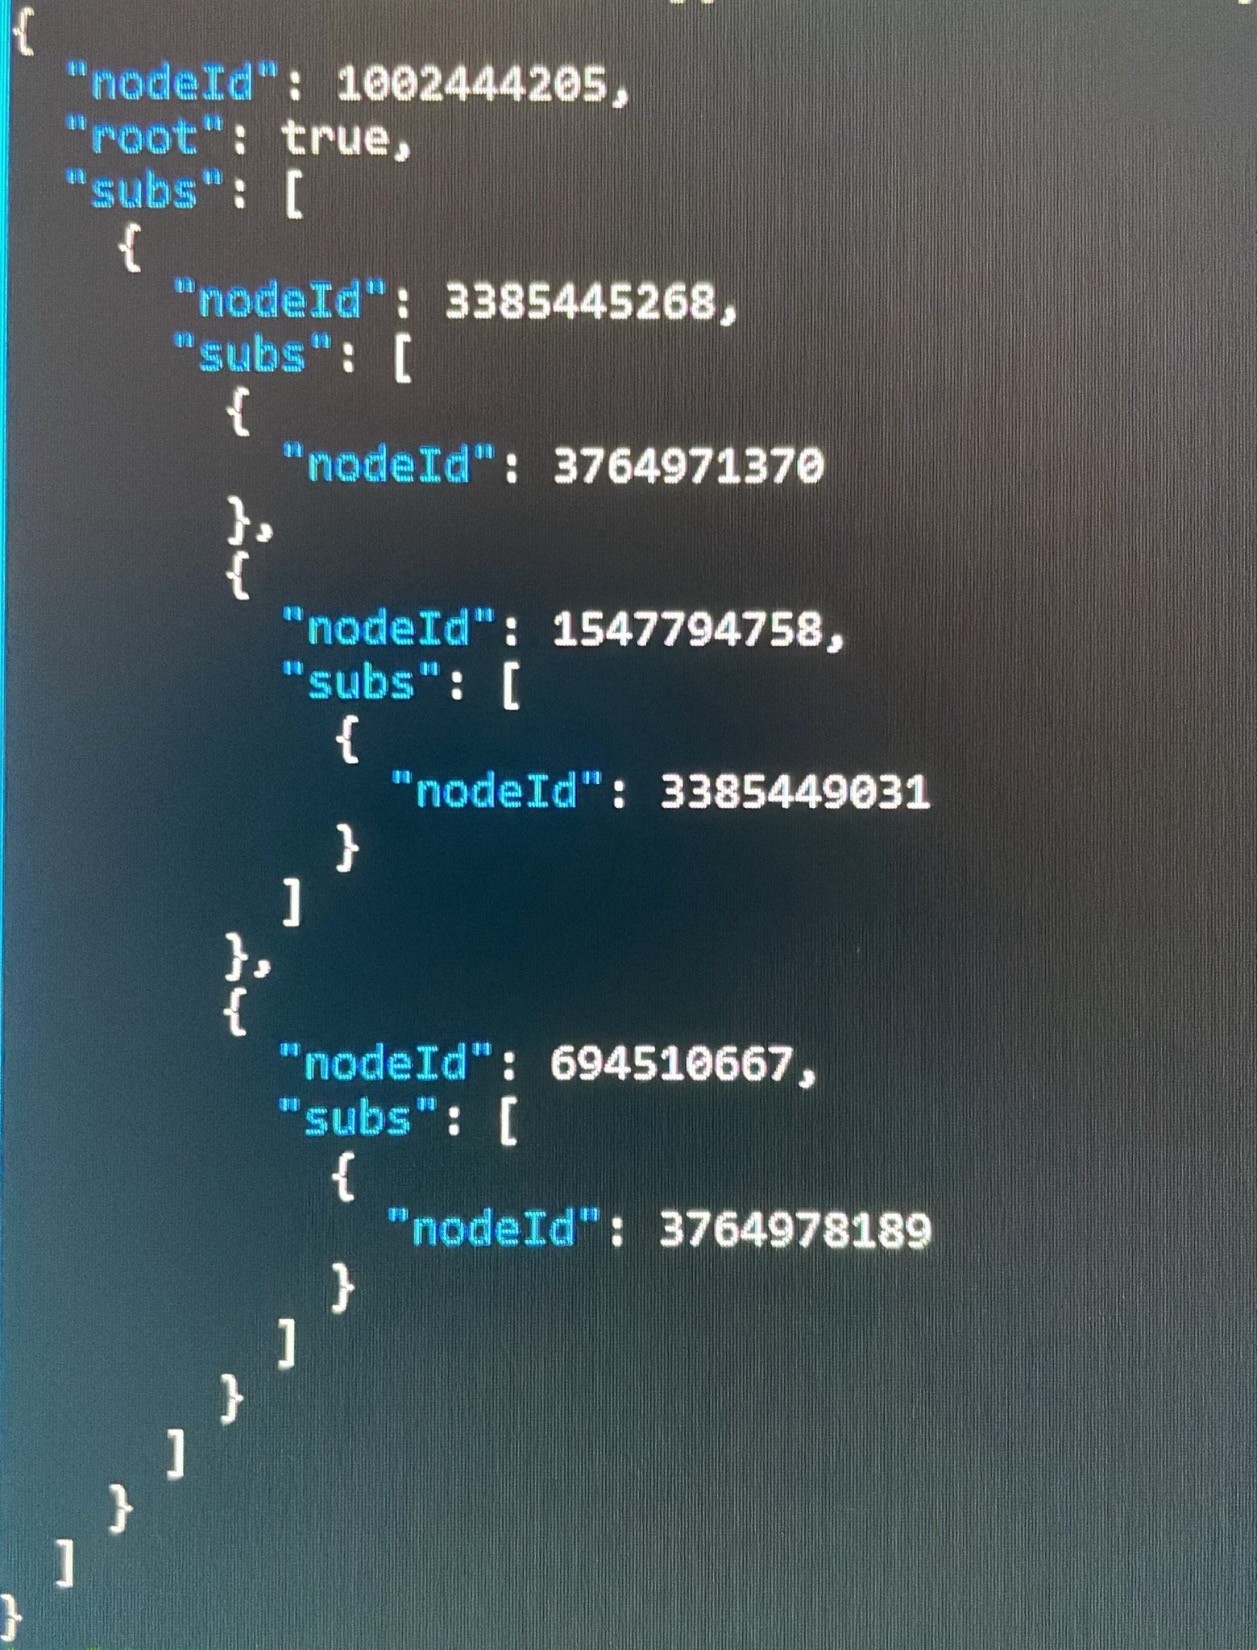
I am less happy that after the web server was restarted, none of the microcontrollers found it by themselves. It looks like the entire mesh collapsed because the root node couldn’t bridge both networks again.
I understand that the root node didn’t restart the bridge between both WiFi (I didn’t set it up that way), but I would have thought that the iot mesh should have continued independently? Perhaps because it is declared as the root node? I’ll have to test this more.
I reset the ESP32 root node and it picked up the home WiFi fine, but none of the probes connected to it again (this mesh should have self healed within minutes, at most)
I went around the house to reset each ESP8266 node and yes, that is when the mesh self organized again and I started seeing the web server collecting readings again, as their BME680 sensor finished its self calibration routine
#meshnetwork #AirQuality #esp32 #esp8266 #bme680 #raspberrypi
DIY устройство в подрозетник с датчиками окружающей среды в комнате
Я не являюсь экспертом в схемотехнике и разработке печатных плат, это был мой первый опыт в этой области, и, конечно, я ожидал, что мой путь будет долгим и тернистым. Но я был решительно настроен, так как конечный результат должен быть использован в моем доме как полноценно работающее устройство.
https://habr.com/ru/articles/841532/
#diy_умный_дом #homeassistant #esp32 #esphome #sensors #scd40 #ld2410c #bme680 #подрозетник
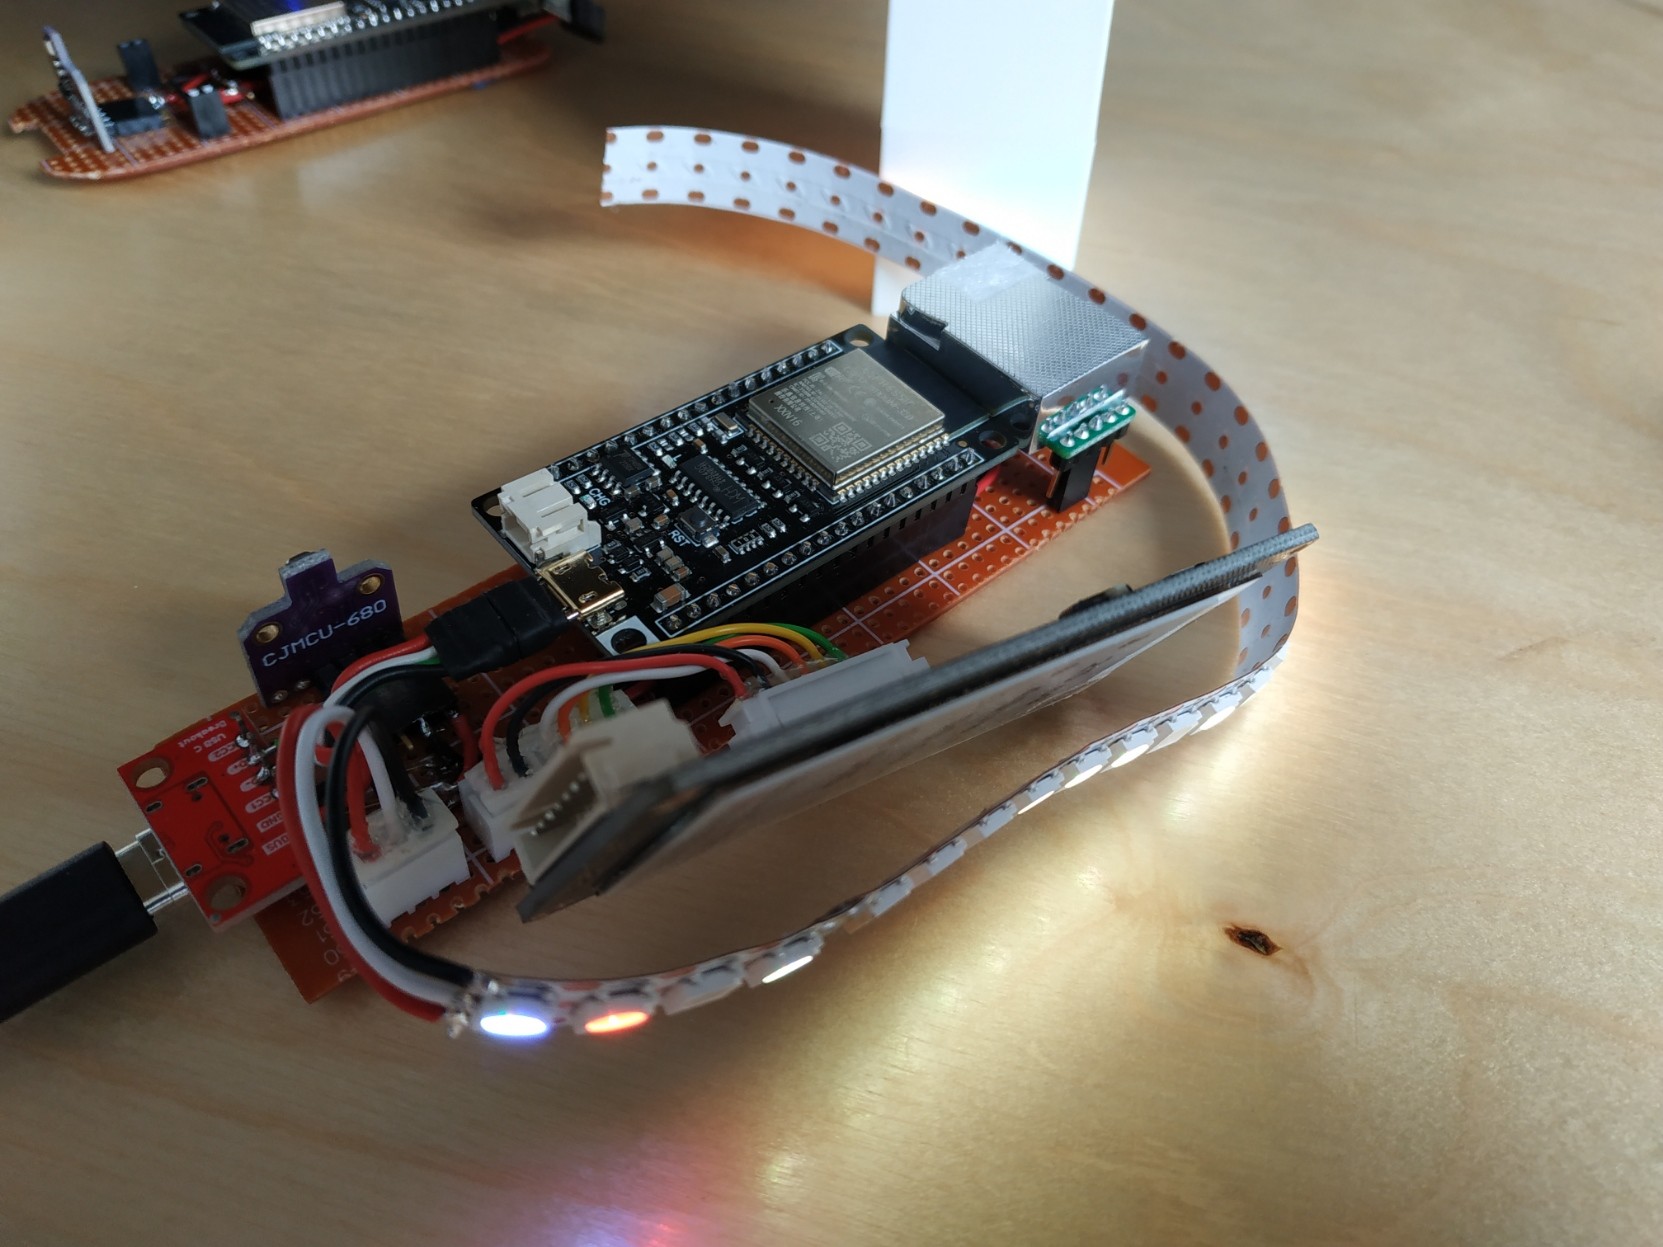
I’m really happy with how my current project is going
This is an air quality sensor plugged into a microcontroller that’s transmitting readings over a mesh WiFi
I only have this one soldered at the moment, plus a prototype on a breadboard. That's my proof of concept that I could do this.
I learned lots doing this. Quite happy. Much to do still.
[edit] Code and documentation are at:
https://github.com/GuillaumeRossolini/griotte

@scrwd in case you’re interested, I finally got my little #electronics experiment working: #BME680 sensor on #ESP8266 microcontroller, sending data over mesh WiFi and viewable from my phone
:meshtastic: Ich habe soeben alle meine Meshtastic Knoten auf die Firmware 2.3.12 Alpha aktualisiert 😀
Das waren dann für heute 3 x T-Beam, 2 x Heltec V3, 2 x T-Deck 1 x RAK und diesmal neu dabei ein Native #Linux Client, da Thomas eine amd64.deb Version neu mit in die Release aufgenommen hat.
Da ich die Wort ›zuverlässig im Dauerbetrieb‹ nicht unbedingt mit SD-Karten und dem #Raspberry in Verbindung bringe, bin ich doch recht froh, dass jetzt sowohl #Mosquitto als auch der Knoten »WMMW« (Warnmeldungen für MV) auf einem »echten« Debianrechner laufen.
So wie es bisher aussieht, läuft diesmal auch der #BME680 auf dem Sensor-Node ohne Problem.
Interested in temperature, humidity, pressure, and gas Bosch sensor measurements with Pi4J? Read this blog post with some interesting insights...
https://pi4j.com/blog/2024/20240517_bosch_sensor_gas_measurement/
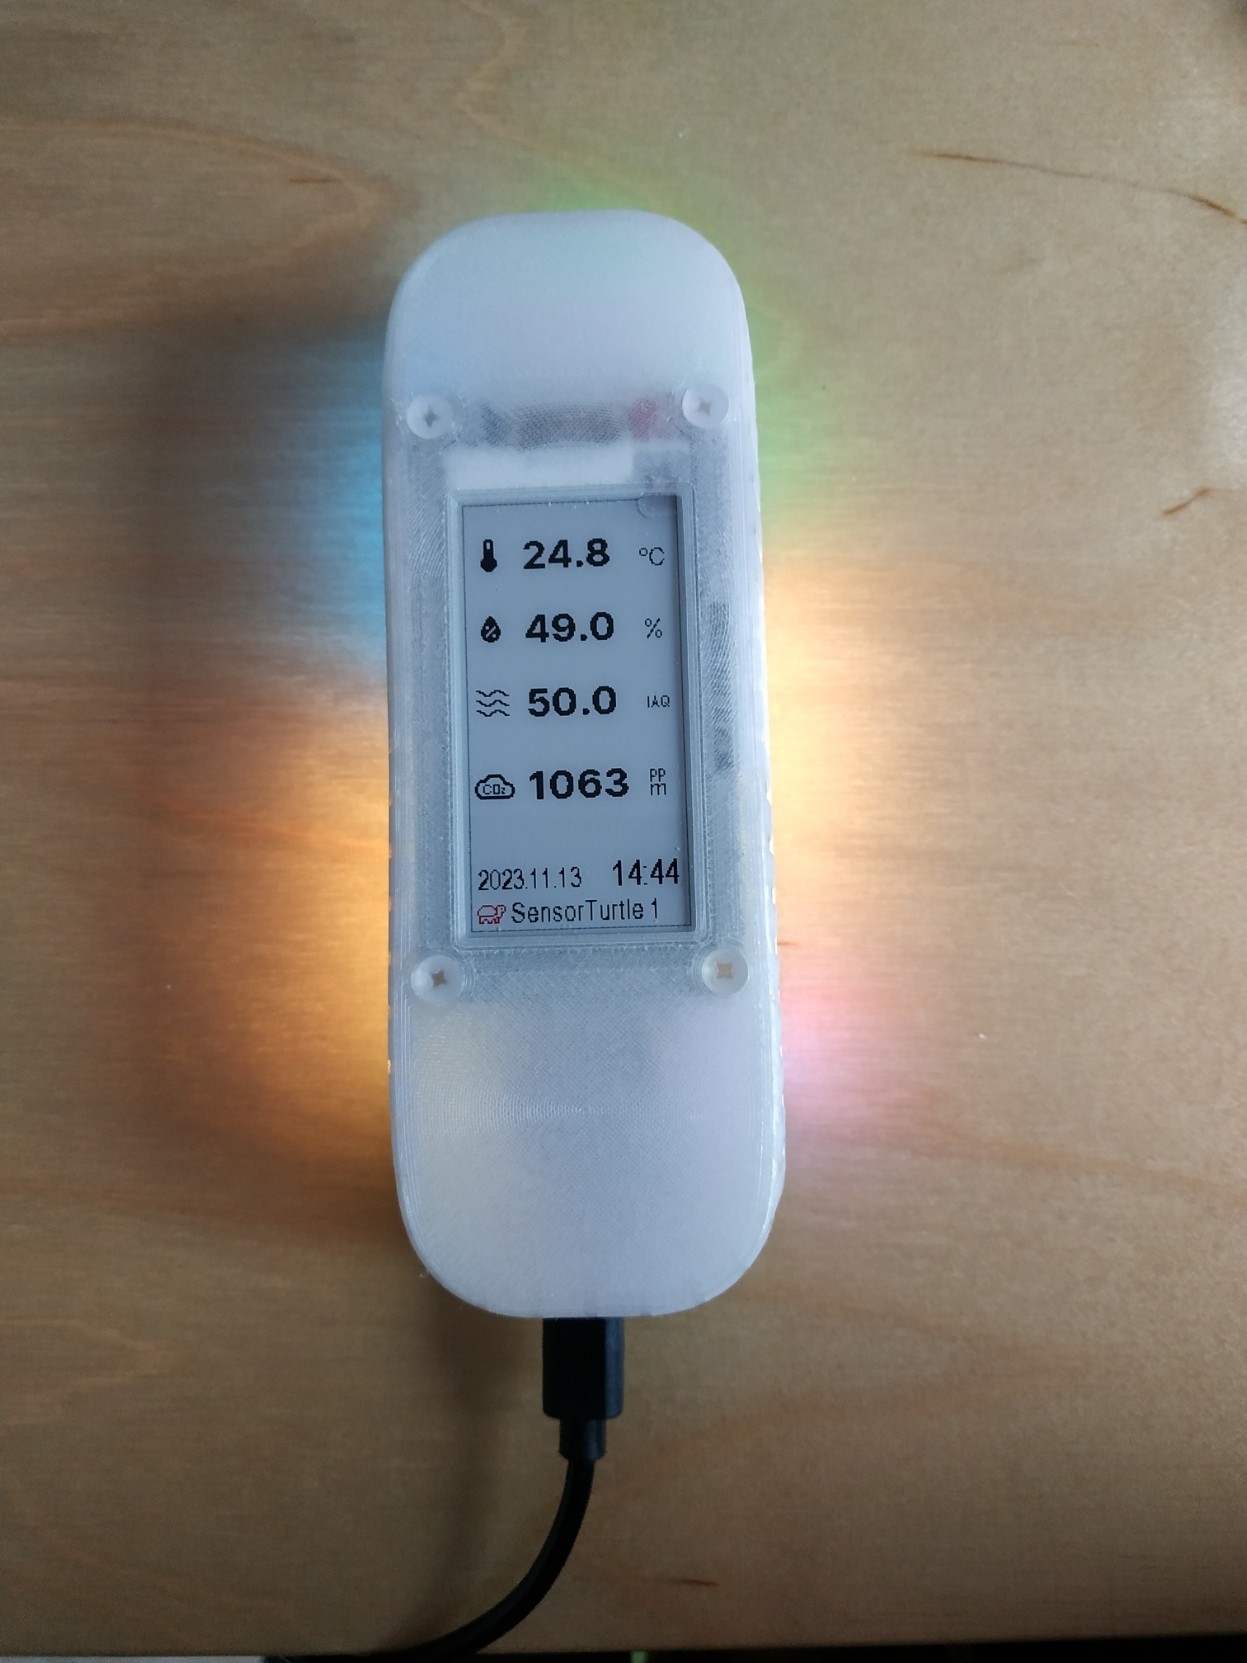
Das Projekt der SensorTurtle geht jetzt ins 3. Jahr.
Es fehlt nur noch die MQTT Anbindung.
Inzwischen hat die Schaltung einen Kondensator und einen USB C Anschluss mit Datenweiterleitung.
Ein Problem was ich sonst noch so habe, ist das die IAQ Genauigkeit des BME680 sich nicht ändert und immer auf 50 bleibt. #esp32 #sensorturtle #bme680 #3dprinting #CO2Sensor

Jetzt läuft auch das zweite Meshtastic #Gateway mit dem Sensor #BME680.
Wenn das Gehäuse (https://www.etsy.com/de-en/listing/1158237722/rak5005-case-for-meshtastic) für meinen mobilen #RAK5005 / #RAK4630 Client angekommen ist, vermutlich Anfang Oktober, dann muss ich mal schauen, ob in dem Gehäuse noch genügend Platz für den Sensor und das Kabel vorhanden ist.
Falls ja, montiere ich dort auch einen Sensor 😀
#meshtastic #lora #wan #mesh
Mit dem Sensor #BME680, der den gleichen #I2C Bus wie das Display nutzt, er also parallel aufgeschaltet / aufgelötet werden kann, ist es möglich, die #Temperatur, die #Luftfeuchtigkeit, den #Luftdruck und die #Luftqualität zu messen, und in die Anzeige des Clients zu übergeben.
Ich habe es heute mit meinem ersten #Gateway, einem #T-Beam getestet.
Das zweite Gateway folgt 😀
#meshtastic #lora #wan #mesh
Hohe Luftfeuchtigkeit sorgt für Jitter in den heutigen PM-Messwerten. Die Nase sagt trotzdem: "verdammte Waldverbrenner" #holzofengate. Der wohl feuchtekompensierte #BME680 low cost sensor (AirQual. IAQ) gibt indikation, dass die Belastung z.Z. auch messtechnisch hoch ist.
I have a Bosch #BME680 at an #ESP 8266 outside that offers Air Quality Monitoring - #AQI.
They reach values of >200 with lowest values i have see after rain being down to 80.
The internet claims values over 200 are really bad - anyone any experience with those sensors outside? What does your sensors show? #AitQuality #AirQualityMonitoring #Rotterdam