#ModernIonicEntablature with #modillions and #dentils adapted for #arcadeIntercolumnation.
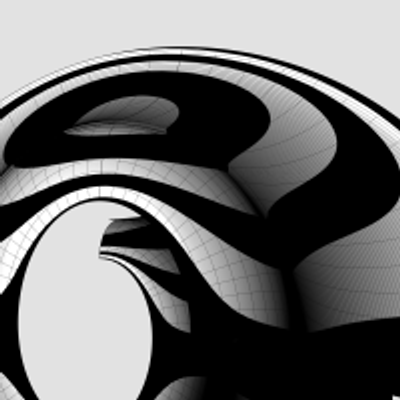
This image shows modillions across the top of the entablature, including modillions visible on the side wall. The dentils are below the modillions and are a bit shorter than in the classic variant.
As with dentils, a #modillion must be centered on a column axis. In the front, there are two modillions directly above the two columns and eight other modillions equally spaced between them. The number is always 10. So the spacing is different for an #arch with no #pedestals.
This image also shows a skinnier #keystone. Its thickness is half that of the one shown in https://pixelfed.social/p/Splines/804548474524642209 but all other measurements remain the same. There is never a modillion directly above the keystone.
The #cymaReversa and #fillet above the keystone have #profileCurves identical to those in the #capital but the top is a square that is only µ x µ units. The top slab is centered front to back on the face of the arch.
In this image, the modern entablature is shown with the classic capital, but it goes really well with the #modernIonicCapital. As I mentioned in https://pixelfed.social/p/Splines/791065657488081419, the classic variant of the column capital has parallel flat #volute slabs only visible from the front and back, but not from the sides. Because of its lack of radial symmetry, the capital does not look as satisfying when viewed from the side, especially in a #colonnade, as seen in https://pixelfed.social/p/Splines/803089629244302486.
The modern variant has curved volute faces on all four sides with pointed ends at all corners and optimized for use in a corner column, but not limited to that. The modern #IonicCapital is the last remaining piece in our systematic look at the complete #IonicOrder.
This concludes our look at the entablature, both classic and modern, and both for #simpleIntercolumniation, or #Architravato, and #arcadeIntercolumniation.
#dentils

#Modillion for the #ModernIonicEntablature
In https://pixelfed.social/p/Splines/790782316675150160 , I mentioned that there are two variations of the #IonicEntablature — a classic version that we saw in https://pixelfed.social/p/Splines/804548474524642209, and a modern version that has a new feature called #modillions, which are projecting brackets under the #corona of the #cornice. Note that, "modern" is a relative term. For designs that are more than 2000 years old, even an alteration hundreds of years ago would qualify as modern.
The modillion design continues a similar pattern but not identical to that of a #keystone. The measurements can be found in https://babel.hathitrust.org/cgi/pt?id=mdp.39015031201190&view=1up&seq=45 from which you can surmise that the length is 130 units (based on µ = 144) and the height is 36 units excluding the flamboyant #cymaReversa. The depth is not given, but can be derived from the sketch in https://babel.hathitrust.org/cgi/pt?id=mdp.39015031201190&view=1up&seq=141.
The measurements for the cymaReversa are listed between the corona and medallions, but its #profileCurve is attached to the modillion, not to the corona. Like #dentils, we attach modillions separately to the entablature. The dentils are still there with the same square footprint and same interdental spacing, but they are shorter to make room for the modillions above.
The original #volute that forms the basis of the modillion design is µ = 144 wide (including #arcZero) and 128 tall. Since the modillion height divides evenly into µ, I used that orientation for constructing the modillion, creating a box 144 units wide and 520 units tall. After construction, I scaled it to 1/4 to get 36 x 130 units, and then rotated it 90°.
The length of 520 was divided into 128*3.5 = 448 for the curved portion (which aligns with the wall) and 72 for the straight portion, which faces the front. Try to recreate it on your own first, and if you need help, just ask me.

#Arch with #Ionic #Entablature and #Keystone Detail
The #dentils arrangement we saw in https://pixelfed.social/p/Splines/791013152244518907 goes well with the classic entablature #profile we saw in https://pixelfed.social/p/Splines/790888454384861893, and they both go well with #simpleIntercolumniation, also known as #architravato.
However, with arches, the entablature profile has to be adjusted a bit so that the dentils arrangement is as shown here. The shape, size, and gap between individual dentils remains the same, but a crucial difference is that the dentils at the #outer corners touch each other.
As I mentioned in https://pixelfed.social/p/Splines/803615973439041638, in #arcadeIntercolumniation, the entablature is repeated on the wall behind the half-column. It doesn't end at the columns and has two "outside" corners and one "inside" corner. While the dentils at the outer corners touch each other, there is a single dentil in the inside corner that is shared by both walls.
A bedrock principle of dentils (like that with #flutes and with eggs in the #EggsAndDarts motif) is that when viewed directly from the front or the sides, a dentil must be centered on the column axis. It is this principle that forces us to adjust the profile of the entablature in arcade intercolumniation giving us the arrangement shown here.
The image also shows the detail of the decoration in front of the #keystone. The most easily recognizable component of that is the large #volute, which is the exact same size as the ones on the #capital. The smaller volute is exactly half the size of the larger one. It is mirrored, rotated and put within a bounding rectangle whose height is exactly 2µ (288 units). The channels of both volutes are bridged with #sinusoids derived from half turn of #helix curves that have been flattened.
This motif in the keystone, where volutes of different sizes are combined with sinusoids is very common. It will be seen in the #modillions of the #modernEntablature.

In https://pixelfed.social/p/Splines/803615973439041638, we saw #Arcade #Intercolumniation without #Pedestal. Here we see it with pedestals. The previous post was missing #dentils but they are included here.
Arches are made up of wedge-shaped blocks known as #voussoir. The middle one at the top of the arch has a special name — #keystone — and it is the stone that supports the most vulnerable part of the beam above and distributes its load to the adjacent blocks, which, in turn, do the same to the next lower block until the load is transferred to the #impost above a #pier.
When the arch does not include a pedestal, the arch opening is closer to the entablature, and there is no special decoration on the keystone. When there are pedestals, they add 6µ (864 units) to the total height, but the height of the opening goes up only by 5µ. So there is greater separation between the entablature and the top of the arch. In that case, there is a decoration on top of the arch to close the gap.
With pedestals, everything added for the arch has different measurement. Because of the increased height, the whole wall behind the columns is thicker — 2µ instead of 1.5µ when there is no pedestal. The pier is also wider, but its base molding is shorter. The impost profile is same, but it is wider because the pier is wider. The #archivolt is also wider, almost reaching the column shaft.
#Scarlata's book https://babel.hathitrust.org/cgi/pt?id=mdp.39015031201190&view=1up&seq=47 has all the measurements. So, I won't repeat them here.
In this post as well as in the previous one, I showed only a single arch on a flat wall with two columns half buried in the wall. When there are multiple arches running along a curve, the wall, entablature, archivolt, impost, pier, and its base are flexible and bend along the curve, but the column and pedestal are rigid. Most #CAD tools offer the option of flowing rigid bodies along a curve or curved surface — Just flow the columns and pedestals separately.

#IonicColumn #VignolaBase and #AtticBase #CAD Plans
Both #Vignola base and #Attic base have the same square footprint of 400 units x 400 units. The #plinth for both is 48 units (6 parts, or µ/3) tall, and the total height for both is 144 units (18 parts, or exactly µ). As such, they are easily interchangeable.
In the Vignola variant, we start at the plinth with a #fillet 2 units tall and a classic #scotia 18 units tall gouging out part of the fillet.
Then there is another fillet 2 units tall, followed by two #reeds, each 8 units tall, followed by another classic scotia as described above.
This is followed by yet another fillet 2 units tall and topped off with a #torus 40 units tall. A Torus is the same as a reed, except larger. When we reach the neck of the shaft, we will see another molding called #Astragal which has the same profile as reed and torus, but sits in the middle in size. Think of reed, astragal, and torus as small, medium, and large of the same profile.
The modern Attic variant is more elegant with fewer moldings. It also gives the impression of more heft for more stately columns. It starts at the plinth with a torus 36 units tall, followed by a fillet 4 units tall, followed by a modern scotia 24 units tall, followed by another fillet 4 units tall, and topped off with another torus 28 units tall.
As in the construction of #IonicEntablature [https://pixelfed.social/p/Splines/791013152244518907], split the construction of the #columnBase into two steps.
Just as we extruded #dentils separately, we extrude the plinth separately. First draw a square 400x400 in the top view. Then extrude the square 48 units in the front view.
For the rest of the base, we need a new 3D operation — #revolve around an axis. Instead of extruding the #primaryProfileCurve, we revolve it around the #columnAxis, and cap the #planarHoles on both ends before performing a #booleanUnion with the plinth. Finally check edges of the solid for #nakedEdges and #nonManifoldEdges.

This sketch shows the arrangement of #dentils in the classic variation of the #IonicEntablature. It shows the full layout, but most of the top is obscured by the top portion of the #cornice. Only the outside square shapes are actually visible.
Each #dentil has a square "footprint" that is 4 parts by 4 parts (32*32 units) and is 6 parts (48 units) tall. The spacing between each dentil is 2 parts (16 units).
Dentils project 4 parts (or 32 units) from the face of the #fascia on which they rest.
Each face of the fascia has 7 dentils with the middle dentil laterally centered and directly in front of the column axis. The 2 side dentils are on side faces, and that is apparent in the darker shading in the sketch at https://pixelfed.social/i/web/post/790782316675150160. Take the time to reconcile this with the numbers listed in #Scarlata's #PracticalArchitecture.
The 3D reconstruction from the #primaryProfileCurves is very similar to that of the #IonicPedestal, with #extrusion, #mitering, #joining, and #capping planar holes as described in https://pixelfed.social/i/web/post/790645054230337543 — just set the dentils aside, for now.
Once you have capped the #planarHoles to get a solid, analyze the edges of the solid in the #CAD program for #nakedEdges and #nonManifoldEdges.
Then, extrude the dentils outline (in the top view) to a height of 48 units (in the front view).
Now perform a #booleanUnion of the two solid shapes to get the complete #entablature.
Finally, check the edges of the solid in the #CAD program AGAIN for #nakedEdges and #nonManifoldEdges.
With this, we have finished two of the three main components of the #IonicOrder. There's a modern version of the Ionic entablature with #modillions, which I will describe later.
Next, we move on to the biggest, most conspicuous part of the order — the #IonicColumn.

Classic variation of the #IonicEntablature. Left side shows the macro-level plan. Right side shows the detailed plan for the #moldings.
All moldings should be familiar from the #IonicPedestal, except the #fascia — flat bands, of which there are 3, at the bottom of the #Architrave. The fascias grow progressively taller, starting at 36 units at the bottom, to 48 in the middle, and 60 at the top, with each successive one offset horizontally by 6 units from the previous one.
Above the fascia, we have a #cymaReversa which is 24 units tall and 20 units wide. Here we are using half turn of a helix with a vertical axis. Either helix or elliptical arcs are acceptable, but the choice must be consistent across the entire order. You cannot use ellipses in the pedestal and helices in the entablature, for example.
If you do use a helix, remember that it is a 3D shape like a round coil. To use it as a #profileCurve, it must be flattened to a 2D shape by #projecting it to the #constructionPlane. I will describe this technique in detail later.
The #frieze is a flat surface with no moldings. It is meant as a blank space on which to put custom decorative 3D #ReliefCarvings or sculptures.
There are no new moldings in the #cornice. Note that the order of #cymaRecta and cyma reversa are reversed from that of the #pedestal, with cyma recta at the top and cyma reversa at the bottom. The only difference between the two is that the recta has a horizontal axis and reversa has a vertical axis. Rotating either one 90° yields the other.
So, the bottom of the cornice starts with a cyma reversa 32 units tall and 34 wide. This is followed by a fascia 56 units tall on which the #dentils will appear later on. The 36 unit horizontal offset for the 4-unit thick fillet above it is to leave room for the dentils.
This is followed by a #reed (8 units), #ovolo (32 units), #corona (48 units), cyma reversa (16 x 12 units), fillet (4 units), cyma recta (40 x 44 units), and fillet 12 units

There are two variations of the #IonicEntablature. The classic variation has #dentils, which are teeth-like structures shown here above the #frieze. The modern version has #modillions, which are projecting brackets under the #corona of the #cornice. Well, "modern" is a relative term. For designs that are more than 2000 years old, even an alteration 1000 years ago would qualify as modern.
Although the sketch shows the #entablature with a square footprint, in practice, it runs the entire length of a #colonnade (multiple columns) or an #arcade (multiple arches).
#CAD construction of the entablature is very similar to that of a #pedestal.
The first step is to consult #Vignola's #RegolaArchitettura for the visual appearance, and then consult #Scarlata's #PracticalArchitecture for #VignolaProportions in tabular form.
It is convenient to create a spreadsheet to convert the measurements given in Scarlata's book from module "parts" to your own model units based on your choice of value for the module parameter µ.
Armed with these measurements, it is time to plot the points and draw the #primaryProfileCurves on our standard 2D grid with minor grid lines 8 units apart and major grid lines 32 units apart.
In the first pass, skip the dentils and draw the profile curves for the rest of the moldings. Just as with the pedestal, I will show the macro-level plan as well as the detail plan. So, you don't have to go to Scarlata's book, but you know it's there if you want to.
I will show the dentil arrangement in a subsequent post.
Based on µ = 144, the classic Ionic entablature is 648 units (36 parts, or 4.5*µ) tall. Of this, the #architrave at the bottom is 180 units (10 parts, or 1.25*µ) tall, the frieze in the middle is 216 units (12 parts, or 1.5*µ) tall, and the cornice at the top is 252 units (14 parts, or 1.75*µ) tall.


Insta 1yr ago: Dentil care. #beachtown #neighborhood #elsegundo #streetscene #architecture #dentils #neon #staysafe #dontbanbooksMB #losangeles #california https://osoporto.com

Client Info
Server: https://mastodon.social
Version: 2025.07
Repository: https://github.com/cyevgeniy/lmst