#ModernIonicCapital sketch
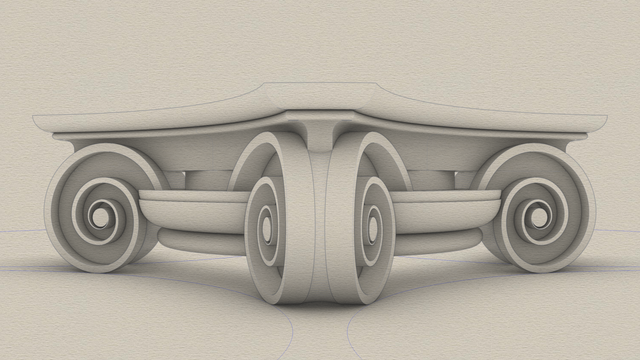
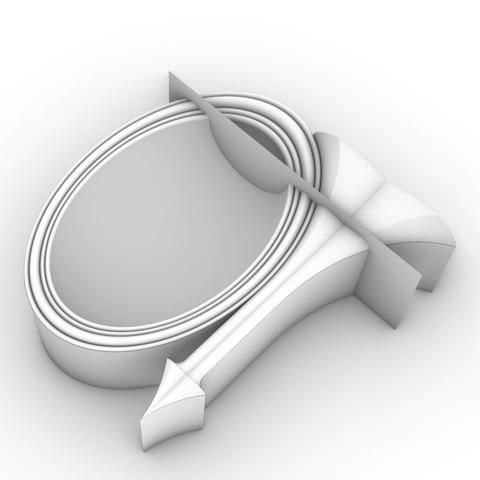
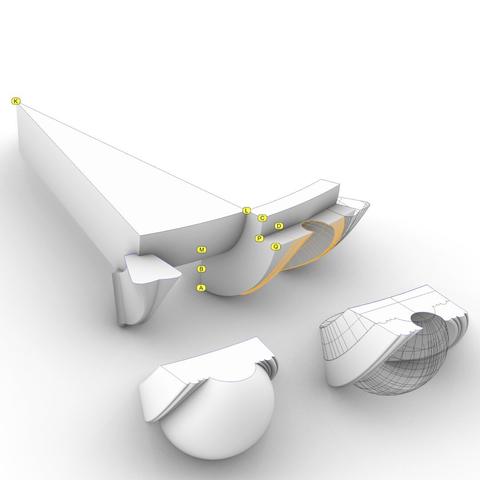
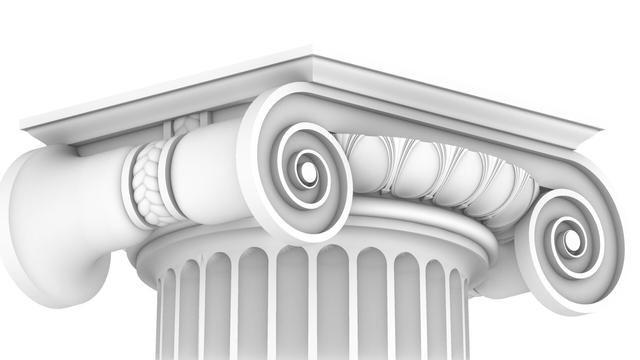
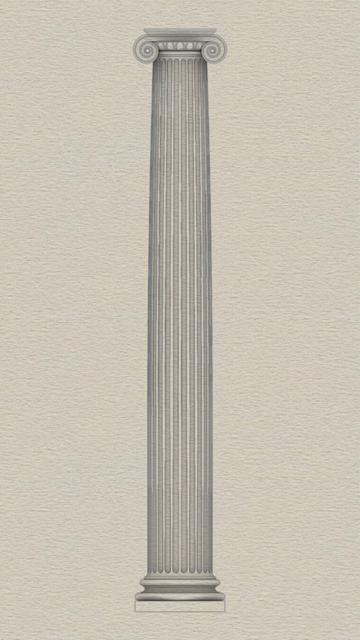
The modern #IonicCapital with curved faces and radial symmetry is a drop-in replacement for the classic Ionic capital with flat faces.
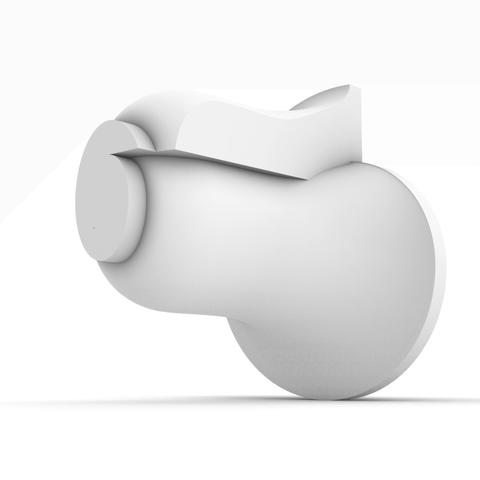
Unlike the classic variant, which has a rectangular footprint, the modern variant has a footprint that fits in a square. In the classic variant, the volutes and scrolls project out so that they are visible from the top. In the modern variant, there are no scrolls, the volutes have a curved face, and they are completely nestled under the top.
The sketch omits the #fillet at the bottom because we added that to the column #shaft in https://pixelfed.social/p/Splines/791794072490907090.
So, we start at the bottom with an #astragal which is exactly the same size as in the classic variant.
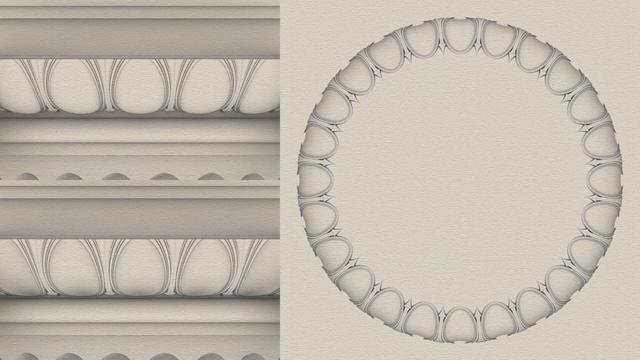
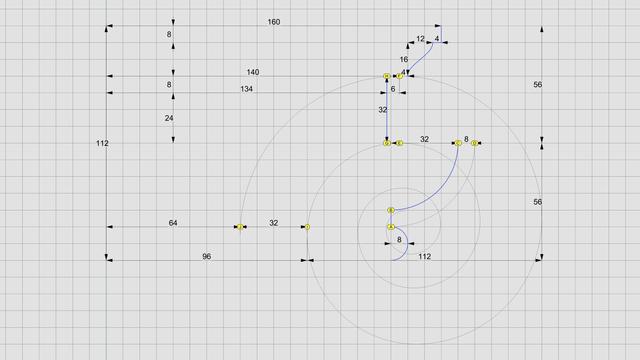
Next up from the bottom is the #ovolo which is shorter than in the classic variant. It still has a #tectonicSurface on which #decorativeElements rest, and a #virtualSurface that envelops the decorative elements. In this case, I chose a minimalist design with no #eggsAndDarts. Instead, I use another plain ovolo as a substitute that is offset from the tectonic surface by 1 part (or 8 units, when µ = 144).
Above the ovolo is the #channel, which in this case is a round slab whose surface matches the neck of the column with a radius equal to 5/6 of µ (120 units).
Above the channel is the #abacus which has a curved face that is repeated on all four sides. There is an abacus with flat sides in the classic variant as well, but it is not visible from the front because it is hidden behind the #volute slab. In fact, the vertical #braidsAssembly in the classic variant is attached to the abacus.
Above the abacus is a #reed, and above that, another small Ovolo that tops the modern capital.
The curved volutes follow the blue circular arcs at the bottom of the sketch. The volutes are shaped like a wedge, as can be seen more clearly in the corner facing the front. The portion of the wedge between the outer rims has a concave surface.
#EggsAndDarts
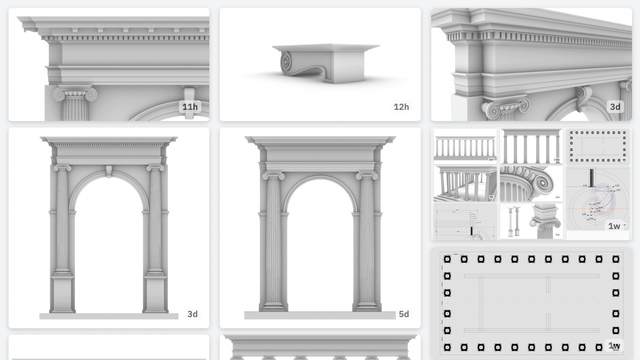
#Milestone9 - #ArcadeIntercolumniation #Keystone and #Modillion
#Arch without Pedestal https://pixelfed.social/p/Splines/803615973439041638
#Arch with #Pedestal and Keystone https://pixelfed.social/p/Splines/804537414363507454
#Keystone and #Dentil Details https://pixelfed.social/p/Splines/804548474524642209
#Modillion Details https://pixelfed.social/p/Splines/805587292338863257
#ModernEntablature with Detail https://pixelfed.social/p/Splines/805607059171193759
#Milestone8 - #SimpleIntercolumniation https://pixelfed.social/p/Splines/803106316515798367
#Milestone7 - Complete #IonicOrder https://pixelfed.social/p/Splines/800050647761776920
#Milestone6 — #Braids #3StrandBraids https://pixelfed.social/p/Splines/799602946527813102
#Milestone5 — #EggsAndDarts https://pixelfed.social/p/Splines/797069447808333887
#Milestone4 — #IonicScroll https://pixelfed.social/p/Splines/795361973789834465
#Milestone3 — #IonicColumn https://pixelfed.social/p/Splines/792803978865652429
#Milestone2 — Classic #IonicEntablature https://pixelfed.social/p/Splines/791021871062069787
#Milestone1 — #IonicPedestal https://pixelfed.social/p/Splines/790752092700055739
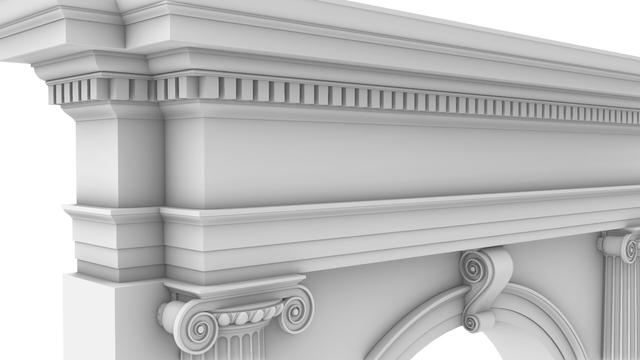
#Arch with #Ionic #Entablature and #Keystone Detail
The #dentils arrangement we saw in https://pixelfed.social/p/Splines/791013152244518907 goes well with the classic entablature #profile we saw in https://pixelfed.social/p/Splines/790888454384861893, and they both go well with #simpleIntercolumniation, also known as #architravato.
However, with arches, the entablature profile has to be adjusted a bit so that the dentils arrangement is as shown here. The shape, size, and gap between individual dentils remains the same, but a crucial difference is that the dentils at the #outer corners touch each other.
As I mentioned in https://pixelfed.social/p/Splines/803615973439041638, in #arcadeIntercolumniation, the entablature is repeated on the wall behind the half-column. It doesn't end at the columns and has two "outside" corners and one "inside" corner. While the dentils at the outer corners touch each other, there is a single dentil in the inside corner that is shared by both walls.
A bedrock principle of dentils (like that with #flutes and with eggs in the #EggsAndDarts motif) is that when viewed directly from the front or the sides, a dentil must be centered on the column axis. It is this principle that forces us to adjust the profile of the entablature in arcade intercolumniation giving us the arrangement shown here.
The image also shows the detail of the decoration in front of the #keystone. The most easily recognizable component of that is the large #volute, which is the exact same size as the ones on the #capital. The smaller volute is exactly half the size of the larger one. It is mirrored, rotated and put within a bounding rectangle whose height is exactly 2µ (288 units). The channels of both volutes are bridged with #sinusoids derived from half turn of #helix curves that have been flattened.
This motif in the keystone, where volutes of different sizes are combined with sinusoids is very common. It will be seen in the #modillions of the #modernEntablature.
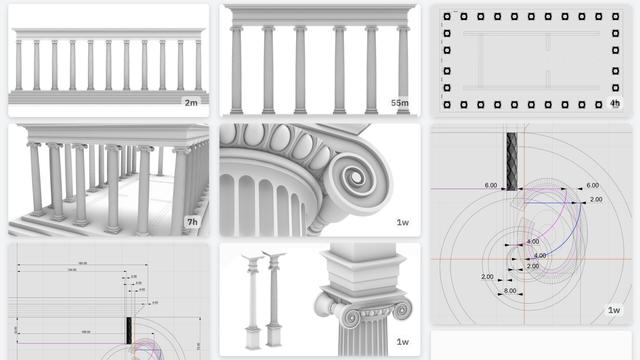
#Milestone8 - #SimpleIntercolumniation
Floor Plan of archetypal Greek Temple https://pixelfed.social/p/Splines/803021258359555093
Front and back #intercolumniation https://pixelfed.social/p/Splines/803076419096100108
Side intercolumniation https://pixelfed.social/p/Splines/803089629244302486
#Milestone7 - Complete #IonicOrder https://pixelfed.social/p/Splines/800050647761776920
#Milestone6 — #Braids #3StrandBraids https://pixelfed.social/p/Splines/799602946527813102
#Milestone5 — #EggsAndDarts https://pixelfed.social/p/Splines/797069447808333887
#Milestone4 — #IonicScroll https://pixelfed.social/p/Splines/795361973789834465
#Milestone3 — #IonicColumn https://pixelfed.social/p/Splines/792803978865652429
#Milestone2 — Classic #IonicEntablature https://pixelfed.social/p/Splines/791021871062069787
#Milestone1 — #IonicPedestal https://pixelfed.social/p/Splines/790752092700055739
#Milestone7 - Complete #IonicOrder with fluted and unadorned #IonicColumn with details of #decorativeElements
#Milestone6 — #Braids #3StrandBraids https://pixelfed.social/p/Splines/799602946527813102
#Milestone5 — #EggsAndDarts https://pixelfed.social/p/Splines/797069447808333887
#Milestone4 — #IonicScroll https://pixelfed.social/p/Splines/795361973789834465
#Milestone3 — #IonicColumn https://pixelfed.social/p/Splines/792803978865652429
#Milestone2 — Classic #IonicEntablature https://pixelfed.social/p/Splines/791021871062069787
#Milestone1 — #IonicPedestal https://pixelfed.social/p/Splines/790752092700055739
#IonicColumn #Flutes
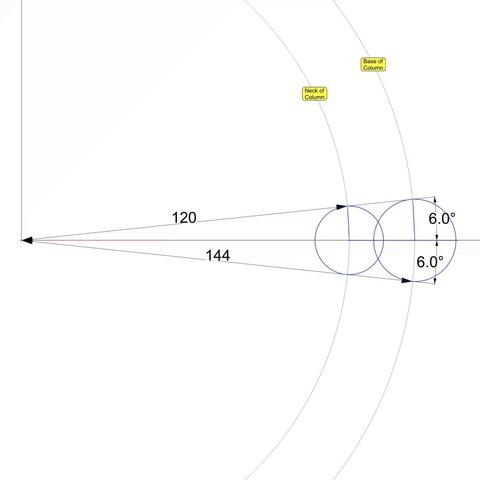
This diagram shows the 2D geometry of an #Ionic #flute. The larger blue circle shows the flute outline near the #base of the #column. The smaller blue circle shows the flute outline near the #neck of the #shaft. Both subtend a 12° angle at the center of the column.
Like an egg in the #EggsAndDarts motif, a flute must be centered on the column axis when viewed directly from the front, back, or the sides. This is why the 12° are split into 6° on either side of the X axis. The center of the larger circle is µ = 144 units from the origin on the X axis. The center of the smaller circle is 5/6 of µ, or 120 units from the origin.
In https://pixelfed.social/p/Splines/799340150182400358, I mentioned working at sub-micron precision, and you might wonder where that came from when we have been using abstract units like µ without specifying any physical units. My apologies for not making it clear that I had assumed 1 unit was equal to 1 mm. If that assumption holds, then µ = 144 mm gives a total order height of 4104 mm, that is 13.46 ft. At smaller scales, the precision is even higher than 1/10 of a micron.
With that said, here the radius of the larger circle is 15.0728 units and that of the smaller circle is 12.5606 units, with sub-micron precision if 1 unit = 1 mm.
Refer to https://pixelfed.social/p/Splines/791399680747885646 and place the center of the smaller circle exactly at point J on the neck line. Later we will draw a sphere at the same location with the same radius.
If you want a flat bottom for flutes, place the center of the larger circle at exactly 28 units (12 for the #fillet and 16 for the #cavetto or #conge) above point A in that figure. If you want a round bottom, then further move the larger circle up by the size of its radius.
Nobody would quibble if you used a radius of 15 units instead of 15.0728 units, but it would make it easier to switch from flat to round bottom or vice-versa by simply moving the circle up or down 15 units.
#IonicColumn
#Flutes have a different configuration in the #IonicOrder than they do in the #DoricOrder. In #Doric, the flutes run right next to each other, dividing the circumference of the column into 24 equal sectors, or 15° each.
In #Ionic, there is a small gap between the flutes. This gap used to vary, but over time, Ionic designers seemed to have settled and standardized the measurements by splitting 15° in 4:1 ratio, giving 12° to a flute and 3° to the gap between flutes.
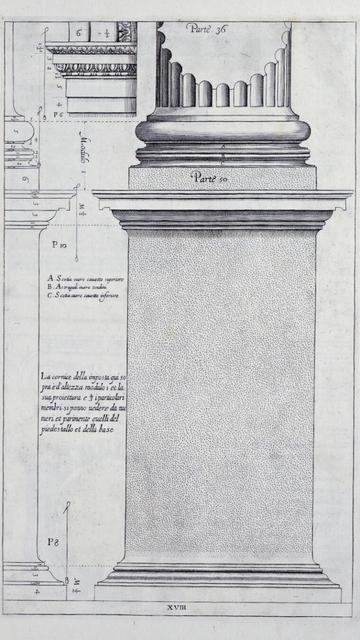
Because of this standardization, there would seem to be little room for variants, but there is. In his #RegolaArchitettura [see https://archive.org/details/gri_33125008229458/page/n37/mode/2up], #Vignola documented flutes with hemispherical tops but flat bottoms, as shown in the image here.
However, it is acceptable to have hemispheres at both top and bottom as long as they are consistently used within a #colonnade or #arcade.
Flute geometry is interesting. Just like the #IonicColumn #shaft, a flute also gradually tapers as it rises from bottom to top. Additionally, it bends along the shaft surface due to #entasis [see https://pixelfed.social/p/Splines/791794072490907090]. In other words, flutes hug the column shaft.
Unlike other decorative elements like #eggsAndDarts and #3StrandBraids, flutes are #subtractive, not #additive to the rest of the design. In other words, we have to carve the flutes out instead of adding them to the design.
#Milestone6 — #Braids #3StrandBraids
#Sinusoid from #Helix https://pixelfed.social/p/Splines/797893262102038801
Braid Geometry https://pixelfed.social/p/Splines/797916882329430160
Braid Strand https://pixelfed.social/p/Splines/798252244743520392
Braid Assembly https://pixelfed.social/p/Splines/799340150182400358
Braid #FlowOnSurface https://pixelfed.social/p/Splines/799514176049543252
#Milestone5 — #EggsAndDarts https://pixelfed.social/p/Splines/797069447808333887
#Milestone4 — #IonicScroll https://pixelfed.social/p/Splines/795361973789834465
#Milestone3 — #IonicColumn https://pixelfed.social/p/Splines/792803978865652429
#Milestone2 — Classic #IonicEntablature https://pixelfed.social/p/Splines/791021871062069787
#Milestone1 — #IonicPedestal https://pixelfed.social/p/Splines/790752092700055739
#3DPrinting
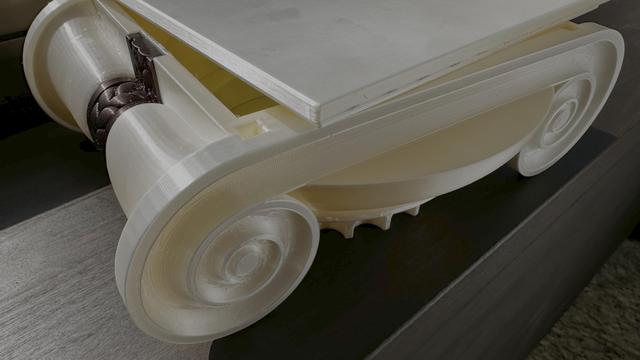
Early #3DPrinted prototype of #Classic #IonicCapital from a few years back using a #Prusa #MK4S #3DPrinter.
The length of the #volute from end-to-end is more than 10". I rotated the #voluteSlab 45° on the printer bed, and by the grace of #Pythagoras, I was able to print it inside the 8" build envelope of the MK4S.
This prototype has many imperfections, and some elements are just plain "wrong" -- like the curved inside of the volute channel (instead of flat).
The #ovolo is lacking #eggsAndDarts because I had not yet made the distinction between a #tectonicSurface on which the #decorativeElements rest, and a #virtualSurface that encloses the decorative elements. My calculations at the time always seemed to differ from those in #Scarlata's book. But as the physical #3DPrint shows, it is perfectly OK to go for a minimalistic look — even if it means a ribbon shorn of #braids. It's the distinctive design of the core tectonic elements that has the greatest impact.
I used brown silk filament for the braids, because, why not? For this prototype, I printed them separately and glued them to the #scroll.
Also, the scrolls are misshapen because I had not yet figured out the correct geometry. It would be another 4 years of tinkering with my #CAD design to finally get my #Eureka moment — and that's when I decided to start this series.
#3StrandBraids
#Braids are the last of the #decorative elements on the #IonicScroll, but like #EggsAndDarts, they are not specific to the #IonicOrder.
Braids are a popular design motif that find wide currency in modern #hairstyle, #fashion, and fashion accessories like #belts and #bracelets.
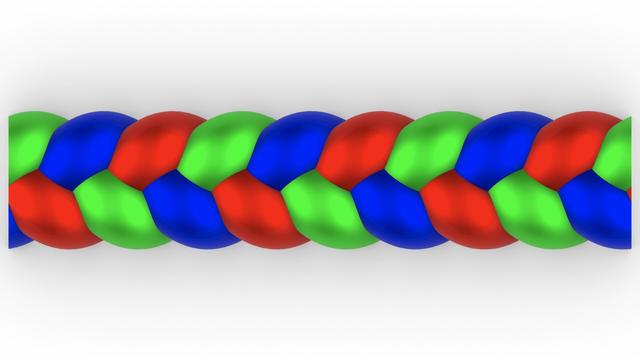
Braids come in infinite varieties with varying number of strands, thickness of strands, roundness or flatness of strands, and how tightly or loosely they are wound together. Here, I focus on the 3-strand variant mentioned in #Vignola's book and previewed in https://pixelfed.social/p/Splines/792015485979791089. The image here is brightly colored to draw attention to the 3 strands.
The geometry of braid strands is not at all obvious despite how familiar they look. Also, a braid strand is the only feature in the entire iconic order whose geometry cannot be captured with straight lines and circular arcs. Instead, a strand geometry must be defined in a series of steps starting with a basic #sinusoidal curve.
A sinusoidal curve or #sinusoid is a wave form whose function belongs to a family of functions known as #transcendentalFunctions that also include #logarithmic and #exponential functions. I mentioned #logarithmicSpirals in https://pixelfed.social/p/Splines/792499765146596723, and in a future post I will show how to construct one and compare it with the #spiral used in our implementation of #IonicVolute.
They are called transcendental functions because they transcend the math of finite algebraic polynomials and go beyond geometry into trigonometry. Fortunately, we don't have to go there.
Few #CAD tools have a direct primitive for a sinusoid, but almost all have a primitive for a 3-dimensional round coil shape called a #helix which we can use to create the sinusoids we need for a braid strand. To create a sinusoid, all we need to do is #project a helix on a flat surface to convert it into a 2D waveform.
#Milestone5 — #EggsAndDarts
Egg 2D https://pixelfed.social/p/Splines/796857354690493749
Dart 2D https://pixelfed.social/p/Splines/796961505955555432
Egg and Dart 3D https://pixelfed.social/p/Splines/797038670230603707
Flow on ovolo surface https://pixelfed.social/p/Splines/797060809462854953
#Milestone4 — #IonicScroll https://pixelfed.social/p/Splines/795361973789834465
#Milestone3 — #IonicColumn https://pixelfed.social/p/Splines/792803978865652429
#Milestone2 — Classic #IonicEntablature https://pixelfed.social/p/Splines/791021871062069787
#Milestone1 — #IonicPedestal https://pixelfed.social/p/Splines/790752092700055739
#EggsAndDarts
To transfer the egg and dart in https://pixelfed.social/p/Splines/797038670230603707 to the #doublyCurved surface of an #ovolo is a multistep process.
There are 24 eggs and darts around the entire Ovolo. So each egg and dart nominally occupies 360°/24 = 15°.
#Revolve arc AD in https://pixelfed.social/p/Splines/792124787573855518 about the #columnAxis to get the virtual surface. Points A and D are same in both figures. Then use cutting planes as described in https://pixelfed.social/p/Splines/790645054230337543 to get a wedge-shaped segment whose angle is 15° and one side of which is marked with A and D.
This is a doubly curved surface. Unlike a cylinder, where one side is straight while the other is curved, the surface of an Ovolo is curved in both horizontal and vertical directions.
To transfer the egg and dart to a doubly curved surface, we need a new operation called #UnrollSurface, which unrolls the wedge shape into a flat surface whose top-left corner is marked Q. Note the top is wider than the bottom.
Place the flattened wedge between the rim and the flat slab and align the top of the flat portion of the slab with the center of the top edge of the flattened wedge. Temporarily move the dart to align its center too, but only move it in the horizontal direction
If the flattened wedge were flexible and if the eggs and darts were flexible, we could flip all of these over, flex and squeeze the solid shapes, and line up Q with D so that the rim and dart appear "outside" the original wedge while the slab remains "inside" (or toward the center of the Ovolo).
Fortunately, in a #CAD tools, solids don't always have to be treated as rigid. Now we will use another new operation called #FlowOnSurface to flow the egg and dart on the wedge.
We then slice off the top of the egg and dart at the location PQ in https://pixelfed.social/p/Splines/796958366767133979.
Finally, we separate the dart, which we had aligned with the egg to minimize distortion
#EggsAndDarts continuation from https://pixelfed.social/p/Splines/796961505955555432
The slab height depends on the roundness of the egg and whether we have a concave design or not. If we are using a concave base, then top half of the egg is eliminated. For a fully round egg, that means the concave variant must scoop out up to 16 units deep. The dart slab will match the egg slab in depth.
To create the 3-dimensional shape of the dart, first #rotate the fin profile 90° in 3D space along the straight line at the bottom of the fin so that the rotated profile is perpendicular to the two #sweepRails for the dart.
Using the two sweep rails and the perpendicular fin profile, #sweepTwoRails to develop the surface of the dart. Remember to close the planar hole at the end of the fin to get a solid #airtight object. As always, check for #nakedEdges and #nonmanifoldEdges to stave off problems later.
#Extrude the bottom of the dart until it is flush with the bottom of the oval slab.
Two details worth noting in the dart design are:
1. The most exaggerated portions of the dart fin are sliced off when the eggs are sliced. After slicing, the size of the fin is roughly in proportion to the rims of the eggs on both sides.
2. There is a gap between the dart arrow and the oval slab. See the gap between points R and T in https://pixelfed.social/p/Splines/796961505955555432. This gap is necessary and will automatically close when we transfer the egg and dart to the #doublyCurved surface of the #ovolo on the #capital of the #IonicColumn. That is because the Ovolo is shaped like a bowl whose top has a bigger radius than the bottom. As a result, the motif will be warped, and its bottom will be condensed to fit the smaller radius at the bottom, closing the gap in the process.
If you plan to use the eggs and darts motif on a linear surface where there is no warping, experiment with the arrow and tip for a pleasing result.
#EggsAndDarts continuation of https://pixelfed.social/p/Splines/796958366767133979
Successive egg slabs are 1/2 part or 4 units away from each other. So the thinnest part of the dart is 4 units. The tip of the dart is at point P, which is 22 units from the major axis for the egg slab.
The inside egg is 4 parts or 32 units wide, and we will start with the dart fin also at 32 units wide, even though a portion of the fin will be sliced off when the egg is sliced by the red cutting plane.
To find the start and end of the fin, draw a vertical line from P of length µ/2 or 72 units. Offset that line on both sides by 16 units. Mark the intersections of these lines with the outline of the largest ellipse with points A and B.
Draw an oval centered on AB with major radius 16 units and minor radius 2/5 of that, or 6.4 units. Divide each arc of the oval into 5 equal parts and mark AD and EF at 2/5 of that. Copy the oval from its top point C to D as well as E. Mark the intersection of the copies at F.
Trim the 3 ovals to get 4 arcs AD, DF, FE, and EB. Join them and close the curve with a straight line from A to B.
Draw a square 12 x 12 whose bottom edge is centered on P. From each of the top 2 corners, draw a circle with diameter 4 units, shown by RS.
#Reflect point P using the major egg axis as a #mirror to get point Q. Draw a #circleThrough3Points P, Q, and R. The origin of the circle, point O should be 3.5 units directly below the base of the large oval.
Draw a vertical line up from S to where it is tangent to the side of the large oval. Trim the straight line and arcs to get the left profile of the dart starting with A, passing through S and T, and ending at P. Join all 4 segments and reflect them using the line PC as the mirror.
These mirrored copies are the #rails along which we will sweep the fin of the dart with #sweepTwoRails operation to create the dart, but we must orient the fin to be perpendicular to the rails first
#Ovolo #TectonicSurfaces for #EggsAndDarts
Continuation of https://pixelfed.social/p/Splines/796857354690493749
Reconcile this figure with the figure in https://pixelfed.social/p/Splines/792124787573855518. The points A, B, C, and D are the same in both. The arc from A to D is the profile for the invisible virtual surface that encloses the decorative elements. Arc BC is start of the #tectonic surface where decorative elements rest. Points K, L, M, P, and Q are new here.
Point K is the center of the Ovolo and lies on the #columnAxis. KD is the upper radius of the Ovolo including the decorative elements, and its length is 22 parts of 176.
The horizontal distance between C and D is 1 part (8 units), and the vertical distance between C and P is also the same. PQ is where the eggs and darts are sliced off exposing the wall CP around the entire Ovolo and making it visible.
Normally, the decorative elements rest on the surface swept by arc BCP. In the case of https://pixelfed.social/p/Splines/796786779066451143, we have a fully round egg shape half of which is buried behind the arc AQD. In the concave variant, this means part of the tectonic surface is also carved out.
In other words, instead of limiting ourself to the range CD (or PQ), we are taking liberty to gouge out portions as far back as arc LM, and that's OK. Neither #Vignola nor #Scarlata mention tectonic surfaces or how far back they should or would be. The actual depth will depend on the choice of our decorative elements — in this case, concave eggs that are fully round like natural eggs.
The concave version of the egg is shown on the bottom right and it lines up with the orange wireframe with the round hole on top. The wireframe of the convex egg is superimposed on the concave portion to show where it will be placed if both are used together.
The depth of the dart slab is the same as that of the concave egg. The slab of the convex egg is thinner because we have to leave room for the bulge of the egg.
#EggsAndDarts is a common classical design motif with endless variations, two of which are shown here — the top-left variant has convex eggs and the bottom-left variant has concave eggs. The sketch on the right shows the bottom view of the concave variant.
This motif is neither specific to the #IonicOrder, nor limited to the #ovolo of the capital. It is common to find it laid on linear #moldings like #cymaRecta or #cymaReversa of a #cornice.
The egg shape, the dart shape, the degree of convexity or concavity, and so on, are infinitely variable from subtle to pronounced. Designers are not limited to convex or concave, and it is possible to combine both in a single design. Also, it is not necessary to use the eggs and dart motif at all. There are infinite possibilities. However, when the eggs and darts motif is used, it is almost invariably sliced off at the top, as the bottom view of concave variant on the right reveals.
The concave version here is quite subtle, but a more pronounced version can be really eye-popping. I will show how to construct one using just straight lines and circular/elliptical arcs exclusively as I originally promised in https://pixelfed.social/p/Splines/789956327130679640.
As usual, we start with a flat 2-dimensional plan with lines and ovals to use as #sweepingRails. Then, we add circles and arcs as #sweepingCurves to define the cross-sections. After sweeping the cross section curves on the rails, we create the eggs.
Simply #revolve an ellipse on its major axis to get the convex version of an egg. To get the concave version of an egg, simply create a flat slab and perform a #booleanDifference on that slab using a convex egg.
Once we have all of this preparatory work done, we have to transfer the 3-dimensional design from the flat surface it was originally created on to the #doublyCurved surface of the Ovolo. This requires some elementary calculations using circle geometry.
Previous— https://pixelfed.social/p/Splines/795361973789834465
After ensuring that the object in https://pixelfed.social/p/Splines/795271266191779399 is #airtight, extrude the front and rear planar surfaces by 1 part (8 units) on each end.
At the end of this step, you should have a solid #scroll object with a smooth surface except for the flat parts that will butt against the head of the unadorned #capital.
We have now concluded the #tectonic portions of the entire #IonicOrder. All that remains are decorative #eggsAndDarts that go on the #ovolo of the capital and the #3StrandBraid that goes on the scroll.
Classic #IonicCapital #Tectonic Surfaces Plan
We already made the 8 unit tall #fillet at the bottom of the #capital a part of the #shaft in https://pixelfed.social/p/Splines/791794072490907090. So, excluding that, the remainder of the capital is 14 parts or 112 units tall, for the bottom half of which we use the #revolve operation (like the #columnBase and #columnShaft), and for the top half we use the #extrude operation (like the #pedestal, #entablature, and #plinth).
Starting at the bottom, we have an #astragal that is 2 parts or 16 units tall and has the same profile as a #reed and #torus, falling in between the two in terms of size. The arc AD is shown in gray because it is an invisible #virtualSurface that envelops the decorations like #eggsAndDarts on the #ovolo. This is the measurement that is given in #Scarlata's #PracticalArchitecture, but it makes no mention of the #decorative and #tectonic surfaces. Arc BC with a radius of 4 parts or 32 units is the tectonic surface on which the Ovolo decorations rest. Such decorations have a variable or uneven surface which may not exceed 1 part or 8 units.
Points E and F mark the horizontal tangent or maxima of the second spiral and the first (outermost) spiral, respectively. The gap between them is exactly 4 parts or 32 units. GH is the profile for the vertical side surface on which part of the #ribbon and #braid lie flat, protruding exactly 6 units to coincide with the invisible virtual flat surface through EF.
The #cymaReversa is 2 parts or 16 units tall and 1.5 parts or 12 units wide. It starts 4 units to the right of F and stops 4 units short of the top fillet, which is one part or 8 units tall and 20 parts or 160 units from the #columnAxis.
Of the 4 parts or 32 units between G and H, the lower 3 parts or 24 units are part of the #voluteChannel groove and the top 1 part or 8 units is a fillet that follows the curve of the #volute and progressively gets narrower until it converges with the #eye of the volute.
The #Capital is the last essential component of the complete #IonicOrder. The column #flutes remain, but they are #decorativeElements, and I will cover them later when I cover the decorative elements of the capital like the #EggsAndDarts motif on the #ovolo and the #3StrandBraid on the ribbon or belt around the middle of the smooth #scrolls.
The Ionic capital is complex, but not unapproachable. We will systematically construct everything in this draft rendering using just straight lines and arcs as promised in https://pixelfed.social/p/Splines/789956327130679640, with the exception of the #cymaReversa near the top and the 3-strand braid on the ribbon.
In this rendering, the cyma reversa near the top is made using a flattened half-turn of a #helix, but it can also be constructed using elliptical arcs as I described in earlier posts.
The braid is a #periodic shape with infinite variety and is also based on a helix. You can vary the number of strands, their thickness, pitch, and so on, none of which are essential to the Ionic Order itself. They're only a jumping point for further exploration.
The eggs in the 'eggs and darts' motif can have different shapes. They can be convex like real eggs or concave as shown here, but the top is almost always sliced off. The total depth of the convex or concave shapes can vary, but only within a range of 1 part, or 8 units.
The #volutes in the front and back of the capital are based on #spiral shapes, of which there are many different kinds. Some have #continuous curvature changes, while some do it in #discrete steps, like #fibonacci spirals that can approximate #logarithmic spirals seen in nature, e.g., nautilus. When curvature changes are discrete, the spiral arms can diverge in #arithmetic, #geometric, or some other sequence.
We will construct all of these, and most notably the smooth, sweeping surface of the scrolls using just straight lines and arcs, and let the #CAD software deal with delicate #NURBS curves and surfaces.
The #column is the most complex component — not least because of the beautiful #capital at the top. It also offers the most opportunities for creative expression, as long as designers differentiate in the #decorativeElements, not #tectonicElements.
There are 3 subcomponents of a column — the #columnBase, #columnShaft, and #columnCapital. In the #IonicOrder, there are variants for each of these components, not just in the tectonic portions, but also in the decorative portions, and it is equally acceptable to mix and match them.
Classic variant of the column #base bears #Vignola's signature in a new #molding called #scotia. There's a "modern" version that has a newer Scotia. I am trying hard to resist the urge to call it #NovaScotia.
The column #shaft is not perfectly cylindrical. It gradually tapers off in the upper 2/3, has a plain unadorned variant, and a #fluted variant.
Classic variant of the column #capital has parallel flat #volute slabs only visible from the front and back, but not from the sides. There's also a modern variant that has curved volute faces on all four sides with pointed ends at all corners and optimized for use in a corner column, but not limited to that.
These variants can be freely intermixed in any combination of base, shaft, and capital. The sketch shows an Ionic column with a modern base, fluted shaft, and classic capital, but any other combination would be equally acceptable as long as all are internally consistent in a single #colonnade or #arcade.
Beyond these tectonic elements, there are decorative elements like the #eggsAndDarts motif in the #ovolo of the capital. The eggs can be convex or concave, the eggs and arrows can look different, or the Ovolo could have a completely different motif, or none at all.
The bell-shaped #scrolls between volute slabs are separated by a ribbon or belt with a 3-strand braid not seen in this sketch. If you design fashion accessories, experiment with other designs while maintaining proportions.
Client Info
Server: https://mastodon.social
Version: 2025.04
Repository: https://github.com/cyevgeniy/lmst
