#kodakhc110b

johnny martyr rss (unofficial)johnnymartyr@ծմակուտ.հայ
2022-04-19

Happy Birthday, Kodak Tri-X

Kodak Tri-X, as a concept, has been around since the 1940's when it was a 200 ISO b&w sheet film. Because it was their first fast film, when Kodak released the 400 ISO roll film version, the Tri-X name was maintained. Just like Kodak TMAX P3200 revolutionized low light photography in 1989, Tri-X was an early step in the liberation of photography out of formal studios and away from posed subjects. With its compelling grain structure, rich blacks and ease of use, Kodak Tri-X became an icon of photojournalism and available light photography of all genres. Stephen Dowling, creator of Kosmo Foto, even proposed that Tri-X might be the best black and white film ever made!

Today, on November 1st, this mid-century American classic celebrates it's 67th birthday. Getting to this age hasn't been without its struggles though. Through the 60's and 70's, with the rise in popularity of color film, legacy b&w film sales declined and caused other stocks to go extinct. Tri-X soldiered on though and out-lived color films like Kodachrome that it once seemed to be losing against. In 1989, Ilford released what is still a strong Tri-X competitor; HP5 Plus, a reformulation of HP5. And in 2007, as digital began to compete seriously with film, Kodak struck back with a reformulated Tri-X that has finer grain and uses less silver but still retains much of its character. Today, amidst a global supply chain crisis, Tri-X has received different packaging and an ever-climbing price point that is turning thrifty film photographers to cheaper alternatives. Whatever the future has in store for Kodak Tri-X, its legacy and impact on photography can never be denied, particularly when viewing expansive bodies of work such as that of Andrew Morang who has been shooting Tri-X seemingly non-stop since the 1960's.

I shoot more Tri-X than any other film. I rate Tri-X at either 400 or 1600 and process it in Kodak HC110b. It looks great behind every type of lens I use thanks to is vast dynamic range that picks up every bit of character from the glass. I can shoot it in broad daylight without too harsh a look or very dim indoor light without a muddy a look. So it's a great film to just leave in your daily carry camera for stream-of-consciousness shooting. In fact, I have gotten to a point of keeping my 1930 Leica loaded with Tri-X exclusively at pretty much all times. The rich contrast compensates for the lack of UV coating on my vintage Leitz lenses. And because it's associated with the birth of photojournalism as an art, Tri-X also just feels like the best film for my old Leica that also helped define the genre of photography about which I am most passionate. Behind more modern, multi-coated lenses, the contrast is show-stopping and the film doesn't look its age in the slightest.

Below are some recent photos I've taken on Kodak Tri-X that I think are strong examples of what I appreciate about its character.

This photo was taken about an hour before sunset through my Leitz 90mm Summicron. This lens, built in 1989, amazingly is only single coated but Tri-X helps deepen the shadows. And the texture of out of focus areas with this combo are quite dreamy. I shot this mid-day in fairly harsh sun with my 1932 Leitz Elmar. This lens doesn't have any UV coating but between the harsh light and contrast of Tri-X, the sky took on a haunting quality. Here's another Tri-X shot with my 5cm 3.5 Leitz Elmar during Golden Hour. The image has a lot of textures going on with the soft swirly bokeh, flaring and details of the plants and subjects. If I'd shot this on TMAX, I think it would be too clear and harsh. But with Tri-X grain, things kind of smooth out and equalize without looking mushy. Put Tri-X behind a modern, multi-coated lens like the Voigtlander 40/1.4, find some nice light and watch it sing! The quality of light and lens make the grain in the highlights and shadows nearly disappear but you still have it in the mid tones. This is exactly what people don't understand when they fake film with digital filters. Film can react completely differently in different lighting conditions or with different lenses. I think that an image like this might also challenge Josh Solomon's comment that ["Shooting Tri-X exclusively does tend to get boring after a while."](http://Shooting Tri-X exclusively does tend to get boring after a while.) I thought this image demonstrated how well Tri-X performs in challenging, mixed lighting. We have window and artificial light from multiple rooms competing here with some under and correctly exposed areas. Yet there is still plenty of detail retained in the mid tones before they fall off into deep shadow. I took this wedding photo through a Nikkor 85mm 1.8 and the film was rated and processed for 1600. Looks completely different than the previous shot or the upcoming one. Very little grey here courtesy of the push process and an example of how diverse the Tri-X look can be. This was a late afternoon family portrait session with my 1930 Leica and '32 Elmar. The speckled leaf light is well-controlled. When I was in school, I read a textbook that mentioned something about how grainy film can be used to enhance very textured subjects such as rocks and sand. I think that's what's going on with the rough patina of this old Pontiac whose finish looks like sandpaper. I know it's corny to share selfies but hey, I love my little 1930 Leica and how crisp it looks on Tri-X! The painterly bokeh and modern resolution of my 90mm Summicron are pulled together and given nuanced detail with Tri-X Tri-X is known for its rich blacks but in this evenly lit, late afternoon image of a wedding guest, the mid tones are soft and delicate. Tri-X has a way of being sharp without harsh. I think this is perfect for portraits. I didn't have to do any dodging or burning on this little gentleman's eyes. The wide latitude of Tri-X renders a full compliment of detail from shadow to highlight.

After 67 years, only the newest photographers don't have an opinion on this ubiquitous film but they are probably going to find out about it soon and begin connecting the dots. The rest of us either cut our teeth on it or continue to use Tri-X regularly and have our own personal stories with this film.

Kodak Tri-X is perhaps so common and widely used that it would not only be impossible to imagine a world without it but we may even forget just how special a product that it is.

As we continue to use Tri-X to document the latest cultural events, using modern shooting methods, and the latest processing and digitizing techniques, we not only make the many looks of Tri-X that much more timeless but we starkly highlight what has changed since 1954 and what remains the same. In 2020, I photographed a Black Lives Matter protest on Tri-X and one of the takeaways seemed to be how reminiscent recent events were to the 1960's civil rights movement. But even the simple, isolated family photos and snapshots of dilapidated Americana shared here seem to carry with them a perspective that's nearly geologic in scale.

The adults above were photographed on Tri-X as children by their parents who were also, themselves photographed on Tri-X and the photos that they experienced the news with were on Tri-X. And now I've photographed their children on it. The car. The sign. They were built when Tri-X was still new. Take these photos on a digital camera, or even another film stock. They'll look great. But on Tri-X, these photos, these people, these objects, these events take their place on longer, more connected strings of history. Rather that matters to some people or not is another question of course. Many may be happy to simulate what they think Tri-X looks like using digital filters. But for me, I'll keep the real, the original Kodak Tri-X 400 loaded in my cameras as long as I can get it, and hopefully keep making a little history as I go.

Thanks for reading, happy shooting!

_Follow, Favorite, Like, Add, Insult, ContactJohnny Martyr _

#family #filmphotography #filmreview #kodak #leica #martyrmusings #nikon #portraits #reviews #weddingphotography #1600iso #2021 #400iso #67yearsold #america #american #availablelight #birthday #blackandwhite #blackandwhitefilm #blackandwhitephotography #bokeh #deepblacks #detail #documentaryphotography #dynamicrange #eastmankodak #existinglight #grain #grainy #grit #gritty #grittygrain #hc110 #hc110b #historic #history #kodakalaris #kodakfilm #kodakhc110 #kodakhc110b #kodaktrix #kodaktrix400 #leitz #lens #look #modern #naturallight #nikkor #people #photography #photographyhistory #photojournalism #richblacks #richcontrast #sharp #time #timeless #trix #versatile #vintage

image
johnny martyr rss (unofficial)johnnymartyr@ծմակուտ.հայ
2021-11-01

Happy Birthday, Kodak Tri-X

Kodak Tri-X, as a concept, has been around since the 1940's when it was a 200 ISO b&w sheet film. Because it was their first fast film, when Kodak released the 400 ISO roll film version, the Tri-X name was maintained. Just like Kodak TMAX P3200 revolutionized low light photography in 1989, Tri-X was an early step in the liberation of photography out of formal studios and away from posed subjects. With its compelling grain structure, rich blacks and ease of use, Kodak Tri-X became an icon of photojournalism and available light photography of all genres. Stephen Dowling, creator of Kosmo Foto, even proposed that Tri-X might be the best black and white film ever made!

Today, on November 1st, this mid-century American classic celebrates it's 67th birthday. Getting to this age hasn't been without its struggles though. Through the 60's and 70's, with the rise in popularity of color film, legacy b&w film sales declined and caused other stocks to go extinct. Tri-X soldiered on though and out-lived color films like Kodachrome that it once seemed to be losing against. In 1989, Ilford released what is still a strong Tri-X competitor; HP5. And in 2007, as digital began to compete seriously with film, Kodak struck back with a reformulated Tri-X that has finer grain and uses less silver but still retains much of its character. Today, amidst a global supply chain crisis, Tri-X has received different packaging and an ever-climbing price point that is turning thrifty film photographers to cheaper alternatives. Whatever the future has in store for Kodak Tri-X, its legacy and impact on photography can never be denied, particularly when viewing expansive bodies of work such as that of Andrew Morang who has been shooting Tri-X seemingly non-stop since the 1960's.

I shoot more Tri-X than any other film. I rate Tri-X at either 400 or 1600 and process it in Kodak HC110b. It looks great behind every type of lens I use thanks to is vast dynamic range that picks up every bit of character from the glass. I can shoot it in broad daylight without too harsh a look or very dim indoor light without a muddy a look. So it's a great film to just leave in your daily carry camera for stream-of-consciousness shooting. In fact, I have gotten to a point of keeping my 1930 Leica loaded with Tri-X exclusively at pretty much all times. The rich contrast compensates for the lack of UV coating on my vintage Leitz lenses. And because it's associated with the birth of photojournalism as an art, Tri-X also just feels like the best film for my old Leica that also helped define the genre of photography about which I am most passionate. Behind more modern, multi-coated lenses, the contrast is show-stopping and the film doesn't look its age in the slightest.

Below are some recent photos I've taken on Kodak Tri-X that I think are strong examples of what I appreciate about its character.

This photo was taken about an hour before sunset through my Leitz 90mm Summicron. This lens, built in 1989, amazingly is only single coated but Tri-X helps deepen the shadows. And the texture of out of focus areas with this combo are quite dreamy. I shot this mid day in fairly harsh sun with my 1932 Leitz Elmar. This lens doesn't have any UV coating but between the harsh light and contrast of Tri-X, I find the sky to take on a haunting quality. Here's another Tri-X shot with my 5cm 3.5 Leitz Elmar during Golden Hour. The image has a lot of textures going on with the soft swirly bokeh, flaring and details of the plants and subjects. If I'd shot this on TMAX, I think it would be too clear and harsh. But with Tri-X grain, things kind of smooth out and equalize without looking mushy. Put Tri-X behind a modern, multi-coated lens like the Voigtlander 40/1.4, find some nice light and watch it sing! The quality of light and lens make the grain in the highlights and shadows nearly disappear but you still have it in the mid tones. This is exactly what people don't understand when they fake film with digital filters. Film can react completely differently in different lighting conditions or with different lenses. I think that an image like this might also challenge Josh Solomon's comment that ["Shooting Tri-X exclusively does tend to get boring after a while."](http://Shooting Tri-X exclusively does tend to get boring after a while.) I thought this image demonstrated how well Tri-X performs in challenging, mixed lighting. We have window and artificial light from multiple rooms competing here with some under and correctly exposed areas. Yet there is still plenty of detail retained in the mid tones before they fall off into deep shadow. I took this wedding photo through a Nikkor 85mm 1.8 and the film was rated and processed for 1600. Looks completely different than the previous shot or the upcoming one. Very little grey here courtesy of the push process and an example of how diverse the Tri-X look can be. This was a late afternoon family portrait session with my 1930 Leica and '32 Elmar. The speckled leaf light is well-controlled. When I was in school, I read a textbook that mentioned something about how grainy film can be used to enhance very textured subjects such as rocks and sand. I think that's what's going on with the rough patina of this old Pontiac whose finish looks like sandpaper. I know it's corny to share selfies but hey, I love my little 1930 Leica and how crisp it looks on Tri-X! The painterly bokeh and modern resolution of my 90mm Summicron are pulled together and given nuanced detail with Tri-X Tri-X is known for its rich blacks but in this evenly lit late afternoon image of a wedding guest, the mid tones are soft and delicate. Tri-X has a way of being sharp without harsh. I think this is perfect for portraits. I didn't have to do any dodging or burning on this little gentleman's eyes. The wide latitude of Tri-X renders a full compliment of detail from shadow to highlight.

After 67 years, only the newest photographers don't have an opinion on this ubiquitous film but they are probably going to find out about it soon and begin connecting the dots. The rest of us either cut our teeth on it or continue to use Tri-X regularly and have our own personal stories with this film.

Kodak Tri-X is perhaps so common and widely used that it would not only be impossible to imagine a world without it but we may even forget just how special a product that it is.

As we continue to use Tri-X to document the latest cultural events, using modern shooting methods, and the latest processing and digitizing techniques, we not only make the many looks of Tri-X that much more timeless but we starkly highlight what has changed since 1954 and what remains the same. In 2020, I photographed a Black Lives Matter protest on Tri-X and one of the takeaways seemed to be how reminiscent recent events were to the 1960's civil rights movement. But even the simple, isolated family photos and snapshots of dilapidated Americana shared here seem to carry with them a perspective that's nearly geologic in scale. The adults above were photographed on Tri-X as children by their parents who were also, themselves photographed on Tri-X and the photos that they experienced the news with were on Tri-X. And now I've photographed their children on it. The car. The sign. They were built when Tri-X was still new, . Take these photos on a digital camera, or even another film stock. They'll look great. But on Tri-X, these photos, these people, these objects, these events take their place on longer, more connected strings of history. Rather that matters to some people or not is another question of course. Many may be happy to simulate what they think Tri-X looks like using digital filters. But for me, I'll keep the real, the original Kodak Tri-X 400 loaded in my cameras as long as I can get it, and hopefully keep making a little history as I go.

Thanks for reading, happy shooting!

_Follow, Favorite, Like, Add, Insult, ContactJohnny Martyr _

#family #filmphotography #filmreview #kodak #leica #martyrmusings #nikon #portraits #reviews #weddingphotography #1600iso #2021 #400iso #67yearsold #america #american #availablelight #birthday #blackandwhite #blackandwhitefilm #blackandwhitephotography #bokeh #deepblacks #detail #documentaryphotography #dynamicrange #eastmankodak #existinglight #grain #grainy #grit #gritty #grittygrain #hc110 #hc110b #historic #history #kodakalaris #kodakfilm #kodakhc110 #kodakhc110b #kodaktrix #kodaktrix400 #leitz #lens #look #modern #naturallight #nikkor #people #photography #photographyhistory #photojournalism #richblacks #richcontrast #sharp #time #timeless #trix #versatile #vintage

image
johnny martyr rss (unofficial)johnnymartyr@ծմակուտ.հայ
2021-05-03

Rating + Processing for Available Light Portraits – EI 3200 ISO

It bears repeating:

International Center of Photography shooter James Mignogna once told me that a good photographer matches their light, lens, film and developer. Nowhere do I think these decisions are more critical than portraits in dim lighting.

That was the intro I used in my previous entry: Rating + Processing for Available Light Portraits - EL 1600 ISO and it's as relevant to the entry you're reading now, which will center around 3200 ISO films. Of which, there are only two currently available.

SHOOTING IN THE DARK: KODAK TMAX P3200 AND DELTA 3200

Okay, so what happens when the sun goes down? 1600 and a 50/2 lens will not cut it anymore so you have to go faster. Ilford Delta and Kodak TMAX 3200 films are here to the rescue!

Armchair available light photographers delight in pointing out that Delta 3200 has a native ISO of 1000 and TMAX P3200 has a native ISO of 800. On a technical level, this is not misinformation. However, I am of the opinion that the constant restating of this as well as some incomplete, inaccurate tutorials about how to shoot these films has spawned not only an inaccurate belief that these films are "best" shot at their native ISO but even a bit of FEAR of shooting them at their box speed or higher.

I say, forget about this native ISO stuff!

For all intents and purposes, 3200 ISO is the NORMAL speed of Delta 3200 and TMAX P3200.

The DX codes printed on their canisters read 3200 by cameras and minilabs. Therefore, this is how Ilford and Kodak want these films to be rated and processed.

The films are not called Delta 1000 or TMAX P800, they're called 3200. This is not just marketing as people will lament on the interwebs.

These films are intended by their designers, to be rated at 3200 and processed for 3200. They are also designed to function as "multiple ISO films," as has been worded in older Kodak literature.

I don't personally see the point of paying for higher priced 3200 ISO films and, rating them well within the range of what 400 ISO film can handle, without a more specific reason than because a few influencers have told followers that this is how these films "should" be used.

To be clear, I'm not discouraging anyone from exploring what these flexible films can do, I'm denouncing boxing oneself into this native ISO rating.

If you are shooting a brighter scene but enjoy grain, yes, go ahead and under-rate your film. Rate it at 1600 and process normal (at EI 3200) This will give you richer contrast, you don't have to pay your lab extra money or separate or mark your film.

Jill| Kodak TMAX P3200 rated at 1600 ISO and processed normal at EI 3200

I was on a Nikkormat kick for some time and the meters on these and other classic cameras top out at 1600, so this guided how I shot and processed my 3200 films. In the example above, I was shooting in flat light that needed the under-rating to bring contrast to the scene. Some Nikkor lenses are not very contrasty at full aperture, so under-rating the film helps balance this out too.

If you like grain and tonality and shooting at wider apertures (a dreamy look, if you will), you can rate 3200 films at box speed to achieve this.

Laurie | Kodak TMAX P3200 rated at 3200 ISO and processed normal at EI 3200

In fact, you can always rate your film at 3200 and process normal at EI 3200. This is what Kodak and Ilford designed the film for and is it's "normal" look. No pushing, no pulling, no over- or under-rating. This will give you a flatter, more tonal image which is perhaps a less popular look currently and the reason that you see people recommending against EI 3200. But look, it's all about assessing the quality of the light you're working in and deciding what style you want. You may also just NEED that extra stop because the light is too dim to shoot at 1600 handheld.

I encourage other photographers not to assign subjective judgement such as presuming more contrast is "better" or less grain is "better."

In truth, everything's about balancing what you are working with and what you are trying to achieve. Under-rating (overexposing) your film may increase contrast but it also reduces tonality and shadow detail. It also gives you fewer apertures from which to choose. A detail-oriented shooter is going to be ready to shoot/process these films several ways depending on what the scene is giving them, as oppose to prescribing one method or film for every situation.

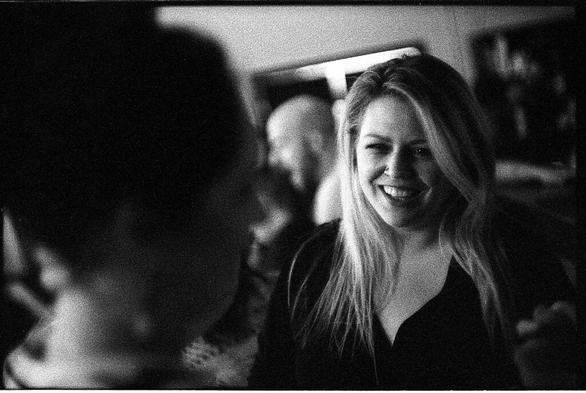
What I do most of the time is rate my film at 6400 ISO and process for EI 6400 by pushing one stop. This is critical of shooting in low light and night time without a flash or camera support and slow shutter speeds. It's how I shoot weddings and concerts and pre-pandemic bar hopping with friends. My reasoning is multi-fold. One being that the light meters of my best cameras top out at 6400, so I can operate them without a shred of guess work. Another being that I'm using these films to do what they were intended. The higher sensitivity allows me to stop down if there's ample light, so I can control my DoF more. The tonality I get from not under-rating gives me more "information" to work with when editing. And the final one being that I very seldom encounter a situation worth photographing where ISO 6400 with a 1/60th shutter speed and a 1.4 aperture are not adequate at bare minimum. Yes, these films can be rated even faster and you may use a lens faster than 1.4. But in these conditions, even with current digital cameras, one encounters some insurmountable (in my opinion) aesthetic concerns.

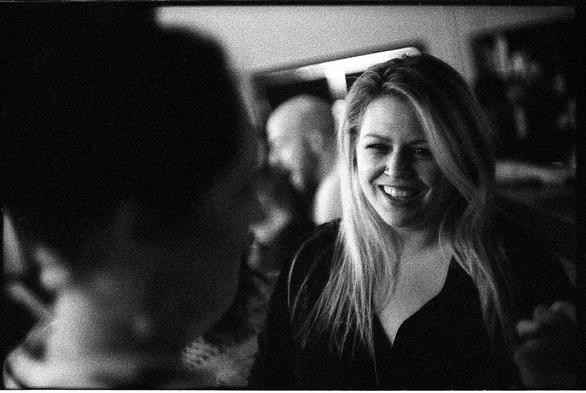
Christi | Kodak TMAX P3200 rated at 6400 ISO and push processed in Kodak HC110b by one stop for EI 6400

Laurie| Kodak TMAX P3200 rated at 6400 ISO and push processed in Kodak HC110b by one stop for EI 6400

Aside from how to expose and process, the other big question is which to use, Ilford Delta 3200 or Kodak TMAX P3200. In HC110b, I find the Kodak to be softer and more tonal, whereas the Ilford is sharper and more contrasty. So, just as I recommend under-rating or push processing to bring contrast to a scene with flatter lighting, I would also recommend choosing Delta. The opposite would be true for a contrasty scene, reach for the TMAX to quell that contrast. OR, if you want to emphasize a contrasty scene, use Delta and to emphasize a flat, dreamy scene, use TMAX. And within each model of film, you can rate and process to add or calm contrast.

Is your head exploding with options?

Don't worry! My recommendation is to start at box speed and normal processing and learn what works and doesn't work with your particular lenses and your usual scenes. I DO NOT recommend starting out by under-rating these films as many influencers will encourage. These films simply are not a one-size-fits all solution. They're not meant to be. They're SUPPOSED to be personally tailored. Just doing whatever you're told to do with them is negating the entire point.

Steph | Ilford Delta 3200 rated at 6400 ISO and push processed in Kodak HC110b by one stop for EI 6400

Lipstick Lamarr | Ilford Delta 3200 rated at 6400 ISO and push processed in Kodak HC110b by one stop for EI 6400

Devon | Ilford Delta 3200 rated at 6400 ISO and push processed in Kodak HC110b by one stop for EI 6400

Another important thing to keep in mind, which I've talked about but maybe not explicitly enough, is not to confuse quantity and quality of light.

Just because a scene has a lower QUANTITY of light and necessitates a higher ISO, this does not mean that you can ignore the QUALITY of the light just because you are shooting at 1600 or 6400. I see so many available light portraits at high ISO's with shadows on faces or other important elements of the scene. I think photographers forget this because in 100 and 400 ISO conditions which are often sunlit, one needn't pay a lot of attention to the quality of light in order to return acceptable photos. A shadow on a face may not turn into a grainy mess in the same way it does at 6400. In fact, I find that the less and less light you shoot in, I find that more critical the quality of that light becomes. And maybe this is one of the main reasons that shooting in these conditions is so challenging.

Tricia| Ilford Delta 3200 rated at 6400 ISO and push processed in Kodak HC110b by one stop for EI 6400

Notice in all these photos, both in this and the 1600 blog, regardless of how dark/black the surrounded area, highlights are generally on the faces. The inclination with candid portraits sometimes is to squeeze the shutter release during the peak of action. But with available light photography, not only must you consider the peak of action but also, this moment has to agree with where the light falls on your subject.

So when working in EI 1600 and 3200; it sounds cheesy and maybe even obvious but… let the light be your guide!

Don't choose your film, rating and process because someone who takes great photos said something is "the best," or because you saw some photos at those specs that look good. Ask these photogs about the quality of light they were shooting in and assess the quality of light you're shooting in. Consider the character of your lenses. Make judgement calls based on those points and your desired outcome. Film responds different ways in different situations. That's why digital can never fully copy it. And it's also why there's a lot to learn in order to get the look you're after. It's very possible that of all my examples, you still don't see something that's right for you. And that's okay. The concept is there. From 1600 to 6400 ISO/EI, hopefully I've given you a springboard from which to find combinations that work for what you are trying to do. Go out and find your own method for shooting portraits in low, available light!

Thanks for reading and happy shooting!

_Follow, Favorite, Like, Add, Insult, ContactJohnny Martyr _

#filmphotography #filmreview #ilford #kodak #martyrmusings #portraits #tipstricksadvice #1600 #1600iso #3200 #3200iso #6400 #6400iso #availablelight #availablelightportrait #barhopping #blackandwhite #blackandwhitefilm #blackandwhitehighspeedfilm #blackandwhiteprocessing #boxspeed #candid #concerts #contrast #contrasty #delta #delta3200 #dim #documentary #dreamy #dxcode #ei1600 #ei3200 #ei6400 #existinglight #existinglightportrait #fastlens #flatter #girls #grain #grainy #handheldcamera #hc110 #hc110b #highiso #highisofilm #highspeedfilm #ilforddelta #ilforddelta3200 #kodakhc110 #kodakhc110b #kodaktmax #kodaktmax3200 #kodaktmaxp3200 #lessgrain #light #lowlight #lowlightfilm #moregrain #nativeiso #naturallight #naturallightportrait #noflash #normalprocessing #overrate #overexpose #p3200 #personal #portraiture #process #processing #pullprocess #pushprocess #qualityoflight #quantityoflight #rating #sharp #soft #tabulargrain #tmax #tonal #traditionalfilm #true #underrate #underexpose #weddings

image
johnny martyr rss (unofficial)johnnymartyr@ծմակուտ.հայ
2021-05-03

Johnny Martyr’s B&W Darkroom Grocery List

If your New Year's resolution is to start processing your own b&w film at home, or you're just interested in comparing notes, I thought it would be handy for me to share my darkroom grocery list.

Disclaimer - I am not a chemist! I'm just a photographer who has found some products and methods that work for my specific purposes. We all have to carve our own path but we can also learn from one another.

My degree is in film, video and theatre. I learned to process in college, from accredited professionals using standard products and practices. As I began working at home, I refined things slightly but have been doing more or less same thing across hundreds of rolls a year intermittently for two decades.

30 rolls of Kodak 36 exposure 35mm from a wedding shoot - a typical workload for me

I shoot Kodak TMAX 100, Fuji Acros 100, Kodak Tri-X 400, Kodak TMAX P3200 and Ilford Delta 3200. I routinely push my Tri-X to EI 1600 and 3200 films to EL 6400. I am primarily a 35mm guy but I sneak in some 120 here and there too. For all these films, I currently use Kodak HC110 Dilution B for its high accutance, accurate push processing, ease of use and economy. The rest of my chemistry is also by Kodak and I'd say I'm pretty Kodak-oriented. If you don't use these films or just don't like the look of my work, then HC110b might not be for you but most of the other products mentioned here have no bearing on the final look of the image. So maybe you can ignore my lack of taste and find something of interest to you anyway!

I heart Kodak

Part of my reason for sticking with Kodak is simply that I have never seen a printed darkroom guide by Fuji, Ilford or any other manufacturer of photochemistry that is as comprehensive and straightforward as the Kodak B&W Darkroom Dataguide. If you found one that I haven't, let me know in the comments! But the Kodak dataguide was a required text book when I was in school and it's still my bible.

The Kodak B&W Darkroom Dataguide Sixth Edition - one of the most important books I've ever read!

I've tried other brands here and there but have always just come back to what I'm comfortable with and has continued to work. I don't believe in buying fifteen different types of film and trying every possible combination of exposing and processing known, or as of yet unknown, to humankind. I believe in consistent and predictable results; accuracy through comfortable, tried and true routines. This allows me to concentrate on the act of taking pictures moreso than the infinitely complex minutia of chemistry.

I am more than happy to dump any mixed chemistry that has any chance of negatively affecting my work. I don't skimp on supplies to save a few bucks while potentially threatening the quality of my negatives. I always mix my developer fresh for each tank and I always test my fixer/examine my chemistry for exhaustion before getting started. You will see some amateur chemists musing about making their own stop bath with vinegar and developing their film using coffee or their ex-girlfriend's piss or whatever. This is all very entertaining and interesting but I work by the Kodak B&W Darkroom Dataguide and I only deviate if I find it absolutely necessary or absolutely inconsequential. I prefer to support Kodak than Folgers. You do what you like.

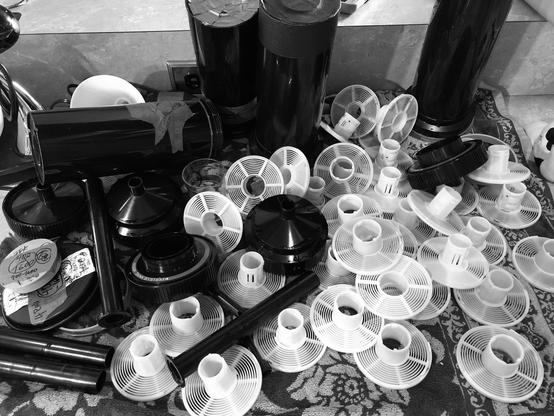
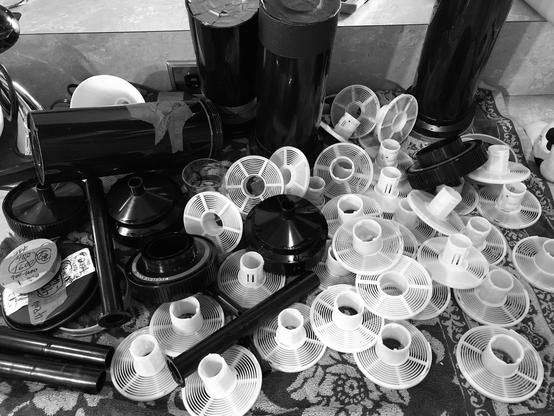
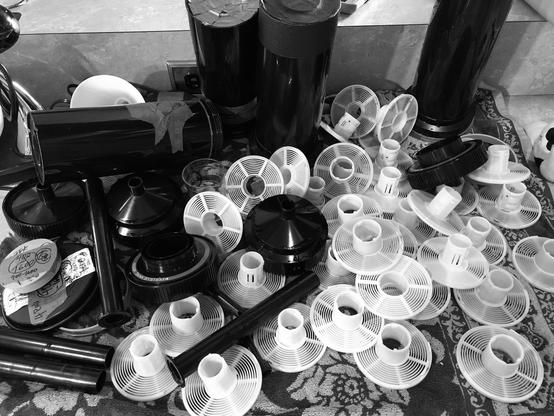
I process my film in five-reel tanks, so I begin by grouping all my film into clusters of five - these rolls represeent two weddings and some personal work

If you are new to processing, you can process just one or two rolls at a time like most people. However, I strongly suggest that shooters work towards the method I use, or something even more, which is processing two five-reel tanks at the same time (that's ten rolls of 36 exposure 35mm). My reason for doing this is that, like most people, my chemistry is mixed to one gallon jugs and two five-reel Patterson tanks use just under one gallon. This enables one to get the most use of their chemicals and fastest total processing time. So rather than mixing a gallon of Kodak HC110b, a gallon of stop, a gallon of fix, and a gallon of hypo, using only a fraction of it to process two rolls of 35 and then letting everything sit, potentially expiring, bottles leaking, work not getting done, whatever, for however long before processing again, you've done as much work as gallon mixes can afford and, if working accurately, the development across ten rolls of film is consistent. Ten rolls of 35mm will keep you off the streets and busy with the scanning.

About to be squeegeed!

That being said, if I'm doing something unusual, I'll scale back how much film I am processing so as to concentrate on the change and do it correctly without potentially harming other rolls. I also understand that it takes a little bit of courage to process more than two rolls at a time because if you mess up, you lose ALOT of film. Ironically though, another reason that I process ten at a time is so that I can mix three or four projects worth of film together. This ensures that if, for some unlikely reason, I did mess them all up, no single project would be fully destroyed. I find that probably most film shooters' worst detriment is not shooting and processing enough. The more film that I can process in a short span of time, the quicker turnaround times are for clients but also, I'm inclined to shoot more and concentrate on improving my actual photography because each single roll sort of has less mental/emotional weight to it, if that makes sense. So by all means, take your time to work up to ten rolls at once! But I do really recommend aiming high.

Cut and sleeved on the light table

Perhaps another noteworthy quirk of mine is that I fully endorse using a squeegee to dry my negatives. Many shooters will tell you that squeegees are only good for scratching ones film and are at best, simply not necessary. I don't use a squeegee to accelerate drying times, although it does help with that. I use one because if I don't, I get water spots on my images. Because of the numerous conversations I've had with other photographers, I understand that the choice to use a squeegee has as much to do with ones water supply, the air quality of the area where one hangs their film and even ones skin type as it does with subjective personal preference. So I won't preach the squeegee but I will offer it as a solution to seemingly incurable drying artifacts.

Without any further delay, I present to you, my black and white darkroom grocery list!

Kodak B&W Darkroom Dataguide Sixth Edition - This book was last published in 2001, it's important to get this most up-to-date copy though older copies have neat features such as sample printing paper. Prices on the Dataguide rise and fall with the wind. It will have to be purchased from a used book store, Amazon or eBay. And yes, it may take a little time to find an affordable copy. Certainly write to Kodak and recommend that they publish a new edition of this wonderful book!

[Distilled Water](http://Distilled Water - I only use distilled for my final rinse, but some will tell you that you should pre-rinse your film to reduce shock of the developer.) - I use distilled for my final rinse, but some will tell you that you should also pre-rinse your film to reduce shock of the developer. Kodak doesn't recommend it so I've never done it and my film has never complained about feeling shocked! You can also get away with not using distilled to do your final rinse if your water supply is not hard. When I lived in Baltimore, I didn't use distilled, the tap water was great for processing. I didn't even have to squeegee. But when I moved to a nicer area with a private, carefully regulated water supply, where the community is constantly debating if we should have fluoride or not, my negatives were crudded up with mineral deposits. I started rinsing with distilled AND using a squeegee to resolve this. Distilled water also makes for a tasty drink while standing around in my kitchen waiting for the next agitation, though I have to admit, I usually prefer a cold Flying Dog. Oh, and this is important, I use my empty distilled one gallon bottles to dump my spent chemistry in. I tape up the tops and label them so that there's no chance of their contents being mistaken (!) then just hold onto them until the designated hazmat collection days in my town.

Kodak HC110 Developer Concentrate - Shipping liquids can be costly so I usually buy from a retailer as close to me as possible or one that offers free shipping. I live in Maryland so New Jersey's Film Photography Project is my first choice, with New York's B&H and Adorama following. In recent years, B&H has noted on their site that some darkroom chems are considered hazmats and can only be purchased locally at their store. Another choice, if you don't live on the East Coast is FreestylePhoto.biz in California.

Kodak HC110 - the old formula on the left and the current formula on the right

Kodak Stop Bath Concentrate - Some folks use water as a stop bath. However, Kodak does not endorse this and I've read various debates back and forth but for me, using Stop hasn't hurt my negatives and costs very little so I just do what Kodak recommends and has worked for me. Stop is probably my least bought and changed chemical.

Kodak Kodafix Solution - Kodak fixer, charmingly dubbed "Kodafix," is available as both a power that is sold in a sealed mylar envelop and mixes to a gallon, or as a liquid concentrate that is sold in a plastic bottle like the developer and stop. The powder is usually cheaper to purchase and ship. I don't use the powder because I find it slightly more challenging to mix since all the granules need to be fully dissolved, else you risk damage to your film. Dissolving fix isn't difficult but if you use dark bottles to mix your chems in, which you should, then you will need to come up with a method to inspect your solution for undissolved granules before use. Additionally, according to the Kodak B&W Darkroom Dataguide, powder fix should be run for eight minutes whereas liquid fix only runs for four. If you're push processing for 15+ minutes just on the developer, getting four minutes of your life back might be gladly welcomed! The final nail in the coffin for powder is that the mylar envelop cannot be recycled in most areas. All that being said, I burn through fixer only second to developer so if the liquid is not available or I'm short on funds, I'll pick up a couple bags to fill my "emergency" stash. You NEVER want to be all set to process, test your fixer, find you need to replenish and not have another bag or bottle ready to go.

Hypo Check - I get the impression that hypo check is a product that some shooters skimp on. The purpose of it is to check your fixer for exhaustion. While you will likely see that your fixer has turned purple or has been used for X number of rolls and should be refreshed, this is a risky game to play. If your fix is exhausted and you're one of those people, myself included, who relishes in opening your tank, exposing your film to bare light, the moment that the fixer has run its four or eight minute cycle, you could ruin your film. And even if your film doesn't get ruined by light, fixing with exhausted fix results in purple negatives that need to be fixed again until clear. So it's just a waste of time not to use hypo check. I have found no value in different brands of hypo check. Remember, it has no direct effect on your images, it's only to test the fixer. So buy whatever brand is cheapest. I like to buy as large a bottle as I can so it's one less thing to worry about stocking up on for a while.

Wetting Agent - Here's another one where I don't think that brand matters much. However, you will likely stumble across heated debates over brands of wetting agent amongst the very old gatekeepers of film photography. I've used several brands of varying prices and have never observed any practical difference. My personal choice, however is LFN by Edwal instead of Kodak. And this is ONLY because it is sold in a bottle with an eyedropper which allows for precise usage. Rule of thumb is that you do one drop of wetting agent for each roll of film in your tank and then fill the tank with tap water if you're lucky, or in my case, distilled water for that final rinse discussed above. Do not over agitate the wetting agent. You should see some suds form but you don't want to give your film a bubble bath!

LFN wetting agent - one drop per reel of 35mm

Patterson Developing Tank and Reels - The argument rages; metal or plastic? As much as I want to get behind metal tanks and reels, I just can't use them for 35mm. I prefer them for 120 but with 35mm film at 36 exposure lengths, I just cannot reliably load the reels as confidently, reliably and quickly as I can plastic Patterson autoloads. And yes, I have Hewes stainless steel reels, unanimously the best version available. If you practice and can get good at loading metal reels and using metal tanks, I admire you. This saves chemistry, which means you can potentially process more film in a session than me and you own some quality equipment that you'll never have to replace because it likely will never break. If you click on the Patterson tank/reels hyperlink, you can read about why I still prefer Patterson.

Patterson tanks loaded and marked with their contents - I cover them in painters or masking tape both to note what's inside as well as to secure the lids as a reminder that bare, unprocessed film is inside. In case I have to stop working and return later, I don't accidently open a tank or process it incorrectly!

Changing Bag - Buy yourself a large changing bag for processing and keep a small changing bag in your camera bag for emergencies. Changing bags are one of the most important bits of gear that a film photographer can have on hand. If you like, you can even buy a changing tent! No more of this towel under the bathroom door bullshit! Buy the right tools and do things right. Instead of hiding in a windowless bathroom, hoping that I remembered to lock the door and that nobody waltzes in on me, I sit on the couch with my large, spacious changing bag on my lap, loading my reels and watching TV!

Film Canister Opener - Here's another small point of contention for me. So many thrifty film photographers will encourage each other to use a can opener to open their film canisters. I disagree. Can openers aren't QUITE designed to easily open a film canister. But you know what is? A film canister opener! Use the right tool. Support businesses that support film photography. Also, some folks use a film leader retriever so as not to have to open the canister at all. And hey, these can come in handy to keep in your bag anyway.

Squeegee - I like Dot Line squeegees. Each side of the squeegee features three blunt edged rubber blades. There is a basic plastic spring built into the hinge. I find that with age and use the hinge seems to be the first part of the device to fail. I have yet to use one of these long enough that the rubber began to deteriorate. For me, the spring tension is important to my feel for how softly to glide the squeegee over my film. So when it breaks, I replace it, though ostensibly, one could continue using it as is. I buy two at a time because, you know, they don't break while you're not in the middle of something! I have tried the Patterson squeegee but find it more difficult to use correctly. It has sharp edged rubber blades and just two per side, not three like the Dot Line. It's perhaps counterintuitive but I think the thinner sharp blades, despite having less surface area to contact the film, are more likely to scratch than the dull blunt blades of the Dot Line. I don't blame my tools and believe that either can be used properly. But I just prefer the Dot Line. Yankee also makes a "squeegee" that replaces the rubber blades with sponges. We used these in school and I don't recall having any problems with them.

Film Drying Clips - These are a bit of a personal thing and much can be dictated by where you hang your film to dry. Many folks hang their film to dry in a bathroom after running a hot shower to produce humidity which decreases static in the air and dust on your film. I think it also helps counteract curling of the film. Anyway, something like the MOD54 hangers in the above hyperlink would be good for use in that scenario. For me, I have these beautiful floor to ceiling windows in my dining room that I enjoy hanging my film in like a giant lightbox. I can easily hang 20 or more rolls of film at a time in just one window and be able to study their contents at a glance or closer examination if required. My wife kindly tolerates me hanging curtain hooks on the rods to these windows with standard binder clips or vintage stainless steel film clips by Kodak, Pako etc., attached to my film.

Photography is a family activity in our house! We hang my processed film in our dining room floor-to-ceiling windows to dry.

Five One Gallon Bottles - You need one for developer, one for stop, one for fix, one for hypo and one as a spare for when something tragic inevitably happens to one of the bottles or lids while you're in the middle of processing. The same people who cover the logos on their Leica's with black electrical tape will swear by using their grandmother's antique amber glass bottles plugged by corks from the local vineyard in which to keep their chemistry. And while I appreciate glass and aesthetic as much as the next anachronist, I prefer brand new (well, now they're getting kinda old) brown plastic darkroom bottles by Delta. They are cheap, light weight and aren't easily broken. Some folks also use "accordion" plastic bottles, which seem like a smart idea to me. The idea is that you collapse the bottle as you spend the chemistry so as to minimize oxidation. My thing is that the chems that I reuse stay pretty close to the top of my bottles and the chems that I don't reuse, I use the full bottle. To me, this is one of those extra steps that one takes as compensation for not shooting/processing more and trying to be cost-efficient.

Thermometer - I really can't stand the old Kodak mercury style thermometers. The refraction of the glass can be difficult to read through at some angles and they can sink into a deep beaker etc. I REALLY like the Weston stainless steal circular or "dial" thermometer that came to me from a friend's dad's old pro darkroom. They're a little pricey but they're quite nice and there are cheaper models available. They feature a clip underneath the dial that can move up and down the sensor part of the thermometer. This allows you to mount the thermometer at any height you want within a liquid. Also, I tend to think that for beakers, you are getting a more accurate reading across the height of the liquid due to the sensor being comprised of a long stem as oppose to the bottom of a conventional mercury type thermometer. I've never needed to do this, but they can also be manually recalibrated which is pretty neat. Oh and of course, it takes no batteries like a modern thermometer. And I know how film guys hate batteries. But finally, the Weston is just easy to read. Larger dial faces are even available.

68 is the magic number!

Graduates - Over time, you wind up just collecting graduates of various sizes and types. The most indispensable for me is a 42oz plastic beaker that I mix developer with. It takes three of these filled with water, plus 4oz of HC110 concentrate to make one gallon of HC110b solution. I have some vintage 32oz glass and plastic Kodak brand graduates just for getting water to the right temp and mixing other chems. Because I'm pretty well set on HC110b, I also picked up a cute little 4oz Kodak glass that is as dedicated as I am to HC110.

I love these old glass Kodak graduates! It's important not to mix up your chemistry!

Funnel - Funnels are essential to pouring from graduates into your one gallon bottles. They don't need to be fancy.

Sleeves - There are many choices. I have never had any issues with Print File brand sleeves in the 20 years I've been processing. The very first negatives that I processed back in school looked and smelled lovely last I checked. As do the Print File sleeves. Because I only shoot 36 exposure rolls of 35mm and still use a flatbed scanner, I buy 35-7 sleeves, that's 7 rows of 6 frames each. Because each row accommodates 6 frames, there are no binder holes as many shooter might prefer for storage of their sleeves. I just keep my finished sleeves boxed. If this offends your sense of order, you might have to sacrifice the 6 maximum frames you can put in each side of an Epson flatbed scanner to just 5 frames. But maybe you're one of those super hip film photogs who uses a digital cam to "scan."

Tools of the trade Light table shots of the negs for my Leica M6 TTL blog

So there are some other odds and ends that are needed to process but you'll figure those out as you go along as everyone does.

I know it's been wordy but hopefully this will be a useful reference to review or get started with. Let me know if I forgot anything and please, by all means, challenge my decisions and give me your recommendations! Developing is always developing! Ha!

Thanks for reading, happy shooting (and processing!)

_Follow, Favorite, Like, Add, Insult, ContactJohnny Martyr _

#filmphotography #kodak #martyrmusings #reviews #tipstricksadvice #100 #1600 #3200 #32oz #35mm #35mmfilm #35mmfilmdeveloping #35mmfilmprocessing #35mmphotography #400 #4oz #6400 #adorama #bh #bw #beaker #binderclips #blackandwhite #blackandwhitefilm #blackandwhitefilmphotography #changingbag #concentrate #darkroom #developer #developing #developingbwfilm #developingblackandwhitefilm #distilledwater #dotline #edwal #film #filmcanister #filmcanisteropener #filmdeveloping #filmdryingclips #filmphotographer #filmphotographyproject #filmprocessing #filmweddingphotographer #fixer #flyingdog #freestylephoto #fujiacros100 #funnel #getstarted #glassbeaker #graduate #hazmat #hc110 #hewesreels #hypo #hypocheck #ilforddelta3200 #kitchen #kodafix #kodakbwdarkroomdataguide #kodakhc110 #kodakhc110b #kodakprofessional #kodaktmax100 #kodaktmaxp3200 #kodaktrix400 #leica #lfn #onegallonbottle #pattersonfilm #pattersonreels #pattersontanks #photoflo #plasticbeaker #practices #processing #processingbwfilm #processingblackandwhitefilm #products #recommendations #refer #reference #rinse #share #sleeves #solution #squeegee #stop #stopbath #tape #thermometer #weddingphotographer #weddingphotography #weddings #weston #wettingagent #yankee
image
johnny martyr rss (unofficial)johnnymartyr@ծմակուտ.հայ
2021-05-03

Lens Hoods for the Leica Summitar

I touched on this topic a little bit in a previous blog about hoods for various LTM lenses entitled Throwing Shade, but I wanted to drill down on lens hood options for the Leitz 50mm f2 Summitar. As previously stated, I think that earlier Leitz lenses require a hood in many circumstances to perform their best. And there are a number of possible hoods for the Summitar that photographers may be interested in trying. The correct original hood is fairly unpopular due to its size, thus I often see photographers looking for an appropriate alternative. It's a little complicated a task though, because Summitars have an odd outer diameter of 41.5mm and their inner threads are 36mm and recessed within the front ring. This unusual design can make finding a well-fitting hood, or any accessory, a somewhat tricky.

The Leica Summitar is the predecessor of the fabled Leica 50mm f2 Summicron and later copies of the Summitar even share the lens barrel with the early Summicron. Consequently, most Summitars and the Version I 50 Summicron can accept the lens hoods that I'm about to discuss. I'm going to keep Summitar as my point of focus since it's what I use but if you're an early Summicron shooter, by all means, you're welcome to huddle in with us too!

And before we get into hoods, we need to talk about the two main versions of Summitars out there, because yes, which version you have will dictate which hoods you can run.

One might divide Summitar lens types into more categories, for the intens and purposes of this discussion, I'm going to simplify them into just two versions.

Summitar Version I (1939)

Summitars from the first decade of this models production run featured sought-after ten blade aperture diaphragms. The front element was uncoated until 1946. Summitars made in the small window between 1946 and 1949 are often regarded as the most desirable due to having both the ten blades and the UV coating. One problem, however, if you can call it that, is that these first generation Summitars do not have the provision for mounting clip-on hoods that Leica would develop and use for many following decades. Summitar Version II got this update.

If you want to use more common, clip-on Leica hoods, there's a simple way to do this. Screw an original Summitar filter onto your Summitar Version I. The tiny gap between the front ring of the lens and filter should create enough of a groove for the Leica clip-on hoods that we're about to examine, to fit onto Version I Summitars.

Being unfamiliar with this recommendation first-hand and wanting to provide accurate accounts here, I decided to try it with my Summitar Version II. I bought an original Type L green filter (GCYOO) in black paint, mounted it to my Summitar Version 2 and then tried both my ITDOO and SOOPD (hoods discussed below). It worked out great. The ITDOO clicked into place with a little play. The SOOPD fit pretty tightly though. Perhaps moreso than when fitted the standard way. I am unaware of any differences between screwing any Type L filter into a Summitar Version I, though admittedly, for every rule with early Leica, there do seem to be exceptions. Please do let me know in the comments if you know more!

Summitar Version II (1949)

Summitar received some revisions in 1949, the main one being what everyone talks about; the recycling of leftover Summar aperture assemblies. But the change that's important with regards to this discussion is the added groove around the front ring of the lens barrel which allows clip-on lens hoods to be fitted. In true Leica style, this tiny feature appears to be merely cosmetic as it perfectly fits the styling of the Summitar. But it adds considerable functionality to the lens, which can now accept both clamp-on and clip-on accessories. Which, as I'm about to get onto, opens up quite a number of options for future-built lens hoods.

SOOPD Version I (1939 - for 50/2 Summitar Version I)

The earliest hood made for Summitar was called SOOPD. SOOPD works with both Summitar versions because it employees a thumb-screw-adjusted circular clamp to attach to the outer circumference of the lens. SOOPD Version I was finished in either black paint or satin silver chrome. The rear section of black SOOPDS is finished in distinctive crinkle coat black. There were E. Leitz Wetzlar Germany and E. Leitz New York copies. Both feature the E. Leitz logo on the top-facing blade of this four blade barndoor assembly, along with the name "Summitar." The placement of this logo is an easy way to spot the difference between Version I and II SOOPDs in online listings. These hoods were sold in the old style, red boxes with gold text.

The old barndoor hoods opened and closed by means of a precise and elegant little spring mechanism. While this folding mechanism is intuitively useful for stowing the hood, what I find quite genius about it is that the closed position of SOOPD serves as a lens cap for Summitar. I like using SOOPD on faster-paced shoots where I wouldn't typically bother with lens caps. SOOPD can easily be closed very quickly to protect the vulnerable front element and cloth shutter, then opened again just as quickly, to get back to shooting.

SOOPD Version II (1949 - for 50/2 Summitar Version II)

The next version of SOOPD, features a faster push-button, clip-on mounting mechanism. As noted, SOOPD Version II is to be used with 1949/50 Summitars with the accessory groove around the front of the lens. Most of these Summitars, if not all, are the 6 aperture blade type.

On both sides of SOOPD Version II are rectangular, spring-loaded buttons. Press these in and, similar to most newer LTM and early M Leica hoods, little tabs are retracted from inside the circumference of the hood's collar. This allows the shooter to slip the shade over the front of the Summitar and release the buttons, deploying the tabs, such that they clip into the groove on the front of the lens barrel.

The push button arrangement makes for quick and easy installation and removal. However, of the two versions, I prefer the earlier, rarer clamp-on because the Version II SOOPD can rotate around the lens if jostled, throwing off it's proper positioning with the view and rangefinder windows.

The engraving on the top-facing blade of the barndoor of SOOPD Version I was relocated to the right-facing blade of the barndoor of SOOPD Version II. The location of the engraving is a GREAT way to tell SOOPD Versions I and II apart from one another in online listings. To my knowledge, there is not a New York copy of SOOPD Version II, only Wetzlar, Germany. And Version II was also sold in a variation of the textured red box with gold text.

SOOFM (1954 - for 50/2 Summitar Version II & 50/2 Summicron Version I)

In 1953, the Summicron was released and the Summitar was discontinued after a 14 year run. Accordingly, SOOPD was renamed SOOFM and repackaged.

The only difference between SOOPD Version II and SOOFM is the addition of "u. Summicron" on the right-facing barndoor blade text.

The box for SOOFM remained the plain red style for some time before upgrading to the mid-century modern style; beige with a stylized graphic of the hood on it.

SOOFM survived until 1960 when the 50mm Summicron shed the old 1930's style collapsible barrel and went rigid.

ITOOY (1956 - for 50/2.8 and 50/3.5 Elmar)

I've heard some fringe recommendations to run ITOOY with Summitar. Personally, though I haven't tried it because I expect that this hood is is too narrow. It was designed for use with the Elmar 50/2.8 and 3.5. While it would be very low profile in appearance on a Summitar, I have a feeling that it would vignette when used at full aperture. I'm noting it here simply because this hood will mechanically fit on the Summitar and might be an option for someone who doesn't use this lens at full aperture much and wants as small a hood for it as possible.

ITDOO (1956 - for 35/3.5 Summaron & 50/2 Summicron)

Before the presentation box for SOOFM was changed but after the Summitar had been discontinued, Leica released a more compact hood for the Summicron and 35mm Summaron, called ITDOO in 1956.

Like the SOOPD Version II and SOOFM, ITDOO was installed onto the lens via two little push-buttons that took advantage of the recessed ring on the front of these lenses. Unlike the push-button SOOPD and SOOFM, ITDOO is a circular shade, thus it doesn't matter if it is jostled while installed as it does not need to sit any particular way on the lens so as not to affect the viewfinder.

ITDOO originally sold with a plastic rear cap that was not available for SOOPD/SOOFM. And this is an important point of distinction in use between these hoods, in my opinion.

The idea with ITDOO was that the photographer could reverse mount it to the lens, then use the supplied rear cap to cap the hood and lens. I don't think most people even realise that ITDOO can be reverse-mounted and thus, you often see the hood for sale sans original cap. I prefer circular lens hoods whose front can be capped rather than needing to make a big effort to protect the lens. However, by reverse-mounting an ITDOO actually takes up less space in ones camera bag than a barndoor hood, providing that hte lens isn't collapsed. Because, when reverse mounted, ITDOO prevents Summitar from fully collapsing. So it's really just about personal preference at this point.

Capping inconveniences aside, ITDOO is more compact in use and just more conventional in appearance, and therefore has become more popular and more expensive than most copies of the SOOPD, which I feel, is one of the few undervalued Leica accessories available.

I am unaware of any cosmetic variation of the ITDOO. The conical part of the hood is black paint aluminum engraved with "Summaron 3.5cm Summicron 5cm" and the narrow chrome mounting ring is engraved with "Ernst Leitz GmbH Wetzlar" and "Germany" on the opposing face. ITDOO was packaged in the old textured red box with gold lettering and later, the beige box with graphics. Apparently it's not difficult to remove the black paint conical section of ITDOO from its silver chrome mounting band. So sometimes you'll see that someone has fitted another

SNHOO (1957 - for Summitar)

SNHOO isn't a hood but rather a special adaptor ring made specifically for the Summitar. You see, Summitar's filter thread is recessed and therefore requires Summitar-specific filters and accessories. The alternative is to screw in a SNHOO which is a step-up ring with a female 39mm thread. 39mm is a much more common accessory size and will then give the photographer access to any 39mm threaded hood.

Some nameless Chinese company makes cheap, modern aluminum SNHOO copies which are widely sold on eBay along with circular vented hoods that resemble the 1960's Summicron style hood. For lack of a simple list like I've compiled here, I stupidly purchased these poor quality, Chinese knock-off kits from a seller called heavystar and ran it on my Summitar until I found that the fake SNHOO got stuck and had to be twisted and cut out of the threads with wire cutters. The seller wouldn't return my messages, offering no help. So if you are going to run some other 39mm threaded hood on your Summitar, please, go to the trouble of tracking down a Leica-made SNHOO. Check the site or write to Tamarkin for help. Don't attach garbage to your Leica, it's not worth it.

IROOA/12571 (1959 - for 35/2, 35/2.8, 35/3.5 and 50/2, 50/2.8, 50/3.5)

Riding off the coattails of ITDOO, Leica came up with IROOA in 1959. Same basic shape/concept as ITDOO but the chrome band on IROOA is wider and sports two rows of tabs instead of just one row. This allows one to lengthen or shorten the hood and to fit a few other lenses. Additionally, when the IROOA is reverse-mounted to the lens for storage, that second set of tabs can clip onto the lens securely. Whereas when ITDOO is reverse-mounted to the lens, there is only a section of velvet lining in the hood that pressure fits it in place.

There were two versions of the IROOA but they differ only in their engravings and were always sold in the graphic laden boxes

Interestingly, I've noticed that there are some quite nice modern aftermarket IROOA copies for sale on eBay. They are made by a Japanese company called UM, look close to original and some even come in 1950's Leica style boxes. There are also IROOA copies made by a Chinese company called Light Lens Lab. They sell for considerably more than the UM copy, and even it seems, more than some original Leica copies. But Light Lens Lab makes their IROOA's in three colors; all black, all chrome or all gold. And of course, not to be outdone in obscurity, Japan Camera Hunter has shown off a rare distressed black and gold IROOA copy.

IROOA is a useful hood because it fits 50mm f2, 2.8 and 3.5 as well as 35 f2, 2.8 and 3.5 lenses.

12585 (1963 - for 35/2, 35/2.8, 35/3.5 and 50/2, 50/2.8, 50/3.5)

This is probably the hippest looking lens hood that anyone can own. The Leica 12585, when paired with a 50 or 35 Cron and a black and brassed M4 practically defined smart and stylish in the 1960's. Zeiss copied it. Voigtlander copied it. You even see some crazies using a hood this shape on their SLR's. The Leica 12585 is a work of art. Form and function fall in love. This circular hood contains the original ITDOO DNA in terms of its mounting and shape but features a reverse conical nose with three cutaways. It eliminates flaring and reduces viewfinder blockage, but is compact. The unusual shape also makes for a good grip when carrying a Leica by its lens. The 12585 simply redefined what a simple lens hood could look like. I run this hood design on my Voigtlander 40mm Nokton and used to run it on my Summitar. I found the 12585 a little large and modern looking for the 1930's style Summitar. But hey, maybe you have one for your newer lenses and don't feel like buying another hood. It will work fine with the Summitar.

CONCLUSION

From my research, that about wraps up all the hoods that I'd recommend to run on your Leica Summitar. Please don't hesitate to give me a shout if there's anything that I missed!

So, what Summitar hood am I using, you might ask. Well, I am tied between my push-button SOOPD and ITDOO. For sheer pragmatics, the SOOPD gets my vote. But so as not to cause my subjects to stare at my camera in bewilderment, which, yes, sometimes they do and it's distracting, the ITDOO serves nicely. If I were to make a single recommendation, I'd probably recommend the clamp-on SOOPD. Leica really did everything right with the first version of the Summitar hood. If I'd picked it up first, I probably wouldn't have sought out the ITDOO. But on a cosmetic level, the ITDOO seems to look the best on a Summitar in my opinion. While I wouldn't normally go out of my way to buy a camera accessory for mere cosmetics, I do find that the SOOPD draws more attention than I'd like, to the point of it being distracting. Old cameras inspire some amount of conversation with subjects but the SOOPD has a habit of really getting people engaged to the point that I've wound up talking about it with them more than actually shooting. Your mileage may vary though!

Much of the information I've noted here came straight from page 106 of the Leica Accessories Guide, exhaustive eBay window-shopping and talking to Leica experts like rock photographer Jason Nicholson.

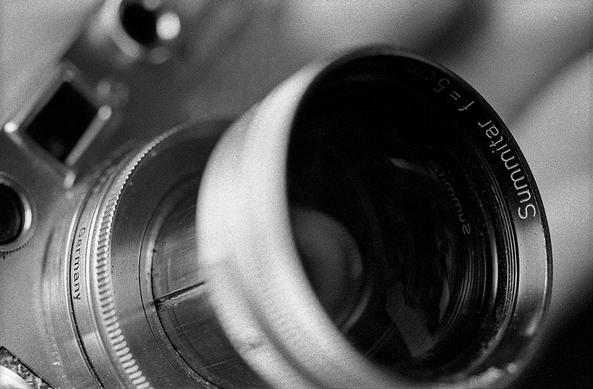
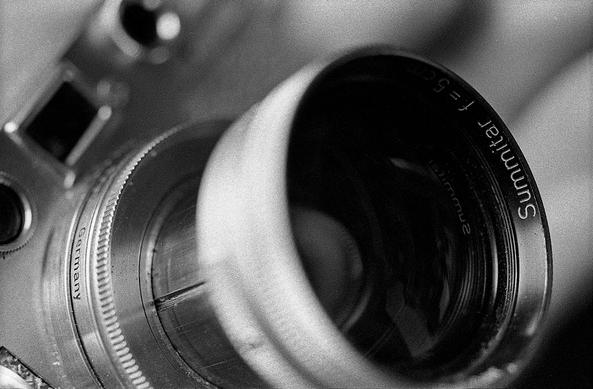
All photos were taken with my Olympus OM-1n and 55mm 3.5 Zuiko on Kodak TMAX P3200 rated at 1600 and processed for 3200 in Kodak HC110b. Pictured is my 1947 Leica IIIc and 1954 Summitar with a SOOPD Version 2 hood, ITDOO and GCYOO green filter in black paint (I figured a black paint copy would look more distinct in photos for this blog!).

Thanks for reading and happy shooting!

_Follow, Favorite, Like, Add, Insult, ContactJohnny Martyr _

#accessoryreviews #filmphotography #leica #lensreview #martyrmusings #reviews #tipstricksadvice #12585 #1939 #35mm #35mmphotography #415mm #502 #50mmf2 #50mmsummicron #50mmsummitar #5cmf2 #5cmsummicron #5cmsummitar #accessories #accessory #bevel #blackandwhite #blackandwhitephotography #blackpaint #bnw #boxspeed #button #categories #chrome #clampon #clipon #collapsible #craftsmanship #flare #gcyoo #gegenlichtblende #gotolens #grainy #iiic #irooa #itdoo #itooy #kodakhc110 #kodakhc110b #kodaktmax3200 #kodaktmaxp3200 #leica12585 #leica50 #leica50mm #leicafilter #leicagcyoo #leicahood #leicaiiic #leicairooa #leicaitdoo #leicaitooy #leicalens #leicaltm #leicashade #leicasnhoo #leicasoofm #leicasoopd #leicasummicron #leicathreadmount #leitz #leitzltm #leitzsummicron #leitzsummitar #leitzthreadmount #lenscap #lenshood #lensprotection #lensshade #ltm #ltmlens #m39 #m39lens #macro #metal #micro #normallens #olympusmacro #olympuszuiko #pushbutton #rangefinderphotography #recessed #rigid #snhoo #soofm #soopd #summicron #summitar #summitargegenlichtblende #summitarhood #summitarshade #summitarsunshade #sunshade #thumbscrew #tmax3200 #tmaxp3200 #typelfilter #versioni #versions #vintage #zuiko55mm35macro

image
johnny martyr rss (unofficial)johnnymartyr@ծմակուտ.հայ
2021-05-02

Rating + Processing for Available Light Portraits – EI 3200 ISO

It bears repeating:

International Center of Photography shooter James Mignogna once told me that a good photographer matches their light, lens, film and developer. Nowhere do I think these decisions are more critical than portraits in dim lighting.

That was the intro I used in my previous entry: Rating + Processing for Available Light Portraits - EL 1600 ISO and it's as relevant to the entry you're reading now, which will center around 3200 ISO films. Of which, there are only two currently available.

SHOOTING IN THE DARK: KODAK TMAX P3200 AND DELTA 3200

Okay, so what happens when the sun goes down? 1600 and a 50/2 lens will not cut it anymore so you have to go faster. Ilford Delta and Kodak TMAX 3200 films are here to the rescue!

Armchair available light photographers delight in pointing out that Delta 3200 has a native ISO of 1000 and TMAX P3200 has a native ISO of 800. On a technical level, this is not misinformation. However, I am of the opinion that the constant restating of this as well as some incomplete, inaccurate tutorials about how to shoot these films has spawned not only an inaccurate belief that these films are "best" shot at their native ISO but even a bit of FEAR of shooting them at their box speed or higher.

I say, forget about this native ISO stuff!

For all intents and purposes, 3200 ISO is the NORMAL speed of Delta 3200 and TMAX P3200.

The DX codes printed on their canisters read 3200 by cameras and minilabs. Therefore, this is how Ilford and Kodak want these films to be rated and processed.

The films are not called Delta 1000 or TMAX P800, they're called 3200. This is not just marketing as people will lament on the interwebs.

These films are intended by their designers, to be rated at 3200 and processed for 3200. They are also designed to function as "multiple ISO films," as has been worded in older Kodak literature.

I don't personally see the point of paying for higher priced 3200 ISO films and, rating them well within the range of what 400 ISO film can handle, without a more specific reason than because a few influencers have told followers that this is how these films "should" be used.

To be clear, I'm not discouraging anyone from exploring what these flexible films can do, I'm denouncing boxing oneself into this native ISO rating.

If you are shooting a brighter scene but enjoy grain, yes, go ahead and under-rate your film. Rate it at 1600 and process normal (at EI 3200) This will give you richer contrast, you don't have to pay your lab extra money or separate or mark your film.

Jill| Kodak TMAX P3200 rated at 1600 ISO and processed normal at EI 3200

I was on a Nikkormat kick for some time and the meters on these and other classic cameras top out at 1600, so this guided how I shot and processed my 3200 films. In the example above, I was shooting in flat light that needed the under-rating to bring contrast to the scene. Some Nikkor lenses are not very contrasty at full aperture, so under-rating the film helps balance this out too.

If you like grain and tonality and shooting at wider apertures (a dreamy look, if you will), you can rate 3200 films at box speed to achieve this.

Laurie | Kodak TMAX P3200 rated at 3200 ISO and processed normal at EI 3200

In fact, you can always rate your film at 3200 and process normal at EI 3200. This is what Kodak and Ilford designed the film for and is it's "normal" look. No pushing, no pulling, no over- or under-rating. This will give you a flatter, more tonal image which is perhaps a less popular look currently and the reason that you see people recommending against EI 3200. But look, it's all about assessing the quality of the light you're working in and deciding what style you want. You may also just NEED that extra stop because the light is too dim to shoot at 1600 handheld.

I encourage other photographers not to assign subjective judgement such as presuming more contrast is "better" or less grain is "better."

In truth, everything's about balancing what you are working with and what you are trying to achieve. Under-rating (overexposing) your film may increase contrast but it also reduces tonality and shadow detail. It also gives you fewer apertures from which to choose. A detail-oriented shooter is going to be ready to shoot/process these films several ways depending on what the scene is giving them, as oppose to prescribing one method or film for every situation.

What I do most of the time is rate my film at 6400 ISO and process for EI 6400 by pushing one stop. This is critical of shooting in low light and night time without a flash or camera support and slow shutter speeds. It's how I shoot weddings and concerts and pre-pandemic bar hopping with friends. My reasoning is multi-fold. One being that the light meters of my best cameras top out at 6400, so I can operate them without a shred of guess work. Another being that I'm using these films to do what they were intended. The higher sensitivity allows me to stop down if there's ample light, so I can control my DoF more. The tonality I get from not under-rating gives me more "information" to work with when editing. And the final one being that I very seldom encounter a situation worth photographing where ISO 6400 with a 1/60th shutter speed and a 1.4 aperture are not adequate at bare minimum. Yes, these films can be rated even faster and you may use a lens faster than 1.4. But in these conditions, even with current digital cameras, one encounters some insurmountable (in my opinion) aesthetic concerns.

Christi | Kodak TMAX P3200 rated at 6400 ISO and push processed in Kodak HC110b by one stop for EI 6400

Laurie| Kodak TMAX P3200 rated at 6400 ISO and push processed in Kodak HC110b by one stop for EI 6400

Aside from how to expose and process, the other big question is which to use, Ilford Delta 3200 or Kodak TMAX P3200. In HC110b, I find the Kodak to be softer and more tonal, whereas the Ilford is sharper and more contrasty. So, just as I recommend under-rating or push processing to bring contrast to a scene with flatter lighting, I would also recommend choosing Delta. The opposite would be true for a contrasty scene, reach for the TMAX to quell that contrast. OR, if you want to emphasize a contrasty scene, use Delta and to emphasize a flat, dreamy scene, use TMAX. And within each model of film, you can rate and process to add or calm contrast.

Is your head exploding with options?

Don't worry! My recommendation is to start at box speed and normal processing and learn what works and doesn't work with your particular lenses and your usual scenes. I DO NOT recommend starting out by under-rating these films as many influencers will encourage. These films simply are not a one-size-fits all solution. They're not meant to be. They're SUPPOSED to be personally tailored. Just doing whatever you're told to do with them is negating the entire point.

Steph | Ilford Delta 3200 rated at 6400 ISO and push processed in Kodak HC110b by one stop for EI 6400

Lipstick Lamarr | Ilford Delta 3200 rated at 6400 ISO and push processed in Kodak HC110b by one stop for EI 6400

Devon | Ilford Delta 3200 rated at 6400 ISO and push processed in Kodak HC110b by one stop for EI 6400

Another important thing to keep in mind, which I've talked about but maybe not explicitly enough, is not to confuse quantity and quality of light.

Just because a scene has a lower QUANTITY of light and necessitates a higher ISO, this does not mean that you can ignore the QUALITY of the light just because you are shooting at 1600 or 6400. I see so many available light portraits at high ISO's with shadows on faces or other important elements of the scene. I think photographers forget this because in 100 and 400 ISO conditions which are often sunlit, one needn't pay a lot of attention to the quality of light in order to return acceptable photos. A shadow on a face may not turn into a grainy mess in the same way it does at 6400. In fact, I find that the less and less light you shoot in, I find that more critical the quality of that light becomes. And maybe this is one of the main reasons that shooting in these conditions is so challenging.

Tricia| Ilford Delta 3200 rated at 6400 ISO and push processed in Kodak HC110b by one stop for EI 6400

Notice in all these photos, both in this and the 1600 blog, regardless of how dark/black the surrounded area, highlights are generally on the faces. The inclination with candid portraits sometimes is to squeeze the shutter release during the peak of action. But with available light photography, not only must you consider the peak of action but also, this moment has to agree with where the light falls on your subject.

So when working in EI 1600 and 3200; it sounds cheesy and maybe even obvious but… let the light be your guide!

Don't choose your film, rating and process because someone who takes great photos said something is "the best," or because you saw some photos at those specs that look good. Ask these photogs about the quality of light they were shooting in and assess the quality of light you're shooting in. Consider the character of your lenses. Make judgement calls based on those points and your desired outcome. Film responds different ways in different situations. That's why digital can never fully copy it. And it's also why there's a lot to learn in order to get the look you're after. It's very possible that of all my examples, you still don't see something that's right for you. And that's okay. The concept is there. From 1600 to 6400 ISO/EI, hopefully I've given you a springboard from which to find combinations that work for what you are trying to do. Go out and find your own method for shooting portraits in low, available light!

Thanks for reading and happy shooting!

_Follow, Favorite, Like, Add, Insult, ContactJohnny Martyr _

#filmphotography #filmreview #ilford #kodak #martyrmusings #portraits #tipstricksadvice #1600 #1600iso #3200 #3200iso #6400 #6400iso #availablelight #availablelightportrait #barhopping #blackandwhite #blackandwhitefilm #blackandwhitehighspeedfilm #blackandwhiteprocessing #boxspeed #candid #concerts #contrast #contrasty #delta #delta3200 #dim #documentary #dreamy #dxcode #ei1600 #ei3200 #ei6400 #existinglight #existinglightportrait #fastlens #flatter #girls #grain #grainy #handheldcamera #hc110 #hc110b #highiso #highisofilm #highspeedfilm #ilforddelta #ilforddelta3200 #kodakhc110 #kodakhc110b #kodaktmax #kodaktmax3200 #kodaktmaxp3200 #lessgrain #light #lowlight #lowlightfilm #moregrain #nativeiso #naturallight #naturallightportrait #noflash #normalprocessing #overrate #overexpose #p3200 #personal #portraiture #process #processing #pullprocess #pushprocess #qualityoflight #quantityoflight #rating #sharp #soft #tabulargrain #tmax #tonal #traditionalfilm #true #underrate #underexpose #weddings

image
johnny martyr rss (unofficial)johnnymartyr@ծմակուտ.հայ
2021-05-02

Johnny Martyr’s B&W Darkroom Grocery List

If your New Year's resolution is to start processing your own b&w film at home, or you're just interested in comparing notes, I thought it would be handy for me to share my darkroom grocery list.

Disclaimer - I am not a chemist! I'm just a photographer who has found some products and methods that work for my specific purposes. We all have to carve our own path but we can also learn from one another.

My degree is in film, video and theatre. I learned to process in college, from accredited professionals using standard products and practices. As I began working at home, I refined things slightly but have been doing more or less same thing across hundreds of rolls a year intermittently for two decades.

30 rolls of Kodak 36 exposure 35mm from a wedding shoot - a typical workload for me

I shoot Kodak TMAX 100, Fuji Acros 100, Kodak Tri-X 400, Kodak TMAX P3200 and Ilford Delta 3200. I routinely push my Tri-X to EI 1600 and 3200 films to EL 6400. I am primarily a 35mm guy but I sneak in some 120 here and there too. For all these films, I currently use Kodak HC110 Dilution B for its high accutance, accurate push processing, ease of use and economy. The rest of my chemistry is also by Kodak and I'd say I'm pretty Kodak-oriented. If you don't use these films or just don't like the look of my work, then HC110b might not be for you but most of the other products mentioned here have no bearing on the final look of the image. So maybe you can ignore my lack of taste and find something of interest to you anyway!

I heart Kodak

Part of my reason for sticking with Kodak is simply that I have never seen a printed darkroom guide by Fuji, Ilford or any other manufacturer of photochemistry that is as comprehensive and straightforward as the Kodak B&W Darkroom Dataguide. If you found one that I haven't, let me know in the comments! But the Kodak dataguide was a required text book when I was in school and it's still my bible.

The Kodak B&W Darkroom Dataguide Sixth Edition - one of the most important books I've ever read!

I've tried other brands here and there but have always just come back to what I'm comfortable with and has continued to work. I don't believe in buying fifteen different types of film and trying every possible combination of exposing and processing known, or as of yet unknown, to humankind. I believe in consistent and predictable results; accuracy through comfortable, tried and true routines. This allows me to concentrate on the act of taking pictures moreso than the infinitely complex minutia of chemistry.

I am more than happy to dump any mixed chemistry that has any chance of negatively affecting my work. I don't skimp on supplies to save a few bucks while potentially threatening the quality of my negatives. I always mix my developer fresh for each tank and I always test my fixer/examine my chemistry for exhaustion before getting started. You will see some amateur chemists musing about making their own stop bath with vinegar and developing their film using coffee or their ex-girlfriend's piss or whatever. This is all very entertaining and interesting but I work by the Kodak B&W Darkroom Dataguide and I only deviate if I find it absolutely necessary or absolutely inconsequential. I prefer to support Kodak than Folgers. You do what you like.

I process my film in five-reel tanks, so I begin by grouping all my film into clusters of five - these rolls represeent two weddings and some personal work

If you are new to processing, you can process just one or two rolls at a time like most people. However, I strongly suggest that shooters work towards the method I use, or something even more, which is processing two five-reel tanks at the same time (that's ten rolls of 36 exposure 35mm). My reason for doing this is that, like most people, my chemistry is mixed to one gallon jugs and two five-reel Patterson tanks use just under one gallon. This enables one to get the most use of their chemicals and fastest total processing time. So rather than mixing a gallon of Kodak HC110b, a gallon of stop, a gallon of fix, and a gallon of hypo, using only a fraction of it to process two rolls of 35 and then letting everything sit, potentially expiring, bottles leaking, work not getting done, whatever, for however long before processing again, you've done as much work as gallon mixes can afford and, if working accurately, the development across ten rolls of film is consistent. Ten rolls of 35mm will keep you off the streets and busy with the scanning.

About to be squeegeed!

That being said, if I'm doing something unusual, I'll scale back how much film I am processing so as to concentrate on the change and do it correctly without potentially harming other rolls. I also understand that it takes a little bit of courage to process more than two rolls at a time because if you mess up, you lose ALOT of film. Ironically though, another reason that I process ten at a time is so that I can mix three or four projects worth of film together. This ensures that if, for some unlikely reason, I did mess them all up, no single project would be fully destroyed. I find that probably most film shooters' worst detriment is not shooting and processing enough. The more film that I can process in a short span of time, the quicker turnaround times are for clients but also, I'm inclined to shoot more and concentrate on improving my actual photography because each single roll sort of has less mental/emotional weight to it, if that makes sense. So by all means, take your time to work up to ten rolls at once! But I do really recommend aiming high.

Cut and sleeved on the light table

Perhaps another noteworthy quirk of mine is that I fully endorse using a squeegee to dry my negatives. Many shooters will tell you that squeegees are only good for scratching ones film and are at best, simply not necessary. I don't use a squeegee to accelerate drying times, although it does help with that. I use one because if I don't, I get water spots on my images. Because of the numerous conversations I've had with other photographers, I understand that the choice to use a squeegee has as much to do with ones water supply, the air quality of the area where one hangs their film and even ones skin type as it does with subjective personal preference. So I won't preach the squeegee but I will offer it as a solution to seemingly incurable drying artifacts.

Without any further delay, I present to you, my black and white darkroom grocery list!

Kodak B&W Darkroom Dataguide Sixth Edition - This book was last published in 2001, it's important to get this most up-to-date copy though older copies have neat features such as sample printing paper. Prices on the Dataguide rise and fall with the wind. It will have to be purchased from a used book store, Amazon or eBay. And yes, it may take a little time to find an affordable copy. Certainly write to Kodak and recommend that they publish a new edition of this wonderful book!

[Distilled Water](http://Distilled Water - I only use distilled for my final rinse, but some will tell you that you should pre-rinse your film to reduce shock of the developer.) - I use distilled for my final rinse, but some will tell you that you should also pre-rinse your film to reduce shock of the developer. Kodak doesn't recommend it so I've never done it and my film has never complained about feeling shocked! You can also get away with not using distilled to do your final rinse if your water supply is not hard. When I lived in Baltimore, I didn't use distilled, the tap water was great for processing. I didn't even have to squeegee. But when I moved to a nicer area with a private, carefully regulated water supply, where the community is constantly debating if we should have fluoride or not, my negatives were crudded up with mineral deposits. I started rinsing with distilled AND using a squeegee to resolve this. Distilled water also makes for a tasty drink while standing around in my kitchen waiting for the next agitation, though I have to admit, I usually prefer a cold Flying Dog. Oh, and this is important, I use my empty distilled one gallon bottles to dump my spent chemistry in. I tape up the tops and label them so that there's no chance of their contents being mistaken (!) then just hold onto them until the designated hazmat collection days in my town.

Kodak HC110 Developer Concentrate - Shipping liquids can be costly so I usually buy from a retailer as close to me as possible or one that offers free shipping. I live in Maryland so New Jersey's Film Photography Project is my first choice, with New York's B&H and Adorama following. In recent years, B&H has noted on their site that some darkroom chems are considered hazmats and can only be purchased locally at their store. Another choice, if you don't live on the East Coast is FreestylePhoto.biz in California.

Kodak HC110 - the old formula on the left and the current formula on the right

Kodak Stop Bath Concentrate - Some folks use water as a stop bath. However, Kodak does not endorse this and I've read various debates back and forth but for me, using Stop hasn't hurt my negatives and costs very little so I just do what Kodak recommends and has worked for me. Stop is probably my least bought and changed chemical.

Kodak Kodafix Solution - Kodak fixer, charmingly dubbed "Kodafix," is available as both a power that is sold in a sealed mylar envelop and mixes to a gallon, or as a liquid concentrate that is sold in a plastic bottle like the developer and stop. The powder is usually cheaper to purchase and ship. I don't use the powder because I find it slightly more challenging to mix since all the granules need to be fully dissolved, else you risk damage to your film. Dissolving fix isn't difficult but if you use dark bottles to mix your chems in, which you should, then you will need to come up with a method to inspect your solution for undissolved granules before use. Additionally, according to the Kodak B&W Darkroom Dataguide, powder fix should be run for eight minutes whereas liquid fix only runs for four. If you're push processing for 15+ minutes just on the developer, getting four minutes of your life back might be gladly welcomed! The final nail in the coffin for powder is that the mylar envelop cannot be recycled in most areas. All that being said, I burn through fixer only second to developer so if the liquid is not available or I'm short on funds, I'll pick up a couple bags to fill my "emergency" stash. You NEVER want to be all set to process, test your fixer, find you need to replenish and not have another bag or bottle ready to go.

Hypo Check - I get the impression that hypo check is a product that some shooters skimp on. The purpose of it is to check your fixer for exhaustion. While you will likely see that your fixer has turned purple or has been used for X number of rolls and should be refreshed, this is a risky game to play. If your fix is exhausted and you're one of those people, myself included, who relishes in opening your tank, exposing your film to bare light, the moment that the fixer has run its four or eight minute cycle, you could ruin your film. And even if your film doesn't get ruined by light, fixing with exhausted fix results in purple negatives that need to be fixed again until clear. So it's just a waste of time not to use hypo check. I have found no value in different brands of hypo check. Remember, it has no direct effect on your images, it's only to test the fixer. So buy whatever brand is cheapest. I like to buy as large a bottle as I can so it's one less thing to worry about stocking up on for a while.

Wetting Agent - Here's another one where I don't think that brand matters much. However, you will likely stumble across heated debates over brands of wetting agent amongst the very old gatekeepers of film photography. I've used several brands of varying prices and have never observed any practical difference. My personal choice, however is LFN by Edwal instead of Kodak. And this is ONLY because it is sold in a bottle with an eyedropper which allows for precise usage. Rule of thumb is that you do one drop of wetting agent for each roll of film in your tank and then fill the tank with tap water if you're lucky, or in my case, distilled water for that final rinse discussed above. Do not over agitate the wetting agent. You should see some suds form but you don't want to give your film a bubble bath!

LFN wetting agent - one drop per reel of 35mm

Patterson Developing Tank and Reels - The argument rages; metal or plastic? As much as I want to get behind metal tanks and reels, I just can't use them for 35mm. I prefer them for 120 but with 35mm film at 36 exposure lengths, I just cannot reliably load the reels as confidently, reliably and quickly as I can plastic Patterson autoloads. And yes, I have Hewes stainless steel reels, unanimously the best version available. If you practice and can get good at loading metal reels and using metal tanks, I admire you. This saves chemistry, which means you can potentially process more film in a session than me and you own some quality equipment that you'll never have to replace because it likely will never break. If you click on the Patterson tank/reels hyperlink, you can read about why I still prefer Patterson.

Patterson tanks loaded and marked with their contents - I cover them in painters or masking tape both to note what's inside as well as to secure the lids as a reminder that bare, unprocessed film is inside. In case I have to stop working and return later, I don't accidently open a tank or process it incorrectly!

Changing Bag - Buy yourself a large changing bag for processing and keep a small changing bag in your camera bag for emergencies. Changing bags are one of the most important bits of gear that a film photographer can have on hand. If you like, you can even buy a changing tent! No more of this towel under the bathroom door bullshit! Buy the right tools and do things right. Instead of hiding in a windowless bathroom, hoping that I remembered to lock the door and that nobody waltzes in on me, I sit on the couch with my large, spacious changing bag on my lap, loading my reels and watching TV!

Film Canister Opener - Here's another small point of contention for me. So many thrifty film photographers will encourage each other to use a can opener to open their film canisters. I disagree. Can openers aren't QUITE designed to easily open a film canister. But you know what is? A film canister opener! Use the right tool. Support businesses that support film photography. Also, some folks use a film leader retriever so as not to have to open the canister at all. And hey, these can come in handy to keep in your bag anyway.

Squeegee - I like Dot Line squeegees. Each side of the squeegee features three blunt edged rubber blades. There is a basic plastic spring built into the hinge. I find that with age and use the hinge seems to be the first part of the device to fail. I have yet to use one of these long enough that the rubber began to deteriorate. For me, the spring tension is important to my feel for how softly to glide the squeegee over my film. So when it breaks, I replace it, though ostensibly, one could continue using it as is. I buy two at a time because, you know, they don't break while you're not in the middle of something! I have tried the Patterson squeegee but find it more difficult to use correctly. It has sharp edged rubber blades and just two per side, not three like the Dot Line. It's perhaps counterintuitive but I think the thinner sharp blades, despite having less surface area to contact the film, are more likely to scratch than the dull blunt blades of the Dot Line. I don't blame my tools and believe that either can be used properly. But I just prefer the Dot Line. Yankee also makes a "squeegee" that replaces the rubber blades with sponges. We used these in school and I don't recall having any problems with them.

Film Drying Clips - These are a bit of a personal thing and much can be dictated by where you hang your film to dry. Many folks hang their film to dry in a bathroom after running a hot shower to produce humidity which decreases static in the air and dust on your film. I think it also helps counteract curling of the film. Anyway, something like the MOD54 hangers in the above hyperlink would be good for use in that scenario. For me, I have these beautiful floor to ceiling windows in my dining room that I enjoy hanging my film in like a giant lightbox. I can easily hang 20 or more rolls of film at a time in just one window and be able to study their contents at a glance or closer examination if required. My wife kindly tolerates me hanging curtain hooks on the rods to these windows with standard binder clips or vintage stainless steel film clips by Kodak, Pako etc., attached to my film.

Photography is a family activity in our house! We hang my processed film in our dining room floor-to-ceiling windows to dry.

Five One Gallon Bottles - You need one for developer, one for stop, one for fix, one for hypo and one as a spare for when something tragic inevitably happens to one of the bottles or lids while you're in the middle of processing. The same people who cover the logos on their Leica's with black electrical tape will swear by using their grandmother's antique amber glass bottles plugged by corks from the local vineyard in which to keep their chemistry. And while I appreciate glass and aesthetic as much as the next anachronist, I prefer brand new (well, now they're getting kinda old) brown plastic darkroom bottles by Delta. They are cheap, light weight and aren't easily broken. Some folks also use "accordion" plastic bottles, which seem like a smart idea to me. The idea is that you collapse the bottle as you spend the chemistry so as to minimize oxidation. My thing is that the chems that I reuse stay pretty close to the top of my bottles and the chems that I don't reuse, I use the full bottle. To me, this is one of those extra steps that one takes as compensation for not shooting/processing more and trying to be cost-efficient.

Thermometer - I really can't stand the old Kodak mercury style thermometers. The refraction of the glass can be difficult to read through at some angles and they can sink into a deep beaker etc. I REALLY like the Weston stainless steal circular or "dial" thermometer that came to me from a friend's dad's old pro darkroom. They're a little pricey but they're quite nice and there are cheaper models available. They feature a clip underneath the dial that can move up and down the sensor part of the thermometer. This allows you to mount the thermometer at any height you want within a liquid. Also, I tend to think that for beakers, you are getting a more accurate reading across the height of the liquid due to the sensor being comprised of a long stem as oppose to the bottom of a conventional mercury type thermometer. I've never needed to do this, but they can also be manually recalibrated which is pretty neat. Oh and of course, it takes no batteries like a modern thermometer. And I know how film guys hate batteries. But finally, the Weston is just easy to read. Larger dial faces are even available.

68 is the magic number!

Graduates - Over time, you wind up just collecting graduates of various sizes and types. The most indispensable for me is a 42oz plastic beaker that I mix developer with. It takes three of these filled with water, plus 4oz of HC110 concentrate to make one gallon of HC110b solution. I have some vintage 32oz glass and plastic Kodak brand graduates just for getting water to the right temp and mixing other chems. Because I'm pretty well set on HC110b, I also picked up a cute little 4oz Kodak glass that is as dedicated as I am to HC110.

I love these old glass Kodak graduates! It's important not to mix up your chemistry!

Funnel - Funnels are essential to pouring from graduates into your one gallon bottles. They don't need to be fancy.

Sleeves - There are many choices. I have never had any issues with Print File brand sleeves in the 20 years I've been processing. The very first negatives that I processed back in school looked and smelled lovely last I checked. As do the Print File sleeves. Because I only shoot 36 exposure rolls of 35mm and still use a flatbed scanner, I buy 35-7 sleeves, that's 7 rows of 6 frames each. Because each row accommodates 6 frames, there are no binder holes as many shooter might prefer for storage of their sleeves. I just keep my finished sleeves boxed. If this offends your sense of order, you might have to sacrifice the 6 maximum frames you can put in each side of an Epson flatbed scanner to just 5 frames. But maybe you're one of those super hip film photogs who uses a digital cam to "scan."

Tools of the trade Light table shots of the negs for my Leica M6 TTL blog

So there are some other odds and ends that are needed to process but you'll figure those out as you go along as everyone does.

I know it's been wordy but hopefully this will be a useful reference to review or get started with. Let me know if I forgot anything and please, by all means, challenge my decisions and give me your recommendations! Developing is always developing! Ha!

Thanks for reading, happy shooting (and processing!)

_Follow, Favorite, Like, Add, Insult, ContactJohnny Martyr _

#filmphotography #kodak #martyrmusings #reviews #tipstricksadvice #100 #1600 #3200 #32oz #35mm #35mmfilm #35mmfilmdeveloping #35mmfilmprocessing #35mmphotography #400 #4oz #6400 #adorama #bh #bw #beaker #binderclips #blackandwhite #blackandwhitefilm #blackandwhitefilmphotography #changingbag #concentrate #darkroom #developer #developing #developingbwfilm #developingblackandwhitefilm #distilledwater #dotline #edwal #film #filmcanister #filmcanisteropener #filmdeveloping #filmdryingclips #filmphotographer #filmphotographyproject #filmprocessing #filmweddingphotographer #fixer #flyingdog #freestylephoto #fujiacros100 #funnel #getstarted #glassbeaker #graduate #hazmat #hc110 #hewesreels #hypo #hypocheck #ilforddelta3200 #kitchen #kodafix #kodakbwdarkroomdataguide #kodakhc110 #kodakhc110b #kodakprofessional #kodaktmax100 #kodaktmaxp3200 #kodaktrix400 #leica #lfn #onegallonbottle #pattersonfilm #pattersonreels #pattersontanks #photoflo #plasticbeaker #practices #processing #processingbwfilm #processingblackandwhitefilm #products #recommendations #refer #reference #rinse #share #sleeves #solution #squeegee #stop #stopbath #tape #thermometer #weddingphotographer #weddingphotography #weddings #weston #wettingagent #yankee

image
johnny martyr rss (unofficial)johnnymartyr@ծմակուտ.հայ
2021-03-28

Rating + Processing for Available Light Portraits – EI 3200 ISO

It bears repeating:

International Center of Photography shooter James Mignogna once told me that a good photographer matches their light, lens, film and developer. Nowhere do I think these decisions are more critical than portraits in dim lighting.

That was the intro I used in my previous entry: Rating + Processing for Available Light Portraits - EL 1600 ISO and it's as relevant to the entry you're reading now, which will center around 3200 ISO films. Of which, there are only two currently available.

SHOOTING IN THE DARK: KODAK TMAX P3200 AND DELTA 3200

Okay, so what happens when the sun goes down? 1600 and a 50/2 lens will not cut it anymore so you have to go faster. Ilford Delta and Kodak TMAX 3200 films are here to the rescue!

Armchair available light photographers delight in pointing out that Delta 3200 has a native ISO of 1000 and TMAX P3200 has a native ISO of 800. On a technical level, this is not misinformation. However, I am of the opinion that the constant restating of this as well as some incomplete, inaccurate tutorials about how to shoot these films has spawned not only an inaccurate belief that these films are "best" shot at their native ISO but even a bit of FEAR of shooting them at their box speed or higher.

I say, forget about this native ISO stuff!

For all intents and purposes, 3200 ISO is the NORMAL speed of Delta 3200 and TMAX P3200.

The DX codes printed on their canisters read 3200 by cameras and minilabs. Therefore, this is how Ilford and Kodak want these films to be rated and processed.

The films are not called Delta 1000 or TMAX P800, they're called 3200. This is not just marketing as people will lament on the interwebs.

These films are intended by their designers, to be rated at 3200 and processed for 3200. They are also designed to function as "multiple ISO films," as has been worded in older Kodak literature.

I don't personally see the point of paying for higher priced 3200 ISO films and, rating them well within the range of what 400 ISO film can handle, without a more specific reason than because a few influencers have told followers that this is how these films "should" be used.

To be clear, I'm not discouraging anyone from exploring what these flexible films can do, I'm denouncing boxing oneself into this native ISO rating.

If you are shooting a brighter scene but enjoy grain, yes, go ahead and under-rate your film. Rate it at 1600 and process normal (at EI 3200) This will give you richer contrast, you don't have to pay your lab extra money or separate or mark your film.

Jill| Kodak TMAX P3200 rated at 1600 ISO and processed normal at EI 3200

I was on a Nikkormat kick for some time and the meters on these and other classic cameras top out at 1600, so this guided how I shot and processed my 3200 films. In the example above, I was shooting in flat light that needed the under-rating to bring contrast to the scene. Some Nikkor lenses are not very contrasty at full aperture, so under-rating the film helps balance this out too.

If you like grain and tonality and shooting at wider apertures (a dreamy look, if you will), you can rate 3200 films at box speed to achieve this.

Laurie | Kodak TMAX P3200 rated at 3200 ISO and processed normal at EI 3200

In fact, you can always rate your film at 3200 and process normal at EI 3200. This is what Kodak and Ilford designed the film for and is it's "normal" look. No pushing, no pulling, no over- or under-rating. This will give you a flatter, more tonal image which is perhaps a less popular look currently and the reason that you see people recommending against EI 3200. But look, it's all about assessing the quality of the light you're working in and deciding what style you want. You may also just NEED that extra stop because the light is too dim to shoot at 1600 handheld.

I encourage other photographers not to assign subjective judgement such as presuming more contrast is "better" or less grain is "better."

In truth, everything's about balancing what you are working with and what you are trying to achieve. Under-rating (overexposing) your film may increase contrast but it also reduces tonality and shadow detail. It also gives you fewer apertures from which to choose. A detail-oriented shooter is going to be ready to shoot/process these films several ways depending on what the scene is giving them, as oppose to prescribing one method or film for every situation.

What I do most of the time is rate my film at 6400 ISO and process for EI 6400 by pushing one stop. This is critical of shooting in low light and night time without a flash or camera support and slow shutter speeds. It's how I shoot weddings and concerts and pre-pandemic bar hopping with friends. My reasoning is multi-fold. One being that the light meters of my best cameras top out at 6400, so I can operate them without a shred of guess work. Another being that I'm using these films to do what they were intended. The higher sensitivity allows me to stop down if there's ample light, so I can control my DoF more. The tonality I get from not under-rating gives me more "information" to work with when editing. And the final one being that I very seldom encounter a situation worth photographing where ISO 6400 with a 1/60th shutter speed and a 1.4 aperture are not adequate at bare minimum. Yes, these films can be rated even faster and you may use a lens faster than 1.4. But in these conditions, even with current digital cameras, one encounters some insurmountable (in my opinion) aesthetic concerns.

Christi | Kodak TMAX P3200 rated at 6400 ISO and push processed in Kodak HC110b by one stop for EI 6400

Laurie| Kodak TMAX P3200 rated at 6400 ISO and push processed in Kodak HC110b by one stop for EI 6400

Aside from how to expose and process, the other big question is which to use, Ilford Delta 3200 or Kodak TMAX P3200. In HC110b, I find the Kodak to be softer and more tonal, whereas the Ilford is sharper and more contrasty. So, just as I recommend under-rating or push processing to bring contrast to a scene with flatter lighting, I would also recommend choosing Delta. The opposite would be true for a contrasty scene, reach for the TMAX to quell that contrast. OR, if you want to emphasize a contrasty scene, use Delta and to emphasize a flat, dreamy scene, use TMAX. And within each model of film, you can rate and process to add or calm contrast.

Is your head exploding with options?

Don't worry! My recommendation is to start at box speed and normal processing and learn what works and doesn't work with your particular lenses and your usual scenes. I DO NOT recommend starting out by under-rating these films as many influencers will encourage. These films simply are not a one-size-fits all solution. They're not meant to be. They're SUPPOSED to be personally tailored. Just doing whatever you're told to do with them is negating the entire point.

Steph | Ilford Delta 3200 rated at 6400 ISO and push processed in Kodak HC110b by one stop for EI 6400

Lipstick Lamarr | Ilford Delta 3200 rated at 6400 ISO and push processed in Kodak HC110b by one stop for EI 6400

Devon | Ilford Delta 3200 rated at 6400 ISO and push processed in Kodak HC110b by one stop for EI 6400

Another important thing to keep in mind, which I've talked about but maybe not explicitly enough, is not to confuse quantity and quality of light.

Just because a scene has a lower QUANTITY of light and necessitates a higher ISO, this does not mean that you can ignore the QUALITY of the light just because you are shooting at 1600 or 6400. I see so many available light portraits at high ISO's with shadows on faces or other important elements of the scene. I think photographers forget this because in 100 and 400 ISO conditions which are often sunlit, one needn't pay a lot of attention to the quality of light in order to return acceptable photos. A shadow on a face may not turn into a grainy mess in the same way it does at 6400. In fact, I find that the less and less light you shoot in, I find that more critical the quality of that light becomes. And maybe this is one of the main reasons that shooting in these conditions is so challenging.

Tricia| Ilford Delta 3200 rated at 6400 ISO and push processed in Kodak HC110b by one stop for EI 6400

Notice in all these photos, both in this and the 1600 blog, regardless of how dark/black the surrounded area, highlights are generally on the faces. The inclination with candid portraits sometimes is to squeeze the shutter release during the peak of action. But with available light photography, not only must you consider the peak of action but also, this moment has to agree with where the light falls on your subject.

So when working in EI 1600 and 3200; it sounds cheesy and maybe even obvious but… let the light be your guide!

Don't choose your film, rating and process because someone who takes great photos said something is "the best," or because you saw some photos at those specs that look good. Ask these photogs about the quality of light they were shooting in and assess the quality of light you're shooting in. Consider the character of your lenses. Make judgement calls based on those points and your desired outcome. Film responds different ways in different situations. That's why digital can never fully copy it. And it's also why there's a lot to learn in order to get the look you're after. It's very possible that of all my examples, you still don't see something that's right for you. And that's okay. The concept is there. From 1600 to 6400 ISO/EI, hopefully I've given you a springboard from which to find combinations that work for what you are trying to do. Go out and find your own method for shooting portraits in low, available light!

Thanks for reading and happy shooting!

_Follow, Favorite, Like, Add, Insult, ContactJohnny Martyr _

#filmphotography #filmreview #ilford #kodak #martyrmusings #portraits #tipstricksadvice #1600 #1600iso #3200 #3200iso #6400 #6400iso #availablelight #availablelightportrait #barhopping #blackandwhite #blackandwhitefilm #blackandwhitehighspeedfilm #blackandwhiteprocessing #boxspeed #candid #concerts #contrast #contrasty #delta #delta3200 #dim #documentary #dreamy #dxcode #ei1600 #ei3200 #ei6400 #existinglight #existinglightportrait #fastlens #flatter #girls #grain #grainy #handheldcamera #hc110 #hc110b #highiso #highisofilm #highspeedfilm #ilforddelta #ilforddelta3200 #kodakhc110 #kodakhc110b #kodaktmax #kodaktmax3200 #kodaktmaxp3200 #lessgrain #light #lowlight #lowlightfilm #moregrain #nativeiso #naturallight #naturallightportrait #noflash #normalprocessing #overrate #overexpose #p3200 #personal #portraiture #process #processing #pullprocess #pushprocess #qualityoflight #quantityoflight #rating #sharp #soft #tabulargrain #tmax #tonal #traditionalfilm #true #underrate #underexpose #weddings

image
johnny martyr rss (unofficial)johnnymartyr@ծմակուտ.հայ
2021-03-28

Johnny Martyr’s B&W Darkroom Grocery List

If your New Year's resolution is to start processing your own b&w film at home, or you're just interested in comparing notes, I thought it would be handy for me to share my darkroom grocery list.

Disclaimer - I am not a chemist! I'm just a photographer who has found some products and methods that work for my specific purposes. We all have to carve our own path but we can also learn from one another.

My degree is in film, video and theatre. I learned to process in college, from accredited professionals using standard products and practices. As I began working at home, I refined things slightly but have been doing more or less same thing across hundreds of rolls a year intermittently for two decades.

30 rolls of Kodak 36 exposure 35mm from a wedding shoot - a typical workload for me

I shoot Kodak TMAX 100, Fuji Acros 100, Kodak Tri-X 400, Kodak TMAX P3200 and Ilford Delta 3200. I routinely push my Tri-X to EI 1600 and 3200 films to EL 6400. I am primarily a 35mm guy but I sneak in some 120 here and there too. For all these films, I currently use Kodak HC110 Dilution B for its high accutance, accurate push processing, ease of use and economy. The rest of my chemistry is also by Kodak and I'd say I'm pretty Kodak-oriented. If you don't use these films or just don't like the look of my work, then HC110b might not be for you but most of the other products mentioned here have no bearing on the final look of the image. So maybe you can ignore my lack of taste and find something of interest to you anyway!

I heart Kodak

Part of my reason for sticking with Kodak is simply that I have never seen a printed darkroom guide by Fuji, Ilford or any other manufacturer of photochemistry that is as comprehensive and straightforward as the Kodak B&W Darkroom Dataguide. If you found one that I haven't, let me know in the comments! But the Kodak dataguide was a required text book when I was in school and it's still my bible.

The Kodak B&W Darkroom Dataguide Sixth Edition - one of the most important books I've ever read!

I've tried other brands here and there but have always just come back to what I'm comfortable with and has continued to work. I don't believe in buying fifteen different types of film and trying every possible combination of exposing and processing known, or as of yet unknown, to humankind. I believe in consistent and predictable results; accuracy through comfortable, tried and true routines. This allows me to concentrate on the act of taking pictures moreso than the infinitely complex minutia of chemistry.

I am more than happy to dump any mixed chemistry that has any chance of negatively affecting my work. I don't skimp on supplies to save a few bucks while potentially threatening the quality of my negatives. I always mix my developer fresh for each tank and I always test my fixer/examine my chemistry for exhaustion before getting started. You will see some amateur chemists musing about making their own stop bath with vinegar and developing their film using coffee or their ex-girlfriend's piss or whatever. This is all very entertaining and interesting but I work by the Kodak B&W Darkroom Dataguide and I only deviate if I find it absolutely necessary or absolutely inconsequential. I prefer to support Kodak than Folgers. You do what you like.

I process my film in five-reel tanks, so I begin by grouping all my film into clusters of five - these rolls represeent two weddings and some personal work

If you are new to processing, you can process just one or two rolls at a time like most people. However, I strongly suggest that shooters work towards the method I use, or something even more, which is processing two five-reel tanks at the same time (that's ten rolls of 36 exposure 35mm). My reason for doing this is that, like most people, my chemistry is mixed to one gallon jugs and two five-reel Patterson tanks use just under one gallon. This enables one to get the most use of their chemicals and fastest total processing time. So rather than mixing a gallon of Kodak HC110b, a gallon of stop, a gallon of fix, and a gallon of hypo, using only a fraction of it to process two rolls of 35 and then letting everything sit, potentially expiring, bottles leaking, work not getting done, whatever, for however long before processing again, you've done as much work as gallon mixes can afford and, if working accurately, the development across ten rolls of film is consistent. Ten rolls of 35mm will keep you off the streets and busy with the scanning.

About to be squeegeed!

That being said, if I'm doing something unusual, I'll scale back how much film I am processing so as to concentrate on the change and do it correctly without potentially harming other rolls. I also understand that it takes a little bit of courage to process more than two rolls at a time because if you mess up, you lose ALOT of film. Ironically though, another reason that I process ten at a time is so that I can mix three or four projects worth of film together. This ensures that if, for some unlikely reason, I did mess them all up, no single project would be fully destroyed. I find that probably most film shooters' worst detriment is not shooting and processing enough. The more film that I can process in a short span of time, the quicker turnaround times are for clients but also, I'm inclined to shoot more and concentrate on improving my actual photography because each single roll sort of has less mental/emotional weight to it, if that makes sense. So by all means, take your time to work up to ten rolls at once! But I do really recommend aiming high.

Cut and sleeved on the light table

Perhaps another noteworthy quirk of mine is that I fully endorse using a squeegee to dry my negatives. Many shooters will tell you that squeegees are only good for scratching ones film and are at best, simply not necessary. I don't use a squeegee to accelerate drying times, although it does help with that. I use one because if I don't, I get water spots on my images. Because of the numerous conversations I've had with other photographers, I understand that the choice to use a squeegee has as much to do with ones water supply, the air quality of the area where one hangs their film and even ones skin type as it does with subjective personal preference. So I won't preach the squeegee but I will offer it as a solution to seemingly incurable drying artifacts.

Without any further delay, I present to you, my black and white darkroom grocery list!

Kodak B&W Darkroom Dataguide Sixth Edition - This book was last published in 2001, it's important to get this most up-to-date copy though older copies have neat features such as sample printing paper. Prices on the Dataguide rise and fall with the wind. It will have to be purchased from a used book store, Amazon or eBay. And yes, it may take a little time to find an affordable copy. Certainly write to Kodak and recommend that they publish a new edition of this wonderful book!

[Distilled Water](http://Distilled Water - I only use distilled for my final rinse, but some will tell you that you should pre-rinse your film to reduce shock of the developer.) - I use distilled for my final rinse, but some will tell you that you should also pre-rinse your film to reduce shock of the developer. Kodak doesn't recommend it so I've never done it and my film has never complained about feeling shocked! You can also get away with not using distilled to do your final rinse if your water supply is not hard. When I lived in Baltimore, I didn't use distilled, the tap water was great for processing. I didn't even have to squeegee. But when I moved to a nicer area with a private, carefully regulated water supply, where the community is constantly debating if we should have fluoride or not, my negatives were crudded up with mineral deposits. I started rinsing with distilled AND using a squeegee to resolve this. Distilled water also makes for a tasty drink while standing around in my kitchen waiting for the next agitation, though I have to admit, I usually prefer a cold Flying Dog. Oh, and this is important, I use my empty distilled one gallon bottles to dump my spent chemistry in. I tape up the tops and label them so that there's no chance of their contents being mistaken (!) then just hold onto them until the designated hazmat collection days in my town.

Kodak HC110 Developer Concentrate - Shipping liquids can be costly so I usually buy from a retailer as close to me as possible or one that offers free shipping. I live in Maryland so New Jersey's Film Photography Project is my first choice, with New York's B&H and Adorama following. In recent years, B&H has noted on their site that some darkroom chems are considered hazmats and can only be purchased locally at their store. Another choice, if you don't live on the East Coast is FreestylePhoto.biz in California.

Kodak HC110 - the old formula on the left and the current formula on the right

Kodak Stop Bath Concentrate - Some folks use water as a stop bath. However, Kodak does not endorse this and I've read various debates back and forth but for me, using Stop hasn't hurt my negatives and costs very little so I just do what Kodak recommends and has worked for me. Stop is probably my least bought and changed chemical.

Kodak Kodafix Solution - Kodak fixer, charmingly dubbed "Kodafix," is available as both a power that is sold in a sealed mylar envelop and mixes to a gallon, or as a liquid concentrate that is sold in a plastic bottle like the developer and stop. The powder is usually cheaper to purchase and ship. I don't use the powder because I find it slightly more challenging to mix since all the granules need to be fully dissolved, else you risk damage to your film. Dissolving fix isn't difficult but if you use dark bottles to mix your chems in, which you should, then you will need to come up with a method to inspect your solution for undissolved granules before use. Additionally, according to the Kodak B&W Darkroom Dataguide, powder fix should be run for eight minutes whereas liquid fix only runs for four. If you're push processing for 15+ minutes just on the developer, getting four minutes of your life back might be gladly welcomed! The final nail in the coffin for powder is that the mylar envelop cannot be recycled in most areas. All that being said, I burn through fixer only second to developer so if the liquid is not available or I'm short on funds, I'll pick up a couple bags to fill my "emergency" stash. You NEVER want to be all set to process, test your fixer, find you need to replenish and not have another bag or bottle ready to go.

Hypo Check - I get the impression that hypo check is a product that some shooters skimp on. The purpose of it is to check your fixer for exhaustion. While you will likely see that your fixer has turned purple or has been used for X number of rolls and should be refreshed, this is a risky game to play. If your fix is exhausted and you're one of those people, myself included, who relishes in opening your tank, exposing your film to bare light, the moment that the fixer has run its four or eight minute cycle, you could ruin your film. And even if your film doesn't get ruined by light, fixing with exhausted fix results in purple negatives that need to be fixed again until clear. So it's just a waste of time not to use hypo check. I have found no value in different brands of hypo check. Remember, it has no direct effect on your images, it's only to test the fixer. So buy whatever brand is cheapest. I like to buy as large a bottle as I can so it's one less thing to worry about stocking up on for a while.

Wetting Agent - Here's another one where I don't think that brand matters much. However, you will likely stumble across heated debates over brands of wetting agent amongst the very old gatekeepers of film photography. I've used several brands of varying prices and have never observed any practical difference. My personal choice, however is LFN by Edwal instead of Kodak. And this is ONLY because it is sold in a bottle with an eyedropper which allows for precise usage. Rule of thumb is that you do one drop of wetting agent for each roll of film in your tank and then fill the tank with tap water if you're lucky, or in my case, distilled water for that final rinse discussed above. Do not over agitate the wetting agent. You should see some suds form but you don't want to give your film a bubble bath!

LFN wetting agent - one drop per reel of 35mm

Patterson Developing Tank and Reels - The argument rages; metal or plastic? As much as I want to get behind metal tanks and reels, I just can't use them for 35mm. I prefer them for 120 but with 35mm film at 36 exposure lengths, I just cannot reliably load the reels as confidently, reliably and quickly as I can plastic Patterson autoloads. And yes, I have Hewes stainless steel reels, unanimously the best version available. If you practice and can get good at loading metal reels and using metal tanks, I admire you. This saves chemistry, which means you can potentially process more film in a session than me and you own some quality equipment that you'll never have to replace because it likely will never break. If you click on the Patterson tank/reels hyperlink, you can read about why I still prefer Patterson.

Patterson tanks loaded and marked with their contents - I cover them in painters or masking tape both to note what's inside as well as to secure the lids as a reminder that bare, unprocessed film is inside. In case I have to stop working and return later, I don't accidently open a tank or process it incorrectly!

Changing Bag - Buy yourself a large changing bag for processing and keep a small changing bag in your camera bag for emergencies. Changing bags are one of the most important bits of gear that a film photographer can have on hand. If you like, you can even buy a changing tent! No more of this towel under the bathroom door bullshit! Buy the right tools and do things right. Instead of hiding in a windowless bathroom, hoping that I remembered to lock the door and that nobody waltzes in on me, I sit on the couch with my large, spacious changing bag on my lap, loading my reels and watching TV!

Film Canister Opener - Here's another small point of contention for me. So many thrifty film photographers will encourage each other to use a can opener to open their film canisters. I disagree. Can openers aren't QUITE designed to easily open a film canister. But you know what is? A film canister opener! Use the right tool. Support businesses that support film photography. Also, some folks use a film leader retriever so as not to have to open the canister at all. And hey, these can come in handy to keep in your bag anyway.

Squeegee - I like Dot Line squeegees. Each side of the squeegee features three blunt edged rubber blades. There is a basic plastic spring built into the hinge. I find that with age and use the hinge seems to be the first part of the device to fail. I have yet to use one of these long enough that the rubber began to deteriorate. For me, the spring tension is important to my feel for how softly to glide the squeegee over my film. So when it breaks, I replace it, though ostensibly, one could continue using it as is. I buy two at a time because, you know, they don't break while you're not in the middle of something! I have tried the Patterson squeegee but find it more difficult to use correctly. It has sharp edged rubber blades and just two per side, not three like the Dot Line. It's perhaps counterintuitive but I think the thinner sharp blades, despite having less surface area to contact the film, are more likely to scratch than the dull blunt blades of the Dot Line. I don't blame my tools and believe that either can be used properly. But I just prefer the Dot Line. Yankee also makes a "squeegee" that replaces the rubber blades with sponges. We used these in school and I don't recall having any problems with them.

Film Drying Clips - These are a bit of a personal thing and much can be dictated by where you hang your film to dry. Many folks hang their film to dry in a bathroom after running a hot shower to produce humidity which decreases static in the air and dust on your film. I think it also helps counteract curling of the film. Anyway, something like the MOD54 hangers in the above hyperlink would be good for use in that scenario. For me, I have these beautiful floor to ceiling windows in my dining room that I enjoy hanging my film in like a giant lightbox. I can easily hang 20 or more rolls of film at a time in just one window and be able to study their contents at a glance or closer examination if required. My wife kindly tolerates me hanging curtain hooks on the rods to these windows with standard binder clips or vintage stainless steel film clips by Kodak, Pako etc., attached to my film.

Photography is a family activity in our house! We hang my processed film in our dining room floor-to-ceiling windows to dry.

Five One Gallon Bottles - You need one for developer, one for stop, one for fix, one for hypo and one as a spare for when something tragic inevitably happens to one of the bottles or lids while you're in the middle of processing. The same people who cover the logos on their Leica's with black electrical tape will swear by using their grandmother's antique amber glass bottles plugged by corks from the local vineyard in which to keep their chemistry. And while I appreciate glass and aesthetic as much as the next anachronist, I prefer brand new (well, now they're getting kinda old) brown plastic darkroom bottles by Delta. They are cheap, light weight and aren't easily broken. Some folks also use "accordion" plastic bottles, which seem like a smart idea to me. The idea is that you collapse the bottle as you spend the chemistry so as to minimize oxidation. My thing is that the chems that I reuse stay pretty close to the top of my bottles and the chems that I don't reuse, I use the full bottle. To me, this is one of those extra steps that one takes as compensation for not shooting/processing more and trying to be cost-efficient.

Thermometer - I really can't stand the old Kodak mercury style thermometers. The refraction of the glass can be difficult to read through at some angles and they can sink into a deep beaker etc. I REALLY like the Weston stainless steal circular or "dial" thermometer that came to me from a friend's dad's old pro darkroom. They're a little pricey but they're quite nice and there are cheaper models available. They feature a clip underneath the dial that can move up and down the sensor part of the thermometer. This allows you to mount the thermometer at any height you want within a liquid. Also, I tend to think that for beakers, you are getting a more accurate reading across the height of the liquid due to the sensor being comprised of a long stem as oppose to the bottom of a conventional mercury type thermometer. I've never needed to do this, but they can also be manually recalibrated which is pretty neat. Oh and of course, it takes no batteries like a modern thermometer. And I know how film guys hate batteries. But finally, the Weston is just easy to read. Larger dial faces are even available.

68 is the magic number!

Graduates - Over time, you wind up just collecting graduates of various sizes and types. The most indispensable for me is a 42oz plastic beaker that I mix developer with. It takes three of these filled with water, plus 4oz of HC110 concentrate to make one gallon of HC110b solution. I have some vintage 32oz glass and plastic Kodak brand graduates just for getting water to the right temp and mixing other chems. Because I'm pretty well set on HC110b, I also picked up a cute little 4oz Kodak glass that is as dedicated as I am to HC110.

I love these old glass Kodak graduates! It's important not to mix up your chemistry!

Funnel - Funnels are essential to pouring from graduates into your one gallon bottles. They don't need to be fancy.

Sleeves - There are many choices. I have never had any issues with Print File brand sleeves in the 20 years I've been processing. The very first negatives that I processed back in school looked and smelled lovely last I checked. As do the Print File sleeves. Because I only shoot 36 exposure rolls of 35mm and still use a flatbed scanner, I buy 35-7 sleeves, that's 7 rows of 6 frames each. Because each row accommodates 6 frames, there are no binder holes as many shooter might prefer for storage of their sleeves. I just keep my finished sleeves boxed. If this offends your sense of order, you might have to sacrifice the 6 maximum frames you can put in each side of an Epson flatbed scanner to just 5 frames. But maybe you're one of those super hip film photogs who uses a digital cam to "scan."

Tools of the trade Light table shots of the negs for my Leica M6 TTL blog

So there are some other odds and ends that are needed to process but you'll figure those out as you go along as everyone does.

I know it's been wordy but hopefully this will be a useful reference to review or get started with. Let me know if I forgot anything and please, by all means, challenge my decisions and give me your recommendations! Developing is always developing! Ha!

Thanks for reading, happy shooting (and processing!)

_Follow, Favorite, Like, Add, Insult, ContactJohnny Martyr _

#filmphotography #kodak #martyrmusings #reviews #tipstricksadvice #100 #1600 #3200 #32oz #35mm #35mmfilm #35mmfilmdeveloping #35mmfilmprocessing #35mmphotography #400 #4oz #6400 #adorama #bh #bw #beaker #binderclips #blackandwhite #blackandwhitefilm #blackandwhitefilmphotography #changingbag #concentrate #darkroom #developer #developing #developingbwfilm #developingblackandwhitefilm #distilledwater #dotline #edwal #film #filmcanister #filmcanisteropener #filmdeveloping #filmdryingclips #filmphotographer #filmphotographyproject #filmprocessing #filmweddingphotographer #fixer #flyingdog #freestylephoto #fujiacros100 #funnel #getstarted #glassbeaker #graduate #hazmat #hc110 #hewesreels #hypo #hypocheck #ilforddelta3200 #kitchen #kodafix #kodakbwdarkroomdataguide #kodakhc110 #kodakhc110b #kodakprofessional #kodaktmax100 #kodaktmaxp3200 #kodaktrix400 #leica #lfn #onegallonbottle #pattersonfilm #pattersonreels #pattersontanks #photoflo #plasticbeaker #practices #processing #processingbwfilm #processingblackandwhitefilm #products #recommendations #refer #reference #rinse #share #sleeves #solution #squeegee #stop #stopbath #tape #thermometer #weddingphotographer #weddingphotography #weddings #weston #wettingagent #yankee

image
johnny martyr rss (unofficial)johnnymartyr@ծմակուտ.հայ
2021-03-28

Lens Hoods for the Leica Summitar

I touched on this topic a little bit in a previous blog about hoods for various LTM lenses entitled Throwing Shade, but I wanted to drill down on lens hood options for the Leitz 50mm f2 Summitar. As previously stated, I think that earlier Leitz lenses require a hood in many circumstances to perform their best. And there are a number of possible hoods for the Summitar that photographers may be interested in trying. The correct original hood is fairly unpopular due to its size, thus I often see photographers looking for an appropriate alternative. It's a little complicated a task though, because Summitars have an odd outer diameter of 41.5mm and their inner threads are 36mm and recessed within the front ring. This unusual design can make finding a well-fitting hood, or any accessory, a somewhat tricky.

The Leica Summitar is the predecessor of the fabled Leica 50mm f2 Summicron and later copies of the Summitar even share the lens barrel with the early Summicron. Consequently, most Summitars and the Version I 50 Summicron can accept the lens hoods that I'm about to discuss. I'm going to keep Summitar as my point of focus since it's what I use but if you're an early Summicron shooter, by all means, you're welcome to huddle in with us too!

And before we get into hoods, we need to talk about the two main versions of Summitars out there, because yes, which version you have will dictate which hoods you can run.

One might divide Summitar lens types into more categories, for the intens and purposes of this discussion, I'm going to simplify them into just two versions.

Summitar Version I (1939)

Summitars from the first decade of this models production run featured sought-after ten blade aperture diaphragms. The front element was uncoated until 1946. Summitars made in the small window between 1946 and 1949 are often regarded as the most desirable due to having both the ten blades and the UV coating. One problem, however, if you can call it that, is that these first generation Summitars do not have the provision for mounting clip-on hoods that Leica would develop and use for many following decades. Summitar Version II got this update.

If you want to use more common, clip-on Leica hoods, there's a simple way to do this. Screw an original Summitar filter onto your Summitar Version I. The tiny gap between the front ring of the lens and filter should create enough of a groove for the Leica clip-on hoods that we're about to examine, to fit onto Version I Summitars.

Being unfamiliar with this recommendation first-hand and wanting to provide accurate accounts here, I decided to try it with my Summitar Version II. I bought an original Type L green filter (GCYOO) in black paint, mounted it to my Summitar Version 2 and then tried both my ITDOO and SOOPD (hoods discussed below). It worked out great. The ITDOO clicked into place with a little play. The SOOPD fit pretty tightly though. Perhaps moreso than when fitted the standard way. I am unaware of any differences between screwing any Type L filter into a Summitar Version I, though admittedly, for every rule with early Leica, there do seem to be exceptions. Please do let me know in the comments if you know more!

Summitar Version II (1949)

Summitar received some revisions in 1949, the main one being what everyone talks about; the recycling of leftover Summar aperture assemblies. But the change that's important with regards to this discussion is the added groove around the front ring of the lens barrel which allows clip-on lens hoods to be fitted. In true Leica style, this tiny feature appears to be merely cosmetic as it perfectly fits the styling of the Summitar. But it adds considerable functionality to the lens, which can now accept both clamp-on and clip-on accessories. Which, as I'm about to get onto, opens up quite a number of options for future-built lens hoods.

SOOPD Version I (1939 - for 50/2 Summitar Version I)

The earliest hood made for Summitar was called SOOPD. SOOPD works with both Summitar versions because it employees a thumb-screw-adjusted circular clamp to attach to the outer circumference of the lens. SOOPD Version I was finished in either black paint or satin silver chrome. The rear section of black SOOPDS is finished in distinctive crinkle coat black. There were E. Leitz Wetzlar Germany and E. Leitz New York copies. Both feature the E. Leitz logo on the top-facing blade of this four blade barndoor assembly, along with the name "Summitar." The placement of this logo is an easy way to spot the difference between Version I and II SOOPDs in online listings. These hoods were sold in the old style, red boxes with gold text.

The old barndoor hoods opened and closed by means of a precise and elegant little spring mechanism. While this folding mechanism is intuitively useful for stowing the hood, what I find quite genius about it is that the closed position of SOOPD serves as a lens cap for Summitar. I like using SOOPD on faster-paced shoots where I wouldn't typically bother with lens caps. SOOPD can easily be closed very quickly to protect the vulnerable front element and cloth shutter, then opened again just as quickly, to get back to shooting.

SOOPD Version II (1949 - for 50/2 Summitar Version II)

The next version of SOOPD, features a faster push-button, clip-on mounting mechanism. As noted, SOOPD Version II is to be used with 1949/50 Summitars with the accessory groove around the front of the lens. Most of these Summitars, if not all, are the 6 aperture blade type.

On both sides of SOOPD Version II are rectangular, spring-loaded buttons. Press these in and, similar to most newer LTM and early M Leica hoods, little tabs are retracted from inside the circumference of the hood's collar. This allows the shooter to slip the shade over the front of the Summitar and release the buttons, deploying the tabs, such that they clip into the groove on the front of the lens barrel.

The push button arrangement makes for quick and easy installation and removal. However, of the two versions, I prefer the earlier, rarer clamp-on because the Version II SOOPD can rotate around the lens if jostled, throwing off it's proper positioning with the view and rangefinder windows.

The engraving on the top-facing blade of the barndoor of SOOPD Version I was relocated to the right-facing blade of the barndoor of SOOPD Version II. The location of the engraving is a GREAT way to tell SOOPD Versions I and II apart from one another in online listings. To my knowledge, there is not a New York copy of SOOPD Version II, only Wetzlar, Germany. And Version II was also sold in a variation of the textured red box with gold text.

SOOFM (1954 - for 50/2 Summitar Version II & 50/2 Summicron Version I)

In 1953, the Summicron was released and the Summitar was discontinued after a 14 year run. Accordingly, SOOPD was renamed SOOFM and repackaged.

The only difference between SOOPD Version II and SOOFM is the addition of "u. Summicron" on the right-facing barndoor blade text.

The box for SOOFM remained the plain red style for some time before upgrading to the mid-century modern style; beige with a stylized graphic of the hood on it.

SOOFM survived until 1960 when the 50mm Summicron shed the old 1930's style collapsible barrel and went rigid.

ITOOY (1956 - for 50/2.8 and 50/3.5 Elmar)

I've heard some fringe recommendations to run ITOOY with Summitar. Personally, though I haven't tried it because I expect that this hood is is too narrow. It was designed for use with the Elmar 50/2.8 and 3.5. While it would be very low profile in appearance on a Summitar, I have a feeling that it would vignette when used at full aperture. I'm noting it here simply because this hood will mechanically fit on the Summitar and might be an option for someone who doesn't use this lens at full aperture much and wants as small a hood for it as possible.

ITDOO (1956 - for 35/3.5 Summaron & 50/2 Summicron)

Before the presentation box for SOOFM was changed but after the Summitar had been discontinued, Leica released a more compact hood for the Summicron and 35mm Summaron, called ITDOO in 1956.

Like the SOOPD Version II and SOOFM, ITDOO was installed onto the lens via two little push-buttons that took advantage of the recessed ring on the front of these lenses. Unlike the push-button SOOPD and SOOFM, ITDOO is a circular shade, thus it doesn't matter if it is jostled while installed as it does not need to sit any particular way on the lens so as not to affect the viewfinder.

ITDOO originally sold with a plastic rear cap that was not available for SOOPD/SOOFM. And this is an important point of distinction in use between these hoods, in my opinion.

The idea with ITDOO was that the photographer could reverse mount it to the lens, then use the supplied rear cap to cap the hood and lens. I don't think most people even realise that ITDOO can be reverse-mounted and thus, you often see the hood for sale sans original cap. I prefer circular lens hoods whose front can be capped rather than needing to make a big effort to protect the lens. However, by reverse-mounting an ITDOO actually takes up less space in ones camera bag than a barndoor hood, providing that hte lens isn't collapsed. Because, when reverse mounted, ITDOO prevents Summitar from fully collapsing. So it's really just about personal preference at this point.

Capping inconveniences aside, ITDOO is more compact in use and just more conventional in appearance, and therefore has become more popular and more expensive than most copies of the SOOPD, which I feel, is one of the few undervalued Leica accessories available.

I am unaware of any cosmetic variation of the ITDOO. The conical part of the hood is black paint aluminum engraved with "Summaron 3.5cm Summicron 5cm" and the narrow chrome mounting ring is engraved with "Ernst Leitz GmbH Wetzlar" and "Germany" on the opposing face. ITDOO was packaged in the old textured red box with gold lettering and later, the beige box with graphics. Apparently it's not difficult to remove the black paint conical section of ITDOO from its silver chrome mounting band. So sometimes you'll see that someone has fitted another

SNHOO (1957 - for Summitar)

SNHOO isn't a hood but rather a special adaptor ring made specifically for the Summitar. You see, Summitar's filter thread is recessed and therefore requires Summitar-specific filters and accessories. The alternative is to screw in a SNHOO which is a step-up ring with a female 39mm thread. 39mm is a much more common accessory size and will then give the photographer access to any 39mm threaded hood.

Some nameless Chinese company makes cheap, modern aluminum SNHOO copies which are widely sold on eBay along with circular vented hoods that resemble the 1960's Summicron style hood. For lack of a simple list like I've compiled here, I stupidly purchased these poor quality, Chinese knock-off kits from a seller called heavystar and ran it on my Summitar until I found that the fake SNHOO got stuck and had to be twisted and cut out of the threads with wire cutters. The seller wouldn't return my messages, offering no help. So if you are going to run some other 39mm threaded hood on your Summitar, please, go to the trouble of tracking down a Leica-made SNHOO. Check the site or write to Tamarkin for help. Don't attach garbage to your Leica, it's not worth it.

IROOA/12571 (1959 - for 35/2, 35/2.8, 35/3.5 and 50/2, 50/2.8, 50/3.5)

Riding off the coattails of ITDOO, Leica came up with IROOA in 1959. Same basic shape/concept as ITDOO but the chrome band on IROOA is wider and sports two rows of tabs instead of just one row. This allows one to lengthen or shorten the hood and to fit a few other lenses. Additionally, when the IROOA is reverse-mounted to the lens for storage, that second set of tabs can clip onto the lens securely. Whereas when ITDOO is reverse-mounted to the lens, there is only a section of velvet lining in the hood that pressure fits it in place.

There were two versions of the IROOA but they differ only in their engravings and were always sold in the graphic laden boxes

Interestingly, I've noticed that there are some quite nice modern aftermarket IROOA copies for sale on eBay. They are made by a Japanese company called UM, look close to original and some even come in 1950's Leica style boxes. There are also IROOA copies made by a Chinese company called Light Lens Lab. They sell for considerably more than the UM copy, and even it seems, more than some original Leica copies. But Light Lens Lab makes their IROOA's in three colors; all black, all chrome or all gold. And of course, not to be outdone in obscurity, Japan Camera Hunter has shown off a rare distressed black and gold IROOA copy.

IROOA is a useful hood because it fits 50mm f2, 2.8 and 3.5 as well as 35 f2, 2.8 and 3.5 lenses.

12585 (1963 - for 35/2, 35/2.8, 35/3.5 and 50/2, 50/2.8, 50/3.5)

This is probably the hippest looking lens hood that anyone can own. The Leica 12585, when paired with a 50 or 35 Cron and a black and brassed M4 practically defined smart and stylish in the 1960's. Zeiss copied it. Voigtlander copied it. You even see some crazies using a hood this shape on their SLR's. The Leica 12585 is a work of art. Form and function fall in love. This circular hood contains the original ITDOO DNA in terms of its mounting and shape but features a reverse conical nose with three cutaways. It eliminates flaring and reduces viewfinder blockage, but is compact. The unusual shape also makes for a good grip when carrying a Leica by its lens. The 12585 simply redefined what a simple lens hood could look like. I run this hood design on my Voigtlander 40mm Nokton and used to run it on my Summitar. I found the 12585 a little large and modern looking for the 1930's style Summitar. But hey, maybe you have one for your newer lenses and don't feel like buying another hood. It will work fine with the Summitar.

CONCLUSION

From my research, that about wraps up all the hoods that I'd recommend to run on your Leica Summitar. Please don't hesitate to give me a shout if there's anything that I missed!

So, what Summitar hood am I using, you might ask. Well, I am tied between my push-button SOOPD and ITDOO. For sheer pragmatics, the SOOPD gets my vote. But so as not to cause my subjects to stare at my camera in bewilderment, which, yes, sometimes they do and it's distracting, the ITDOO serves nicely. If I were to make a single recommendation, I'd probably recommend the clamp-on SOOPD. Leica really did everything right with the first version of the Summitar hood. If I'd picked it up first, I probably wouldn't have sought out the ITDOO. But on a cosmetic level, the ITDOO seems to look the best on a Summitar in my opinion. While I wouldn't normally go out of my way to buy a camera accessory for mere cosmetics, I do find that the SOOPD draws more attention than I'd like, to the point of it being distracting. Old cameras inspire some amount of conversation with subjects but the SOOPD has a habit of really getting people engaged to the point that I've wound up talking about it with them more than actually shooting. Your mileage may vary though!

Much of the information I've noted here came straight from page 106 of the Leica Accessories Guide, exhaustive eBay window-shopping and talking to Leica experts like rock photographer Jason Nicholson.

All photos were taken with my Olympus OM-1n and 55mm 3.5 Zuiko on Kodak TMAX P3200 rated at 1600 and processed for 3200 in Kodak HC110b. Pictured is my 1947 Leica IIIc and 1954 Summitar with a SOOPD Version 2 hood, ITDOO and GCYOO green filter in black paint (I figured a black paint copy would look more distinct in photos for this blog!).

Thanks for reading and happy shooting!

_Follow, Favorite, Like, Add, Insult, ContactJohnny Martyr _

#accessoryreviews #filmphotography #leica #lensreview #martyrmusings #reviews #tipstricksadvice #12585 #1939 #35mm #35mmphotography #415mm #502 #50mmf2 #50mmsummicron #50mmsummitar #5cmf2 #5cmsummicron #5cmsummitar #accessories #accessory #bevel #blackandwhite #blackandwhitephotography #blackpaint #bnw #boxspeed #button #categories #chrome #clampon #clipon #collapsible #craftsmanship #flare #gcyoo #gegenlichtblende #gotolens #grainy #iiic #irooa #itdoo #itooy #kodakhc110 #kodakhc110b #kodaktmax3200 #kodaktmaxp3200 #leica12585 #leica50 #leica50mm #leicafilter #leicagcyoo #leicahood #leicaiiic #leicairooa #leicaitdoo #leicaitooy #leicalens #leicaltm #leicashade #leicasnhoo #leicasoofm #leicasoopd #leicasummicron #leicathreadmount #leitz #leitzltm #leitzsummicron #leitzsummitar #leitzthreadmount #lenscap #lenshood #lensprotection #lensshade #ltm #ltmlens #m39 #m39lens #macro #metal #micro #normallens #olympusmacro #olympuszuiko #pushbutton #rangefinderphotography #recessed #rigid #snhoo #soofm #soopd #summicron #summitar #summitargegenlichtblende #summitarhood #summitarshade #summitarsunshade #sunshade #thumbscrew #tmax3200 #tmaxp3200 #typelfilter #versioni #versions #vintage #zuiko55mm35macro

image

Client Info

Server: https://mastodon.social
Version: 2025.04
Repository: https://github.com/cyevgeniy/lmst