#RaspberryPiPIco

Zachary Powell đŸ„‘:androidHead:devwithzachary@androiddev.social
2025-06-16

🚀 Retro just got Modern!
In today’s video on DevWithZachary, I explore the Clockwork PicoCalc — a tiny yet mighty handheld computer powered by the Raspberry Pi Pico.

With just 264KB of memory, this device can run C, C++, Python, and Lua — proving that powerful programming doesn't always need modern specs.

What can you really achieve with less than 300KB? Let’s find out. 👇
đŸ“ș Watch here: youtu.be/3dSFMKGKUvM

#RetroComputing #PicoCalc #RaspberryPiPico #Microcontrollers #EmbeddedSystems

Laurent Abballaurentabbal
2025-06-12

[ 1re] Projet "Manettes" phase IV
Gros succĂšs!

Tod Kurt (todbot)todbot
2025-06-09

I've made *many* little SynthDIY boards over the years, targeting: low-cost, for newbies, Pico & CircuitPython. Here are some.
I've never been quite satisfied w/ the results.
Maybe the solution is more knobs & more choc keyswitches?
Good idea?

collection of some of the open source synthdiy PCBs I've made, most based on the Raspberry Pi Pico
2025-06-08

2/3
Aber es gab diverse Issues...
#RaspAP z.B. ist trotz eigentlich guter FunktionalitĂ€t fĂŒr mich nicht zu gebrauchen. Leaken der echten IP in einigen #VPN Situationen - vor allem aber gibts mit RaspAP derzeit bekannte StabilitĂ€tsprobleme mit dem aktuellen #RaspberryOS auf dem #RaspberryPiPico.

Und jetzt scripte ich mir seit 2 Tagen nen Wolf alle RaspAP FunktionalitÀt mittels #NetworkManager (#nmcli), #dnsmasq und #iptables zu ersetzen.

2025-06-08

#piSpot Projekt.

UrsprĂŒnglich war gedacht mittels #RaspAP und #PiHole einen mobilen Hotspot zu bauen.

Mögliche Internetquellen sollten sein
#eth, #wlan, #wwan + optinal #vpn oder/und #Tor.

#RaspberryPi und #RaspberryPiPico sind als Ziel-Hardware gedacht.

Captive Registrierung sollte automatisch erfolgen und im Passwort-Zweifel auch vom Terminal aus bedient werden können.

Ich hatte das zu 90% ziemlich schnell realisiert - und schon 2 Tage lang in der Stadt alle möglichen Wlan getestet.
1/3

Tod Kurt (todbot)todbot
2025-06-03

For the last month or so I've been working on seeing how far I can push CircuitPython into emulating a TB-303 bass synth. With the new audiofilters library, you can "stack" filters to make two two-pole filters seem like a 4-pole filter, getting close to that squelchy sound we need. My efforts so far:
youtube.com/watch?v=1AflpXbEIno

mirobo Technologymirobotech@techhub.social
2025-06-02

We don't care if you love #Arduino or #RaspberryPiPico, #C, or #MicroPython–we just want to show you some love by giving you $10 off a BEAPER Nano or BEAPER Pico electronic parts kit using code NANOHAMFEST or PICOHAMFEST when you order from here: mirobo.tech/beaper

Rear-left view of a yellow 3D-printed BEAPER Bot robot controlled by an Arduino Nano ESP32 microcontroller mounted in a blue BEAPER Nano printed circuit board. The LCD display mounted between the Arduino and a green screw terminal strip is displaying the mirobo.tech logo.Front-right view of a red 3D-printed BEAPER Bot robot controlled by a Raspberry Pi Pico 2 microcontroller mounted in a blue BEAPER Pico printed circuit board. The LCD display mounted behind the Raspberry Pi Pico is displaying a radar-like display showing the distance to an object sensed by a time-of-flight (ToF) module mounted in the oval window at the front, and the reflectivity of the floor sensed by the left and right optical floor sensor modules attached by rainbow-coloured extension cables.
peppe8opeppe8o
2025-06-02

Create a small, weather monitoring system with a and @openmeteo 's APIs. This tutorial guides you through all the steps, even if you are a beginner, explaining the code line by line peppe8o.com/raspberry-pi-pico-

N-gated Hacker Newsngate
2025-05-29

Raspberry Pi Pico BASIC: because nothing screams cutting-edge technology like resurrecting a programming language from the 1960s and slapping it on a microcontroller đŸ”„đŸ€“. But wait, there's more—now you can enjoy the thrill of playing and building a "Precision Analog Clock" on a device that could probably power a small spaceship 🚀😂.
geoffg.net/picomite.html

Rundkuchenbrot / PseudoRundkuchenbrot@troet.cafe
2025-05-27

Smarti, Schlepptopf - pöh laaaangweilich
Wer das Ding (wenn es denn einen Akku bekommt) im Zug ausm Rucksack hebt, Tastatur und Maus anschließt und loslegt ... 👀

Zitat:
Ein britischer Bastler hat den Macintosh aus dem Jahre 1984 im Miniformat nachgebaut. Er soll voll funktionsfÀhig sein
gerade einmal 62 Millimeter hoch

heise.de/news/Winziger-Macinto

#Macintosh #RaspberryPiPico #RaspberryPi #Raspberry #PicoMac

Laurent Abballaurentabbal
2025-05-21

[ 1re] Le projet "Manettes" entre dans sa phase III.

Laurent Abballaurentabbal
2025-05-11

[ 1re] Le projet "Manettes" entre dans sa phase II.

diyelectromusicdiyelectromusic
2025-05-03

I finally have a good enough Eurorack version of my picoDexed.

diyelectromusic.com/2025/05/03

This is using a neat pico-to-zero adaptor from bablokb, released on Github, which allows me to use my existing MiniDexed PCBs and module with no other hardware changes.

Photo of my cake-box Eurorack enclosure with a black MiniDexed Eurorack module installed showing "Srings 1" on the display as it is running my picoDexed code.
Simple DIY Electronic Music Projectsdiyelectromusic.com@diyelectromusic.com
2025-05-03

picoDexed + MiniDexed EuroRack

Since attempting my picoDexed + StackyPi + MiniDexed EuroRack build and failing, I’ve found another Pico-to-Zero board that is provided as open source, so I’ve had some made.

This post details how to get that running with my MiniDexed Zero Eurorack module.

Warning! I strongly recommend using old or second hand equipment for your experiments.  I am not responsible for any damage to expensive instruments!

If you are new to microcontrollers and single board computers, see the Getting Started pages.

Pi Zero RP2040s

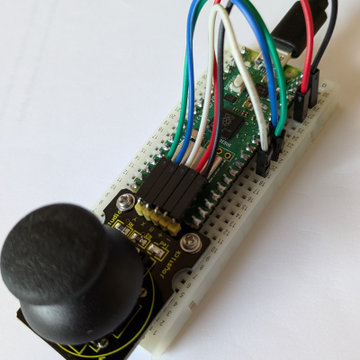
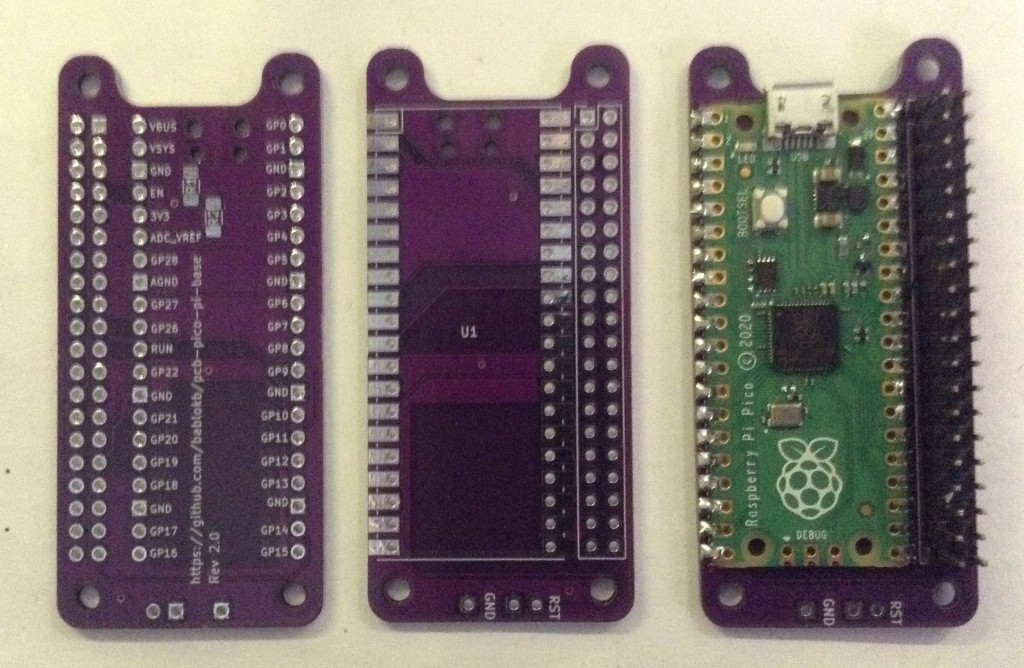
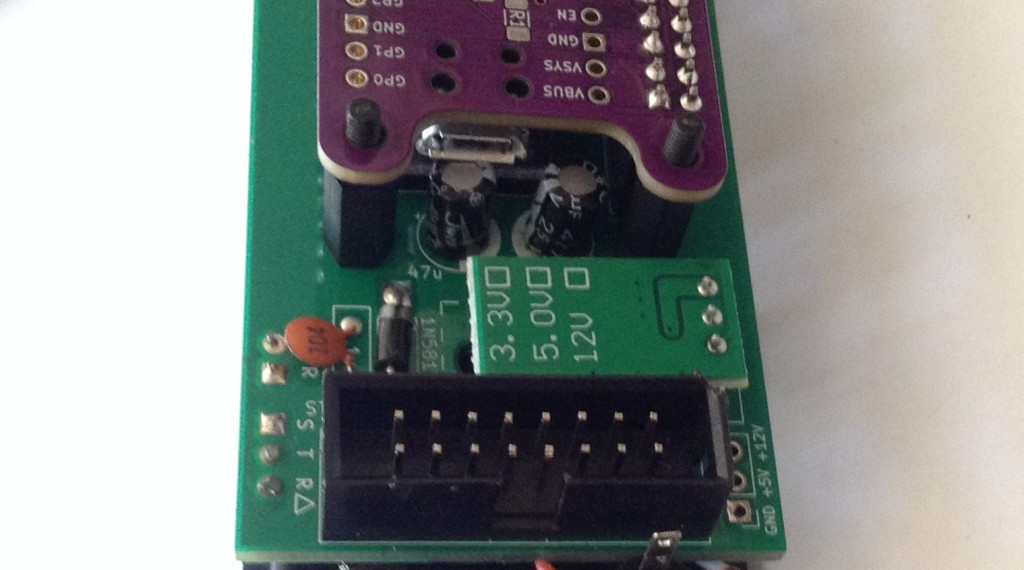
As mentioned last time I found a number of options for a RP2040 based dev board in a Raspberry Pi Zero form factor. But this post is about this one:

It is fairly simple to build. It just requires a Pico and GPIO header pins.

There is an option for pull-ups on the I2C bus, but I’ve not bothered with them here. There is also a breakout header for a reset switch if required (it will support two sizes of switch by the looks of things).

Mapping over to MiniDexed/RPi Zero

The pinout is slightly different to the Stacky-pi, so here is an updated table of the GPIO mappings and which are required to be used with my MiniDexed board.

RP2040UseRPiRpiUseRP20403V35VGP2LCD SDAGP2 SDA5VGP3LCD SCLGP3 SCLGNDGP4GP4GP14 TXDGP0GNDGP15 RXDMIDI INGP1GP5GP17GP18I2S BCLKGP18GP6GP27GNDGP7GP22GP23GP83V3GP24GP28GP11RE BGP10 MOSIGNDGP12RE AGP9 MISOGP25GP27GP10RE SWGP11 SCLKGP8GP9GNDGP7GP26ID_SDID_SCGP22SW BACKGP5GNDGP13SW HOMEGP6GP12GP21GP14GP13GNDGP19I2S LCLKGP19GP16GP20GP15GP26GP20GP17GNDGP21I2S DATAGP16

The two key problem areas will be the I2S interface and encoder, which both require consecutive GPIO pins for the PIO code to do its magic.

The encoder should be fine – pins RE A and RE B map onto the Pico’s GP11 and 12.

The I2S interface might be ok – with a BCLK on GP18, it will be expecting LCLK on GP19. Data on GP21 should be ok.

Unlike the previous attempt, I’m hopeful I can just get this running ok with the correct pin mappings


Changing I2C Bus and UARTs

Unlike the first attempt, I2C is mapped onto GP2 and GP3 which is what I was using in the original picoDexed. So that is all fine, multiplexed onto the I2C bus 1.

There is an issue with the UART however as picoDexed uses the following by default:

  • UART 0 – GP 0,1 – Serial debug
  • UART 1 – GP 4,5 – MIDI

I can swap these over so that UART0 (GP0,1) is MIDI, but that has to be matched with a change in the debug serial port too. But unfortunately, as far as I can see, that has to be configured in the master CMakeLists.txt file (as I talked about in Part 3).

New picoDexed GPIO Configuration

Given the above, the following new GPIO pins should be defined in config.h:

#define PWM_PIN         10

#define I2S_DATA_PIN 16
#define I2S_BCLK_PIN 18
#define I2S_LRCLK_PIN 19 // Implied by BCLK=12

#define MIDI_UART 0
#define MIDI_TX_PIN 0 // Not used
#define MIDI_RX_PIN 1

#define DEBUG_UART_TX_PIN 8
#define DEBUG_UART_RX_PIN 9

#define DISPLAY_I2C_BUS 1
#define DISPLAY_I2C_SDA 2
#define DISPLAY_I2C_SCL 3
#define DISPLAY_I2C_ADDR 0x3C
#define DISPLAY_W 128
#define DISPLAY_H 32

#define ENCODER_A_PIN 11
#define ENCODER_B_PIN 12 // Not used
#define ENCODER_SW_PIN 10 // Not used

In addition to this, to keep using the debug output requires the following lines adding to ‘target_compile_definitions’ in CMakeLists.txt.

    PICO_DEFAULT_UART=1
PICO_DEFAULT_UART_TX_PIN=8
PICO_DEFAULT_UART_RX_PIN=9

I’ve added a separate configuration file (config-ER.h) in the repository to allow this version to be built, but the CMakelists.txt change above has not been included.

I’ve also added a picodexed-v0.03-ER.uf2 file in the build area which can be downloaded and installed directly onto the Pico to provide the above configuration ready to go.

Bringing it all together


The nice thing about this PCB is that I can map everything nicely over to the pinouts used with my MiniDexed EuroRack PCB meaning that once the Pico has the custom firmware installed, it will just plug in and work and no hardware changes or patching is required at all!

I was slightly concerned that the USB port of the Pico might clash with the two installed electrolytic capacitors on the MiniDexed PCB, but in my case I can just about get away with it!

Here is the final assembled unit.

Closing Thoughts

I finally have my Eurorack picoDexed which is pretty neat. Big thanks to bablokb for putting that PCB up online. That saved me a job. And it was particularly nice that things like assuming consecutive pins for the I2S mapping was included as that made using the PIO I2S code a lot easier.

I’d like to see what the power usage is like now as I’m really after a lower power Dexed engine compared to the full Zero version.

Naturally at some point I might still make my own picoDexed Eurorack PCB, but this is a pretty good solution as far as I’m concerned, so that wouldn’t really add much for me now.

Kevin

#midi #minidexed #pcb #picodexed #raspberryPiPico

:rss: Qiita - äșșæ°—ăźèš˜äș‹qiita@rss-mstdn.studiofreesia.com
2025-05-02

Raspberry Pi PicoでPicoMite(MMBasic)ă‚’äœżă†ă€œOLEDディă‚čăƒ—ăƒŹă‚€ăžăźć‡ș抛
qiita.com/ksakabe/items/482045

#qiita #RaspberryPiPico #RaspberryPiPicoW #RaspberryPiPico2 #PicoMite #MMBasic

mirobo Technologymirobotech@techhub.social
2025-04-25

Wanna learn how to program a Raspberry Pi Pico? Wanna build a robot? Do both – and lots more – with BEAPER Pico!

youtu.be/DOxU7mvjICc

#STEM #STEMeducation #robotics #RaspberryPiPico

YouTube thumbnail image showing the title 'Introducing BEAPER Pico' above an image of two 3D-printed robot circuits. Subtitle at the bottom says 'The beginner robot circuit for Raspberry Pi Pico'.
2025-04-19

Raspberry Pi Pico 2 W + DHT22 Mini Proyecto Servidor Web

Aprovechamos la capacidad inalĂĄmbrica de la Raspberry Pi Pico 2 W para crear un servidor web que genera una pĂĄgina web y permite visualizar datos de temperatura y humedad de un sensor DHT22 mediante cualquier dispositivo con navegador web.
Un mini proyecto fĂĄcil de implementar con diagrama completo de conexiĂłn y cĂłdigo en IDE de Arduino explicado lĂ­nea por lĂ­nea.

IntroducciĂłn a Raspberry Pi Pico 2W:
youtube.com/watch?v=cG89EN-pkW

CĂłdigo fuente del programa en:
github.com/bitwiseAr/Curso-Ard

#RaspberryPiPico
#raspberrypipicow
#PiPico2W

👉youtube.com/watch?v=8xxSg3SOUw

2025-04-18

erster Entworf fĂŒr ein offgrid licht mit Helligkeitserkennung(fĂŒr den HĂŒhnerstall) auf USB Basis (kann mit powerbank und USB Solarzelle betrieben werden), hat 3 Schalter (Dauerlicht, komplett aus und ein umschalter fĂŒr die Leuchtdauer), es soll nach Sonnenuntergang 4/2 h leuchten damit die Tierchen nicht im dunkeln hocken #elektronik #schaltplan #circuit #usb #rp2040 #RaspberryPiPico #lichtsensor #led

HĂŒhnerlicht Schalplan entwurf

Client Info

Server: https://mastodon.social
Version: 2025.04
Repository: https://github.com/cyevgeniy/lmst