@iFixit Sadly, after calibration, the new battery only lasts a little over 48 hours. 😞 It's been through two full charge/discharge cycles now, so I thinks that's just its capacity. A little better than before the swap, but still only a quarter of the original battery life of the #PebbleTimeSteel.
#DIYRepair
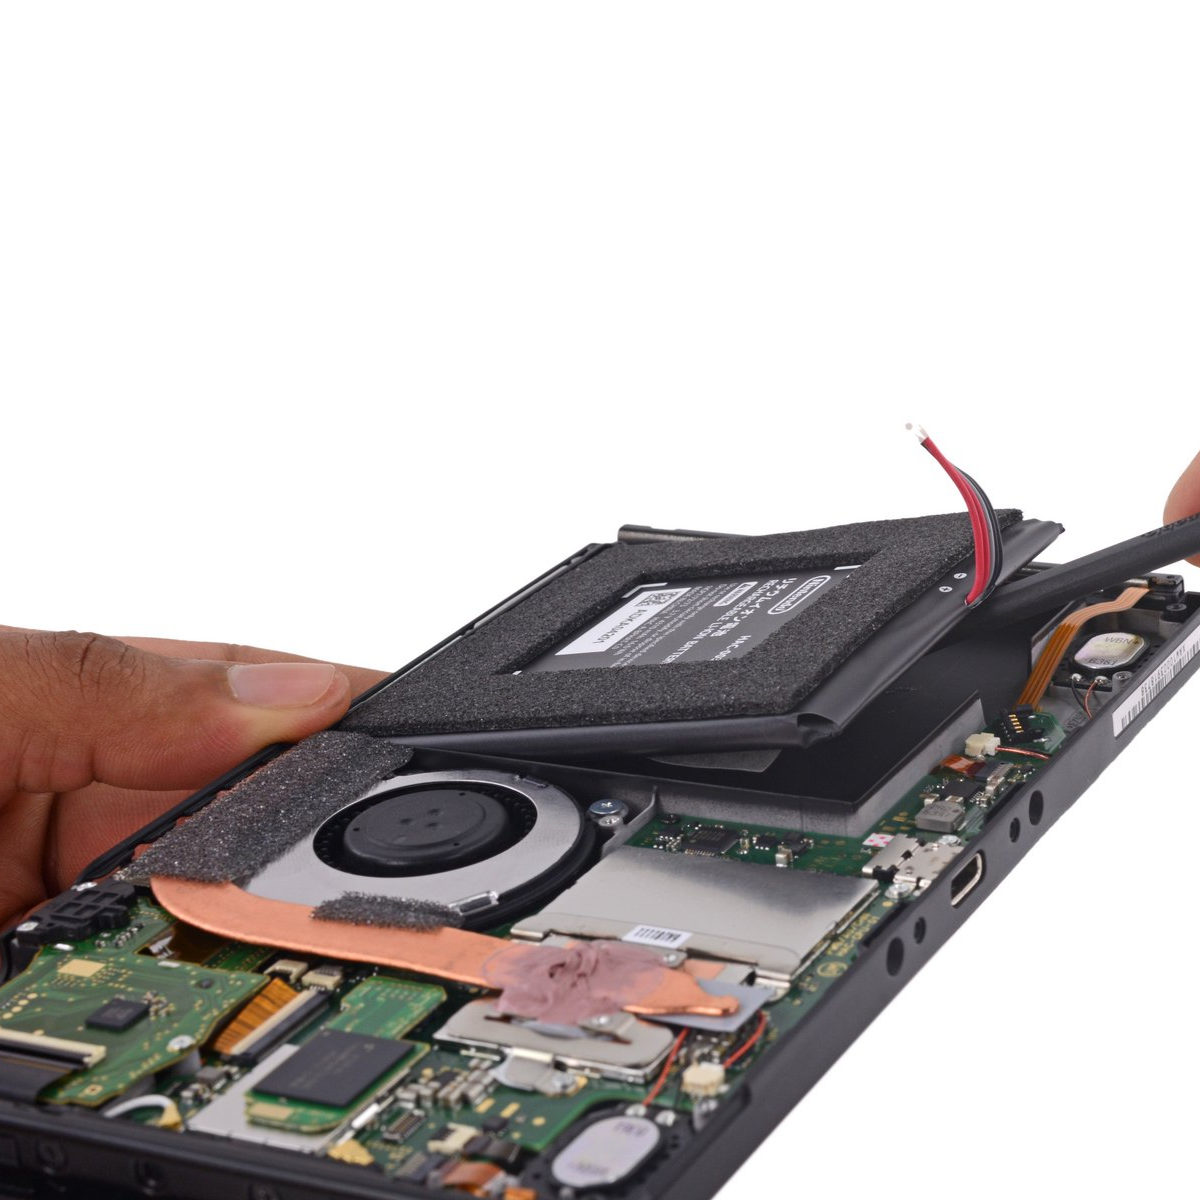
Over time, Nintendo has actively restricted repairs by refusing to sell parts, withholding repair manuals, and making it harder for independent shops and DIYers to fix common issues like Joy-Con drift. That kind of repair gatekeeping goes against everything a good score stands for.
So we updated our scoring to better reflect repair access, not just repair theory, and the Switch took a hit.
Read the full story here: https://www.ifixit.com/News/110747/why-were-nerfing-the-nintendo-switchs-repairability-score
—
#RightToRepair #iFixit #NintendoSwitch #DIYRepair
Today I swapped out the battery in my Pebble Time Steel. After nearly 10 years in use, its original battery only lasted about 36 hours. I actually bought a replacement battery and Tesa tape from @iFixit last year, but balked at cracking the case until my friend with a better soldering iron (and more experience wielding it) was free to help. On my own, I surely would have made a mess of the battery flex cable contact points. But it came through the procedure in perfect shape, now (hopefully) with a new lease on life! I'm reasonably confident I can perform the same transplant on our other Pebbles (my spouse and kid both wear one too).
Huge thanks to Aadi B. for his great walkthrough at https://www.ifixit.com/Guide/Pebble+Time+Steel+Battery+Replacement/164426!
A tricky Commodore PET repair: tracking down 6 1/2 bad chips
http://www.righto.com/2025/04/commodore-pet-repair.html
#HackerNews #CommodorePET #Repair #TrickyTech #VintageComputing #DIYRepair #RetroTech
How to repair the parts that explode in Lenovo Yoga laptops
http://adammunich.com/how-to-repair-the-parts-that-explode-in-lenovo-yoga-laptops/
#HackerNews #LenovoYogaRepair #LaptopIssues #TechFix #ExplodingParts #DIYRepair
iPhone 16e entra nel programma Apple Self Service Repair
#Apple #AssistenzaTecnica #DIYRepair #FaiDaTe #iPhone #iPhone16e #Manuali #Notizie #Novità #PezziDiRicambio #Riparazione #SelfServiceRepair #Smartphone #TechNews #Tecnologia
https://www.ceotech.it/iphone-16e-entra-nel-programma-apple-self-service-repair/
3hr introduction to bike mechanics at Adelaide Bike Kitchen, Mon March 31st
Facing Epson Error Code 00043? Follow this comprehensive guide to troubleshoot and resolve the issue quickly.
https://www.izoate.com/blog/how-to-fix-epson-error-code-00043-a-comprehensive-guide/ #izoate #tech #technology #howto #EpsonError00043 #PrinterTroubleshooting #DIYRepair #TechGuide #EpsonFix #PrinterMaintenance #Izoate
Tid til at se, om jeg kan få den her til at virke.
Jeg startede med at åbne den op, så jeg kunne smøre de bevægelige dele, tjekke ledningerne og fjerne fnuld og snavs.
Jeg tror jeg vil male den gamle og gulnede plastic, og lime den sammen, hvor den er flækket.
Først skal jeg have skiftet nogle ledninger på strømforsyning og tjekke om den er ok, inden jeg slutter den til strøm og skruer på knapper.
@tokeriis@helvede.net
#nørklerier #symaskine #sewingmachine #diyrepair
Hello hackers
Getting into #soldering, I want free shipping from DigiKey, if I buy 2 x 1lb solder spools... is that excessive if I'm doing small repairs? I feel like I should try to find something else to hit free shipping... I figure even 1lb of solder will last me a lifetime.
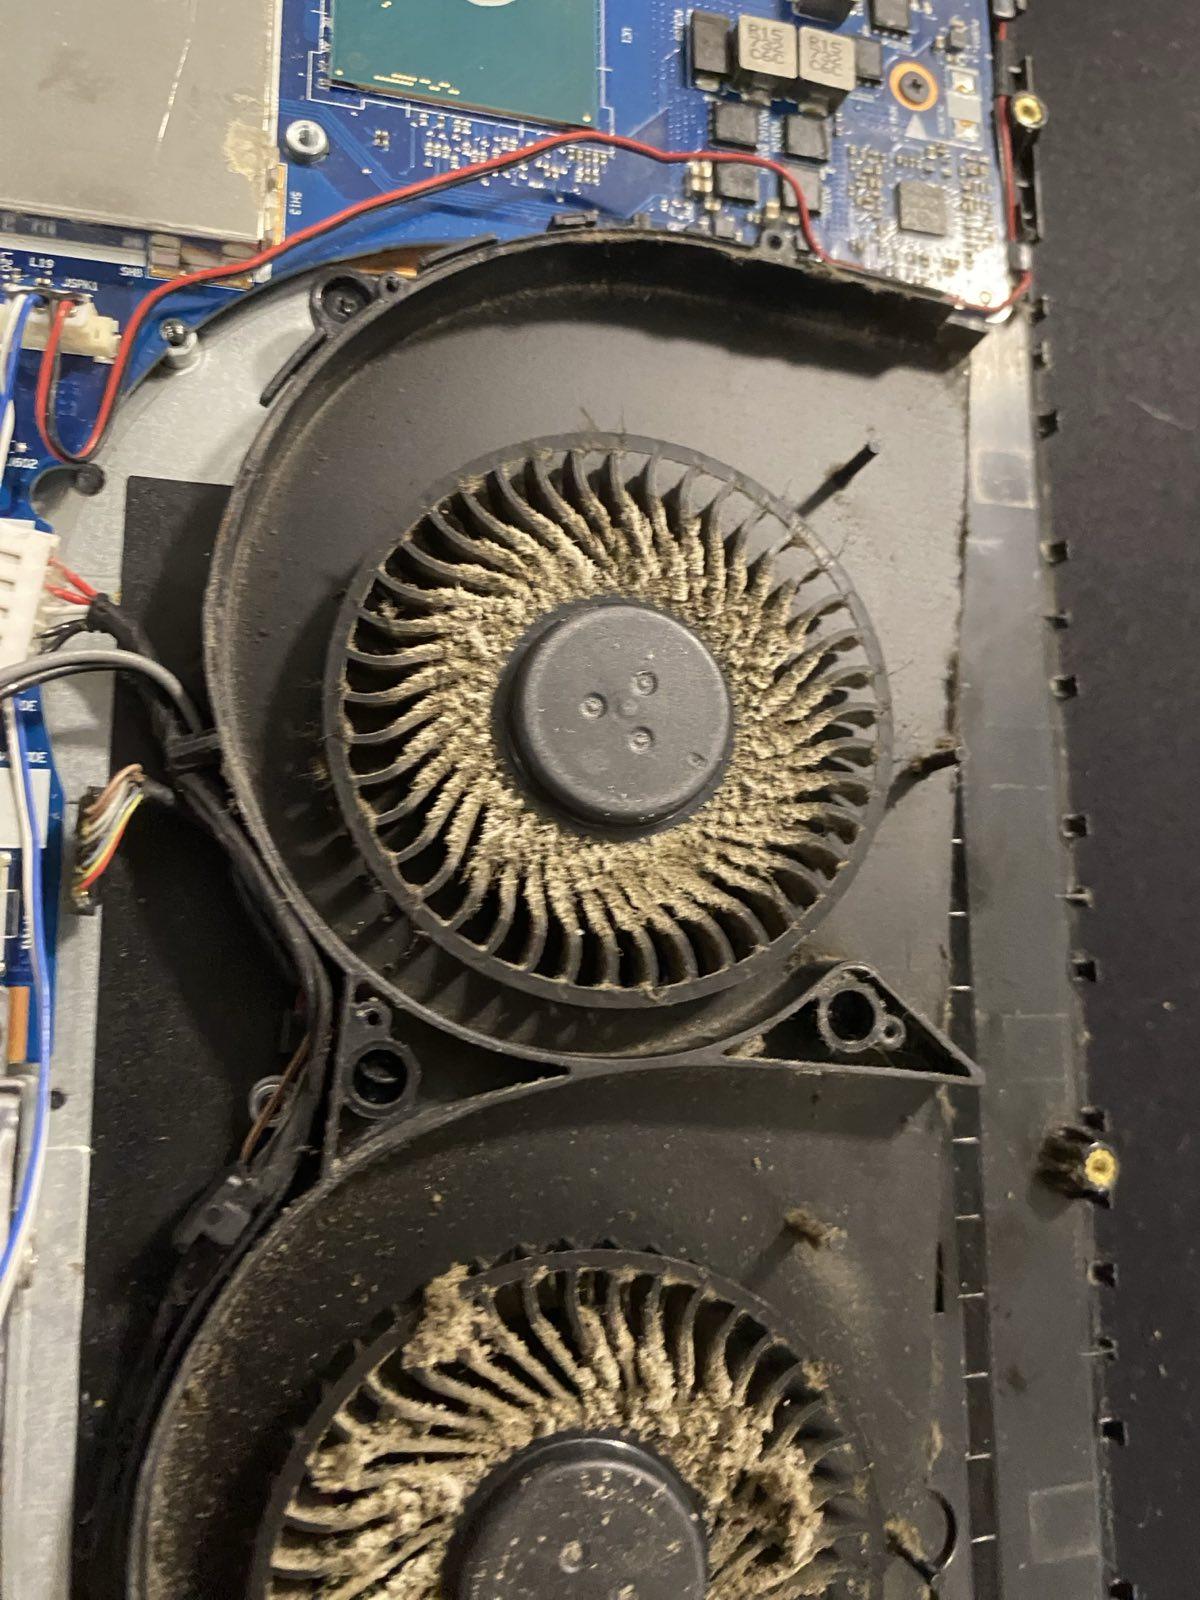
Cleaned and serviced Lenovo Legion laptop. Originally planned to replace the broken keyboard, but… Lenovo engineers, why do you make everything so awful?! So many parts are held together with plastic rivets—like they were never meant to be replaced. Let me repair the tech I paid for! 🤬
P.S. This probably doesn’t apply to ThinkPads, never had one in my hands yet.

Not only did I save money (€400 versus €3000 for a new e-bike!), but I'm riding again.
This isn't just about money - it's personal. After 2.5 years of not being able to cycle to work due to long covid and a broken e-bike, I'm finally able to do the 30km again.
Tomorrow I'll be cycling to work for the first time in years and I couldn't be more excited! 💪
Thanks N. for your support!😊
(2/2)
#EBike #DIYrepair #fietsen #bicycle #fahrrard #LongCovidRecovery
Back on the Road! 🚴♂️🔋
Replacing the battery on my e-bike wasn't as easy as it sounds! My e-bike is a custom build and after 8 years the battery finally gave out.
The dealer no longer sells the conversion kit I used, but luckily I found a compatible battery.
It took me 1.5 days of drilling, tinkering and patience to get it just right, but the hard work paid off.
(1/2)
#EBike #DIYrepair #fietsen #bicycle #Fahrrard #LongCovidRecovery
So… fixing the #IntelAtomC2000 bomb…
I dug up my dud boards… took a bit of rummaging around, and I'll have to dig up some RAM later… but there's 6 sticks of RAM to shuffle between these three boards.
That's enough to get things running. 16GB each. The RAM is DDR3 ECC SO-DIMMs… as rare as rocking-horse excrement. More is in an anti-static bag in one of my boxes. If I get a machine going, I'll go digging up the rest.
https://imgur.com/a/supermicro-a1sai-2750f-lpc-clock-fix-cZdof6q shows the 100ohm fix in detail. If that post is correct… this shouldn't be too difficult to manage.
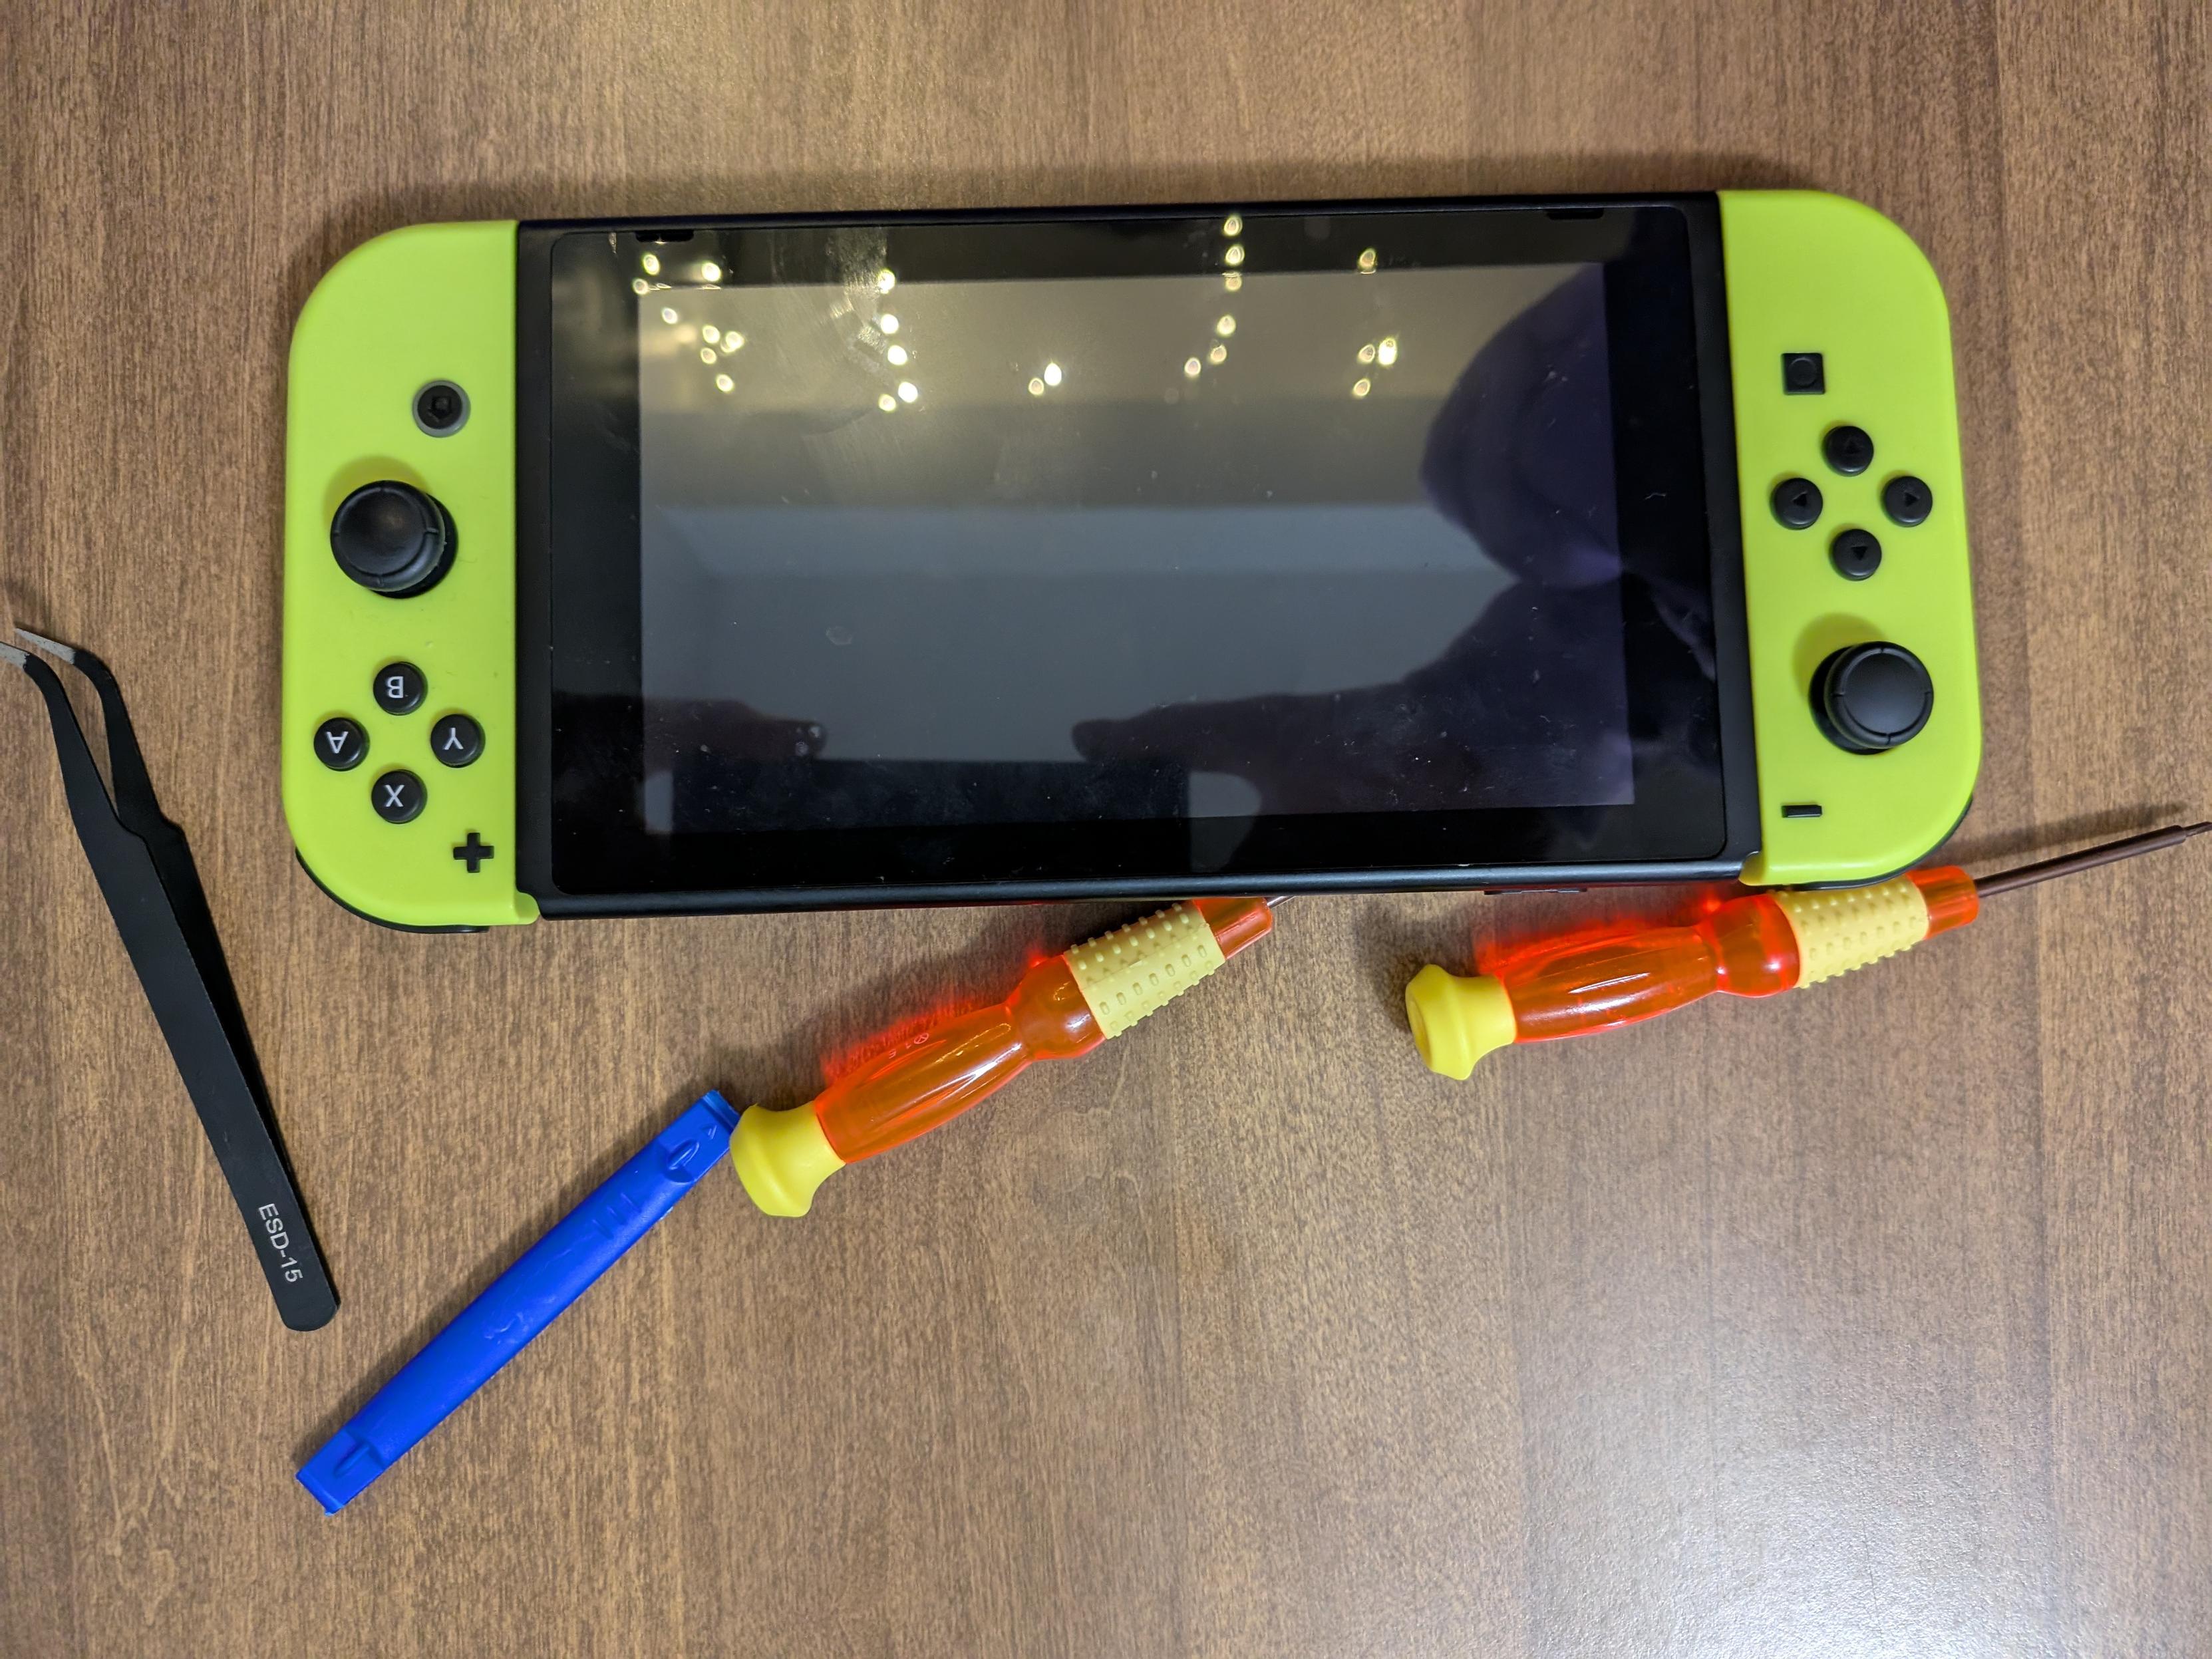
NGL I'm pretty proud of myself 😂 one thumstick was broken and I was able to successfully replace it!
#Nintendo #Switch #JoyCon #JoyConDrift #JoyConFix #NintendoSwitchRepair #DIYRepair #TechHelp #Gaming #Gamer #NintendoFan #FixIt #ConsoleRepair #NintendoCommunity #Fediverse #MastoAdmin #SwitchRepair
#Apple launches #DIYrepair options for #iPhone16 and #iPhone16Pro. Save money with genuine parts for battery, screen, and camera #replacements.
https://gadgetbond.com/apple-iphone-16-diy-self-service-repair-parts/
As an addendum, shameless personal preference plug: PB B'laster is the Good Shit™ compared to WD-40 when you've got crusty corroded car parts to work on. 😤
I can speak from experience, having worked in the auto parts sales industry, and worked on my own car, mechanics generally prefer PB B'laster over WD-40.
You can find it next to the WD-40 at your local auto parts store~
#DIY PSA: WD-40 and similar products are NOT lubricants!
They are penetrators, made with extremely low viscosity oils that can seep into stuck joints to facilitate loosening them.
They will dissolve and wash away any lubricating oils or greases that were originally present if you attempt use WD-40 as a lubricant, then it itself evaporates.
Always use the correct product for the application! If you gotta lube up a squeaky/creaky joint, use a lubricating oil or grease!
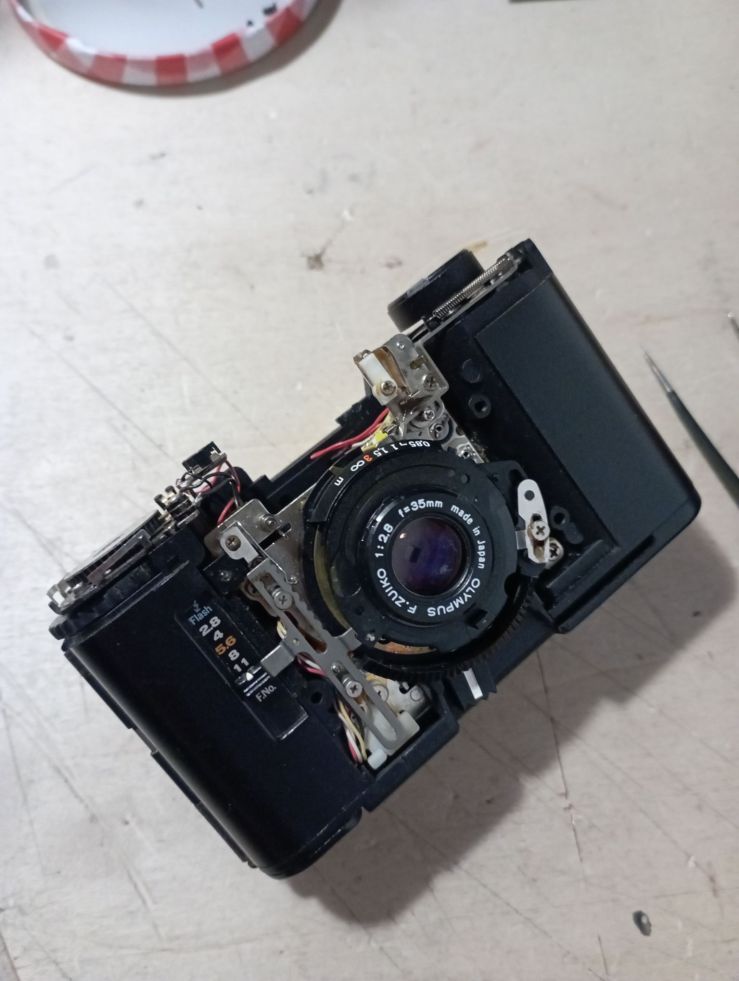
Comprei essa Olympus XA em 2019, ela tinha um defeito que era irreparável na época. Ela armava e disparava, mas sempre na velocidade máxima, ignorando o fotômetro e a abertura. Cheguei a desmontar ela e olhar o circuito, havia um pouco de corrosão, provavelmente algo impedia um eletroimã de segurar o obturador aberto.
Uns dois anos depois achei um figura vendendo pedaços de Olympus XA num fórum e resolvi arriscar investir numa objetiva e circuitos para trocar. Fiz a compra e uns dias depois chegou em casa a caixinha. Eu abri aquilo e encontrei exatamente o que eu tinha pedido. Mas comecei a pensar no trabalho que ia dar, dessoldar tantos fios, sem um espaço apropriado para fazer o reparo. Enfim, bateu uma preguiça enorme.
O tempo passou e acabei esquecendo da XA por um ano e pouco. Dai lembrei e resolvi começar, na época desmontei a câmara e num dado momento não sabia o que fazer para tirar a lente original. Desisti e guardei tudo de novo e esqueci novamente.
Semana passada estava procurando uma ferramenta e acabei encontrando a XA novamente. Resolvi acabar com esse sofrimento e fiz um anúncio num fórum para vender no estado. Dois dias depois nem uma mensagem. Tomei vergonha na cara e decidi encarar a XA mais uma vez.
Bom, segui a risca a maneira correta de desmontar a câmara e tenho ainda frescas na memória as piores partes:
- a lente que eu comprei é da mesma câmara, mas não da mesma versão (provavelmente a minha câmara é dos primeiros anos de fabricação, a lente que eu comprei é bem mais recente);
- a lente que eu comprei veio faltando algumas peças da periferia que interagem com o resto do sistema (consegui aproveitar tudo da lente velha, mas não posso te certeza se isso é aceitável para um bom funcionamento);
- a lente que eu comprei veio com os fios cortados ao invés de dessoldados, logo tive que fazer extensões para todos eles, demorado, tedioso e possivelmente introduz mais pontos problemáticos;
- por comparação, percebi que o circuito da câmara estava mesmo bem degradado, oxidado, etc.
Decidi eliminar a parte do circuito relacionada ao sincronismo de flash. Eram quatro soldas a menos para fazer e menos alguns pontos problemáticos nas minhas contas.
Posto isso tudo, montei a câmara o suficiente para realizar alguns testes. Conferi as baterias com o multímetro antes disso. O check de baterias da câmara também acusou ok. De cara, alguma dificuldade de disparar, disparador intermitente. Depois alguns clicks perfeitos (com tempos longos de acordo com a iluminação). Voltei a desconectar o beeper (que tinha vindo desconectado originalmente). Ainda o problema intermitente, era só preguiça do técnico anterior, faz sentido.
Percebi que quando a câmara falhava em disparar, a agulha do fotômetro do visor dava um pequeno pulo. Ou seja, o circuito do disparador fechava, mas a corrente escapava em outra direção ao invés de atuar no eletroimã responsável pelo disparo. Deixei tudo de lado enquanto a cabeça volta e meia matutava numa maneira de testar esse problema intermitente.
Pensei em usar esse tempo para modificar a outra lente e usar nas câmaras Sony, mas depois de ver esse site aqui, desisti disso também…
Talvez o melhor seja deixar passar mais uns anos, enquanto as idéias voltam a se alinhar.
Well shoot! My favorite powerbank (portable charger, battery oack, whatever) got left outside under a sprinkler (don't ask...) and now theres some rust and corrosion in the connectors. Its not recieving a charge through the USB-C port... any ideas on how I could fix? Model is a Nimble 10k PD Portable Charger - 18W
Client Info
Server: https://mastodon.social
Version: 2025.04
Repository: https://github.com/cyevgeniy/lmst